Mercury Mountaineer 1997 s Repair Manual
Mountaineer 1997
Mercury
Mercury
https://www.carmanualsonline.info/img/33/11000/w960_11000-0.png
Mercury Mountaineer 1997 s Repair Manual
Trending: alternator, seat adjustment, oil temperature, automatic transmission fluid, check oil, air conditioning, fuel pressure
Page 61 of 197
Press in the desired direction to
raise or lower the seat, or to move
the seat backward or forward.
Push to increase (+) or decrease
(-) lumbar support.
+–
Seating and safety restraints
61
Page 62 of 197
Rear seat four-way head
restraints (if equipped)
Push the lock release button to
raise or lower the head restraint.
Push or pull head restraint to
desired position.
Folding rear seat
If your vehicle is equipped with a
built-in child seat, the seatback
cannot be folded down unless the
built-in child seat is fully stowed.
1. Push the lower release handle
downward to unlatch seat back.
2. Rotate seatback downward into
the load floor position.
3. Push down on the top outboard
area of the seatback until you hear
a ``click.'' The seat is latched in the
load floor position.
Seating and safety restraints
62
Page 63 of 197
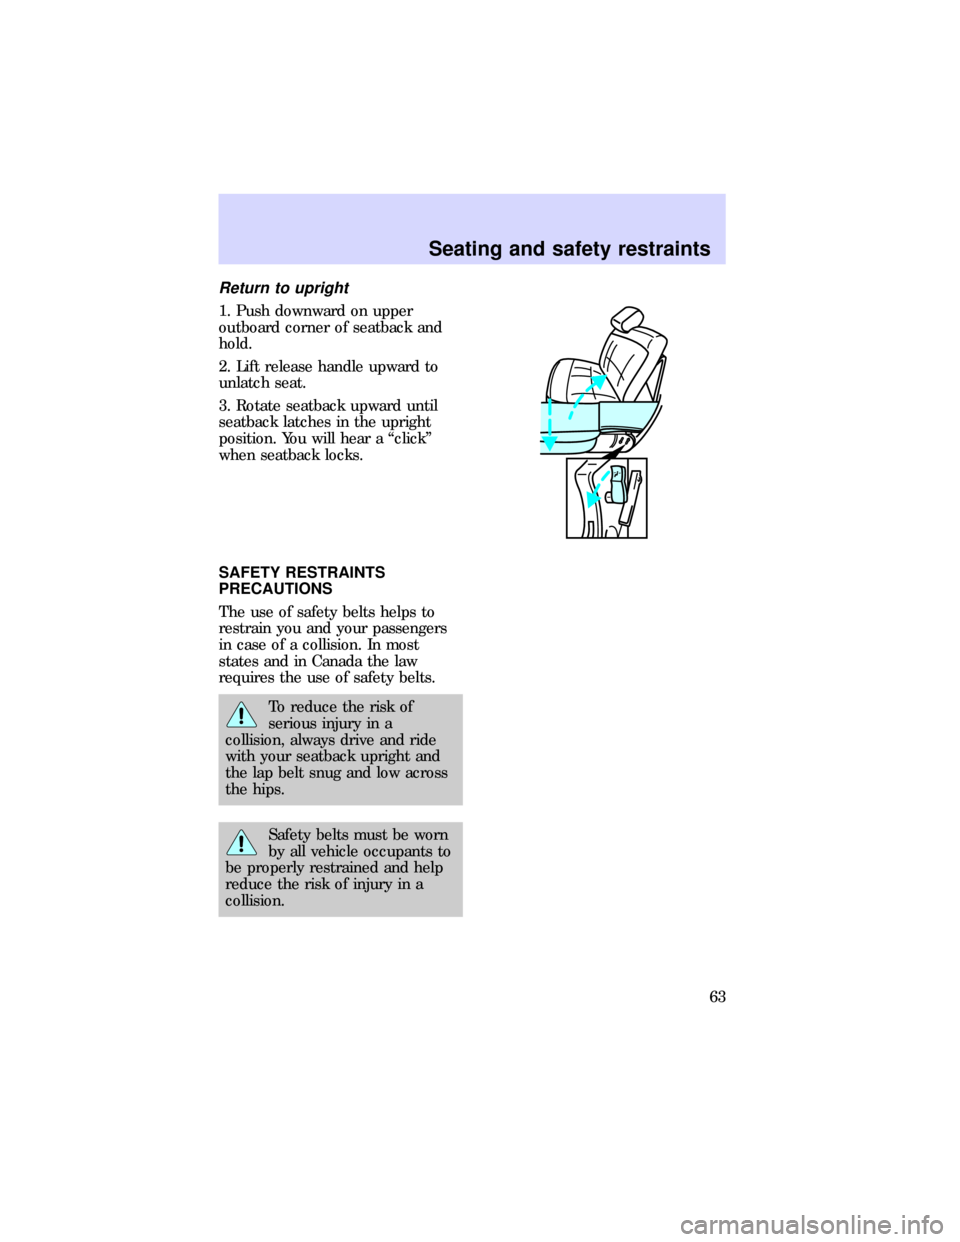
Return to upright
1. Push downward on upper
outboard corner of seatback and
hold.
2. Lift release handle upward to
unlatch seat.
3. Rotate seatback upward until
seatback latches in the upright
position. You will hear a ``click''
when seatback locks.
SAFETY RESTRAINTS
PRECAUTIONS
The use of safety belts helps to
restrain you and your passengers
in case of a collision. In most
states and in Canada the law
requires the use of safety belts.
To reduce the risk of
serious injury in a
collision, always drive and ride
with your seatback upright and
the lap belt snug and low across
the hips.
Safety belts must be worn
by all vehicle occupants to
be properly restrained and help
reduce the risk of injury in a
collision.
Seating and safety restraints
63
Page 64 of 197
To prevent the risk of
injury make sure children
sit where they can be properly
restrained.
It is extremely dangerous
to ride in a cargo area,
inside or outside of a vehicle. In
a collision, people riding in these
areas are more likely to be
seriously injured or killed.
Do not allow people to
ride in any area of your
vehicle that is not equipped with
seats and safety belts.
Be sure everyone in your
vehicle is in a seat and
using a safety belt properly.
USING THE SAFETY
RESTRAINTS PROPERLY
Combination lap and shoulder
belts
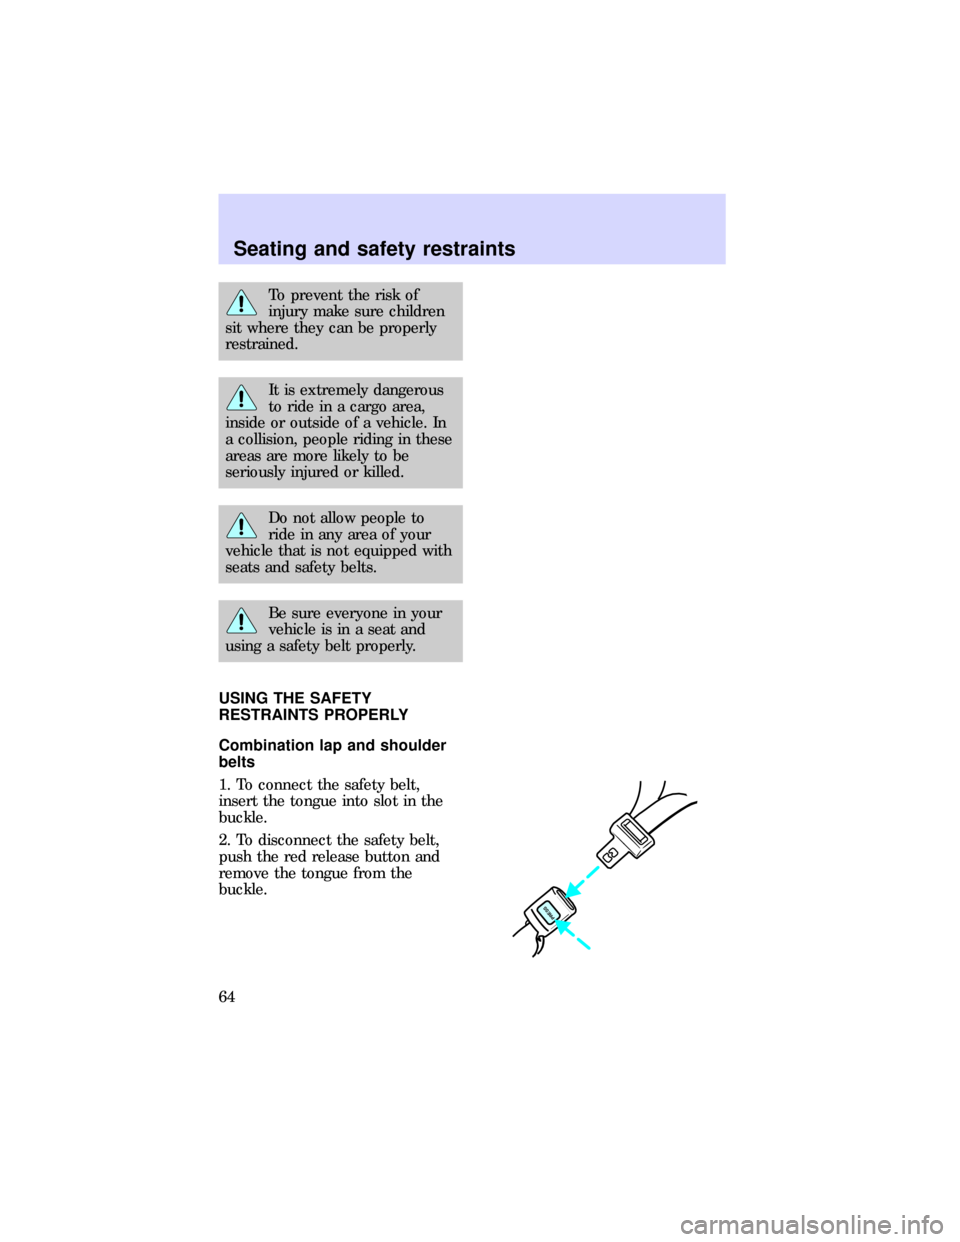
1. To connect the safety belt,
insert the tongue into slot in the
buckle.
2. To disconnect the safety belt,
push the red release button and
remove the tongue from the
buckle.
PRESS
Seating and safety restraints
64
Page 65 of 197
The outboard safety restraints in
the vehicle are combination lap
and shoulder safety belts. The
front and rear seat passenger
outboard safety belts have the two
types of locking modes described
below:
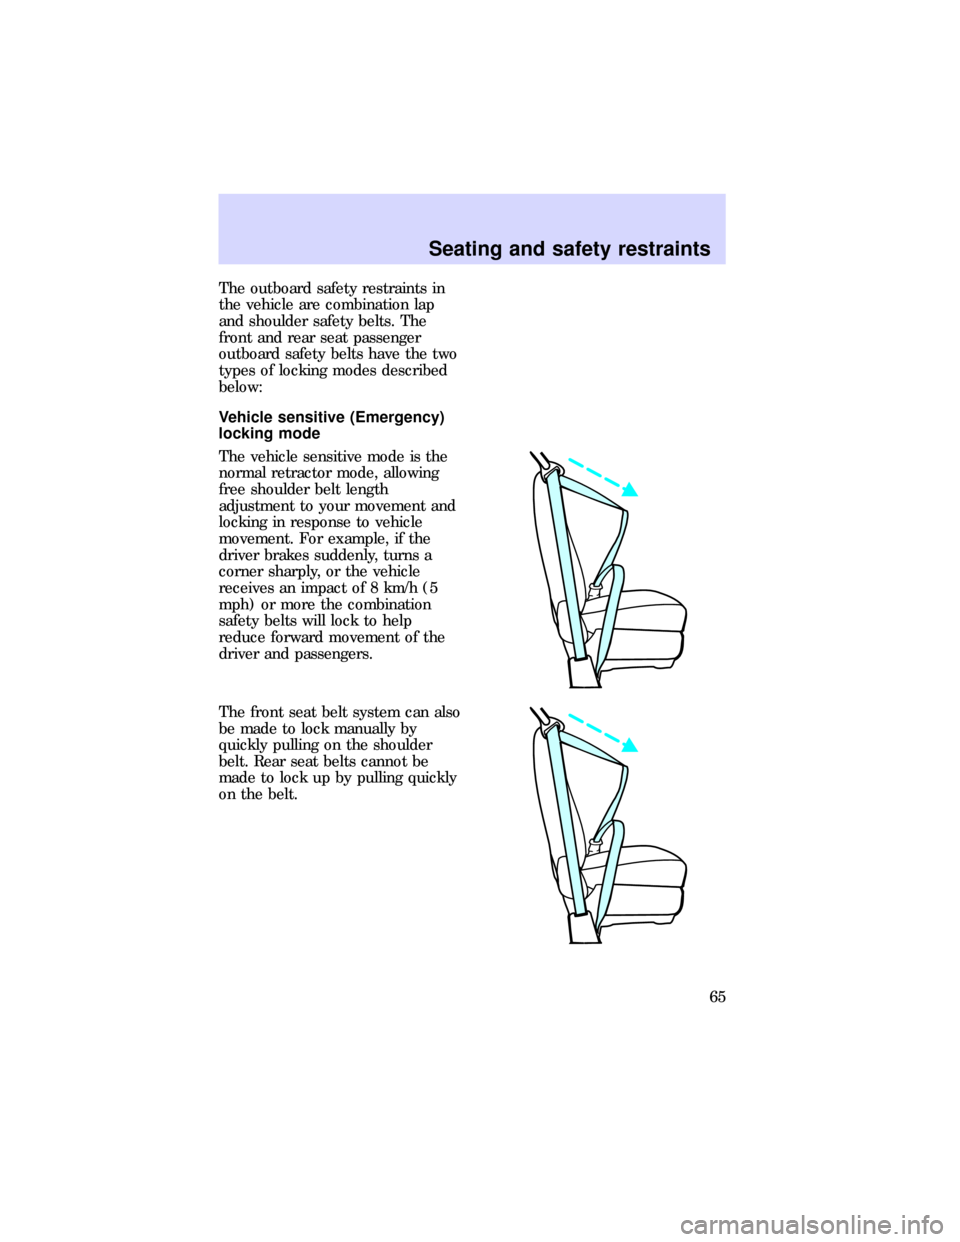
Vehicle sensitive (Emergency)
locking mode
The vehicle sensitive mode is the
normal retractor mode, allowing
free shoulder belt length
adjustment to your movement and
locking in response to vehicle
movement. For example, if the
driver brakes suddenly, turns a
corner sharply, or the vehicle
receives an impact of 8 km/h (5
mph) or more the combination
safety belts will lock to help
reduce forward movement of the
driver and passengers.
The front seat belt system can also
be made to lock manually by
quickly pulling on the shoulder
belt. Rear seat belts cannot be
made to lock up by pulling quickly
on the belt.
Seating and safety restraints
65
Page 66 of 197
Automatic locking mode
In this mode, the shoulder belt is
automatically pre-locked; however,
the belt will still retract to remove
any slack in the shoulder belt.
The automatic locking mode is not
available on the driver safety belt.
When to use the automatic
locking mode
²When a tight lap/shoulder belt
fit is desired.
²Any timea child safety seat is
installed in the vehicle. Refer to
Children and infant or child
safety seatslater in this section.
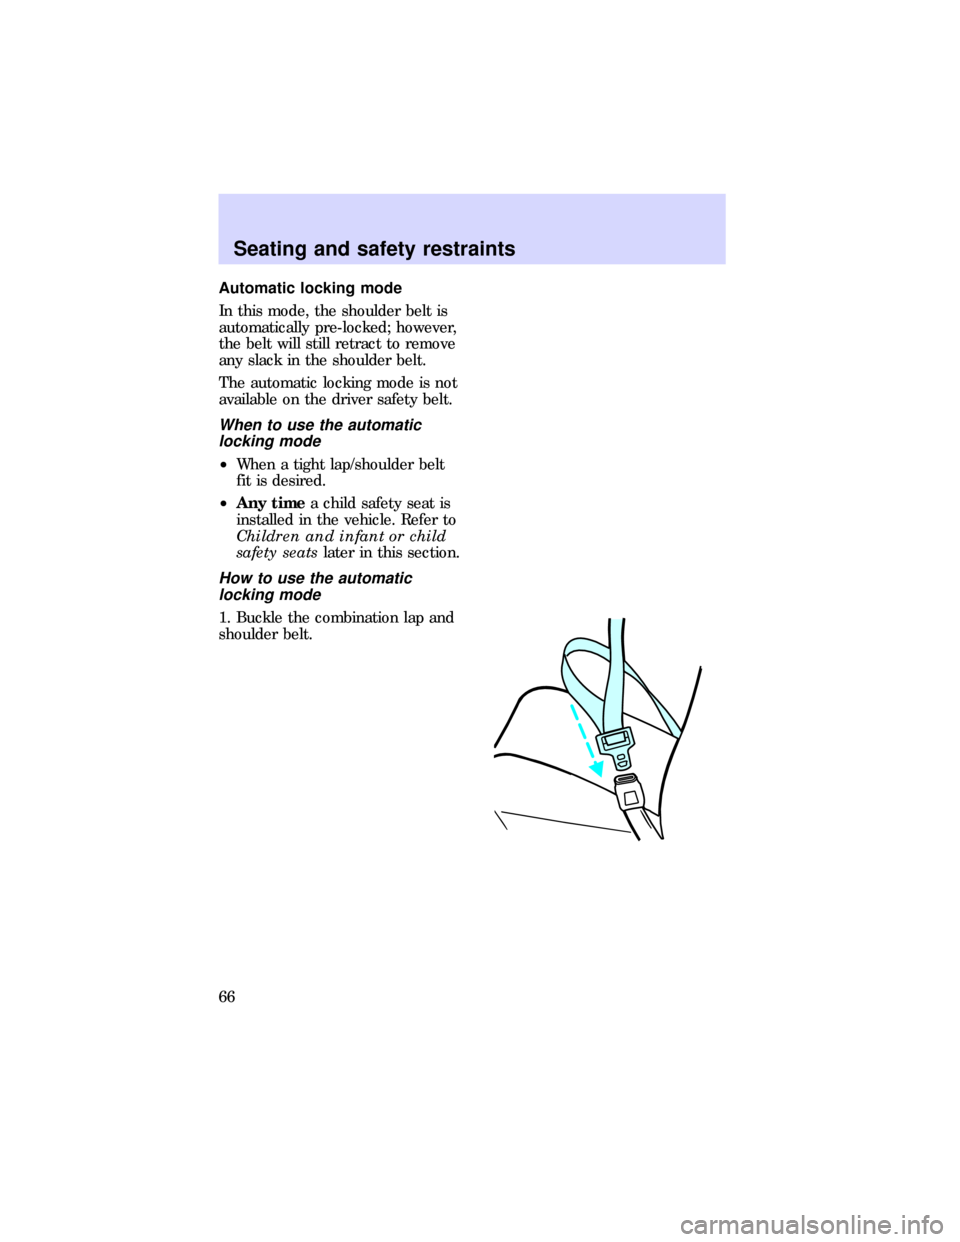
How to use the automatic
locking mode
1. Buckle the combination lap and
shoulder belt.
Seating and safety restraints
66
Page 67 of 197
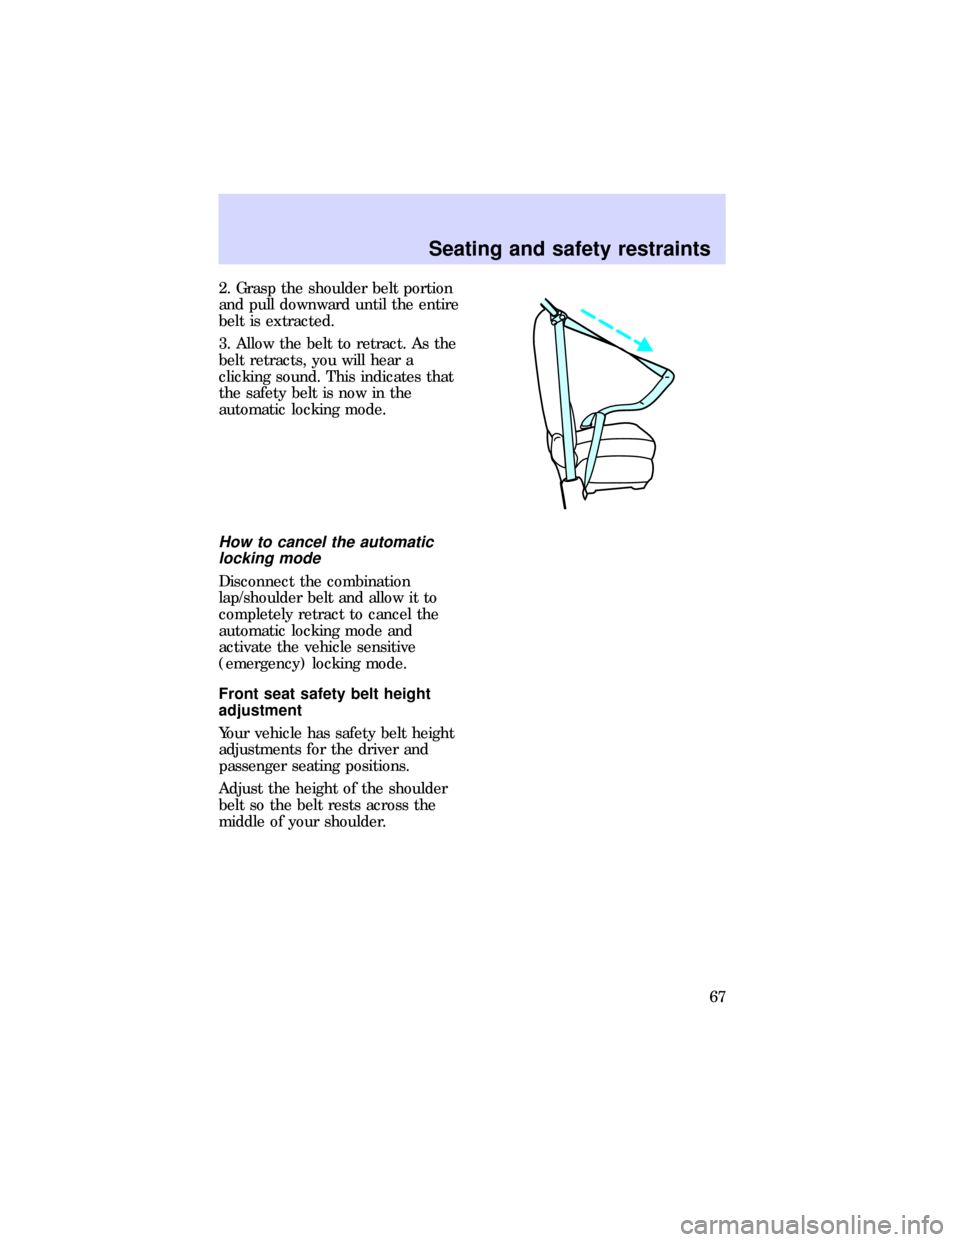
2. Grasp the shoulder belt portion
and pull downward until the entire
belt is extracted.
3. Allow the belt to retract. As the
belt retracts, you will hear a
clicking sound. This indicates that
the safety belt is now in the
automatic locking mode.
How to cancel the automatic
locking mode
Disconnect the combination
lap/shoulder belt and allow it to
completely retract to cancel the
automatic locking mode and
activate the vehicle sensitive
(emergency) locking mode.
Front seat safety belt height
adjustment
Your vehicle has safety belt height
adjustments for the driver and
passenger seating positions.
Adjust the height of the shoulder
belt so the belt rests across the
middle of your shoulder.
Seating and safety restraints
67
Page 68 of 197
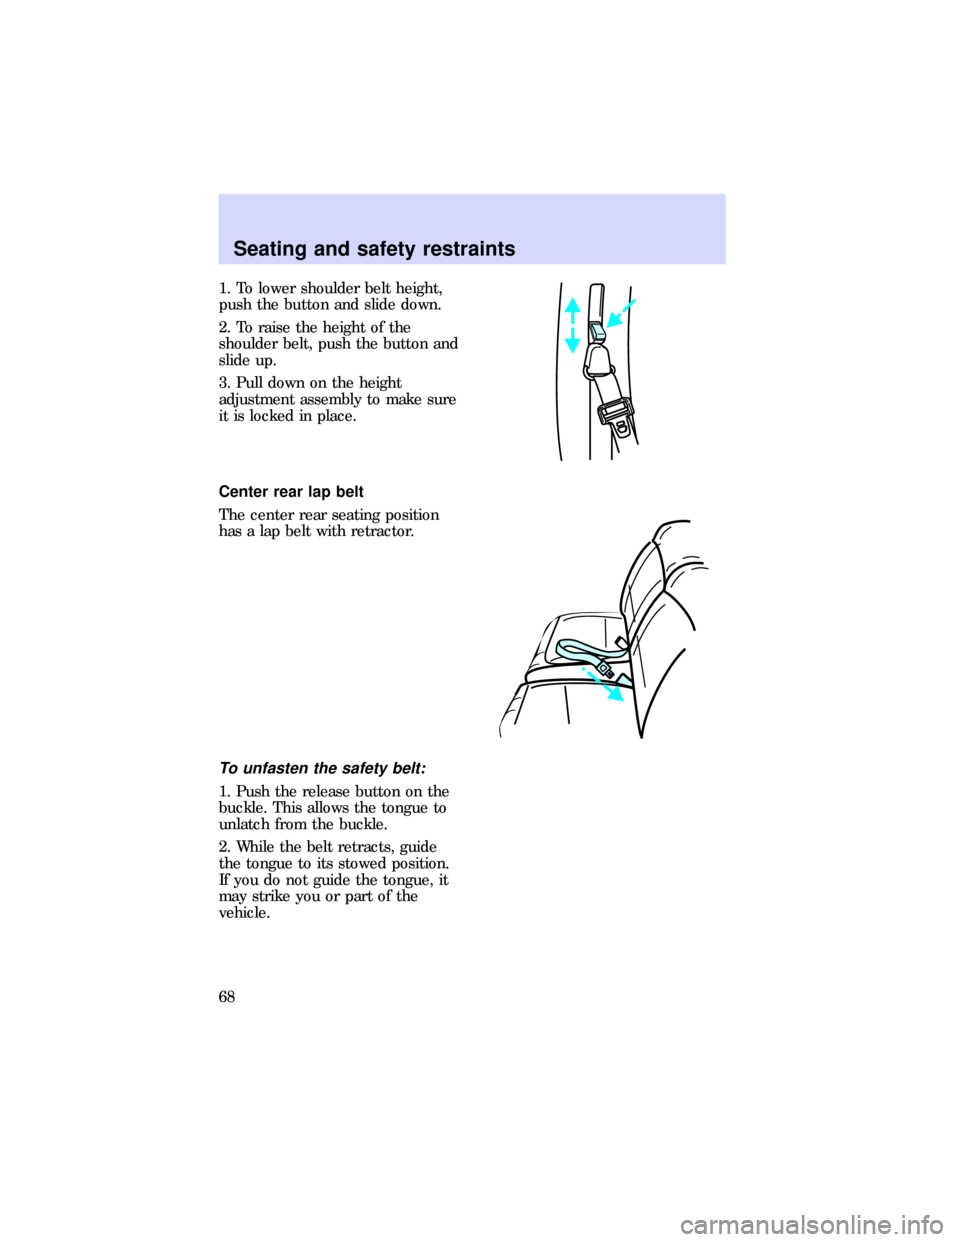
1. To lower shoulder belt height,
push the button and slide down.
2. To raise the height of the
shoulder belt, push the button and
slide up.
3. Pull down on the height
adjustment assembly to make sure
it is locked in place.
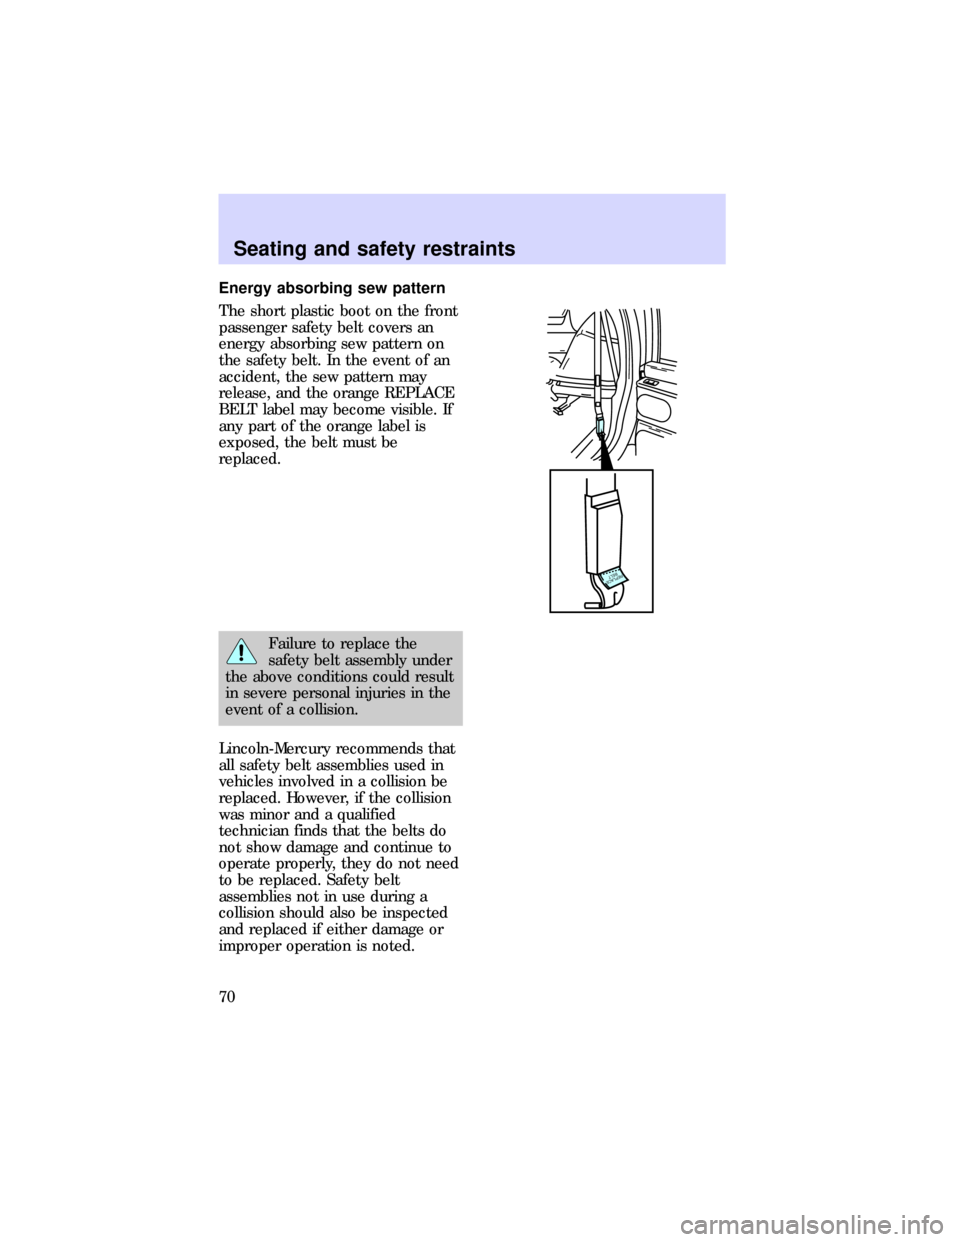
Center rear lap belt
The center rear seating position
has a lap belt with retractor.
To unfasten the safety belt:
1. Push the release button on the
buckle. This allows the tongue to
unlatch from the buckle.
2. While the belt retracts, guide
the tongue to its stowed position.
If you do not guide the tongue, it
may strike you or part of the
vehicle.
Seating and safety restraints
68
Page 69 of 197
SAFETY BELT WARNING AND
INDICATOR CHIME
The
warning light illuminates
in the instrument cluster and a
chime sounds to remind the
occupants to fasten their safety
belts.
Conditions of operation
If... Then...
The safety belt is not buckled
before the ignition key is turned
to ON...The safety belt indicator light
illuminates for one to two minutes
and the warning chime sounds for
4-8 seconds.
The safety belt is buckled while
the indicator light is illuminated
and the warning chime is
sounding...The safety belt indicator light and
the warning chime turn off.
The safety belt is buckled before
the ignition key is turned to ON...Both the safety belt warning light
and chime remain off.
SAFETY BELT MAINTENANCE
Check the safety belt systems
periodically to make sure that they
work properly and are not
damaged. Check the safety belts to
make sure there are no nicks,
wear, or cuts. If your vehicle has
been involved in an accident, have
all the safety belts and child seat
anchoring brackets (if equipped)
examined by a qualified technician.
Seating and safety restraints
69
Page 70 of 197
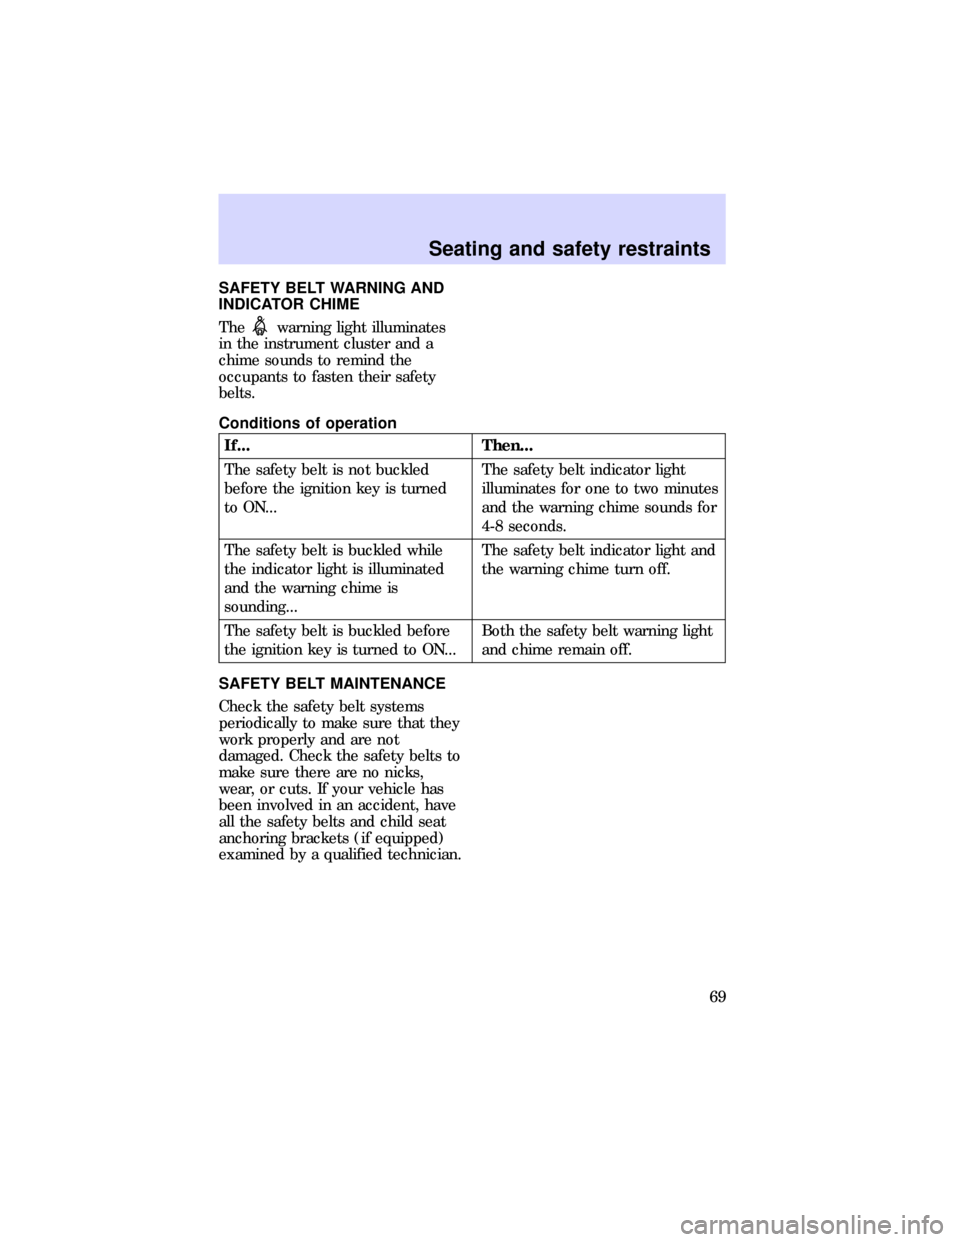
Energy absorbing sew pattern
The short plastic boot on the front
passenger safety belt covers an
energy absorbing sew pattern on
the safety belt. In the event of an
accident, the sew pattern may
release, and the orange REPLACE
BELT label may become visible. If
any part of the orange label is
exposed, the belt must be
replaced.
Failure to replace the
safety belt assembly under
the above conditions could result
in severe personal injuries in the
event of a collision.
Lincoln-Mercury recommends that
all safety belt assemblies used in
vehicles involved in a collision be
replaced. However, if the collision
was minor and a qualified
technician finds that the belts do
not show damage and continue to
operate properly, they do not need
to be replaced. Safety belt
assemblies not in use during a
collision should also be inspected
and replaced if either damage or
improper operation is noted.
REPLACE
BELT
Seating and safety restraints
70
Trending: dimensions, automatic transmission fluid, checking oil, center console, boot, coolant, set clock


