MITSUBISHI COLT 2008 Owner's Manual (in English)
COLT 2008
MITSUBISHI
MITSUBISHI
https://www.carmanualsonline.info/img/19/34848/w960_34848-0.png
MITSUBISHI COLT 2008 Owner's Manual (in English)
Trending: towing capacity, mirror, steering wheel, Tire, snow chains, sport mode, fuel tank capacity
Page 381 of 450
Maintenance8-39
8
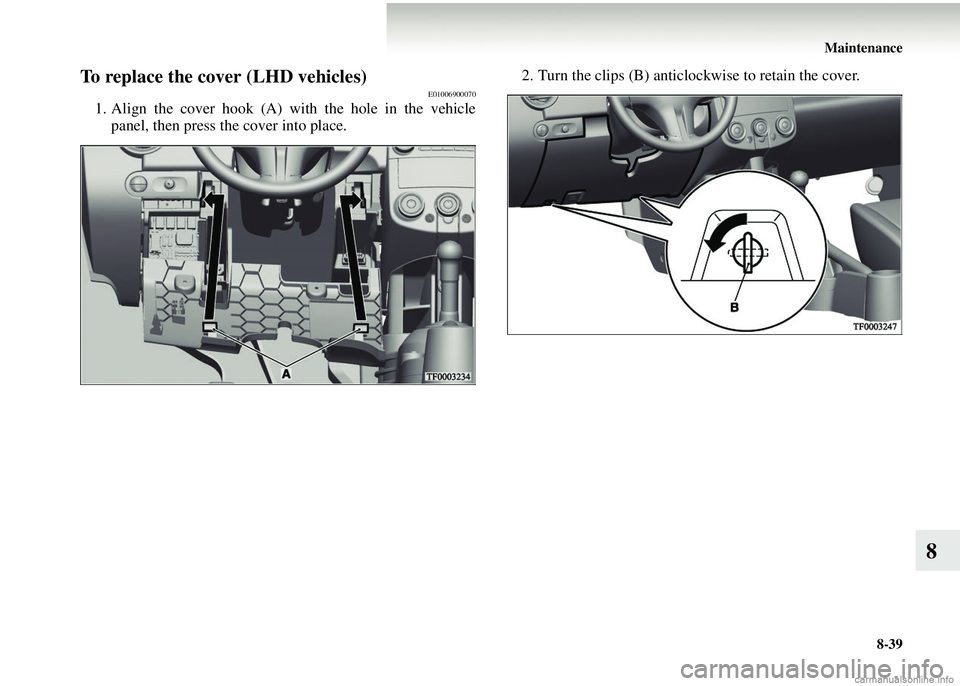
To replace the cover (LHD vehicles)E01006900070
1. Align the cover hook (A) with the hole in the vehiclepanel, then press the cover into place. 2. Turn the clips (B) anticlockwise to retain the cover.
Page 382 of 450
8-40 Maintenance
8
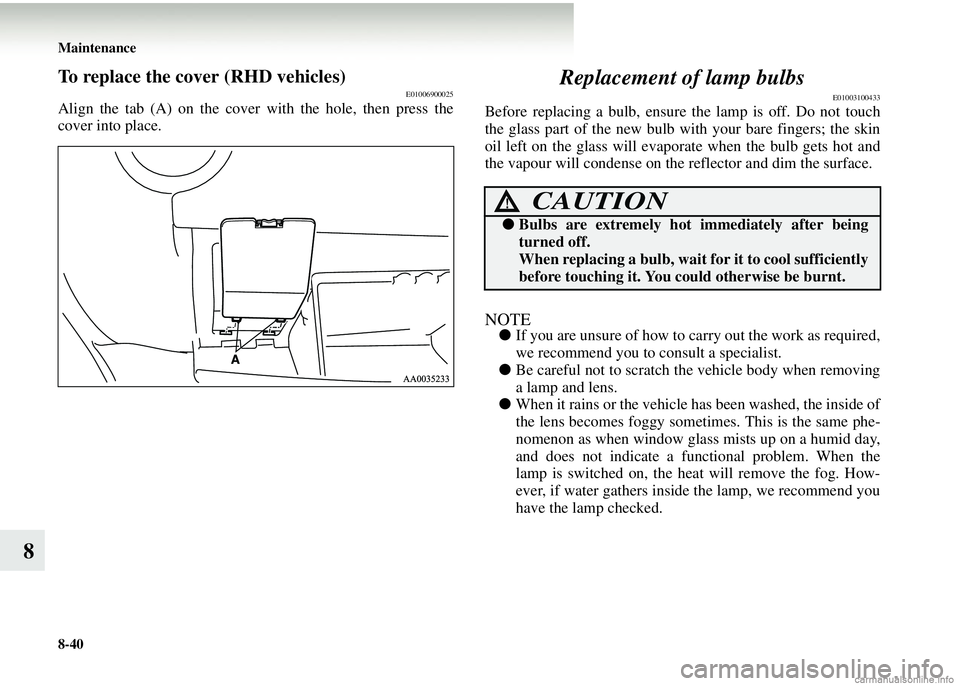
To replace the cover (RHD vehicles)E01006900025
Align the tab (A) on the cover with the hole, then press the
cover into place.
Replacement of lamp bulbs
E01003100433
Before replacing a bulb, ensure the lamp is off. Do not touch
the glass part of the new bulb with your bare fingers; the skin
oil left on the glass will evapor ate when the bulb gets hot and
the vapour will condense on the reflector and dim the surface.
NOTE● If you are unsure of how to carry out the work as required,
we recommend you to consult a specialist.
● Be careful not to scratch the vehicle body when removing
a lamp and lens.
● When it rains or the vehicle has been washed, the inside of
the lens becomes foggy sometimes. This is the same phe-
nomenon as when window glass mists up on a humid day,
and does not indicate a functional problem. When the
lamp is switched on, the heat will remove the fog. How-
ever, if water gathers inside the lamp, we recommend you
have the lamp checked.
CAUTION!
●Bulbs are extremely hot immediately after being
turned off.
When replacing a bulb, wait for it to cool sufficiently
before touching it. You could otherwise be burnt.
Page 383 of 450
Maintenance8-41
8
Bulb capacityE01003200043
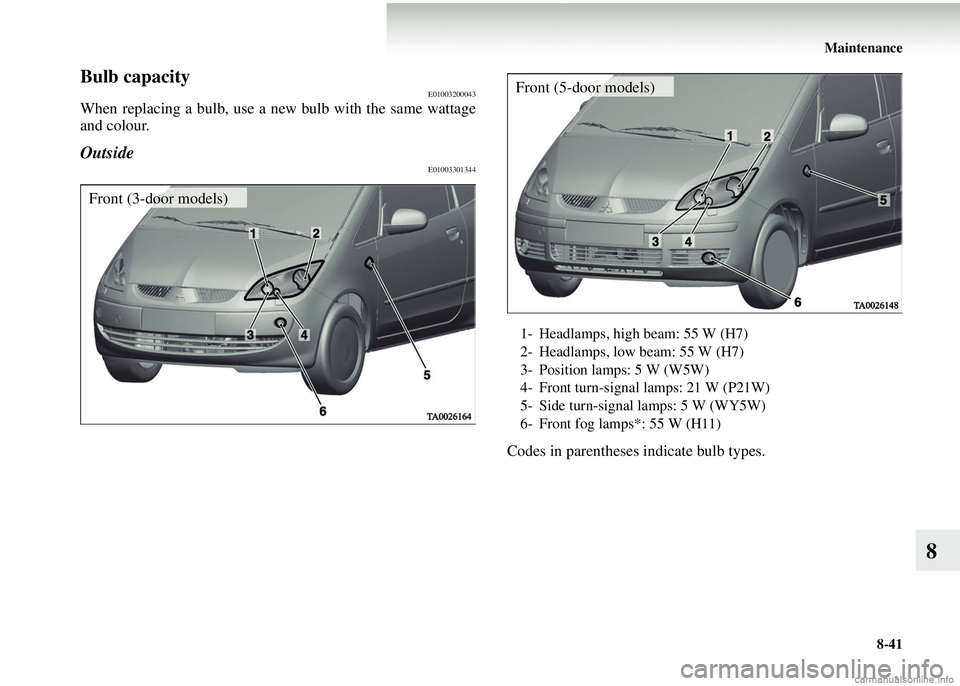
When replacing a bulb, use a new bulb with the same wattage
and colour.
OutsideE01003301344
Codes in parentheses indicate bulb types.
Front (3-door models)
1- Headlamps, high beam: 55 W (H7)
2- Headlamps, low beam: 55 W (H7)
3- Position lamps: 5 W (W5W)
4- Front turn-signal lamps: 21 W (P21W)
5- Side turn-signal lamps: 5 W (WY5W)
6- Front fog lamps*: 55 W (H11)
Front (5-door models)
Page 384 of 450
8-42 Maintenance
8
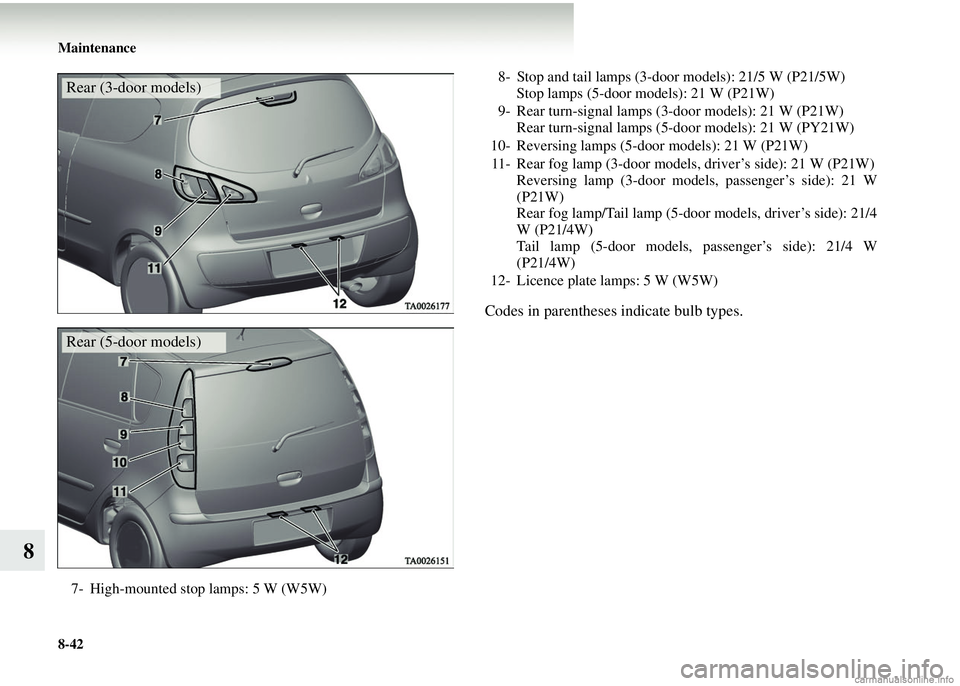
Codes in parentheses indicate bulb types.
7- High-mounted stop lamps: 5 W (W5W)
Rear (3-door models)
Rear (5-door models)
8- Stop and tail lamps (3-door models): 21/5 W (P21/5W)Stop lamps (5-door models): 21 W (P21W)
9- Rear turn-signal lamps (3-door models): 21 W (P21W) Rear turn-signal lamps (5-door models): 21 W (PY21W)
10- Reversing lamps (5-door models): 21 W (P21W) 11- Rear fog lamp (3-door models, driver’s side): 21 W (P21W) Reversing lamp (3-door models, passenger’s side): 21 W
(P21W)
Rear fog lamp/Tail lamp (5-door models, driver’s side): 21/4
W (P21/4W)
Tail lamp (5-door models, passenger’s side): 21/4 W
(P21/4W)
12- Licence plate lamps: 5 W (W5W)
Page 385 of 450
Maintenance8-43
8
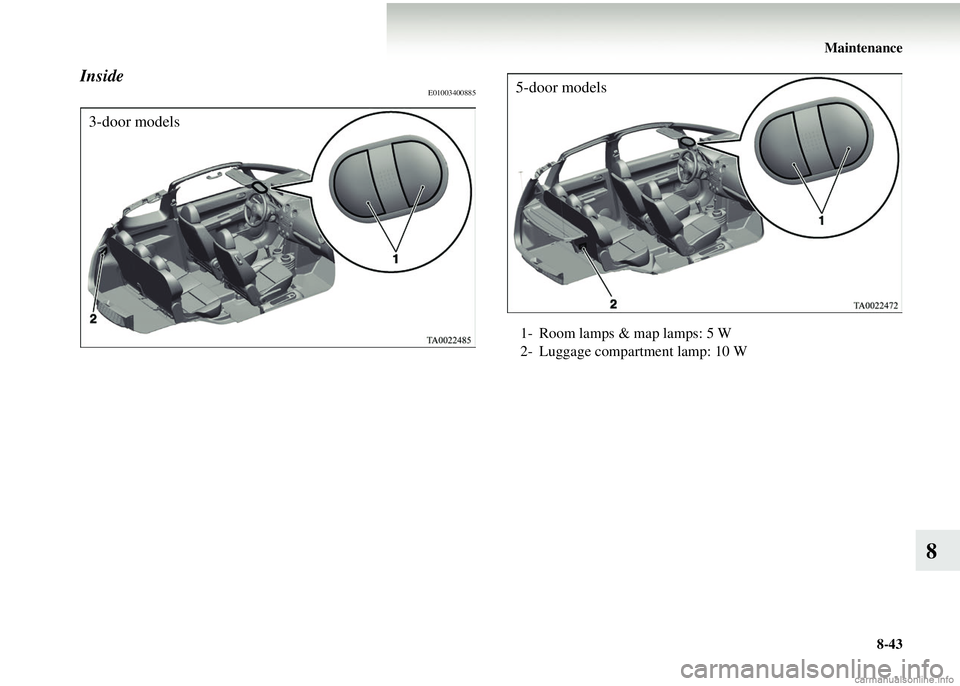
InsideE01003400885
3-door models
1- Room lamps & map lamps: 5 W
2- Luggage compartment lamp: 10 W
5-door models
Page 386 of 450
8-44 Maintenance
8
HeadlampsE01003500642
Replacement of low beam
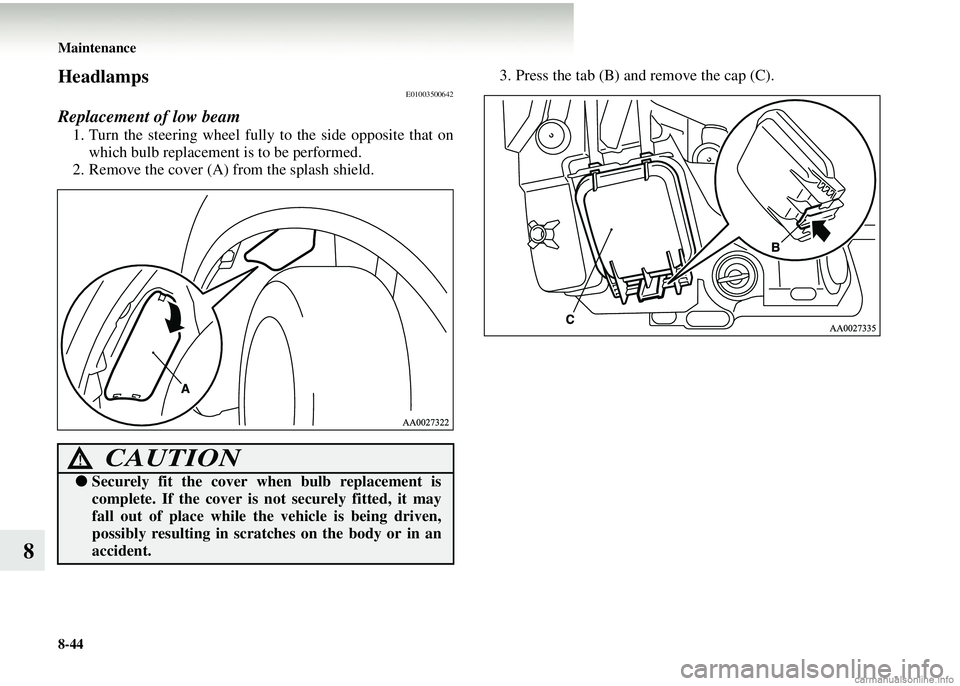
1. Turn the steering wheel fully to the side opposite that onwhich bulb replacement is to be performed.
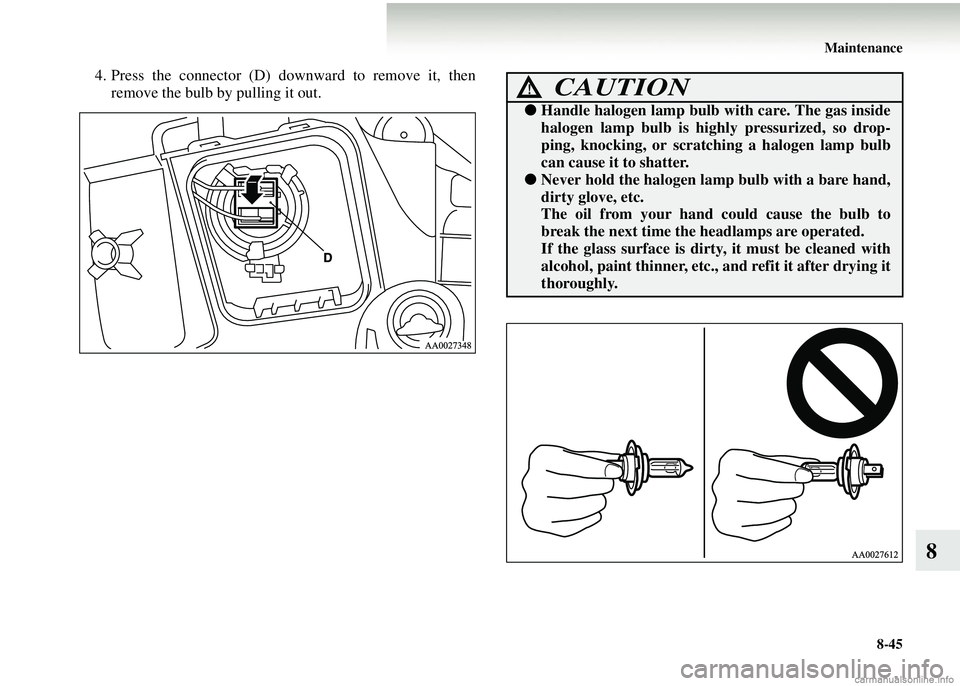
2. Remove the cover (A) from the splash shield. 3. Press the tab (B) and remove the cap (C).
CAUTION!
●
Securely fit the cover when bulb replacement is
complete. If the cover is no t securely fitted, it may
fall out of place while th e vehicle is being driven,
possibly resulting in scratches on the body or in an
accident.
Page 387 of 450
Maintenance8-45
8
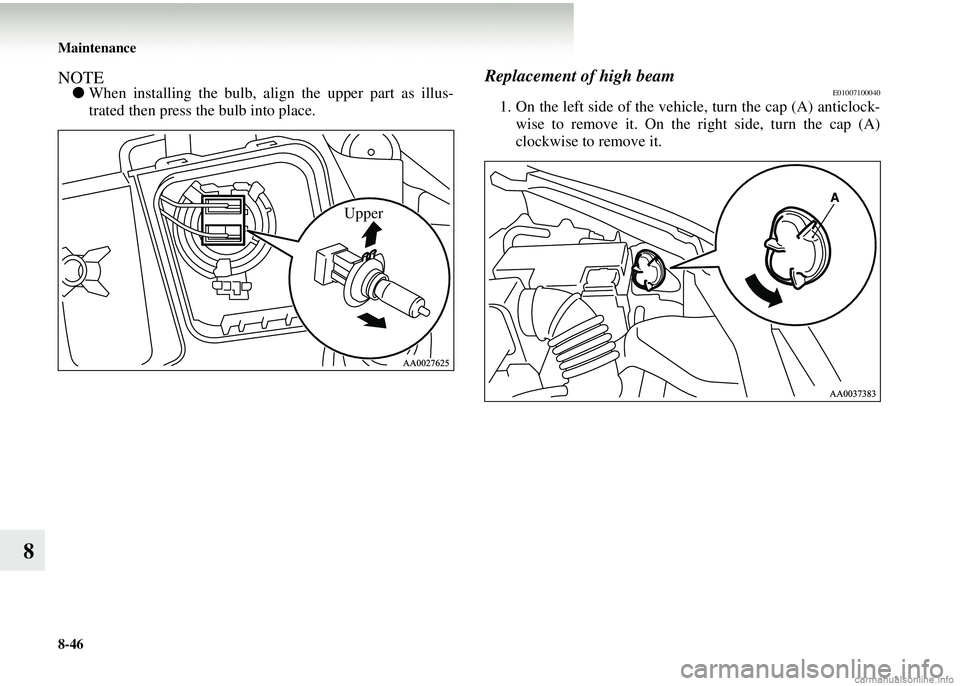
4. Press the connector (D) downward to remove it, thenremove the bulb by pulling it out.CAUTION!
● Handle halogen lamp bulb with care. The gas inside
halogen lamp bulb is highly pressurized, so drop-
ping, knocking, or scratc hing a halogen lamp bulb
can cause it to shatter.
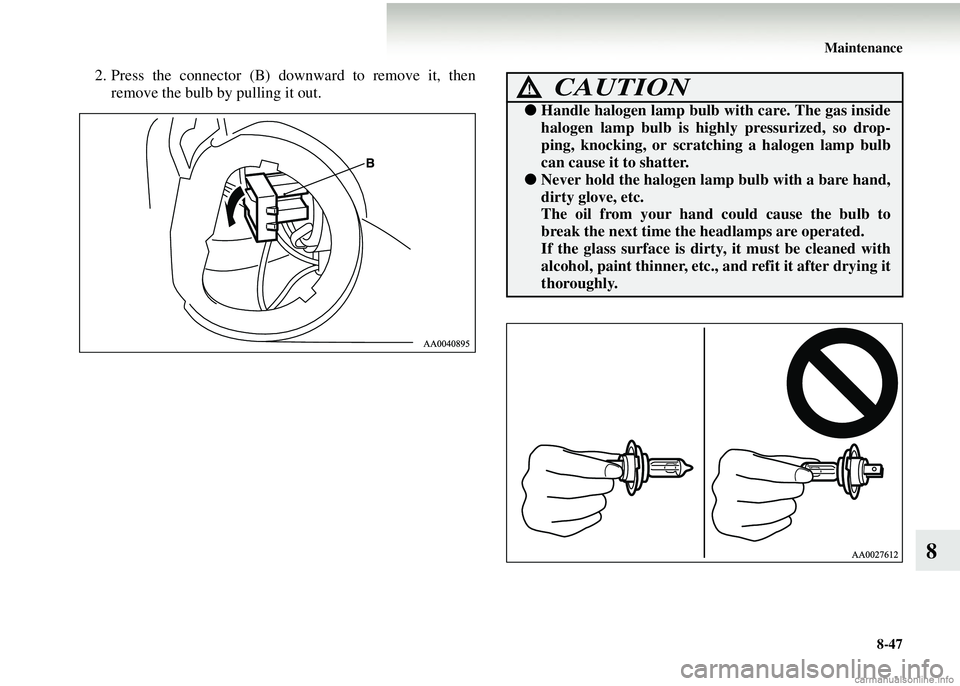
● Never hold the halogen lamp bulb with a bare hand,
dirty glove, etc.
The oil from your hand could cause the bulb to
break the next time th e headlamps are operated.
If the glass surface is dirt y, it must be cleaned with
alcohol, paint thinner, etc., and refit it after drying it
thoroughly.
Page 388 of 450
8-46 Maintenance
8
NOTE●When installing the bulb, align the upper part as illus-
trated then press the bulb into place.
Replacement of high beamE01007100040
1. On the left side of the vehi cle, turn the cap (A) anticlock-
wise to remove it. On the right side, turn the cap (A)
clockwise to remove it.
Upper
Page 389 of 450
Maintenance8-47
8
2. Press the connector (B) dow nward to remove it, then
remove the bulb by pulling it out.CAUTION!
● Handle halogen lamp bulb with care. The gas inside
halogen lamp bulb is highly pressurized, so drop-
ping, knocking, or scratc hing a halogen lamp bulb
can cause it to shatter.
● Never hold the halogen lamp bulb with a bare hand,
dirty glove, etc.
The oil from your hand could cause the bulb to
break the next time th e headlamps are operated.
If the glass surface is dirt y, it must be cleaned with
alcohol, paint thinner, etc., and refit it after drying it
thoroughly.
Page 390 of 450
8-48 Maintenance
8
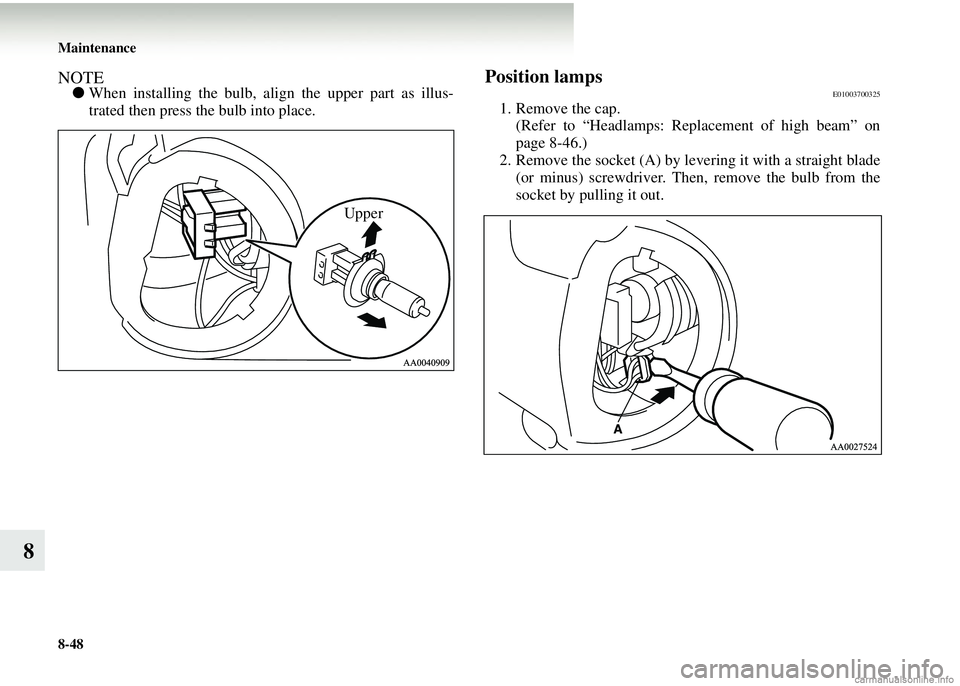
NOTE●When installing the bulb, align the upper part as illus-
trated then press the bulb into place.Position lampsE01003700325
1. Remove the cap.
(Refer to “Headlamps: Re placement of high beam” on
page 8-46.)
2. Remove the socket (A) by leve ring it with a straight blade
(or minus) screwdriver. Then, remove the bulb from the
socket by pulling it out.
Upper
Trending: spare wheel, brakes, oil pressure, suspension, Front seat, seat adjustment, park assist
