MITSUBISHI COLT 2011 Owner's Manual (in English)
Manufacturer: MITSUBISHI, Model Year: 2011, Model line: COLT, Model: MITSUBISHI COLT 2011Pages: 274, PDF Size: 17.88 MB
Page 171 of 274
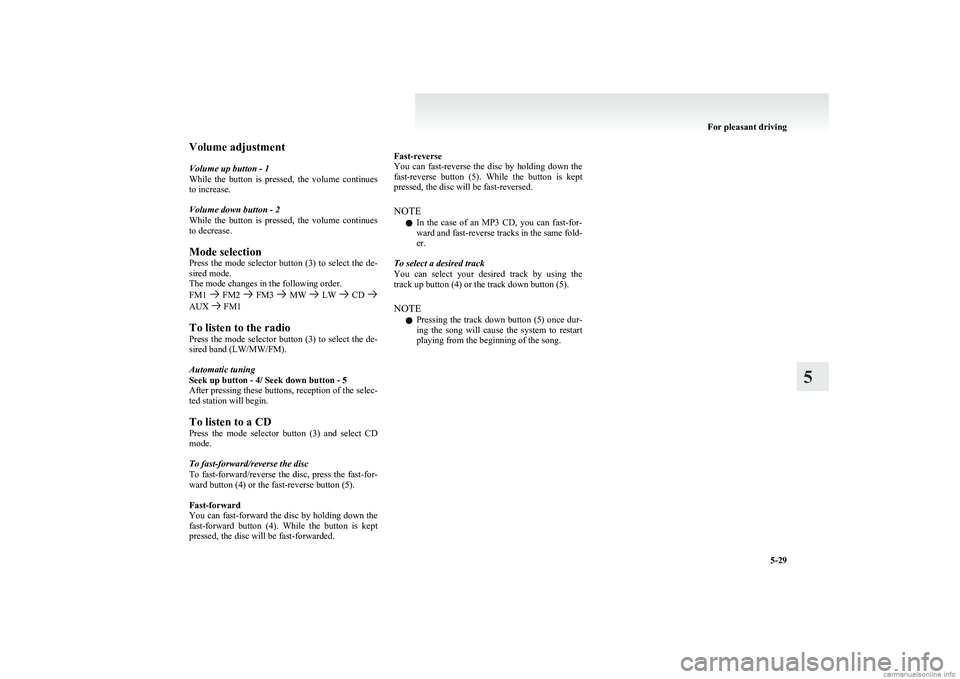
Volume adjustment
Volume up button - 1
While the button is pressed, the volume continues
to increase.
Volume down button - 2
While the button is pressed, the volume continues
to decrease.
Mode selection
Press the mode selector button (3) to select the de-
sired mode.
The mode changes in the following order.
FM1
FM2 FM3 MW LW CD AUX FM1
To listen to the radio
Press the mode selector button (3) to select the de-
sired band (LW/MW/FM).
Automatic tuning
Seek up button - 4/ Seek down button - 5
After pressing these buttons, reception of the selec-
ted station will begin.
To listen to a CD
Press the mode selector button (3) and select CD
mode.
To fast-forward/reverse the disc
To fast-forward/reverse the disc, press the fast-for-
ward button (4) or the fast-reverse button (5).
Fast-forward
You can fast-forward the disc by holding down the
fast-forward button (4). While the button is kept
pressed, the disc will be fast-forwarded.
Fast-reverse
You can fast-reverse the disc by holding down the
fast-reverse button (5). While the button is kept
pressed, the disc will be fast-reversed.
NOTE l In the case of an MP3 CD, you can fast-for-
ward and fast-reverse tracks in the same fold-
er.
To select a desired track
You can select your desired track by using the
track up button (4) or the track down button (5).
NOTE l Pressing the track down button (5) once dur-
ing the song will cause the system to restart
playing from the beginning of the song.
For pleasant driving
5-29
5
Page 172 of 274
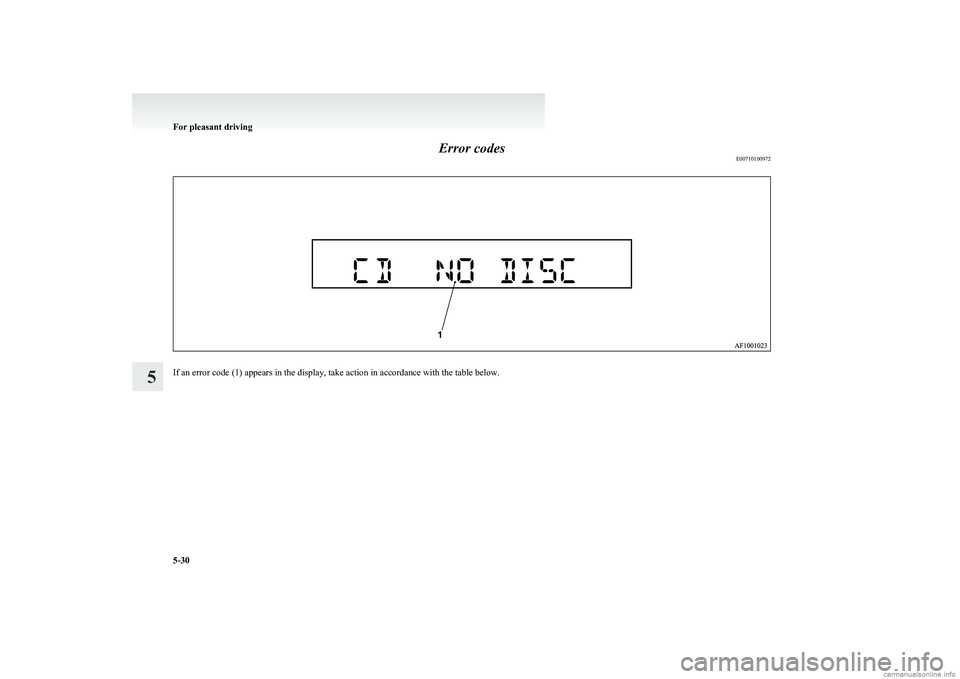
Error codesE00710100972
If an error code (1) appears in the display, take action in accordance with the table below.
For pleasant driving
5-30
5
Page 173 of 274
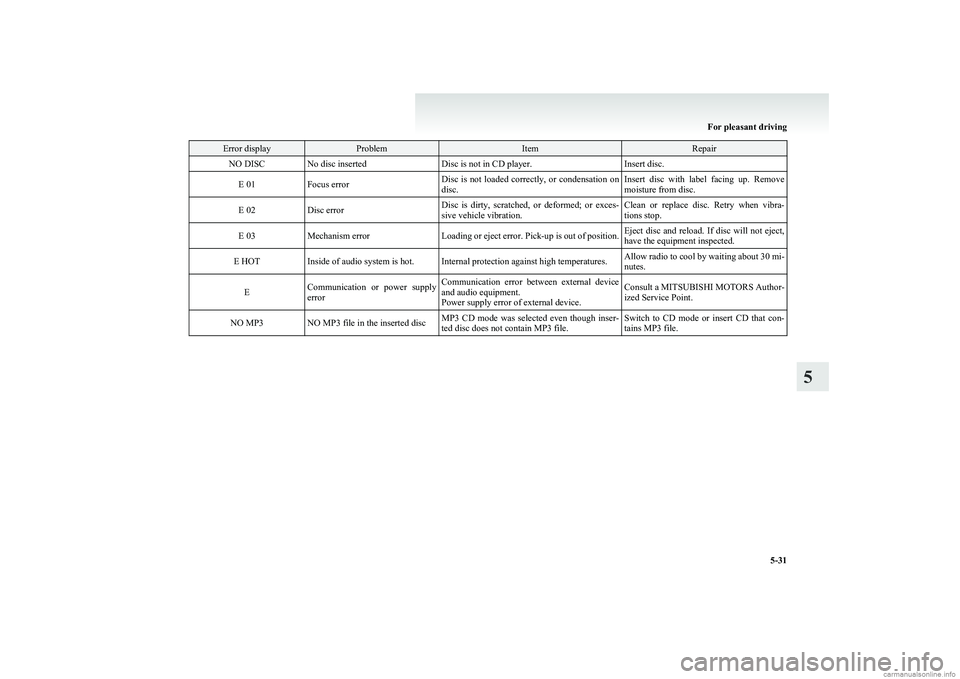
Error displayProblemItemRepairNO DISCNo disc insertedDisc is not in CD player.Insert disc.E 01Focus errorDisc is not loaded correctly, or condensation on
disc.Insert disc with label facing up. Remove
moisture from disc.E 02Disc errorDisc is dirty, scratched, or deformed; or exces-
sive vehicle vibration.Clean or replace disc. Retry when vibra-
tions stop.E 03Mechanism errorLoading or eject error. Pick-up is out of position.Eject disc and reload. If disc will not eject,
have the equipment inspected.E HOTInside of audio system is hot.Internal protection against high temperatures.Allow radio to cool by waiting about 30 mi-
nutes.ECommunication or power supply
errorCommunication error between external device
and audio equipment.
Power supply error of external device.Consult a MITSUBISHI MOTORS Author-
ized Service Point.NO MP3NO MP3 file in the inserted discMP3 CD mode was selected even though inser-
ted disc does not contain MP3 file.Switch to CD mode or insert CD that con-
tains MP3 file.
For pleasant driving
5-31
5
Page 174 of 274
Handling of compact discsE00723000207
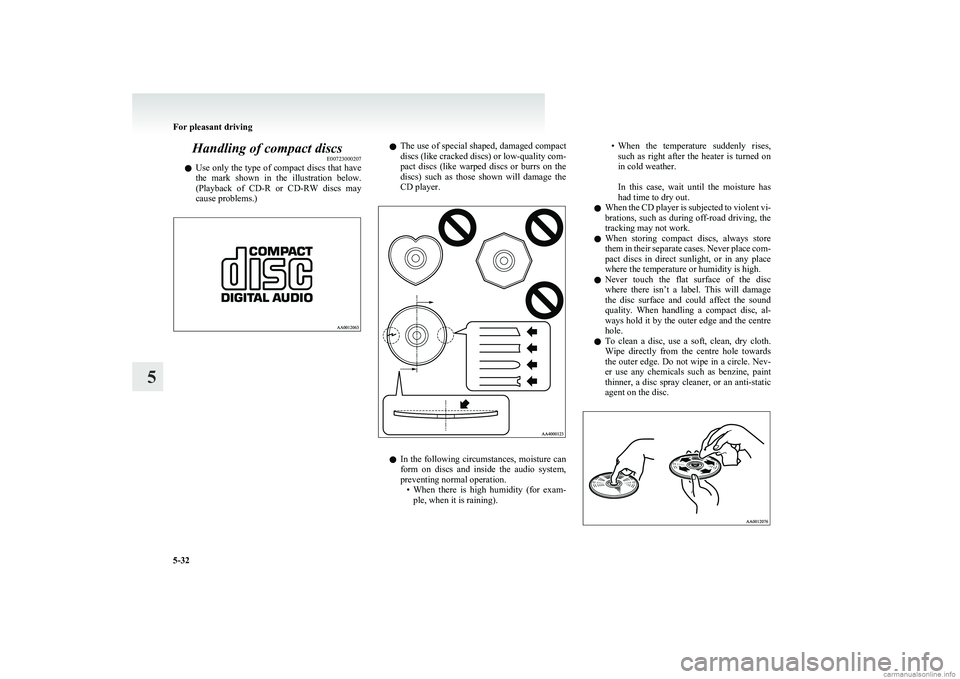
l Use only the type of compact discs that have
the mark shown in the illustration below.
(Playback of CD-R or CD-RW discs may
cause problems.)l The use of special shaped, damaged compact
discs (like cracked discs) or low-quality com-
pact discs (like warped discs or burrs on the
discs) such as those shown will damage the
CD player.
l In the following circumstances, moisture can
form on discs and inside the audio system,
preventing normal operation. •When there is high humidity (for exam-
ple, when it is raining).
• When the temperature suddenly rises,
such as right after the heater is turned on
in cold weather.
In this case, wait until the moisture has
had time to dry out.
l When the CD player is subjected to violent vi-
brations, such as during off-road driving, the
tracking may not work.
l When storing compact discs, always store
them in their separate cases. Never place com-
pact discs in direct sunlight, or in any place
where the temperature or humidity is high.
l Never touch the flat surface of the disc
where there isn’t a label. This will damage
the disc surface and could affect the sound
quality. When handling a compact disc, al-
ways hold it by the outer edge and the centre
hole.
l To clean a disc, use a soft, clean, dry cloth.
Wipe directly from the centre hole towards
the outer edge. Do not wipe in a circle. Nev-
er use any chemicals such as benzine, paint
thinner, a disc spray cleaner, or an anti-static
agent on the disc.
For pleasant driving
5-32
5
Page 175 of 274
lDo not use a ball point pen, felt pen, pencil,
etc. to write on the label surface of the disc.
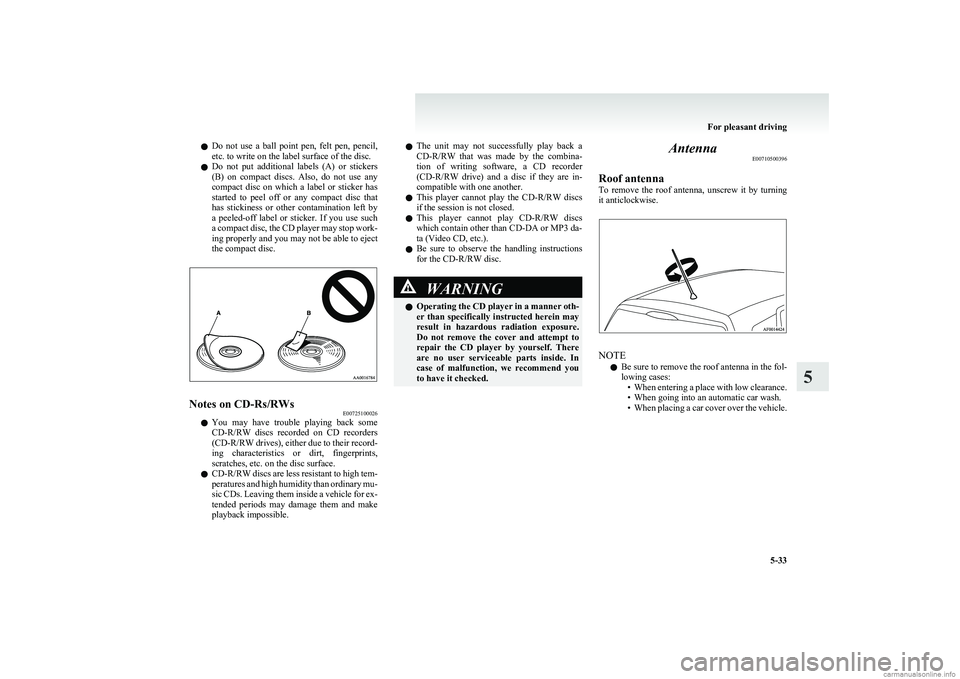
l Do not put additional labels (A) or stickers
(B) on compact discs. Also, do not use any
compact disc on which a label or sticker has
started to peel off or any compact disc that
has stickiness or other contamination left by
a peeled-off label or sticker. If you use such
a compact disc, the CD player may stop work-
ing properly and you may not be able to eject
the compact disc.Notes on CD-Rs/RWs E00725100026
lYou may have trouble playing back some
CD-R/RW discs recorded on CD recorders
(CD-R/RW drives), either due to their record-
ing characteristics or dirt, fingerprints,
scratches, etc. on the disc surface.
l CD-R/RW discs are less resistant to high tem-
peratures and high humidity than ordinary mu-
sic CDs. Leaving them inside a vehicle for ex-
tended periods may damage them and make
playback impossible.
l The unit may not successfully play back a
CD-R/RW that was made by the combina-
tion of writing software, a CD recorder
(CD-R/RW drive) and a disc if they are in-
compatible with one another.
l This player cannot play the
CD-R/RW discs
if the session is not closed.
l This player cannot play
CD-R/RW discs
which contain other than CD-DA or MP3 da-
ta (Video CD, etc.).
l Be sure to observe the handling instructions
for the CD-R/RW disc.WARNINGl Operating the CD player in a manner oth-
er than specifically instructed herein may
result in hazardous radiation exposure.
Do not remove the cover and attempt to
repair the CD player by yourself. There
are no user serviceable parts inside. In
case of malfunction, we recommend you
to have it checked.Antenna E00710500396
Roof antenna
To remove the roof antenna, unscrew it by turning
it anticlockwise.
NOTE
l Be sure to remove the roof antenna in the fol-
lowing cases: •When entering a place with low clearance.
• When going into an automatic car wash.
• When placing a car cover over the vehicle.
For pleasant driving
5-33
5
Page 176 of 274
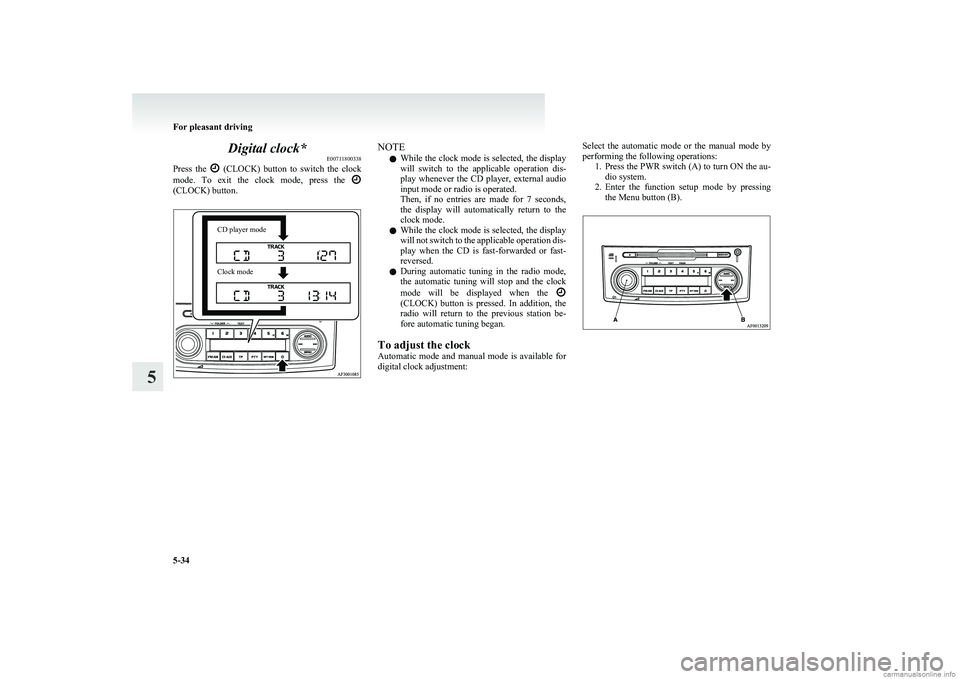
Digital clock*E00711800338
Press the
(CLOCK) button to switch the clock
mode. To exit the clock mode, press the
(CLOCK) button.
CD player modeClock modeNOTE
l While the clock mode is selected, the display
will switch to the applicable operation dis-
play whenever the CD player, external audio
input mode or radio is operated.
Then, if no entries are made for 7 seconds,
the display will automatically return to the
clock mode.
l While the clock mode is selected, the display
will not switch to the applicable operation dis-
play when the CD is fast-forwarded or fast-
reversed.
l During automatic tuning in the radio mode,
the automatic tuning will stop and the clock
mode will be displayed when the
(CLOCK) button is pressed. In addition, the
radio will return to the previous station be-
fore automatic tuning began.
To adjust the clock
Automatic mode and manual mode is available for
digital clock adjustment:
Select the automatic mode or the manual mode by
performing the following operations: 1.Press the PWR switch (A) to turn ON the au-
dio system.
2. Enter the function setup mode by pressing
the Menu button (B).
For pleasant driving
5-34
5
Page 177 of 274
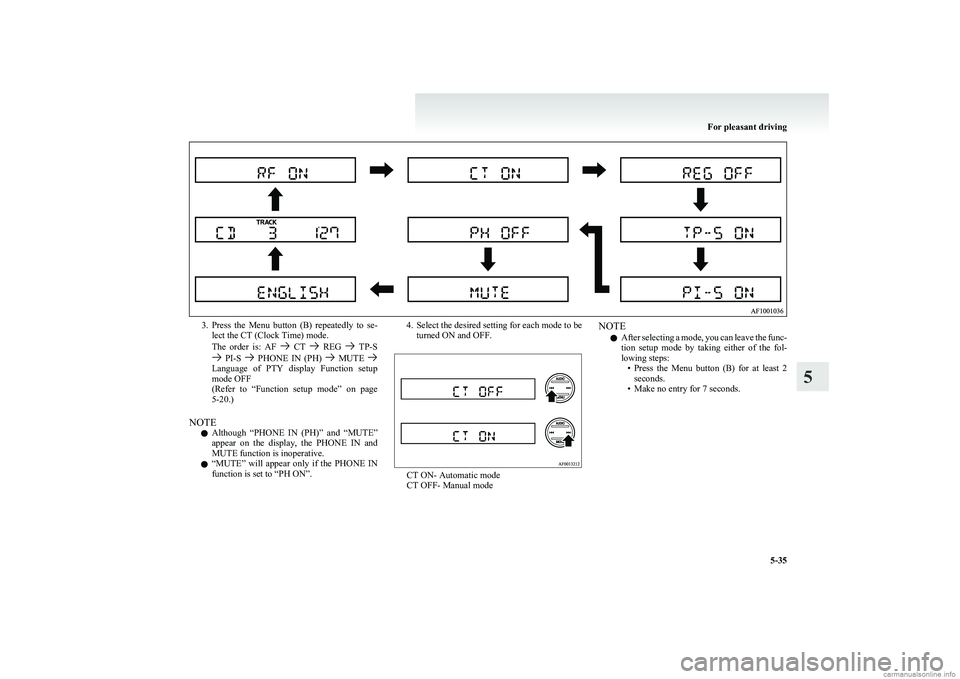
3.Press the Menu button (B) repeatedly to se-
lect the CT (Clock Time) mode.
The order is: AF
CT REG TP-S PI-S PHONE IN (PH) MUTE Language of PTY display Function setup
mode OFF
( Refer to “Function setup mode” on page
5-20.)
NOTE l Although “PHONE IN (PH)” and “MUTE”
appear on the display, the PHONE IN and
MUTE function is inoperative.
l “
MUTE” will appear only if the PHONE IN
function is set to “PH ON”.
4. Select the desired setting for each mode to be turned ON and OFF.
CT ON- Automatic mode
CT OFF- Manual mode
NOTE
l After selecting a mode, you can leave the func-
tion setup mode by taking either of the fol-
lowing steps: •Press the Menu button (B) for at least 2
seconds.
• Make no entry for 7 seconds.
For pleasant driving
5-35
5
Page 178 of 274
Automatic mode
The automatic mode can set the local time automat-
ically by using the signal from the local RDS sta-
tions. Refer to “Radio data system (RDS)” on page
5-17.
Manual mode
The manual mode is also available in case the “Au-
tomatic mode” shows the incorrect time when the
adjacent local RDS stations are located in a differ-
ent time zone. Refer to “Radio data system (RDS)”
on page 5-17.
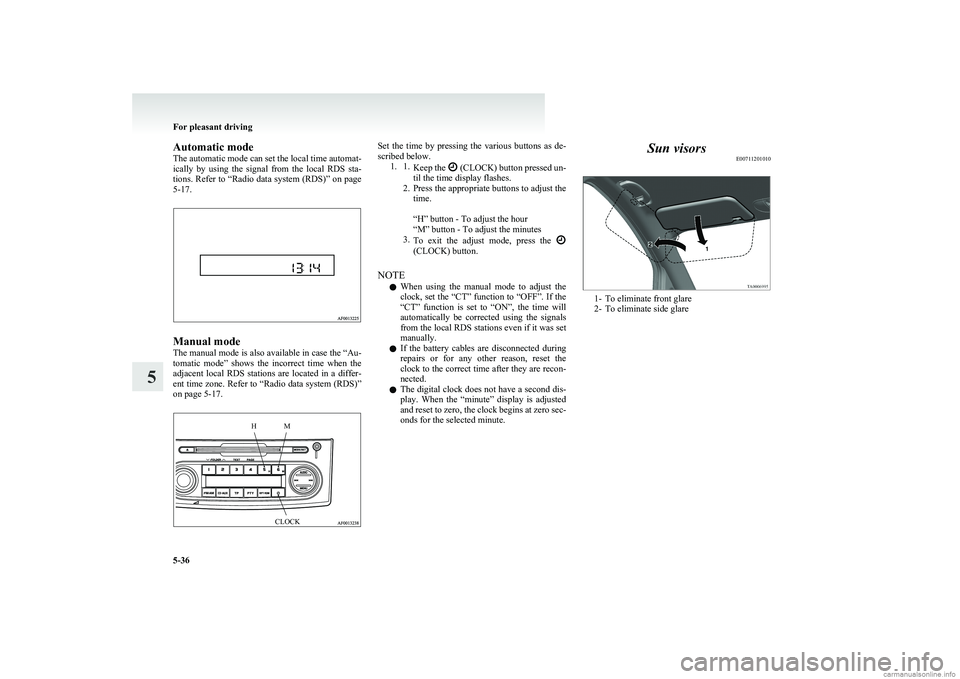
HMCLOCKSet the time by pressing the various buttons as de-
scribed below. 1. 1. Keep the
(CLOCK) button pressed un-
til the time display flashes.
2. Press the appropriate buttons to adjust the
time.
“H” button - To adjust the hour
“M” button - To adjust the minutes
3. To exit the adjust mode, press the
(CLOCK) button.
NOTE l When using the manual mode to adjust the
clock, set the “CT” function to “OFF”. If the
“CT” function is set to “ON”, the time will
automatically be corrected using the signals
from the local RDS stations even if it was set
manually.
l If the battery cables are disconnected during
repairs or for any other reason, reset the
clock to the correct time after they are recon-
nected.
l The digital clock does not have a second dis-
play. When the “minute” display is adjusted
and reset to zero, the clock begins at zero sec-
onds for the selected minute.
Sun visors E00711201010
1- To eliminate front glare
2- To eliminate side glare
For pleasant driving
5-36
5
Page 179 of 274
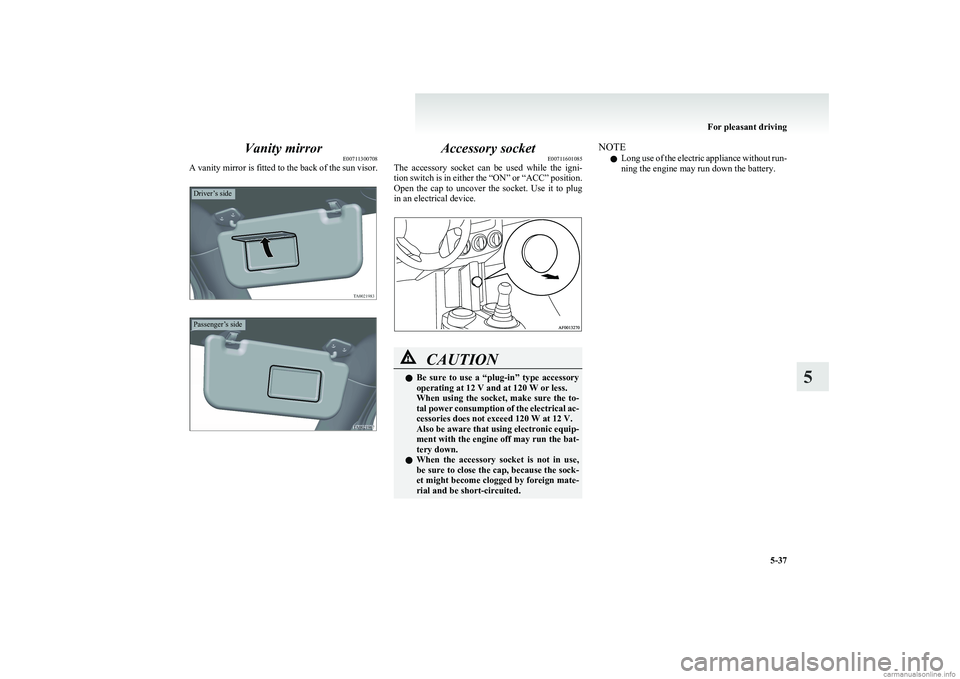
Vanity mirrorE00711300708
A vanity mirror is fitted to the back of the sun visor.
Driver’s sidePassenger’s side
Accessory socket E00711601085
The accessory socket can be used while the igni-
tion switch is in either the “ON” or “ACC” position.
Open the cap to uncover the socket. Use it to plug
in an electrical device.CAUTIONl Be sure to use a “plug-in” type accessory
operating at 12 V and at 120 W or less.
When using the socket, make sure the to-
tal power consumption of the electrical ac-
cessories does not exceed 120 W at 12 V.
Also be aware that using electronic equip-
ment with the engine off may run the bat-
tery down.
l When the accessory socket is not in use,
be sure to close the cap, because the sock-
et might become clogged by foreign mate-
rial and be short-circuited.NOTE
l Long use of the electric appliance without run-
ning the engine may run down the battery.
For pleasant driving
5-37
5
Page 180 of 274
Interior lampsE00712000799
The interior lamps go on when a door or tailgate is
opened.
When all doors and tailgate are closed, the interior
lamps are illuminated and dimmed gradually for 15
seconds then go out.
However, the interior lamps go out immediately
without being dimmed in the following cases:
l The ignition switch is turned “ON”.
l All doors and tailgate are locked using the
key mechanism of the driver’s door, the lock
knob of the driver’s door, or the remote con-
trol switch of the keyless entry system.
NOTE l The dimming period is adjustable.
For further information, we recommend you
to consult a MITSUBISHI MOTORS Author-
ized Service Point.
l If you leave the lamps on without running
the engine, you will run down the battery. Be-
fore you leave the vehicle, make sure that all
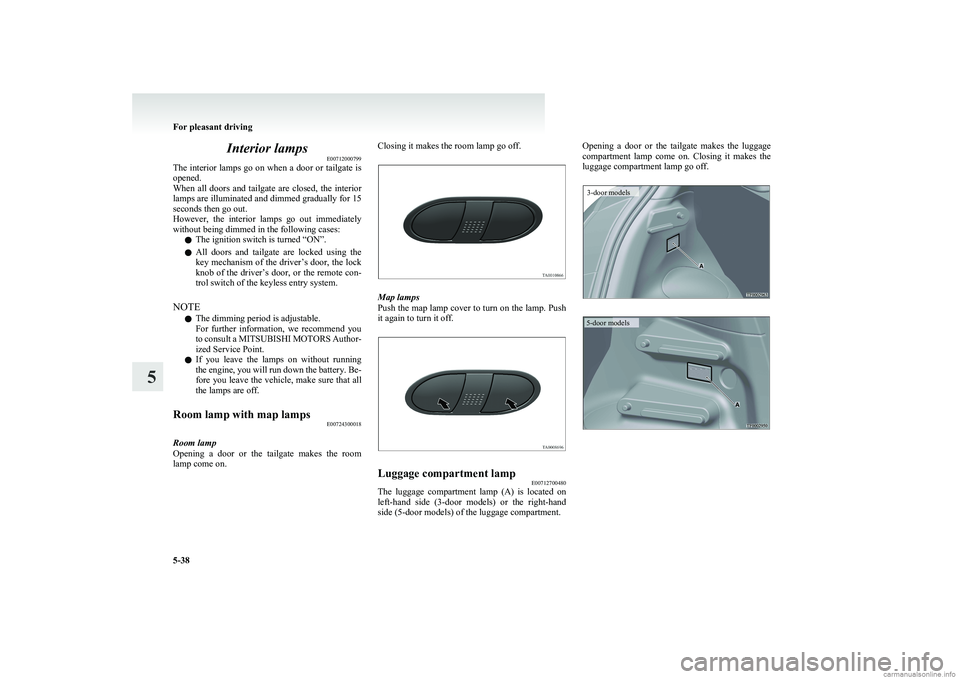
the lamps are off.Room lamp with map lamps E00724300018
Room lamp
Opening a door or the tailgate makes the room
lamp come on.
Closing it makes the room lamp go off.
Map lamps
Push the map lamp cover to turn on the lamp. Push
it again to turn it off.
Luggage compartment lamp E00712700480
The luggage compartment lamp (A) is located on
left-hand side (3-door models) or the right-hand
side (5-door models) of the luggage compartment.
Opening a door or the tailgate makes the luggage
compartment lamp come on. Closing it makes the
luggage compartment lamp go off.3-door models5-door models
For pleasant driving
5-38
5