MITSUBISHI ENDEAVOR 2004 Service Repair Manual
ENDEAVOR 2004
MITSUBISHI
MITSUBISHI
https://www.carmanualsonline.info/img/19/57105/w960_57105-0.png
MITSUBISHI ENDEAVOR 2004 Service Repair Manual
Trending: power steering fluid, inflation pressure, Abs sensor, Ball joint nut, Oil filter, Rear end, Immobilizer and or key ring antenna
Page 1601 of 3870
2004 Mitsubishi Endeavor Limited
2004 ENGINE Engine - Endeavor
Page 1602 of 3870
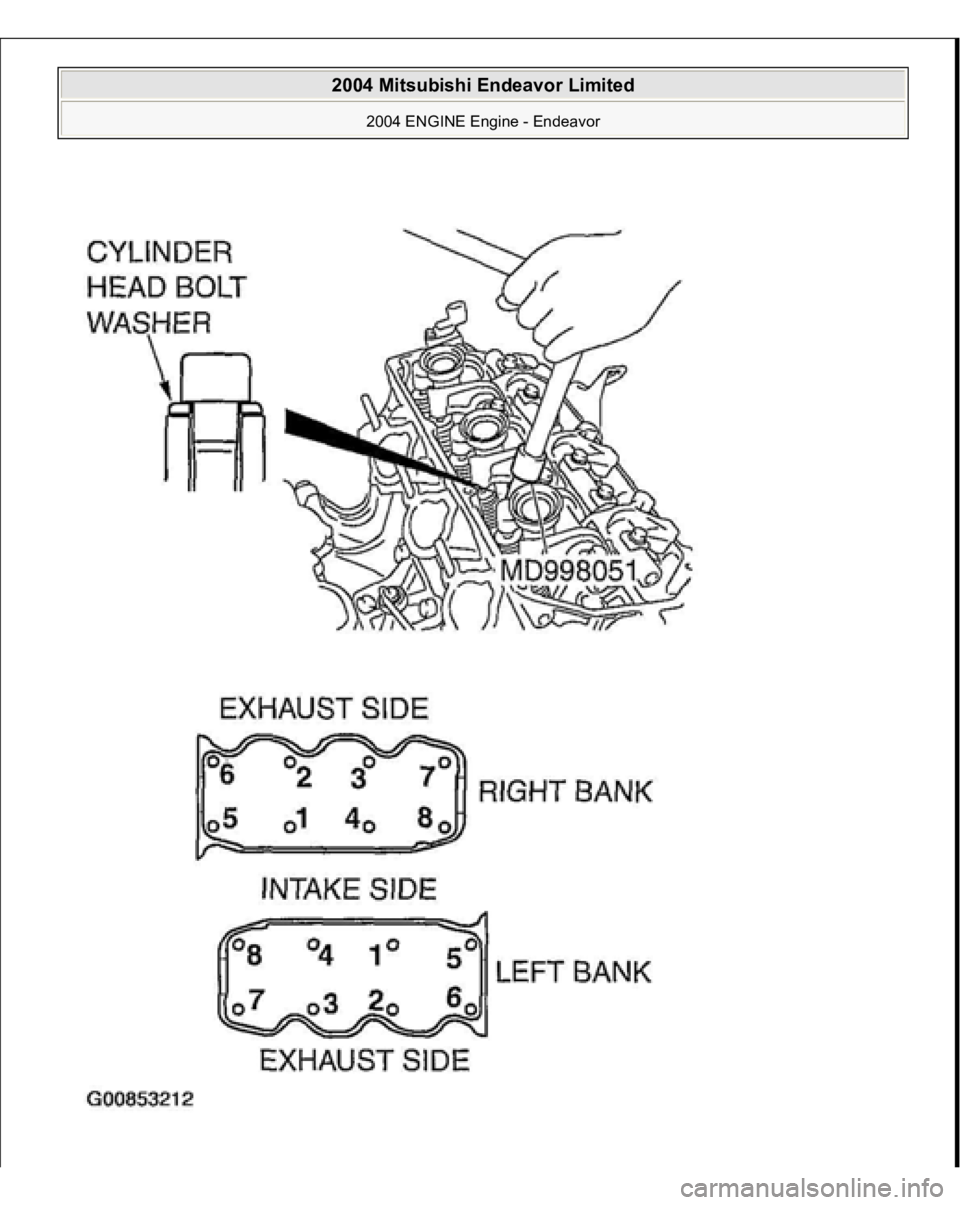
Fig. 85: Tightening Bolts
Courtesy of MITSUBISHI MOTOR SALES OF AMERICA.
TIMING BELT REMOVAL AND INSTALLATION
2004 Mitsubishi Endeavor Limited
2004 ENGINE Engine - Endeavor
Page 1603 of 3870
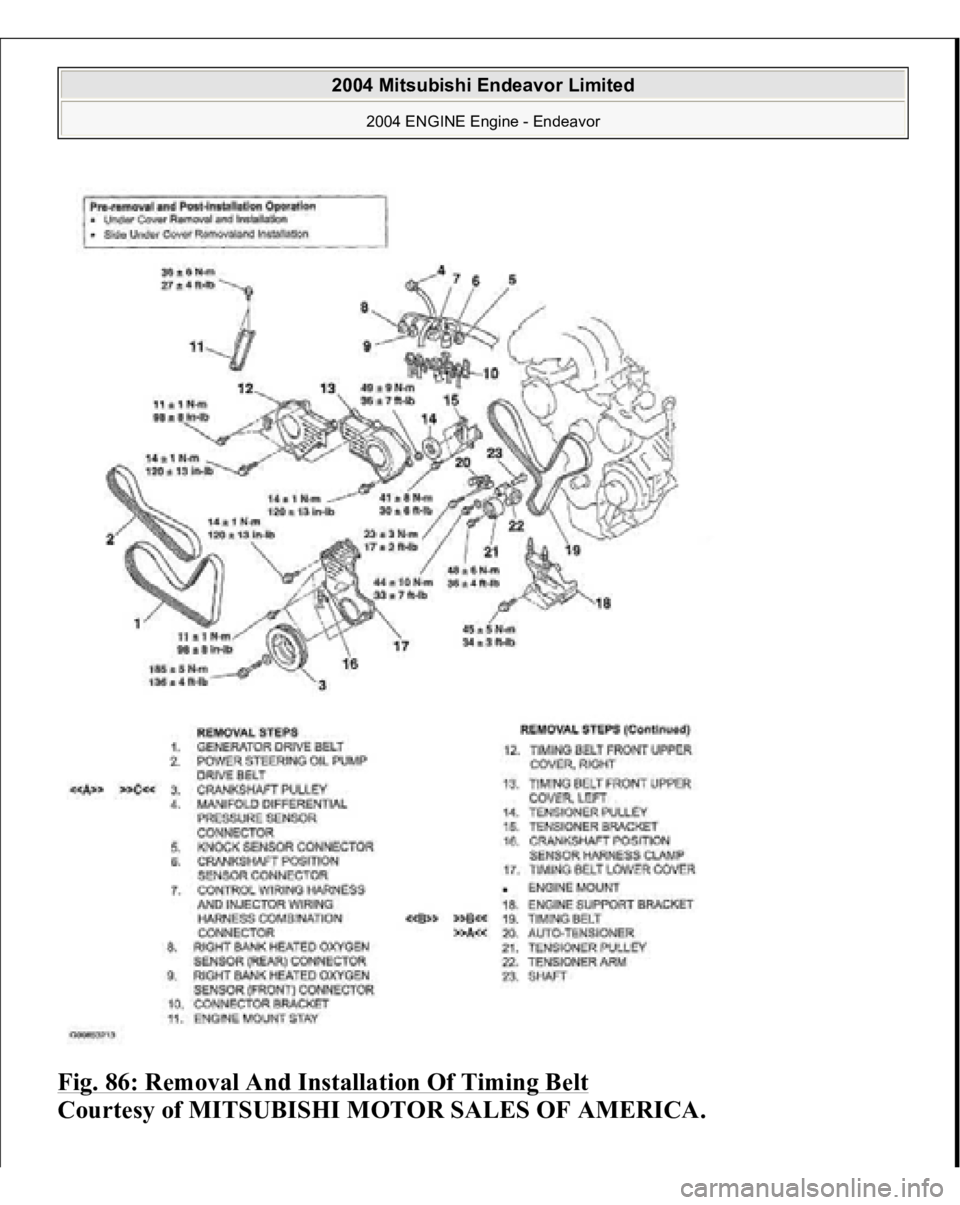
Fig. 86: Removal And Installation Of Timing Belt
Courtesy of MITSUBISHI MOTOR SALES OF AMERICA.
2004 Mitsubishi Endeavor Limited
2004 ENGINE Engine - Endeavor
Page 1604 of 3870
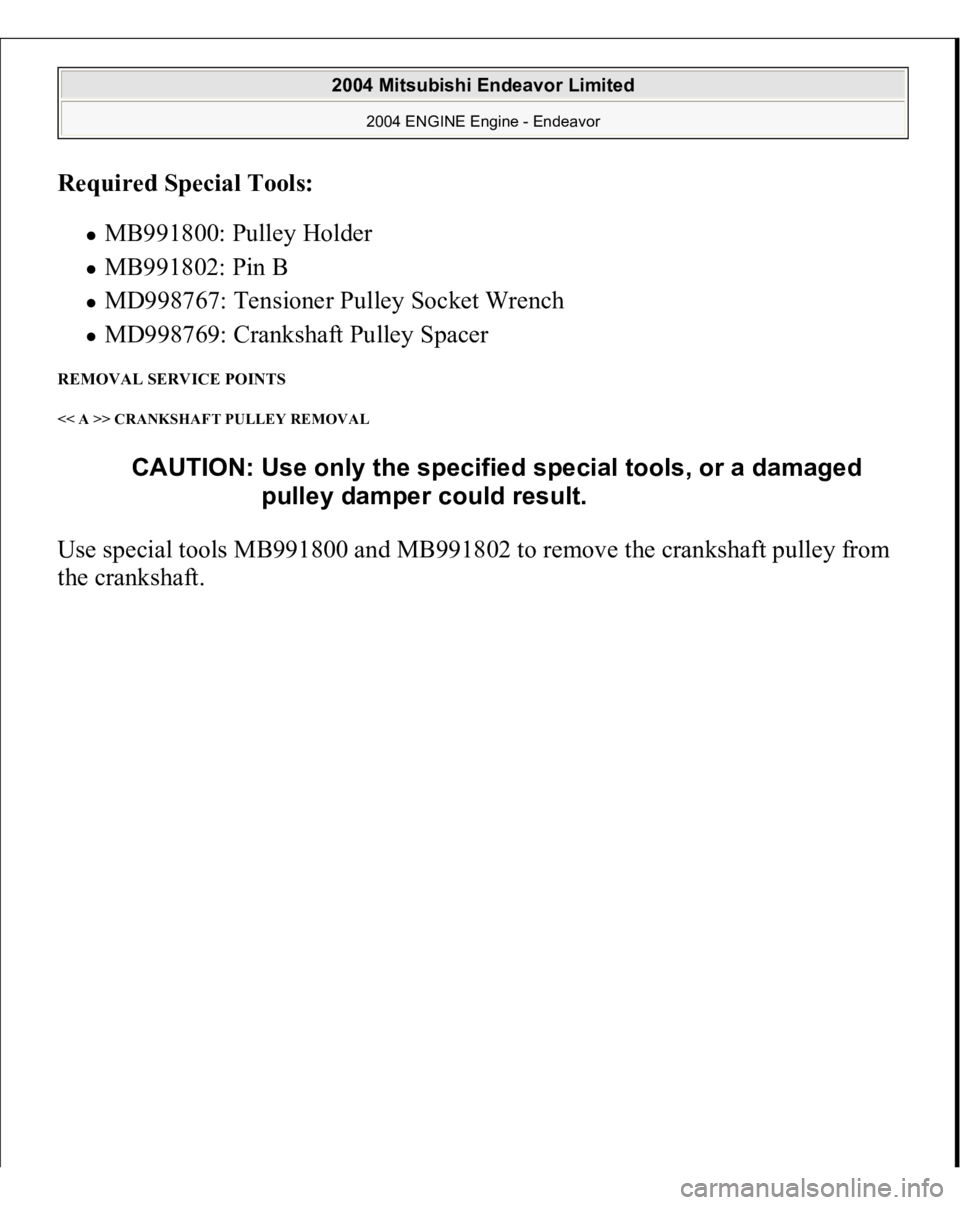
Required Special Tools:
MB991800: Pulley Holder MB991802: Pin B MD998767: Tensioner Pulley Socket Wrench MD998769: Crankshaft Pulley Spacer
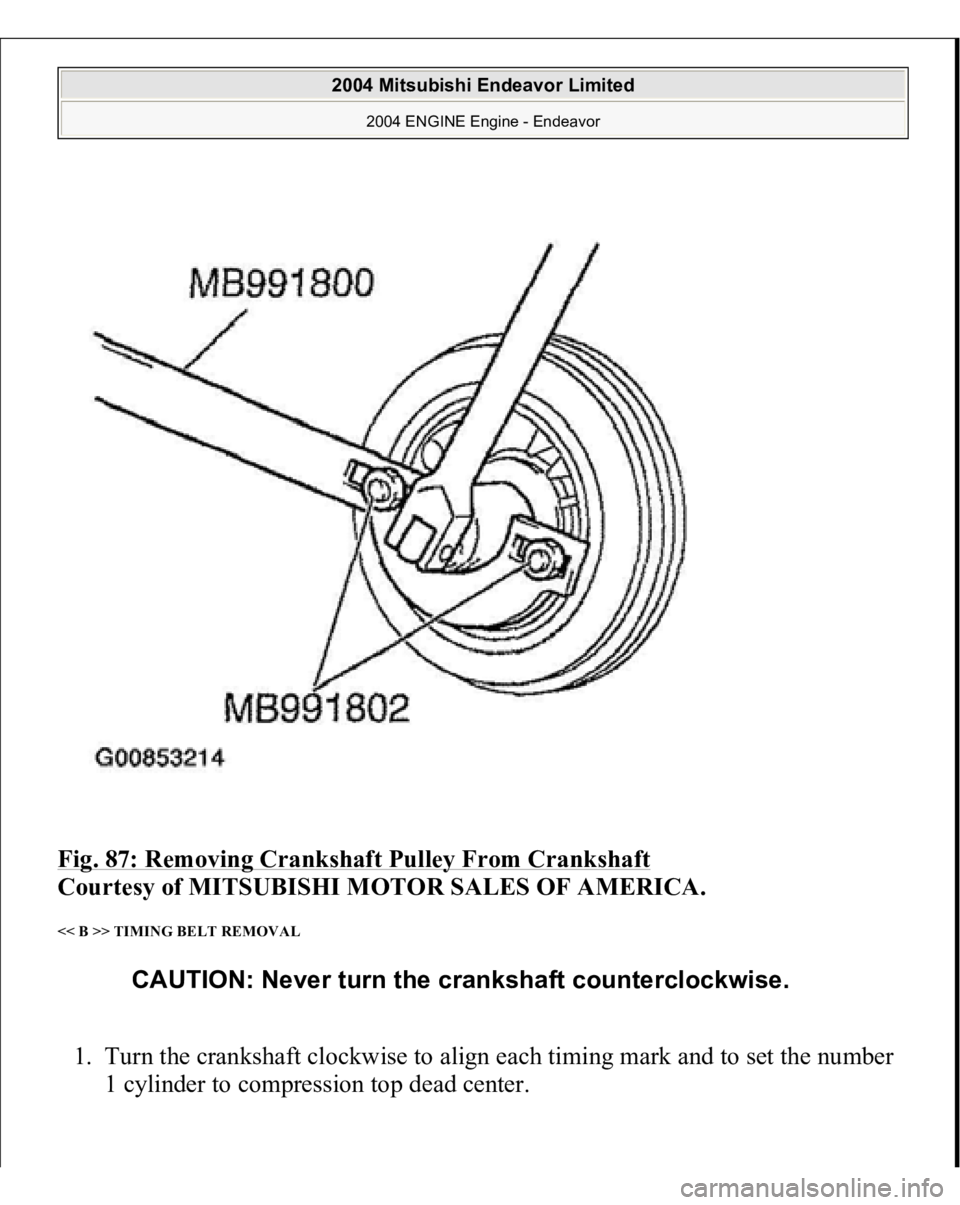
REMOVAL SERVICE POINTS << A >> CRANKSHAFT PULLEY REMOVAL Use special tools MB991800 and MB991802 to remove the crankshaft pulley from
the crankshaft.
CAUTION: Use only the specified special tools, or a damaged
pulley damper could result.
2004 Mitsubishi Endeavor Limited
2004 ENGINE Engine - Endeavor
Page 1605 of 3870
Fig. 87: Removing Crankshaft Pulley From Crankshaft
Courtesy of MITSUBISHI MOTOR SALES OF AMERICA.
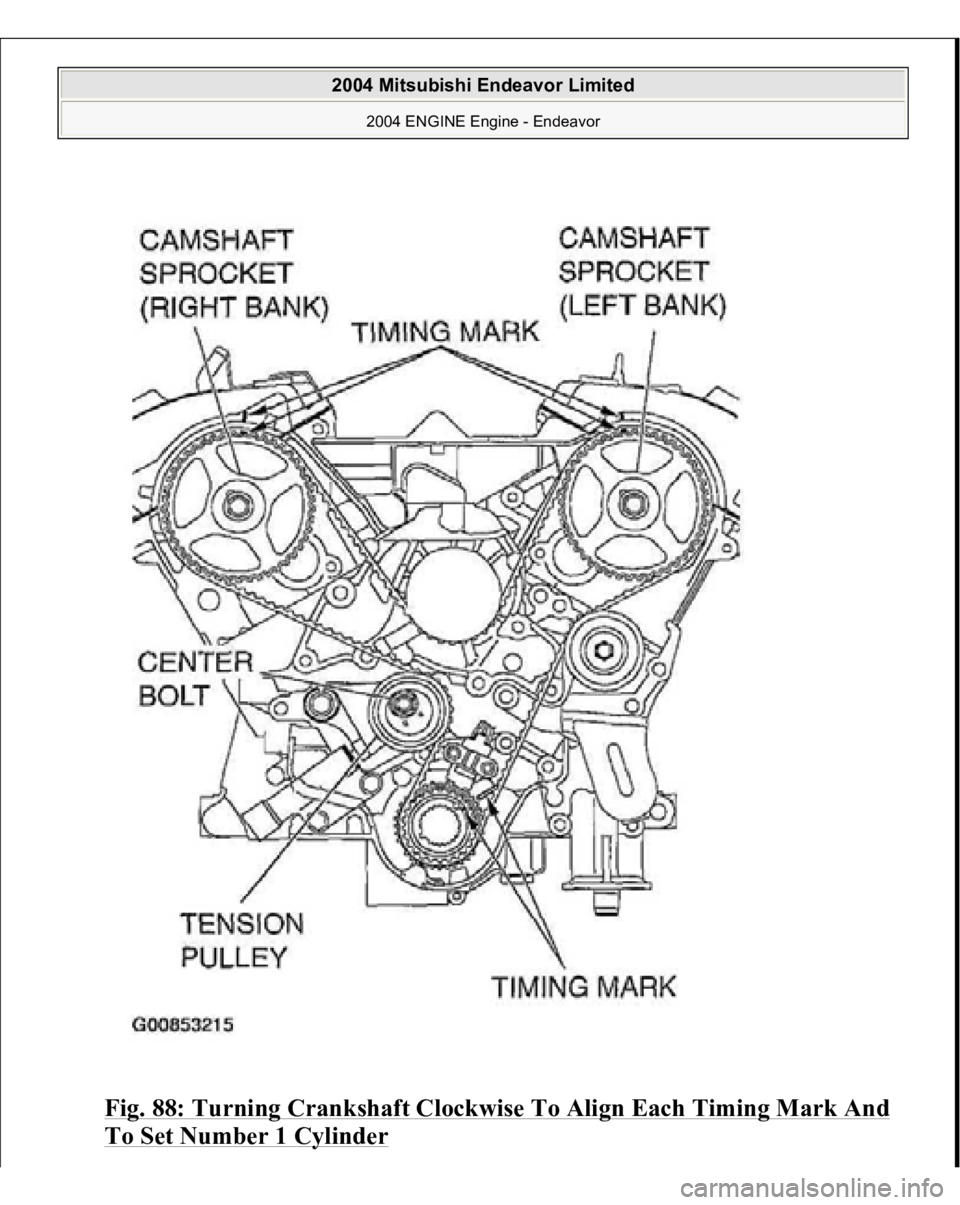
<< B >> TIMING BELT REMOVAL 1. Turn the crankshaft clockwise to align each timing mark and to set the number
1 c
ylinder to com
pression to
p dead center.
CAUTION: Never turn the crankshaft counterclockwise.
2004 Mitsubishi Endeavor Limited
2004 ENGINE Engine - Endeavor
Page 1606 of 3870
Fig. 88: Turning Crankshaft Clockwise To Align Each Timing Mark And To Set Number 1 Cylinder
2004 Mitsubishi Endeavor Limited
2004 ENGINE Engine - Endeavor
Page 1607 of 3870
Courtesy of MITSUBISHI MOTOR SALES OF AMERICA
.
2. If the timing belt is to be reused, chalk an arrow on the flat side of the belt,
indicating the clockwise direction.
3. Loosen the center bolt of the tensioner pulley, then remove the timing belt.
INSTALLATION SERVICE POINTS >>A<< AUTO-TENSIONER INSTALLATION 1. If the auto-tensioner rod remains fully extended, set according to the following
procedure.
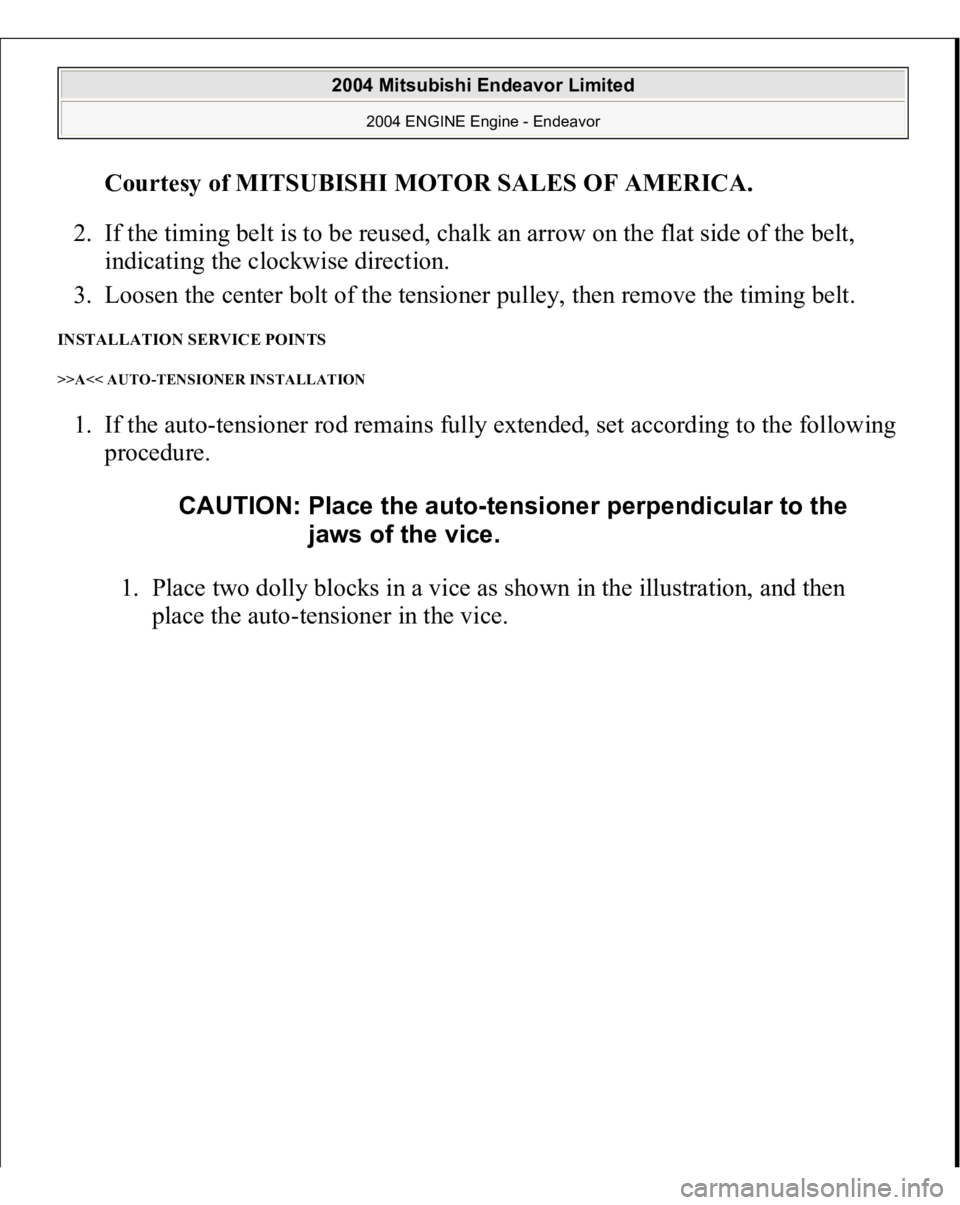
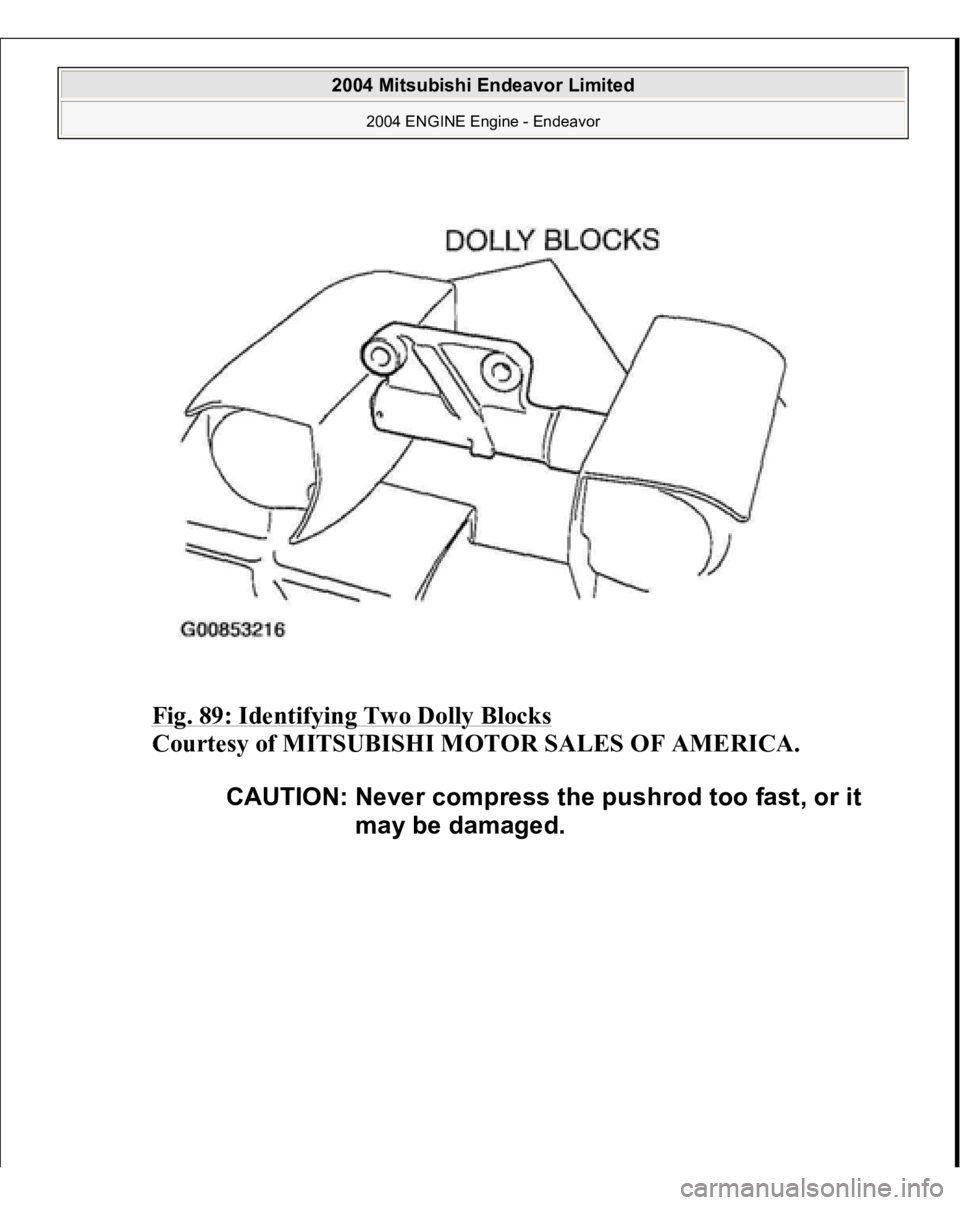
1. Place two dolly blocks in a vice as shown in the illustration, and then
place the auto-tensioner in the vice. CAUTION: Place the auto-tensioner perpendicular to the
jaws of the vice.
2004 Mitsubishi Endeavor Limited
2004 ENGINE Engine - Endeavor
Page 1608 of 3870
Fig. 89: Identifying Two Dolly Blocks
Courtesy of MITSUBISHI MOTOR SALES OF AMERICA.
CAUTION: Never compress the pushrod too fast, or it
may be damaged.
2004 Mitsubishi Endeavor Limited
2004 ENGINE Engine - Endeavor
Page 1609 of 3870
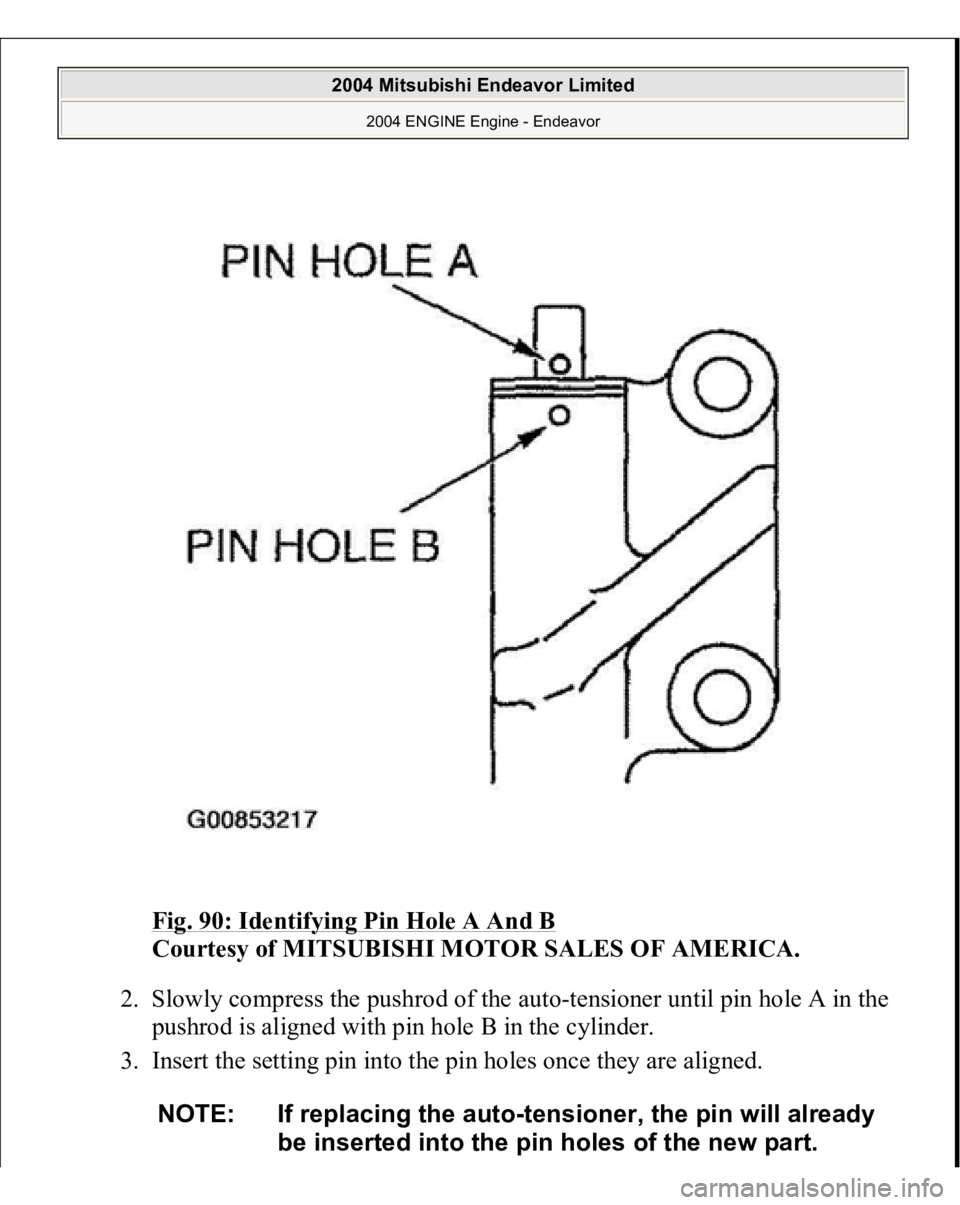
Fig. 90: Identifying Pin Hole A And B
Courtesy of MITSUBISHI MOTOR SALES OF AMERICA.
2. Slowly compress the pushrod of the auto-tensioner until pin hole A in the
pushrod is aligned with pin hole B in the cylinder.
3. Insert the setting pin into the pin holes once they are aligned.
NOTE: If replacing the auto-tensioner, the pin will already
be inserted into the pin holes of the new part.
2004 Mitsubishi Endeavor Limited
2004 ENGINE Engine - Endeavor
Page 1610 of 3870
4. Install the auto-tensioner to the engine.
>>B<< TIMING BELT INSTALLATION 1. Align the timing marks on the camshaft sprockets with those on the rocker
cover and the timing mark on the crankshaft sprocket with that on the engine
block as shown in the illustration.
CAUTION: Do not remove the setting pin from the auto-
tensioner.
CAUTION: The camshaft sprocket (right bank) can turn
easily due to the spring force applied, so be
careful not to get your fingers caught.
2004 Mitsubishi Endeavor Limited
2004 ENGINE Engine - Endeavor
Trending: ad blue, purge valve, Throttle body, parking brake, speed sensor, Gasoline, airbag
