ignition MITSUBISHI L200 2015 (in English) Service Manual
[x] Cancel search | Manufacturer: MITSUBISHI, Model Year: 2015, Model line: L200, Model: MITSUBISHI L200 2015Pages: 418, PDF Size: 25.8 MB
Page 156 of 418
CAUTIONlOperating the accelerator pedal while the
other foot is resting on the brake pedal will affect braking efficiency and may cause pre-
mature wear of brake pads.
l Use the selector lever in the correct shift po-
sition in accordance with driving conditions.Never coast downhill backward with the
driving shift position {“D” (DRIVE) or
sports mode} or coast forward with the “R” (REVERSE) position.
The engine stops and the brake pedal effort or the steering wheel handling weight in-creasing could lead to an accident.
l Do not race the engine with brake pedal
pressed when the vehicle is stationary.
This can damage the automatic transmission.Passing acceleration
E00604500329
To gain extra acceleration in “D” (DRIVE)
position, push the accelerator to the floor.The automatic transmission will automatical- ly downshift.
NOTEl In “Sports mode”, downshifts do not take
place when the accelerator is depressed all
the way to the floor.Waiting
E00604600304
For short waiting periods, such as at traffic
signals, the vehicle can be left in gear and held stationary with the service brake.
For longer waiting periods with the engine
running, place the selector lever in the “N” (NEUTRAL) position..CAUTIONl Never hold the vehicle stationary on a hill
using the accelerator pedal (without using the brake pedal). Always apply the parking
brake and/or service brakes.
l Unexpected acceleration may occur if the se-
lector lever is in a position other than “P”
(PARK) or “N” (NEUTRAL). Prior to mov-
ing off after having stopped the vehicle, make sure that the selector lever is in the
“D” (DRIVE) position.Parking
E00604700262
To park the vehicle, first bring it to a com-
plete stop, fully engage the parking brake,and then move the selector lever to the “P”
(PARK) position.
If you are going to leave the vehicle unatten-
ded, always switch off the engine and remove the ignition key.
NOTEl On a slope, be sure to apply the parking
brake before moving the selector lever to the
“P” (PARK) position. If you move the selec- tor lever to the “P” (PARK) position before applying the parking brake, it may be diffi-
cult to disengage the selector lever from the
“P” (PARK) position when next you drive the vehicle, requiring application of a strong
force to the selector lever to move from the
“P” (PARK) position.When the automatic transmis-
sion makes no speed change
E00604800683
If the transmission does not change speeds
while driving, or your vehicle does not pick up enough speed when starting on an uphillslope, it may be that there is something un-
usual happening in the transmission, causing a safety device to activate. We recommendyou to have your vehicle checked as soon as
possible. 1. If your vehicle has difficulty moving up-
hill, shift the selector lever into 2 nd
gear
of the “Sports mode”.
This method might not work depending
on the type of transmission malfunction.
2. Once the vehicle is moving on a level
road, move the selector lever back to“D” (DRIVE).
Automatic transmission Sports Mode 4A/T, 5A/T
6-24OKTE15E3Starting and driving6
Page 160 of 418
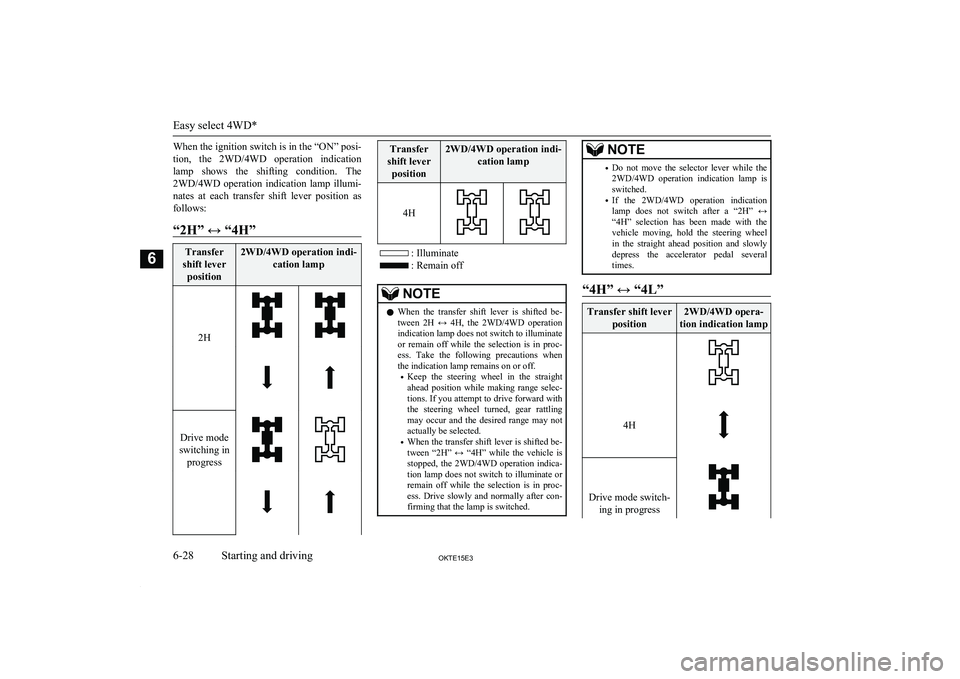
When the ignition switch is in the “ON” posi-
tion, the 2WD/4WD operation indication lamp shows the shifting condition. The 2WD/4WD operation indication lamp illumi-
nates at each transfer shift lever position as follows:
“2H” ↔ “4H”Transfer
shift lever position2WD/4WD operation indi- cation lamp
2H
Drive mode
switching in progress
Transfer
shift lever position2WD/4WD operation indi- cation lamp
4H
: Illuminate
: Remain off
NOTElWhen the transfer shift lever is shifted be-
tween 2H ↔ 4H, the 2WD/4WD operation indication lamp does not switch to illuminate
or remain off while the selection is in proc- ess. Take the following precautions when the indication lamp remains on or off.
• Keep the steering wheel in the straight
ahead position while making range selec-
tions. If you attempt to drive forward with the steering wheel turned, gear rattling
may occur and the desired range may not actually be selected.
• When the transfer shift lever is shifted be-
tween “2H” ↔ “4H” while the vehicle is stopped, the 2WD/4WD operation indica-
tion lamp does not switch to illuminate or remain off while the selection is in proc-
ess. Drive slowly and normally after con- firming that the lamp is switched.NOTE• Do not move the selector lever while the
2WD/4WD operation indication lamp is
switched.
• If the 2WD/4WD operation indication
lamp does not switch after a “2H” ↔ “4H” selection has been made with thevehicle moving, hold the steering wheel
in the straight ahead position and slowly
depress the accelerator pedal several times.
“4H” ↔ “4L”
Transfer shift lever
position2WD/4WD opera-
tion indication lamp
4HDrive mode switch- ing in progressEasy select 4WD*
6-28OKTE15E3Starting and driving6
Page 164 of 418
To shift fromToProcedureVehicles with manual transmissionVehicles with automatic transmission4LLc4HLction, a gear noise may be generated, with a possible
failure to shift into a proper gear.NOTEl Shifting of the transfer shift lever between
“2H” ↔ “4H” should only be done at speeds below 100 km/h (62 mph).
l During driving, never attempt to shift from
“4HLc” to “4LLc”.
l When shifting from “2H” to “4H” in cold
weather while the vehicle is in motion, the transmission gear may make some noise. In
cold weather, try to shift the gear while the
vehicle is stopped.
l When the transfer shift lever is shifted from
“4H” to “4HLc” while the vehicle is stop- ped, the 2WD/4WD operation indication lamp blinks while the selection is in process. Drive slowly and normally after confirmingthat the lamp is illuminated. (Refer to “2WD/4WD operation indication lamp” on
page 6-32.)
l Do not move the selector lever while the
2WD/4WD operation indication lamp is blinking.
l The 2WD/4WD operation indication lamp
will go out momentarily during shifting process from “4HLc” to “4LLc” or vice ver-sa, as the transfer shift lever passes through the neutral position.
Be sure to operate the transfer shift lever un-
til the 2WD/4WD operation indication lamp illuminates again.NOTEl There may be a case that the transfer shift
lever feels heavy when it is moved from
“2H” to “4H” with the steering wheel in
turned position.
This is normal and not any indication of trouble.CAUTIONl Do not operate the transfer shift lever while
the rear wheels of the vehicle are slipping on snow or ice.2WD/4WD operation indica-
tion lamp
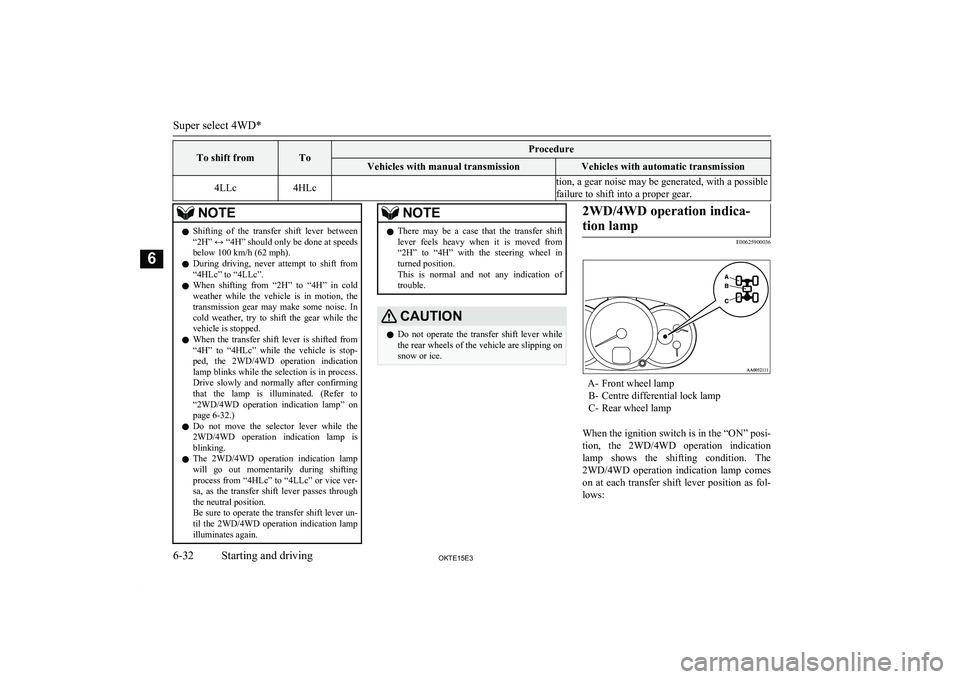
E00625900036
A- Front wheel lamp B- Centre differential lock lamp
C- Rear wheel lamp
When the ignition switch is in the “ON” posi-
tion, the 2WD/4WD operation indication lamp shows the shifting condition. The 2WD/4WD operation indication lamp comeson at each transfer shift lever position as fol-
lows:
Super select 4WD*
6-32OKTE15E3Starting and driving6
Page 167 of 418
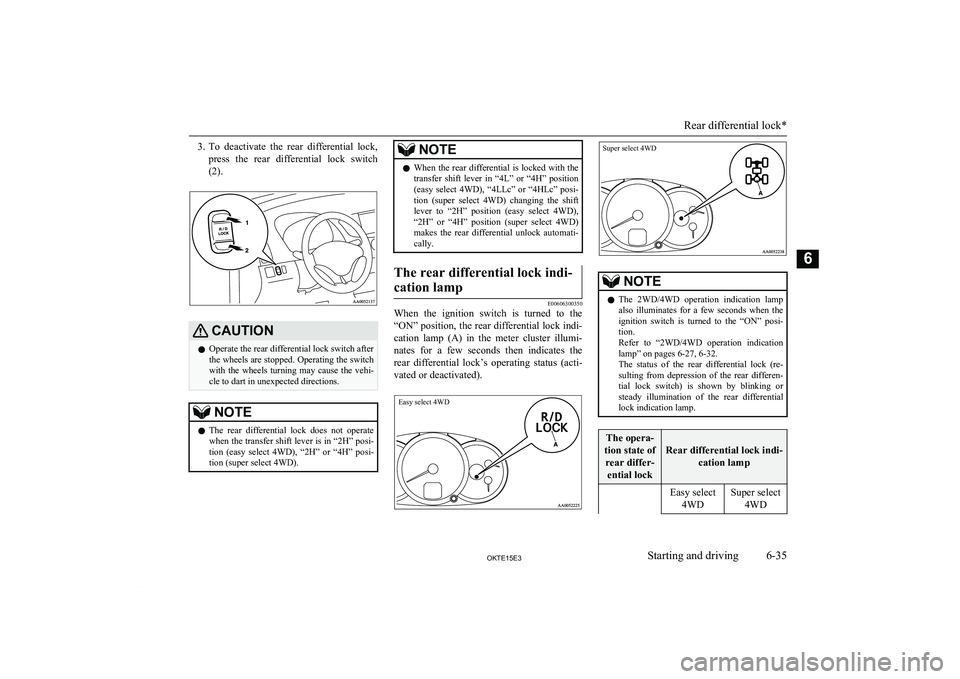
3.To deactivate the rear differential lock,
press the rear differential lock switch
(2).CAUTIONl Operate the rear differential lock switch after
the wheels are stopped. Operating the switch
with the wheels turning may cause the vehi- cle to dart in unexpected directions.NOTEl The rear differential lock does not operate
when the transfer shift lever is in “2H” posi-
tion (easy select 4WD), “2H” or “4H” posi- tion (super select 4WD).NOTEl When the rear differential is locked with the
transfer shift lever in “4L” or “4H” position(easy select 4WD), “4LLc” or “4HLc” posi-
tion (super select 4WD) changing the shift
lever to “2H” position (easy select 4WD),
“2H” or “4H” position (super select 4WD) makes the rear differential unlock automati-
cally.The rear differential lock indi-
cation lamp
E00606300350
When the ignition switch is turned to the
“ON” position, the rear differential lock indi- cation lamp (A) in the meter cluster illumi-nates for a few seconds then indicates the
rear differential lock’s operating status (acti-
vated or deactivated).
Easy select 4WDSuper select 4WD
NOTEl The 2WD/4WD operation indication lamp
also illuminates for a few seconds when the
ignition switch is turned to the “ON” posi- tion.
Refer to “2WD/4WD operation indication
lamp” on pages 6-27, 6-32.
The status of the rear differential lock (re- sulting from depression of the rear differen-
tial lock switch) is shown by blinking or steady illumination of the rear differential
lock indication lamp.The opera-
tion state of rear differ- ential lock
Rear differential lock indi- cation lamp
Easy select4WDSuper select 4WD
Rear differential lock*
6-35OKTE15E3Starting and driving6
Page 178 of 418
CAUTIONlEven the ABS cannot prevent the natural
laws of physics from acting on the vehicle. Itcannot for instance avoid accidents that may
result from excessive speed on bends or fol- lowing another vehicle too closely or aqua- planing. It should remain the driver’s task to
observe safety precautions to judge speeds and brake applications correctly in such con-
ditions.
l Be sure to use tyres of the same type and
size on 4 wheels.
If tyre types or sizes are mixed, ABS may not function normally.
l Never install a limited-slip differential,
which is not a MITSUBISHI MOTORS gen-
uine part, as the ABS may not function nor-
mally.
We recommend you to consult a MITSUBISHI MOTORS Authorized Serv-
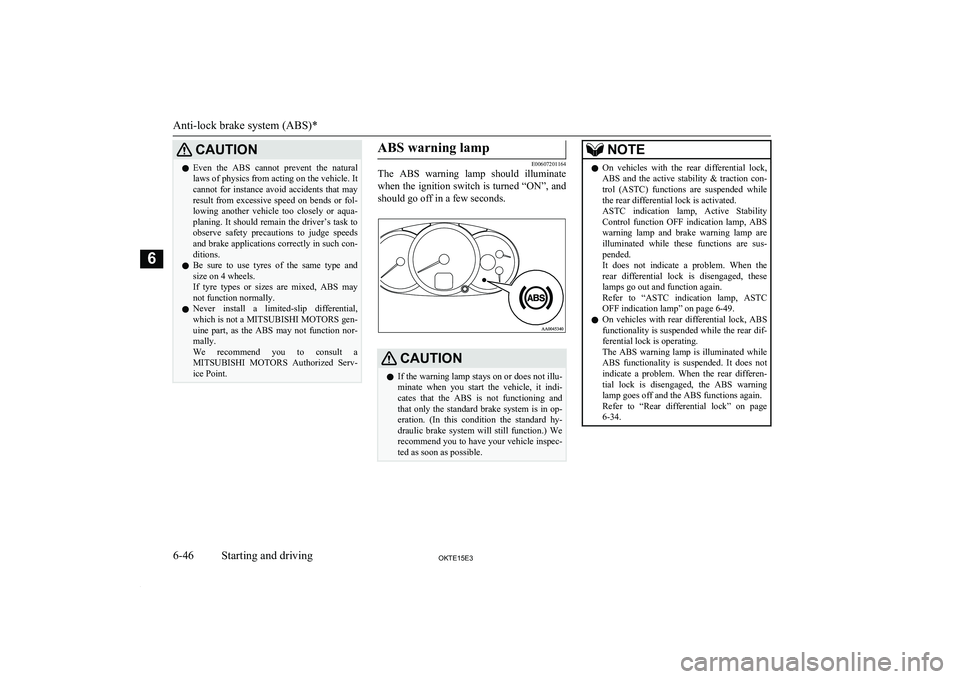
ice Point.ABS warning lamp
E00607201164
The ABS warning lamp should illuminate
when the ignition switch is turned “ON”, and
should go off in a few seconds.
CAUTIONl If the warning lamp stays on or does not illu-
minate when you start the vehicle, it indi-
cates that the ABS is not functioning and
that only the standard brake system is in op-
eration. (In this condition the standard hy- draulic brake system will still function.) We
recommend you to have your vehicle inspec- ted as soon as possible.NOTEl On vehicles with the rear differential lock,
ABS and the active stability & traction con-
trol (ASTC) functions are suspended while the rear differential lock is activated.
ASTC indication lamp, Active Stability
Control function OFF indication lamp, ABS warning lamp and brake warning lamp are
illuminated while these functions are sus- pended.
It does not indicate a problem. When the
rear differential lock is disengaged, these lamps go out and function again.
Refer to “ASTC indication lamp, ASTC
OFF indication lamp” on page 6-49.
l On vehicles with rear differential lock, ABS
functionality is suspended while the rear dif- ferential lock is operating.
The ABS warning lamp is illuminated while ABS functionality is suspended. It does notindicate a problem. When the rear differen-
tial lock is disengaged, the ABS warning
lamp goes off and the ABS functions again.
Refer to “Rear differential lock” on page
6-34.
Anti-lock brake system (ABS)*
6-46OKTE15E3Starting and driving6
Page 181 of 418
Driving hints
E00616800039
When extricating the vehicle from mud, sand
or fresh snow, you may find that operation of
the ASTC prevents the engine speed from in-
creasing in response to depression of the ac- celerator pedal. If this happens and the vehi-cle remains stuck as a result, deactivate the
ASC function by pressing the “ASC OFF”
switch. The vehicle will then be easier to ex- tricate. (Brake control of the ATC function isstill working to prevent wheel spins when the
ASC function is deactivated by pressing the “ASC OFF” switch.)
Active Stability Control func-
tion
E00616900115
The Active Stability Control function is de- signed to improve the vehicle’s stability byrestraining its tendency to slip sideways (for
example, when rounding a curve in slippery conditions, or when the driver takes rapid
steering action to avoid an obstacle). It works
by controlling the engine output and brake on each wheel.
NOTEl On vehicles with rear differential locks, the
Active Stability Control function does notoperate when the rear differential lock is ac-
tivated.
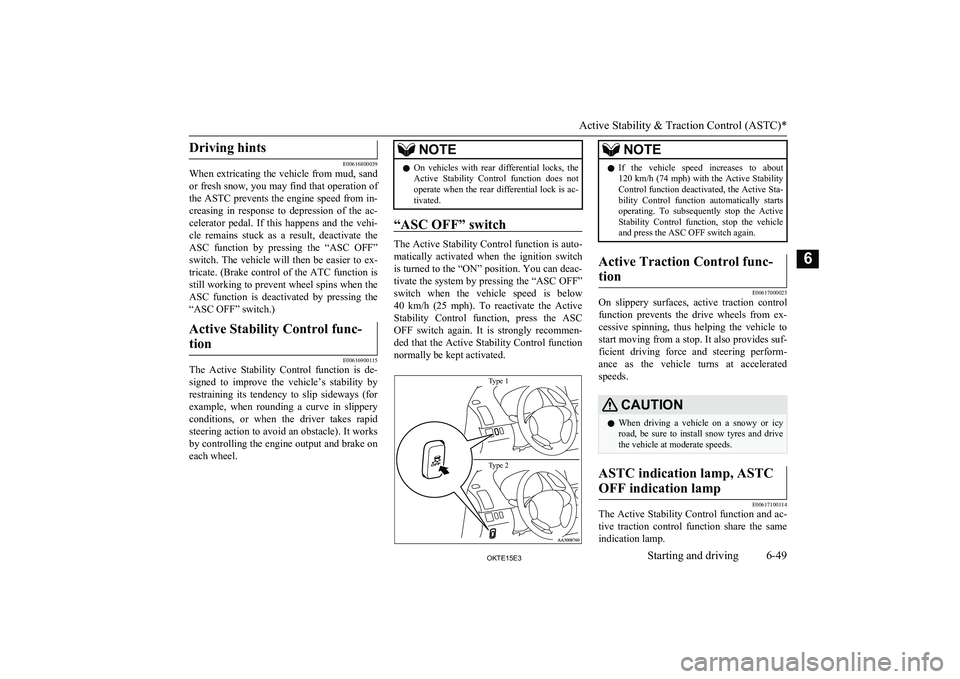
“ASC OFF” switch
The Active Stability Control function is auto-
matically activated when the ignition switch
is turned to the “ON” position. You can deac- tivate the system by pressing the “ASC OFF”
switch when the vehicle speed is below 40 km/h (25 mph). To reactivate the Active
Stability Control function, press the ASC OFF switch again. It is strongly recommen-
ded that the Active Stability Control function
normally be kept activated.
Type 1Type 2
NOTEl If the vehicle speed increases to about
120 km/h (74 mph) with the Active Stability Control function deactivated, the Active Sta-bility Control function automatically starts operating. To subsequently stop the Active
Stability Control function, stop the vehicle
and press the ASC OFF switch again.Active Traction Control func-
tion
E00617000025
On slippery surfaces, active traction control function prevents the drive wheels from ex- cessive spinning, thus helping the vehicle to
start moving from a stop. It also provides suf-
ficient driving force and steering perform- ance as the vehicle turns at accelerated
speeds.
CAUTIONl When driving a vehicle on a snowy or icy
road, be sure to install snow tyres and drive the vehicle at moderate speeds.ASTC indication lamp, ASTC
OFF indication lamp
E00617100114
The Active Stability Control function and ac-
tive traction control function share the same indication lamp.
Active Stability & Traction Control (ASTC)*
6-49OKTE15E3Starting and driving6
Page 182 of 418
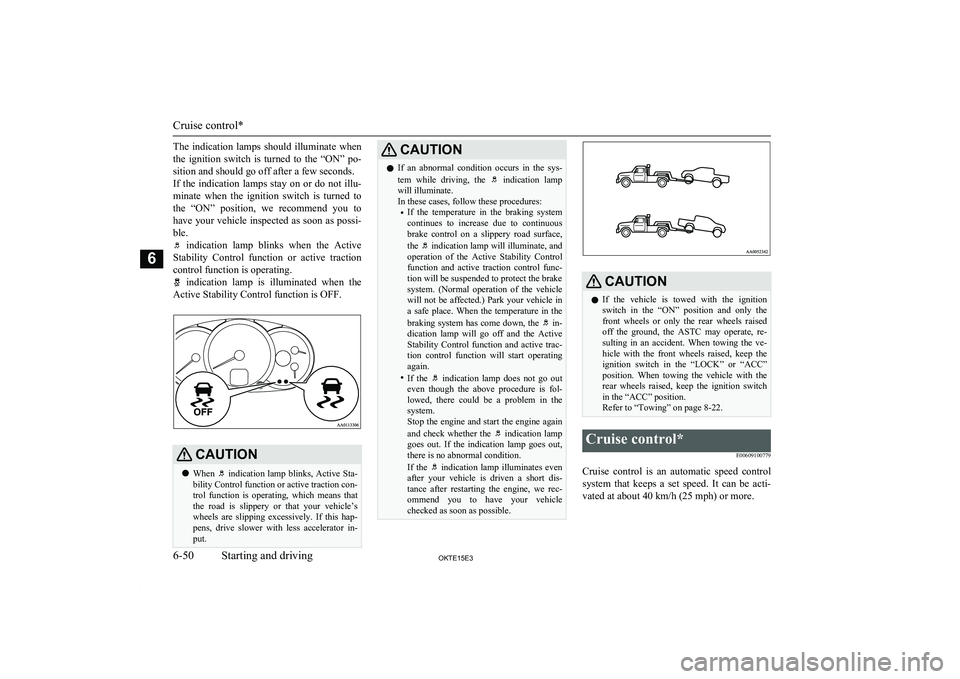
The indication lamps should illuminate when
the ignition switch is turned to the “ON” po- sition and should go off after a few seconds.
If the indication lamps stay on or do not illu- minate when the ignition switch is turned to
the “ON” position, we recommend you to have your vehicle inspected as soon as possi-ble.
indication lamp blinks when the Active
Stability Control function or active traction
control function is operating.
indication lamp is illuminated when the
Active Stability Control function is OFF.
CAUTIONl When indication lamp blinks, Active Sta-
bility Control function or active traction con- trol function is operating, which means that
the road is slippery or that your vehicle’s wheels are slipping excessively. If this hap-
pens, drive slower with less accelerator in-
put.CAUTIONl If an abnormal condition occurs in the sys-
tem while driving, the indication lamp
will illuminate.
In these cases, follow these procedures:
• If the temperature in the braking system
continues to increase due to continuous brake control on a slippery road surface,
the
indication lamp will illuminate, and
operation of the Active Stability Control function and active traction control func-
tion will be suspended to protect the brake
system. (Normal operation of the vehicle will not be affected.) Park your vehicle in
a safe place. When the temperature in the
braking system has come down, the
in-
dication lamp will go off and the Active
Stability Control function and active trac- tion control function will start operating again.
• If the
indication lamp does not go out
even though the above procedure is fol-
lowed, there could be a problem in the system.
Stop the engine and start the engine again
and check whether the
indication lamp
goes out. If the indication lamp goes out, there is no abnormal condition.
If the
indication lamp illuminates even
after your vehicle is driven a short dis-
tance after restarting the engine, we rec-
ommend you to have your vehicle checked as soon as possible.
CAUTIONl If the vehicle is towed with the ignition
switch in the “ON” position and only the
front wheels or only the rear wheels raised off the ground, the ASTC may operate, re-
sulting in an accident. When towing the ve- hicle with the front wheels raised, keep the
ignition switch in the “LOCK” or “ACC” position. When towing the vehicle with the
rear wheels raised, keep the ignition switch in the “ACC” position.
Refer to “Towing” on page 8-22.Cruise control*
E00609100779
Cruise control is an automatic speed controlsystem that keeps a set speed. It can be acti-vated at about 40 km/h (25 mph) or more.
Cruise control*
6-50OKTE15E3Starting and driving6
Page 183 of 418
CAUTIONlWhen you do not wish to drive at a set
speed, turn off the cruise control for safety.
l Do not use cruise control when driving con-
ditions will not allow you to stay at the same
speed, such as in heavy traffic or on roads that are winding, icy, snow-covered, wet,
slippery, on a steep downhill slope.
l On vehicles with manual transmission, do
not move the gearshift lever to the “N” (Neutral) position while driving at a setspeed without depressing the clutch pedal.The engine will run too fast and might be damaged.NOTEl Cruise control may not be able to keep your
speed on uphills or downhills.
l Your speed may decrease on a steep uphill.
You may use the accelerator pedal if you
want to stay at your set speed.
l Your speed may increase to more than the
set speed on a steep downhill. You must use the brake to control your speed. As a result, the set speed driving is deactivated.Cruise control switches
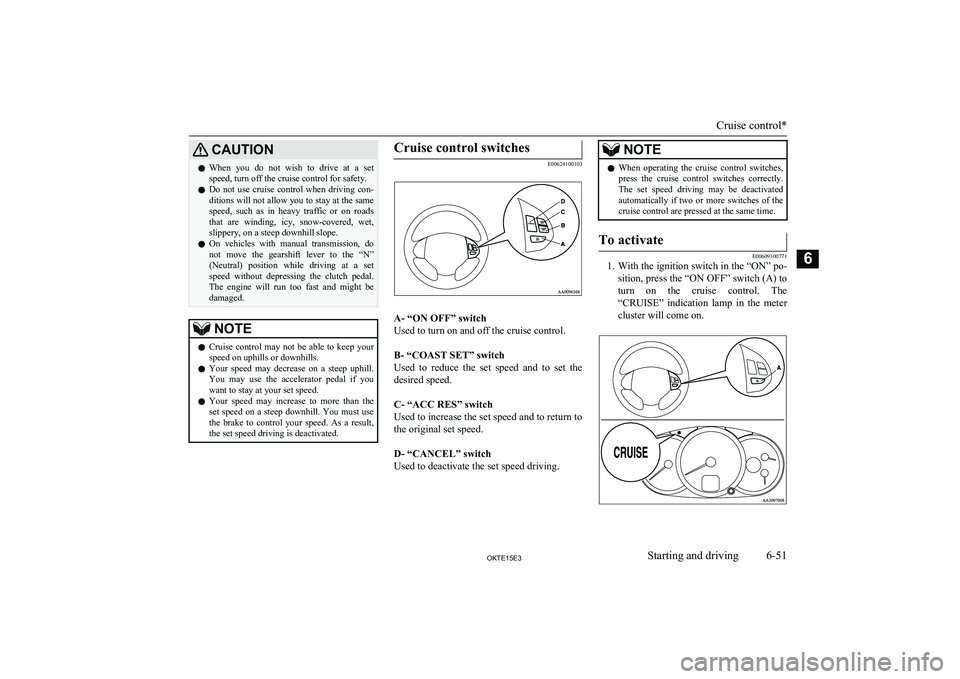
E00624100103
A- “ON OFF” switch
Used to turn on and off the cruise control.
B- “COAST SET” switch
Used to reduce the set speed and to set the
desired speed.
C- “ACC RES” switch
Used to increase the set speed and to return to
the original set speed.
D- “CANCEL” switch
Used to deactivate the set speed driving.
NOTEl When operating the cruise control switches,
press the cruise control switches correctly.
The set speed driving may be deactivated automatically if two or more switches of the
cruise control are pressed at the same time.To activate
E00609300771
1. With the ignition switch in the “ON” po-
sition, press the “ON OFF” switch (A) to turn on the cruise control. The
“CRUISE” indication lamp in the meter cluster will come on.
Cruise control*
6-51OKTE15E3Starting and driving6
Page 184 of 418

NOTElIf the cruise control is on when the ignition
switch is turned to the “LOCK” or “ACC” position, cruise control will be on automati- cally the next time you start the engine.
The “CRUISE” indication lamp will also be
on.
l If the battery voltage is insufficient, the
memory data for the cruise control may be erased.
As a result, the “CRUISE” indication lamp may not come on when you restart the en-
gine.
If this happens, press the “ON OFF” switch once again to turn on the cruise control.
2. Accelerate or decelerate to your desired
speed, then press and release the “COAST SET” switch (B) when the
“CRUISE” indication lamp is illumina- ted. The vehicle will then maintain the
desired speed.
NOTEl When you release the “COAST SET”
switch, the vehicle speed will be set.To increase the set speed
E00609400570
There are 2 ways to increase the set speed.
“ACC RES” switch
Press and hold the “ACC RES” switch (C)while driving at the set speed, and your speed
will then gradually increase.
When you reach your desired speed, release
the switch. Your new cruising speed is now set.
To increase your speed in small amounts,
press the “ACC RES” switch for less than about 1 second and release it. Each time youpress the “ACC RES” switch, your vehicle
will go about 1.6 km/h (1 mph) faster.
Accelerator pedal
While driving at the set speed, use the accel-
erator pedal to reach your desired speed and
then press the “COAST SET” switch (B) and release the switch momentarily to set a new
desired cruising speed.
To decrease the set speed
E00609500500
There are 2 ways to decrease the set speed.
“COAST SET” switch
Press and hold the “COAST SET” switch (B)
while driving at the set speed, and your speed will slow down gradually.
Cruise control*
6-52OKTE15E3Starting and driving6
Page 187 of 418
to resume the previously set speed. In thesesituations, repeat the speed setting procedure:
l The “ON OFF” switch is pressed.
l The ignition switch is turned OFF.
l “CRUISE” indication lamp is turned
OFF.Cargo loads
E00609901123
Cargo loads precautions
CAUTIONlWhen loading luggage, be careful to the fol-
lowing.
• Stow cargo and luggage in the cargo area
whenever possible.
• Distribute cargo or luggage evenly not to
be unbalanced in weight.
• Do not place cargo or luggage on the in-
strument panel.
Also, do not stack up cargo or luggage on the front passenger’s seat or the rear seat.
Having the driver’s vision blocked, and
your cargo being thrown inside the cabin if you suddenly have to brake can cause a
serious accident or injury.Trailer towing
E00610001674
In order to tow a trailer with your vehicle,
when having a trailer towing device mounted that meets all relevant regulations in your
area, consult a MITSUBISHI MOTORS Au-
thorized Service Point.
The regulations concerning the towing of a
trailer may differ from country to country. You are advised to obey the regulations in
each area.CAUTIONl Danger of Accident!
A towing bar should be fitted according to MITSUBISHI MOTORS guidelines.NOTEl If you are going to tow a trailer, pay careful
attention to the following points.
Maximum towable weight with
brake and maximum trailer- nose weight
Never exceed the maximum towable weight
with brake and the maximum trailer-nose weight as listed in the specifications. (Referto “Vehicle weight” on page 11-11.)
If you tow a trailer at an altitude of more than
1,000 m above sea-level, reduce your weight
by 10 % of the gross combination weight for
every increase of 1,000 m above sea-level, as the engine output is lowered owing to de-
crease in atmospheric pressure.
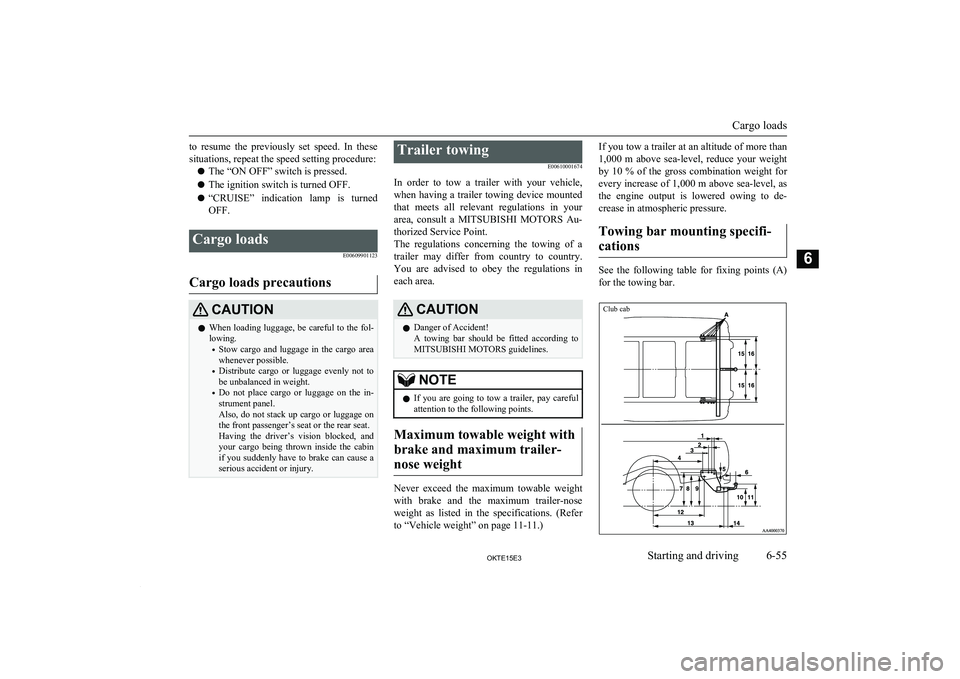
Towing bar mounting specifi-cations
See the following table for fixing points (A) for the towing bar.
Club cab
Cargo loads
6-55OKTE15E3Starting and driving6