ignition MITSUBISHI L200 2015 (in English) Owner's Guide
[x] Cancel search | Manufacturer: MITSUBISHI, Model Year: 2015, Model line: L200, Model: MITSUBISHI L200 2015Pages: 418, PDF Size: 25.8 MB
Page 103 of 418
NOTElWhen the driving range is 50 km (30 miles)
or less, the display shows “----”.
When it is 3,000 km (2,000 miles) or more,
“3,000 km” or “2,000 miles” will be shown.
l When the driving range cannot be measured,
the display shows “----”.
l The driving range is shown based on the ac-
cumulated fuel consumption data, however,
may be changed depending on the driving condition (road condition, driving behavior, etc.). If the battery terminals are disconnec-
ted, the accumulated fuel consumption data will be erased. It is recommended to use the indication as reference.
l When the vehicle is fueled, the driving range
will be updated. However, if the amount of
fueling is small, the indication may not be
correct. Therefore, fill up the tank as much as possible in case of fueling.
l When the vehicle is stopped on a steep
slope, the value of the driving range may in-
crease. This is caused by the fuel movement inside the tank on the slope and is not
deemed as a failure.Resetting the driving range
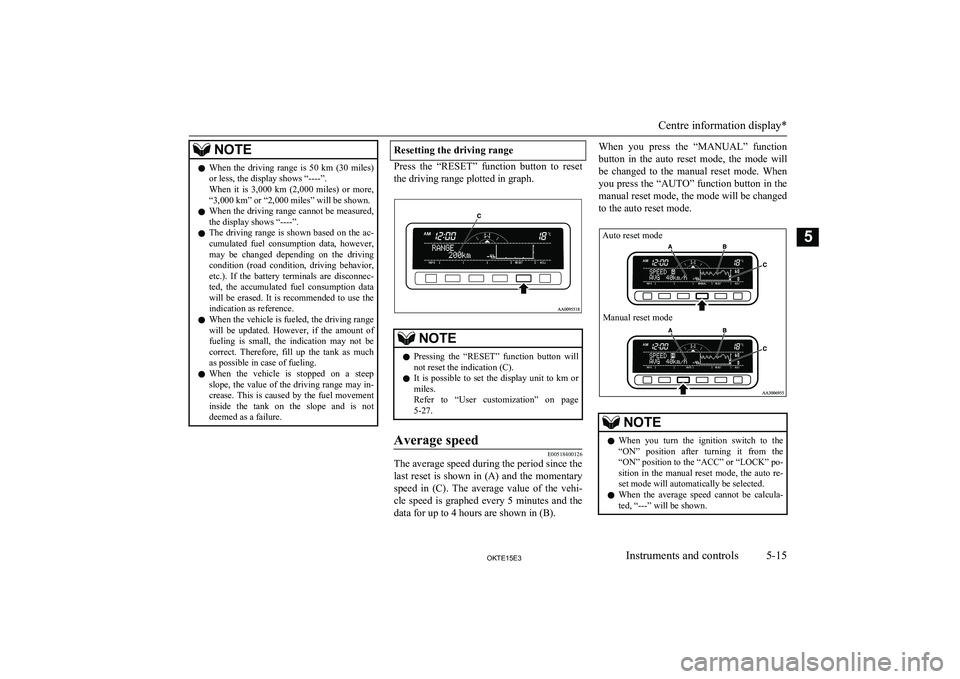
Press the “RESET” function button to reset
the driving range plotted in graph.
NOTEl Pressing the “RESET” function button will
not reset the indication (C).
l It is possible to set the display unit to km or
miles.
Refer to “User customization” on page 5-27.Average speed
E00518400126
The average speed during the period since the
last reset is shown in (A) and the momentary speed in (C). The average value of the vehi-cle speed is graphed every 5 minutes and the
data for up to 4 hours are shown in (B).
When you press the “MANUAL” function
button in the auto reset mode, the mode will
be changed to the manual reset mode. When you press the “AUTO” function button in themanual reset mode, the mode will be changed
to the auto reset mode.NOTEl When you turn the ignition switch to the
“ON” position after turning it from the “ON” position to the “ACC” or “LOCK” po-
sition in the manual reset mode, the auto re- set mode will automatically be selected.
l When the average speed cannot be calcula-
ted, “---” will be shown.
Centre information display*
5-15OKTE15E3Instruments and controls5 Auto reset modeManual reset mode
Page 104 of 418
NOTElThe average and momentary speed change
depending on the driving condition (road
condition, driving behavior, etc.). The indi- cations may differ from the actual speed.
Therefore, it is recommended to use the indi-
cations as reference.
l The unit indication can be changed to your
desired setting (km/h or mph).
Refer to “User customization” on page 5-27.
Resetting the average speed
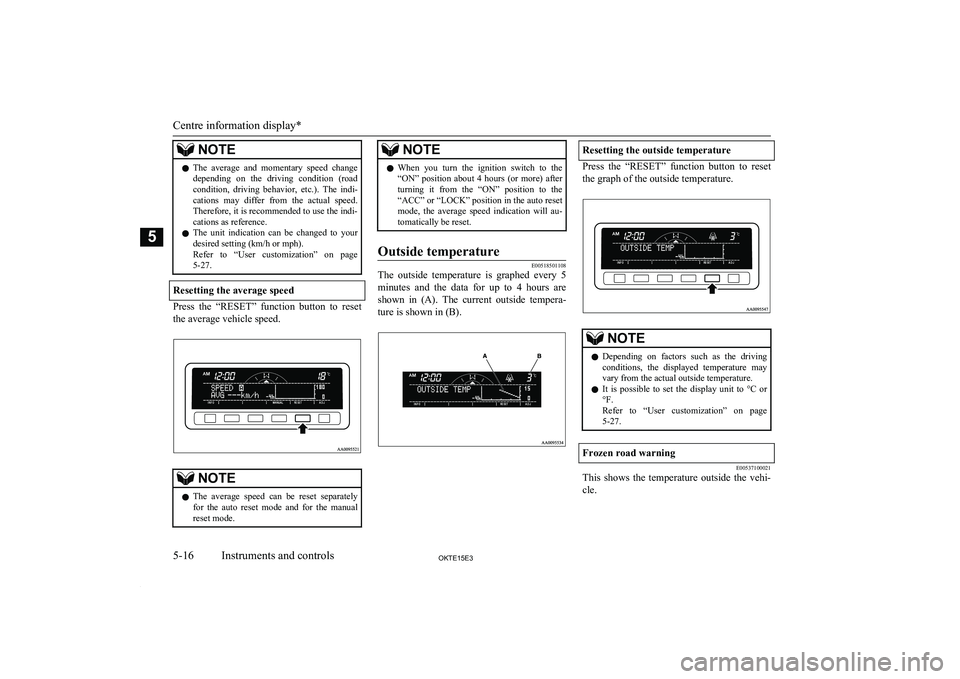
Press the “RESET” function button to reset
the average vehicle speed.
NOTEl The average speed can be reset separately
for the auto reset mode and for the manualreset mode.NOTEl When you turn the ignition switch to the
“ON” position about 4 hours (or more) after turning it from the “ON” position to the
“ACC” or “LOCK” position in the auto reset mode, the average speed indication will au-
tomatically be reset.Outside temperature
E00518501108
The outside temperature is graphed every 5
minutes and the data for up to 4 hours are shown in (A). The current outside tempera-ture is shown in (B).
Resetting the outside temperature
Press the “RESET” function button to reset
the graph of the outside temperature.
NOTEl Depending on factors such as the driving
conditions, the displayed temperature may vary from the actual outside temperature.
l It is possible to set the display unit to °C or
°F.
Refer to “User customization” on page 5-27.Frozen road warning
E00537100021
This shows the temperature outside the vehi-
cle.
Centre information display*
5-16OKTE15E3Instruments and controls5
Page 121 of 418
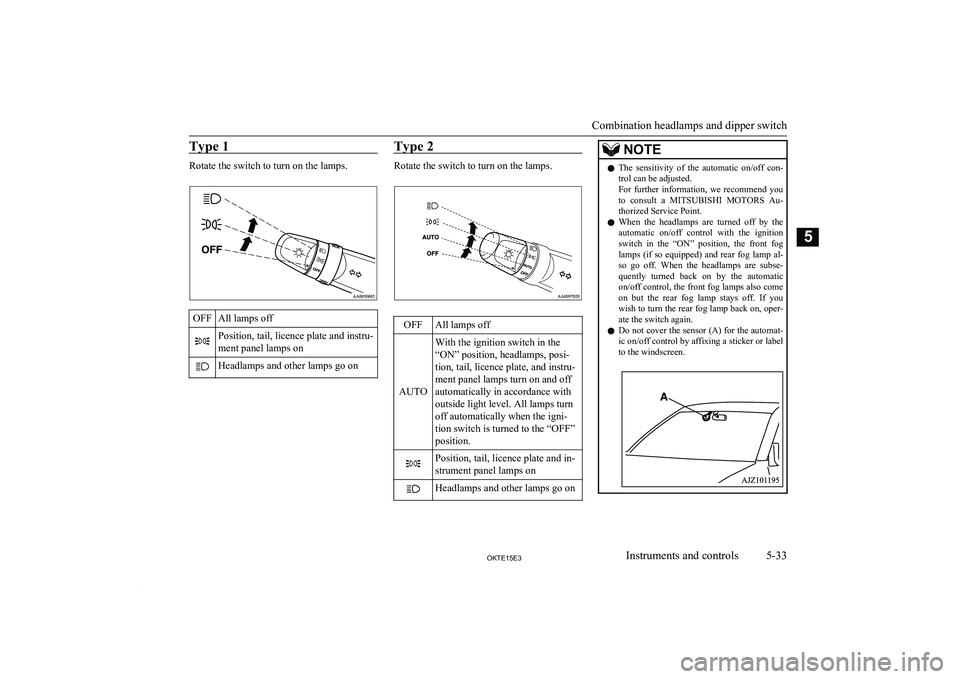
Type 1
Rotate the switch to turn on the lamps.
OFFAll lamps offPosition, tail, licence plate and instru-
ment panel lamps onHeadlamps and other lamps go onType 2
Rotate the switch to turn on the lamps.
OFFAll lamps off
AUTO
With the ignition switch in the
“ON” position, headlamps, posi-
tion, tail, licence plate, and instru-
ment panel lamps turn on and off
automatically in accordance with
outside light level. All lamps turn
off automatically when the igni-
tion switch is turned to the “OFF”
position.Position, tail, licence plate and in-
strument panel lamps onHeadlamps and other lamps go onNOTEl The sensitivity of the automatic on/off con-
trol can be adjusted.
For further information, we recommend you
to consult a MITSUBISHI MOTORS Au-
thorized Service Point.
l When the headlamps are turned off by the
automatic on/off control with the ignition
switch in the “ON” position, the front fog lamps (if so equipped) and rear fog lamp al-
so go off. When the headlamps are subse- quently turned back on by the automatic
on/off control, the front fog lamps also come on but the rear fog lamp stays off. If you wish to turn the rear fog lamp back on, oper-
ate the switch again.
l Do not cover the sensor (A) for the automat-
ic on/off control by affixing a sticker or label
to the windscreen.
Combination headlamps and dipper switch
5-33OKTE15E3Instruments and controls5
Page 122 of 418
NOTElIf the lamps do not turn on or off with the
switch in the “AUTO” position, manually
operate the switch and we recommend you
to have your vehicle checked.
[Vehicles with Daytime Run-
ning Lamp]
When the ignition switch is in the “ON” posi- tion and the lamp switch is set to the “OFF”
position, the low beam of the headlamps, tail lamps, etc., will illuminate.
Lamps (headlamps, fog lamps, etc.) auto-cutout function
l If the ignition key is turned to “LOCK”
or “ACC” position or removed from the
ignition switch and the lamps will stay on for about 3 minutes without opening the driver’s door while the lamp switch
in the “
” position, the lamps automat-
ically turn off.
l If the ignition key is turned to “LOCK”
or “ACC” position or removed from the ignition switch and the driver’s door is opened within 3 minutes while the lamp
switch in the “
” position, a buzzer
will sound to warn the driver that the
lamps have not been turned off, and
these lamps will automatically turn off.
NOTEl The lamp auto-cutout will not function when
the lamp switch is in the “” position.
l When the ignition key has been turned either
to the “LOCK” or “ACC” position or re- moved from the ignition switch with the
lamp switch in the “
” position, and the
lamp switch is returned to the “OFF” posi- tion within approximately 3 minutes, the au-
to-cutout function will not be activated.
When you want to keep the
lamps on
l Turn the lamp switch in the “OFF” posi-
tion to switch off all lamps while the ig-
nition key is in the “LOCK” or “ACC” position or remove it from the ignitionswitch.
l Turn on the lamps with the switch in the
“
” or “” position again, then the
lamps will remain on.
NOTEl It is possible to alter the auto-cutout function
such that:
• Auto-cutout function is never activated.
For details, we recommend you to consult a
MITSUBISHI MOTORS Authorized Serv-
ice Point.Lamp monitor buzzer
E00506100184
If the driver’s door is opened when the igni-
tion key is in the “LOCK” or “ACC” position or removed from the ignition switch while
the lamps are on, a buzzer will sound to re-
mind the driver to turn off the lamps. When
the lamp auto-cutout function acts, the buzzer
will stop automatically. When this function does not act, turn off the lamp switch to stop
the buzzer.
Dipper (High/Low beam
change)
E00506200286
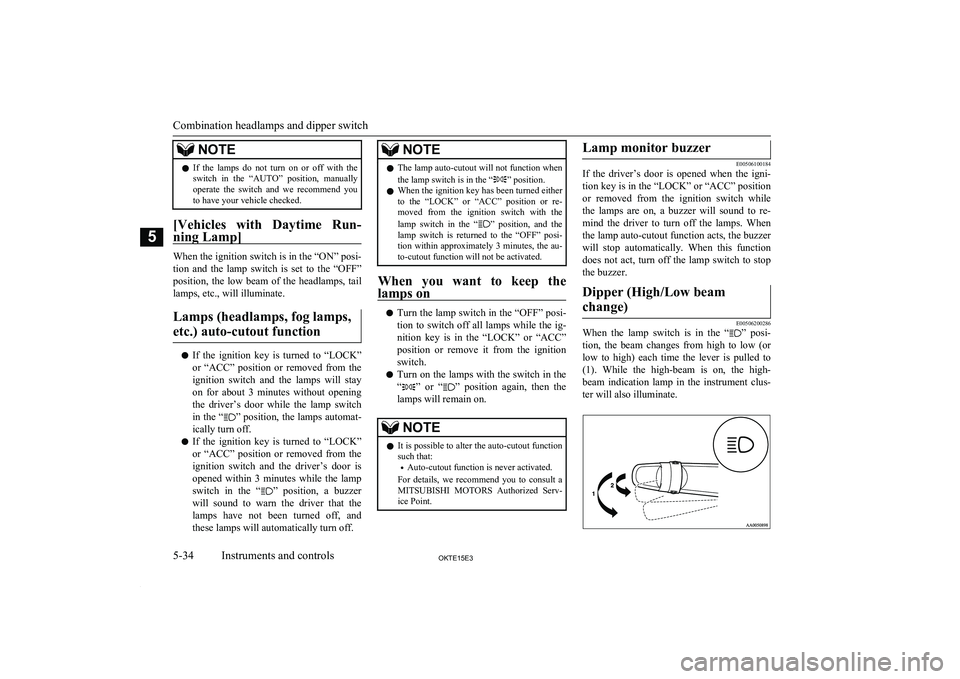
When the lamp switch is in the “” posi-
tion, the beam changes from high to low (or
low to high) each time the lever is pulled to (1). While the high-beam is on, the high-
beam indication lamp in the instrument clus-
ter will also illuminate.
Combination headlamps and dipper switch
5-34OKTE15E3Instruments and controls5
Page 124 of 418
Switch position 3-Driver + Full luggageloading
{Vehicles with heavy duty suspension}Switch position 4-Driver + Full luggageloading
{Vehicles without heavy
duty suspension}
Double cab
Vehicle con- ditionSwitch posi- tion“0”“2” or “3” or “4”●:1 person:Full luggage loadingSwitch position 0-Driver onlySwitch position 2-Driver + Full luggageloading
{Vehicles with heavy duty suspension for Rus-sia, Kazakhstan and Uk-
raine}Switch position 3-Driver + Full luggage loading
{Vehicles with heavy duty suspension except
for Russia, Kazakhstan
and Ukraine}
{Vehicles with head- lamp - type 2* and with-
out heavy duty suspen- sion}Switch position 4-Driver + Full luggageloading
{Vehicles with head-
lamp - type 1* and with- out heavy duty suspen-
sion}
*: Refer to “Outside” on page 10-25
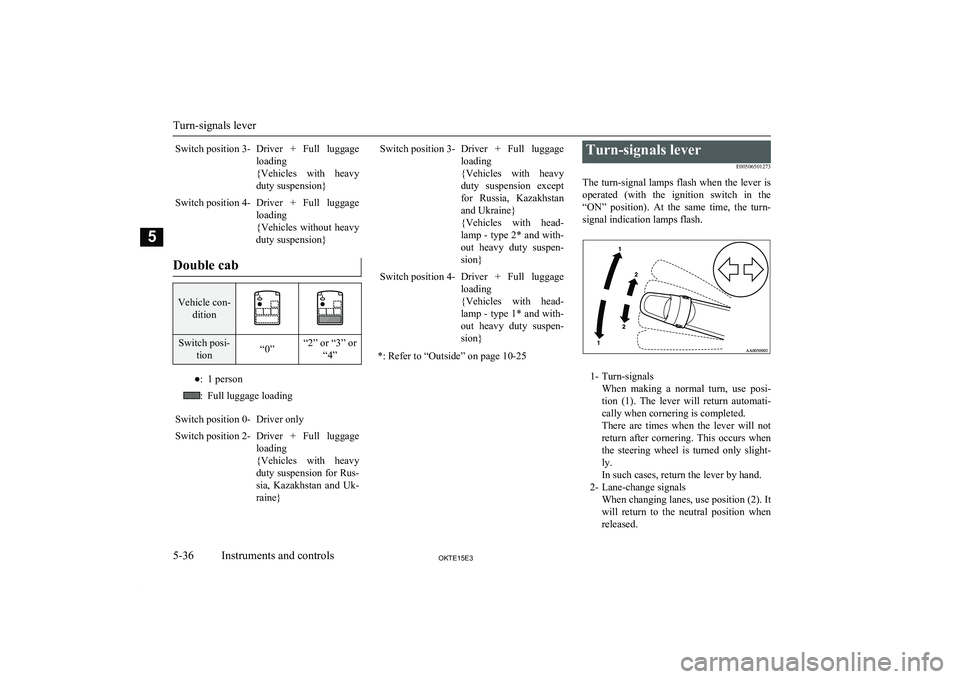
Turn-signals lever
E00506501273
The turn-signal lamps flash when the lever is
operated (with the ignition switch in the “ON” position). At the same time, the turn-
signal indication lamps flash.
1- Turn-signals When making a normal turn, use posi-
tion (1). The lever will return automati- cally when cornering is completed.
There are times when the lever will not
return after cornering. This occurs when the steering wheel is turned only slight-
ly.
In such cases, return the lever by hand.
2- Lane-change signals When changing lanes, use position (2). It
will return to the neutral position when released.
Turn-signals lever
5-36OKTE15E3Instruments and controls5
Page 126 of 418
NOTElThe front fog lamps are automatically turned
off when the headlamps or tail lamps are turned off. To turn the front fog lamps on again, turn the knob in the “ON” directionafter turning on the headlamps or tail lamps.
l Do not use fog lamps except in conditions of
fog, otherwise excessive lamp glare maytemporarily blind oncoming vehicle drivers.
l In case of vehicles with Daytime Running
Lamp, the front fog lamp can be operated even if the lamp switch is set to the “OFF”
position, because the low beam of the head- lamps, tail lamps, etc. illuminate when the
ignition key is at the “ON” position.Rear fog lamp switch
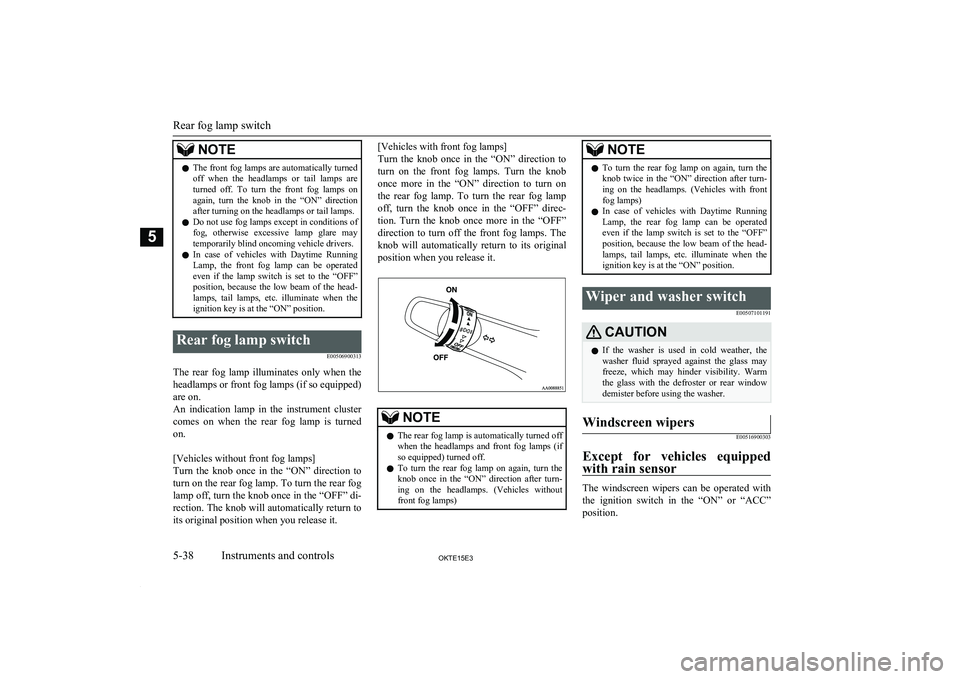
E00506900313
The rear fog lamp illuminates only when theheadlamps or front fog lamps (if so equipped)
are on.
An indication lamp in the instrument cluster
comes on when the rear fog lamp is turned on.
[Vehicles without front fog lamps]
Turn the knob once in the “ON” direction to
turn on the rear fog lamp. To turn the rear fog
lamp off, turn the knob once in the “OFF” di- rection. The knob will automatically return to
its original position when you release it.
[Vehicles with front fog lamps]
Turn the knob once in the “ON” direction to turn on the front fog lamps. Turn the knob
once more in the “ON” direction to turn on the rear fog lamp. To turn the rear fog lamp
off, turn the knob once in the “OFF” direc- tion. Turn the knob once more in the “OFF” direction to turn off the front fog lamps. The
knob will automatically return to its original
position when you release it.NOTEl The rear fog lamp is automatically turned off
when the headlamps and front fog lamps (if
so equipped) turned off.
l To turn the rear fog lamp on again, turn the
knob once in the “ON” direction after turn-ing on the headlamps. (Vehicles without
front fog lamps)NOTEl To turn the rear fog lamp on again, turn the
knob twice in the “ON” direction after turn-ing on the headlamps. (Vehicles with front
fog lamps)
l In case of vehicles with Daytime Running
Lamp, the rear fog lamp can be operated
even if the lamp switch is set to the “OFF”
position, because the low beam of the head- lamps, tail lamps, etc. illuminate when the ignition key is at the “ON” position.Wiper and washer switch
E00507101191CAUTIONlIf the washer is used in cold weather, the
washer fluid sprayed against the glass may
freeze, which may hinder visibility. Warm the glass with the defroster or rear window
demister before using the washer.Windscreen wipers
E00516900303
Except for vehicles equipped
with rain sensor
The windscreen wipers can be operated with the ignition switch in the “ON” or “ACC”
position.
Rear fog lamp switch
5-38OKTE15E3Instruments and controls5
Page 127 of 418
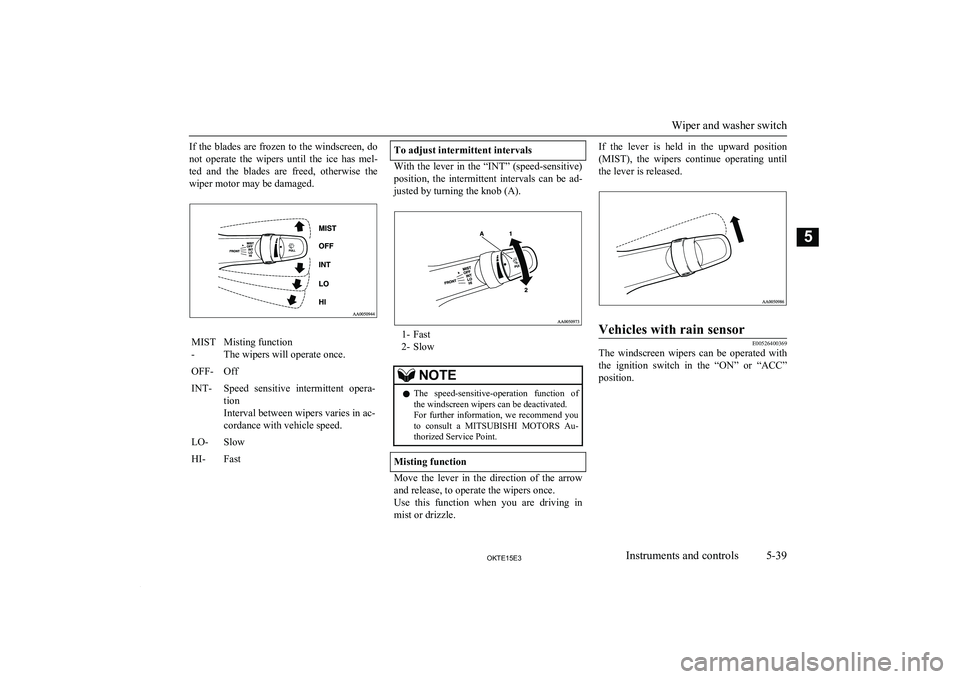
If the blades are frozen to the windscreen, do
not operate the wipers until the ice has mel- ted and the blades are freed, otherwise thewiper motor may be damaged.MIST
-Misting function
The wipers will operate once.OFF-OffINT-Speed sensitive intermittent opera- tion
Interval between wipers varies in ac-
cordance with vehicle speed.LO-SlowHI-FastTo adjust intermittent intervals
With the lever in the “INT” (speed-sensitive) position, the intermittent intervals can be ad-justed by turning the knob (A).
1- Fast
2- Slow
NOTEl The speed-sensitive-operation function of
the windscreen wipers can be deactivated.
For further information, we recommend you to consult a MITSUBISHI MOTORS Au-
thorized Service Point.
Misting function
Move the lever in the direction of the arrow
and release, to operate the wipers once.
Use this function when you are driving in
mist or drizzle.
If the lever is held in the upward position
(MIST), the wipers continue operating until the lever is released.Vehicles with rain sensor
E00526400369
The windscreen wipers can be operated withthe ignition switch in the “ON” or “ACC”
position.
Wiper and washer switch
5-39OKTE15E3Instruments and controls5
Page 128 of 418
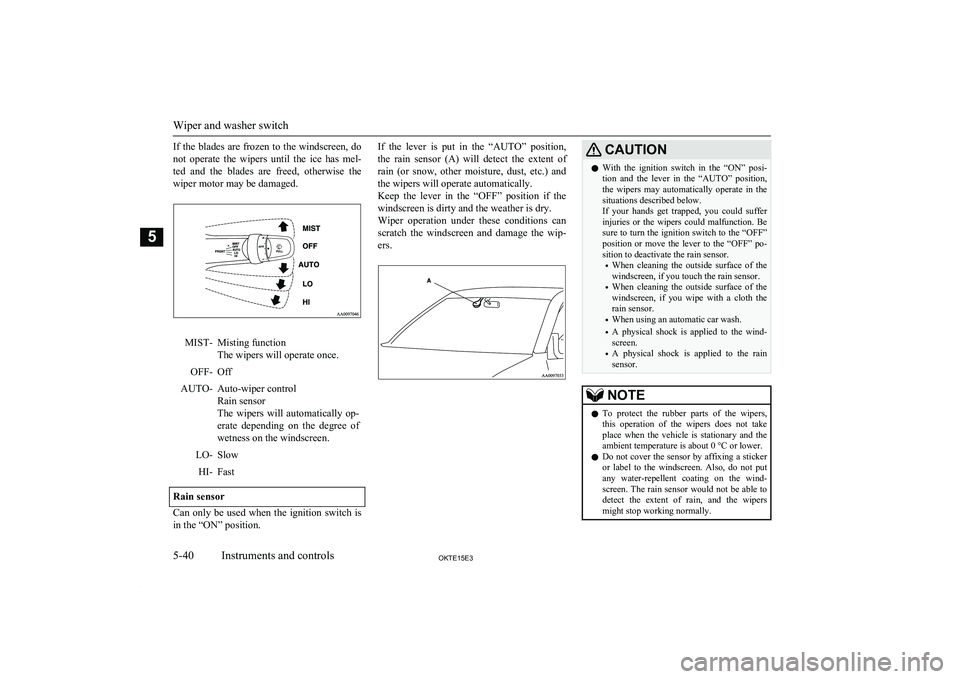
If the blades are frozen to the windscreen, do
not operate the wipers until the ice has mel- ted and the blades are freed, otherwise thewiper motor may be damaged.MIST-Misting function
The wipers will operate once.OFF-OffAUTO-Auto-wiper control
Rain sensor
The wipers will automatically op- erate depending on the degree of
wetness on the windscreen.LO-SlowHI-Fast
Rain sensor
Can only be used when the ignition switch is in the “ON” position.
If the lever is put in the “AUTO” position,
the rain sensor (A) will detect the extent of rain (or snow, other moisture, dust, etc.) and the wipers will operate automatically.
Keep the lever in the “OFF” position if the
windscreen is dirty and the weather is dry.
Wiper operation under these conditions can scratch the windscreen and damage the wip-
ers.CAUTIONl With the ignition switch in the “ON” posi-
tion and the lever in the “AUTO” position,the wipers may automatically operate in the situations described below.
If your hands get trapped, you could suffer injuries or the wipers could malfunction. Be sure to turn the ignition switch to the “OFF”
position or move the lever to the “OFF” po-
sition to deactivate the rain sensor.
• When cleaning the outside surface of the
windscreen, if you touch the rain sensor.
• When cleaning the outside surface of the
windscreen, if you wipe with a cloth the
rain sensor.
• When using an automatic car wash.
• A physical shock is applied to the wind-
screen.
• A physical shock is applied to the rain
sensor.NOTEl To protect the rubber parts of the wipers,
this operation of the wipers does not take
place when the vehicle is stationary and the
ambient temperature is about 0 °C or lower.
l Do not cover the sensor by affixing a sticker
or label to the windscreen. Also, do not put
any water-repellent coating on the wind- screen. The rain sensor would not be able to
detect the extent of rain, and the wipers might stop working normally.
Wiper and washer switch
5-40OKTE15E3Instruments and controls5
Page 130 of 418
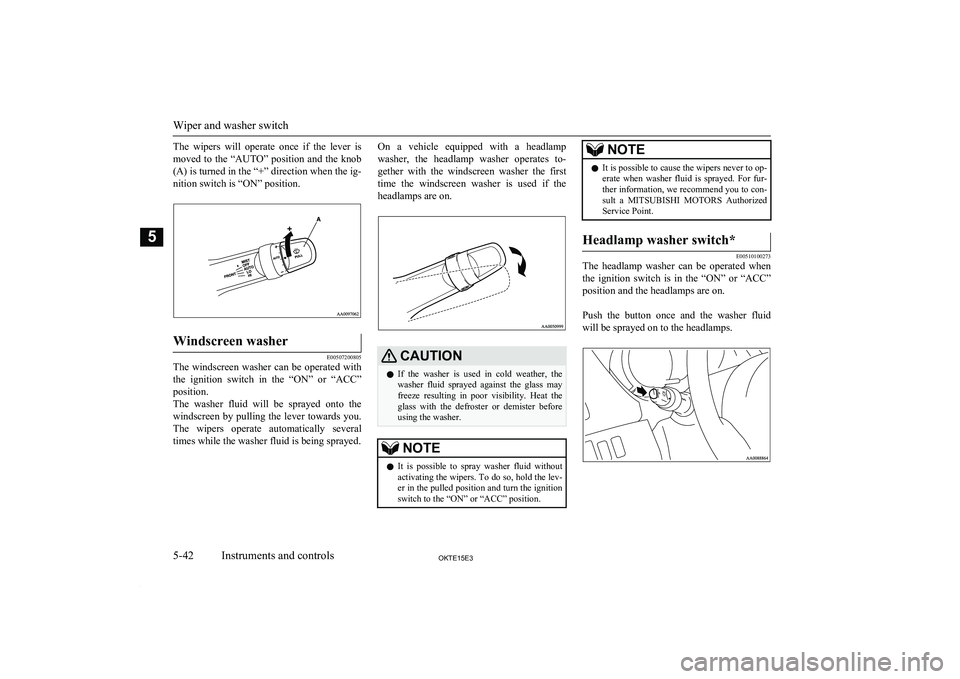
The wipers will operate once if the lever ismoved to the “AUTO” position and the knob
(A) is turned in the “+” direction when the ig-
nition switch is “ON” position.Windscreen washer
E00507200805
The windscreen washer can be operated with the ignition switch in the “ON” or “ACC”
position.
The washer fluid will be sprayed onto the windscreen by pulling the lever towards you.The wipers operate automatically several
times while the washer fluid is being sprayed.
On a vehicle equipped with a headlamp
washer, the headlamp washer operates to-
gether with the windscreen washer the first time the windscreen washer is used if the headlamps are on.CAUTIONl If the washer is used in cold weather, the
washer fluid sprayed against the glass may
freeze resulting in poor visibility. Heat the
glass with the defroster or demister before using the washer.NOTEl It is possible to spray washer fluid without
activating the wipers. To do so, hold the lev- er in the pulled position and turn the ignition
switch to the “ON” or “ACC” position.NOTEl It is possible to cause the wipers never to op-
erate when washer fluid is sprayed. For fur-
ther information, we recommend you to con- sult a MITSUBISHI MOTORS Authorized
Service Point.Headlamp washer switch*
E00510100273
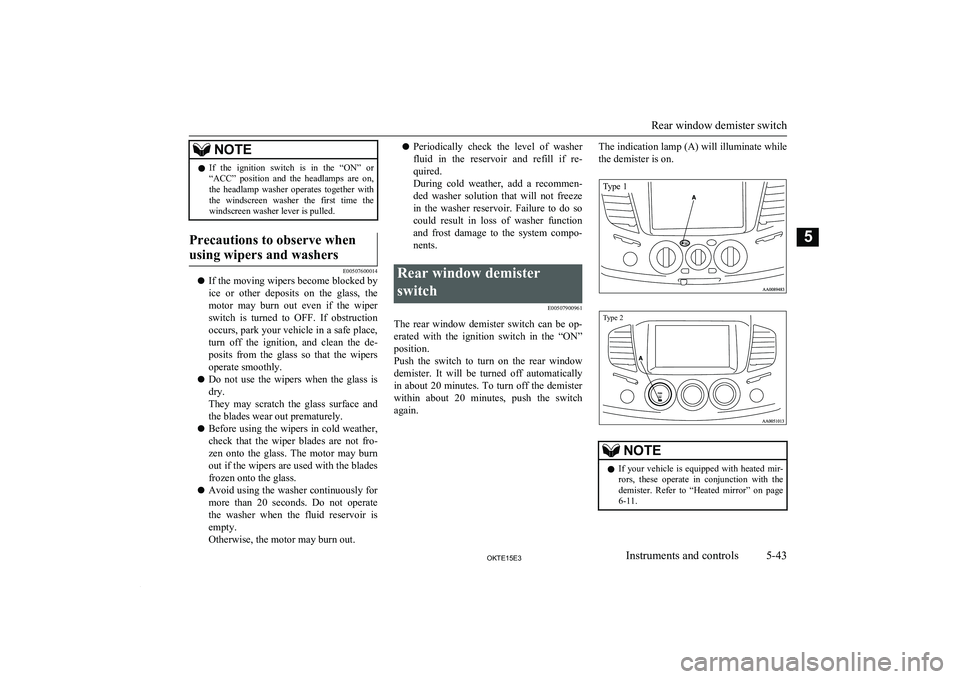
The headlamp washer can be operated when
the ignition switch is in the “ON” or “ACC” position and the headlamps are on.
Push the button once and the washer fluid will be sprayed on to the headlamps.
Wiper and washer switch
5-42OKTE15E3Instruments and controls5
Page 131 of 418
NOTElIf the ignition switch is in the “ON” or
“ACC” position and the headlamps are on,
the headlamp washer operates together with the windscreen washer the first time thewindscreen washer lever is pulled.Precautions to observe when
using wipers and washers
E00507600014
l If the moving wipers become blocked by
ice or other deposits on the glass, the
motor may burn out even if the wiper switch is turned to OFF. If obstruction
occurs, park your vehicle in a safe place, turn off the ignition, and clean the de- posits from the glass so that the wipersoperate smoothly.
l Do not use the wipers when the glass is
dry.
They may scratch the glass surface and
the blades wear out prematurely.
l Before using the wipers in cold weather,
check that the wiper blades are not fro-
zen onto the glass. The motor may burn out if the wipers are used with the blades
frozen onto the glass.
l Avoid using the washer continuously for
more than 20 seconds. Do not operate the washer when the fluid reservoir isempty.
Otherwise, the motor may burn out.
l Periodically check the level of washer
fluid in the reservoir and refill if re- quired.
During cold weather, add a recommen- ded washer solution that will not freeze
in the washer reservoir. Failure to do so
could result in loss of washer function and frost damage to the system compo- nents.Rear window demister
switch E00507900961
The rear window demister switch can be op-erated with the ignition switch in the “ON”position.
Push the switch to turn on the rear window
demister. It will be turned off automatically
in about 20 minutes. To turn off the demister
within about 20 minutes, push the switch again.
The indication lamp (A) will illuminate while
the demister is on.Type 1Type 2
NOTEl If your vehicle is equipped with heated mir-
rors, these operate in conjunction with thedemister. Refer to “Heated mirror” on page
6-11.
Rear window demister switch
5-43OKTE15E3Instruments and controls5