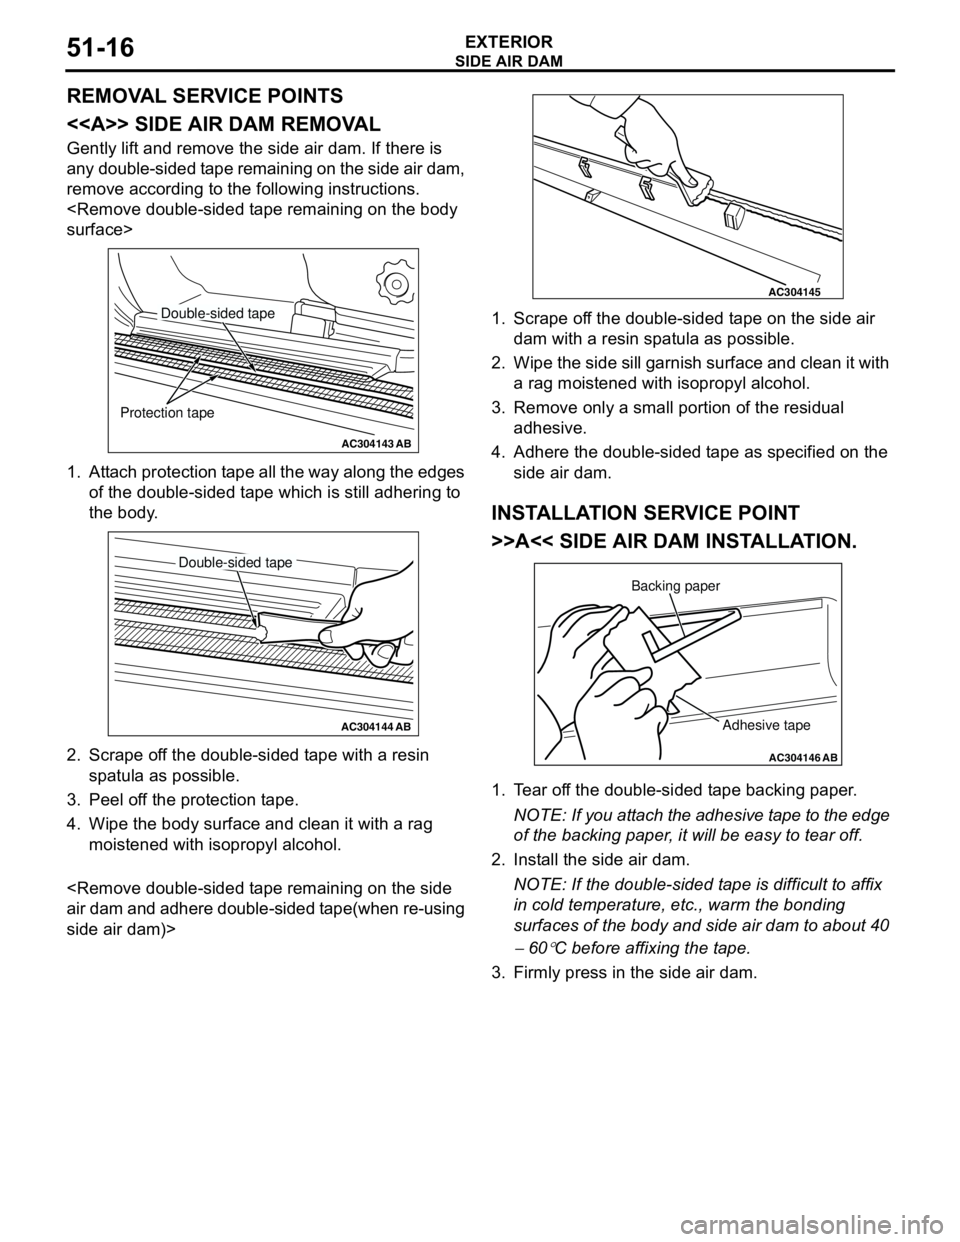
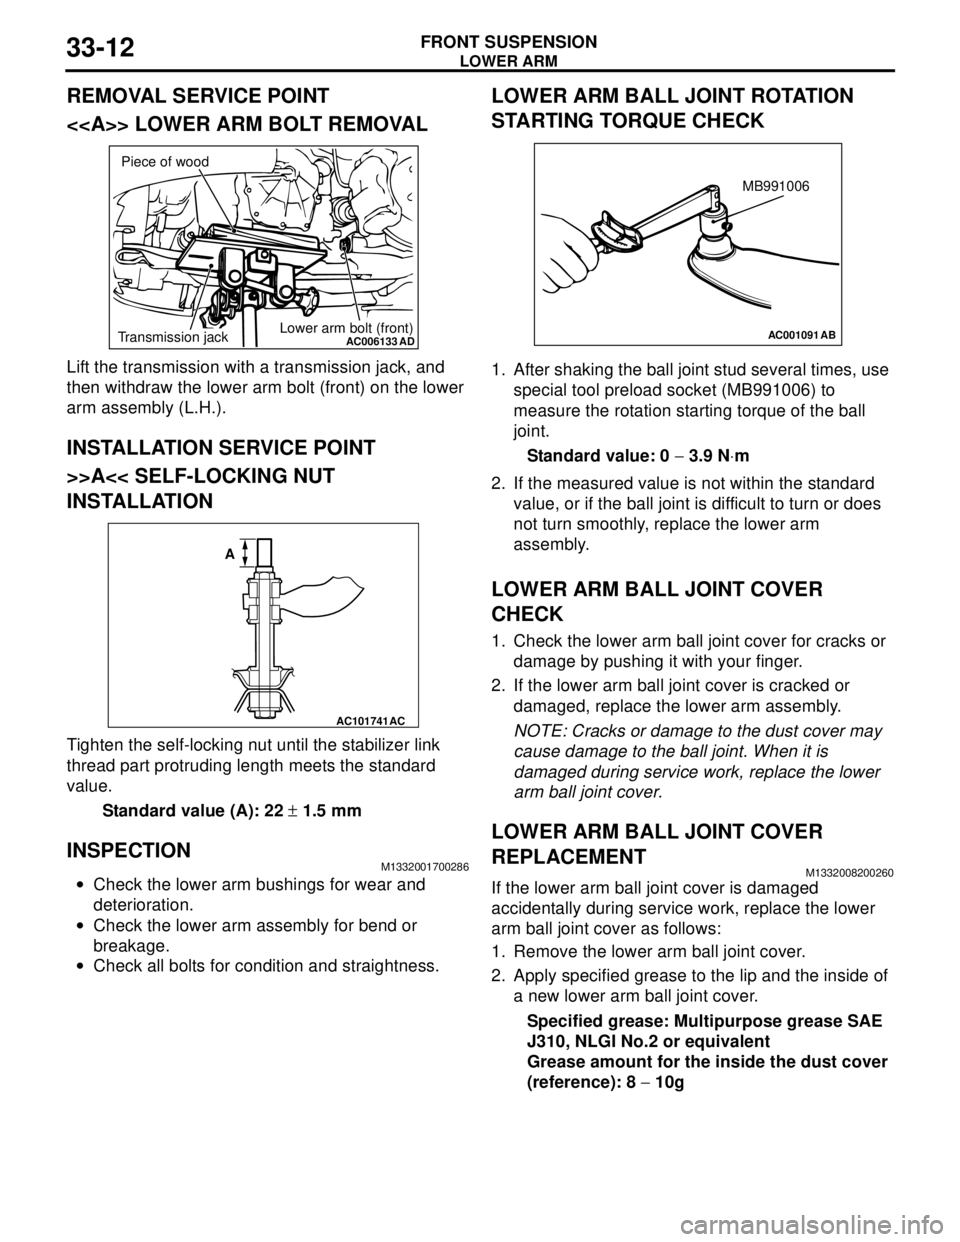
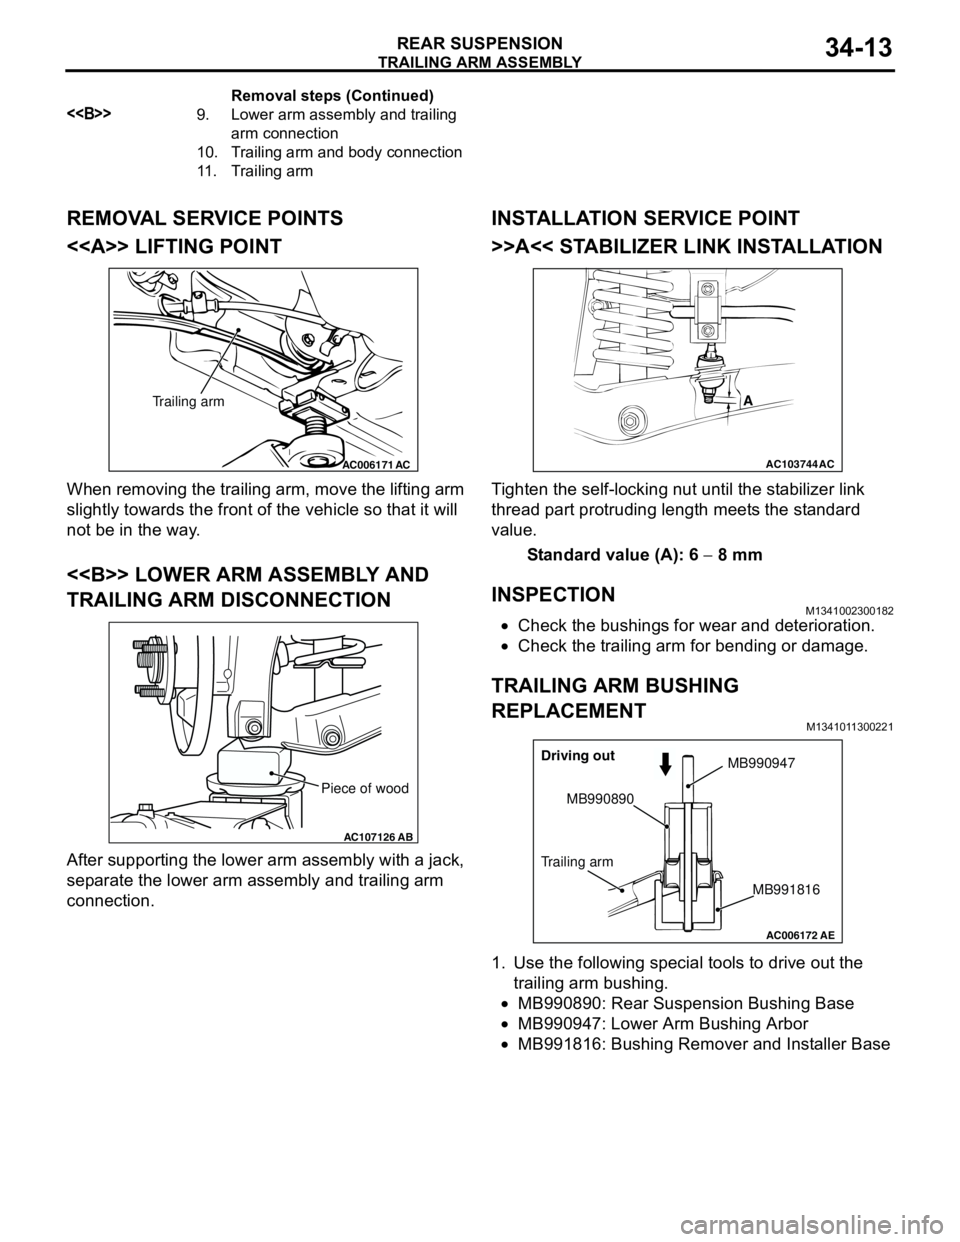
lift point MITSUBISHI LANCER 2005 Workshop Manual
[x] Cancel search | Manufacturer: MITSUBISHI, Model Year: 2005, Model line: LANCER, Model: MITSUBISHI LANCER 2005Pages: 788, PDF Size: 45.98 MB
Page 194 of 788
Page 212 of 788
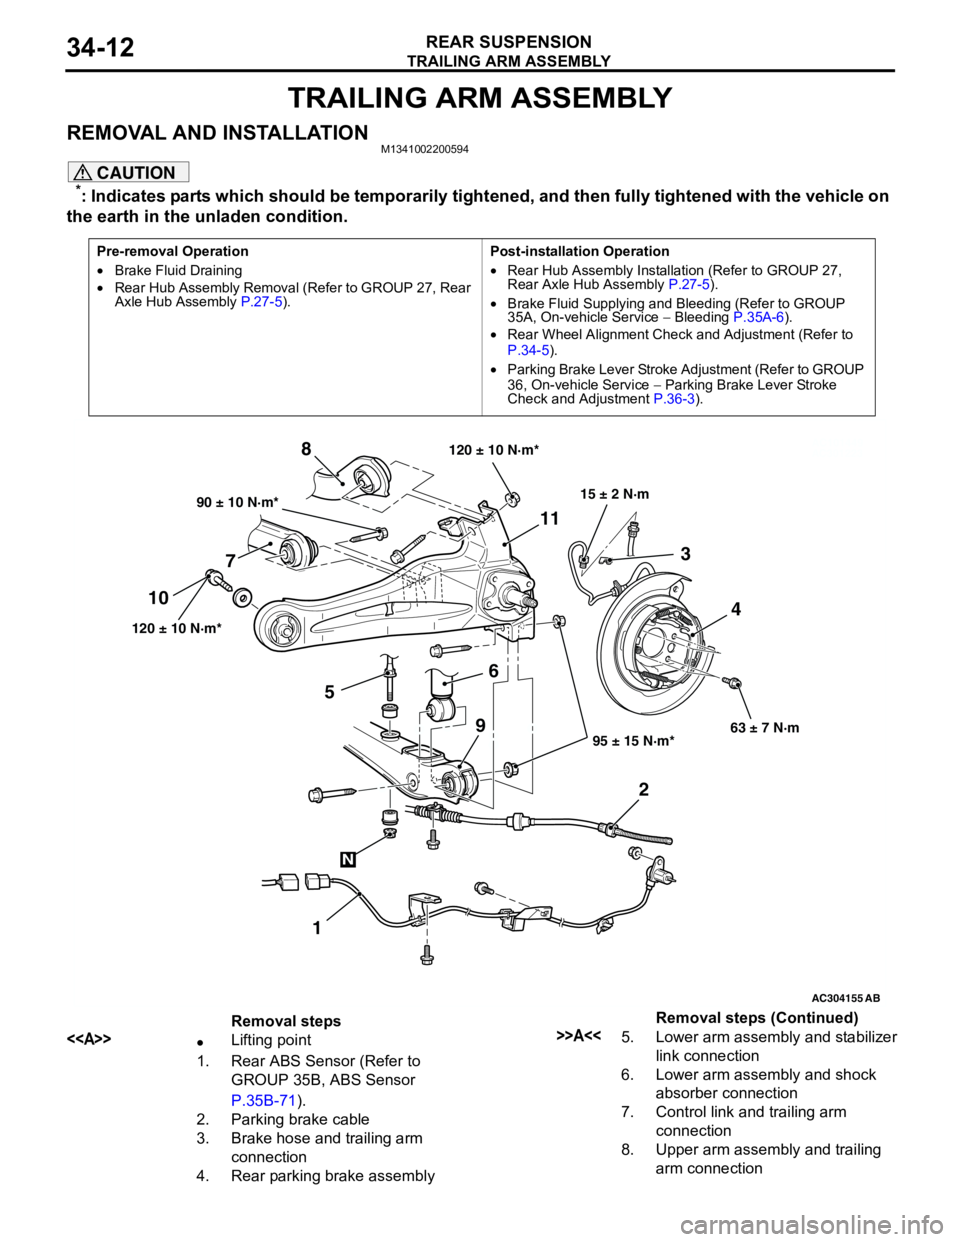
TRAILING ARM ASSEMBLY
REAR SUSPENSION34-12
TRAILING ARM ASSEMBLY
REMOVAL AND INSTALLATIONM1341002200594
CAUTION
*: Indicates parts which should be temporarily tightened, and then fully tightened with the vehicle on
the earth in the unladen condition.
Pre-removal Operation
•Brake Fluid Draining
•Rear Hub Assembly Removal (Refer to GROUP 27, Rear
Axle Hub Assembly P.27-5).Post-installation Operation
•Rear Hub Assembly Installation (Refer to GROUP 27,
Rear Axle Hub Assembly P.27-5).
•Brake Fluid Supplying and Bleeding (Refer to GROUP
35A, On-vehicle Service − Bleeding P.35A-6).
•Rear Wheel Alignment Check and Adjustment (Refer to
P.34-5).
•Parking Brake Lever Stroke Adjustment (Refer to GROUP
36, On-vehicle Service − Parking Brake Lever Stroke
Check and Adjustment P.36-3).
AC101449
AC301223
AC304155AB
90 ± 10 N·m*
120 ± 10 N·m*
95 ± 15 N·m*63 ± 7 N·m
6 78
1 1011
23
4
120 ± 10 N·m*
15 ± 2 N·m
N
9
5
Removal steps
<>•Lifting point
1. Rear ABS Sensor (Refer to
GROUP 35B, ABS Sensor
P.35B-71).
2. Parking brake cable
3. Brake hose and trailing arm
connection
4. Rear parking brake assembly>>A<<5. Lower arm assembly and stabilizer
link connection
6. Lower arm assembly and shock
absorber connection
7. Control link and trailing arm
connection
8. Upper arm assembly and trailing
arm connection Removal steps (Continued)
Page 213 of 788
Page 272 of 788
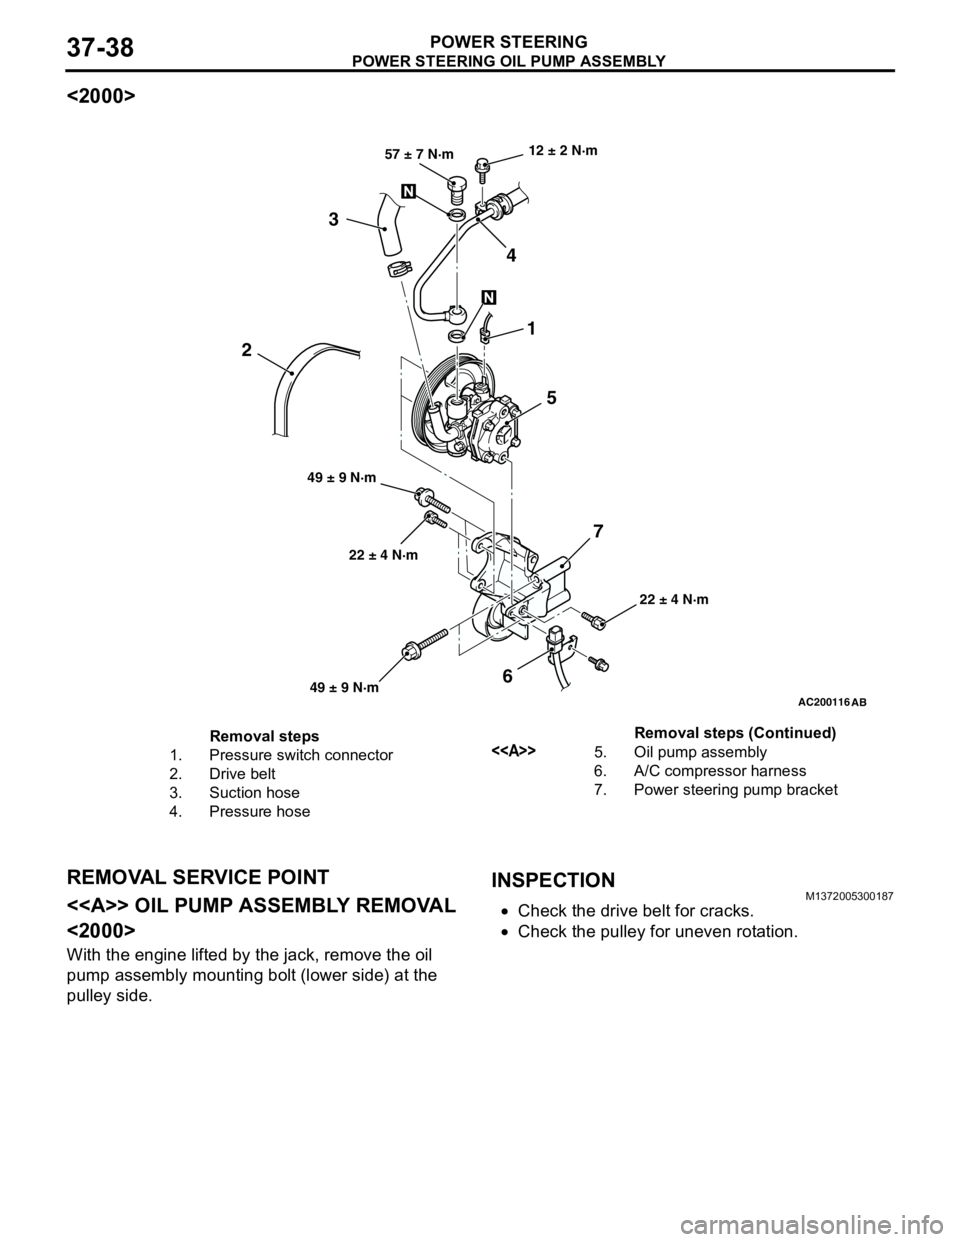
POWER STEERING OIL PUMP ASSEMBLY
POWER STEERING37-38
<2000>
REMOVAL SERVICE POINT
<> OIL PUMP ASSEMBLY REMOVAL
<2000>
With the engine lifted by the jack, remove the oil
pump assembly mounting bolt (lower side) at the
pulley side.
INSPECTIONM1372005300187
•Check the drive belt for cracks.
•Check the pulley for uneven rotation.
AC200116
AB
22 ± 4 N·m 12 ± 2 N·m
22 ± 4 N·m 49 ± 9 N·m57 ± 7 N·m
1
5 4 3
6 2
7
49 ± 9 N·m
Removal steps
1. Pressure switch connector
2. Drive belt
3. Suction hose
4. Pressure hose<>5. Oil pump assembly
6. A/C compressor harness
7. Power steering pump bracketRemoval steps (Continued)
Page 293 of 788
WINDOW GLASS
BODY42-15
2. The inner side of the windshield is curved,
therefore, make a point to assemble the glass
stopper and windshield spacer without any lifting
and assemble in the position shown in the Figure
of the instructions.
3. Install the windshield moulding.
>>B<
the windshield against the body, and place a
mating mark on the windshield and body.
CAUTION
•The primer strengthens the adhesive, so be
sure to apply it evenly around the entire
circumference. However, a too thick
application will weaken the adhesive.
•Do not touch the coated surface.
•Do not apply the primer on the remaining
adhesive because of weakening the adhesive.
2. Soak a sponge in the primer, and apply evenly to
the windshield in the specified places. If the
adhesive does not remain on the body flange
surface because of the panel replacement on the
body side, apply evenly to the body side in the
specified places.
3. Allow the windshield to dry for at least three
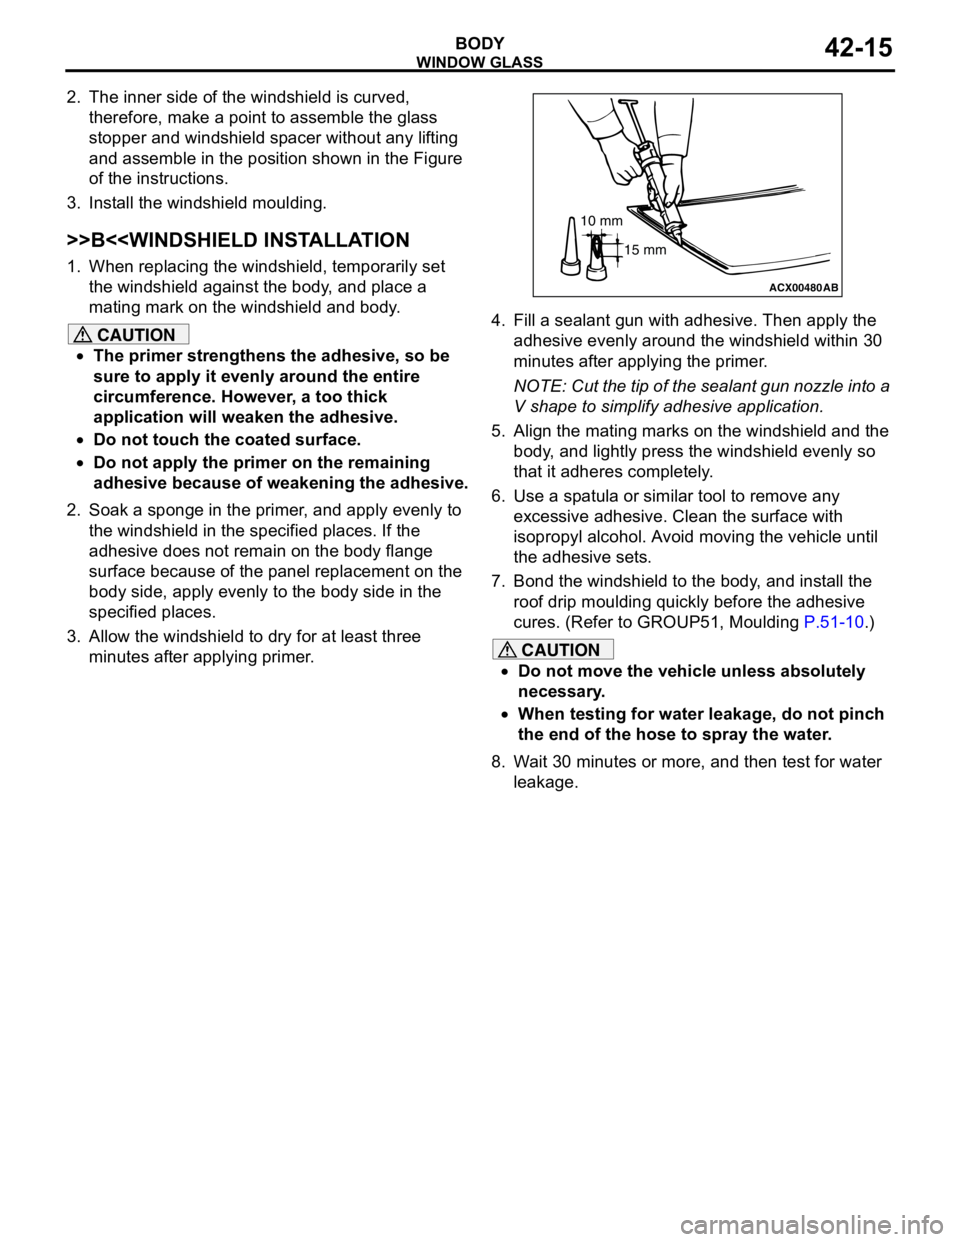
minutes after applying primer.4. Fill a sealant gun with adhesive. Then apply the
adhesive evenly around the windshield within 30
minutes after applying the primer.
NOTE: Cut the tip of the sealant gun nozzle into a
V shape to simplify adhesive application.
5. Align the mating marks on the windshield and the
body, and lightly press the windshield evenly so
that it adheres completely.
6. Use a spatula or similar tool to remove any
excessive adhesive. Clean the surface with
isopropyl alcohol. Avoid moving the vehicle until
the adhesive sets.
7. Bond the windshield to the body, and install the
roof drip moulding quickly before the adhesive
cures. (Refer to GROUP51, Moulding P.51-10.)
CAUTION
•Do not move the vehicle unless absolutely
necessary.
•When testing for water leakage, do not pinch
the end of the hose to spray the water.
8. Wait 30 minutes or more, and then test for water
leakage.
ACX00480
10 mm
15 mm
AB
Page 312 of 788
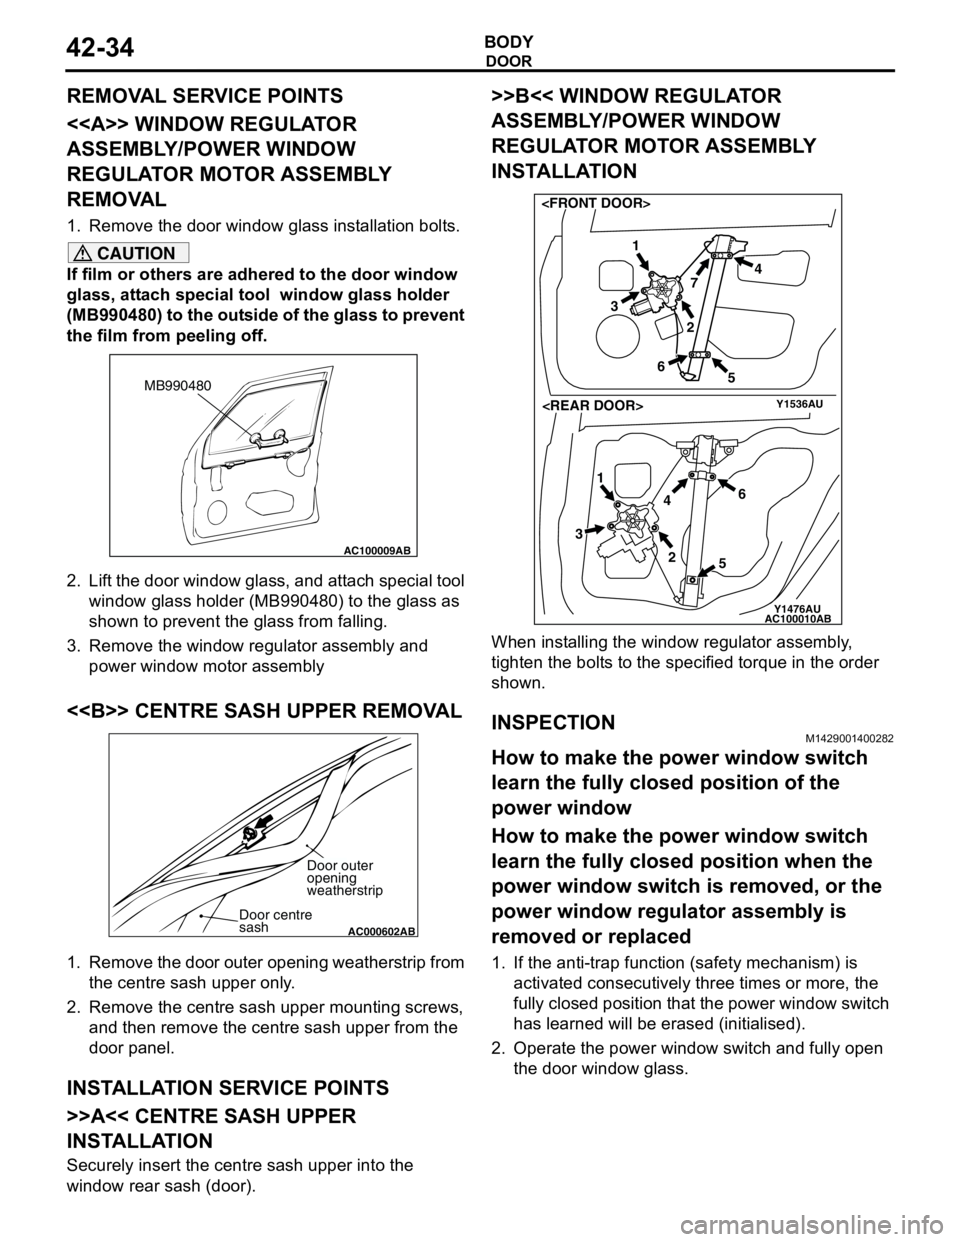
Page 352 of 788
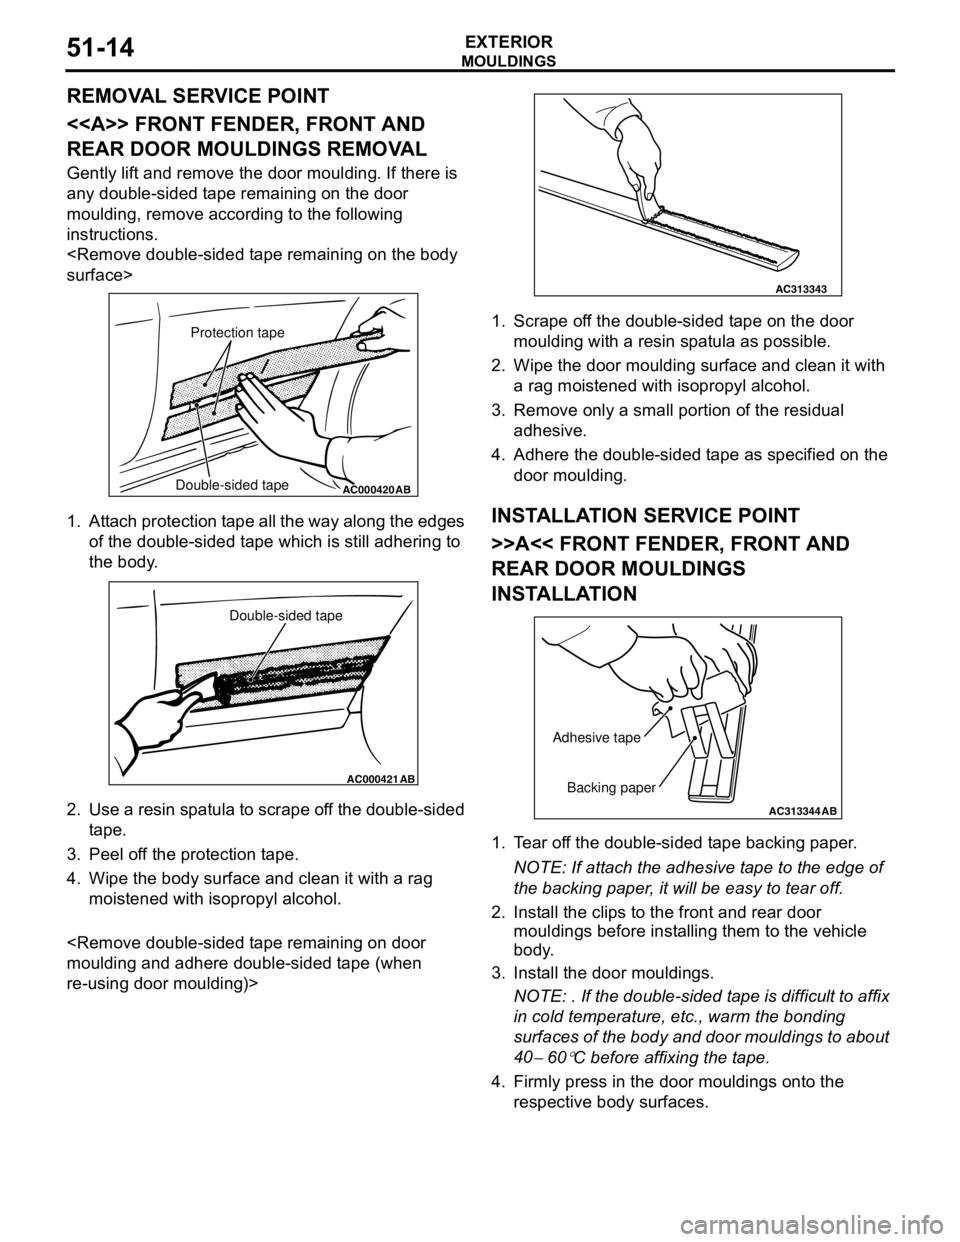
Page 354 of 788