fuses NISSAN TIIDA 2007 Service Owner's Guide
[x] Cancel search | Manufacturer: NISSAN, Model Year: 2007, Model line: TIIDA, Model: NISSAN TIIDA 2007Pages: 5883, PDF Size: 78.95 MB
Page 4780 of 5883

ON BOARD DIAGNOSTIC (OBD) SYSTEM
SRC-11
< FUNCTION DIAGNOSIS >
C
D
E
F
G
I
J
K
L
MA
B
SRC
N
O
P
ON BOARD DIAGNOSTIC (OBD) SYSTEM
Trouble Diagnosis IntroductionINFOID:0000000001396360
CAUTION:
Do not use electrical test equipment on any circuit related to the SRS unless instructed to do so in
this Service Manual. SRS wiring harnesses can be identified by yellow and/or orange harness con-
nectors.
Do not attempt to repair, splice or modify SRS wiring harnesses. If a harness is damaged, replace it
with a new one.
Keep ground connections clean.
DIAGNOSIS FUNCTION
The SRS self-diagnosis results can be read by using “AIR BAG” warning lamp and/or CONSULT-III.
The User mode is exclusively prepared for the customer (driver). This mode warns the driver of a system mal-
function through the operation of the “AIR BAG” warning lamp.
The Diagnosis mode allows the technician to locate and inspect the malfunctioning part.
The mode applications for the “AIR BAG” warning lamp and CONSULT-III are as follows:
HOW TO PERFORM TROUBLE DIAGNOSES FOR QUICK AND ACCURATE REPAIR
A good understanding of the malfunction conditions can make troubleshooting faster and more accurate.
In general, each customer feels differently about a malfunction. It is important to fully understand the symp-
toms or conditions for a customer complaint.
Information From Customer
WHAT - Vehicle model
WHEN - Date, Frequencies
WHERE - Road conditions
HOW - Operating conditions, Symptoms
Preliminary Check
Check that the following parts are in good order.
Battery
Fuses
System component-to-harness connections
SRS Operation CheckINFOID:0000000001396361
DIAGNOSTIC PROCEDURE 1
Checking SRS Operation Using “AIR BAG” Warning Lamp—User Mode
1. Turn the ignition switch from OFF to ON, and check that the air bag warning lamp blinks.
2. Compare the SRS air bag warning lamp blinking pattern with the
examples.
User mode Diagnosis mode Display type
“AIR BAG” warning lamp X X ON-OFF operation
CONSULT-III — X Monitoring
BF-1845D
Page 4824 of 5883

SEAT BELT WARNING LAMP CONTROL UNIT
SRC-55
< COMPONENT DIAGNOSIS >
C
D
E
F
G
I
J
K
L
MA
B
SRC
N
O
P
SEAT BELT WARNING LAMP CONTROL UNIT
Power Supply and Ground Circuit Check for Seat Belt Warning Lamp Control Unit
INFOID:0000000001724689
1.CHECK FUSES
Check for blown fuses.
Are any fuses blown?
YES >> Install new fuse. Eliminate cause of malfunction if fuse blows again.
NO >> GO TO 2
2.POWER SUPPLY CIRCUIT CHECK
1. Disconnect the seat belt warning lamp control unit connectors
B50 and B51.
2. Check voltage between seat belt warning lamp control unit har-
ness connectors B50, B51 terminals 1, 17 and ground.
Are the inspection results normal?
YES >> GO TO 3
NO >> Check harness for open between seat belt warning lamp control unit and fuse.
3.GROUND CIRCUIT CHECK
1. Turn ignition switch OFF.
2. Check continuity between seat belt warning lamp control unit
harness connector B50 terminal 16 and ground.
Is the inspection result normal?
YES >> Inspection End.
NO >> Check harness for ground.
Seat Belt Buckle Switch Circuit CheckINFOID:0000000001726677
1.CHECK SEAT BELT BUCKLE SWITCH SIGNAL
1. Turn ignition switch ON.
2. Fasten both seat belts.
Unit Power source Fuse Location
Seat belt warning lamp control
unitBattery 14
Fuse block (J/B)
Ignition switch ON or START 2
Terminals Ignition switch position
(+)
(–) OFF ON
Connector Terminal
A: B50 1
GroundBattery
voltage
B: B51 17 —Battery
voltage
AWHIA0021ZZ
Te r m i n a l s
Continuity (+)
(–)
Connector Terminal
B50 16 Ground Yes
AWHIA0022ZZ
Page 4851 of 5883
SRC-82
< SYMPTOM DIAGNOSIS >
SRS AIR BAG SYSTEM
SYMPTOM DIAGNOSIS
SRS AIR BAG SYSTEM
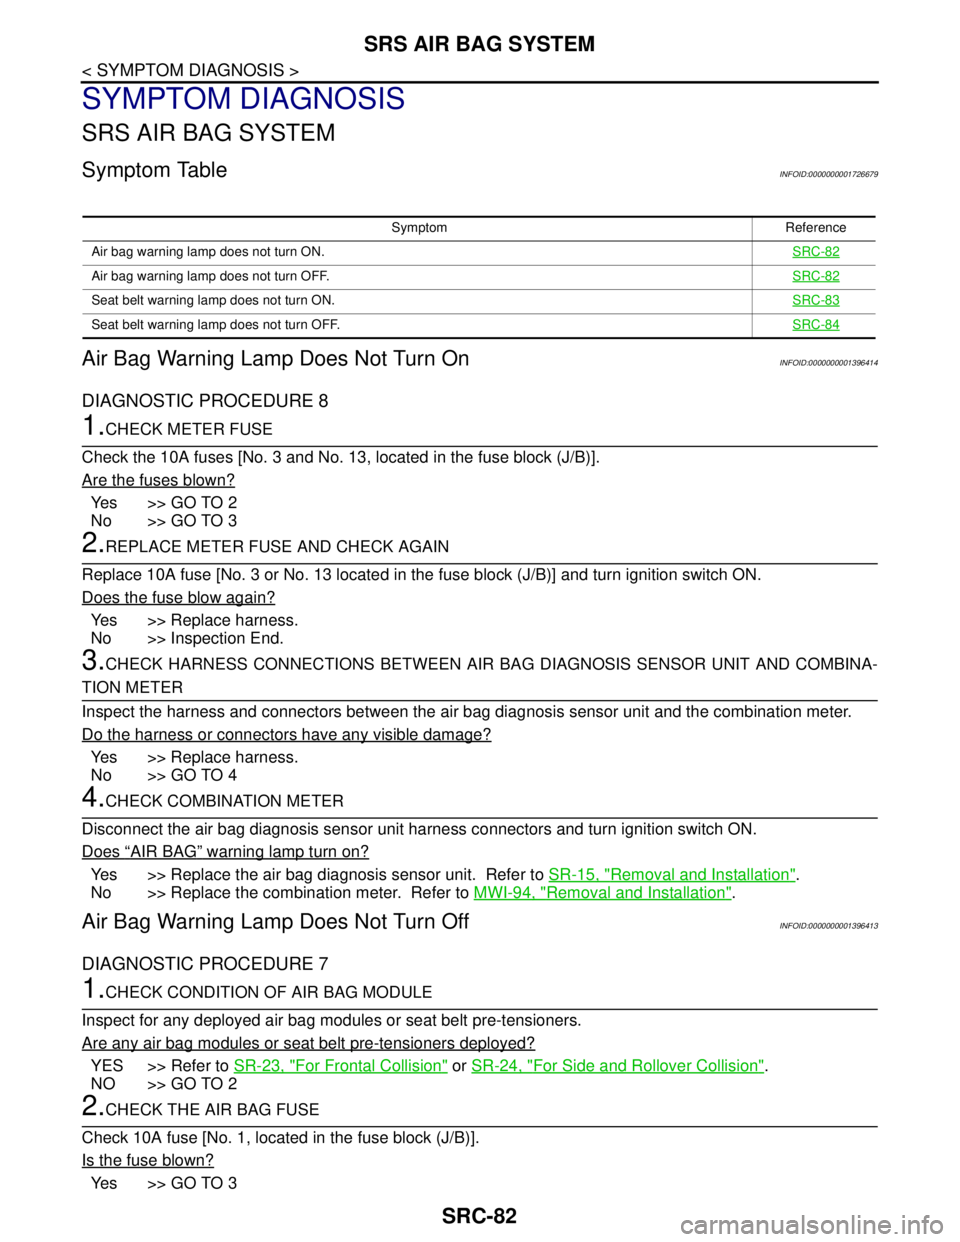
Symptom TableINFOID:0000000001726679
Air Bag Warning Lamp Does Not Turn OnINFOID:0000000001396414
DIAGNOSTIC PROCEDURE 8
1.CHECK METER FUSE
Check the 10A fuses [No. 3 and No. 13, located in the fuse block (J/B)].
Are the fuses blown?
Ye s > > G O T O 2
No >> GO TO 3
2.REPLACE METER FUSE AND CHECK AGAIN
Replace 10A fuse [No. 3 or No. 13 located in the fuse block (J/B)] and turn ignition switch ON.
Does the fuse blow again?
Yes >> Replace harness.
No >> Inspection End.
3.CHECK HARNESS CONNECTIONS BETWEEN AIR BAG DIAGNOSIS SENSOR UNIT AND COMBINA-
TION METER
Inspect the harness and connectors between the air bag diagnosis sensor unit and the combination meter.
Do the harness or connectors have any visible damage?
Yes >> Replace harness.
No >> GO TO 4
4.CHECK COMBINATION METER
Disconnect the air bag diagnosis sensor unit harness connectors and turn ignition switch ON.
Does
“AIR BAG” warning lamp turn on?
Yes >> Replace the air bag diagnosis sensor unit. Refer to SR-15, "Removal and Installation".
No >> Replace the combination meter. Refer to MWI-94, "
Removal and Installation".
Air Bag Warning Lamp Does Not Turn OffINFOID:0000000001396413
DIAGNOSTIC PROCEDURE 7
1.CHECK CONDITION OF AIR BAG MODULE
Inspect for any deployed air bag modules or seat belt pre-tensioners.
Are any air bag modules or seat belt pre-tensioners deployed?
YES >> Refer to SR-23, "For Frontal Collision" or SR-24, "For Side and Rollover Collision".
NO >> GO TO 2
2.CHECK THE AIR BAG FUSE
Check 10A fuse [No. 1, located in the fuse block (J/B)].
Is the fuse blown?
Ye s > > G O T O 3
Symptom Reference
Air bag warning lamp does not turn ON.SRC-82
Air bag warning lamp does not turn OFF.SRC-82
Seat belt warning lamp does not turn ON.SRC-83
Seat belt warning lamp does not turn OFF.SRC-84
Page 5736 of 5883
WCS
POWER SUPPLY AND GROUND CIRCUIT
WCS-21
< COMPONENT DIAGNOSIS >
C
D
E
F
G
H
I
J
K
L
MB A
O
P
COMPONENT DIAGNOSIS
POWER SUPPLY AND GROUND CIRCUIT
COMBINATION METER
COMBINATION METER : Diagnosis ProcedureINFOID:0000000001728304
1.CHECK FUSES
Check for blown combination meter fuses.
Is the inspection result normal?
YES >> GO TO 2
NO >> If fuse is blown, be sure to eliminate cause of malfunction before installing new fuse.
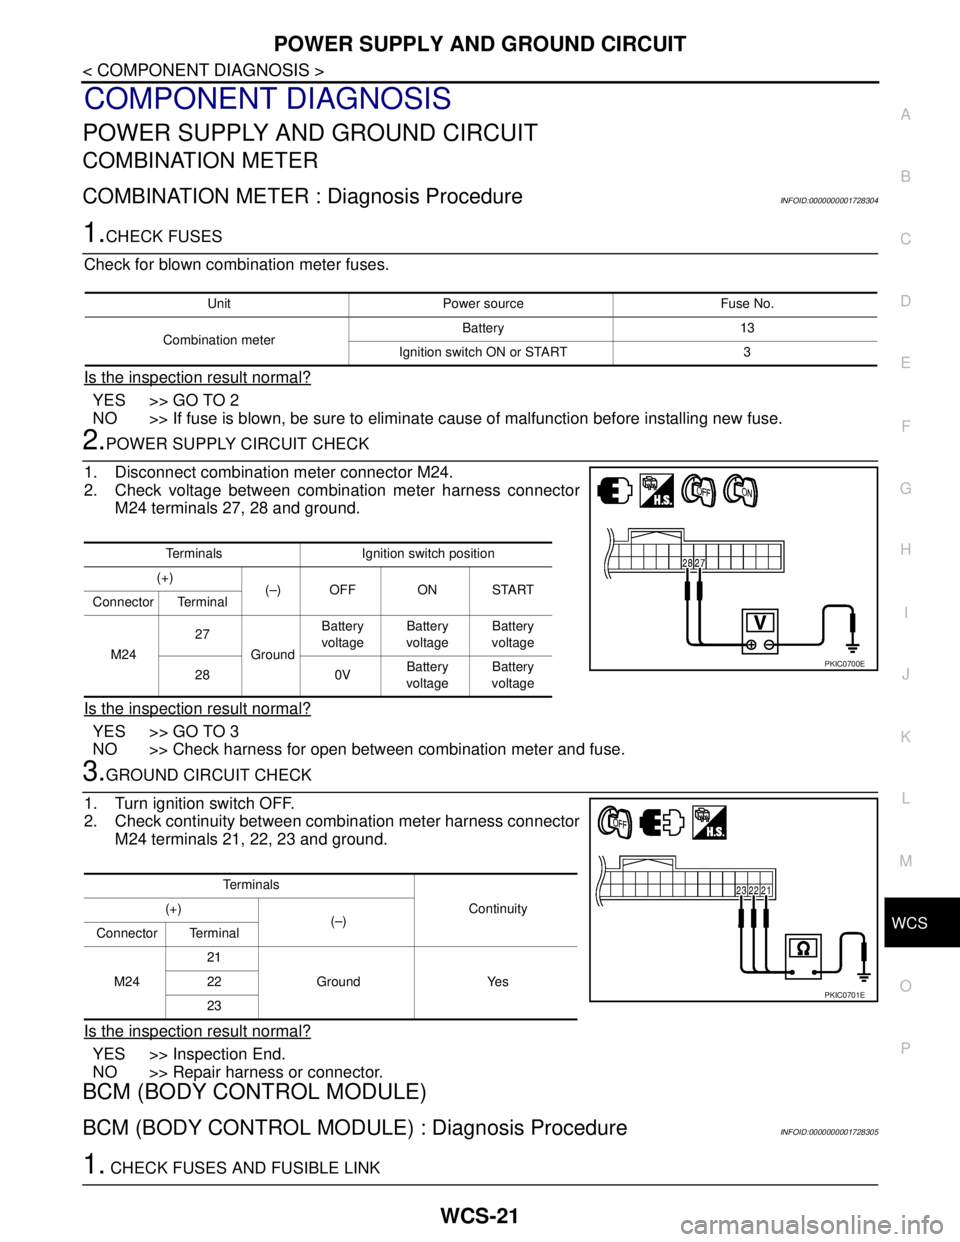
2.POWER SUPPLY CIRCUIT CHECK
1. Disconnect combination meter connector M24.
2. Check voltage between combination meter harness connector
M24 terminals 27, 28 and ground.
Is the inspection result normal?
YES >> GO TO 3
NO >> Check harness for open between combination meter and fuse.
3.GROUND CIRCUIT CHECK
1. Turn ignition switch OFF.
2. Check continuity between combination meter harness connector
M24 terminals 21, 22, 23 and ground.
Is the inspection result normal?
YES >> Inspection End.
NO >> Repair harness or connector.
BCM (BODY CONTROL MODULE)
BCM (BODY CONTROL MODULE) : Diagnosis ProcedureINFOID:0000000001728305
1. CHECK FUSES AND FUSIBLE LINK
Unit Power source Fuse No.
Combination meterBattery 13
Ignition switch ON or START 3
Terminals Ignition switch position
(+)
(–) OFF ON START
Connector Terminal
M2427
GroundBattery
voltageBattery
voltageBattery
voltage
28 0VBattery
voltageBattery
voltage
PKIC0700E
Te r m i n a l s
Continuity (+)
(–)
Connector Terminal
M2421
Ground Yes 22
23
PKIC0701E
Page 5737 of 5883

WCS-22
< COMPONENT DIAGNOSIS >
POWER SUPPLY AND GROUND CIRCUIT
Check that the following fuses and fusible link are not fusing.
Is the fuse fusing?
YES >> Replace the blown fuse or fusible link after repairing the affected circuit if a fuse or fusible link is
blown.
NO >> GO TO 2.
2. CHECK POWER SUPPLY CIRCUIT
1. Turn ignition switch OFF.
2. Disconnect BCM.
3. Check voltage between BCM harness connector and ground.
Is the measurement value normal?
YES >> GO TO 3
NO >> Repair or replace harness.
3. CHECK GROUND CIRCUIT
Check continuity between BCM harness connector and ground.
Does continuity exist?
YES >> INSPECTION END
NO >> Repair or replace harness.
Terminal No. Signal name Fuses and fusible link No.
22
Battery power supply9 (10A)
728 (10A)
74
G (40A)
79
24 Ignition power supply 55 (10A)
Te r m i n a l s
Ignition switch position
(+)
(−) BCM
OFF ACC ON
Connector Terminal
M1822
GroundBattery
voltageBattery
voltageBattery
voltage
24Approx.
0 VApprox.
0 VBattery
voltage
M2072
Battery
voltageBattery
voltageBattery
voltage 74
79
ALMIA0188ZZ
BCM
GroundContinuity
Connector Terminal
M18 2
Ye s
M20 70
ALMIA0189ZZ
Page 5819 of 5883

WIPER AND WASHER FUSE, FUSIBLE LINK
WW-17
< COMPONENT DIAGNOSIS >
C
D
E
F
G
H
I
J
K
MA
B
WW
N
O
P
COMPONENT DIAGNOSIS
WIPER AND WASHER FUSE, FUSIBLE LINK
DescriptionINFOID:0000000001366608
Fuse, fusible link list
Diagnosis ProcedureINFOID:0000000001366609
1. CHECK FUSES AND FUSIBLE LINK
Check that the following fuses and fusible link are not blown.
Is the fuse or fusible link blown?
YES >> Replace the fuse or fusible link after repairing the applicable circuit.
NO >> The fuse or fusible link is normal.
Unit Location Fuse No. Capacity
Front wiper motor IPDM E/R 39 30 A
Front and rear washer motor Fuse block (J/B) 4 15 A
Headlamp washer motor Fuse and fusible link box L 30 A
Unit Location Fuse No. Capacity
Front wiper motor IPDM E/R 39 30 A
Front and rear washer motor Fuse block (J/B) 4 15 A
Headlamp washer motor Fuse and fusible link box L 30 A