NISSAN XTERRA 2006 N50 / 2.G Navigation Manual
XTERRA 2006 N50 / 2.G
NISSAN
NISSAN
https://www.carmanualsonline.info/img/5/699/w960_699-0.png
NISSAN XTERRA 2006 N50 / 2.G Navigation Manual
Page 34 of 272
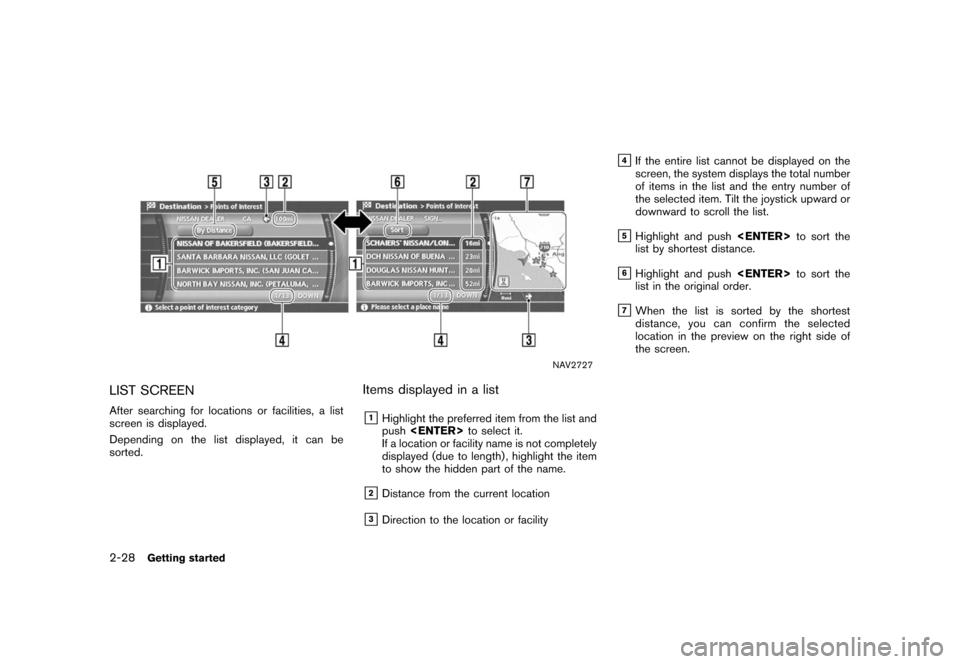
NAV2727
LIST SCREENAfter searching for locations or facilities, a list
screen is displayed.
Depending on the list displayed, it can be
sorted.
Items displayed in a list&1Highlight the preferred item from the list and
push to select it.
If a location or facility name is not completely
displayed (due to length) , highlight the item
to show the hidden part of the name.
&2Distance from the current location
&3Direction to the location or facility
&4If the entire list cannot be displayed on the
screen, the system displays the total number
of items in the list and the entry number of
the selected item. Tilt the joystick upward or
downward to scroll the list.
&5Highlight and push to sort the
list by shortest distance.
&6Highlight and push to sort the
list in the original order.
&7When the list is sorted by the shortest
distance, you can confirm the selected
location in the preview on the right side of
the screen.
2-28
Getting started
Page 36 of 272
NAV2729
3. Highlight [Travel] and push.
NAV2730
4. From the category list, highlight [AIRPORT]
and push .
The character input screen is displayed.
NAV2731
5. Highlight [OK] and push .
A list screen is displayed.
INFO:
You can enter the city name and facility
name to narrow down your search.
2-30
Getting started
Page 37 of 272
NAV2732
6. Highlight the preferred airport from the listand push .
NAV2733
INFO:
By selecting [By Distance], you can sort the
list by the shortest distance.
The position of the selected location is
displayed in the preview on the right side
of the screen.
NAV2734
7. The selected destination is displayed at the center of the map. Highlight [OK] after
confirming the location of the displayed
destination, and push .
INFO:
The system sets the destination to the
selected location and starts calculating a
route.
Getting started
2-31
Page 41 of 272
NAV2741
3. A confirmation message is displayed. High-light [Yes] and push .
INFO:
If a route is cancelled, [Cancel Route Guidance]
changes to [Resume Route Guidance].
Highlight [Resume Route Guidance] and push
to reactivate the cancelled route.
This is available only until a new route is set.
NAI0412
Delete the route using (only
for 350Z)1. Push .
NAV3024
2. A confirmation message is displayed. High-
light [Yes] and push .
Getting started
2-35
Page 47 of 272
3 Map settingsMap types........................................................ 3-2
Plan view ..................................................... 3-2
Birdview
TM.................................................... 3-3
Switching the map view ....................................... 3-4
Available views .............................................. 3-5
Moving a map ................................................... 3-7
Plan view ..................................................... 3-7
BirdviewTM.................................................... 3-8
Returning to the current vehicle location .............. 3-9
Map scrolling information ............................... 3-10 Changing the scale of a map
.............................. 3-12
Map scale .................................................. 3-13
Other settings for the map screen ........................ 3-15
Settings of heading/long range map view ........... 3-15
Changing the Birdview
TM
angle ....................... 3-17
Changing the scale of the left screen ................ 3-20
Map icons ...................................................... 3-22
Displaying landmark icons .............................. 3-22
Map symbols. .............................................. 3-24
Page 48 of 272
Two types of map views are available: Plan View
and Birdview
TM.
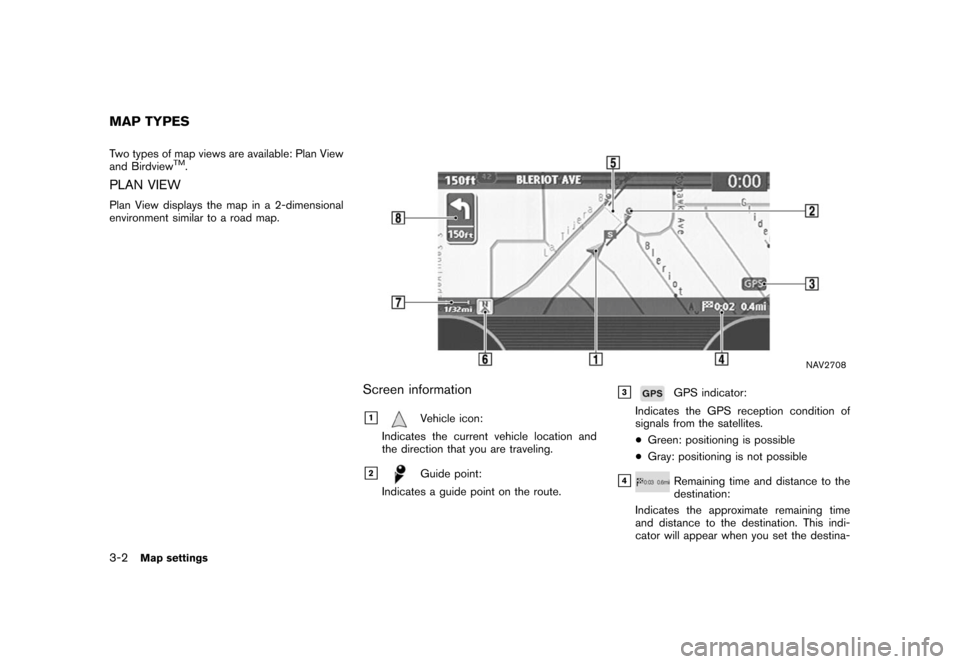
PLAN VIEWPlan View displays the map in a 2-dimensional
environment similar to a road map.
NAV2708
Screen information&1
Vehicle icon:
Indicates the current vehicle location and
the direction that you are traveling.
&2
Guide point:
Indicates a guide point on the route.
&3
GPS indicator:
Indicates the GPS reception condition of
signals from the satellites.
*Green: positioning is possible*Gray: positioning is not possible
&4
Remaining time and distance to the
destination:
Indicates the approximate remaining time
and distance to the destination. This indi-
cator will appear when you set the destina-
MAP TYPES3-2
Map settings
Page 49 of 272
tion and start route guidance.
&5Suggested route:
Appears in bold yellow during route gui-
dance.
&6
/
Direction indicator:
Indicates the direction of the map.
&7
Scale indicator:
Indicates the scale of the map.
&8
Arrow:
Indicates the distance to the next guide
point and the turning direction at that guide
point.
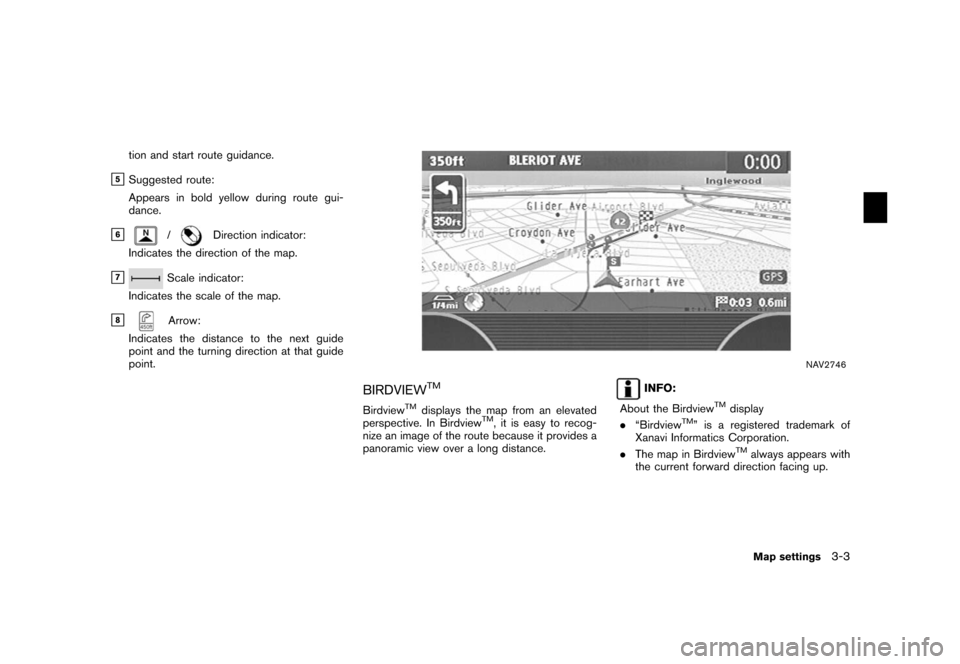
NAV2746
BIRDVIEW
TM
Birdview
TM
displays the map from an elevated
perspective. In Birdview
TM, it is easy to recog-
nize an image of the route because it provides a
panoramic view over a long distance.
INFO:
About the Birdview
TM
display
. “Birdview
TM” is a registered trademark of
Xanavi Informatics Corporation.
. The map in Birdview
TM
always appears with
the current forward direction facing up.Map settings
3-3
Page 50 of 272
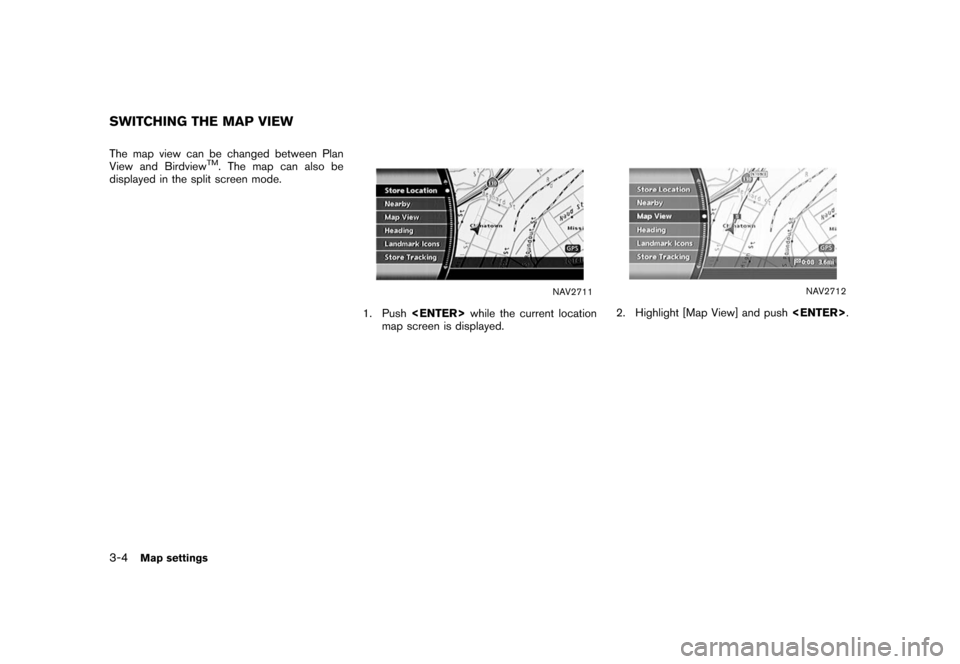
The map view can be changed between Plan
View and Birdview
TM. The map can also be
displayed in the split screen mode.
NAV2711
1. Push while the current location
map screen is displayed.
NAV2712
2. Highlight [Map View] and push
.
SWITCHING THE MAP VIEW3-4
Map settings
Page 51 of 272
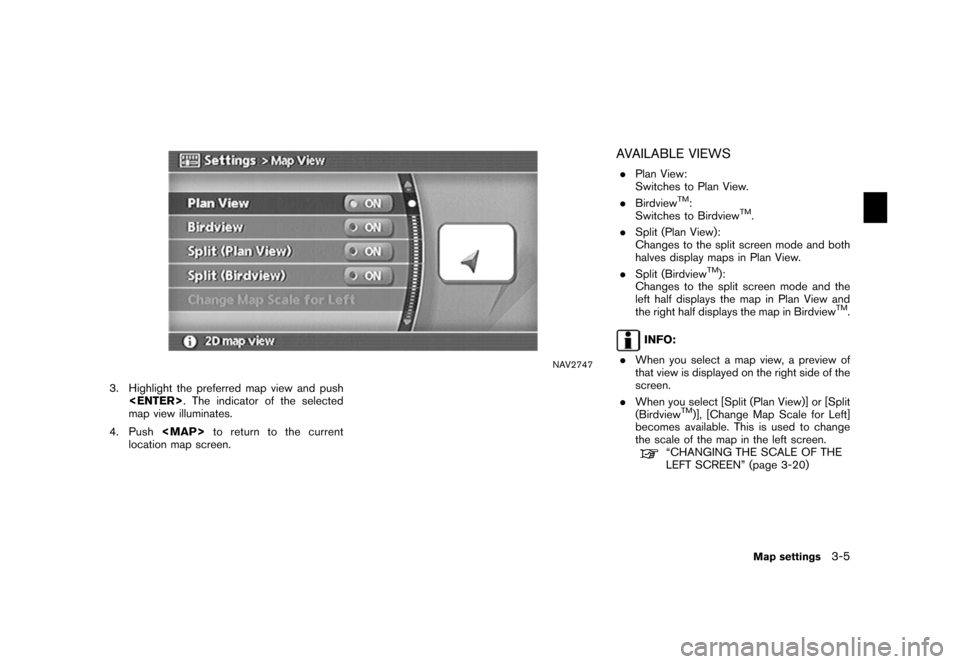
NAV2747
3. Highlight the preferred map view and push . The indicator of the selected
map view illuminates.
4. Push
Page 55 of 272
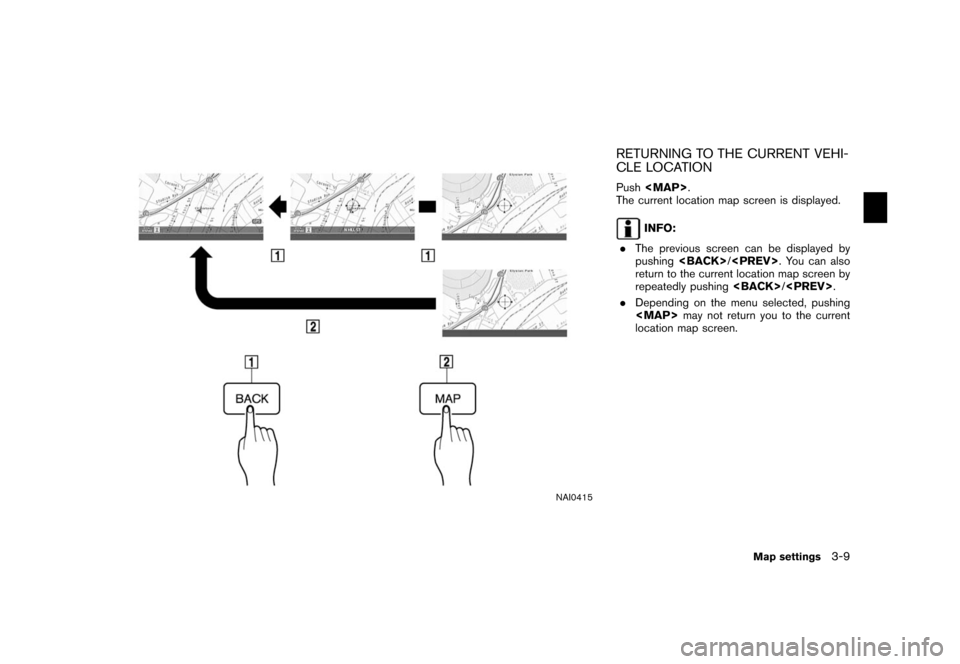
NAI0415
RETURNING TO THE CURRENT VEHI-
CLE LOCATIONPush
![NISSAN XTERRA 2006 N50 / 2.G Navigation Manual
NAV2729
3. Highlight [Travel] and push<ENTER>.
NAV2730
4. From the category list, highlight [AIRPORT]
and push <ENTER> .
The character input screen is displayed.
NAV2731
5. Highlight [OK] and push <E NISSAN XTERRA 2006 N50 / 2.G Navigation Manual
NAV2729
3. Highlight [Travel] and push<ENTER>.
NAV2730
4. From the category list, highlight [AIRPORT]
and push <ENTER> .
The character input screen is displayed.
NAV2731
5. Highlight [OK] and push <E](/img/5/699/w960_699-35.png)
![NISSAN XTERRA 2006 N50 / 2.G Navigation Manual
NAV2732
6. Highlight the preferred airport from the listand push <ENTER> .
NAV2733
INFO:
By selecting [By Distance], you can sort the
list by the shortest distance.
The position of the selected locat NISSAN XTERRA 2006 N50 / 2.G Navigation Manual
NAV2732
6. Highlight the preferred airport from the listand push <ENTER> .
NAV2733
INFO:
By selecting [By Distance], you can sort the
list by the shortest distance.
The position of the selected locat](/img/5/699/w960_699-36.png)
![NISSAN XTERRA 2006 N50 / 2.G Navigation Manual
NAV2741
3. A confirmation message is displayed. High-light [Yes] and push <ENTER>.
INFO:
If a route is cancelled, [Cancel Route Guidance]
changes to [Resume Route Guidance].
Highlight [Resume Route G NISSAN XTERRA 2006 N50 / 2.G Navigation Manual
NAV2741
3. A confirmation message is displayed. High-light [Yes] and push <ENTER>.
INFO:
If a route is cancelled, [Cancel Route Guidance]
changes to [Resume Route Guidance].
Highlight [Resume Route G](/img/5/699/w960_699-40.png)

