maintenance OPEL GT-R 1973 Workshop Manual
[x] Cancel search | Manufacturer: OPEL, Model Year: 1973, Model line: GT-R, Model: OPEL GT-R 1973Pages: 625, PDF Size: 17.22 MB
Page 281 of 625
5C- 221973 OPEL SERVICE MANUAL
DRUM BRAKES
CONTENTS
Subject
DESCRIPTION AND OPERATION:
Description of Brake Mechanism. . . . . . . . . . . . . . . . . . . . . . . . . . . . . . .OperationofHydraulicServiceBrake
. . . . . . . . . . . . . . . . . . . . . . . .DIAGNOSIS:
BrakeTrouble
Diagnosis. . . . . . . . . . . . . . . . . . . . . . . . . . . . . . . . . . . . . . . . . . . . . . . . . .MAINTENANCE AND ADJUSTMENTS:
BrakeAdjustment
. . . . . . . . . . . . . . . . . . . . . . . . . . . . . . . . . . . . . . . . . . . . . . . . . . . . . . . . . . . . . .Filling, Bleeding and Flushing Brake
Hydraulic System
. . . . . . . . . . . . . . . . . . . . . . . . . . . . . . . . . . . . . . . . . . . . . . . . . . . . . . . . . .MAJOR REPAIR:
Replace or Reline Brake Shoes
. . . . . . . . . . . . . . . . . . . . . . . . . . . . . . . . . . .Inspecting and Reconditioning Brake Drums
. . . . . . . . . .Brake Wheel Cylinder Overhaul
. . . . . . . . . . . . . . . . . . . . . . . . . . . . . . . . . .
ReplacingBrakePipes. . . . . . . . . . . . . . . . . . . . . . . . . . . . . . . . . . . . . . . . . . . . . . . . . . . . . .SPECIFICATIONS:
Brake Specifications
. . . . . . . . . . , . . . . . . . . . . . . . . . . . . . . . . . . . . . . . . . . . . . . . . . . . . . . .
DESCRIPTION AND OPERATION - DRUM
BRAKES
DESCRIPTION OF BRAKE MECHANISM
Wheel Brake Assemblies
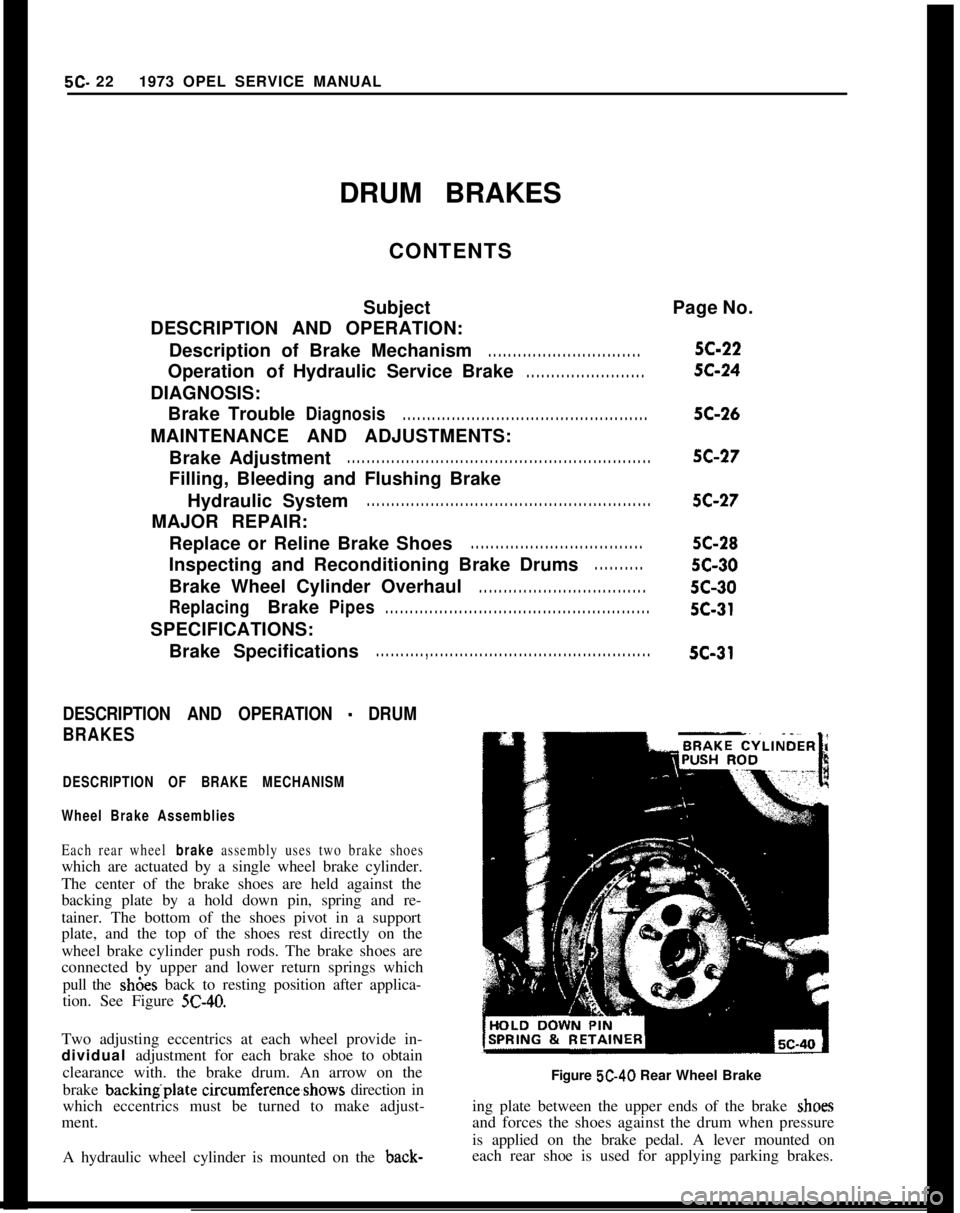
Each rear wheel brake assembly uses two brake shoeswhich are actuated by a single wheel brake cylinder.
The center of the brake shoes are held against the
backing plate by a hold down pin, spring and re-
tainer. The bottom of the shoes pivot in a support
plate, and the top of the shoes rest directly on the
wheel brake cylinder push rods. The brake shoes are
connected by upper and lower return springs which
pull the sh6es back to resting position after applica-
tion. See Figure
5C-40.Two adjusting eccentrics at each wheel provide in-
dividual adjustment for each brake shoe to obtain
clearance with. the brake drum. An arrow on the
brake backing.plate circumference,shows direction in
which eccentrics must be turned to make adjust-
ment.
A hydraulic wheel cylinder is mounted on the back-Page No.5C-225C-245C-26
5C-275C-275C-28
5c-30
5c-305c-315c-31
Figure 5C-40 Rear Wheel Brake
ing plate between the upper ends of the brake
shoeand forces the shoes against the drum when pressure
is applied on the brake pedal. A lever mounted on
each rear shoe is used for applying parking brakes.
Page 286 of 625
DRUM BRAKES5C- 27MAINTENANCE AND ADJUSTMENTSBRAKE ADJUSTMENT
Preliminary Checks
1. Depress brake pedal firmly. If pedal travels to
within two inches of toeboard and has a hard feel,
brake shoes require adjustment or relining. However,
if pedal has a spongy feel, brake system needs bleed-
ing.2. Remove one rear drum if lining is worn nearly to
rivets. Reline both rear brakes (drum brakes only).
3. Check fluid level in master cylinder reservoir and
add fluid if necessary.
4. Fully release parking brake lever and place trans-
mission in neutral.
5. Pull on both ends of rear brake cable a number of
times to make sure that cables operate rear brake
shoes freely and do not bind in conduits. Check for
free movement of cable in brake cable sheave and
check brake cable spring for tension. Replace a weak
or broken cable spring.
Pedal Height Adjustment
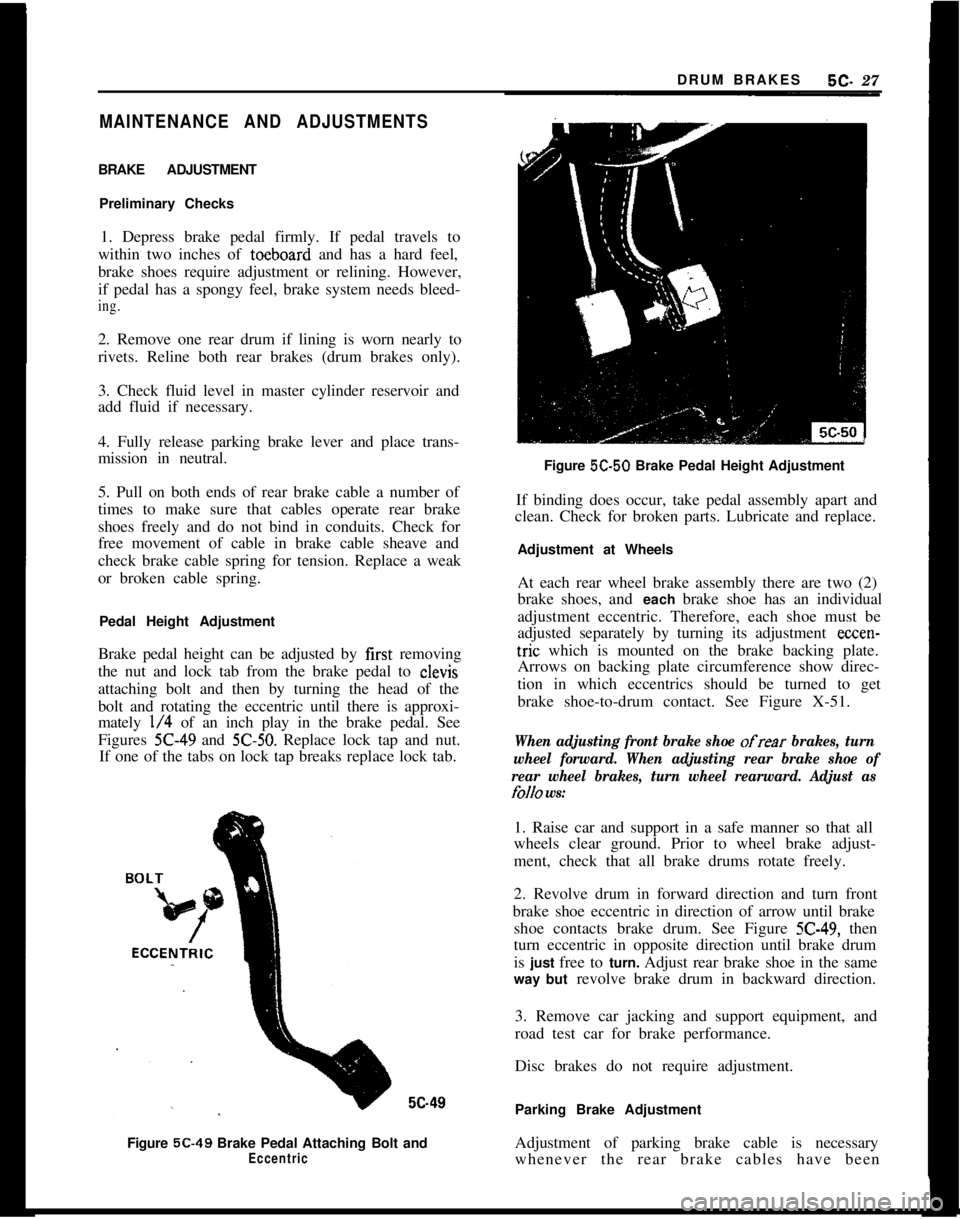
Brake pedal height can be adjusted by first removing
the nut and lock tab from the brake pedal to clevis
attaching bolt and then by turning the head of the
bolt and rotating the eccentric until there is approxi-
mately
l/4 of an inch play in the brake pedal. See
Figures
X-49 and 5C-50. Replace lock tap and nut.
If one of the tabs on lock tap breaks replace lock tab.5c49
Figure 5C-49 Brake Pedal Attaching Bolt and
EccentricFigure 5C-50 Brake Pedal Height Adjustment
If binding does occur, take pedal assembly apart and
clean. Check for broken parts. Lubricate and replace.
Adjustment at Wheels
At each rear wheel brake assembly there are two (2)
brake shoes, and each brake shoe has an individual
adjustment eccentric. Therefore, each shoe must be
adjusted separately by turning its adjustment
ccccn-tric which is mounted on the brake backing plate.
Arrows on backing plate circumference show direc-
tion in which eccentrics should be turned to get
brake shoe-to-drum contact. See Figure X-51.
When adjusting front brake shoe ofrear brakes, turn
wheel forward. When adjusting rear brake shoe of
rear wheel brakes, turn wheel rearward. Adjust as
folio ws:1. Raise car and support in a safe manner so that all
wheels clear ground. Prior to wheel brake adjust-
ment, check that all brake drums rotate freely.
2. Revolve drum in forward direction and turn front
brake shoe eccentric in direction of arrow until brake
shoe contacts brake drum. See Figure
5C-49, then
turn eccentric in opposite direction until brake drum
is just free to turn. Adjust rear brake shoe in the same
way but revolve brake drum in backward direction.
3. Remove car jacking and support equipment, and
road test car for brake performance.
Disc brakes do not require adjustment.
Parking Brake Adjustment
Adjustment of parking brake cable is necessary
whenever the rear brake cables have been
Page 293 of 625
6A- 21973 OPEL SERVICE MANUAL
ENGINE
CONTENTS
Subject
DESCRIPTION AND OPERATION:
EngineConstruction..........................................................
LubricationSystem............................................................
DIAGNOSIS:
Excessive Oil Consumption............................................NoisyValvesandLifters..................................................
MAINTENANCE AND ADJUSTMENTS:
Valve
LifterAdjustment..................................................
MAJOR REPAIR:
Engine Removal and Installation..................................
Engine
OilPanRemoval
andInstallation..................
Manifold, Cylinder Head, Valve Train and
Lifters................................................................................
Connecting Rod Bearings................................................
Crankshaft Bearings and Seals....................................
Piston, Rings and Connecting Rods............................
TimingChainCoverandTimingChain......................
Camshaft..............................................................................
Oil Pump Cover and Gears............................................
SPECIFICATIONS:
BoltTorque.Specifications
..............................................General Specifications......................................................
Engine Dimension and Fits............................................Page No.
6A- 2
6A- 4
6A- 6
6A- 6
6A- 7
6A- 86A-106A-126A-156A-166A-196A-236A-256A-266A-276A-286A-29
DESCRIPTION AND OPERATION
ENGINE CONSTRUCTION
Engine UsageThe 1.9 liter engine is standard equipment on all 1973
Opel
1900, Manta and GT models. This engine has
a compression ratio of
7.6:1 and operates on“regular” low lead grade fuel.
Engine ConstructionThe
cyfinderhead is made of high-grade chromium
grey cast iron. The valve guides are cast intergal with
the head. The overhead camshaft is supported in four
bearings in the cylinder head.Location of the
vzllve seats in combustion chamber
is above the center of cylinder bore. The spark plug
is positioned in the center and near the highest point
of combustion chamber. This arrangement provides
for short flame travel, uniform combustion and good
cold start prop&ties. Exhaust valves have seat in-serts of highly heat and water resisting material. The
head surface is alumetized and so are the seats of the
inlet v&es Alumetizing makes the valve heads
non- scaling and promotes long life. All engines have“rota-caps”.
The forged, five main bearing crankshaft has large-
diameter main and connecting rod bearing journals
with considerable overlap for vibration-free operat-
ion. T&metal bearing shells are used for main and
connecting rod bearings. The crankshaft end play is
controlled by the rear main bearing.
Page 298 of 625
ENGINE MECHANICAL AND MOUNTS6A- 7
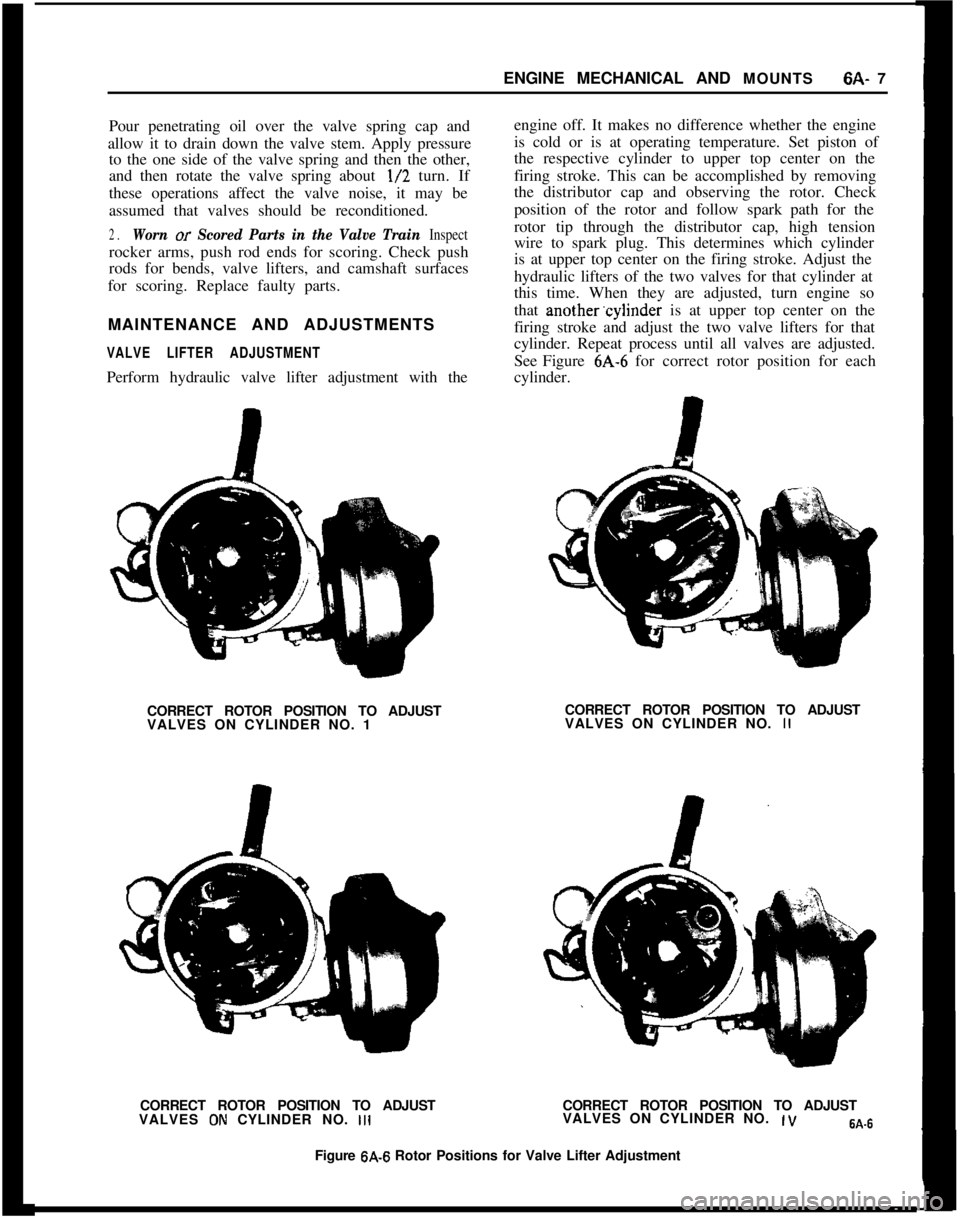
Pour penetrating oil over the valve spring cap andengine off. It makes no difference whether the engine
allow it to drain down the valve stem. Apply pressureis cold or is at operating temperature. Set piston of
to the one side of the valve spring and then the other,the respective cylinder to upper top center on the
and then rotate the valve spring about l/2 turn. Iffiring stroke. This can be accomplished by removing
these operations affect the valve noise, it may bethe distributor cap and observing the rotor. Check
assumed that valves should be reconditioned.position of the rotor and follow spark path for the
2.Worn or Scored Parts in the Valve Train Inspectrotor tip through the distributor cap, high tension
rocker arms, push rod ends for scoring. Check pushwire to spark plug. This determines which cylinder
rods for bends, valve lifters, and camshaft surfacesis at upper top center on the firing stroke. Adjust the
for scoring. Replace faulty parts.hydraulic lifters of the two valves for that cylinder at
this time. When they are adjusted, turn engine so
MAINTENANCE AND ADJUSTMENTSthat another.cylinder is at upper top center on the
firing stroke and adjust the two valve lifters for that
VALVE LIFTER ADJUSTMENTcylinder. Repeat process until all valves are adjusted.
See Figure 6A-6 for correct rotor position for each
Perform hydraulic valve lifter adjustment with thecylinder.
CORRECT ROTOR POSITION TO ADJUSTCORRECT ROTOR POSITION TO ADJUST
VALVES ON CYLINDER NO. 1VALVES ON CYLINDER NO. II
CORRECT ROTOR POSITION TO ADJUSTCORRECT ROTOR POSITION TO ADJUST
VALVES
ON CYLINDER NO. IllVALVES ON CYLINDER NO. ,VW-6Figure
6A-6 Rotor Positions for Valve Lifter Adjustment
Page 306 of 625
ENGINE MECHANICAL AND MOUNTS6A- 15New inlet valves must not be refaced or lapped with
grinding compound.The correct angle for the intake
and exhaust valve head is 44 degrees.10. Install cylinder head.
11. Adjust valve clearance. See MAINTENANCE
AND ADJUSTMENTS.
7. Inspect valve guides. Worn or pitted guides can be
reamed to accept valves with oversize stems. Over-
size valves are occasionally used in production.
Oversize valves are marked
’ 1 u “2” or “A” and are
stamped into the valve stem end and also stamped
near spark plug hole. See Figure 6A-22.
Replacing Rocker Arm Studs1. When replacing rocker arm studs become
neces-
sary, remove air cleaner, rocker arm cover and
rocker arm.
8. Reseat valve seats in cylinder head in the following
sequence:
Intake
NOTE:The rocker arm studs are screwed into the
cylinder head. A tapered part of the stem serves to
a void stud loosening.With 45 degrees cutter, remove burnt structure until
a metallic bright seat is obtained. Lightly coat valve
head with red lead, insert it into guide and turn it
under light pressure several times back and forth.
Thereby a contact pattern is obtained and the seat
width can be measured. If valve does not seat per-
fectly all around, lightly recut valve seat to the estab-
lished seat width of
,049” - .059” with 30 degrees
correction cutter.
ExhaustThe directions for reconditioning intake valve seats
apply in principle also to exhaust valve seat recondi-
tioning with the exception that the valve seat width
should be
.063-,073 in. and different cutters are em-
ployed.
NOTE:
: OTse new valve seals whenever
valves are reconditioned.9. Lube valves with engine oil and reinstall valves,
valve springs, caps and cap retainers using J-8062.
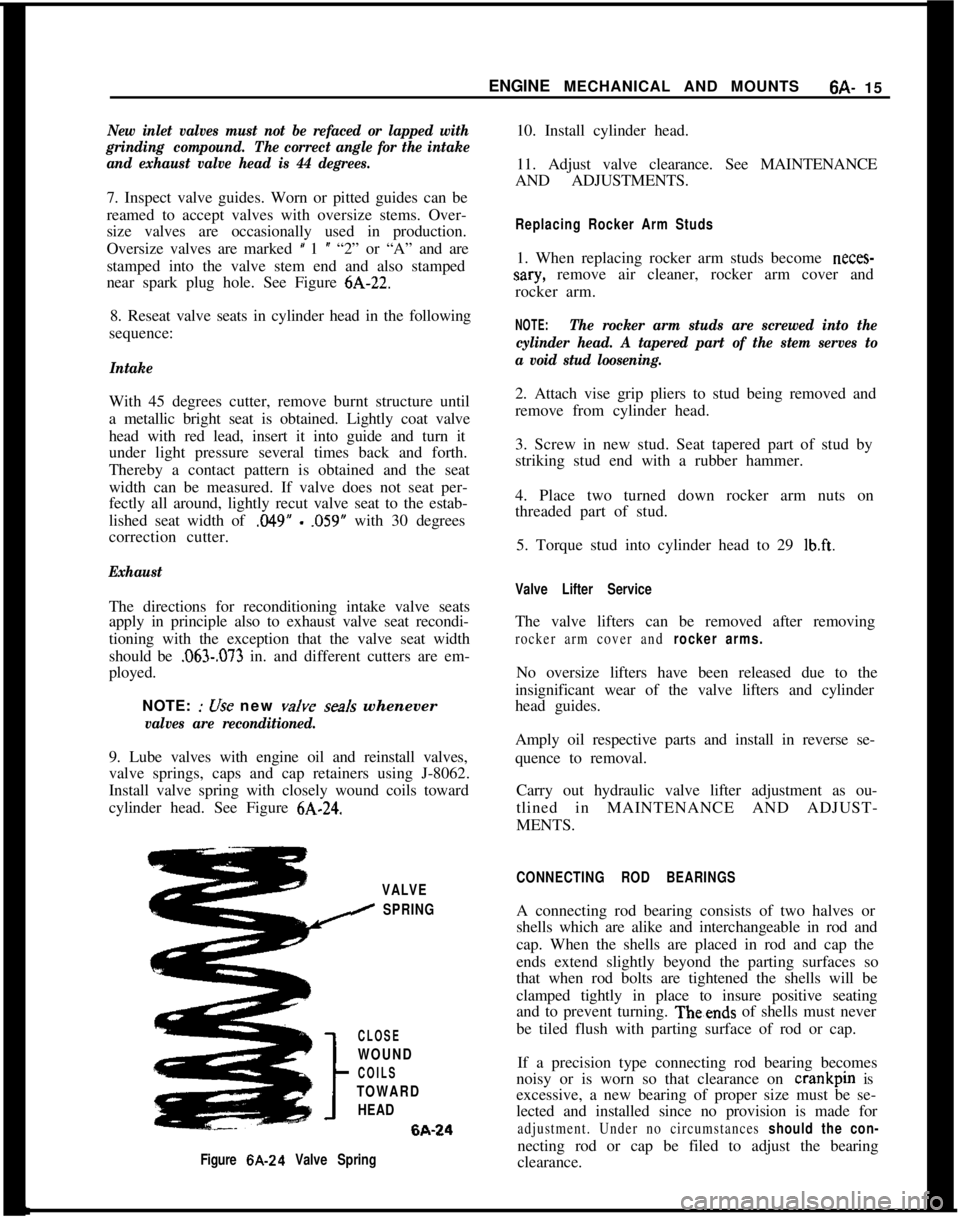
Install valve spring with closely wound coils toward
cylinder head. See Figure
6A-24.2. Attach vise grip pliers to stud being removed and
remove from cylinder head.
3. Screw in new stud. Seat tapered part of stud by
striking stud end with a rubber hammer.
4. Place two turned down rocker arm nuts on
threaded part of stud.
5. Torque stud into cylinder head to 29
lb.ft.
Valve Lifter ServiceThe valve lifters can be removed after removing
rocker arm cover and rocker arms.No oversize lifters have been released due to the
insignificant wear of the valve lifters and cylinder
head guides.
Amply oil respective parts and install in reverse se-
quence to removal.
Carry out hydraulic valve lifter adjustment as ou-
tlined in MAINTENANCE AND ADJUST-
MENTS.
VALVE
I SPRING
CLOSE
WOUND
COILS
TOWARD
HEAD6A-24
Figure 6A-24 Valve SpringCONNECTING ROD BEARINGSA connecting rod bearing consists of two halves or
shells which are alike and interchangeable in rod and
cap. When the shells are placed in rod and cap the
ends extend slightly beyond the parting surfaces so
that when rod bolts are tightened the shells will be
clamped tightly in place to insure positive seating
and to prevent turning. Theends of shells must never
be tiled flush with parting surface of rod or cap.
If a precision type connecting rod bearing becomes
noisy or is worn so that clearance on crankpin is
excessive, a new bearing of proper size must be se-
lected and installed since no provision is made for
adjustment. Under no circumstances should the con-necting rod or cap be filed to adjust the bearing
clearance.
Page 323 of 625
66.321973 OPEL SERVICE MANUAL
COOLING SYSTEM
CONTENTS
Subject
DESCRIPTION AND OPERATION:
Cooling System and Water Pump
. . . . . . . . . . . . . . . . . . . . . . . . . . . . . . . .DIAGNOSIS: (Not Applicable)
MAINTENANCE AND ADJUSTMENTS:
Checking and Filling Cooling System
. . . . . . . . . . . . . . . . . . . . . . . .Draining
andFlushingCoolingSystem. . . . . . . . . . . . . . . . . . . . . .Conditioning the Cooling System
. . . . . . . . . . . . . . . . . . . . . . . . . . . . . . . .Using and Testing Anti-Freeze Solutions
. . . . . . . . . . . . . . . . . .Fan Belt Adjustment or Replacement
. . . . . . . . . . . . . . . . . . . . . . . .Radiator Thermostat Inspection and Test
. . . . . . . . . . . . . . . .MAJOR REPAIR:
Water Pump Removal
. . . . . . . . . . . . . . . . . . . . . . . . . . . . . . . . . . . . . . . . . . . . . . . . . . . . .Radiator
Removal. . . . . . . . . . . . . . . . . . . . . . . . . . . . . . . . . . . . . . . . . . . . . . . . . . . . . . . . . . . . . .SPECIFICATIONS:
Cooling System Capacities
. . . . . . . . . . . . . . . . . . . . . . . . . . . . . . . . . . . . . . . . . . . .Page No.
68-32
6B-32
68-32
68-33
68-33
68-33
68-33
68-34
68-34
6B-35
DESCRIPTION AND OPERATION
COOLING SYSTEM AND WATER PUMPThe coiling system is of the conventional pressurized
type. A centrifugal pump arranged in timing case
serves to circulate the coolant.
When the thermostat is closed, the coolant will re-
turn to the pump via a by-pass for swift and uniform
warming up of the engine the coolant circulates
through the radiator, only when the engine has
reached normal operating temperature.
The heater system branches off the cooling system
ahead of thermostat in flow direction so that the
heater is in operation before engine has reached full
operating temperature.
MAINTENANCE AND ADJUSTMENTS
Checking and Filling Cooling SystemThe coolant level should be checked only when the
engine is cold and only enough coolant should be
added to bring the level halfway between core andtank top. It is unnecessary and undesirable to remove
the radiator cap and check the coolant level each
time the car stops at a filling station for gasoline or
oil, since the engine is usually hot at such times.
WARNING: Never remove the radiator cap quickly
when engine is HOT Sudden release of cooling
sys-
tern pressure may cause the coolant to boil and some
of it may be ejected from the radiator
filler neck,
resulting in
inl’ury to persons or damage to the car
finish.If it is necessary at any time to remove the radiator
cap when engine is hot, rotate the cap counterclock-
wise until first stop is reached. Leave cap in this
position until all pressure in cooling system has been
released, then turn cap past the first stop and remove
it.
Draining and Flushing
Cooling SystemThe cooling system should be completely drained
and the recommended coolant installed every two (2)
years.To drain the cooling system, remove radiator cap,
remove lower radiator hose from the lower tank and
Page 327 of 625
6C- 361973 OPEL SERVICE MANUAL
FUEL SYSTEM
ALL MODELS
CONTENTS
Subject
DESCRIPTION AND OPERATION:
Fuel Pump. . . . . . . . . . . . . . . . . . . . . . . . . . . . . . . . . . . . . . . . . . . . . . . . . . . . . . . . . . . . . . . . .. . . . . . . . . . .Evaporation Control System
. . . . . . . . . . . . . . . . . . . . . . . . . . . . . . . . . . . . . . . . . .DIAGNOSIS:
(Not Applicable)
MAINTENANCE AND ADJUSTMENTS:
Cleaning Fuel Pump Strainer.,....................................
*.Evaporation Control System
. . . . . . . . . . . , . . . . . . . . . . . . . . . . . . . . . . . . . . . . . .MAJOR REPAIR:
Fuel Tank
. . . . . . . . . . . . . . . . . . . . . . . . . . . . . . . . . . . . . . . . . . . . . . . . . . . . . . . . . . . . . . . . . . . . . . . . . . . . . .Fuel Lines and Fuel Tank Gauge Units
. . . . . . . . . . . . . . . . . . . . . .SPECIFICATIONS:
Fuel System Specifications
. . . . . . . . . . . . . . . . . . . . . . . . . . . . . . . . . . . . . . . . . . .Page No.6C-366C-376C-376C-386C-396C-416C-41
DESCRIPTION AND OPERATION
FUEL PUMPThe 1.9 liter engine uses a push rod type fuel pump.
The push rod is actuated by an eccentric on the
distributor shaft. The push rod is held in contact
with the eccentric at all times by a push rod spring.
Each time the push rod is on the high part of the
eccentric, the lighter diaphragm spring will push the
diaphragm to replace any fuel used in the carburetor.
The diaphragm seldom operates through a full
stroke; under normal driving conditions, the dia-
phragm moves only a few tenths of an inch.
Fuel pump pressure is determined by the compres-
sion of the diaphragm spring. Low pressure or pres-
sure leak- down generally indicates a leaky
diaphragm or check valves.
Two holes in the lower part of the fuel pump serve
to ventilate the space below the diaphragm and to
drain any fuel which may have entered. If any fuel
comes from these holes, this indicates a defective
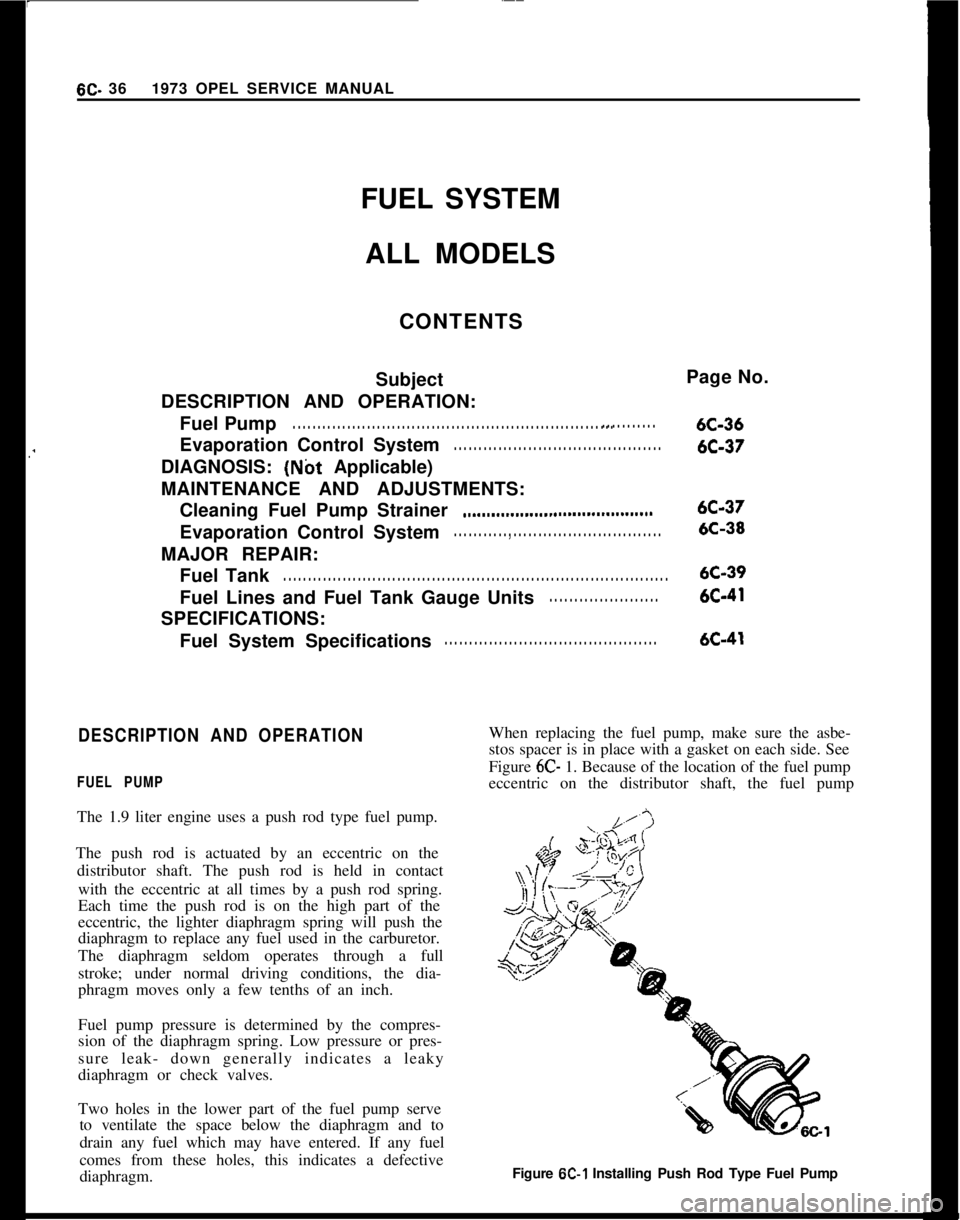
diaphragm.When replacing the fuel pump, make sure the asbe-
stos spacer is in place with a gasket on each side. See
Figure 6C- 1. Because of the location of the fuel pump
eccentric on the distributor shaft, the fuel pump
Figure
6C-1 Installing Push Rod Type Fuel Pump
Page 328 of 625
FUEL SYSTEMSC- 37
must always be removed before the distributor can be
removed.
EVAPORATION CONTROL SYSTEM1. The function of the fuel evaporation control sys-
tem is to absorb the fuel vapors developing in the fuel
tank, especially when vehicle is parked, due to at-
mospheric pressure and temperature influences, and
to release these fuel vapors during vehicle operation.
2. This system utilizes the property of the activated
carbon to absorb and expel fuel vapors. The activated
carbon container is installed on the left front side of
the engine compartment. The fuel tank has a
non-vented tiller cap. Vent hoses are joined in the area of
the tank. A plastic evaporation line leads from there
along vehicle underbody to the activated carbon con-
tainer.
3. A small tube above the throttle valve body con-
nects the carburetor to the activated carbon con-
tainer. In this way, the fuel vapor collected in the
activated carbon container is fed through the carbu-
retor into the combustion chambers during engine
operation.
4. The carburetor is provided with an internal and
outside ventilation, the activated carbon container is
also connected to the outside ventilation (only effec-
tive when engine is idling). In this way, the fuel
vapors escaping to the outside during engine idle are
collected by the activated carbon container and fed
into the combustion chambers.
5. The vent lines are connected to the upper part of
the activated carbon container. Fresh air enters
through a foam rubber filter at the lower part andflows, together with the fuel vapor, to the carburetor.
Metered bores in the hose fittings of the fuel tank
control the air
- and fuel vapor flow through the
activated carbon container to the carburetor, and the
pressure release in the fuel tank and ensure complete
purging of the carbon container.
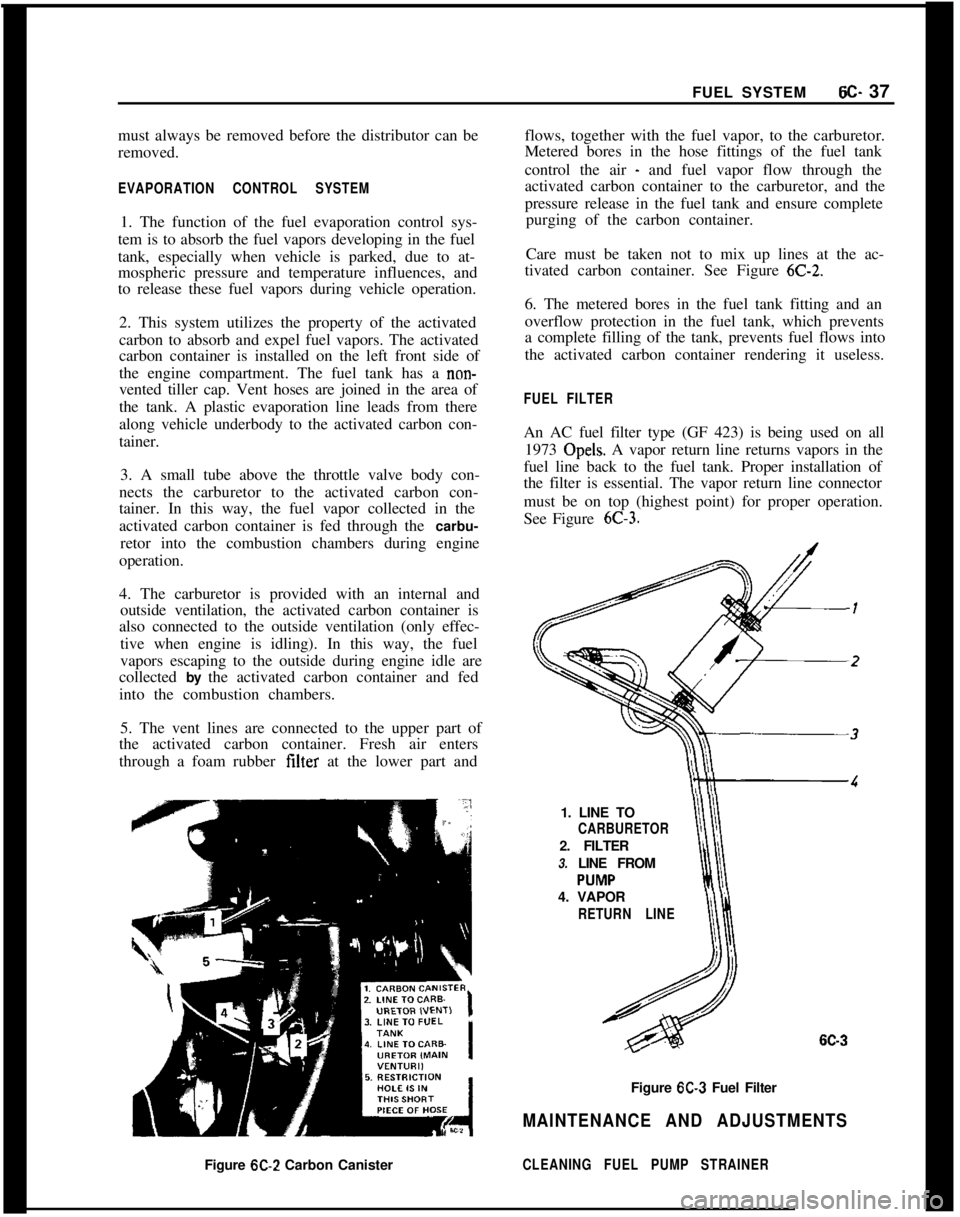
Care must be taken not to mix up lines at the ac-
tivated carbon container. See Figure
6C-2.6. The metered bores in the fuel tank fitting and an
overflow protection in the fuel tank, which prevents
a complete filling of the tank, prevents fuel flows into
the activated carbon container rendering it useless.
FUEL FILTERAn AC fuel filter type (GF 423) is being used on all
1973 Opels. A vapor return line returns vapors in the
fuel line back to the fuel tank. Proper installation of
the filter is essential. The vapor return line connector
must be on top (highest point) for proper operation.
See Figure
6C-3.1. LINE TO
CARBURETOR2. FILTER
3. LINE FROM
4. VAPOR
RETURN LINE
6C-3Figure
6C-3 Fuel Filter
MAINTENANCE AND ADJUSTMENTSFigure
6C-2 Carbon CanisterCLEANING FUEL PUMP STRAINER
Page 329 of 625
6C- 381973 OPEL SERVICE MANUALCAUTION:Because the fuel pump is below fuel tank
level, fuel
will drain from the tank. when the supply
hne is disconnected from the fuel pump.1. Pull fuel supply line and rubber connector from
fuel pump. Plug rubber connector to prevent fuel
loss.2. Remove fuel pump cap, gasket and plastic
strainer.
3. Cover center opening in sediment bowl with finger
and blow out sediment bowl with compressed air.
4. Wash plastic strainer in solvent; if strainer does
not clean-up or is damaged, replace strainer.
5. Install clean parts, noting the following:
(a) Strainer must be properly seated with projections
facing upward.(b) A new cap gasket must be positioned over
strainer.
(c) Sealing ring must be in place on cap retaining
screw.6. Reconnect fuel supply line. Start engine and check
for leaks.
EVAPORATION CONTROL SYSTEMProper performance of the system requires the use of
a non-vented fuel tank cap, hose connections be leak-
free, and all hoses routed correctly to avoid a
pinched or blocked line.
Maintenance requirements demand only that the ac-
cumulator purge air tilter, an oiled foam filter assem-
bled in the bottom of the canister, be replaced at
12,CKO mile intervals. Under extremely dusty condi-
tions, more frequent attention may be required.
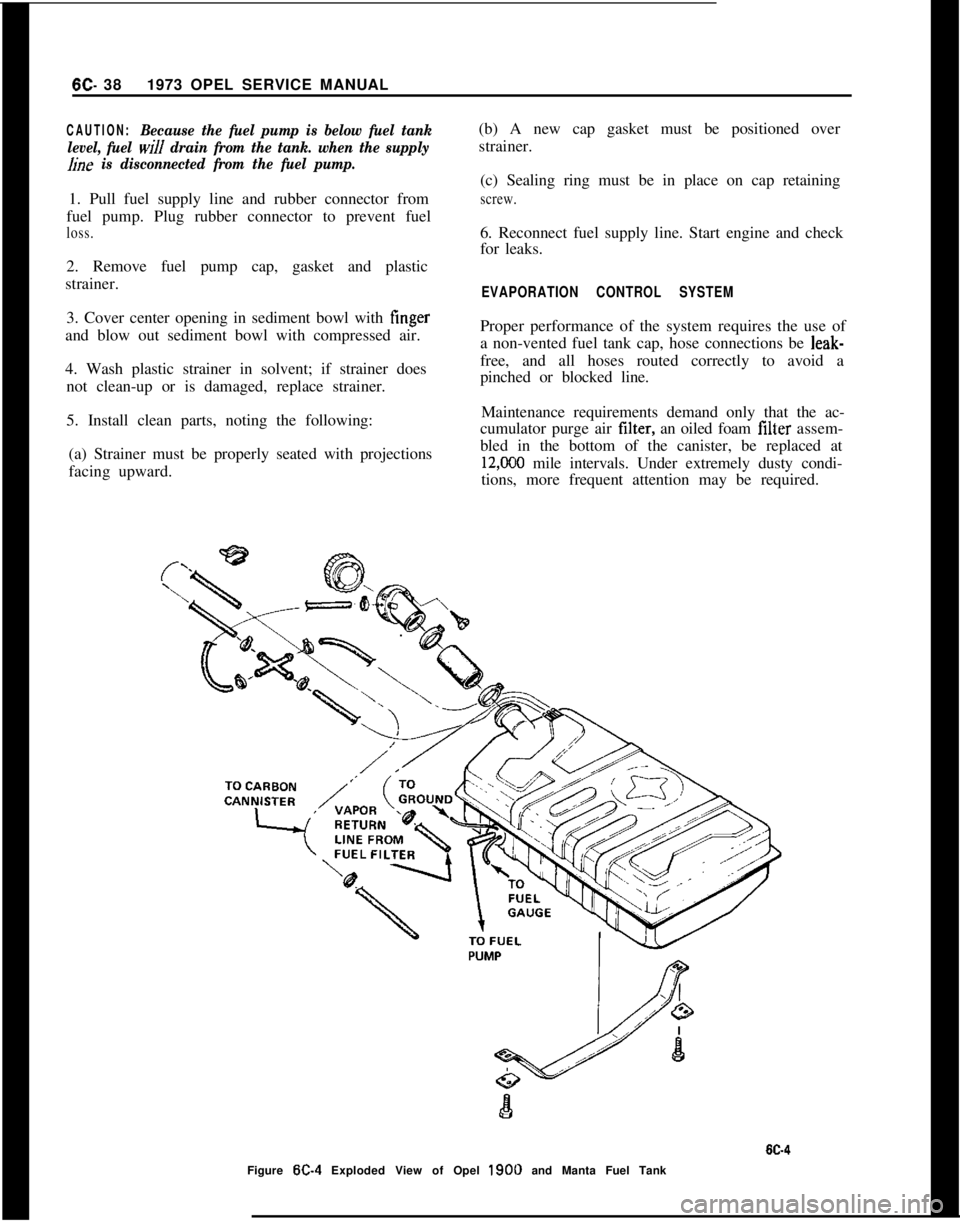
Figure
W-4 Exploded View of Opel 1900 and Manta Fuel Tank
Page 333 of 625

6D. 421973 OPEL SERVICE MANUAL
EXHAUST SYSTEMS
ALL MODELS
CONTENTS
Subject
DESCRIPTION AND OPERATION: (Not Applicable)
DIAGNOSIS: (Not Applicable)
MAINTENANCE AND ADJUSTMENTS: (Not
Applicable)
MAJOR REPAIR:Page No.
Exhaust System (All Models). . . . . . . . . , . . . . . . . . . . . . . . . . . . . . . . . . . . . . . .SPECIFICA’TIONS:
Torque Specifications
. . . . . . . . . . . . . . . . . . . . . . . . . . . . . . . . . . . . . . . . . . . . * . . . . . . . . .
6D-42
6D-42
MAJOR REPAIR
EXHAUST SYSTEM (ALL MODELS)
Removal1. Remove exhaust pipe from exhaust manifold.
2. Loosen front exhaust pipe to mufller clamp and
pull exhaust pipe out of muffler.
3. Remove muffler damper rings.
4. Remove center exhaust pipe clamp. Remove rearmut&r and tail pipe(s) as an assembly. See Figure
6D-1.5. Remove front exhaust pipe clamp, and remove
front muffler and center exhaust pipe as an assembly,then remove center exhaust pipe from front mufler.
The front mufIler and center exhaust pipe are one
piece on production-built cars but are separate itemsfor service, the tail pipe of the Rallye and GT, has
a dual pipe with one resonator.
InstallationCheck rubber damper rings for muffler and tail pipe
hanger and replace as necessary.
1. Coat I.D. of rear muffler inlet neck and O.D. of
center exhaust pipe outlet (rear of pipe) with exhaust
sealer compound (several brands are currently avail-able on the market).2. Insert center exhaust pipe into rear mufIler and
tighten clamp.
3. Coat I.D. of front muffler outlet neck and O.D. of
center exhaust pipe inlet (front of pipe) with exhaust
sealer compound.4. Insert center exhaust pipe into front mufiler and
tighten clamp.
5. Install muffler and tail pipe assembly on rubber
damper rings and tighten hangers. See Figures
6D-1and
6D-2.6. Install front exhaust pipe into muffler. Do not
tighten clamp.
7. Be sure to install gasket between exhaust manifoldand exhaust pipe. Using bolts with washers, attach
the exhaust pipe to the exhaust manifold. Torque to
15 lb.ft.8. Align exhaust system and tighten all clamps.
9. Check alignment of exhaust system; make sure
that the exhaust system components have at least
3/4” clearance from the floor pan to avoid possible
overheating of the floor pan.
SPECIFICATIONS
TORQUE SPECIFICATIONSExhaust Pipe to Exhaust Manifold
- 15 lb.ft.