wheel Peugeot 306 Break 2002 User Guide
[x] Cancel search | Manufacturer: PEUGEOT, Model Year: 2002, Model line: 306 Break, Model: Peugeot 306 Break 2002Pages: 131, PDF Size: 2.25 MB
Page 102 of 131
MAINTENANCE OF YOUR 306
32
12
2
1
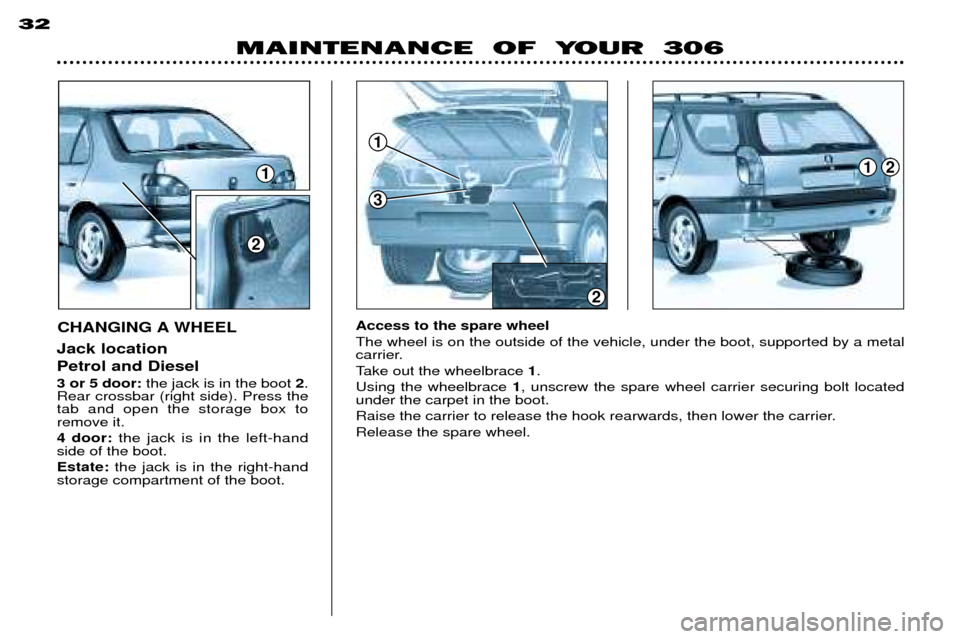
CHANGING A WHEEL
1
3
2
Jack location Petrol and Diesel 3 or 5 door:
the jack is in the boot 2.
Rear crossbar (right side). Press the tab and open the storage box toremove it. 4 door: the jack is in the left-hand
side of the boot. Estate: the jack is in the right-hand
storage compartment of the boot. Access to the spare wheel The wheel is on the outside of the vehicle, under the boot, supported by a metal
carrier.
Take out the wheelbrace
1.
Using the wheelbrace 1, unscrew the spare wheel carrier securing bolt located
under the carpet in the boot.
Raise the carrier to release the hook rearwards, then lower the carrier.Release the spare wheel.
Page 103 of 131
MAINTENANCE OF YOUR 30633
For your safety, always change the wheel:
- on level, stabIe and non-slippe- ry ground,
- with the handbrake applied,
- with first gear or reverse enga- ged (position Pfor the automa-
tic gearbox).
Never go underneath a vehicle which is supported only by a jack.(Use a ramp).
To fit the wheel After positioning the wheel, pre- tighten the bolts using the wheel-brace. Lower the jack and remove it.Fully tighten the wheel bolts using the wheelbrace. Fit the wheel trim starting with the section by the valve and press intoplace using the palm of the hand.
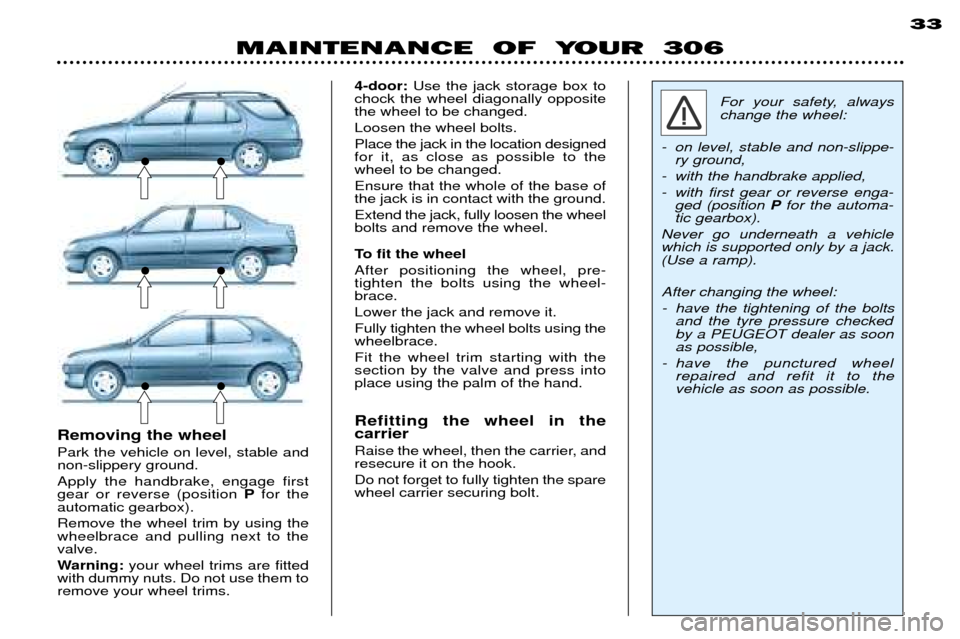
Removing the wheel Park the vehicle on level, stable and non-slippery ground. Apply the handbrake, engage first gear or reverse (position Pfor the
automatic gearbox). Remove the wheel trim by using the wheelbrace and pulling next to thevalve.
Warning: your wheel trims are fitted
with dummy nuts. Do not use them to remove your wheel trims.4-door: Use the jack storage box to
chock the wheel diagonally opposite the wheel to be changed. Loosen the wheel bolts.Place the jack in the location designed for it, as close as possible to thewheel to be changed. Ensure that the whole of the base of the jack is in contact with the ground. Extend the jack, fully loosen the wheel bolts and remove the wheel. Refitting the wheel in the carrier
Raise the wheel, then the carrier, and resecure it on the hook. Do not forget to fully tighten the spare wheel carrier securing bolt. After changing the wheel:
- have the tightening of the bolts
and the tyre pressure checked by a PEUGEOT dealer as soonas possible,
- have the punctured wheel repaired and refit it to thevehicle as soon as possible.
Page 104 of 131
MAINTENANCE OF YOUR 306
34
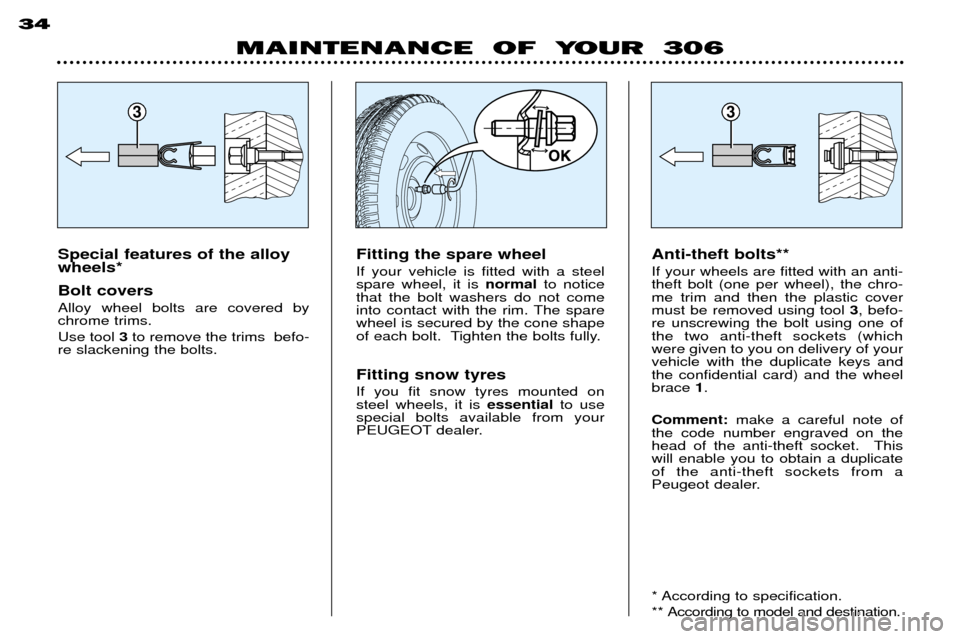
Special features of the alloy wheels* Bolt covers Alloy wheel bolts are covered by chrome trims. Use tool
3to remove the trims befo-
re slackening the bolts. Anti-theft bolts** If your wheels are fitted with an anti- theft bolt (one per wheel), the chro-me trim and then the plastic covermust be removed using tool
3, befo-
re unscrewing the bolt using one ofthe two anti-theft sockets (whichwere given to you on delivery of yourvehicle with the duplicate keys andthe confidential card) and the wheelbrace 1.
Comment: make a careful note of
the code number engraved on the
head of the anti-theft socket. Thiswill enable you to obtain a duplicateof the anti-theft sockets from a
Peugeot dealer.
* According to specification.
** According to model and destination.
Fitting the spare wheel If your vehicle is fitted with a steel spare wheel, it is
normalto notice
that the bolt washers do not come
into contact with the rim. The sparewheel is secured by the cone shape
of each bolt. Tighten the bolts fully. Fitting snow tyres If you fit snow tyres mounted on steel wheels, it is essentialto use
special bolts available from your
PEUGEOT dealer.
33
Page 109 of 131
MAINTENANCE OF YOUR 306
38
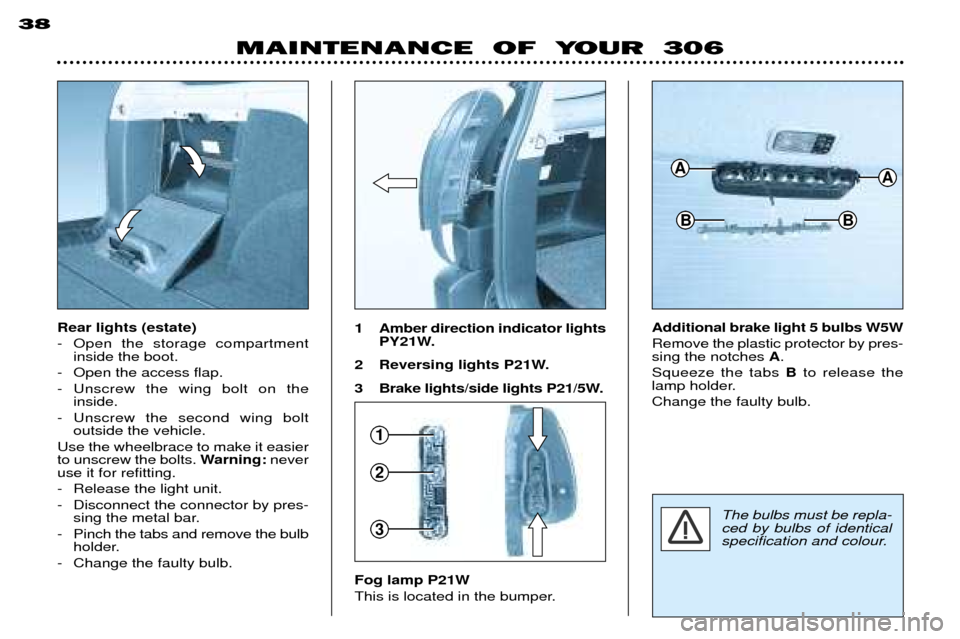
Rear lights (estate)
- Open the storage compartment
inside the boot.
- Open the access flap.
- Unscrew the wing bolt on the inside.
- Unscrew the second wing bolt outside the vehicle.
Use the wheelbrace to make it easier to unscrew the bolts. Warning:never
use it for refitting.
- Release the light unit.
- Disconnect the connector by pres- sing the metal bar.
- Pinch the tabs and remove the bulb holder.
- Change the faulty bulb.
Fog lamp P21W
This is located in the bumper.Additional brake light 5 bulbs W5WRemove the plastic protector by pres- sing the notches
A.
Squeeze the tabs Bto release the
lamp holder. Change the faulty bulb.
1 Amber direction indicator lights
PY21W.
2 Reversing lights P21W.
3 Brake lights/side lights P21/5W.
AA
BB
1
2
3The bulbs must be repla- ced by bulbs of identical
specification and colour.
Page 118 of 131
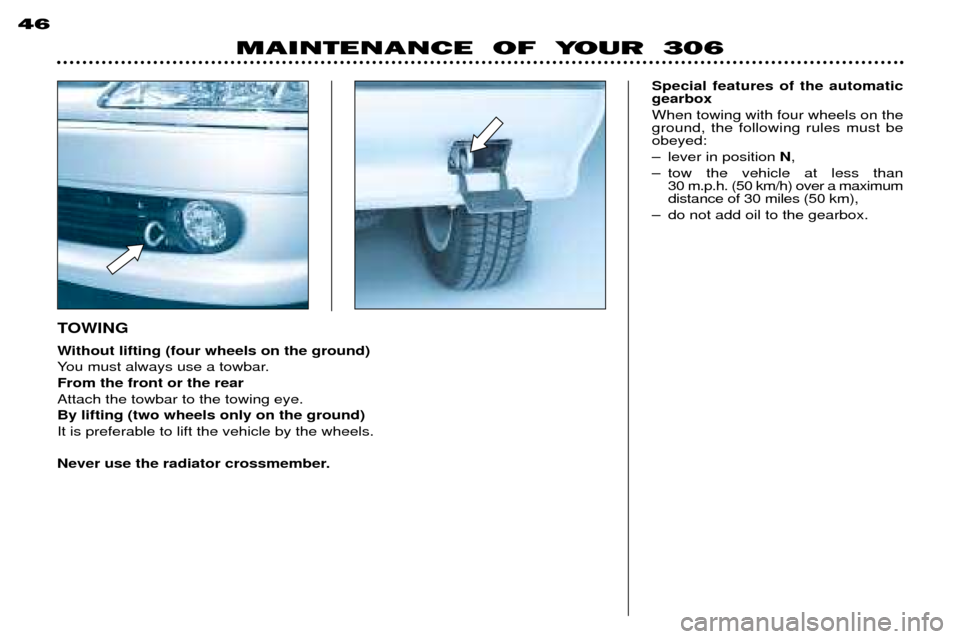
TOWING
Without lifting (four wheels on the ground)
You must always use a towbar.From the front or the rearAttach the towbar to the towing eye.By lifting (two wheels only on the ground)It is preferable to lift the vehicle by the wheels.
Never use the radiator crossmember.
MAINTENANCE OF YOUR 306
46
Special features of the automatic gearbox When towing with four wheels on the ground, the following rules must beobeyed:
Ð lever in position N,
Ð tow the vehicle at less than 30 m.p.h. (50 km/h) over a maximum distance of 30 miles (50 km),
Ð do not add oil to the gearbox.
Page 121 of 131
PARTS AND ACCESSORIES 15
For your PEUGEOT, use only accessories and original parts approved by the manufacturer.
These accessories and parts are all suitable for your PEUGEOT, after being tested and approved for reliability and
safety.
A wide choice of original accessories, approved by PEUGEOT, is available through the network.
They all carry the PEUGEOT guarantee. Safety: Anti-theft alarm, engraving of windows, wheel anti-theft devices, first aid kitÉ
Comfort: Telephone console, armrests, seat covers compatible with side airbags, mats, boot tray, sunroof, luggage net, door deflectors, storage under rear parcel shelfÉ
Communication: Audio equipment, telephone, CB, speakers, CD changer, audio accessories, navigationÉ
Personalisation: Spoiler, alloy wheels, wheel trims, long range lights, fog lamps, sports exhaust, mudflaps,...
Leisure: Towbar, roof bars, roof box,É
Children: Booster seats and child seats, side blinds and rear blind...
Maintenance products: Windscreen wiper fluid, internal and external cleaning and maintenance products...
Page 131 of 131
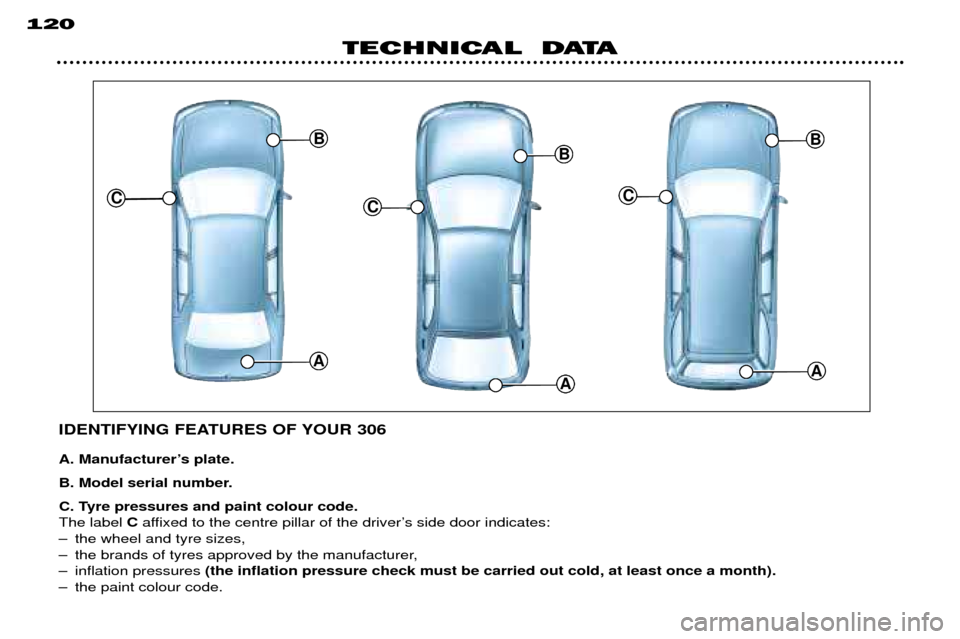
IDENTIFYING FEATURES OF YOUR 306
A. ManufacturerÕs plate.
B. Model serial number.
C. Tyre pressures and paint colour code. The label Caffixed to the centre pillar of the driverÕs side door indicates:
Ð the wheel and tyre sizes,
Ð the brands of tyres approved by the manufacturer,
Ð inflation pressures (the inflation pressure check must be carried out cold, at least once a month).
Ð the paint colour code.
120
TECHNICAL DATA
C
A
BBB
CC
AA