PEUGEOT PARTNER TEPEE ELECTRIC 2017 Repair Manual
Manufacturer: PEUGEOT, Model Year: 2017, Model line: PARTNER TEPEE ELECTRIC, Model: PEUGEOT PARTNER TEPEE ELECTRIC 2017Pages: 252, PDF Size: 9.89 MB
Page 61 of 252
23
Each press of the button on the end of the
wiper control stalk allows you to scroll through
the various trip computer information displays,
depending on the screen.
The "vehicle" tab with the range, current fuel
consumption and remaining distance to travel.
The "1" tab (trip 1) with the average speed,
average fuel consumption and distance
travelled in trip 1 .
The "2" tab (trip 2) with the same information
for a 2
nd trip.
Zero reset
F When the desired trip is displayed, press the control for more than two seconds.
A few definitions
Range: displays the distance that can still be
travelled with the fuel detected in the tank on
the basis of the average consumption over the
last few miles (kilometres) travelled. If dashes instead of figures continue to
be displayed when driving, contact a
PEUGEOT dealer.
This displayed value can vary greatly
following a change in the vehicle's driving
conditions or the terrain. When the range falls below 19
miles (30 km),
dashes are displayed. After filling with at least
10 litres of fuel, the range is recalculated and is
displayed if it exceeds 62 miles (100 km).
Current fuel consumption: calculated
and displayed only when exceeding 19 mph
(30
km/h).
Average consumption: this is the average
fuel consumption since the last trip computer
zero reset.
Distance travelled: calculated from the last
trip computer zero reset.
Remaining distance: calculated according
to the final destination entered by the user. If
navigation is activated, the navigation system
calculates it instantaneously.
Average speed: this is the average speed
calculated since the last trip computer zero
reset (with the ignition on).
Date and time setting
Centre console without
screen
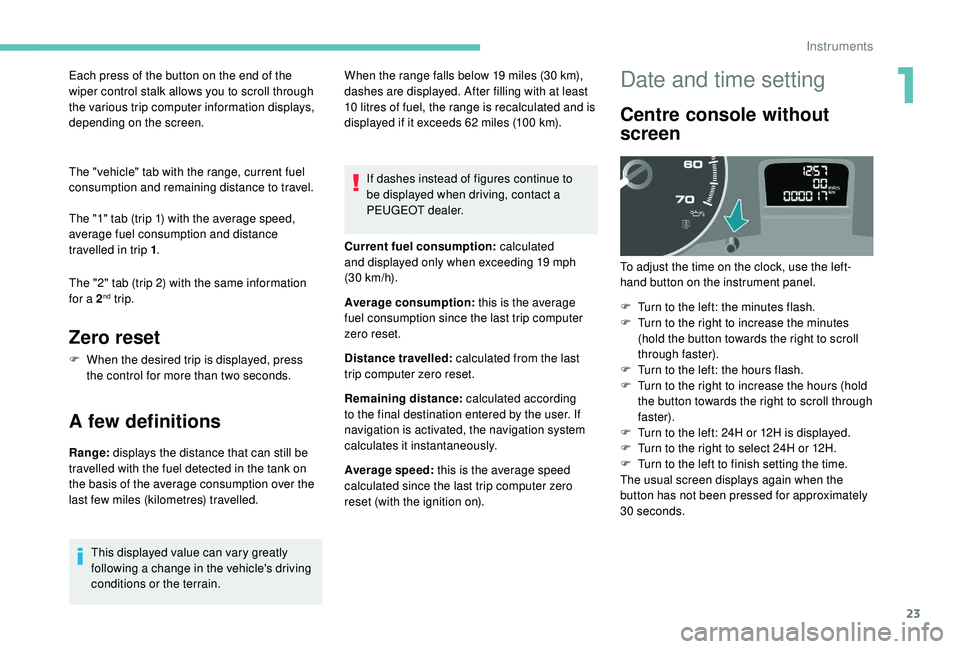
To adjust the time on the clock, use the left-
hand button on the instrument panel.
F
T
urn to the left: the minutes flash.
F
T
urn to the right to increase the minutes
(hold the button towards the right to scroll
through faster).
F
T
urn to the left: the hours flash.
F
T
urn to the right to increase the hours (hold
the button towards the right to scroll through
faster).
F
T
urn to the left: 24H or 12H is displayed.
F
T
urn to the right to select 24H or 12H.
F
T
urn to the left to finish setting the time.
The usual screen displays again when the
button has not been pressed for approximately
30
seconds.
1
Instruments
Page 62 of 252
24
Centre console with screen
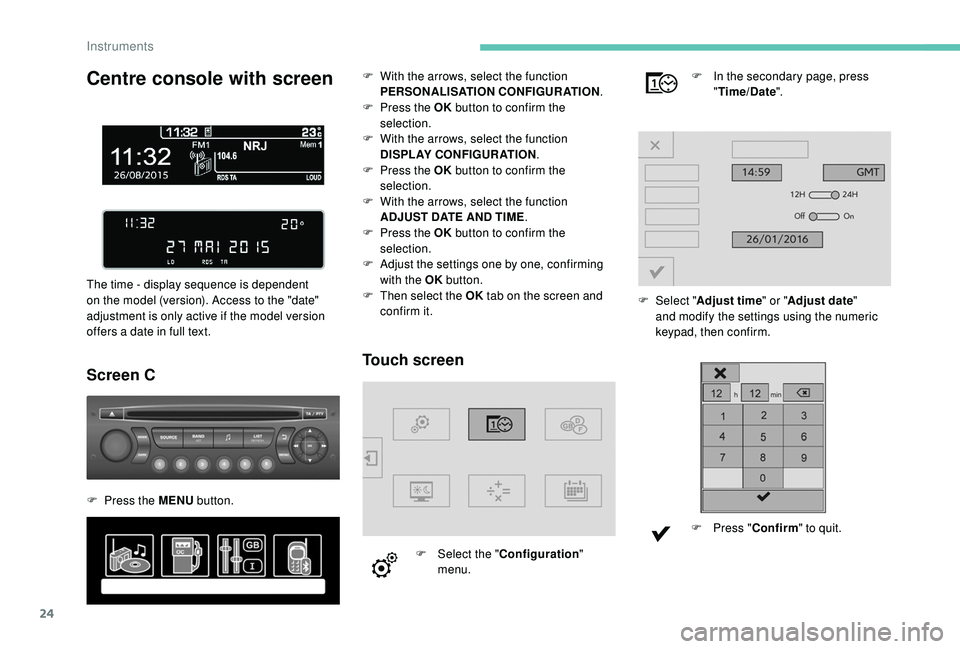
The time - display sequence is dependent
on the model (version). Access to the "date"
adjustment is only active if the model version
offers a date in full text.
Screen C
F Press the MENU button.
Touch screen
F Select the "Configuration"
menu. F
I
n the secondary page, press
" Time/Date ".
F
Sel
ect "
Adjust time" or " Adjust date"
and modify the settings using the numeric
keypad, then confirm.
F
P
ress "
Confirm " to quit.
F
W
ith the arrows, select the function
PERSONALISATION CONFIGURATION .
F
P
ress the OK
button to confirm the
selection.
F
W
ith the arrows, select the function
DISPLAY CONFIGURATION .
F
P
ress the OK
button to confirm the
selection.
F
W
ith the arrows, select the function
ADJUST DATE AND TIME .
F
P
ress the OK
button to confirm the
selection.
F
A
djust the settings one by one, confirming
with the OK button.
F
T
hen select the OK
tab on the screen and
confirm it.
Instruments
Page 63 of 252
25
Key
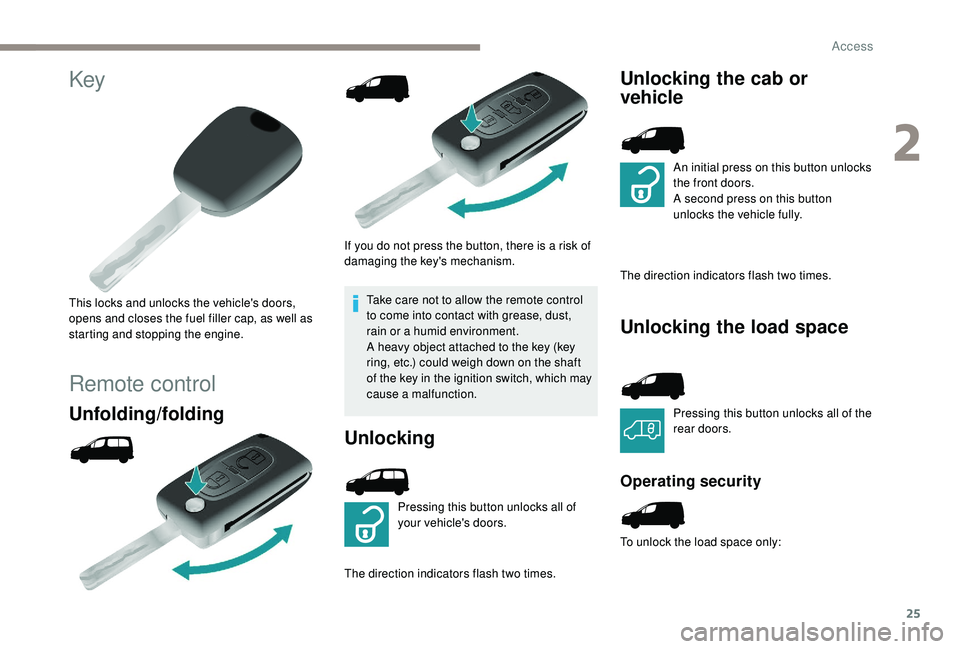
This locks and unlocks the vehicle's doors,
opens and closes the fuel filler cap, as well as
starting and stopping the engine.
Remote control
Unfolding/folding
If you do not press the button, there is a risk of
damaging the key's mechanism.Take care not to allow the remote control
to come into contact with grease, dust,
rain or a humid environment.
A heavy object attached to the key (key
ring, etc.) could weigh down on the shaft
of the key in the ignition switch, which may
cause a malfunction.
Unlocking
Pressing this button unlocks all of
your vehicle's doors.
The direction indicators flash two times.
Unlocking the cab or
vehicle
An initial press on this button unlocks
the front doors.
A second press on this button
unlocks the vehicle fully.
The direction indicators flash two times.
Unlocking the load space
Pressing this button unlocks all of the
rear doors.
Operating security
To unlock the load space only:
2
Access
Page 64 of 252
26
F Press this button to lock the vehicle fully.
F
P
ress this button to unlock the
load space. Only the front doors
remain locked.
Locking
Pressing this button locks all of your
vehicle's doors.
Deadlocking
A second press on the closed padlock on the
remote control within five seconds of locking
the doors changes the locking to deadlocking.
This is confirmed by fixed lighting of the
direction indicators for approximately two
seconds.
Deadlocking renders the exterior and interior
door handles inoperative. Therefore, never
leave anyone inside the vehicle when it is
deadlocked.
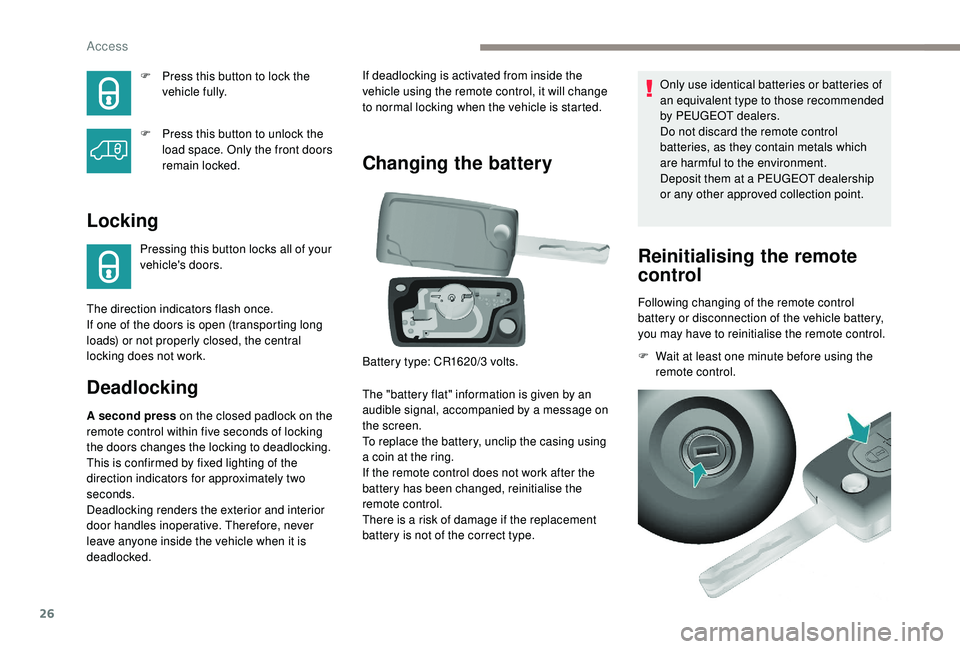
Changing the battery
The "battery flat" information is given by an
audible signal, accompanied by a message on
the screen.
To replace the battery, unclip the casing using
a coin at the ring.
If the remote control does not work after the
battery has been changed, reinitialise the
remote control.
There is a risk of damage if the replacement
battery is not of the correct type. Only use identical batteries or batteries of
an equivalent type to those recommended
by PEUGEOT dealers.
Do not discard the remote control
batteries, as they contain metals which
are harmful to the environment.
Deposit them at a PEUGEOT dealership
or any other approved collection point.
Reinitialising the remote
control
Following changing of the remote control
battery or disconnection of the vehicle battery,
you may have to reinitialise the remote control.
F
W
ait at least one minute before using the
remote control.
The direction indicators flash once.
If one of the doors is open (transporting long
loads) or not properly closed, the central
locking does not work. If deadlocking is activated from inside the
vehicle using the remote control, it will change
to normal locking when the vehicle is started.
Battery type: CR1620/3 volts.
Access
Page 65 of 252
27
Lost keys, remote control
Go to a PEUGEOT dealer, taking with you the
vehicle's registration certificate, your personal
identification documents and if possible, the
label bearing the key code.
The PEUGEOT dealer will be able to retrieve
the key code and the transponder code
required to order a new key.
F
I
nsert the key into the ignition switch with
the remote control buttons (padlocks) facing
you.
F
S
witch on the ignition.
F
W
ithin ten seconds, press the locking
padlock for at least five seconds.
F
S
witch off the ignition.
F
W
ait at least one minute before using the
remote control.
The remote control is now working again. Anti-theft protection
Do not make any modifications to the
electronic engine immobiliser system; this
could cause malfunctions.
For vehicles with an ignition switch, do not
forget to remove the key and turn the steering
wheel to engage the steering lock.
Remote control
The high frequency remote control is a
sensitive system; do not operate it while it is
in your pocket as there is a possibility that
it may unlock the vehicle, without you being
aware of it.
Do not repeatedly press the buttons of your
remote control out of range and out of sight
of your vehicle. You may stop it from working
and the remote control would have to be
reinitialised.
The remote control does not operate when
the key is in the ignition, even when the
ignition is switched off.
Locking the vehicle
Driving with the doors locked may make
access to the passenger compartment by
the emergency ser vices more difficult in an
emergency.
As a safety precaution (with children on
board), remove the key from the ignition or
take the electronic key when you leave the
vehicle, even for a short time. When purchasing a second-hand vehicle
Have the key codes memorised by a
PEUGEOT dealer, to ensure that the keys in
your possession are the only ones which can
start the vehicle.
2
Access
Page 66 of 252
28
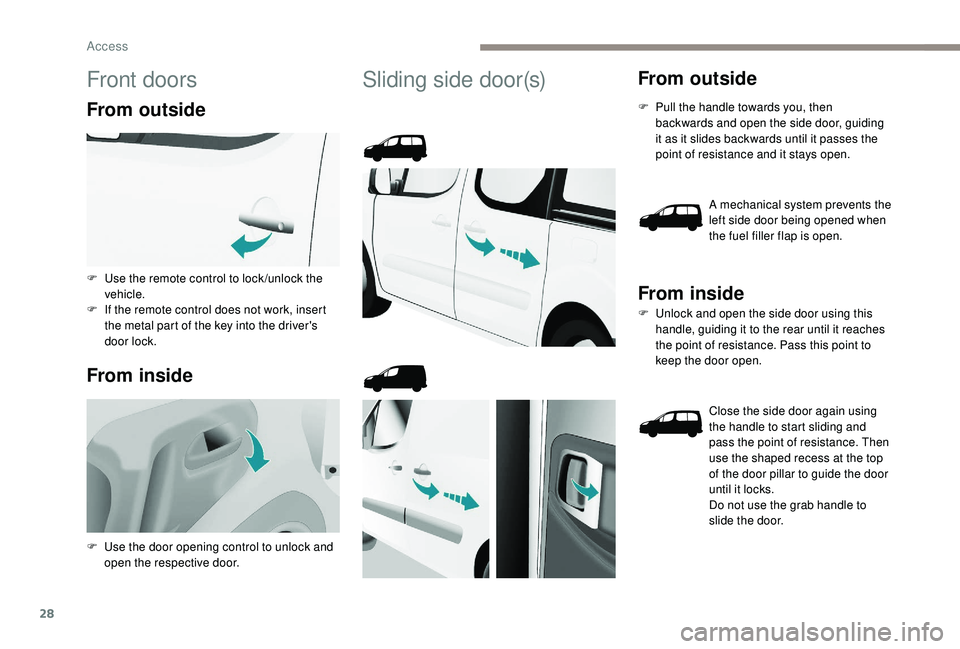
Front doors
From outside
From inside
Sliding side door(s)From outside
F Pull the handle towards you, then backwards and open the side door, guiding
it as it slides backwards until it passes the
point of resistance and it stays open.
A mechanical system prevents the
left side door being opened when
the fuel filler flap is open.
From inside
F Unlock and open the side door using this handle, guiding it to the rear until it reaches
the point of resistance. Pass this point to
keep the door open.
Close the side door again using
the handle to start sliding and
pass the point of resistance. Then
use the shaped recess at the top
of the door pillar to guide the door
until it locks.
Do not use the grab handle to
slide the door.
F
U
se the remote control to lock /unlock the
vehicle.
F
I
f the remote control does not work, insert
the metal part of the key into the driver's
door lock.
F
U
se the door opening control to unlock and
open the respective door.
Access
Page 67 of 252
29
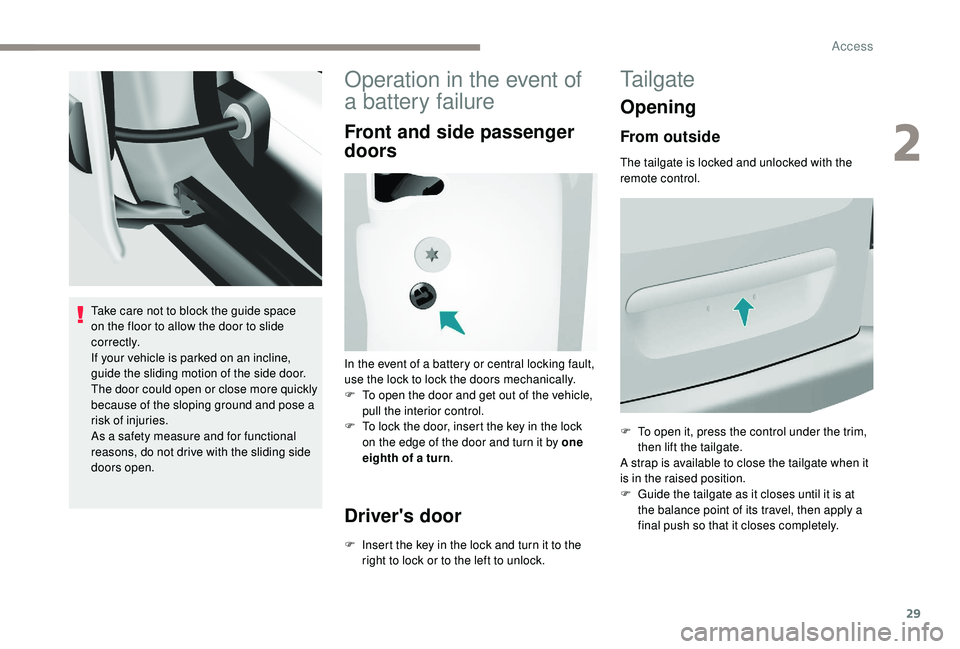
Take care not to block the guide space
on the floor to allow the door to slide
c o r r e c t l y.
If your vehicle is parked on an incline,
guide the sliding motion of the side door.
The door could open or close more quickly
because of the sloping ground and pose a
risk of injuries.
As a safety measure and for functional
reasons, do not drive with the sliding side
doors open.
Operation in the event of
a battery failure
Front and side passenger
doors
In the event of a battery or central locking fault,
use the lock to lock the doors mechanically.
F
T
o open the door and get out of the vehicle,
pull the interior control.
F
T
o lock the door, insert the key in the lock
on the edge of the door and turn it by one
eighth of a turn .
Driver's door
F Insert the key in the lock and turn it to the
right to lock or to the left to unlock.
Tailgate
Opening
From outside
The tailgate is locked and unlocked with the
remote control.
F
T
o open it, press the control under the trim,
then lift the tailgate.
A strap is available to close the tailgate when it
is in the raised position.
F
G
uide the tailgate as it closes until it is at
the balance point of its travel, then apply a
final push so that it closes completely.
2
Access
Page 68 of 252
30
From inside
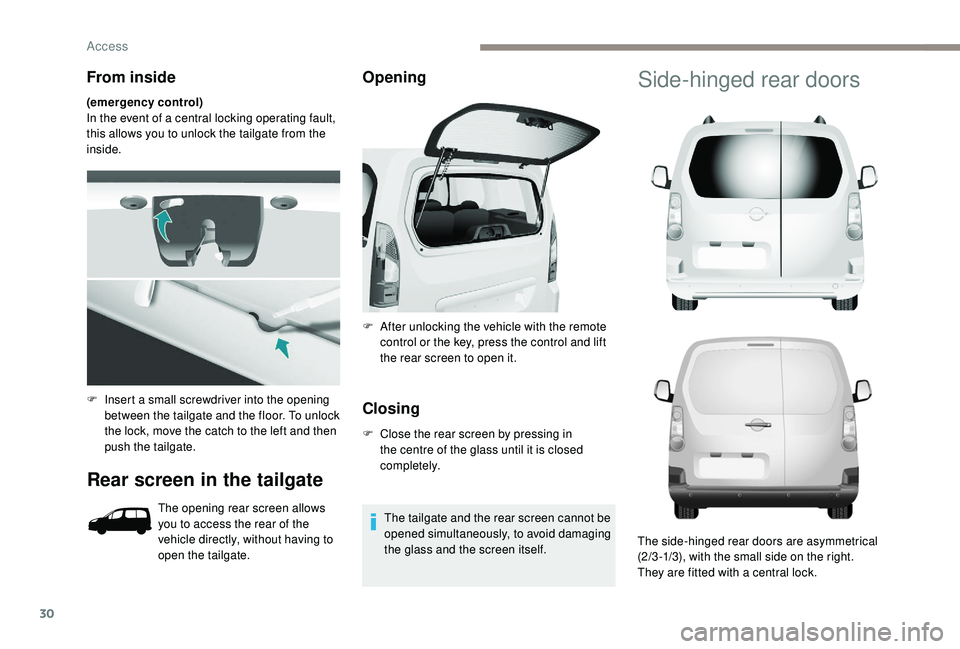
(emergency control)
In the event of a central locking operating fault,
this allows you to unlock the tailgate from the
inside.
Rear screen in the tailgate
The opening rear screen allows
you to access the rear of the
vehicle directly, without having to
open the tailgate.
Opening
Closing
F Close the rear screen by pressing in the centre of the glass until it is closed
completely.
The tailgate and the rear screen cannot be
opened simultaneously, to avoid damaging
the glass and the screen itself.
F
I
nsert a small screwdriver into the opening
between the tailgate and the floor. To unlock
the lock, move the catch to the left and then
push the tailgate. F
A
fter unlocking the vehicle with the remote
control or the key, press the control and lift
the rear screen to open it.
Side-hinged rear doors
The side-hinged rear doors are asymmetrical
(2/3 -1/3), with the small side on the right.
They are fitted with a central lock.
Access
Page 69 of 252
31
From outside
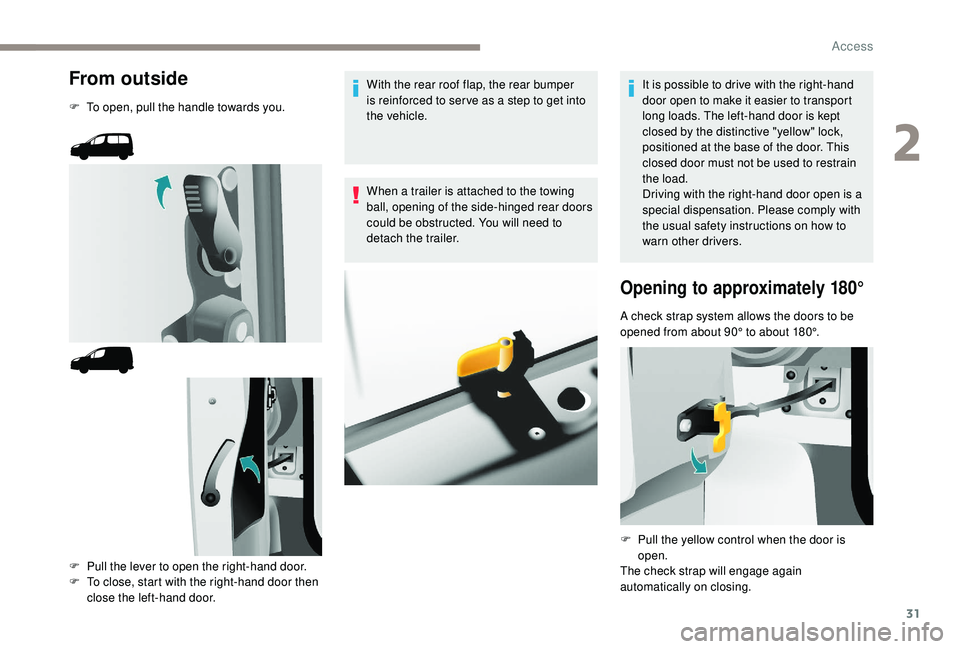
F To open, pull the handle towards you.F
P
ull the lever to open the right-hand door.
F
T
o close, start with the right-hand door then
close the left-hand door. With the rear roof flap, the rear bumper
is reinforced to ser ve as a step to get into
the vehicle.
When a trailer is attached to the towing
ball, opening of the side-hinged rear doors
could be obstructed. You will need to
detach the trailer.
It is possible to drive with the right-hand
door open to make it easier to transport
long loads. The left-hand door is kept
closed by the distinctive "yellow" lock,
positioned at the base of the door. This
closed door must not be used to restrain
the load.
Driving with the right-hand door open is a
special dispensation. Please comply with
the usual safety instructions on how to
warn other drivers.
Opening to approximately 180°
A check strap system allows the doors to be
opened from about 90° to about 180°.
F
P
ull the yellow control when the door is
open.
The check strap will engage again
automatically on closing.
2
Access
Page 70 of 252
32
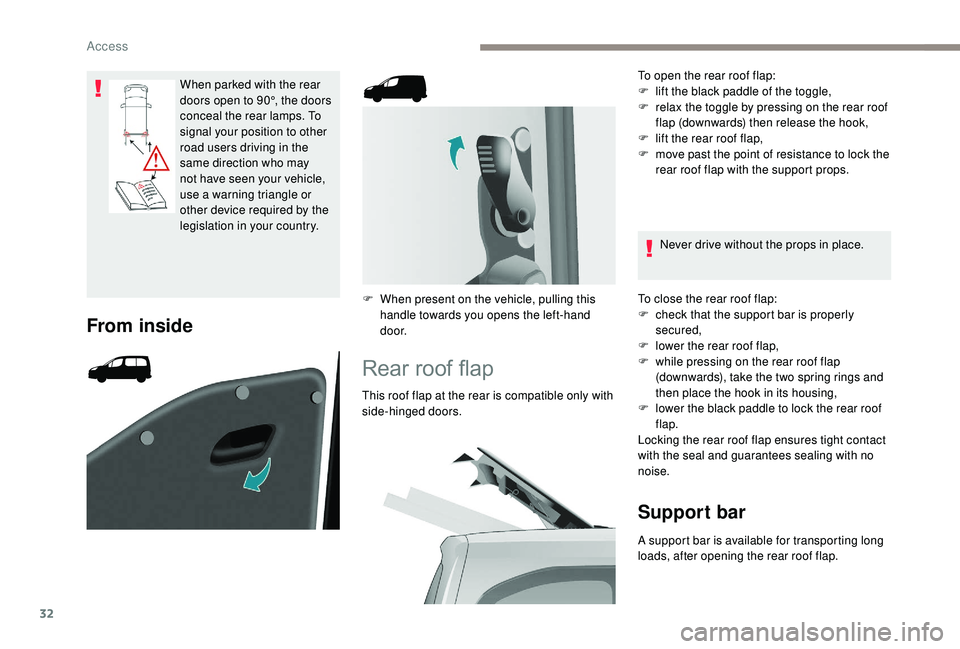
When parked with the rear
doors open to 90°, the doors
conceal the rear lamps. To
signal your position to other
road users driving in the
same direction who may
not have seen your vehicle,
use a warning triangle or
other device required by the
legislation in your country.
From inside
F When present on the vehicle, pulling this handle towards you opens the left-hand
d o o r.
Rear roof flap
This roof flap at the rear is compatible only with
side-hinged doors. To open the rear roof flap:
F
l
ift the black paddle of the toggle,
F
r
elax the toggle by pressing on the rear roof
flap (downwards) then release the hook,
F
l
ift the rear roof flap,
F
m
ove past the point of resistance to lock the
rear roof flap with the support props.
Never drive without the props in place.
To close the rear roof flap:
F
c
heck that the support bar is properly
secured,
F
l
ower the rear roof flap,
F
w
hile pressing on the rear roof flap
(downwards), take the two spring rings and
then place the hook in its housing,
F l ower the black paddle to lock the rear roof
flap.
Locking the rear roof flap ensures tight contact
with the seal and guarantees sealing with no
noise.
Support bar
A support bar is available for transporting long
loads, after opening the rear roof flap.
Access