tow PEUGEOT PARTNER TEPEE ELECTRIC 2017 Owners Manual
[x] Cancel search | Manufacturer: PEUGEOT, Model Year: 2017, Model line: PARTNER TEPEE ELECTRIC, Model: PEUGEOT PARTNER TEPEE ELECTRIC 2017Pages: 252, PDF Size: 9.89 MB
Page 3 of 252
1
.
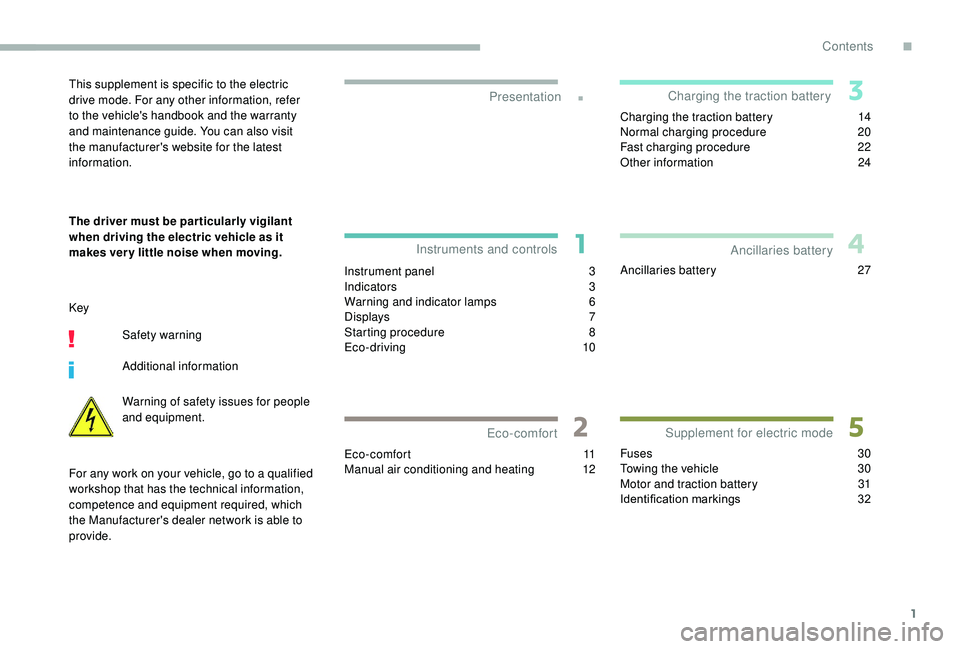
Instrument panel 3
I ndicators 3
Warning and indicator lamps
6
D
isplays
7
Starting procedure
8
E
co-driving
10
Eco-comfort
11
Manual air conditioning and heating
1
2Charging the traction battery
1
4
Normal charging procedure
2
0
Fast charging procedure
2
2
Other information
2
4
Ancillaries battery 2 7
Fuses
30
Towing the vehicle
3
0
Motor and traction battery
3
1
Identification markings
3
2
Presentation
Instruments and controls
Eco-comfort Charging the traction battery
Supplement for electric mode Ancillaries batteryThis supplement is specific to the electric
drive mode. For any other information, refer
to the vehicle's handbook and the warranty
and maintenance guide. You can also visit
the manufacturer's website for the latest
information.
The driver must be par ticularly vigilant
when driving the electric vehicle as it
makes ver y little noise when moving.
Key
Safety warning
Additional information
Warning of safety issues for people
and equipment.
For any work on your vehicle, go to a qualified
workshop that has the technical information,
competence and equipment required, which
the Manufacturer's dealer network is able to
provide.
Contents
.
Contents
Page 15 of 252
13
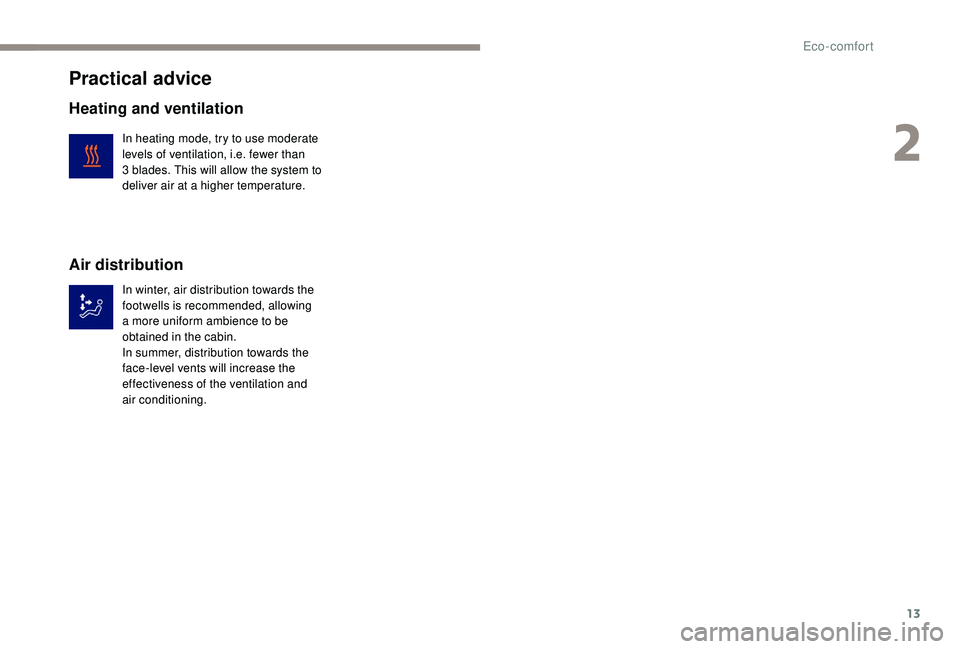
Practical advice
Heating and ventilation
In heating mode, try to use moderate
levels of ventilation, i.e. fewer than
3 blades. This will allow the system to
deliver air at a higher temperature.
Air distribution
In winter, air distribution towards the
footwells is recommended, allowing
a more uniform ambience to be
obtained in the cabin.
In summer, distribution towards the
face-level vents will increase the
effectiveness of the ventilation and
air conditioning.
2
Eco-comfort
Page 23 of 252
21
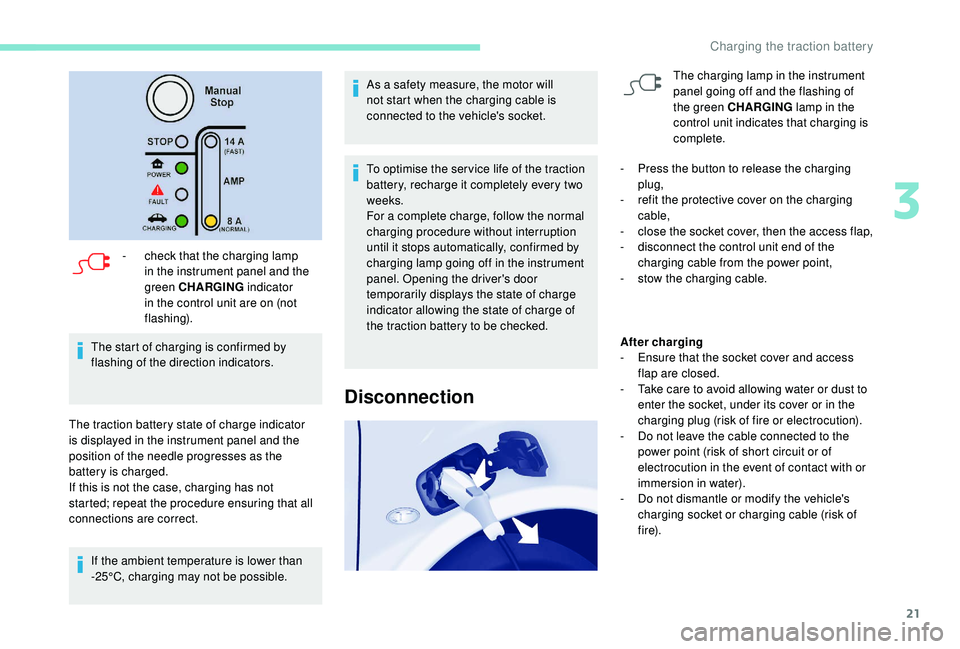
- check that the charging lamp in the instrument panel and the
green CHARGING indicator
in the control unit are on (not
flashing).
The start of charging is confirmed by
flashing of the direction indicators.
The traction battery state of charge indicator
is displayed in the instrument panel and the
position of the needle progresses as the
battery is charged.
If this is not the case, charging has not
started; repeat the procedure ensuring that all
connections are correct. If the ambient temperature is lower than
-25°C, charging may not be possible. As a safety measure, the motor will
not start when the charging cable is
connected to the vehicle's socket.
To optimise the ser vice life of the traction
battery, recharge it completely every two
weeks.
For a complete charge, follow the normal
charging procedure without interruption
until it stops automatically, confirmed by
charging lamp going off in the instrument
panel. Opening the driver's door
temporarily displays the state of charge
indicator allowing the state of charge of
the traction battery to be checked.
Disconnection
The charging lamp in the instrument
panel going off and the flashing of
the green CHARGING
lamp in the
control unit indicates that charging is
complete.
-
P
ress the button to release the charging
plug,
-
r
efit the protective cover on the charging
cable,
-
c
lose the socket cover, then the access flap,
-
d
isconnect the control unit end of the
charging cable from the power point,
-
s
tow the charging cable.
After charging
-
E
nsure that the socket cover and access
flap are closed.
-
T
ake care to avoid allowing water or dust to
enter the socket, under its cover or in the
charging plug (risk of fire or electrocution).
-
D
o not leave the cable connected to the
power point (risk of short circuit or of
electrocution in the event of contact with or
immersion in water).
-
D
o not dismantle or modify the vehicle's
charging socket or charging cable (risk of
f i r e).
3
Charging the traction battery
Page 32 of 252
30
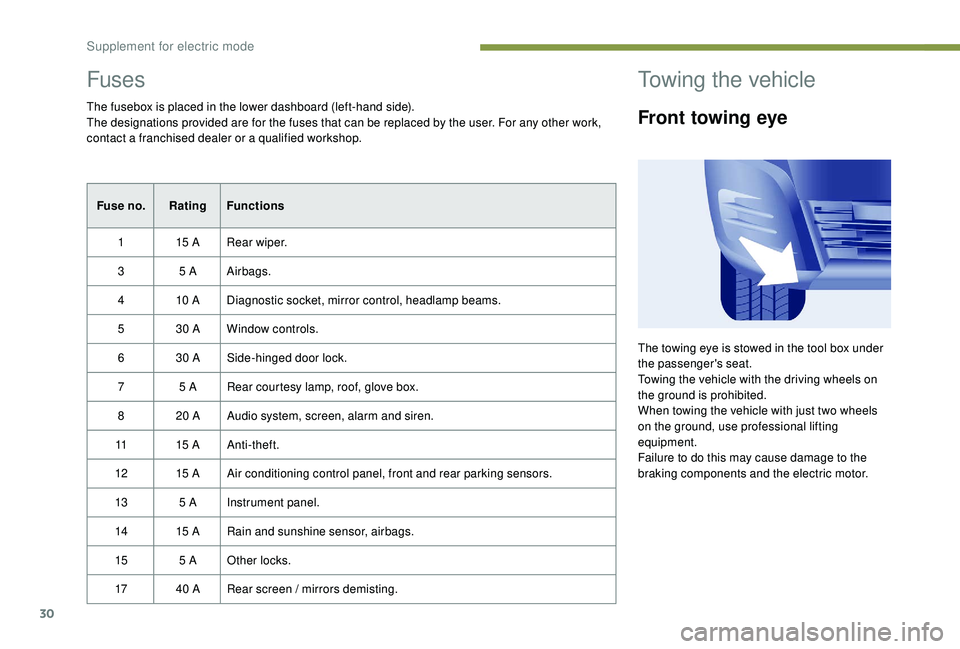
Fuses
The fusebox is placed in the lower dashboard (left-hand side).
The designations provided are for the fuses that can be replaced by the user. For any other work,
contact a franchised dealer or a qualified workshop.Fuse no. Rating Functions
1 15
ARear wiper.
3 5
AAirbags.
4 10
ADiagnostic socket, mirror control, headlamp beams.
5 30
AWindow controls.
6 30
ASide-hinged door lock.
7 5
A Rear courtesy lamp, roof, glove box.
8 20
A Audio system, screen, alarm and siren.
11 15
AAnti-theft.
12 15
AAir conditioning control panel, front and rear parking sensors.
13 5
AInstrument panel.
14 15
ARain and sunshine sensor, airbags.
15 5
AOther locks.
17 40
ARear screen / mirrors demisting.
Towing the vehicle
Front towing eye
The towing eye is stowed in the tool box under
the passenger's seat.
Towing the vehicle with the driving wheels on
the ground is prohibited.
When towing the vehicle with just two wheels
on the ground, use professional lifting
equipment.
Failure to do this may cause damage to the
braking components and the electric motor.
Supplement for electric mode
Page 33 of 252
31
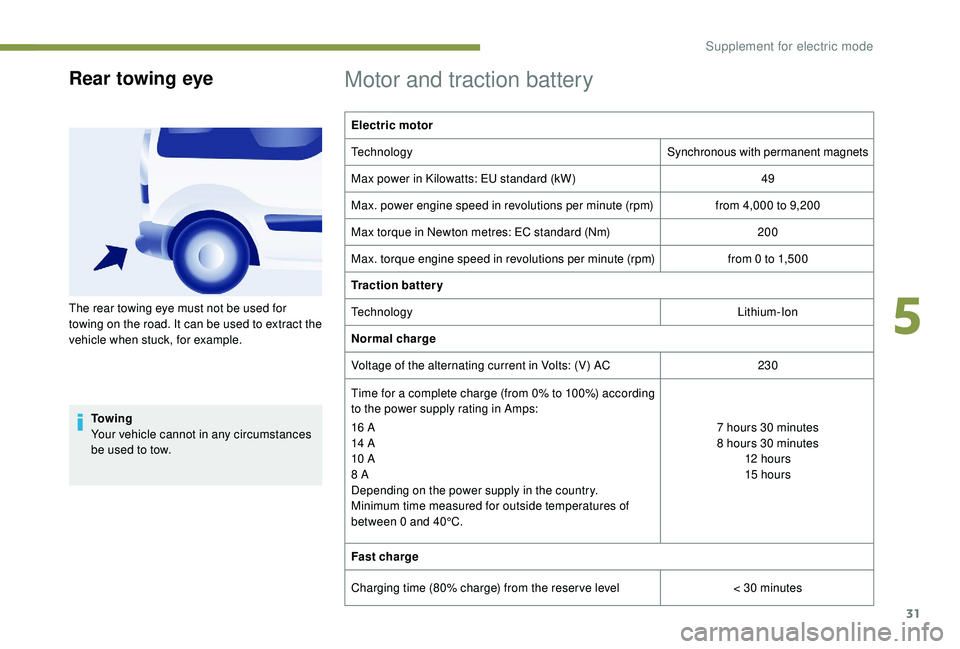
Rear towing eye
To w i n g
Your vehicle cannot in any circumstances
be used to tow.
Motor and traction battery
Electric motor
TechnologySynchronous with permanent magnets
Max power in Kilowatts: EU standard (kW) 49
Max. power engine speed in revolutions per minute (rpm) from 4,000
to 9,200
Max torque in Newton metres: EC standard (Nm) 200
Max. torque engine speed in revolutions per minute (rpm) from 0
to 1,500
Traction battery
Technology Lithium-Ion
Normal charge
Voltage of the alternating current in Volts: (V) AC 230
Time for a complete charge (from 0% to 100%) according
to the power supply rating in Amps:
16
A
14
A
10
A
8
A
Depending on the power supply in the country.
Minimum time measured for outside temperatures of
between 0
and 40°C. 7
hours 30 minutes
8
hours 30 minutes
12
hour s
15
hours
Fast charge
Charging time (80% charge) from the reser ve level < 30
minutes
The rear towing eye must not be used for
towing on the road. It can be used to extract the
vehicle when stuck, for example.
5
Supplement for electric mode
Page 41 of 252
3
.
.
Driving recommendations 103
Starting and stopping 1 04
Electronic engine immobiliser
1
05
Parking brake
1
05
Manual gearbox
1
05
6-speed electronic gearbox
1
06
Gear shift indicator
1
08
Stop & Start
1
08
Hill start assist
1
11
Tyre under-inflation detection
1
12
Tyre under-inflation detection with
reinitialisation
113
Speed limiter
1
15
Cruise control
1
17
Active City Brake
1
20
Parking sensors
1
22
Reversing camera
1
24Fuel 1
26
Fuel system cut-off 1 27
Compatibility of fuels
1
28
Snow chains
1
29
Removable snow shield
1
30
Changing a wiper blade
1
30
Towing device
1
31
Towbar with a swan neck towball
1
31
Roof bars
1
33
Zenith roof bars
1
33
Maximum weights on bars
1
34
Other accessories
1
34
Bonnet
13 5
Engines
1
36
Checking levels
1
36
Chec ks
13 8
AdBlue
® (BlueHDi engines) 1 40
Temporary puncture repair kit
1
43
Changing a wheel
1
43
Fitting the wheel trim on the rim
1
47
Changing a bulb
1
49
Changing a fuse
1
54
Battery
158
Economy mode
1
59
Towing your vehicle
1
59
Running out of fuel (Diesel)
1
60
Characteristics of engines and towed loads 1 61Petrol engines/weights 162
Diesel engines/weights 1 63
Dimensions
165
Identification markings
1
74
DrivingPractical information
In the event of a breakdown Technical data
Alphabetical index
Audio and Telematics
7-inch touch screen
Peugeot Connect Sound (RD5)
.
Contents
Page 43 of 252
5
As a passenger, if you avoid connecting your
multimedia devices (film, music, video game,
etc.), you will contribute towards limiting
the consumption of electrical energy and
therefore of fuel.
Disconnect your portable devices before
leaving the vehicle.
Eco- driving
Eco-driving is a range of everyday practices that allow the motorist to optimise their fuel consumption and CO2 emissions.
Optimise the use of your
gearbox
With a manual gearbox, move off gently and
change up without waiting. While accelerating,
change up early.
With an automatic gearbox, give preference
to automatic mode and avoid pressing the
accelerator pedal heavily or suddenly.
The gear shift indicator invites you to engage
the most suitable gear: as soon as the
indication is displayed in the instrument panel,
follow it straight away.
For vehicles fitted with an automatic gearbox,
this indicator appears only in manual mode.
Drive smoothly
Maintain a safe distance between vehicles,
use engine braking rather than the brake
pedal and press the accelerator gradually.
These practices contribute towards a
reduction in fuel consumption and CO
2
emissions and also help to reduce the
background traffic noise.
If your vehicle has cruise control, make use of
the system at speeds above 25
mph (40 km/h)
when the traffic is flowing well.
Control the use of your electrical
equipment
Before moving off, if the passenger
compartment is too warm, ventilate it by opening
the windows and air vents before using the air
conditioning.
Above 31
mph (50 km/h), close the windows and
open the air vents.
Consider using equipment that can help keep
the temperature in the passenger compartment
down (sunroof blind and window blinds, etc.).
Switch off the headlamps and foglamps when
there is sufficient visibility without them.
Avoid running the engine before moving off,
particularly in winter; your vehicle will warm up
much faster while driving.
Unless it has automatic regulation, switch off
the air conditioning as soon as the desired
temperature has been reached.
Switch off the demisting and defrosting controls,
if these are not automatically managed.
Switch off the heated seat as soon as possible.
.
.
Eco-drivingsommaire
Page 54 of 252
16
Warning/indicator lampStateIndicates Action/Observations
Dipped beam
headlamps/daytime
running lamps Fixed.
A manual selection or automatic
illumination. Rotate the lighting control stalk ring to the second
position.
Activation of the dipped beam
headlamps on switching on the
ignition: daytime running lamps
(depending on country of sale).
Blue warning/indicator lamps
Main beam
headlamps Fixed.
The lighting control stalk has
been pulled towards you. Pull the stalk to return to dipped beam headlamps.
Warning/indicator lamp in
the display screen State
Indicates Action/Observations
Cruise control Fixed. Cruise control is selected. Manual selection.
For more information on the Cruise control , refer to
the corresponding section.
Speed limiter Fixed. The limiter is selected. Manual selection.
For more information on the Speed limiter , refer to
the corresponding section.
Gear shift
indicator Fixed.
A recommendation which does
not take into account the road
configuration and the traffic
density. To reduce fuel consumption with a manual gearbox,
engage the appropriate gear. The driver remains
responsible for deciding whether or not to follow this
advice.
Instruments
Page 61 of 252
23
Each press of the button on the end of the
wiper control stalk allows you to scroll through
the various trip computer information displays,
depending on the screen.
The "vehicle" tab with the range, current fuel
consumption and remaining distance to travel.
The "1" tab (trip 1) with the average speed,
average fuel consumption and distance
travelled in trip 1 .
The "2" tab (trip 2) with the same information
for a 2
nd trip.
Zero reset
F When the desired trip is displayed, press the control for more than two seconds.
A few definitions
Range: displays the distance that can still be
travelled with the fuel detected in the tank on
the basis of the average consumption over the
last few miles (kilometres) travelled. If dashes instead of figures continue to
be displayed when driving, contact a
PEUGEOT dealer.
This displayed value can vary greatly
following a change in the vehicle's driving
conditions or the terrain. When the range falls below 19
miles (30 km),
dashes are displayed. After filling with at least
10 litres of fuel, the range is recalculated and is
displayed if it exceeds 62 miles (100 km).
Current fuel consumption: calculated
and displayed only when exceeding 19 mph
(30
km/h).
Average consumption: this is the average
fuel consumption since the last trip computer
zero reset.
Distance travelled: calculated from the last
trip computer zero reset.
Remaining distance: calculated according
to the final destination entered by the user. If
navigation is activated, the navigation system
calculates it instantaneously.
Average speed: this is the average speed
calculated since the last trip computer zero
reset (with the ignition on).
Date and time setting
Centre console without
screen
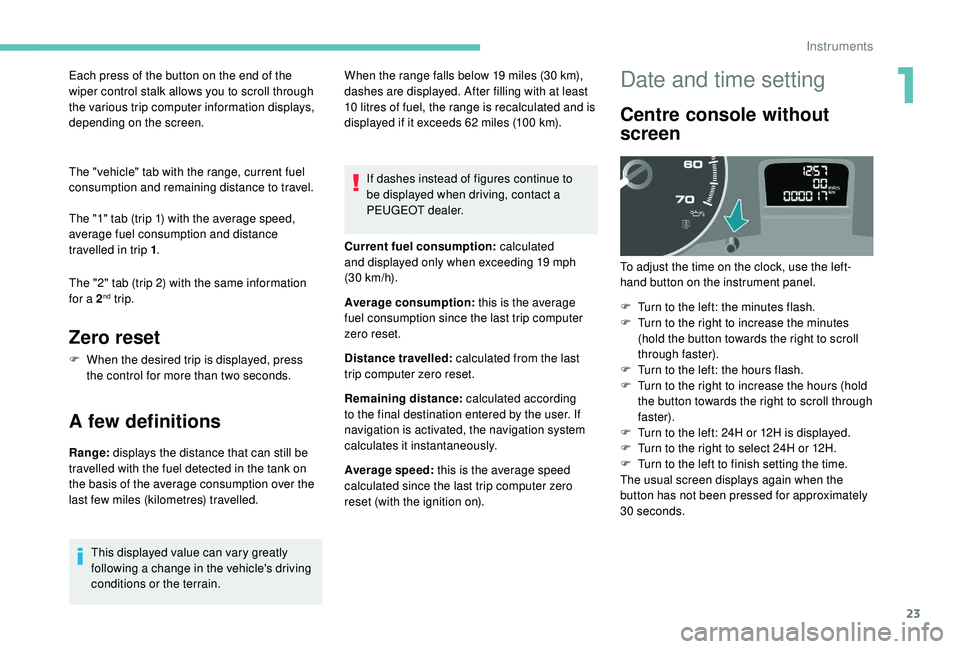
To adjust the time on the clock, use the left-
hand button on the instrument panel.
F
T
urn to the left: the minutes flash.
F
T
urn to the right to increase the minutes
(hold the button towards the right to scroll
through faster).
F
T
urn to the left: the hours flash.
F
T
urn to the right to increase the hours (hold
the button towards the right to scroll through
faster).
F
T
urn to the left: 24H or 12H is displayed.
F
T
urn to the right to select 24H or 12H.
F
T
urn to the left to finish setting the time.
The usual screen displays again when the
button has not been pressed for approximately
30
seconds.
1
Instruments
Page 66 of 252
28
Front doors
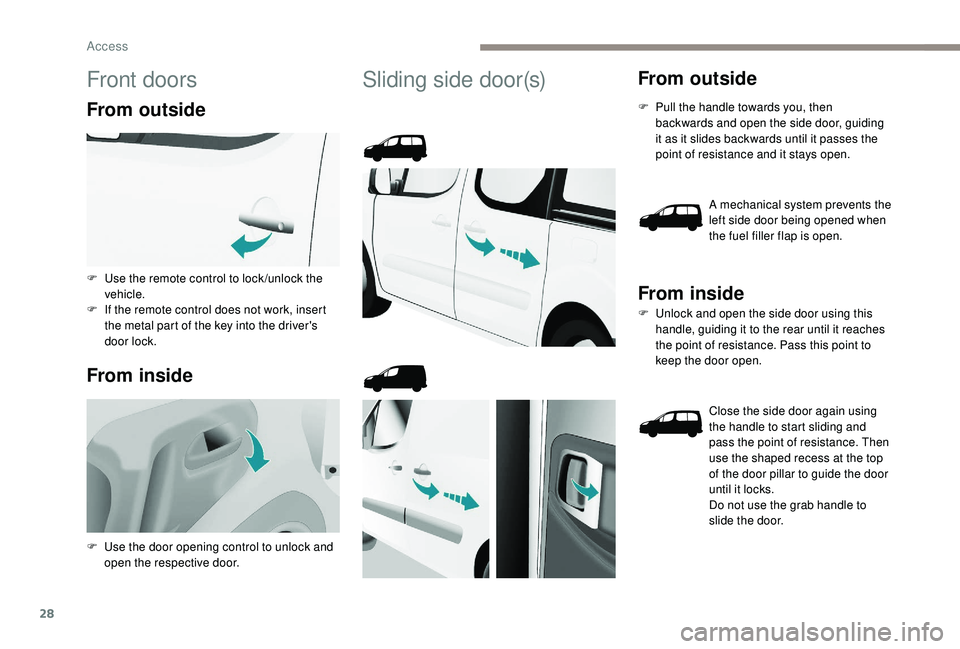
From outside
From inside
Sliding side door(s)From outside
F Pull the handle towards you, then backwards and open the side door, guiding
it as it slides backwards until it passes the
point of resistance and it stays open.
A mechanical system prevents the
left side door being opened when
the fuel filler flap is open.
From inside
F Unlock and open the side door using this handle, guiding it to the rear until it reaches
the point of resistance. Pass this point to
keep the door open.
Close the side door again using
the handle to start sliding and
pass the point of resistance. Then
use the shaped recess at the top
of the door pillar to guide the door
until it locks.
Do not use the grab handle to
slide the door.
F
U
se the remote control to lock /unlock the
vehicle.
F
I
f the remote control does not work, insert
the metal part of the key into the driver's
door lock.
F
U
se the door opening control to unlock and
open the respective door.
Access