ECO mode RAM CHASSIS CAB 2021 Workshop Manual
[x] Cancel search | Manufacturer: RAM, Model Year: 2021, Model line: CHASSIS CAB, Model: RAM CHASSIS CAB 2021Pages: 463, PDF Size: 21.5 MB
Page 218 of 463
216STARTING AND OPERATING
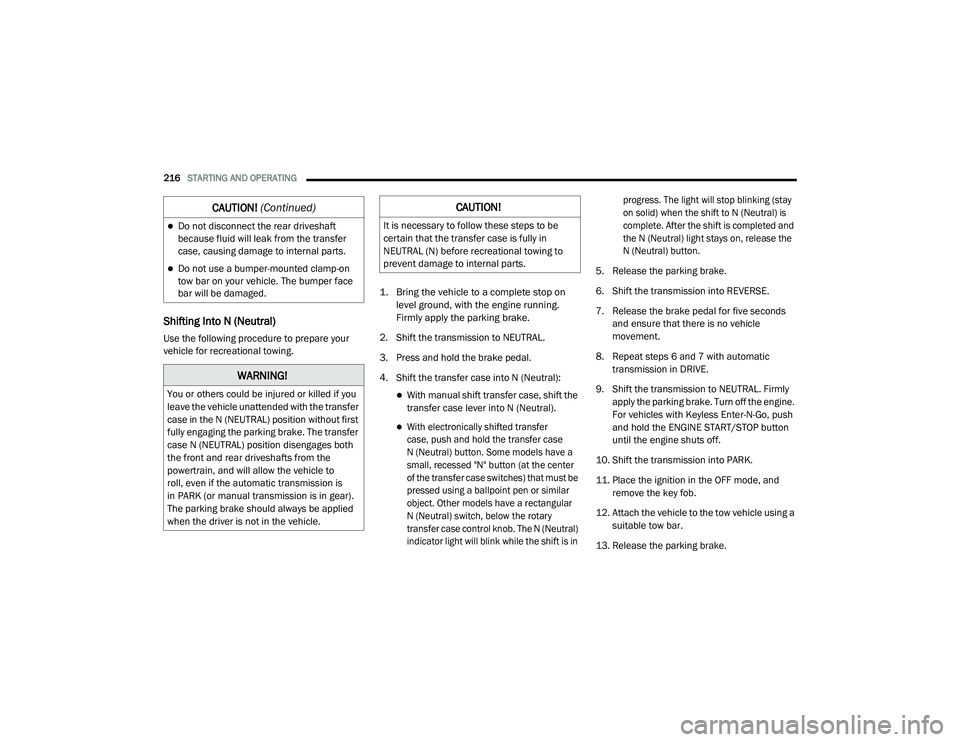
Shifting Into N (Neutral)
Use the following procedure to prepare your
vehicle for recreational towing.
1. Bring the vehicle to a complete stop on
level ground, with the engine running.
Firmly apply the parking brake.
2. Shift the transmission to NEUTRAL.
3. Press and hold the brake pedal.
4. Shift the transfer case into N (Neutral):
With manual shift transfer case, shift the
transfer case lever into N (Neutral).
With electronically shifted transfer
case, push and hold the transfer case
N (Neutral) button. Some models have a
small, recessed "N" button (at the center
of the transfer case switches) that must be
pressed using a ballpoint pen or similar
object. Other models have a rectangular
N (Neutral) switch, below the rotary
transfer case control knob. The N (Neutral)
indicator light will blink while the shift is in progress. The light will stop blinking (stay
on solid) when the shift to N (Neutral) is
complete. After the shift is completed and
the N (Neutral) light stays on, release the
N (Neutral) button.
5. Release the parking brake.
6. Shift the transmission into REVERSE.
7. Release the brake pedal for five seconds and ensure that there is no vehicle
movement.
8. Repeat steps 6 and 7 with automatic transmission in DRIVE.
9. Shift the transmission to NEUTRAL. Firmly apply the parking brake. Turn off the engine.
For vehicles with Keyless Enter-N-Go, push
and hold the ENGINE START/STOP button
until the engine shuts off.
10. Shift the transmission into PARK.
11. Place the ignition in the OFF mode, and remove the key fob.
12. Attach the vehicle to the tow vehicle using a suitable tow bar.
13. Release the parking brake.
Do not disconnect the rear driveshaft
because fluid will leak from the transfer
case, causing damage to internal parts.
Do not use a bumper-mounted clamp-on
tow bar on your vehicle. The bumper face
bar will be damaged.
WARNING!
You or others could be injured or killed if you
leave the vehicle unattended with the transfer
case in the N (NEUTRAL) position without first
fully engaging the parking brake. The transfer
case N (NEUTRAL) position disengages both
the front and rear driveshafts from the
powertrain, and will allow the vehicle to
roll, even if the automatic transmission is
in PARK (or manual transmission is in gear).
The parking brake should always be applied
when the driver is not in the vehicle.
CAUTION! (Continued)CAUTION!
It is necessary to follow these steps to be
certain that the transfer case is fully in
NEUTRAL (N) before recreational towing to
prevent damage to internal parts.
21_DPF_OM_EN_USC_t.book Page 216
Page 224 of 463
222MULTIMEDIA
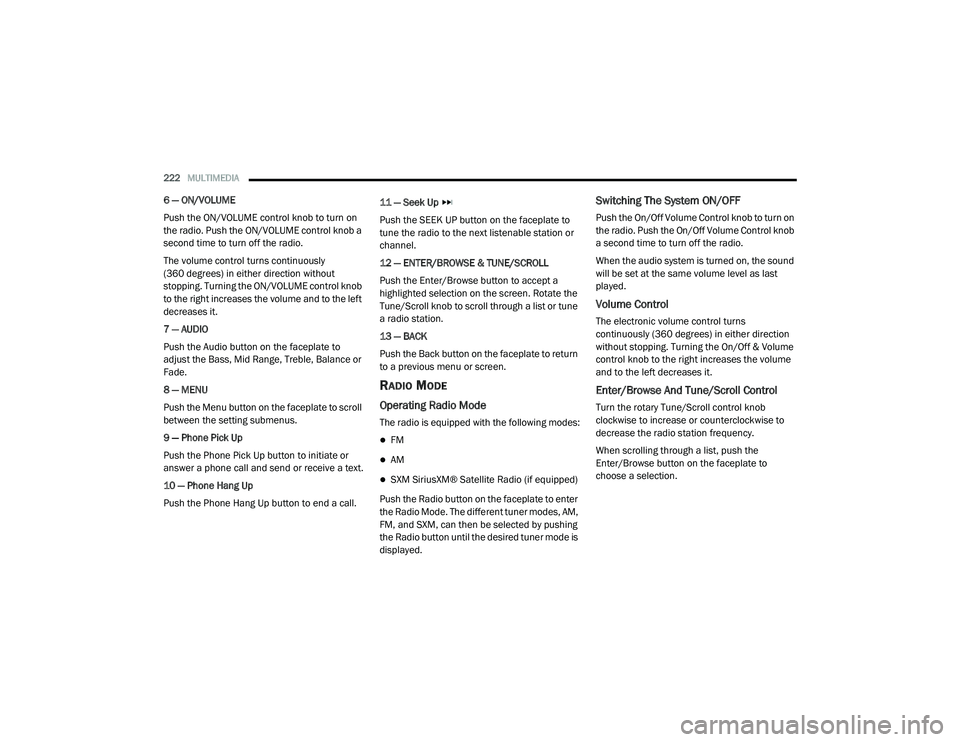
6 — ON/VOLUME
Push the ON/VOLUME control knob to turn on
the radio. Push the ON/VOLUME control knob a
second time to turn off the radio.
The volume control turns continuously
(360 degrees) in either direction without
stopping. Turning the ON/VOLUME control knob
to the right increases the volume and to the left
decreases it.
7 — AUDIO
Push the Audio button on the faceplate to
adjust the Bass, Mid Range, Treble, Balance or
Fade.
8 — MENU
Push the Menu button on the faceplate to scroll
between the setting submenus.
9 — Phone Pick Up
Push the Phone Pick Up button to initiate or
answer a phone call and send or receive a text.
10 — Phone Hang Up
Push the Phone Hang Up button to end a call. 11 — Seek Up
Push the SEEK UP button on the faceplate to
tune the radio to the next listenable station or
channel.
12 — ENTER/BROWSE & TUNE/SCROLL
Push the Enter/Browse button to accept a
highlighted selection on the screen. Rotate the
Tune/Scroll knob to scroll through a list or tune
a radio station.
13 — BACK
Push the Back button on the faceplate to return
to a previous menu or screen.
RADIO MODE
Operating Radio Mode
The radio is equipped with the following modes:
FM
AM
SXM SiriusXM® Satellite Radio (if equipped)
Push the Radio button on the faceplate to enter
the Radio Mode. The different tuner modes, AM,
FM, and SXM, can then be selected by pushing
the Radio button until the desired tuner mode is
displayed.
Switching The System ON/OFF
Push the On/Off Volume Control knob to turn on
the radio. Push the On/Off Volume Control knob
a second time to turn off the radio.
When the audio system is turned on, the sound
will be set at the same volume level as last
played.
Volume Control
The electronic volume control turns
continuously (360 degrees) in either direction
without stopping. Turning the On/Off & Volume
control knob to the right increases the volume
and to the left decreases it.
Enter/Browse And Tune/Scroll Control
Turn the rotary Tune/Scroll control knob
clockwise to increase or counterclockwise to
decrease the radio station frequency.
When scrolling through a list, push the
Enter/Browse button on the faceplate to
choose a selection.
21_DPF_OM_EN_USC_t.book Page 222
Page 225 of 463
MULTIMEDIA223
Seek Functions
Seek Up
Push and release the Seek Up button to tune
the radio to the next listenable station or
channel.
During a Seek Up function, if the radio
reaches the starting station after passing
through the entire band two times, the radio
will stop at the station where it began.
Seek Down
Push and release the Seek Down button to
tune the radio to the next listenable station or
channel.
During a Seek Down function, if the radio
reaches the starting station after passing
through the entire band two times, the radio will
stop at the station where it began.
SiriusXM® Satellite Radio Mode — If
Equipped
SiriusXM® Satellite Radio uses direct
satellite-to-receiver broadcasting technology
to provide clear digital sound, coast to coast.
The subscription service provider is SiriusXM®
Satellite Radio. This service offers over 130 channels of music, sports, news,
entertainment, and programming for children,
directly from its satellites and broadcasting
studios. A one-year SiriusXM® Satellite Radio
subscription is included.
Visit siriusxm.com/getallaccess or review your
SiriusXM® Radio pamphlet in your Owner’s
Manual kit for more information.
SiriusXM® and all related marks and logos are
trademarks of SiriusXM® Radio Inc. and its
subsidiaries. SiriusXM® Satellite Radio requires
a subscription, sold separately after the trial
subscription included with vehicle purchase.
Prices and programming are provided by SiriusXM®
and are subject to change. Subscriptions
governed by Terms & Conditions available at
www.siriusxm.com/customeragreement
.
SiriusXM® Radio US service is only available to
those at least 18 years of age in the 48 contiguous
United States, D.C., and PR. Service is available in
Canada; see
www.siriusxm.ca
.
No Subscription
Radios equipped with a Satellite receiver
require a subscription to the SiriusXM® Service.
When the Radio does not have the necessary
subscription, the Radio is able to receive the
Preview channel only.
Acquiring SiriusXM® Subscription
To activate the SiriusXM® Satellite Radio
subscription, US visit siriusxm.com/
getallaccess or call: 1-800-643-2112
Canada visit https://www.siriusxm.ca/ or
call: 1-888-539-7474.
Setting Presets
The Presets are available for all Radio Modes,
and are activated by pushing any of the six
Preset buttons on the faceplate.
When you are receiving a station that you wish
to commit into memory, push and hold the
desired numbered button on the faceplate for
more than two seconds or until you hear a
confirmation beep.
The Radio stores up to 18 presets in each of the
Radio modes.
5
21_DPF_OM_EN_USC_t.book Page 223
Page 226 of 463
224MULTIMEDIA
Audio
Push Audio button. Turning the Tune/Scroll
knob highlights the desired selection.
The Audio Menu shows the following options for
you to customize the audio settings:
Treble, Mid, Bass, Fade And Balance — Select
the desired setting to adjust, then push the
Enter/Browse button. Turn the Tune/Scroll
knob to adjust the setting + or – 9. Push the
BACK button on the faceplate when done.
Speed Adjusted Volume (if equipped) —
Select Speed Adjusted Volume and push the
Enter/Browse button. Turn the Tune/Scroll
knob to adjust the setting to Off, 1, 2, or 3.
Push the Back button on the faceplate when
done.
Loudness (if equipped) — Select Loudness
and push the Enter/Browse button to mark
the check box on or off. Push the Back button
on the faceplate when done.
AUX Volume Offset (if equipped) — Select AUX
Volume Offset and push the Enter/Browse
button. Turn the Tune/Scroll knob to adjust
the setting + or – 3. Push the Back button on
the faceplate when done.
Clock Setting
1. Push the Menu button at the bottom of the
radio, and push the Enter/Browse button
for System Settings. Next, select the Time
and Format setting and then select Set
Time by pushing the Enter/Browse button.
2. Adjust the hours or minutes by turning the Tune/Scroll knob, then pushing the
Enter/Browse button to move to the next
entry. You can also select 12 hr or 24 hr
format by turning the Tune/Scroll knob,
then pushing the Enter/Browse button on
the desired selection.
3. Once the time is set, press the Back button to exit the time screen.
MEDIA MODE
Operating Media Mode
Media Mode is entered by pushing the Media
button on the faceplate located to the left of the
display. Once in Media Mode, press the Media
button in order to select the desired media
source. Audio Source Selection
Push the Media button on the faceplate to
select the desired audio source, AUX, USB or
Bluetooth® audio device.
Seek Up/Seek Down
Push and release the Seek Up button on the
faceplate for the next selection.
Push and release the Seek Down button on
the faceplate to return to the beginning of the
current selection, or return to the beginning of
the previous selection if the Media is within the
first three seconds of the current selection.
Fast Seek Up
Push and hold the Seek Up button on the
faceplate and the desired mode will begin to
fast forward through the current track until the
button on the faceplate is released.
Fast Seek Down
Push and hold the Seek Down button on the
faceplate and the desired mode will begin to
rewind through the current track until the
button on the faceplate is released.
21_DPF_OM_EN_USC_t.book Page 224
Page 227 of 463
MULTIMEDIA225
USB Mode
USB Mode is entered by either inserting a USB
device into the USB port, or by pushing the
Media button. Once in Media Mode, push the
Media button and select USB. The display will
show the track number, and track time in
minutes and seconds. Play will begin at the start
of track one.
Bluetooth® Mode
Bluetooth® Streaming Audio (BTSA) or
Bluetooth® Mode is entered by pairing a
Bluetooth® device containing music to the
Uconnect system.
Before proceeding, the Bluetooth® device
must be paired with the Uconnect Phone to
communicate with the Uconnect system.
Once the Bluetooth® device is paired to the
Uconnect system, push the Media button
located on the faceplate. Once in Media Mode,
push the Media button and then select
Bluetooth®.
For mobile phone compatibility and pairing
instructions, please visit UconnectPhone.com.
AUX Mode
AUX Mode is entered by inserting an AUX device
using a cable with a 3.5 mm stereo audio jack
into the AUX port, or by pushing Media button.
Once in Media Mode, push the Media button
and select AUX.
If you insert an auxiliary device with the ignition
ON/RUN and the radio On, the unit will switch to
AUX Mode and begin to play when you insert the
device cable.
Controlling The Auxiliary Device
The control of the auxiliary device (e.g.,
selecting playlists, play, fast forward, etc.)
cannot be provided by the radio. Use the device
controls instead. Adjust the volume with the
On/Off Volume rotary knob or with the volume
of the attached device.
NOTE:
The vehicle radio unit is acting as the amplifier
for audio output from the auxiliary device.
Therefore, if the volume control on the auxiliary
device is set too low, there will be insufficient
audio signal for the radio unit to play music from
the device.
PHONE MODE
Operating Phone Mode
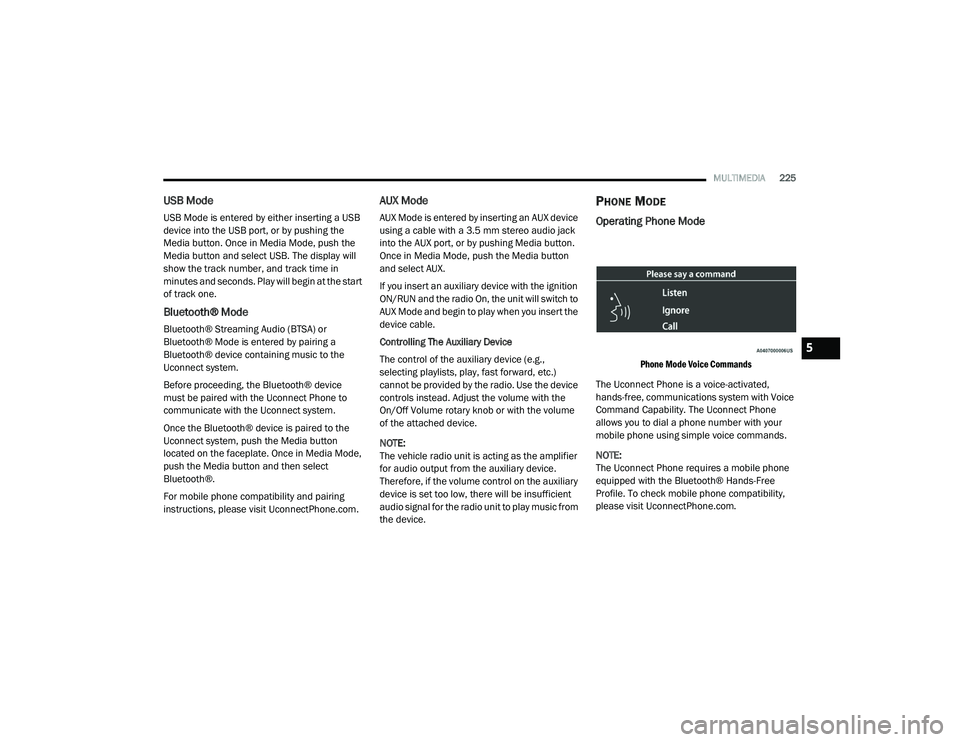
Phone Mode Voice Commands
The Uconnect Phone is a voice-activated,
hands-free, communications system with Voice
Command Capability. The Uconnect Phone
allows you to dial a phone number with your
mobile phone using simple voice commands.
NOTE:
The Uconnect Phone requires a mobile phone
equipped with the Bluetooth® Hands-Free
Profile. To check mobile phone compatibility,
please visit UconnectPhone.com.
5
21_DPF_OM_EN_USC_t.book Page 225
Page 230 of 463
228MULTIMEDIA
steering wheel controls during a call, push the
Voice Recognition button on the steering wheel.
After the beep, say “transfer call”.
UCONNECT SETTINGS
The Uconnect system uses a combination of
buttons on the touchscreen and buttons on the
faceplate located on the center of the instrument
panel. These buttons allow you to access and
change the Customer Programmable Features.
Many features can vary by vehicle.
Buttons on the faceplate are located below
and/or beside the Uconnect system in the
center of the instrument panel. In addition,
there is a Scroll/Enter control knob located on
the right side. Turn the control knob to scroll
through menus and change settings. Push the
center of the control knob one or more times to
select or change a setting.
Your Uconnect system may also have Screen
Off and Mute buttons on the faceplate.
Push the Screen Off button on the faceplate to
turn off the Uconnect screen. Push the button
again or tap the screen to turn the screen on.
Press the Back Arrow button to exit out of a
Menu or certain option on the Uconnect system.
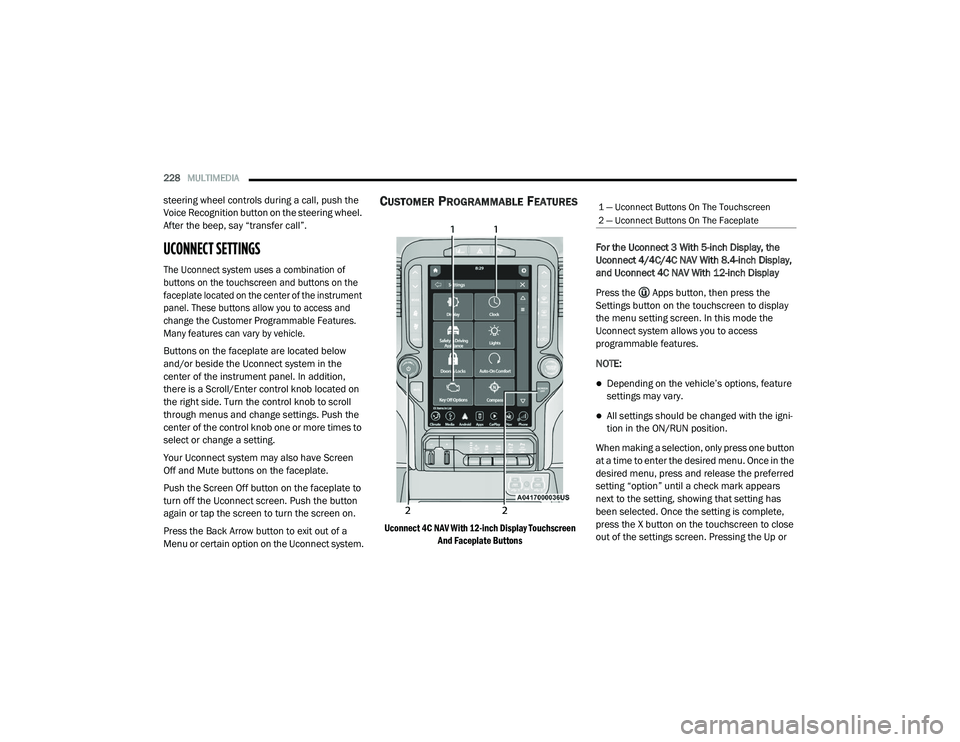
CUSTOMER PROGRAMMABLE FEATURES
Uconnect 4C NAV With 12-inch Display Touchscreen
And Faceplate Buttons
For the Uconnect 3 With 5-inch Display, the
Uconnect 4/4C/4C NAV With 8.4-inch Display,
and Uconnect 4C NAV With 12-inch Display
Press the Apps button, then press the
Settings button on the touchscreen to display
the menu setting screen. In this mode the
Uconnect system allows you to access
programmable features.
NOTE:
Depending on the vehicle’s options, feature
settings may vary.
All settings should be changed with the igni
-
tion in the ON/RUN position.
When making a selection, only press one button
at a time to enter the desired menu. Once in the
desired menu, press and release the preferred
setting “option” until a check mark appears
next to the setting, showing that setting has
been selected. Once the setting is complete,
press the X button on the touchscreen to close
out of the settings screen. Pressing the Up or
1 — Uconnect Buttons On The Touchscreen
2 — Uconnect Buttons On The Faceplate
21_DPF_OM_EN_USC_t.book Page 228
Page 232 of 463

230MULTIMEDIA
Units
When the Units button is pressed on the touchscreen, the system displays the different measurement options. The selected unit of measurement will
display in the instrument cluster display and Navigation system (if equipped). The available settings are:Keyboard
This setting will change the keyboard type on the display. The selectable keyboards are
“ABCDEF Keyboard”, “QWERTY Keyboard”, and “AZERTY Keyboard”.
Touchscreen Beep This setting will allow you to turn the touchscreen beep on or off.
Control Screen Timeout This setting allows you to set the Control Screen to turn off automatically after five seconds or
stay open until manually closed.
Navigation Next Turn Pop-ups Displayed in Cluster This setting will display navigation prompts in the Instrument Cluster Display.
Phone Pop-ups Displayed In Cluster This setting will display smartphone notifications and messages in the Instrument Cluster
Display.
Fuel Saver Display This setting will enable fuel saver mode in the Instrument Cluster Display.
Ready To Drive Pop-ups This setting will enable the Ready To Drive Pop-ups in the Instrument Cluster Display.
Setting Name Description
USThis setting will change the unit of measurement on the display to US.
Metric This setting will change the unit of measurement on the display to Metric.
Custom This setting changes the “Speed” (MPH or km/h), “Distance” (mi or km), “Fuel Consumption”
(MPG [US], MPG [UK], L/100 km, or km/L), “Pressure” (psi, kPa, or bar), “Temperature”
(°C or °F), and “Capacity” (Gal [US], Gal [UK], or L) units of measurement independently.
Setting Name
Description
21_DPF_OM_EN_USC_t.book Page 230
Page 249 of 463
MULTIMEDIA247
UCONNECT MODES
STEERING WHEEL AUDIO CONTROLS
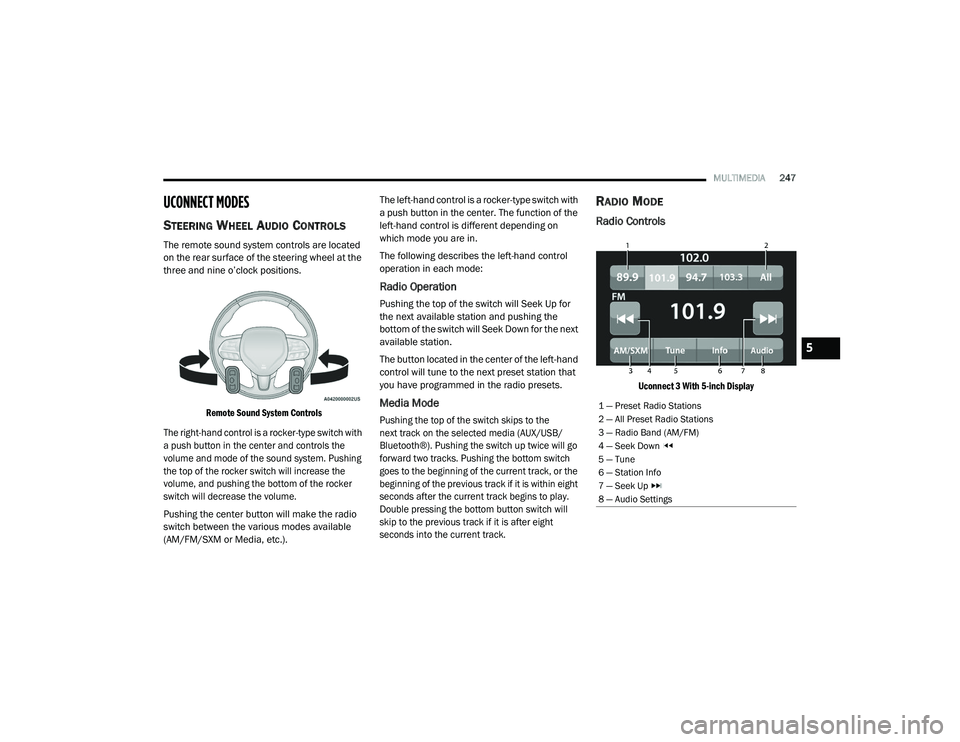
The remote sound system controls are located
on the rear surface of the steering wheel at the
three and nine o’clock positions.
Remote Sound System Controls
The right-hand control is a rocker-type switch with
a push button in the center and controls the
volume and mode of the sound system. Pushing
the top of the rocker switch will increase the
volume, and pushing the bottom of the rocker
switch will decrease the volume.
Pushing the center button will make the radio
switch between the various modes available
(AM/FM/SXM or Media, etc.). The left-hand control is a rocker-type switch with
a push button in the center. The function of the
left-hand control is different depending on
which mode you are in.
The following describes the left-hand control
operation in each mode:
Radio Operation
Pushing the top of the switch will Seek Up for
the next available station and pushing the
bottom of the switch will Seek Down for the next
available station.
The button located in the center of the left-hand
control will tune to the next preset station that
you have programmed in the radio presets.
Media Mode
Pushing the top of the switch skips to the
next track on the selected media (AUX/USB/
Bluetooth®). Pushing the switch up twice will go
forward two tracks. Pushing the bottom switch
goes to the beginning of the current track, or the
beginning of the previous track if it is within eight
seconds after the current track begins to play.
Double pressing the bottom button switch will
skip to the previous track if it is after eight
seconds into the current track.
RADIO MODE
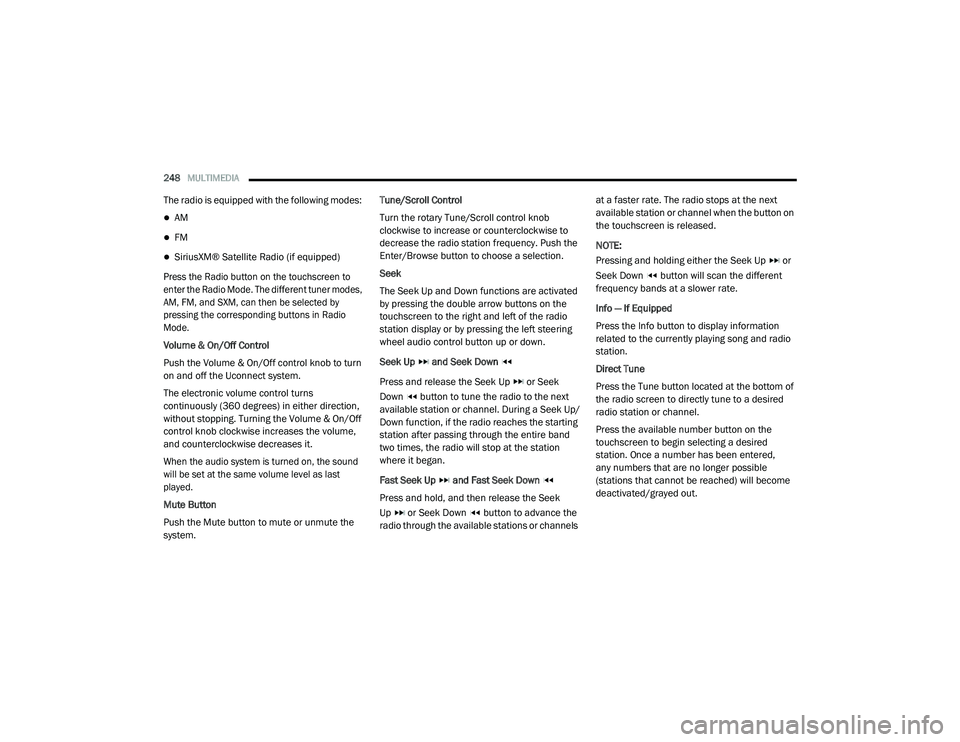
Radio Controls
Uconnect 3 With 5-inch Display
1 — Preset Radio Stations
2 — All Preset Radio Stations
3 — Radio Band (AM/FM)
4 — Seek Down
5 — Tune
6 — Station Info
7 — Seek Up
8 — Audio Settings
5
21_DPF_OM_EN_USC_t.book Page 247
Page 250 of 463
248MULTIMEDIA
The radio is equipped with the following modes:
AM
FM
SiriusXM® Satellite Radio (if equipped)
Press the Radio button on the touchscreen to
enter the Radio Mode. The different tuner modes,
AM, FM, and SXM, can then be selected by
pressing the corresponding buttons in Radio
Mode.
Volume & On/Off Control
Push the Volume & On/Off control knob to turn
on and off the Uconnect system.
The electronic volume control turns
continuously (360 degrees) in either direction,
without stopping. Turning the Volume & On/Off
control knob clockwise increases the volume,
and counterclockwise decreases it.
When the audio system is turned on, the sound
will be set at the same volume level as last
played.
Mute Button
Push the Mute button to mute or unmute the
system. Tune/Scroll Control
Turn the rotary Tune/Scroll control knob
clockwise to increase or counterclockwise to
decrease the radio station frequency. Push the
Enter/Browse button to choose a selection.
Seek
The Seek Up and Down functions are activated
by pressing the double arrow buttons on the
touchscreen to the right and left of the radio
station display or by pressing the left steering
wheel audio control button up or down.
Seek Up and Seek Down
Press and release the Seek Up or Seek
Down button to tune the radio to the next
available station or channel. During a Seek Up/
Down function, if the radio reaches the starting
station after passing through the entire band
two times, the radio will stop at the station
where it began.
Fast Seek Up and Fast Seek Down
Press and hold, and then release the Seek
Up or Seek Down button to advance the
radio through the available stations or channels at a faster rate. The radio stops at the next
available station or channel when the button on
the touchscreen is released.
NOTE:
Pressing and holding either the Seek Up or
Seek Down button will scan the different
frequency bands at a slower rate.
Info — If Equipped
Press the Info button to display information
related to the currently playing song and radio
station.
Direct Tune
Press the Tune button located at the bottom of
the radio screen to directly tune to a desired
radio station or channel.
Press the available number button on the
touchscreen to begin selecting a desired
station. Once a number has been entered,
any numbers that are no longer possible
(stations that cannot be reached) will become
deactivated/grayed out.
21_DPF_OM_EN_USC_t.book Page 248
Page 253 of 463

MULTIMEDIA251
Replay
The replay function provides a means to store and replay up to 22 minutes of music audio and 48 minutes of talk radio. Once the channel is switched,
content in replay memory is lost.
Press the Replay button on the touchscreen. The play/pause, rewind/forward and live buttons will display at the top of the screen, along with the replay time.
You can exit by pressing the Replay button on the touchscreen any time during the Replay Mode.
Play/Pause Press the Pause/Play button on the touchscreen to pause
the playing of live or rewound content at any time. Play can be resumed by pressing the Pause/Play button again on the touchscreen.
Rewind Press the Rewind button on the touchscreen to rewind the
content in steps of five seconds. Pressing the Rewind
button on the touchscreen for more than two seconds
rewinds the content. The radio begins playing the content at the point at which the press is released.
Forward Each press of the Forward button on the touchscreen
forwards the content in steps of five seconds. Forwarding of the content can only be done when the content is
previously rewound, and therefore, cannot be done for live content. A continuous press of the Forward button on the touchscreen also forwards the content. The radio begins playing the content at the point at which the press is release.
Live LivePress the Live button on the touchscreen to resume the
playing of live content.
5
21_DPF_OM_EN_USC_t.book Page 251