clutch Seat Alhambra 2015 Owner's Manual
[x] Cancel search | Manufacturer: SEAT, Model Year: 2015, Model line: Alhambra, Model: Seat Alhambra 2015Pages: 305, PDF Size: 5.46 MB
Page 9 of 305
Safe driving
If your physical constitution prevents you
from maintaining the correct sitting position,
contact a specialised workshop for help with
any special devices. The seat belt and airbag
can only provide optimum protection if a cor-
rect sitting position is adopted. SEAT recom-
mends taking your car in for technical serv-
ice.
For your own safety and to reduce the risk of
injury in the event of an accident or sudden
braking or manoeuvre, SEAT recommend the
following positions:
Valid for all vehicle occupants:
● Adjust the head restraint so that its upper
edge is at the same level as the top of your
head, or as close as possible to the same lev-
el as the top of your head and under no cir-
cumstances below eye level. Keep the back
of your neck as close as possible to the head
restraint ››› Fig. 1 and
›
›› Fig. 2.
● Short people must lower the head restraint
completely, even if your head is below its up-
per edge.
● Tall people must raise the head restraint
completely.
● Adjust the seat backrest to an upright posi-
tion so that your back rests completely
against it.
● Always keep your feet in the footwell while
the vehicle is in motion. ●
Adjust and fasten your seat belt correctly
››› page 14.
Al
so valid for the driver:
● Adjust the steering wheel so that there is a
distance of at least 25 cm (10 inches) be-
tween it and your chest ››› Fig. 1 and so that
you c
an hold the steering wheel with both
hands on the outside of the ring at the 9
o'clock and 3 o'clock positions with your
arms slightly bent.
● The adjusted steering wheel must face your
chest and not your face.
● Adjust the driver seat forwards or back-
wards so that you are able to press the accel-
erator, brake and clutch pedals to the floor
with your knees slightly angled and the dis-
tance between your knees and the dash pan-
el is at least 10 cm (4 inches) ››› Fig. 1
.
● Adjust the height of the driver seat so that
you can easily reach the top of the steering
wheel.
● Keep both feet in the footwell so that you
have the vehicle under control at all times.
Also valid for the front passenger:
● Move the front passenger seat back as far
as possible for optimum protection should
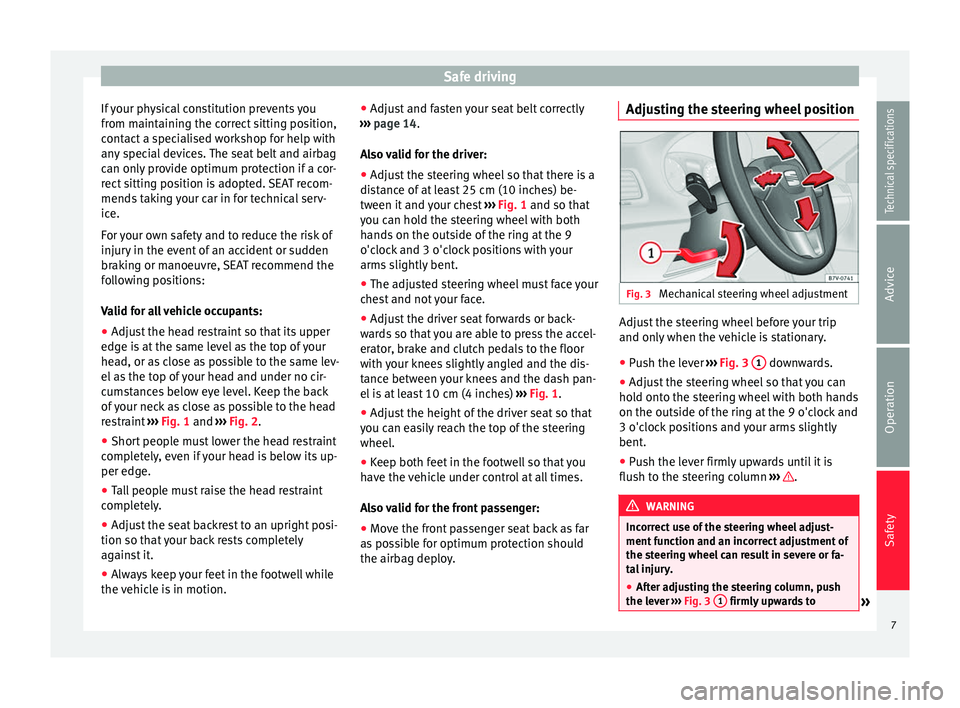
the airbag deploy. Adjusting the steering wheel position
Fig. 3
Mechanical steering wheel adjustment Adjust the steering wheel before your trip
and only when the vehicle is stationary.
●
Push the lever ››› Fig. 3 1 downwards.
● Adjust the steering wheel so that you can
hold onto the steering wheel with both hands
on the outside of the ring at the 9 o'clock and
3 o'clock positions and your arms slightly
bent.
● Push the lever firmly upwards until it is
flush to the steering column ››› .
WARNING
Incorrect use of the steering wheel adjust-
ment function and an incorrect adjustment of
the steering wheel can result in severe or fa-
tal injury.
● After adjusting the steering column, push
the lever ››› Fig. 3 1 firmly upwards to
» 7
Technical specifications
Advice
Operation
Safety
Page 11 of 305
Safe driving
●
Always keep your feet in the footwell while
the vehicle is in motion. Never, for example,
put your feet on the surface of a seat or on
the dash panel and never put them out of a
window. Otherwise the airbag and seat belt
offer insufficient protection and the risk of in-
jury in the event of an accident is increased. WARNING
Before every trip, adjust the seat, the seat
belt and the head restraints and instruct your
passengers to fasten their seat belts proper-
ly.
● Move the front passenger seat back as far
as possible.
● Adjust the driver seat so that there is a dis-
tance of at least 25 cm (10 inches) between
the centre of your chest and the hub of the
steering wheel. Adjust the driver seat so that
you are able to press the accelerator, brake
and clutch pedals to the floor with your knees
slightly angled and that the distance be-
tween your knees and the dash panel is at
least 10 cm (4 inches). If your physical consti-
tution prevents you from meeting these re-
quirements, contact a specialised workshop
to make any modifications required.
● Never drive with the seat backrest tilted far
back. The further the seat backrests are tilted
to the rear, the greater the risk of injury due
to incorrect positioning of the belt web or to
the incorrect sitting position!
● Never drive with the seat backrest tilted
forwards. Should a front airbag deploy, it could throw the seat backrest backwards and
injure the passengers of the rear seats.
●
Sit as far away as possible from the steer-
ing wheel and the dash panel.
● Keep your back straight and resting com-
pletely against the seat backrest and the
front seats correctly adjusted. Never place
any part of your body in the area of the airbag
or very close to it.
● If passengers on the rear seats are not sit-
ting in an upright position, the risk of severe
injury due to incorrect positioning of the belt
web increases. WARNING
Incorrect seat adjustment may lead to acci-
dents and severe injuries.
● Only adjust the seats when the vehicle is
stationary, as the seats could move unex-
pectedly while the vehicle is in motion and
you could lose control of the vehicle. Further-
more, an incorrect position is adopted when
adjusting the seat.
● Only adjust the height, seat backrest and
forwards or backwards position of the seat
when there is nobody in the seat adjustment
area.
● There must be no objects blocking the seat
adjustment area.
● Only adjust the height, angle and longitu-
dinal position of the rear seats when nobody
is in the way. ●
The seat adjustment and lock areas must
be kept clean. Pedal area
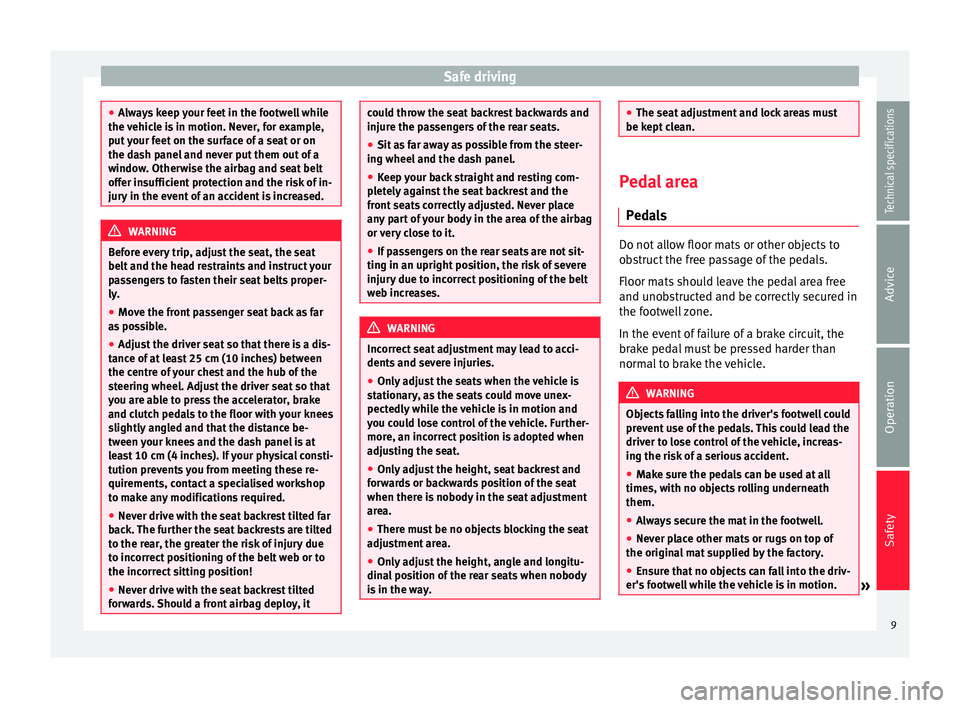
Pedals Do not allow floor mats or other objects to
obstruct the free passage of the pedals.
Floor mats should leave the pedal area free
and unobstructed and be correctly secured in
the footwell zone.
In the event of failure of a brake circuit, the
brake pedal must be pressed harder than
normal to brake the vehicle.
WARNING
Objects falling into the driver's footwell could
prevent use of the pedals. This could lead the
driver to lose control of the vehicle, increas-
ing the risk of a serious accident.
● Make sure the pedals can be used at all
times, with no objects rolling underneath
them.
● Always secure the mat in the footwell.
● Never place other mats or rugs on top of
the original mat supplied by the factory.
● Ensure that no objects can fall into the driv-
er's footwell while the vehicle is in motion. » 9Technical specifications
Advice
Operation
Safety
Page 137 of 305
Driving
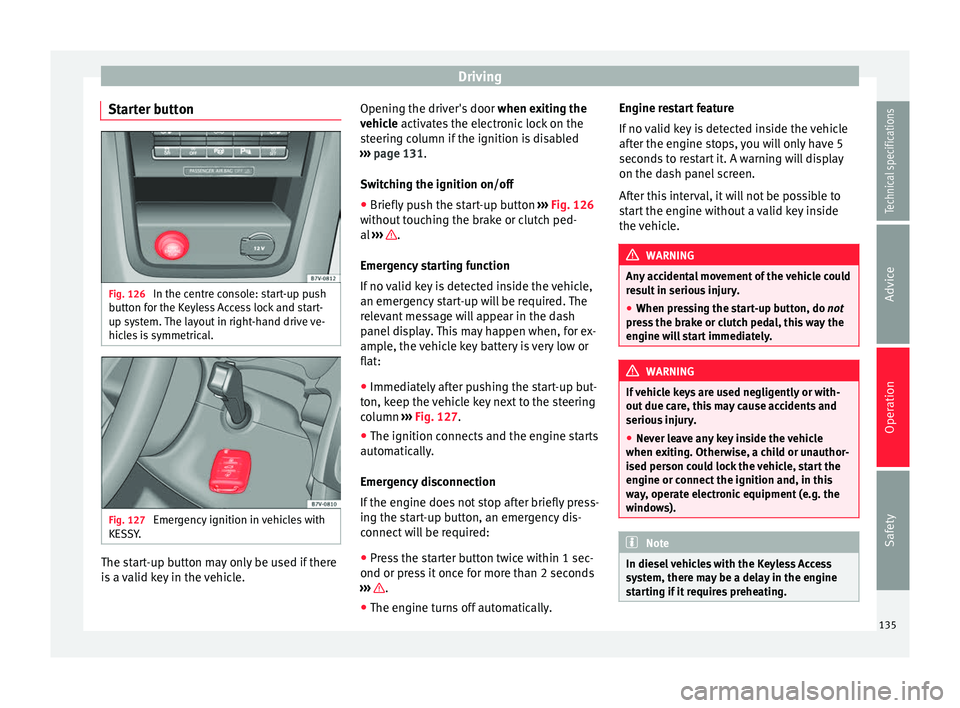
Starter button Fig. 126
In the centre console: start-up push
button for the Keyless Access lock and start-
up system. The layout in right-hand drive ve-
hicles is symmetrical. Fig. 127
Emergency ignition in vehicles with
KESSY. The start-up button may only be used if there
is a valid key in the vehicle. Opening the driver's door
when exiting the
vehicle activates the electronic lock on the
s t
eering column if the ignition is disabled
››› page 131.
Swit
ching the ignition on/off
● Briefly push the start-up button ››› Fig. 126
without touching the brake or clutch ped-
al ››› .
Emergency starting function
If no valid key is detected inside the vehicle,
an emergency start-up will be required. The
relevant message will appear in the dash
panel display. This may happen when, for ex-
ample, the vehicle key battery is very low or
flat:
● Immediately after pushing the start-up but-
ton, keep the vehicle key next to the steering
column ››› Fig. 127 .
● The ignition c onnects
and the engine starts
automatically.
Emergency disconnection
If the engine does not stop after briefly press-
ing the start-up button, an emergency dis-
connect will be required:
● Press the starter button twice within 1 sec-
ond or press it once for more than 2 seconds
››› .
● The engine turns off automatically. Engine restart feature
If no valid key is detected inside the vehicle
after the engine stops, you will only have 5
seconds to restart it. A warning will display
on the dash panel screen.
After this interval, it will not be possible to
start the engine without a valid key inside
the vehicle.
WARNING
Any accidental movement of the vehicle could
result in serious injury.
● When pressing the start-up button, do not
pr e
ss the brake or clutch pedal, this way the
engine will start immediately. WARNING
If vehicle keys are used negligently or with-
out due care, this may cause accidents and
serious injury.
● Never leave any key inside the vehicle
when exiting. Otherwise, a child or unauthor-
ised person could lock the vehicle, start the
engine or connect the ignition and, in this
way, operate electronic equipment (e.g. the
windows). Note
In diesel vehicles with the Keyless Access
system, there may be a delay in the engine
starting if it requires preheating. 135
Technical specifications
Advice
Operation
Safety
Page 138 of 305
Operation
Starting the engine Complete operations only in the sequence
given: Vehicles without
Keyless AccessVehicles with
Keyless Access
1.Press and hold the brake pedal until step 5 is per- formed.
1a.In vehicles with a manual gearbox: press and
hold the clutch down until the engine starts.
2.Put the gearbox lever in neutral or the selector lever in position P or N.
3.
Only in vehicles with
diesel engines: for pre-
heating, turn the key in the ignition lock to po-
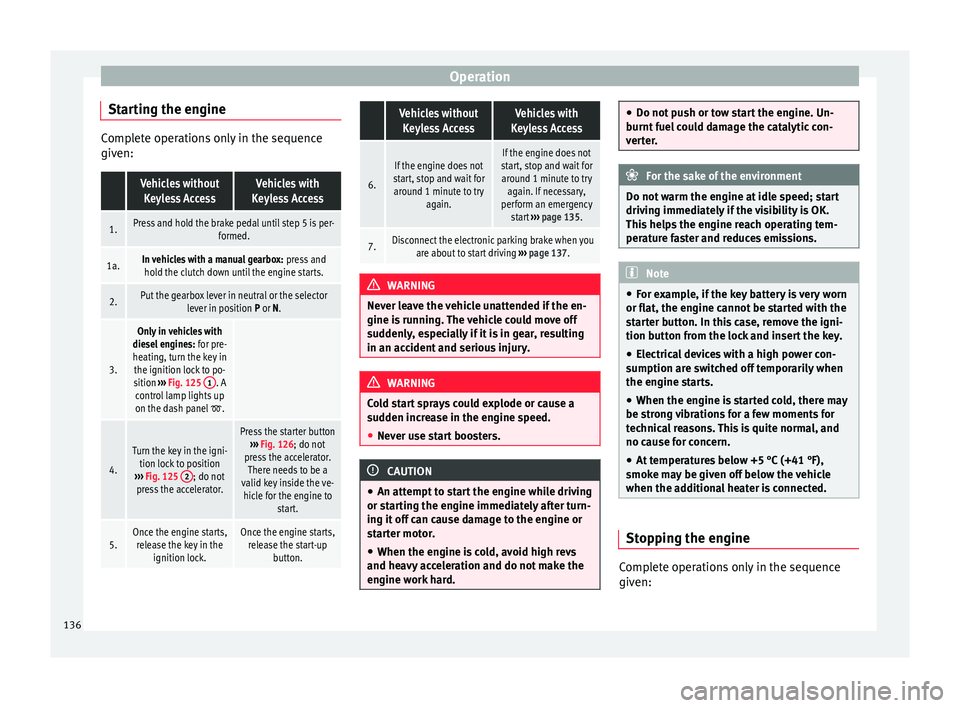
sition ››› Fig. 125 1
. A
control lamp lights up
on the dash panel
.
4.
Turn the key in the igni- tion lock to position
››› Fig. 125 2
; do not
press the accelerator.
Press the starter button ››› Fig. 126; do not
press the accelerator. There needs to be a
valid key inside the ve- hicle for the engine to start.
5.Once the engine starts,release the key in the ignition lock.Once the engine starts,release the start-up button.
Vehicles without
Keyless AccessVehicles with
Keyless Access
6.
If the engine does not
start, stop and wait for around 1 minute to try again.If the engine does not
start, stop and wait for around 1 minute to try again. If necessary,
perform an emergency start ››› page 135.
7.Disconnect the electronic parking brake when you
are about to start driving ››› page 137. WARNING
Never leave the vehicle unattended if the en-
gine is running. The vehicle could move off
suddenly, especially if it is in gear, resulting
in an accident and serious injury. WARNING
Cold start sprays could explode or cause a
sudden increase in the engine speed.
● Never use start boosters. CAUTION
● An attempt to start the engine while driving
or starting the engine immediately after turn-
ing it off can cause damage to the engine or
starter motor.
● When the engine is cold, avoid high revs
and heavy acceleration and do not make the
engine work hard. ●
Do not push or tow start the engine. Un-
burnt fuel could damage the catalytic con-
verter. For the sake of the environment
Do not warm the engine at idle speed; start
driving immediately if the visibility is OK.
This helps the engine reach operating tem-
perature faster and reduces emissions. Note
● For example, if the key battery is very worn
or flat, the engine cannot be started with the
starter button. In this case, remove the igni-
tion button from the lock and insert the key.
● Electrical devices with a high power con-
sumption are switched off temporarily when
the engine starts.
● When the engine is started cold, there may
be strong vibrations for a few moments for
technical reasons. This is quite normal, and
no cause for concern.
● At temperatures below +5 °C (+41 °F),
smoke may be given off below the vehicle
when the additional heater is connected. Stopping the engine
Complete operations only in the sequence
given:
136
Page 142 of 305
Operation
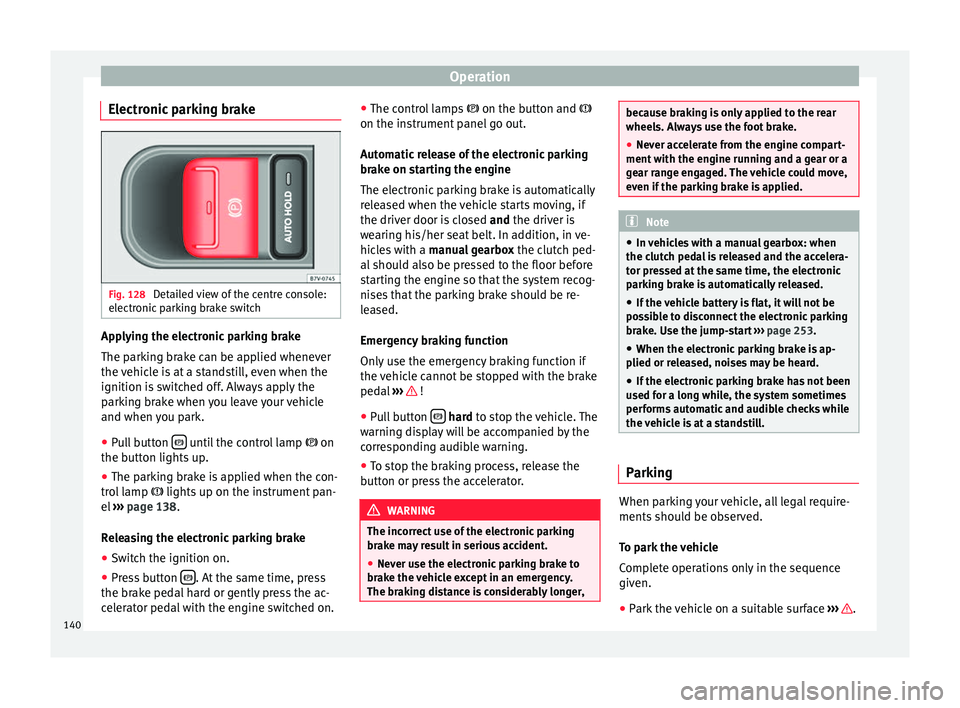
Electronic parking brake Fig. 128
Detailed view of the centre console:
electronic parking brake switch Applying the electronic parking brake
The parking brake can be applied whenever
the vehicle is at a standstill, even when the
ignition is switched off. Always apply the
parking brake when you leave your vehicle
and when you park.
●
Pull button until the control lamp
on
the button lights up.
● The parking brake is applied when the con-
trol lamp lights up on the instrument pan-
el ››› page 138 .
R el
easing the electronic parking brake
● Switch the ignition on.
● Press button . At the same time, press
the brake pedal hard or gently press the ac-
celerator pedal with the engine switched on. ●
The control lamps on the button and
on the in s
trument panel go out.
Automatic release of the electronic parking
brake on starting the engine
The electronic parking brake is automatically
released when the vehicle starts moving, if
the driver door is closed and
the driver is
wearing his/her seat belt. In addition, in ve-
hicles with a manual gearbox the clutch ped-
al should also be pressed to the floor before
starting the engine so that the system recog-
nises that the parking brake should be re-
leased.
Emergency braking function
Only use the emergency braking function if
the vehicle cannot be stopped with the brake
pedal ››› !
● Pull button
hard
to stop the vehicle. The
w
arning display will be accompanied by the
corresponding audible warning.
● To stop the braking process, release the
button or press the accelerator. WARNING
The incorrect use of the electronic parking
brake may result in serious accident.
● Never use the electronic parking brake to
brake the vehicle except in an emergency.
The braking distance is considerably longer, because braking is only applied to the rear
wheels. Always use the foot brake.
●
Never accelerate from the engine compart-
ment with the engine running and a gear or a
gear range engaged. The vehicle could move,
even if the parking brake is applied. Note
● In vehicles with a manual gearbox: when
the clutch pedal is released and the accelera-
tor pressed at the same time, the electronic
parking brake is automatically released.
● If the vehicle battery is flat, it will not be
possible to disconnect the electronic parking
brake. Use the jump-start ››› page 253.
● When the electronic parking brake is ap-
plied or released, noises may be heard.
● If the electronic parking brake has not been
used for a long while, the system sometimes
performs automatic and audible checks while
the vehicle is at a standstill. Parking
When parking your vehicle, all legal require-
ments should be observed.
To park the vehicle
Complete operations only in the sequence
given.
● Park the vehicle on a suitable surface ››› .
140
Page 143 of 305
Driving
● Press and hold the brake pedal until the ve-
hicle comes to a standstill.
● Connect the electronic parking brake
››› page 140 .
● For an aut
omatic gearbox, move the selec-
tor lever to position P.
● Sw
itch off the engine and release the brake
pedal.
● Remove the key from the ignition.
● If necessary, turn the steering wheel slight-
ly to lock the steering.
● With a manual gearbox, engage 1st gear on
flat ground and slopes, or even reverse gear
on hills, and release the clutch pedal.
● Ensure that all passengers leave the vehi-
cle, especially children.
● When leaving the vehicle, take all keys with
you.
● Lock the vehicle.
Additional information for steep slopes and
hills
Before switching off the engine, rotate the
steering wheel so that if the vehicle should
move, it will be held by the kerb.
● On slopes, turn the front wheels so that
they are against the edge of the kerb.
● Uphill, turn the wheels towards the centre
of the road. WARNING
The components of the exhaust system reach
very high temperatures. This could cause a
fire and considerable damage.
● Always park your vehicle so that no part of
the exhaust system can come in contact with
flammable materials (such as wood,
leaves,dried grass, or spilled fuel). CAUTION
● Special care should be taken when parking
in areas with high kerbs or fixed barriers. Ob-
jects protruding from the ground may dam-
age the bumper or other parts of the vehicle
during manoeuvres. To avoid damage, stop
before the wheels touch the barrier or kerb.
● Special attention is required when driving
through entrances, over ramps, kerbs or oth-
er objects. The vehicle underbody, bumpers,
mudguards and running gear, and the engine
and exhaust system could be damaged as
you drive over these objects. Information about the brakes
For the first 200 to 300 km, new brake pads
have not yet reached their maximum braking
capacity, and need to be “run in” first
››› .
The slightly reduced braking effect can be
compensated for by increasing pressure on
the brake pedal. While running in, the full
br ak
ing distance or emergency braking dis- tance is larger
then when the brake pads
have been run in. While running in, avoid full
power braking or situations requiring braking
performance. For example, in heavy traffic.
The
rate of wear of the brake pads depends
to a great extent on the conditions in which
the vehicle is used and the way the vehicle is
driven. If the vehicle is used frequently in city
traffic or for short trips or driven sport style,
visit a specialised workshop regularly, more
frequently than advised in the Maintenance
Programme, to have the brake pads checked.
If you drive with wet brakes, for example, af-
ter crossing areas of water, in heavy rainfall
or even after washing the car, the effect of
the brakes is lessened as the brake discs are
wet or even frozen (in winter). At higher
speed, “dry” the brakes as quickly as possi-
ble by braking gently several times. Only do
this without endangering vehicles behind
you or any other road users ››› .
A layer of salt on the discs and brake pads
w i
ll reduce the effectiveness of the brakes
and increase braking distance. If you drive for
a prolonged period on salted roads without
braking then brake carefully several times to
eliminate the layer of salt on the brakes ››› .
If the vehicle remains parked for considera-
ble lengths of time, is used little, or if the
brakes are not used, there may be corrosion
on the brake discs and a build up of dirt on
the brake pads. If the brakes are not used »
141
Technical specifications
Advice
Operation
Safety
Page 146 of 305
Operation
The position of each of the gears is shown on
the gear stick ››› Fig. 129 .
● Keep the c
lutch pedal pushed all the way
down.
● Move the gearbox lever to the required po-
sition.
In some countries, it is necessary to press the
clutch pedal to the floor to start the engine.
Selecting reverse gear
● With the vehicle at a standstill, press the
clutch pedal to the floor and keep pressed.
● Push the gear lever down.
● Move the gear stick to the left and then for-
wards to reverse gear ››› Fig. 129 R .
WARNING
When the engine is running, the vehicle will
start to move as soon as a gear is engaged
and the clutch released. This is also the case
with the electronic parking brake on.
● Never engage the reverse gear when a vehi-
cle is moving forward. CAUTION
To prevent damage and avoid premature
wear, please observe the following:
● While driving, do not leave your hand rest-
ing on the gear stick. The pressure applied by your hand is transmitted to the gearbox se-
lector forks.
● Always ensure that the vehicle is complete-
ly stopped before engaging the reverse gear.
● When changing gear, always make sure the
clutch pedal is pushed right to the floor.
● Never hold the vehicle “on the clutch” on
hills with the engine on. Automatic gearbox*: selecting gears
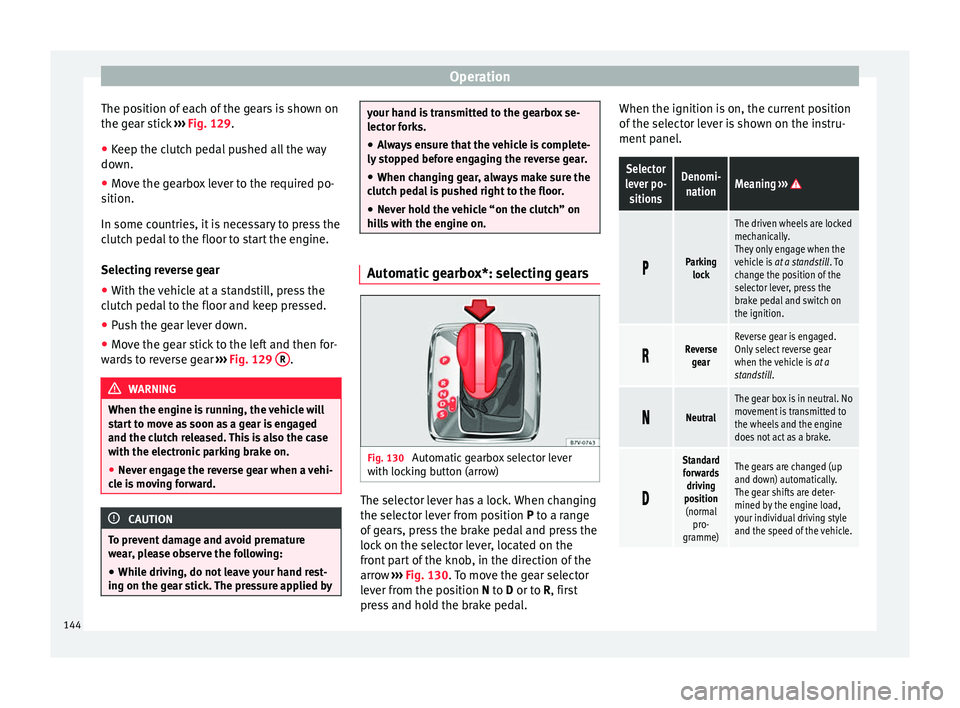
Fig. 130
Automatic gearbox selector lever
with locking button (arrow) The selector lever has a lock. When changing
the selector lever from position
P
to a range
of
gears, press the brake pedal and press the
lock on the selector lever, located on the
front part of the knob, in the direction of the
arrow ››› Fig. 130
. To move the gear selector
lever from the position N to D or to R, first
press and hold the brake pedal. When the ignition is on, the current position
of the selector lever is shown on the instru-
ment panel.
Selector
lever po- sitionsDenomi- nationMeaning ›››
Parking
lock
The driven wheels are locked
mechanically.
They only engage when the
vehicle is at a standstill . To
change the position of the
selector lever, press the
brake pedal and switch on
the ignition.
Reverse
gearReverse gear is engaged.
Only select reverse gear
when the vehicle is at a
standstill.
Neutral
The gear box is in neutral. No
movement is transmitted to
the wheels and the engine
does not act as a brake.
Standard
forwards driving
position (normal pro-
gramme)The gears are changed (up
and down) automatically.
The gear shifts are deter-
mined by the engine load,
your individual driving style
and the speed of the vehicle. 144
Page 148 of 305
Operation
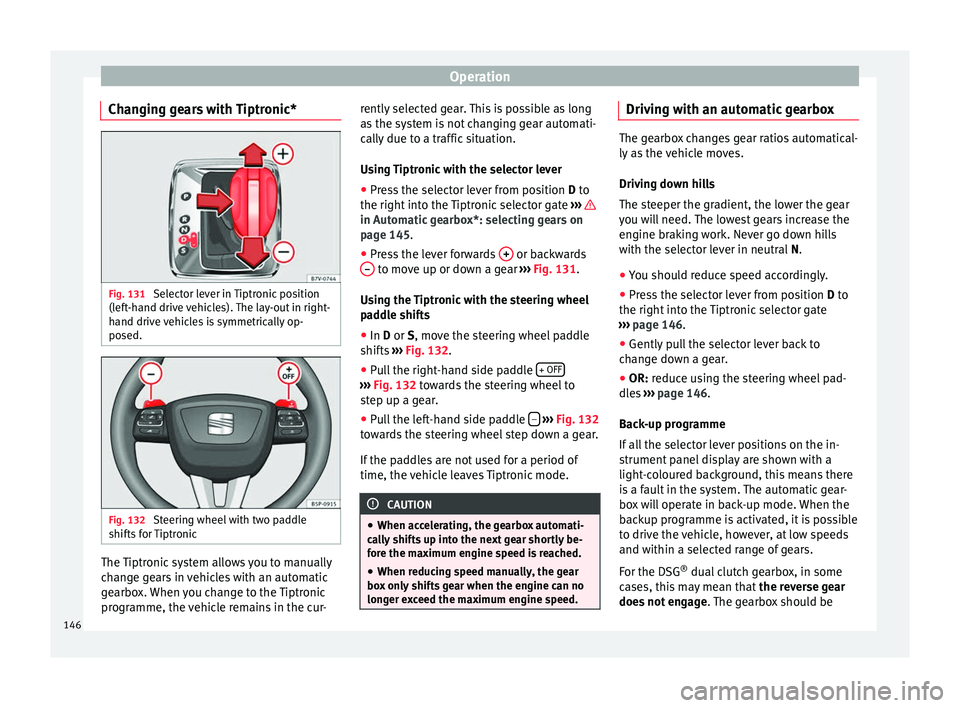
Changing gears with Tiptronic* Fig. 131
Selector lever in Tiptronic position
(left-hand drive vehicles). The lay-out in right-
hand drive vehicles is symmetrically op-
posed. Fig. 132
Steering wheel with two paddle
shifts for Tiptronic The Tiptronic system allows you to manually
change gears in vehicles with an automatic
gearbox. When you change to the Tiptronic
programme, the vehicle remains in the cur- rently selected gear. This is possible as long
as the system is not changing gear automati-
cally due to a traffic situation.
Using Tiptronic with the selector lever
● Press the selector lever from position D to
the right int
o the Tiptronic selector gate ››› in Automatic gearbox*: selecting gears on
page 145
.
● Pr e
ss the lever forwards + or backwards
– to move up or down a gear
››› Fig. 131 .
U s
ing the Tiptronic with the steering wheel
paddle shifts
● In
D or S, move the steering wheel paddle
shifts ››› Fig. 132.
● Pu
ll the right-hand side paddle + OFF ›››
Fig. 132 towards the steering wheel to
s t
ep up a gear.
● Pull the left-hand side paddle –
››› Fig. 132
towards the steering wheel step down a gear.
If the paddles are not used for a period of
time, the vehicle leaves Tiptronic mode. CAUTION
● When accelerating, the gearbox automati-
cally shifts up into the next gear shortly be-
fore the maximum engine speed is reached.
● When reducing speed manually, the gear
box only shifts gear when the engine can no
longer exceed the maximum engine speed. Driving with an automatic gearbox
The gearbox changes gear ratios automatical-
ly as the vehicle moves.
Driving down hills
The steeper the gradient, the lower the gear
you will need. The lowest gears increase the
engine braking work. Never go down hills
with the selector lever in neutral
N.
● You shou
ld reduce speed accordingly.
● Press the selector lever from position D to
the right int
o the Tiptronic selector gate
››› page 146
.
● Gently pull the selector lever back to
change down a gear.
● OR:
reduce using the steering wheel pad-
dles ›››
page 146.
Bac
k-up programme
If all the selector lever positions on the in-
strument panel display are shown with a
light-coloured background, this means there
is a fault in the system. The automatic gear-
box will operate in back-up mode. When the
backup programme is activated, it is possible
to drive the vehicle, however, at low speeds
and within a selected range of gears.
For the DSG ®
dual clutch gearbox, in some
cases, this may mean that the reverse gear
does not engage . The gearbox should be
146
Page 149 of 305
Driving
checked by a specialised workshop as soon
as possible.
Overload protection for the 6-speed DSG
gearbox ®
When the clutch is overloaded, the vehicle
begins to jerk and the selector lever position
indic at
or begins to flash. To prevent damage
to the clutch, this interrupts the power trans-
mission between the engine and the gear-
box. There is no more traction and it is not
possible to accelerate. If the clutch is opened
automatically due to overloading, press the
brake pedal. Wait a few seconds before start-
ing to move again.
Kick-down
The kick-down system provides maximum ac-
celeration when the gear selector lever is in
the positions D,
S or in the Tiptronic position.
When the accelerator pedal is pressed right
down, the automatic gearbox will shift down
to a lower gear, depending on road speed
and engine speed. This takes advantage of
the maximum acceleration of the vehicle
››› .
When the accelerator is pressed to the floor,
the automatic gearbox shifts to the next gear
only after the engine reaches the specified
maximum engine speed. Launch-Control Programme
The Launch-Control programme enables max-
imum acceleration while at a standstill.
●
Switch off the ASR ››› page 137.
● Press and hold the brake pedal with your
left foot.
● Place the selector lever in position S or Tip-
tronic.
● Press the accelerator with the right foot un-
til the vehicle reaches an engine speed of ap-
proximately 3200 rpm.
● Lift the left foot off the brake ››› . The ve-
hicle starts with maximum acceleration.
● Turn on the ASR after accelerating! WARNING
Rapid acceleration can cause loss of traction
and skidding, especially on slippery ground.
This could cause loss of control of the vehicle
resulting in an accident and considerable
damage.
● Only use kick-down and rapid acceleration
when weather conditions, surface conditions
and traffic conditions permit; accelerate and
drive in a manner that does not endanger
other road users.
● Please remember that the driven wheels
can slip and the vehicle can skid if the ASR is
turned off, especially on slippery ground.
● Turn on the ASR after accelerating! CAUTION
● If you stop on a hill with a gear range en-
gaged, do not try to prevent the vehicle from
rolling back by pressing on the accelerator.
This could cause overheating and damage the
automatic gearbox.
● Never allow the vehicle to move with the
gear selector lever in N, especially with the
engine turned off. The automatic gearbox will
not be lubricated and could be damaged. Recommended gear display
In some vehicles, the recommended gear for
reducing fuel consumption is displayed on
the instrument panel:DisplayMeaning
Optimum gear.
Recommendation to change up a gear.
Recommendation to change down a
gear.
Information for “cleaning” the diesel
particulate filter
The exhaust gas system control recognises
when the diesel particulate filter is blocked,
»
147
Technical specifications
Advice
Operation
Safety
Page 150 of 305
Operation
and helps to clean it by recommending a spe-
cific gear for driving. It may therefore be nec-
essary to drive with the engine at an
exceptionally high speed ››› page 151. WARNING
The recommended gear display is intended as
a guideline only; it should never replace the
driver's attention to driving carefully.
● Responsibility for selecting the correct gear
for each situation continues to lie with the
driver, for example when overtaking, climb-
ing a hill or towing a trailer. For the sake of the environment
Selecting the most appropriate gear for the
situation will help you to save fuel. Note
The recommended gear display is switched
off when the clutch pedal is pressed. Run-in and economical driving
Running-in Please observe the instructions for running-in
new components. Running-in the engine
The engine needs to be run-in over the first
1500 km (1000 miles). During its first few
hours of running, the internal friction in the
engine is greater than later on when all the
moving parts have bedded down.
How the vehicle is driven for the first
1500 km (1000 miles) influences the future
engine performance. Throughout the life of
the vehicle, it should be driven at a moderate
speed – especially when the engine is cold –
this will reduce engine wear and increase its
useful life. Never drive at extremely low en-
gine speeds. Always engage a lower gear
when the engine works “irregularly”. For the
first 1000 km or 600 miles, please note:
● Do not use full throttle.
● Do not force the engine above two thirds of
its maximum speed.
● Do not tow a trailer.
Between 1000 and 1500 kilometres (600 to
1000 miles) ,
gradually increase power until
reaching the maximum speed and high en-
gine speeds.
Running in new tyres and brake pads
● Replacement of wheel rims and new tyres
››› page 231
● Notes on the brakes ››› page 141 For the sake of the environment
If the engine is run in gently, the life of the
engine will be increased and the engine oil
consumption reduced. Environmental friendliness
Environmental protection is a top priority in
the design, choice of materials and manufac-
ture of your new SEAT.
Constructive measures to encourage
recycling
● Joints and connections designed for easy
dismantling
● Modular construction to facilitate disman-
tling
● Increased use of single-grade materials.
● Plastic parts and elastomers are marked in
accordance with ISO 1043, ISO 11469 and
ISO 1629.
Choice of materials
● Use of recycled materials.
● Use of compatible plastics in the same part
if its components are not easily separated.
● Use of recycled materials and/or materials
originating from renewable sources.
● Reduction of volatile components, includ-
ing odour, in plastic materials.
148