SSANGYONG MUSSO 1998 Workshop Repair Manual
MUSSO 1998
SSANGYONG
SSANGYONG
https://www.carmanualsonline.info/img/67/57510/w960_57510-0.png
SSANGYONG MUSSO 1998 Workshop Repair Manual
Trending: fuel type, power steering fluid, lights, fuse box diagram, jump start, height adjustment, sensor
Page 1291 of 1463
MANUAL & SEMIAUTO-HVAC 7B/C-17
Removal & Installation Procedure
1. Disconnect the inlet and outlet pipes of condenser.
Notice
Before disconnection, evacuate the refrigerant from the
system.
2. Remove the mounting bolts (4bolts) and condenser
assembly.
3. Remove the main condenser fan from condenser.
4. Installation should follow the removal procedure in the
reverse order.
Page 1292 of 1463
7B/C-18 MANUAL & SEMIAUTO-HVAC
RECEIVER DRIER
Diesel Engine
1 Condenser
2 Receiver Drier
3 Bolt......................................................... 4-6 Nm4 Bolt..........................................................5-8 Nm
5 Bracket
Page 1293 of 1463
MANUAL & SEMIAUTO-HVAC 7B/C-19
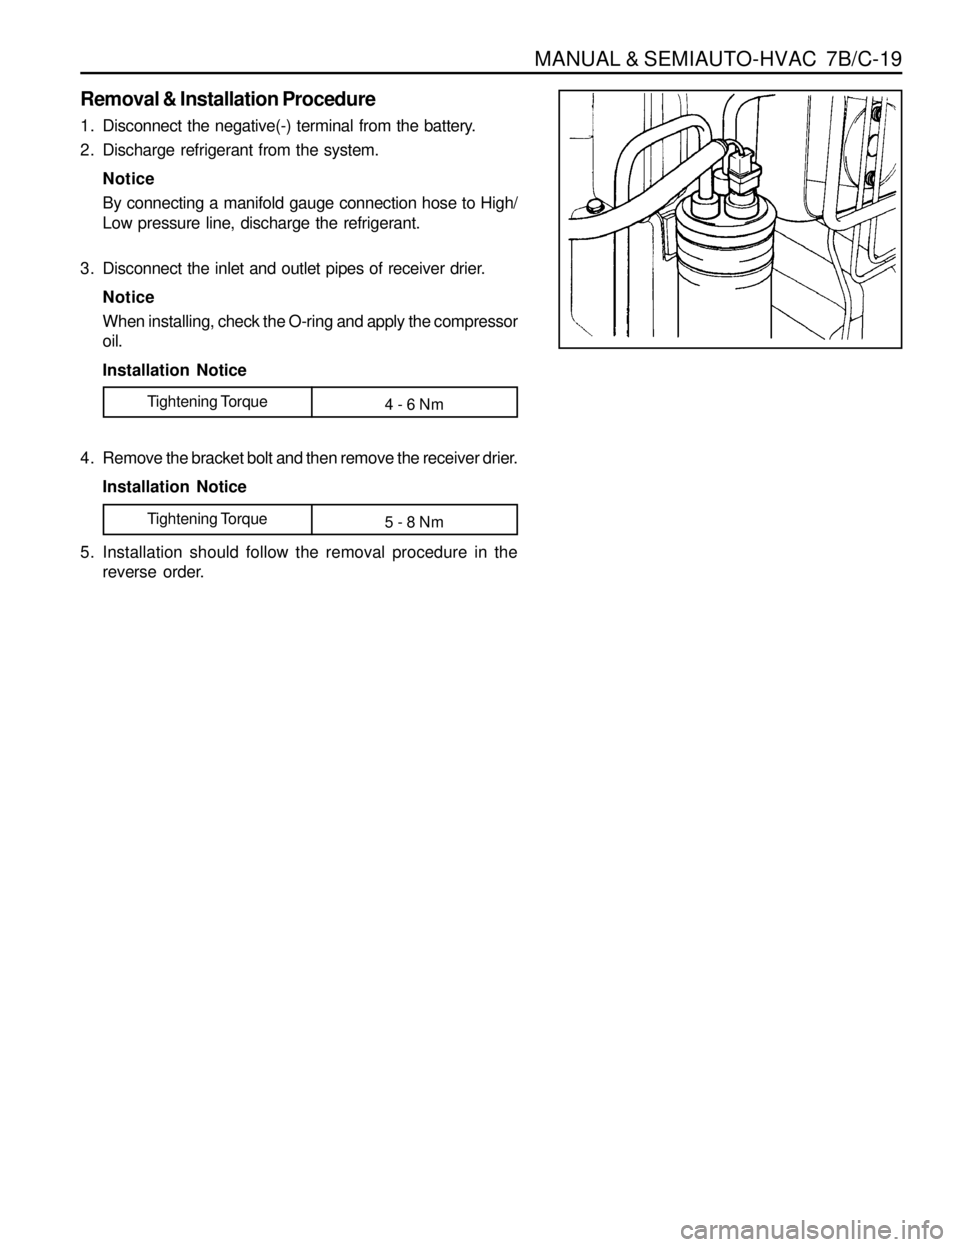
Removal & Installation Procedure
1. Disconnect the negative(-) terminal from the battery.
2. Discharge refrigerant from the system.
Notice
By connecting a manifold gauge connection hose to High/
Low pressure line, discharge the refrigerant.
3. Disconnect the inlet and outlet pipes of receiver drier.
Notice
When installing, check the O-ring and apply the compressor
oil.
Installation Notice
4. Remove the bracket bolt and then remove the receiver drier.
Installation Notice
Tightening Torque
4 - 6 Nm
5. Installation should follow the removal procedure in the
reverse order.
Tightening Torque
5 - 8 Nm
Page 1294 of 1463
7B/C-20 MANUAL & SEMIAUTO-HVAC
1 Condenser
2 Receiver Drier3 Bracket
Removal & Installation Procedure
1. Disconnect the dual pressure switch connector from the
receiver drier.
2. Discharge refrigerant from the system.
3. Remove the high pressure pipe from the inlet / outlet of
receiver drier.
4. Remove the bracket bolts and remove the receiver drier.
5. Installation should follow the removal procedure in the
reverse order.
Gasoline Engine
Page 1295 of 1463
MANUAL & SEMIAUTO-HVAC 7B/C-21
COMPRESSOR
Preceding Work : Removal of the poly V-belt
Diesel Engine
1 Low Pressure Pipe
2 High Pressure Pipe3 Compressor Bracket
4 Compressor
Page 1296 of 1463
7B/C-22 MANUAL & SEMIAUTO-HVAC
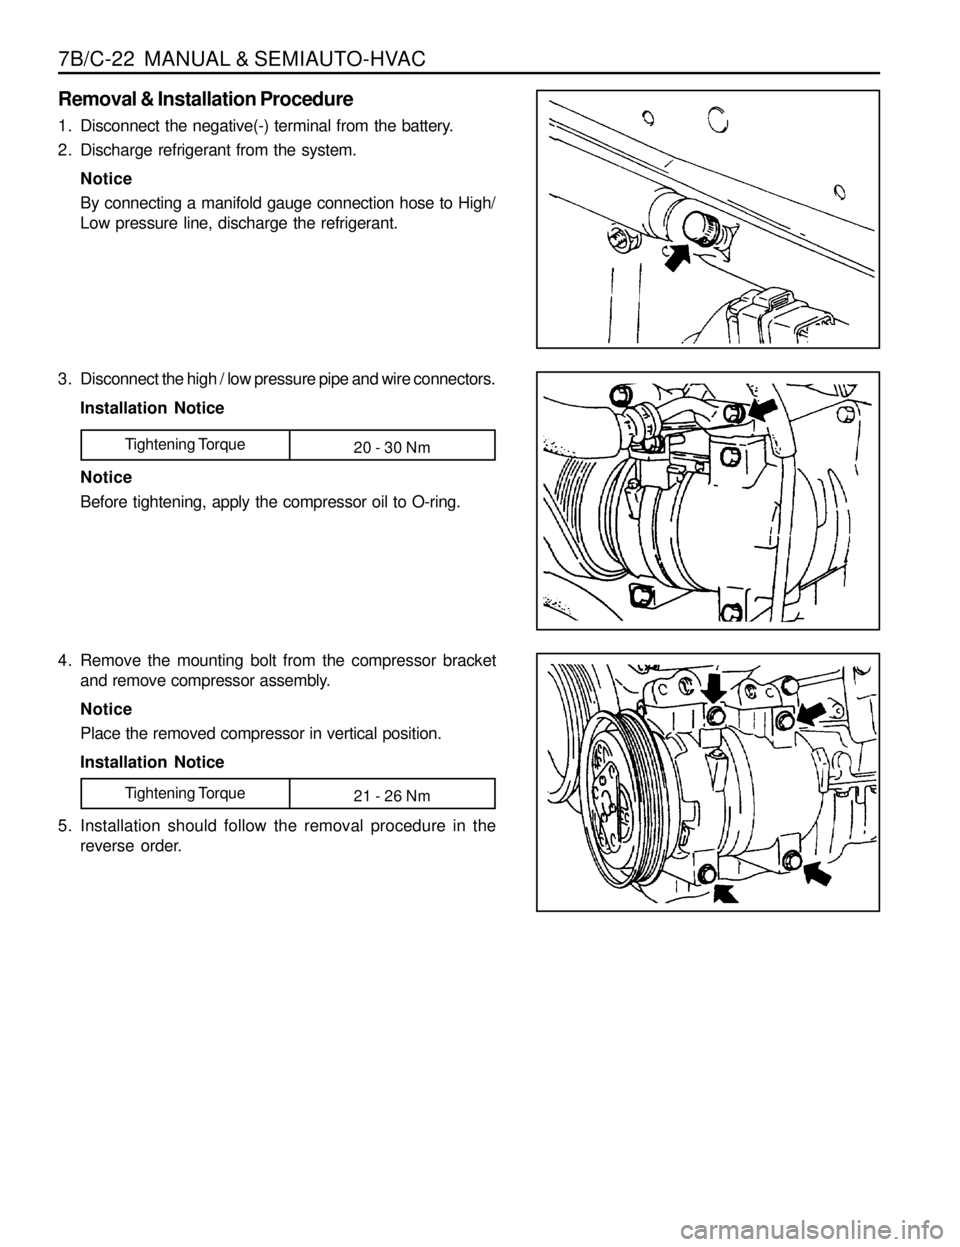
Removal & Installation Procedure
1. Disconnect the negative(-) terminal from the battery.
2. Discharge refrigerant from the system.
Notice
By connecting a manifold gauge connection hose to High/
Low pressure line, discharge the refrigerant.
3. Disconnect the high / low pressure pipe and wire connectors.
Installation Notice
Notice
Before tightening, apply the compressor oil to O-ring.
Tightening Torque
20 - 30 Nm
4. Remove the mounting bolt from the compressor bracket
and remove compressor assembly.
Notice
Place the removed compressor in vertical position.
Installation Notice
5. Installation should follow the removal procedure in the
reverse order.
Tightening Torque
21 - 26 Nm
Page 1297 of 1463
MANUAL & SEMIAUTO-HVAC 7B/C-23
Gasoline Engine
1 Low Pressure Pipe
2 High Pressure Pipe3 Compressor Bracket
4 Compressor
Removal & Installation Procedure
1. Disconnect the negative(-) terminal from the battery.
2. Discharge refrigerant from the system.
Notice
By connecting a manifold gauge connection hose to High/
Low pressure line, discharge the refrigerant.
3. Disconnect the high / low pressure pipe and wire connectors.
Page 1298 of 1463
7B/C-24 MANUAL & SEMIAUTO-HVAC
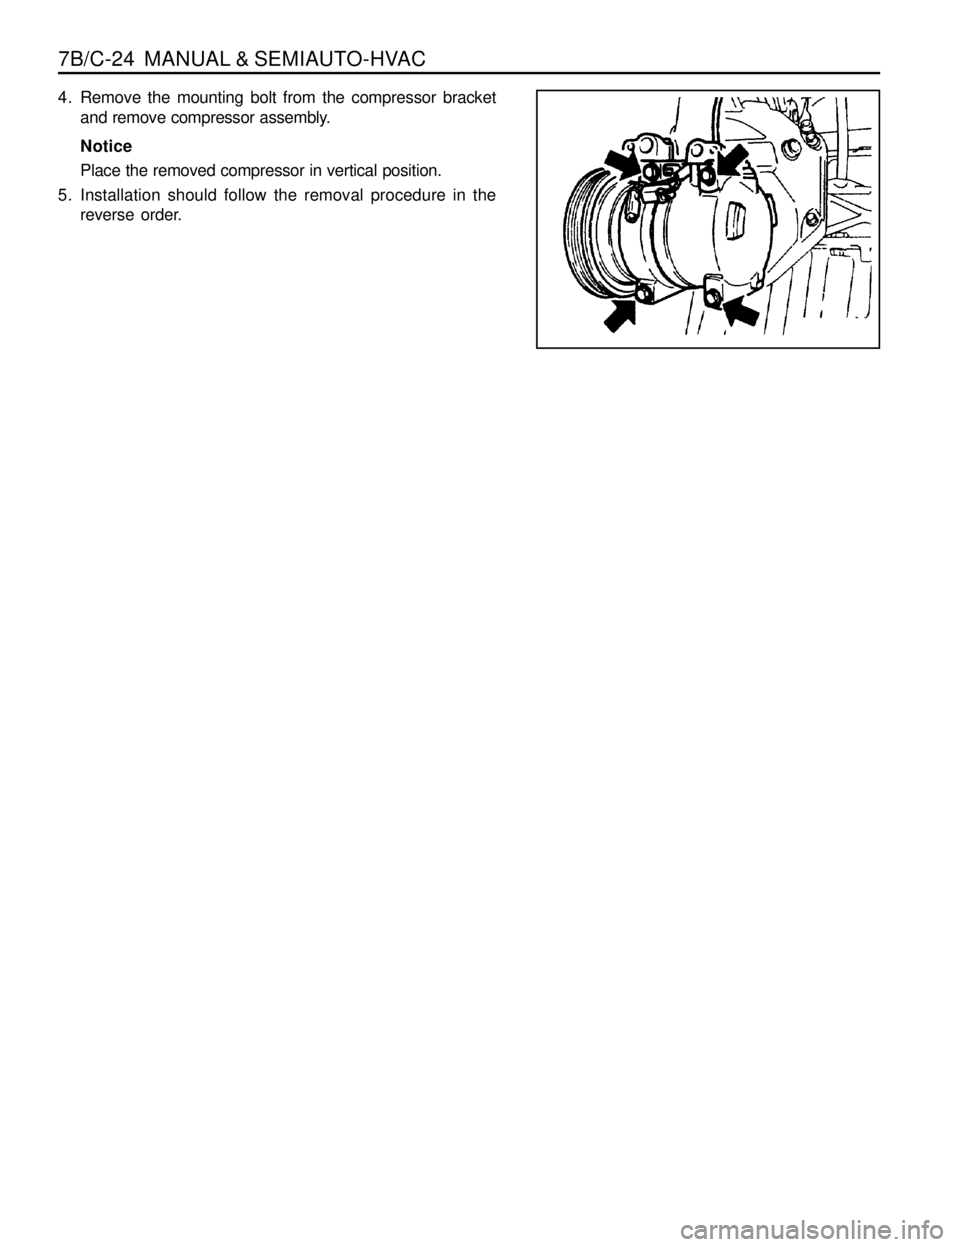
4. Remove the mounting bolt from the compressor bracket
and remove compressor assembly.
Notice
Place the removed compressor in vertical position.
5. Installation should follow the removal procedure in the
reverse order.
Page 1299 of 1463
MANUAL & SEMIAUTO-HVAC 7B/C-25
HEATER AND AIR CONDITIONER CONTROL BOX
1 Blower Switch
2 Recirculation Switch
3 Mode Switch4 A/C Switch
5 Temperature Control Lever
6 In-vehicle Sensor
MANUAL
SATC
Page 1300 of 1463
7B/C-26 MANUAL & SEMIAUTO-HVAC
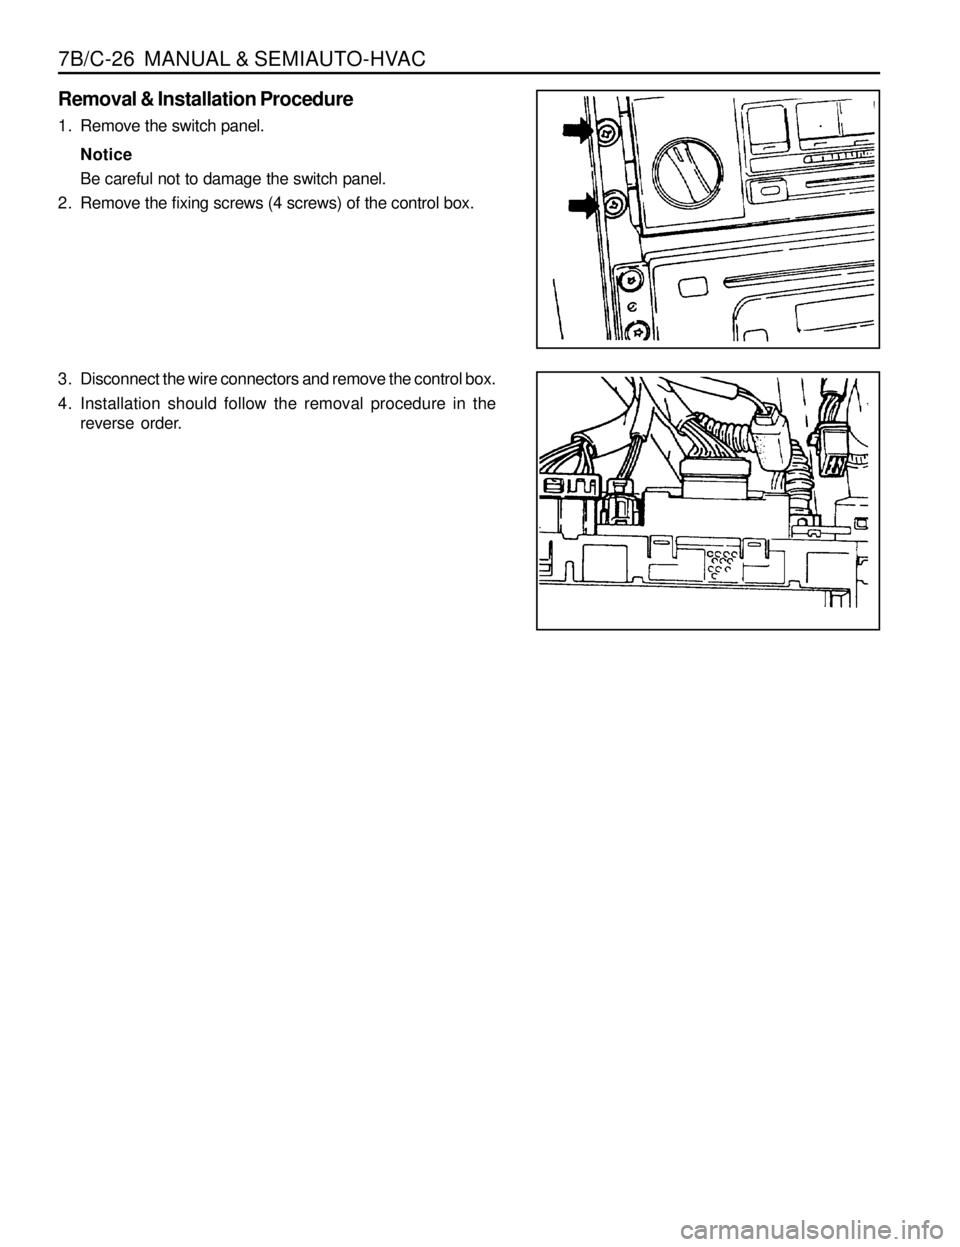
Removal & Installation Procedure
1. Remove the switch panel.
Notice
Be careful not to damage the switch panel.
2. Remove the fixing screws (4 screws) of the control box.
3. Disconnect the wire connectors and remove the control box.
4. Installation should follow the removal procedure in the
reverse order.
Trending: compression ratio, traction control, cruise control, seat memory, brake light, brake pads replacement, open hood


