SSANGYONG MUSSO 1998 Workshop Repair Manual
MUSSO 1998
SSANGYONG
SSANGYONG
https://www.carmanualsonline.info/img/67/57510/w960_57510-0.png
SSANGYONG MUSSO 1998 Workshop Repair Manual
Trending: check engine, light, fuel pump, air filter, cooling, lock, handbrake
Page 1421 of 1463
SECTION 9Q
ROOF
TABLE OF CONTENTS
Schematic and Routing Diagrams . . . . . . . . 9Q-2
Sun Roof . . . . . . . . . . . . . . . . . . . . . . . . . . . . 9Q-2
Maintenance and Repair . . . . . . . . . . . . . . . 9Q-3
On-Vehicle Service . . . . . . . . . . . . . . . . . . . . . . 9Q-3
Sun Roof . . . . . . . . . . . . . . . . . . . . . . . . . . . . 9Q-3
Page 1422 of 1463
9Q-2 ROOF
SUN ROOF
SCHEMATIC AND ROUTING DIAGRAMS
Page 1423 of 1463
ROOF 9Q-3
MAINTENANCE AND REPAIR
ON-VEHICLE SERVICE
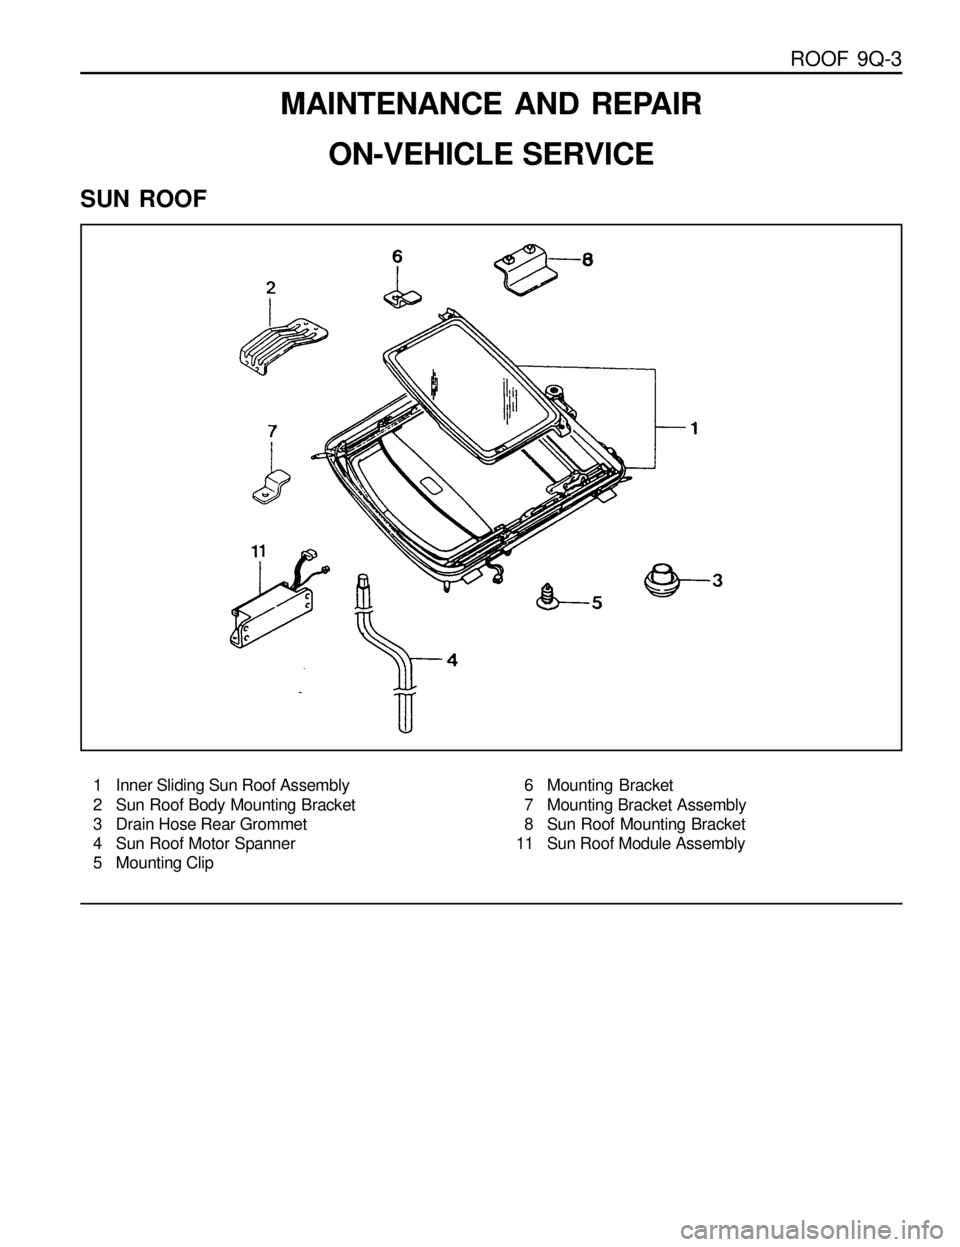
SUN ROOF
1 Inner Sliding Sun Roof Assembly
2 Sun Roof Body Mounting Bracket
3 Drain Hose Rear Grommet
4 Sun Roof Motor Spanner
5 Mounting Clip6 Mounting Bracket
7 Mounting Bracket Assembly
8 Sun Roof Mounting Bracket
11 Sun Roof Module Assembly
Page 1424 of 1463
9Q-4 ROOF
Removal & Installation Procedure
1. Disconnect the connector and remove the sun roof module
assembly.
2. Disconnect the front and rear drain hose.
3. Unscrew the sun roof mounting bracket bolts(arrows) and
remove the inner sliding and sun roof assembly
Page 1425 of 1463
SECTION 9R
BODY FRONT END
TABLE OF CONTENTS
Maintenance and Repair . . . . . . . . . . . . . . . 9R-2
On-Vehicle Service . . . . . . . . . . . . . . . . . . . . . . 9R-2Hood . . . . . . . . . . . . . . . . . . . . . . . . . . . . . . . . 9R-2
Fender . . . . . . . . . . . . . . . . . . . . . . . . . . . . . . 9R-5
Page 1426 of 1463
9R-2 BODY FRONT END
MAINTENANCE AND REPAIR
ON-VEHICLE SERVICE
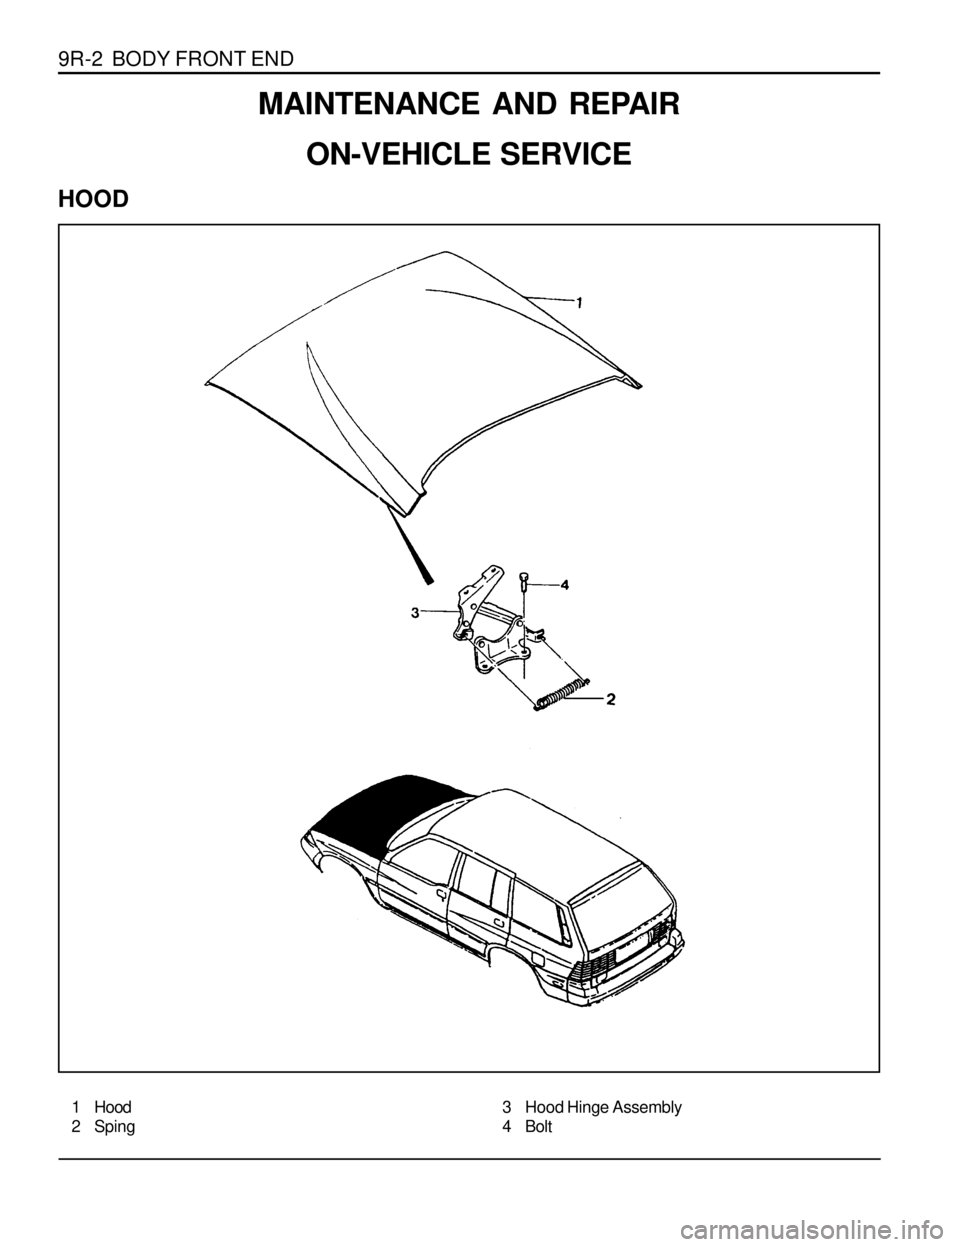
HOOD
1 Hood
2 Sping3 Hood Hinge Assembly
4 Bolt
Page 1427 of 1463
BODY FRONT END 9R-3
Removal & Installation Procedure
1. Remove the hood striker assembly.
Notice
When installing, tighten the bolt after setting the hole
between wratch and hood striker assembly.
Installation Notice
Tightening Toque 8 - 11 Nm
2. Remove the hood Mounting bolt and hood lifter assembly.
Installation Notice
3. Remove the hood lock, hood relese from the clip.
4. Remove the cable holder screw.
5. Pull the cable nut toward driver side.
6. Installation should follow the removal procedure in the
reverse order.
Tightening Toque 14 - 26 Nm
Page 1428 of 1463
9R-4 BODY FRONT END
Adjustment Procedure
1. Alignment between hood striker and latch hole.
lLoosen the mounting bolt of hood latch slightly and adjust
hood in forward/rearward and left/right directions. Then
align the center between hood striker and latch hole.
Notice
Tighten the bolt fully after alignment.
Installation Notice
Tightening Toque 13 - 26 Nm
2. Adjusting the height of hood overslam bumper.
Unlock the hood and check the clearance between hood
and fender by adjusting the hood overslam bumper in left/
right directions.
Normal 20 - 22 Nm
3. Hood Hinge.
lLoosen the hood lock bolts.
lAdjust the lock in forward/rearward and left/right
directions, align with the hood striker and adjust the hood
height.
Page 1429 of 1463
BODY FRONT END 9R-5
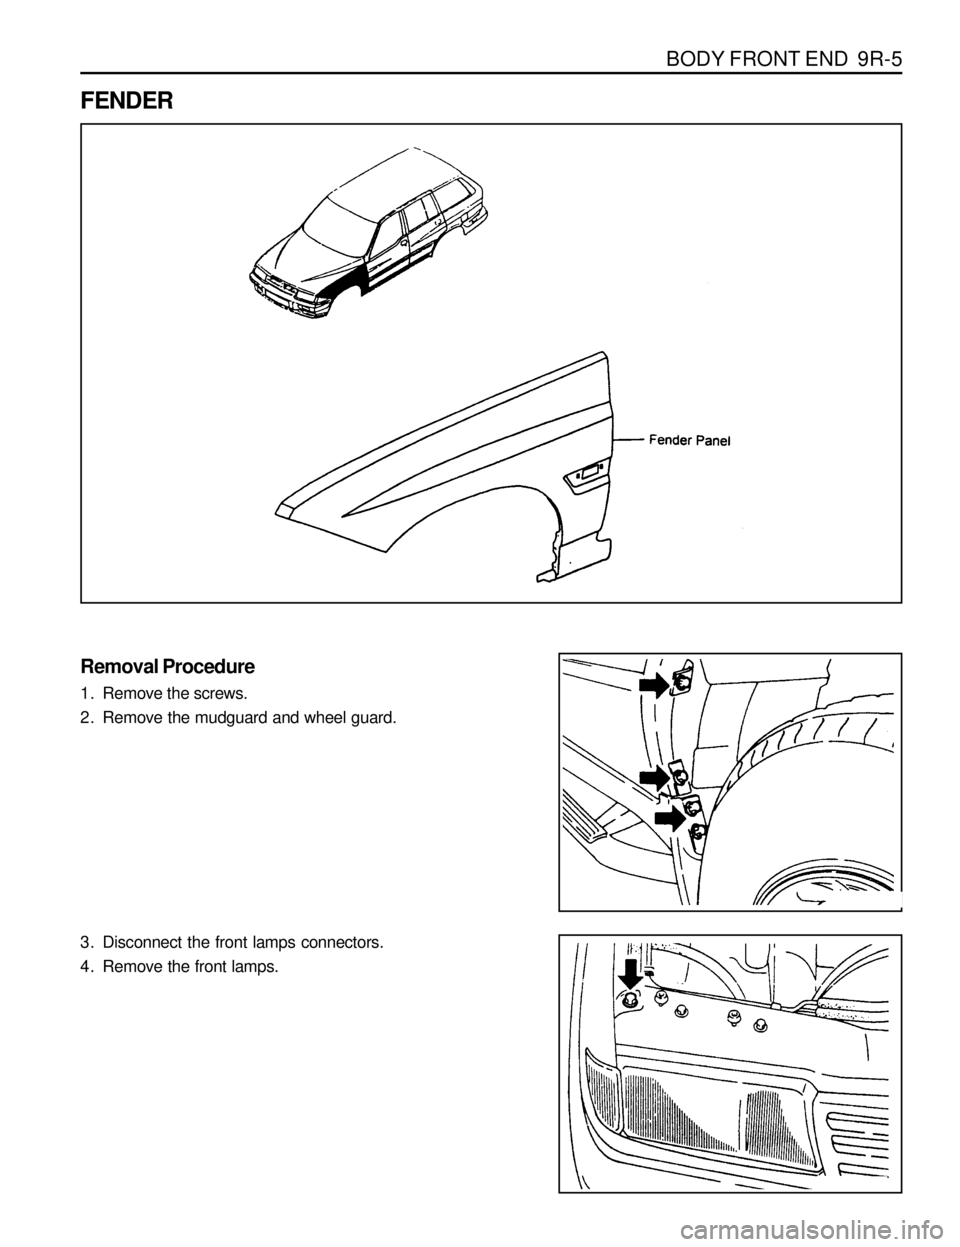
FENDER
Removal Procedure
1. Remove the screws.
2. Remove the mudguard and wheel guard.
3. Disconnect the front lamps connectors.
4. Remove the front lamps.
Page 1430 of 1463
9R-6 BODY FRONT END
5. Remove the fender mounting bolts.
Notice
Be careful not to damage the paintwork.
Installation Procedure
1. Installation should follow the removal procedure in the
reverse order.
Notice
Apply a tape sealer to the fender and body panel to prevent
rust in fender mounting bolts area.
Tightening Torque 7 - 9 Nm
Trending: automatic transmission fluid, ESP, lock, spare tire location, hood open, light, lug pattern


