TESLA MODEL 3 2019 Owner's Manual (Europe)
MODEL 3 2019
TESLA
TESLA
https://www.carmanualsonline.info/img/26/9163/w960_9163-0.png
TESLA MODEL 3 2019 Owner's Manual (Europe)
Trending: width, hood release, tires, ECU, mileage, coolant temperature, display
Page 141 of 179
Wiper Blades and Washer Jets
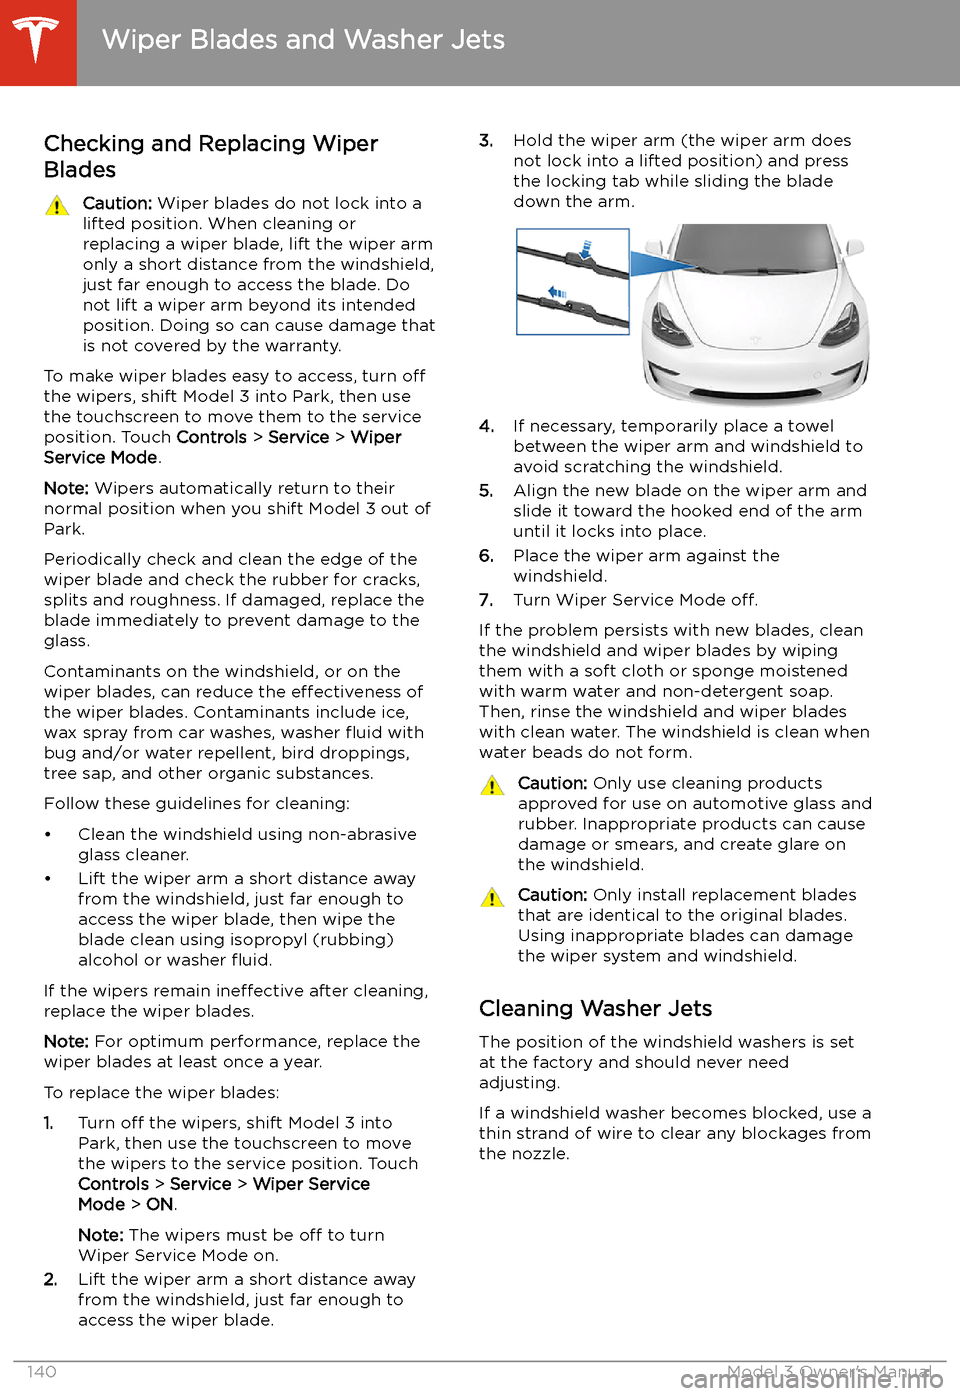
Checking and Replacing Wiper
Blades
Caution: Wiper blades do not lock into a
lifted position. When cleaning or
replacing a wiper blade, lift the wiper arm
only a short distance from the windshield,
just far enough to access the blade. Do
not lift a wiper arm beyond its intended
position. Doing so can cause damage that
is not covered by the warranty.
To make wiper blades easy to access, turn off
the wipers, shift Model 3 into Park, then use the touchscreen to move them to the service
position. Touch Controls > Service > Wiper
Service Mode .
Note: Wipers automatically return to their
normal position when you shift Model 3 out of Park.
Periodically check and clean the edge of the wiper blade and check the rubber for cracks,
splits and roughness. If damaged, replace the blade immediately to prevent damage to the
glass.
Contaminants on the windshield, or on the wiper blades, can reduce the effectiveness of
the wiper blades. Contaminants include ice,
wax spray from car washes, washer
Page 142 of 179
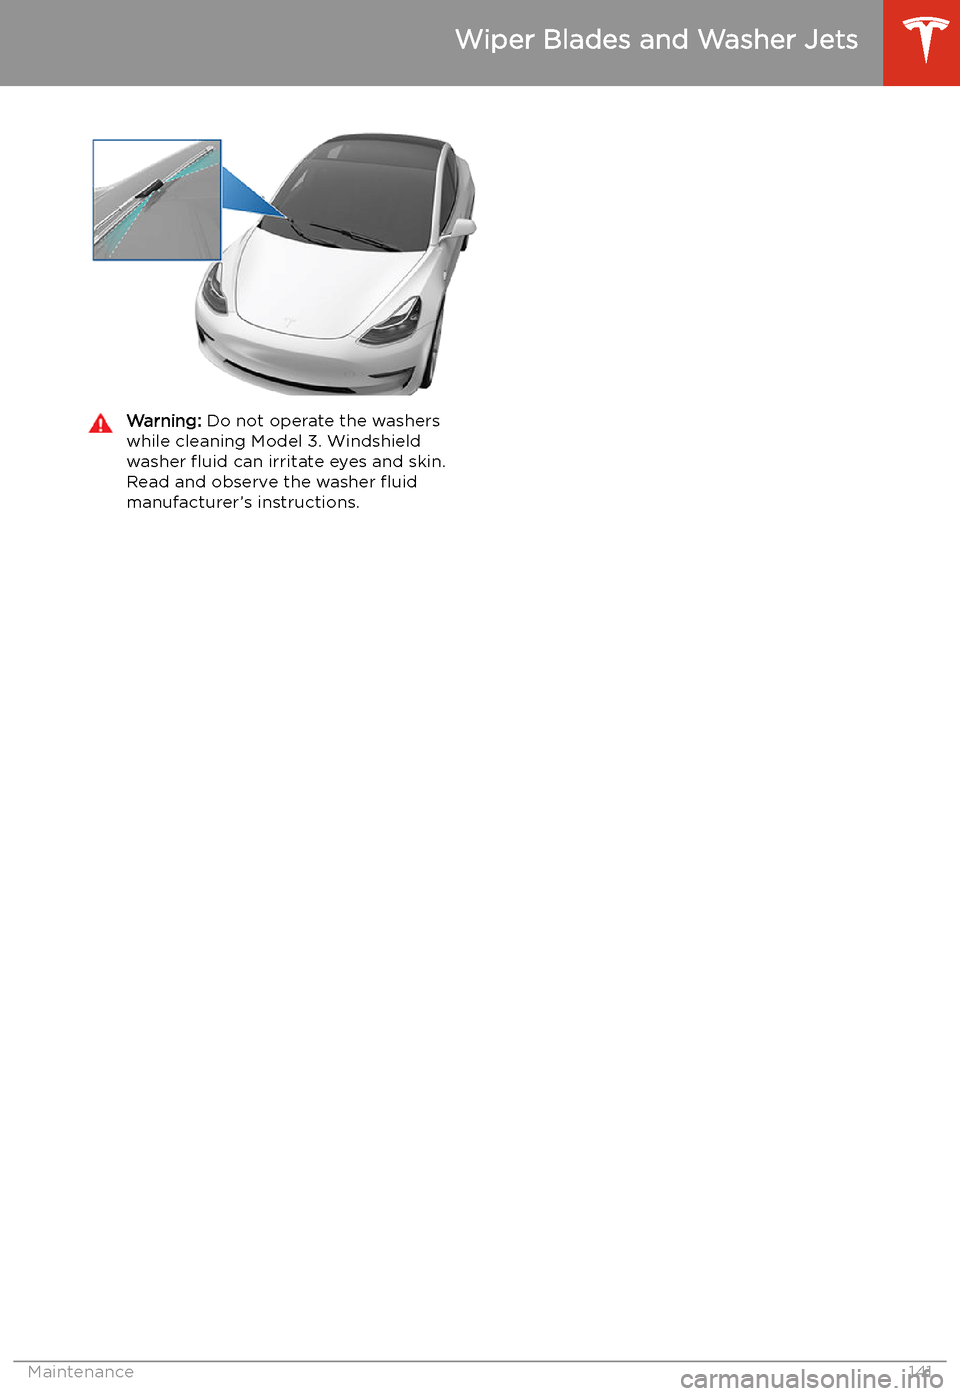
Warning: Do not operate the washers
while cleaning Model 3. Windshield
washer
Page 143 of 179
Fluid Reservoirs
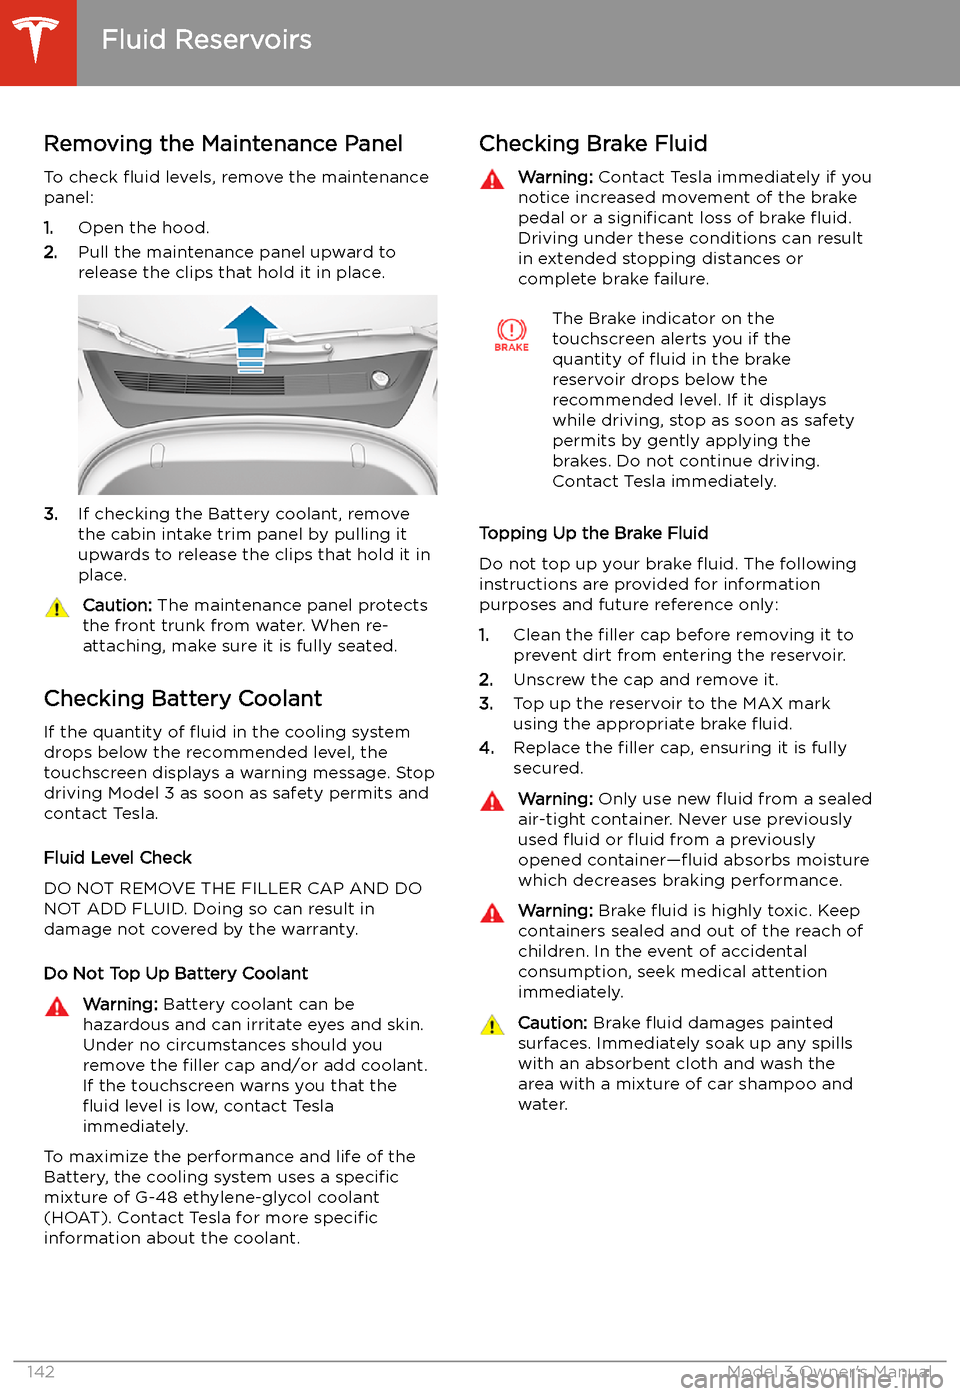
Removing the Maintenance Panel
To check
Page 144 of 179
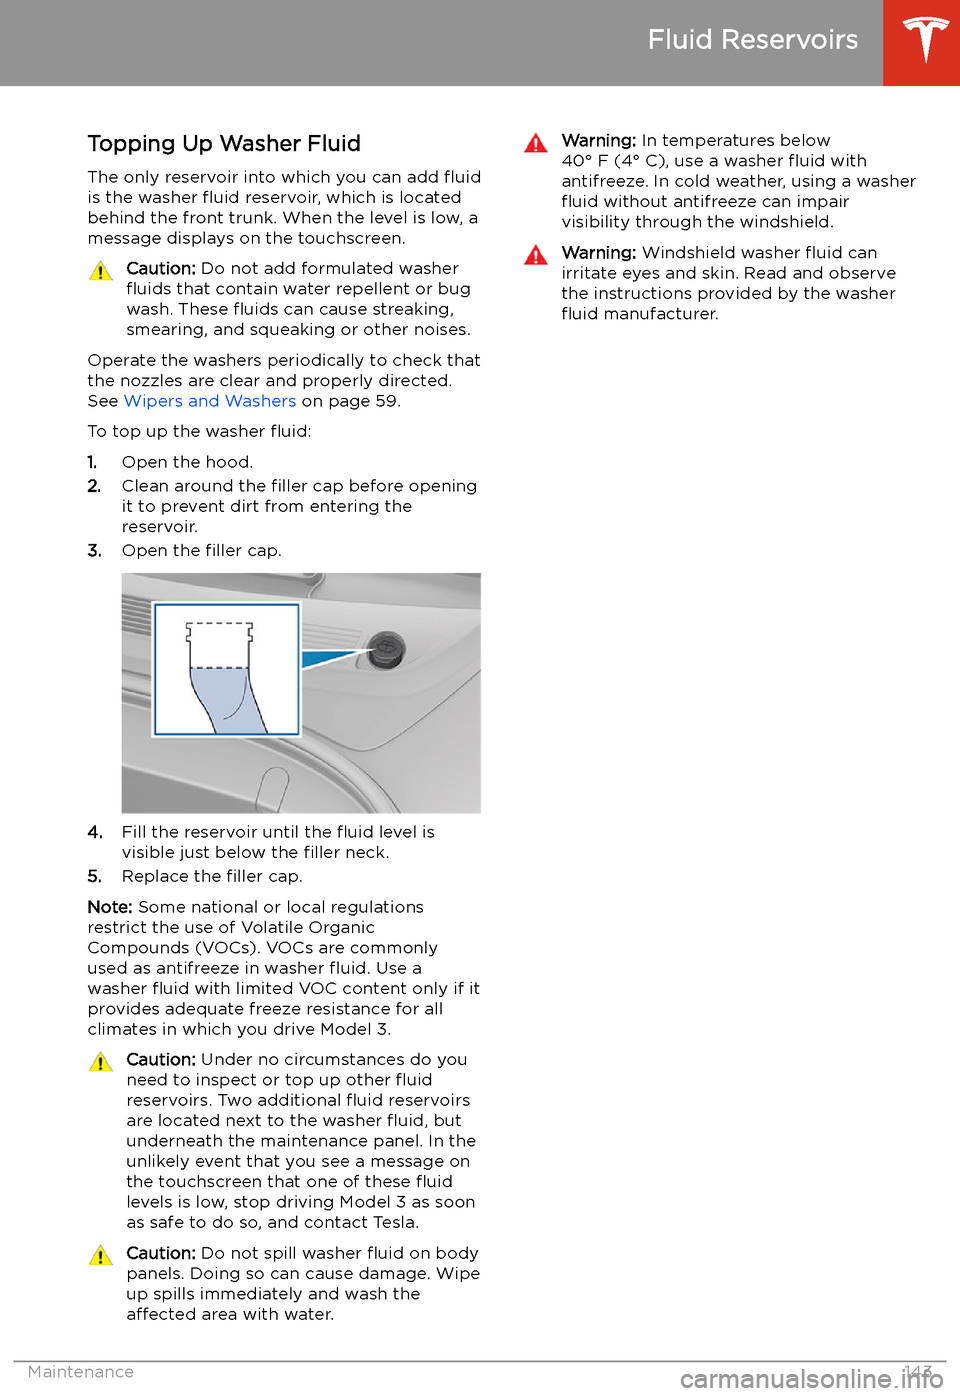
Topping Up Washer Fluid
The only reservoir into which you can add
Page 145 of 179
Jacking and Lifting
Jacking Procedure
Follow the steps below to lift Model 3. Ensure
that any non-Tesla repair facility is aware of
these lifting points.
1. Position Model 3 centrally between the lift
posts.
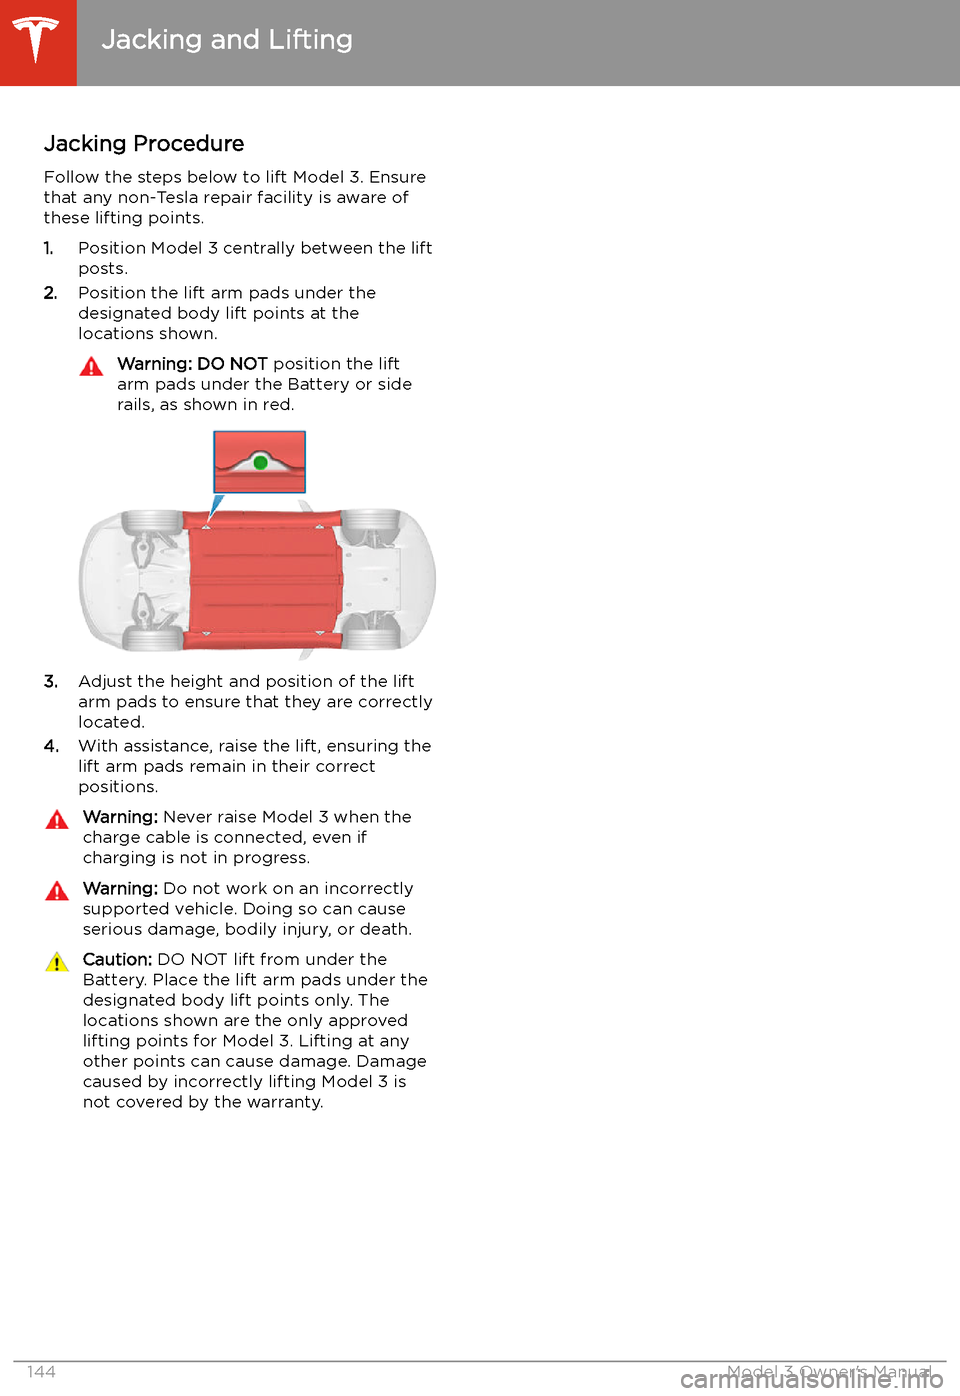
2. Position the lift arm pads under the
designated body lift points at the
locations shown.
Warning: DO NOT position the lift
arm pads under the Battery or side
rails, as shown in red.
3. Adjust the height and position of the lift
arm pads to ensure that they are correctly
located.
4. With assistance, raise the lift, ensuring the
lift arm pads remain in their correct
positions.
Warning: Never raise Model 3 when the
charge cable is connected, even if
charging is not in progress.Warning: Do not work on an incorrectly
supported vehicle. Doing so can cause
serious damage, bodily injury, or death.Caution: DO NOT lift from under the
Battery. Place the lift arm pads under the designated body lift points only. The
locations shown are the only approved lifting points for Model 3. Lifting at anyother points can cause damage. Damage
caused by incorrectly lifting Model 3 is
not covered by the warranty.
Jacking and Lifting
144Model 3 Owner
Page 146 of 179
Parts and Accessories
Parts, Accessories, and
Modifications
Use only genuine Tesla parts and accessories.
Tesla performs rigorous testing on parts to
ensure their suitability, safety, and reliability.
Purchase these parts from Tesla, where they
are professionally installed and where you can receive expert advice about modifications to
Model 3. Accessories are available for
purchase from Tesla stores or online at www.tesla.com/shop .
Tesla is unable to assess parts manufactured
by other distributors and therefore accepts no
responsibility if you use non-Tesla parts onModel 3.
Warning: Installing non-approved parts
and accessories, or performing non- approved modifications, can affect the
performance of Model 3 and the safety of
its occupants. Any damage caused by
using or installing non-approved parts, or by performing non-approved
modifications, is not covered by the
warranty.Warning: Tesla does not accept liability
for death, personal injury or damage that
occurs if you use or install non-approved
accessories or make non-approved
modifications.Body Repairs
If Model 3 is in a collision, contact Tesla toensure that it is repaired with genuine Tesla
parts. Tesla has selected and approved body
shops that meet strict requirements for
training, equipment, quality, and customer
satisfaction.
Some repair shops and insurance companies
might suggest using non-original equipment
or salvaged parts to save money. However,
these parts do not meet Tesla
Page 147 of 179
Specifications
Identification
Labels
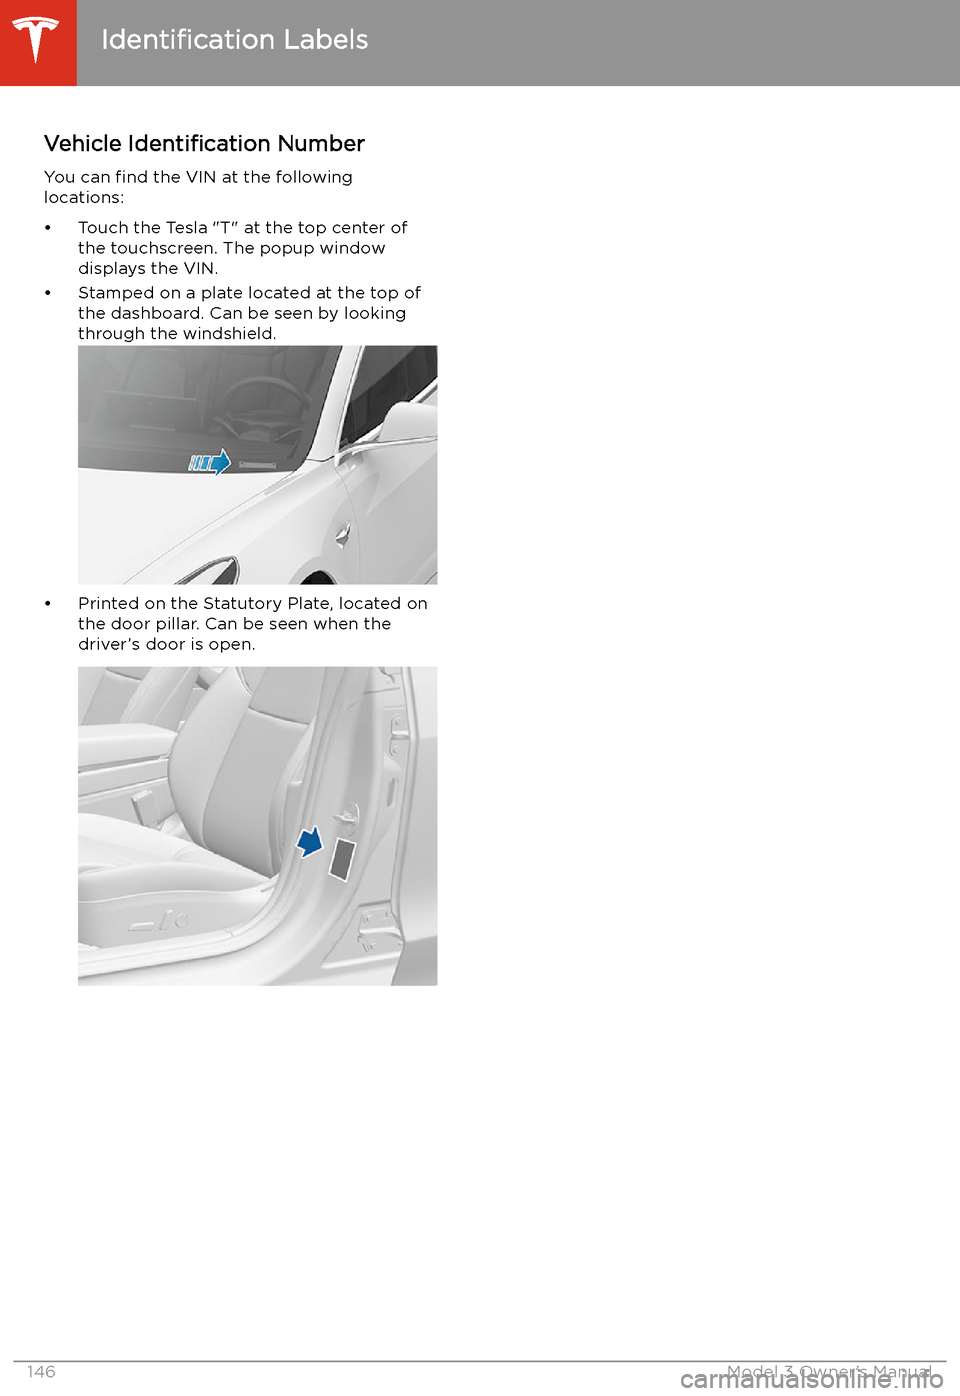
Vehicle Identification Number
You can find the VIN at the following
locations:
Page 148 of 179
Vehicle Loading
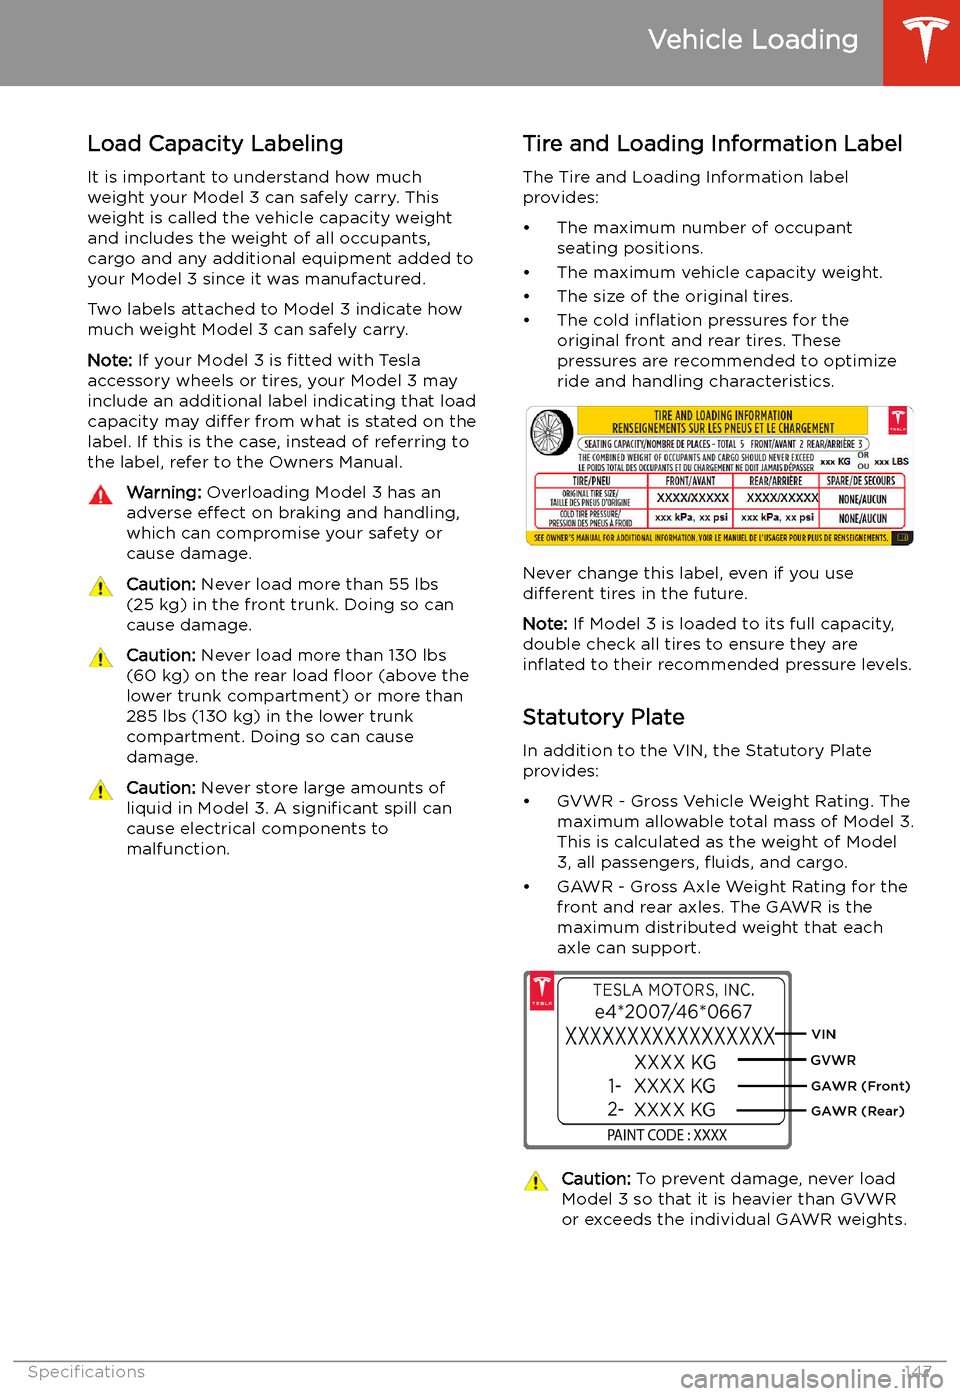
Load Capacity Labeling It is important to understand how much
weight your Model 3 can safely carry. This weight is called the vehicle capacity weight
and includes the weight of all occupants,
cargo and any additional equipment added to your Model 3 since it was manufactured.
Two labels attached to Model 3 indicate how much weight Model 3 can safely carry.
Note: If your Model 3 is fitted with Tesla
accessory wheels or tires, your Model 3 may
include an additional label indicating that load capacity may differ from what is stated on the
label. If this is the case, instead of referring to
the label, refer to the Owners Manual.
Warning: Overloading Model 3 has an
adverse effect on braking and handling,
which can compromise your safety or cause damage.Caution: Never load more than 55 lbs
(25 kg) in the front trunk. Doing so can
cause damage.Caution: Never load more than 130 lbs
(60 kg) on the rear load
Page 149 of 179
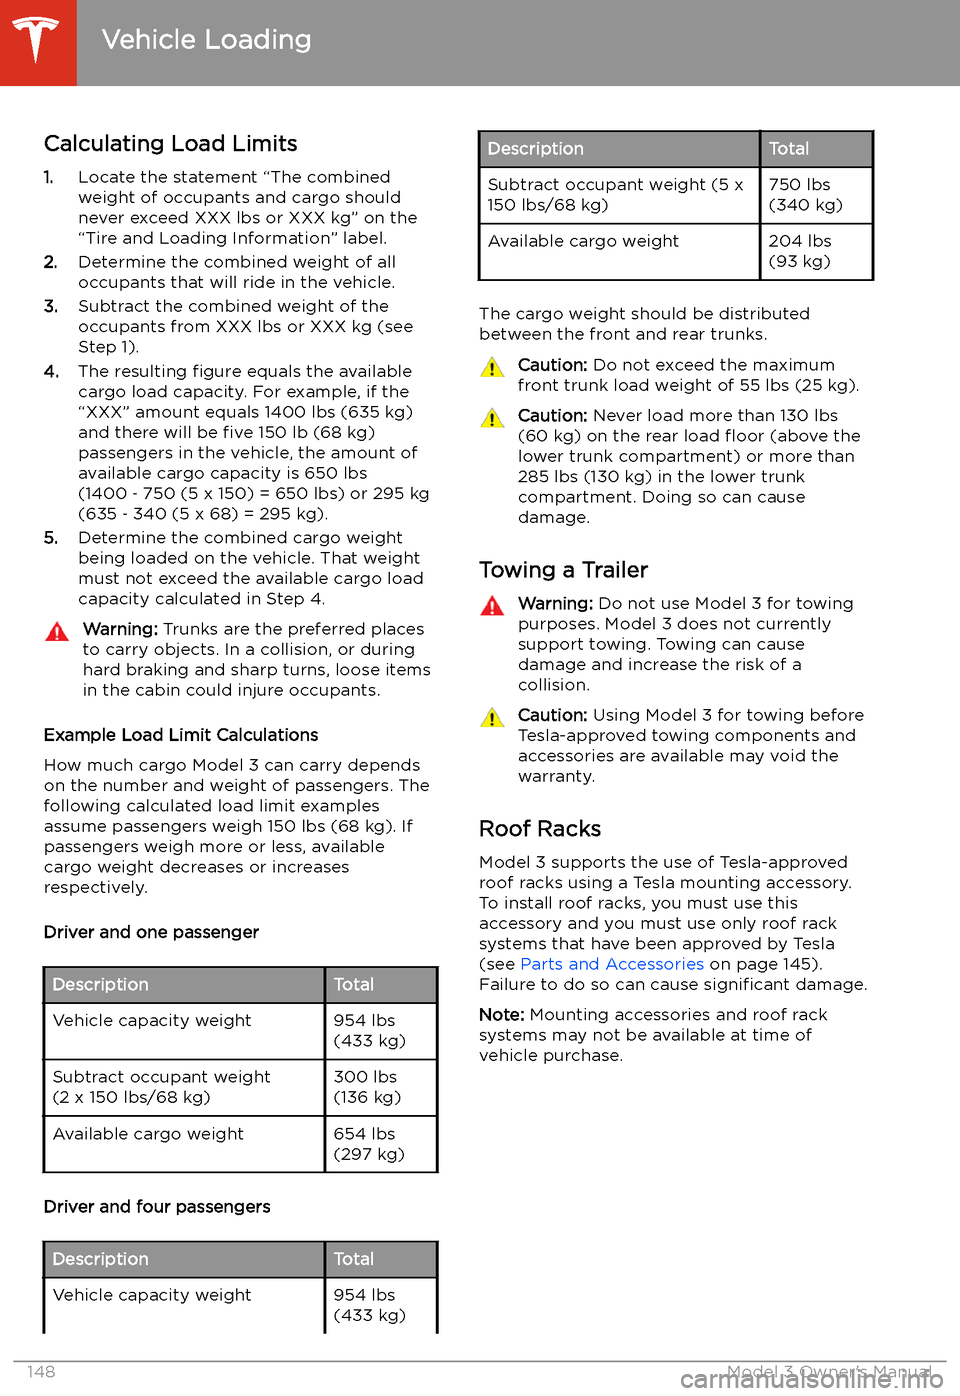
Calculating Load Limits
1. Locate the statement
Page 150 of 179
Dimensions and Weights
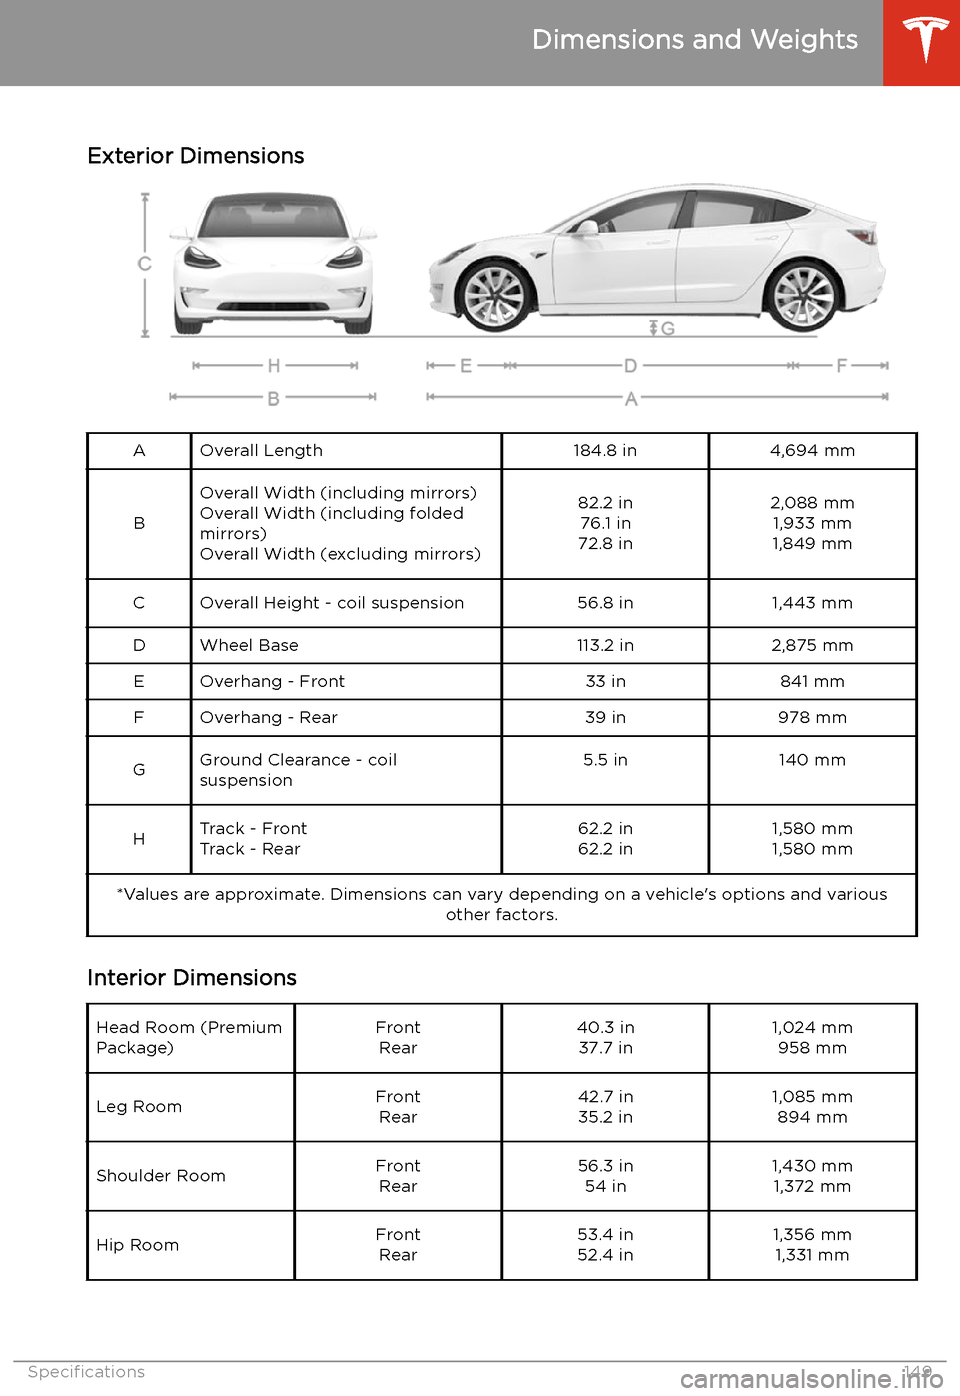
Exterior Dimensions
AOverall Length184.8 in4,694 mm
B
Overall Width (including mirrors) Overall Width (including folded
mirrors)
Overall Width (excluding mirrors)82.2 in 76.1 in
72.8 in2,088 mm 1,933 mm
1,849 mmCOverall Height - coil suspension56.8 in1,443 mmDWheel Base113.2 in2,875 mmEOverhang - Front33 in841 mmFOverhang - Rear39 in978 mmGGround Clearance - coil
suspension5.5 in140 mmHTrack - Front
Track - Rear62.2 in
62.2 in1,580 mm
1,580 mm*Values are approximate. Dimensions can vary depending on a vehicle
Trending: door lock, service indicator, hood release, tire pressure, AUX, air condition, oil

