TOYOTA COROLLA HATCHBACK 2022 Owners Manual (in English)
Manufacturer: TOYOTA, Model Year: 2022, Model line: COROLLA HATCHBACK, Model: TOYOTA COROLLA HATCHBACK 2022Pages: 758, PDF Size: 155.26 MB
Page 211 of 758
209
4
4-3. Operating the lights and wipers
Driving
*: If equipped
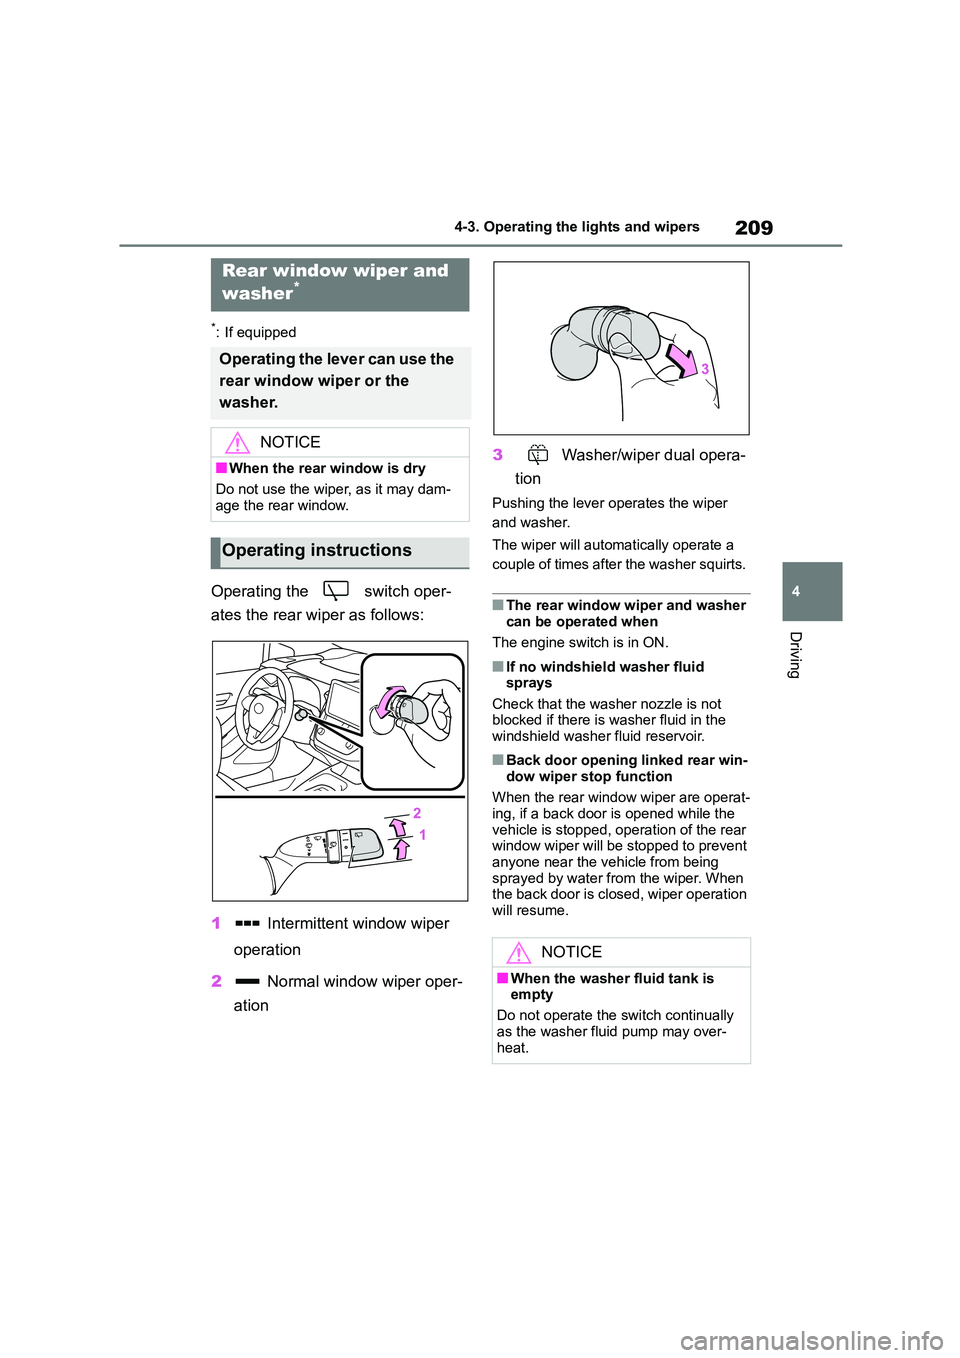
Operating the switch oper-
ates the rear wiper as follows:
1 Intermittent window wiper
operation
2 Normal window wiper oper-
ation
3 Washer/wiper dual opera-
tion
Pushing the lever operates the wiper
and washer.
The wiper will automatically operate a
couple of times after the washer squirts.
■The rear window wiper and washer
can be operated when
The engine switch is in ON.
■If no windshield washer fluid
sprays
Check that the washer nozzle is not blocked if there is washer fluid in the
windshield washer fluid reservoir.
■Back door opening linked rear win-
dow wiper stop function
When the rear window wiper are operat-
ing, if a back door is opened while the
vehicle is stopped, operation of the rear window wiper will be stopped to prevent
anyone near the vehicle from being
sprayed by water from the wiper. When the back door is closed, wiper operation
will resume.
Rear window wiper and
washer*
Operating the lever can use the
rear window wiper or the
washer.
NOTICE
■When the rear window is dry
Do not use the wiper, as it may dam-
age the rear window.
Operating instructions
NOTICE
■When the washer fluid tank is
empty
Do not operate the switch continually
as the washer fluid pump may over-
heat.
Page 212 of 758
2104-3. Operating the lights and wipers
NOTICE
■When a nozzle becomes blocked
In this case, contact any authorized
Toyota retailer or Toyota authorized repairer, or any reliable repairer.
Do not try to clear it with a pin or other
object. The nozzle will be damaged.
Page 213 of 758
211
4
4-4. Refueling
Driving
4-4.Refueling
Turn the engine switch off and
ensure that all the doors and
windows are closed.
Confirm the type of fuel.
■Fuel types
P.576
■Fuel tank opening for unleaded
gasoline
To help prevent incorrect fueling, your vehicle has a fuel tank opening that only
accommodates the special nozzle on
unleaded fuel pumps.
Opening the fuel tank
cap
Perform the following steps to
open the fuel tank cap:
Before refueling the vehicle
WA R N I N G
■When refueling the vehicle
Observe the following precautions
while refueling the vehicle. Failure to
do so may result in death or serious injury.
●After exiting the vehicle and before opening the fuel door, touch an
unpainted metal surface to dis-
charge any static electricity. It is important to discharge static elec-
tricity before refueling because
sparks resulting from static electric- ity can cause fuel vapors to ignite
while refueling.
●Always hold the grips on the fuel tank cap and turn it slowly to
remove it.
A whooshing sound may be heard when the fuel tank cap is loosened.
Wait until the sound cannot be
heard before fully removing the cap. In hot weather, pressurized
fuel may spray out the filler neck
and cause injury.
●Do not allow anyone that has not
discharged static electricity from their body to come close to an open
fuel tank.
●Do not inhale vaporized fuel.
Fuel contains substances that are
harmful if inhaled.
●Do not smoke while refueling the
vehicle. Doing so may cause the fuel to
ignite and cause a fire.
●Do not return to the vehicle or touch
any person or object that is stati-
cally charged. This may cause static electricity to
build up, resulting in a possible igni-
tion hazard.
■When refueling
Observe the following precautions to prevent fuel overflowing from the fuel
tank:
●Securely insert the fuel nozzle into
the fuel filler neck.
●Stop filling the tank after the fuel
nozzle automatically clicks off.
●Do not top off the fuel tank.
Page 214 of 758
2124-4. Refueling
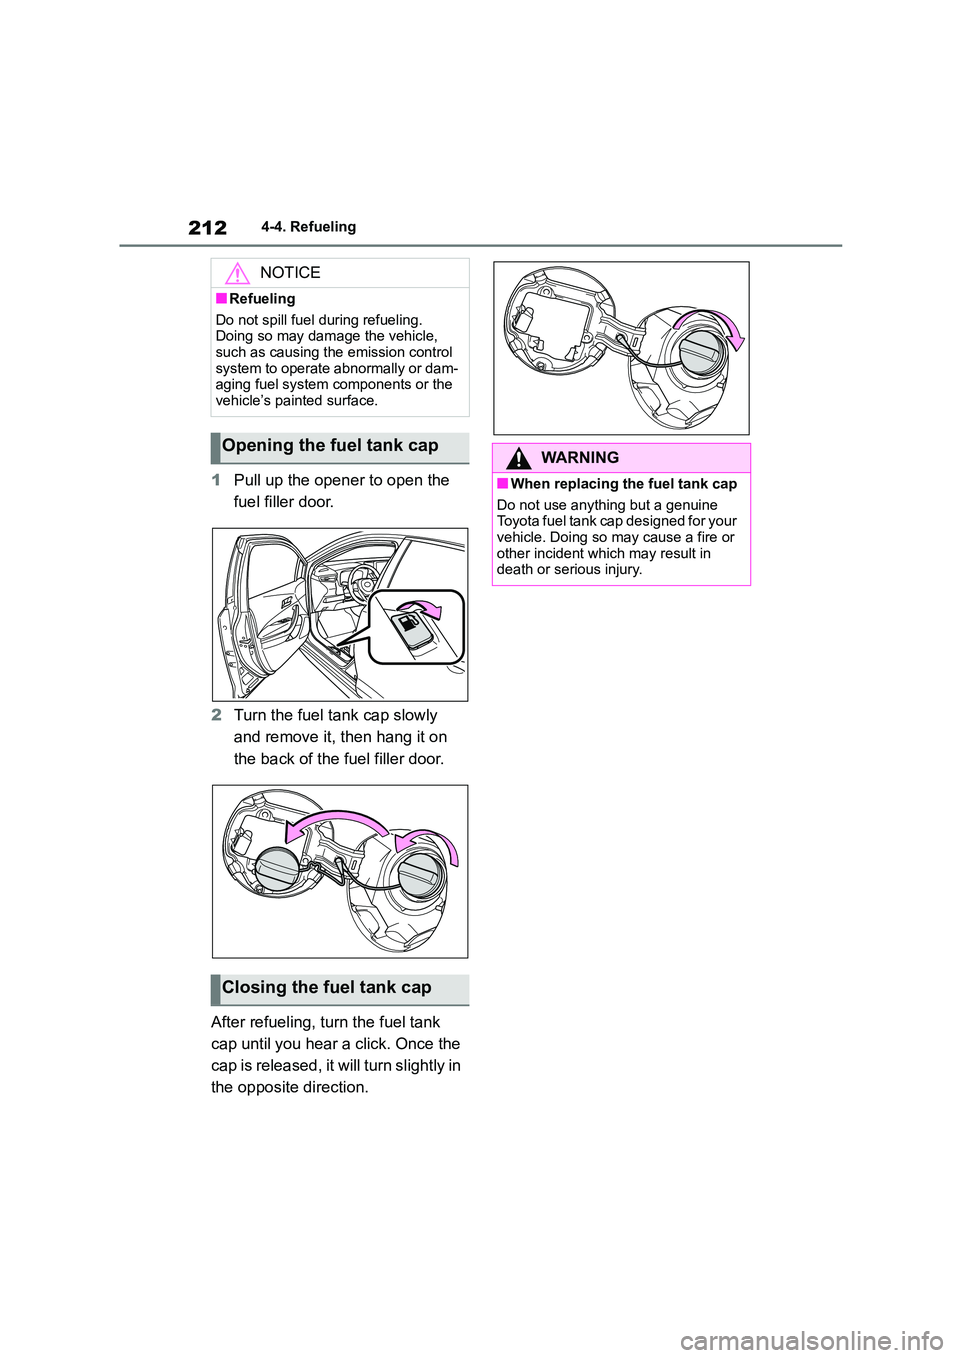
1Pull up the opener to open the
fuel filler door.
2 Turn the fuel tank cap slowly
and remove it, then hang it on
the back of the fuel filler door.
After refueling, turn the fuel tank
cap until you hear a click. Once the
cap is released, it w ill turn slightly in
the opposite direction.
NOTICE
■Refueling
Do not spill fuel during refueling.
Doing so may damage the vehicle, such as causing the emission control
system to operate abnormally or dam-
aging fuel system components or the vehicle’s painted surface.
Opening the fuel tank cap
Closing the fuel tank cap
WA R N I N G
■When replacing the fuel tank cap
Do not use anything but a genuine
Toyota fuel tank cap designed for your vehicle. Doing so ma y cause a fire or
other incident which may result in
death or serious injury.
Page 215 of 758
213
4
4-5. Using the driving support systems
Driving
4-5.Using the driving support systems
*: If equipped
■PCS (Pre-Collision System)
P. 2 2 4
■LTA (Lane Tracing Assist)*
P. 2 3 1
*: If equipped
■LDA (Lane Departure Alert
with steering control)*
P. 2 4 1
*: If equipped
■AHS (Adaptive High-beam
System)*
P. 2 0 1
*: If equipped
■AHB (Automatic High Beam)*
P. 1 9 9
*: If equipped
■RSA (Road Sign Assist)*
P. 2 7 6
*: If equipped
■Dynamic radar cruise control
with full-speed range*
P. 2 4 9
*: If equipped
■Dynamic radar cruise control*
P.260
*: If equipped
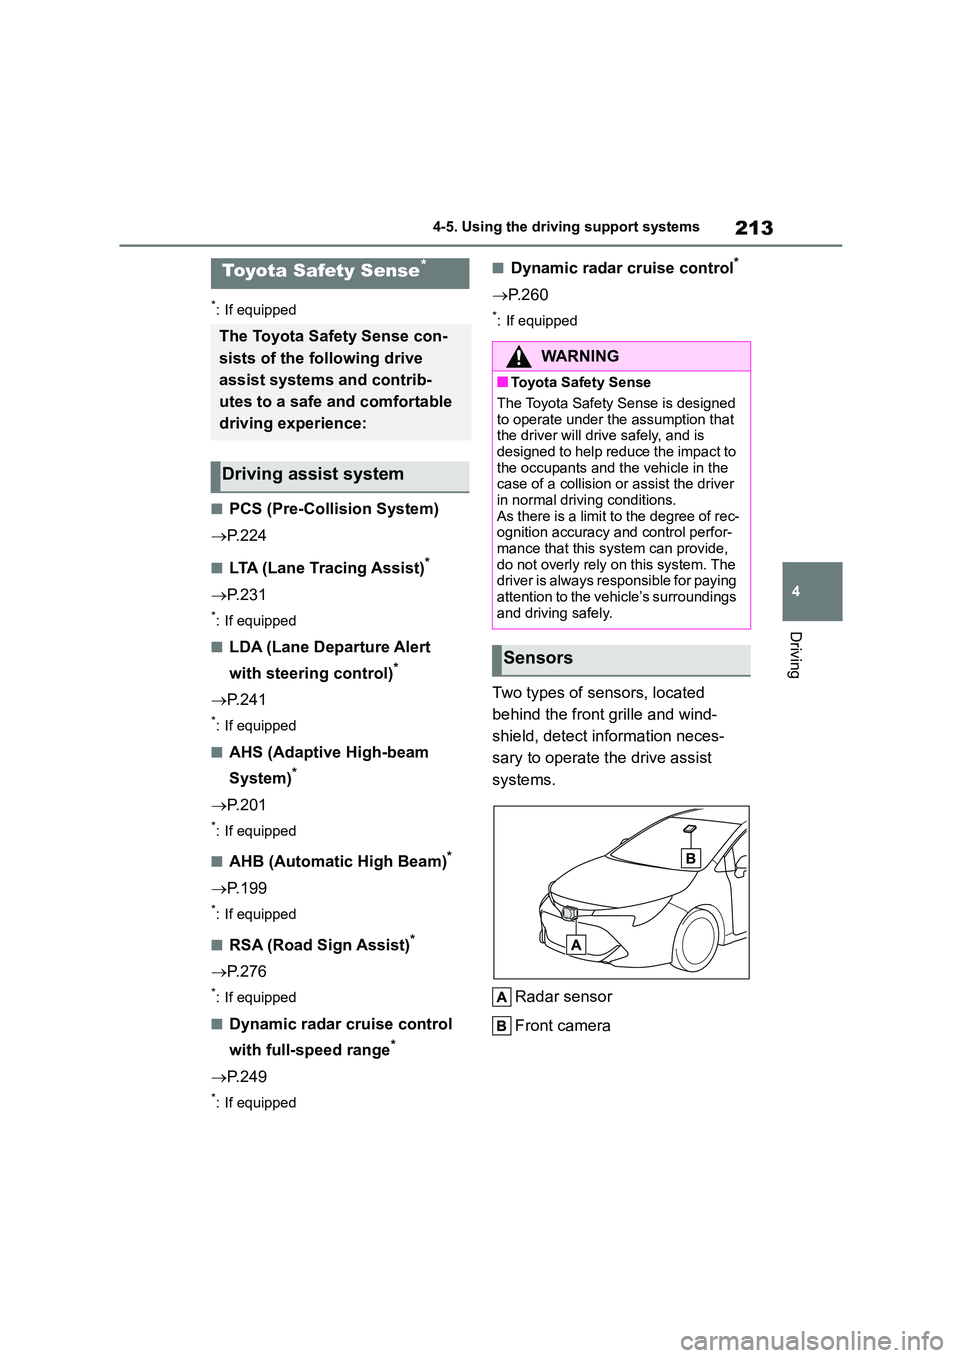
Two types of sensors, located
behind the front grille and wind-
shield, detect in formation neces-
sary to operate the drive assist
systems.
Radar sensor
Front camera
Toyota Safety Sense*
The Toyota Safety Sense con-
sists of the following drive
assist systems and contrib-
utes to a safe and comfortable
driving experience:
Driving assist system
WA R N I N G
■Toyota Safety Sense
The Toyota Safety Sense is designed
to operate under the assumption that
the driver will drive safely, and is designed to help reduce the impact to
the occupants and the vehicle in the
case of a collision or assist the driver in normal driving conditions.
As there is a limit to the degree of rec-
ognition accuracy and control perfor- mance that this system can provide,
do not overly rely on this system. The
driver is always responsible for paying attention to the vehicle’s surroundings
and driving safely.
Sensors
Page 216 of 758
2144-5. Using the driving support systems
WA R N I N G
■To avoid malfunction of the radar
sensor
Observe the following precautions. Otherwise, the radar sensor may not
operate properly, possibly leading to
an accident resulting in death or seri- ous injury.
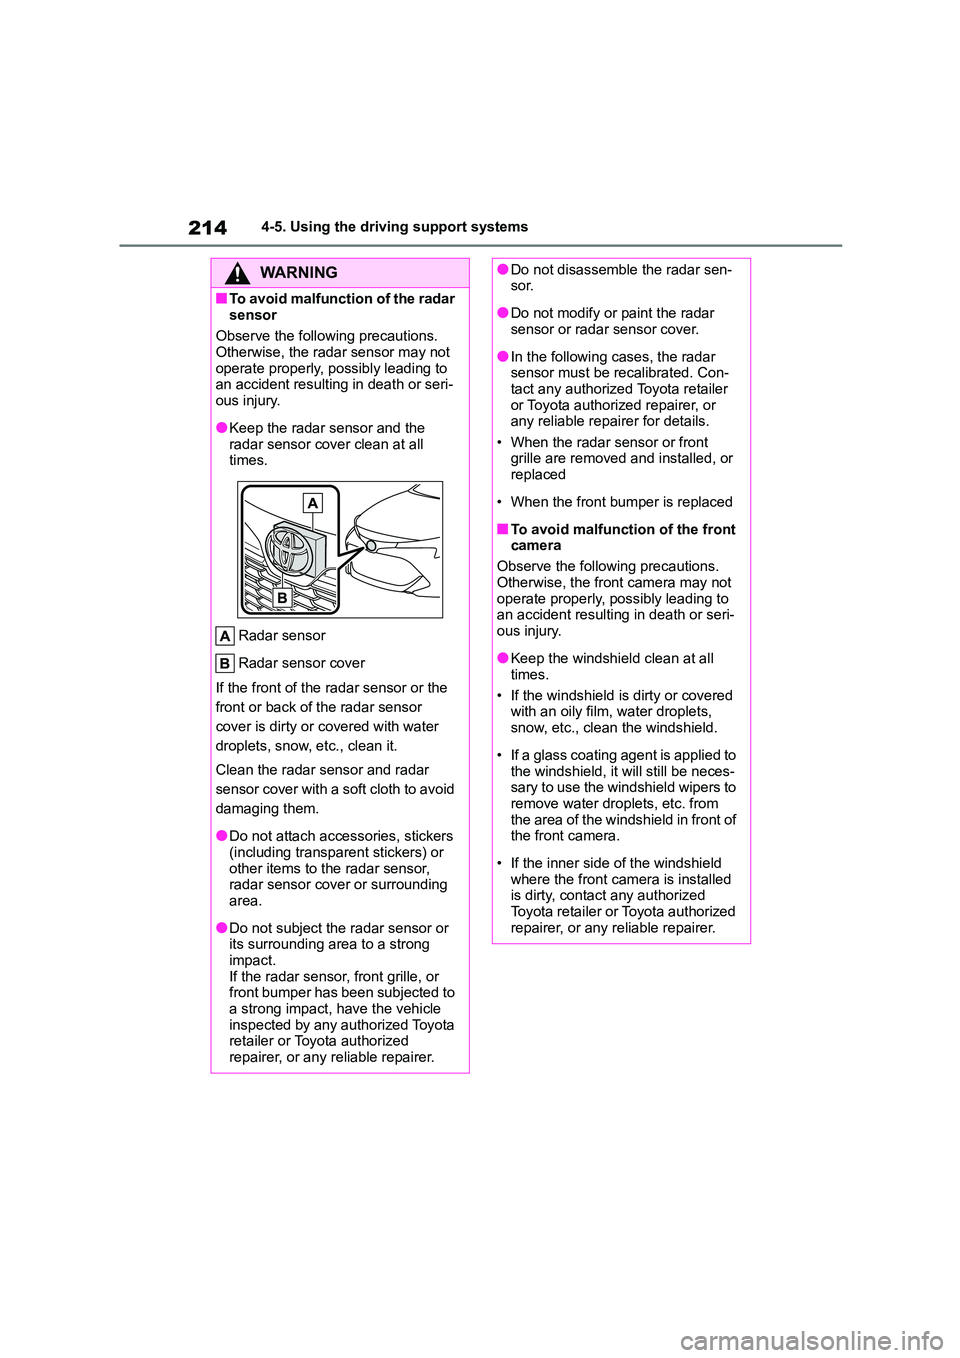
●Keep the radar sensor and the
radar sensor cover clean at all times.
Radar sensor
Radar sensor cover
If the front of the radar sensor or the
front or back of the radar sensor
cover is dirty or covered with water
droplets, snow, etc., clean it.
Clean the radar sensor and radar
sensor cover with a soft cloth to avoid
damaging them.
●Do not attach accessories, stickers
(including transparent stickers) or
other items to the radar sensor, radar sensor cover or surrounding
area.
●Do not subject the radar sensor or
its surrounding area to a strong
impact. If the radar sensor, front grille, or
front bumper has been subjected to
a strong impact, have the vehicle inspected by any authorized Toyota
retailer or Toyota authorized
repairer, or any reliable repairer.
●Do not disassemble the radar sen- sor.
●Do not modify or paint the radar sensor or radar sensor cover.
●In the following cases, the radar sensor must be recalibrated. Con-
tact any authorized Toyota retailer
or Toyota authorized repairer, or any reliable repairer for details.
• When the radar sensor or front
grille are removed and installed, or replaced
• When the front bumper is replaced
■To avoid malfunction of the front
camera
Observe the following precautions.
Otherwise, the front camera may not
operate properly, possibly leading to an accident resulting in death or seri-
ous injury.
●Keep the windshield clean at all
times.
• If the windshield is dirty or covered with an oily film, water droplets,
snow, etc., clean the windshield.
• If a glass coating agent is applied to
the windshield, it will still be neces-
sary to use the windshield wipers to remove water droplets, etc. from
the area of the windshield in front of
the front camera.
• If the inner side of the windshield
where the front camera is installed is dirty, contact any authorized
Toyota retailer or Toyota authorized
repairer, or any reliable repairer.
Page 217 of 758
215
4
4-5. Using the driving support systems
Driving
WA R N I N G
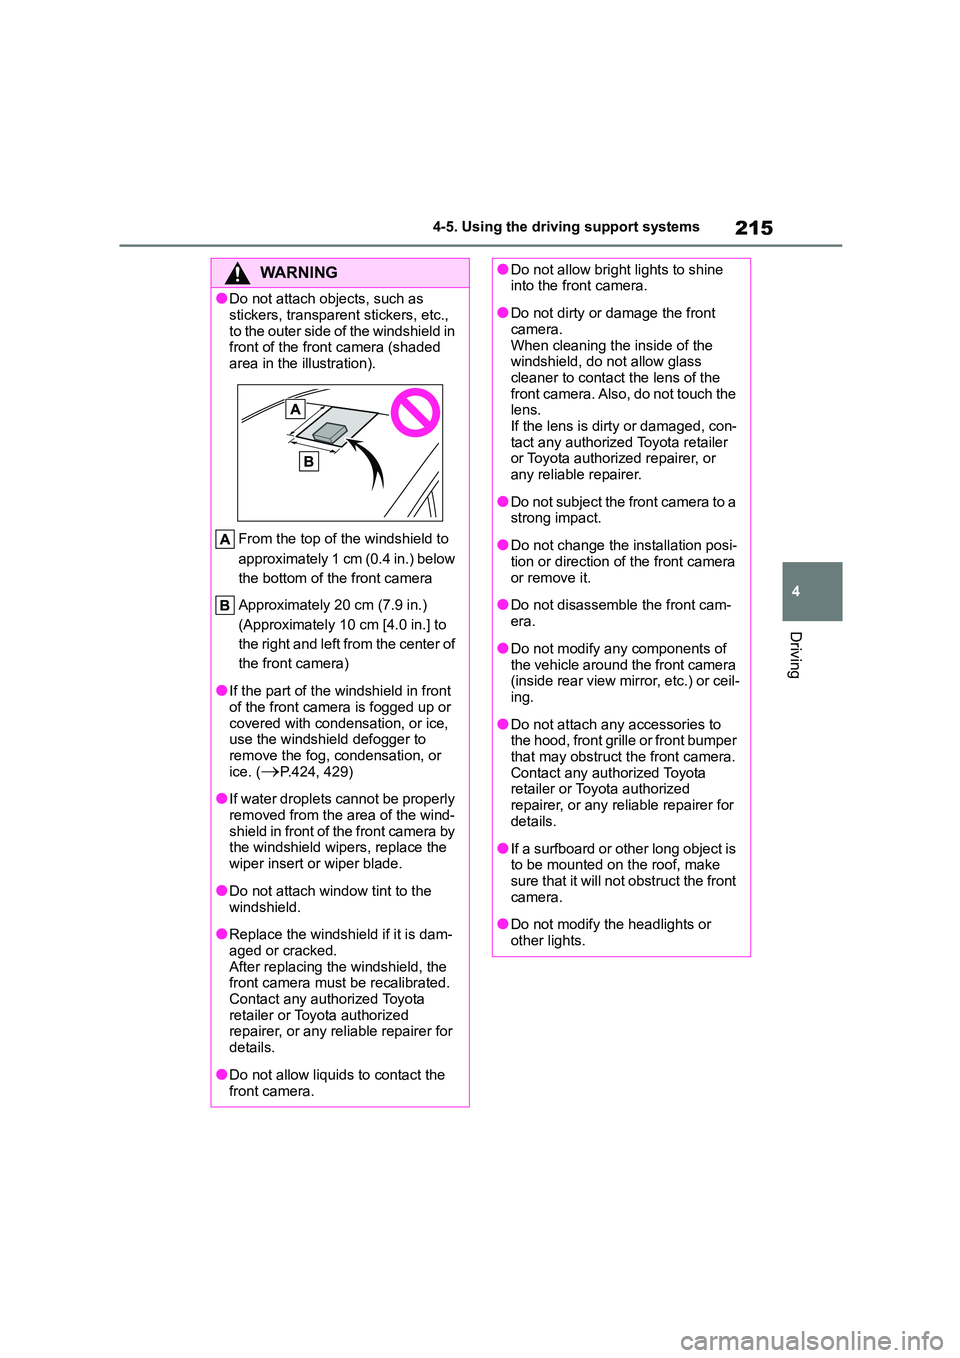
●Do not attach ob jects, such as
stickers, transparent stickers, etc.,
to the outer side of the windshield in front of the front camera (shaded
area in the illustration).
From the top of the windshield to
approximately 1 cm (0.4 in.) below
the bottom of the front camera
Approximately 20 cm (7.9 in.)
(Approximately 10 cm [4.0 in.] to
the right and left from the center of
the front camera)
●If the part of the windshield in front
of the front camera is fogged up or
covered with condensation, or ice, use the windshield defogger to
remove the fog, condensation, or
ice. (P.424, 429)
●If water droplets cannot be properly
removed from the area of the wind- shield in front of the front camera by
the windshield wipers, replace the
wiper insert or wiper blade.
●Do not attach window tint to the
windshield.
●Replace the windshield if it is dam-
aged or cracked. After replacing the windshield, the
front camera must be recalibrated.
Contact any authorized Toyota retailer or Toyota authorized
repairer, or any reliable repairer for
details.
●Do not allow liquids to contact the
front camera.
●Do not allow bright lights to shine into the front camera.
●Do not dirty or damage the front camera.
When cleaning the inside of the
windshield, do not allow glass cleaner to contact the lens of the
front camera. Also, do not touch the
lens. If the lens is dirty or damaged, con-
tact any authorized Toyota retailer
or Toyota authorized repairer, or any reliable repairer.
●Do not subject the front camera to a strong impact.
●Do not change the installation posi-tion or direction of the front camera
or remove it.
●Do not disassemble the front cam-
era.
●Do not modify any components of
the vehicle around the front camera
(inside rear view mirror, etc.) or ceil- ing.
●Do not attach any accessories to the hood, front grille or front bumper
that may obstruct the front camera.
Contact any authorized Toyota retailer or Toyota authorized
repairer, or any reliable repairer for
details.
●If a surfboard or other long object is
to be mounted on the roof, make sure that it will not obstruct the front
camera.
●Do not modify the headlights or
other lights.
Page 218 of 758
2164-5. Using the driving support systems
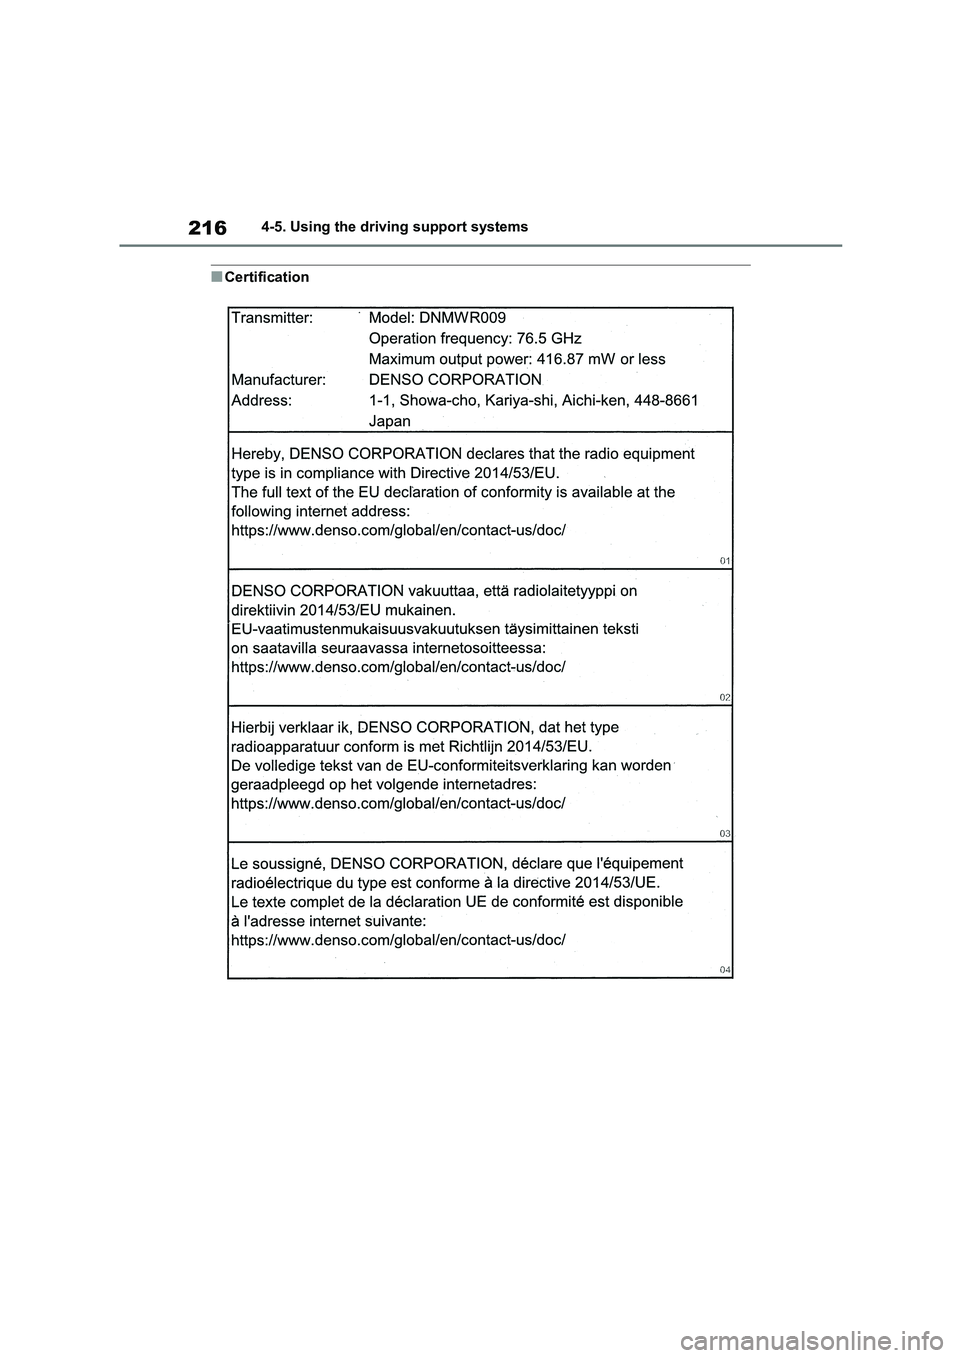
■Certification
Page 219 of 758
217
4
4-5. Using the driving support systems
Driving
Page 220 of 758

2184-5. Using the driving support systems