tire pressure reset TOYOTA SUPRA 2022 Owners Manual
[x] Cancel search | Manufacturer: TOYOTA, Model Year: 2022, Model line: SUPRA, Model: TOYOTA SUPRA 2022Pages: 498, PDF Size: 104.06 MB
Page 306 of 498

3045-1. MOBILITY
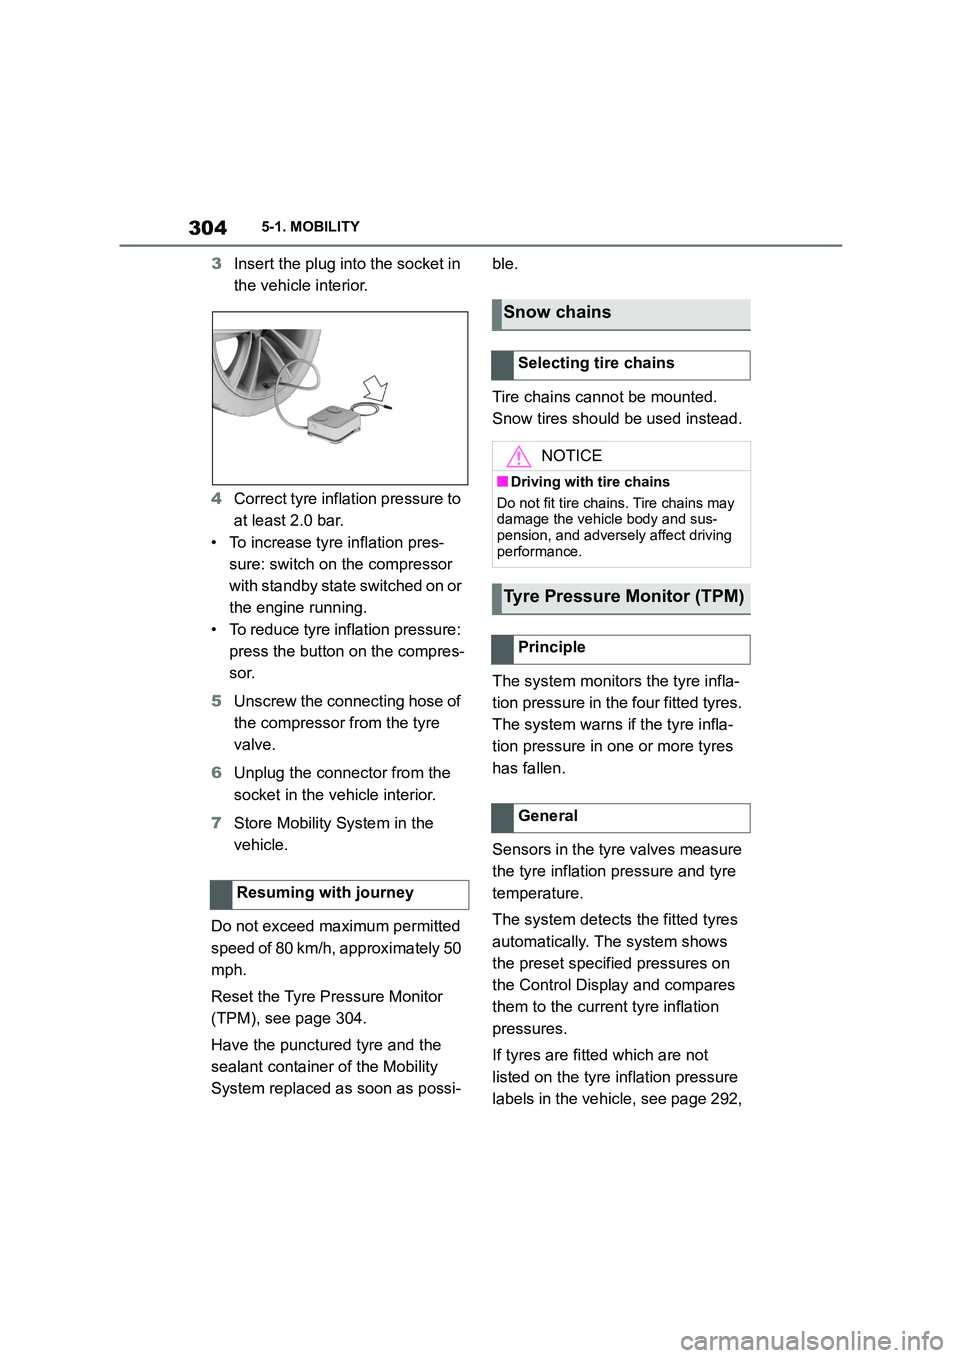
3Insert the plug into the socket in
the vehicle interior.
4 Correct tyre inflation pressure to
at least 2.0 bar.
• To increase tyre inflation pres-
sure: switch on the compressor
with standby state switched on or
the engine running.
• To reduce tyre inflation pressure:
press the button on the compres-
sor.
5 Unscrew the connecting hose of
the compressor from the tyre
valve.
6 Unplug the connector from the
socket in the vehicle interior.
7 Store Mobility System in the
vehicle.
Do not exceed maximum permitted
speed of 80 km/h, approximately 50
mph.
Reset the Tyre Pressure Monitor
(TPM), see page 304.
Have the punctured tyre and the
sealant containe r of the Mobility
System replaced as soon as possi-
ble.
Tire chains cannot be mounted.
Snow tires should be used instead.
The system monitors the tyre infla-
tion pressure in the four fitted tyres.
The system warns if the tyre infla-
tion pressure in one or more tyres
has fallen.
Sensors in the tyre valves measure
the tyre inflation pressure and tyre
temperature.
The system detects the fitted tyres
automatically. The system shows
the preset specified pressures on
the Control Display and compares
them to the current tyre inflation
pressures.
If tyres are fitted which are not
listed on the tyre inflation pressure
labels in the vehicle, see page 292,
Resuming with journey
Snow chains
Selecting tire chains
NOTICE
■Driving with tire chains
Do not fit tire chains. Tire chains may
damage the vehicle body and sus- pension, and adversely affect driving
performance.
Tyre Pressure Monitor (TPM)
Principle
General
Page 319 of 498

317
5
5-1. MOBILITY
MOBILITY
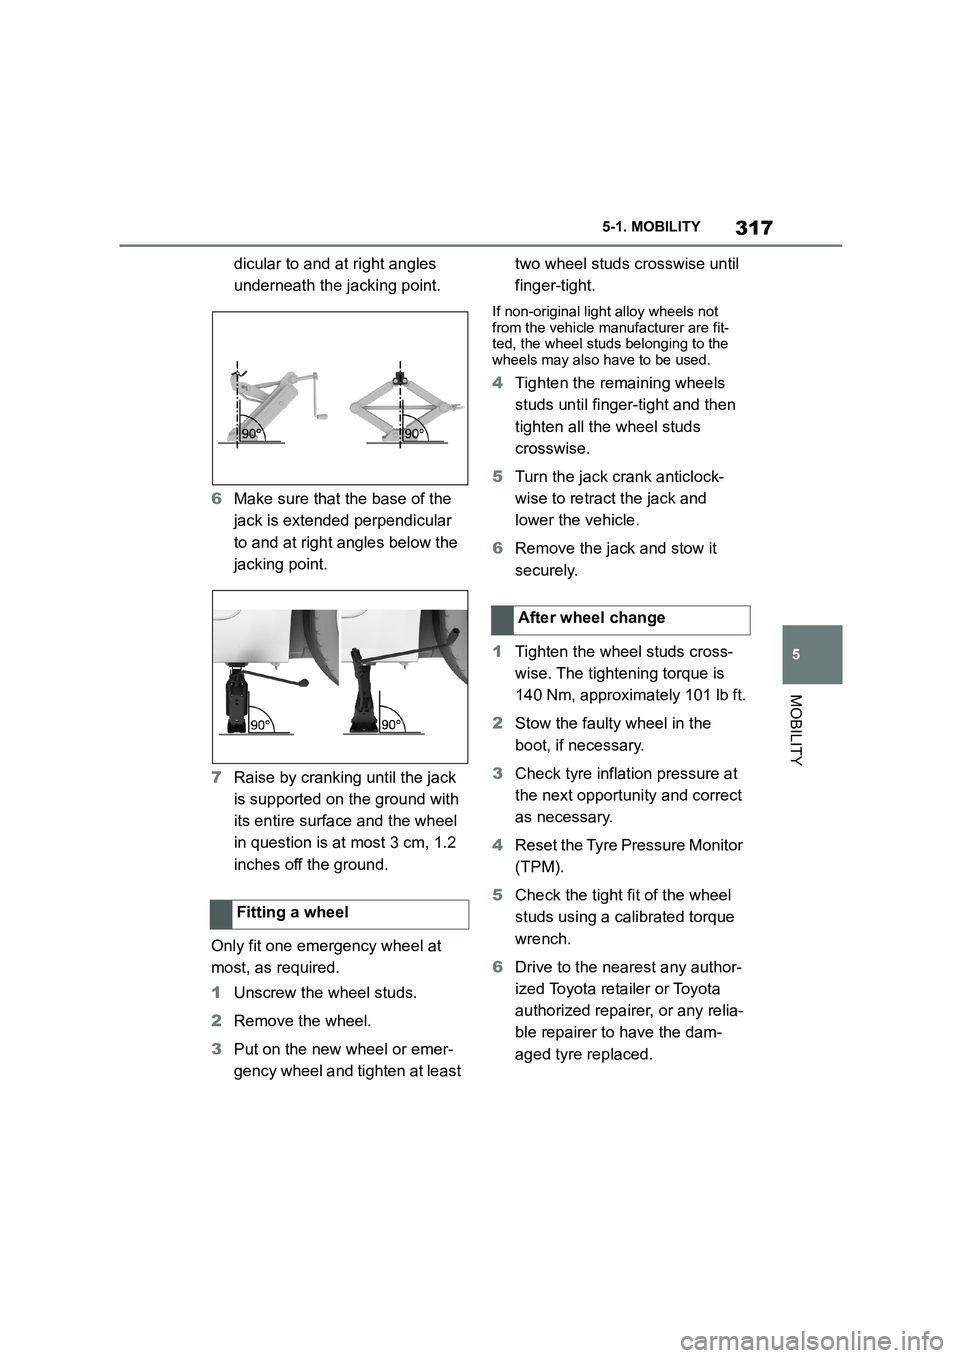
dicular to and at right angles
underneath the jacking point.
6 Make sure that the base of the
jack is extended perpendicular
to and at right angles below the
jacking point.
7 Raise by cranking until the jack
is supported on the ground with
its entire surface and the wheel
in question is at most 3 cm, 1.2
inches off the ground.
Only fit one emergency wheel at
most, as required.
1 Unscrew the wheel studs.
2 Remove the wheel.
3 Put on the new wheel or emer-
gency wheel and tighten at least
two wheel studs crosswise until
finger-tight.
If non-original light alloy wheels not
from the vehicle manufacturer are fit- ted, the wheel studs belonging to the
wheels may also have to be used.
4 Tighten the remaining wheels
studs until finger-tight and then
tighten all the wheel studs
crosswise.
5 Turn the jack crank anticlock-
wise to retract the jack and
lower the vehicle.
6 Remove the jack and stow it
securely.
1 Tighten the wheel studs cross-
wise. The tightening torque is
140 Nm, approximately 101 lb ft.
2 Stow the faulty wheel in the
boot, if necessary.
3 Check tyre inflation pressure at
the next opportunity and correct
as necessary.
4 Reset the Tyre Pressure Monitor
(TPM).
5 Check the tight fit of the wheel
studs using a calibrated torque
wrench.
6 Drive to the nearest any author-
ized Toyota reta iler or Toyota
authorized repairer, or any relia-
ble repairer to have the dam-
aged tyre replaced.
Fitting a wheel
After wheel change