transmission TOYOTA SUPRA 2022 Owners Manual
[x] Cancel search | Manufacturer: TOYOTA, Model Year: 2022, Model line: SUPRA, Model: TOYOTA SUPRA 2022Pages: 498, PDF Size: 104.06 MB
Page 38 of 498
362-1. QUICK REFERENCE
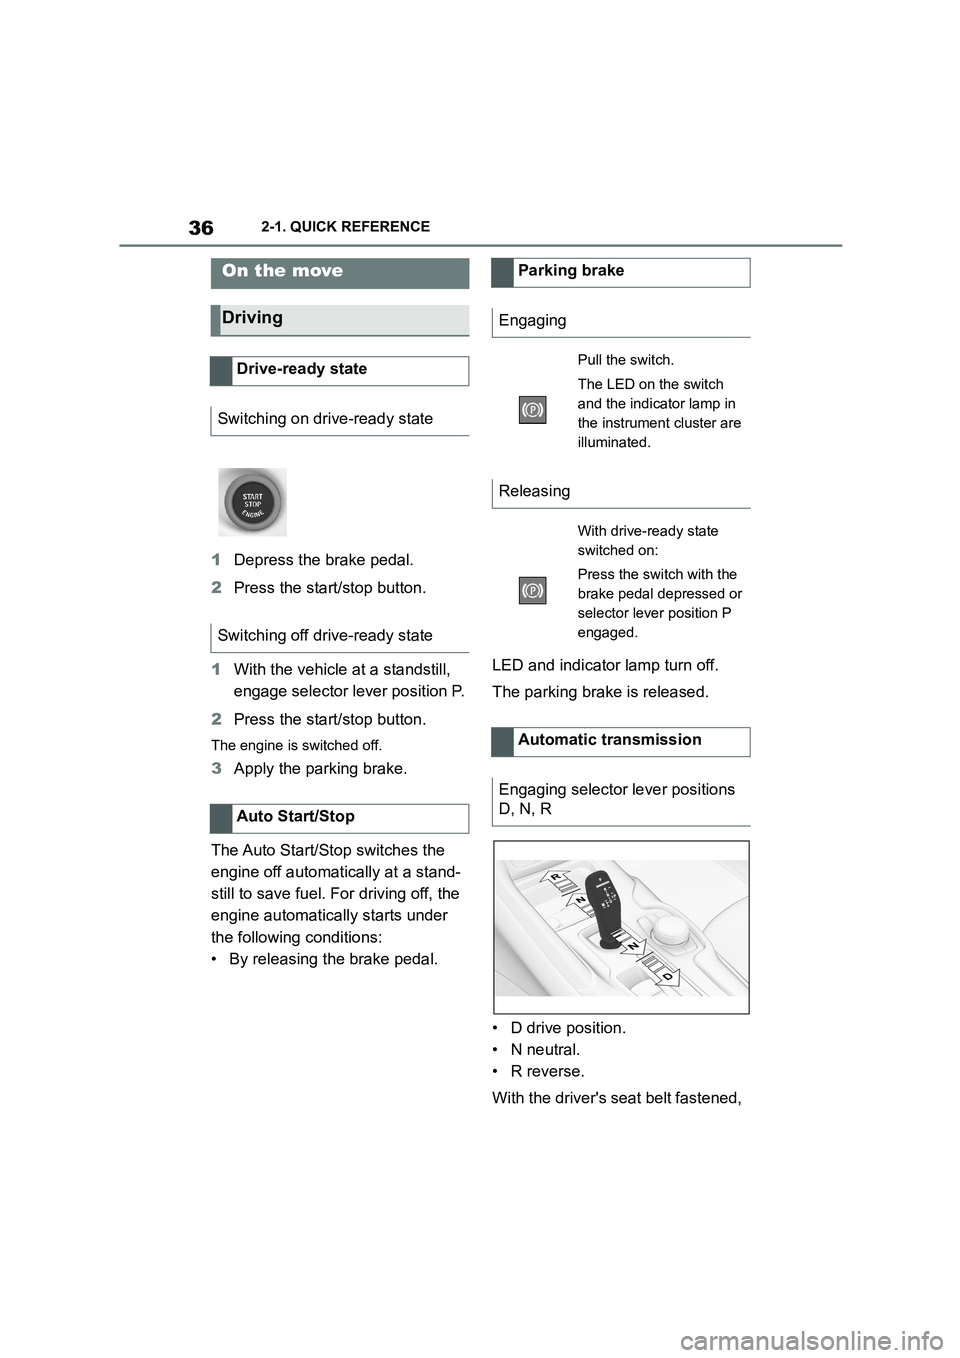
1Depress the brake pedal.
2 Press the start/stop button.
1 With the vehicle at a standstill,
engage selector lever position P.
2 Press the start/stop button.
The engine is switched off.
3Apply the parking brake.
The Auto Start/St op switches the
engine off automatically at a stand-
still to save fuel. For driving off, the
engine automatically starts under
the following conditions:
• By releasing the brake pedal.
LED and indicator lamp turn off.
The parking brake is released.
• D drive position.
• N neutral.
• R reverse.
With the driver's seat belt fastened,
On the move
Driving
Drive-ready state
Switching on drive-ready state
Switching off drive-ready state
Auto Start/Stop
Parking brake
Engaging
Pull the switch.
The LED on the switch
and the indicator lamp in
the instrument cluster are
illuminated.
Releasing
With drive-ready state
switched on:
Press the switch with the
brake pedal depressed or
selector lever position P
engaged.
Automatic transmission
Engaging selector lever positions
D, N, R
Page 39 of 498
37
2
2-1. QUICK REFERENCE
QUICK REFERENCE
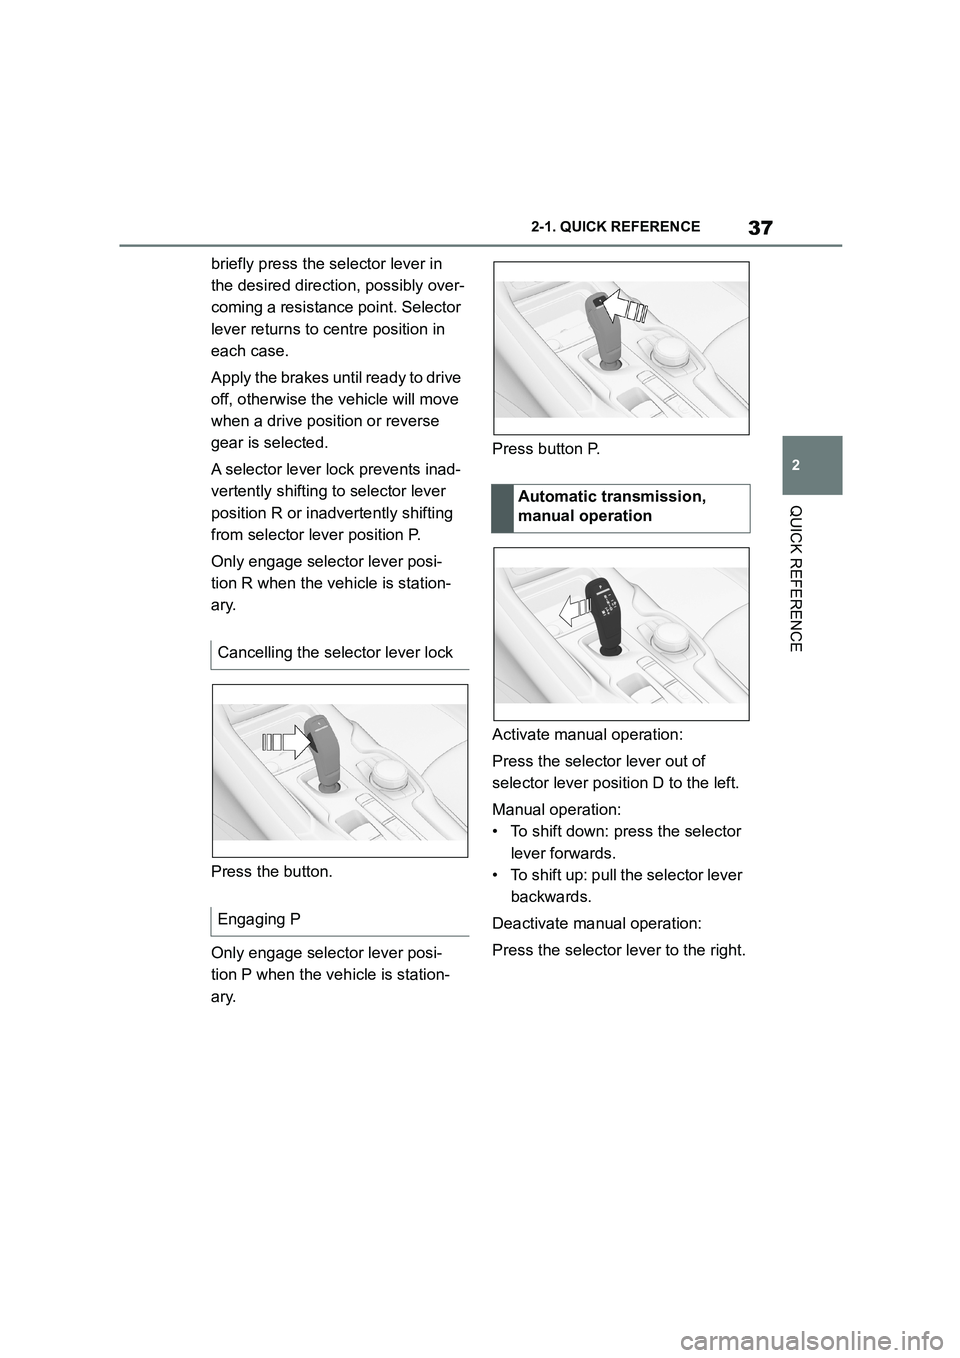
briefly press the se lector lever in
the desired direction, possibly over-
coming a resistance point. Selector
lever returns to centre position in
each case.
Apply the brakes until ready to drive
off, otherwise the vehicle will move
when a drive position or reverse
gear is selected.
A selector lever lock prevents inad-
vertently shifting to selector lever
position R or inadvertently shifting
from selector lever position P.
Only engage selector lever posi-
tion R when the vehicle is station-
ary.
Press the button.
Only engage selector lever posi-
tion P when the vehicle is station-
ary.
Press button P.
Activate manual operation:
Press the selector lever out of
selector lever position D to the left.
Manual operation:
• To shift down: press the selector
lever forwards.
• To shift up: pull the selector lever
backwards.
Deactivate manual operation:
Press the selector lever to the right.
Cancelling the selector lever lock
Engaging P
Automatic transmission,
manual operation
Page 50 of 498
483-1. CONTROLS
13 Horn, entire area
14 To release the bonnet
P. 3 2 1
15 Unlocking the boot lid P.91
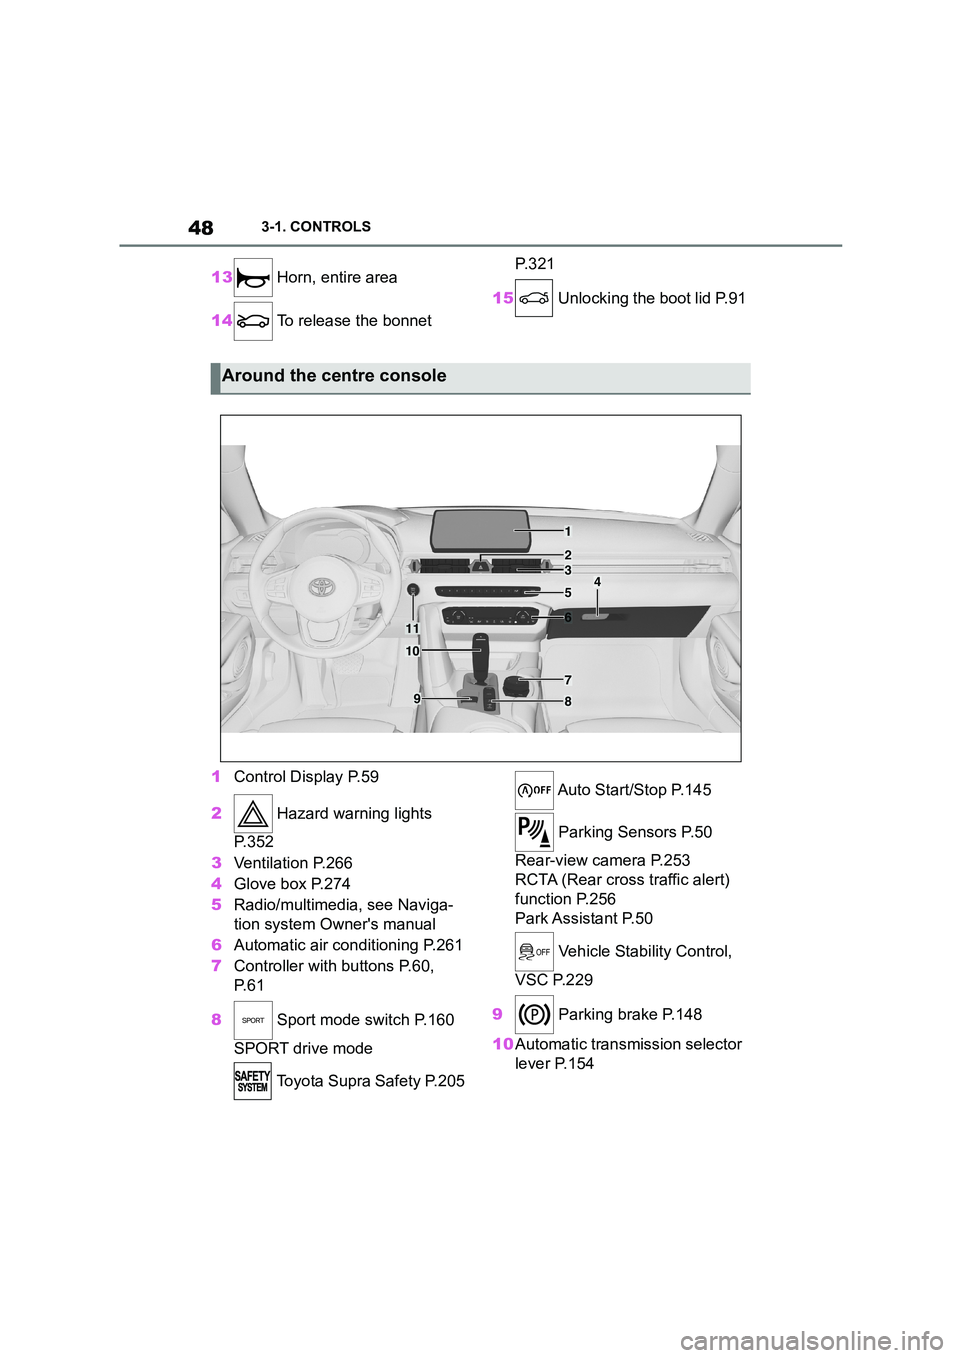
1 Control Display P.59
2 Hazard warning lights
P. 3 5 2
3 Ventilation P.266
4 Glove box P.274
5 Radio/multimedia, see Naviga-
tion system Owner's manual
6 Automatic air conditioning P.261
7 Controller with buttons P.60,
P. 6 1
8 Sport mode switch P.160
SPORT drive mode
Toyota Supra Safety P.205
Auto Start/Stop P.145
Parking Sensors P.50
Rear-view camera P.253
RCTA (Rear cross traffic alert)
function P.256
Park Assistant P.50
Vehicle Stability Control,
VSC P.229
9 Parking brake P.148
10 Automatic transmission selector
lever P.154
Around the centre console
1
4
23
5
6
7
89
10
11
Page 58 of 498
563-1. CONTROLS
1Depress the brake pedal.
2 Press the start/stop button.
The starting process is activated
automatically for a short time and
stops as soon as the engine starts.
Most of the indicator and warning
lamps in the instrument cluster are
illuminated for different lengths of
time.
Depending on the motorisation, full
drive power and the entire engine
speed range may not be available
until approx. 30 seconds after the
engine is started. In this case, the
vehicle will not accelerate in the
usual way, refer to page P.168.
1 With the vehicle at a standstill,
engage selector lever position P.
2 Press the start/stop button.
The engine is switched off. The vehicle
changes to standby state.
3 Apply the parking brake.
Switching on drive-ready
state
Principle
Drive-ready state is
switched on using
the start/stop button:
Automatic transmission
Petrol engine
Display in the instrument
cluster
READY in the instrument
cluster indicates that
drive-ready state is
switched on.
Switching off drive-ready
state
Page 95 of 498
93
3
3-1. CONTROLS
CONTROLS
Additional remote controls are
available from any authorized
Toyota retailer or Toyota authorized
repairer, or any reliable repairer.
A lost remote control can be
blocked and replaced by any
authorized Toyota retailer or Toyota
authorized repairer, or any reliable
repairer.
If a driver profile, see page 76, has
been assigned to the lost remote
control, the connection to this
remote control must be removed. A
new remote control can then be
assigned to the driver profile.
A vehicle message, see page 163,
is shown.
It may be difficult for the vehicle to
detect the remote control in some
conditions, including the following:
• The battery of the vehicle key is
discharged. To replace the bat-
tery, see page 92.
• Disruption of the radio link by
transmission masts or other
equipment transmitting powerful
signals.
• Shielding of the remote control
by metallic objects.
Do not transport the remote control
together with metallic objects.
• Disruption of the radio link by
mobile telephones or other elec-
tronic devices in the immediate
vicinity of the remote control.
Do not transport the remote control
together with electronic devices.
• Interference with radio transmis-
sion caused by the charging of
mobile devices, for example a
mobile phone.
• The remote control is located in
the immediate vicinity of the
wireless charging dock. Place
the remote control somewhere
else.
If there is a malfunction, the vehicle
can be unlocked and locked from
the outside with the integrated key,
see page 94.
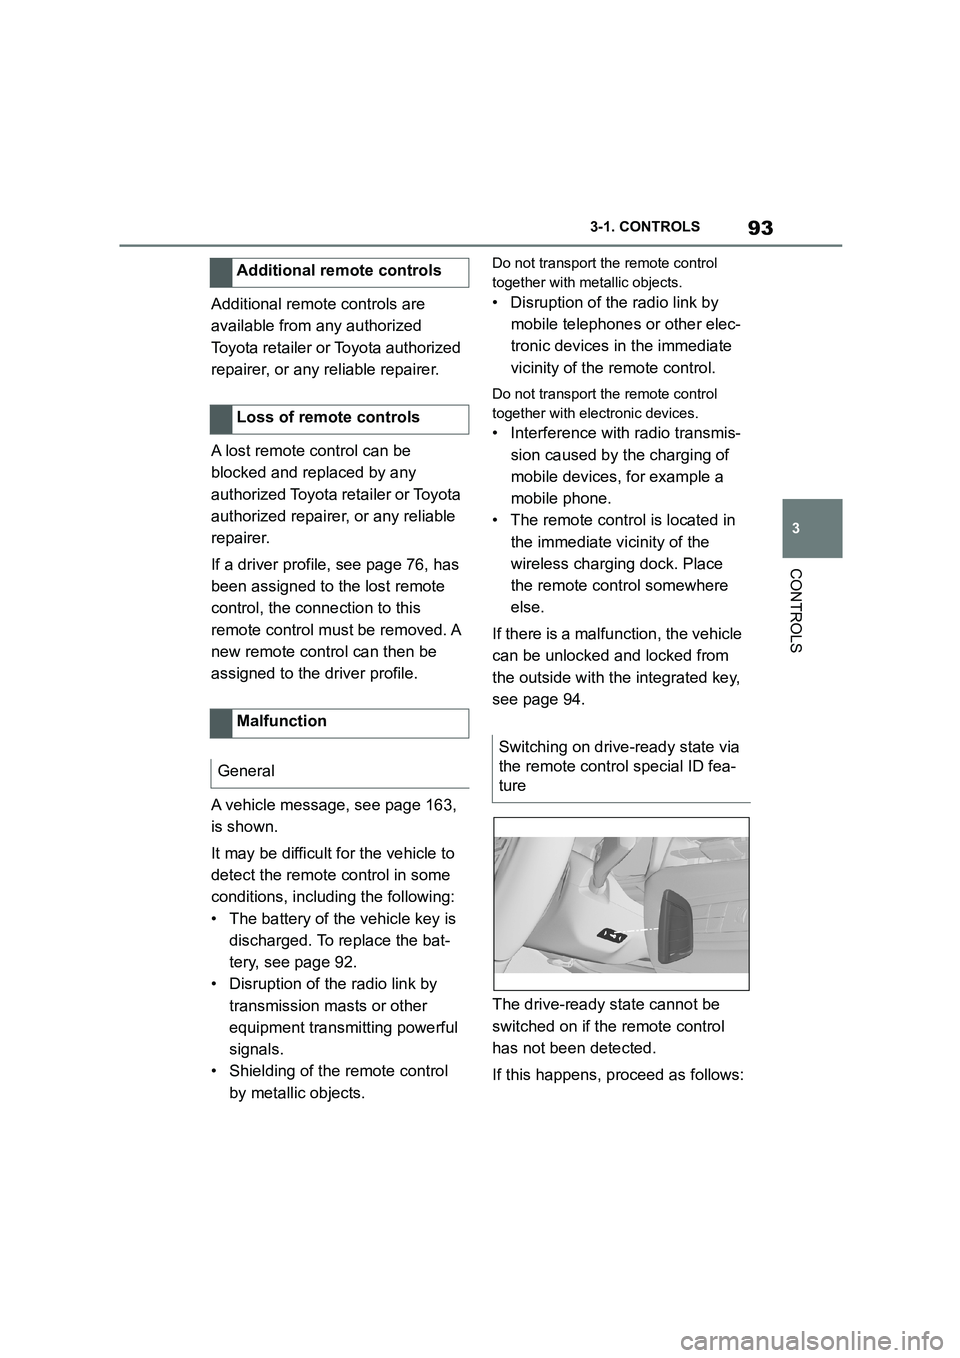
The drive-ready state cannot be
switched on if the remote control
has not been detected.
If this happens, proceed as follows:
Additional remote controls
Loss of remote controls
Malfunction
General
Switching on drive-ready state via
the remote control special ID fea-
ture
Page 156 of 498
1543-1. CONTROLS
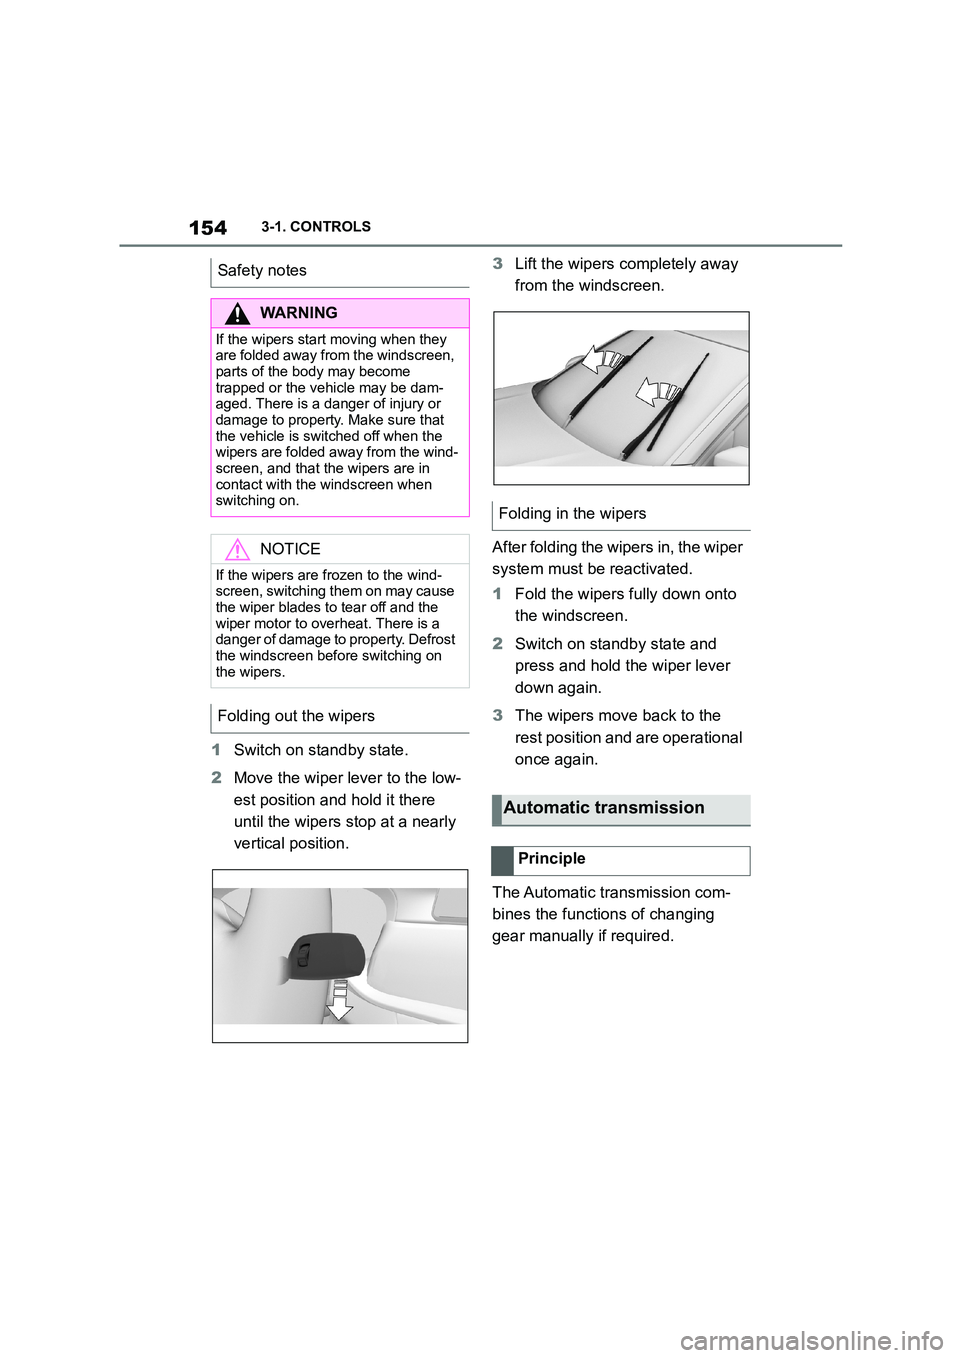
1Switch on standby state.
2 Move the wiper lever to the low-
est position and hold it there
until the wipers stop at a nearly
vertical position.
3 Lift the wipers completely away
from the windscreen.
After folding the wipers in, the wiper
system must be reactivated.
1 Fold the wipers fully down onto
the windscreen.
2 Switch on standby state and
press and hold the wiper lever
down again.
3 The wipers move back to the
rest position and are operational
once again.
The Automatic transmission com-
bines the functions of changing
gear manually if required.
Safety notes
WA R N I N G
If the wipers start moving when they
are folded away from the windscreen, parts of the body may become
trapped or the vehicle may be dam-
aged. There is a danger of injury or damage to property. Make sure that
the vehicle is switched off when the
wipers are folded away from the wind-
screen, and that the wipers are in contact with the windscreen when
switching on.
NOTICE
If the wipers are frozen to the wind-
screen, switching them on may cause
the wiper blades to tear off and the wiper motor to overheat. There is a
danger of damage to property. Defrost
the windscreen before switching on the wipers.
Folding out the wipers
Folding in the wipers
Automatic transmission
Principle
Page 157 of 498
155
3
3-1. CONTROLS
CONTROLS
Selector lever posi tion for all nor-
mal driving. All gears for forward
driving are selected automatically.
Only engage selector lever posi-
tion R when the vehicle is station-
ary.
In selector lever position N, the
vehicle can be pushed or can roll
without power from the engine, for
example in car washes, see page
156.
Selector lever position for parking
the vehicle, for example. In selector
lever position P, the transmission
blocks the drive wheels.
Only engage selector lever posi-
tion P when the vehicle is station-
ary.
■P is engaged automatically
Selector lever position P is auto-
matically engaged in the following
situations, for example:
After switching off drive-ready
state if selector lever position R,
D or M is engaged.
After switching off standby state
if selector leve r position N is
engaged.
If, while the vehicle is at a stand-
still and selector le ver position D,
M or R is engaged, the driver's
seat belt is unfastened, the
driver's door is opened and the
brake pedal is not depressed.
Apply the brakes until you are
ready to drive off, otherwise the
vehicle will move wh en a drive posi-
tion is selected.
Safety note
WA R N I N G
An unsecured vehicle can start mov-
ing and rolling away. There is a dan- ger of accidents. Before leaving the
vehicle, secure it to prevent it from
rolling away, for example by applying the parking brake.
Observe the following to ensure that
the vehicle is secured against rolling away:
• Apply the parking brake.
• Turn the front wheels towards the
kerb on upward or downward gradi- ents.
• Additionally secure the vehicle on upward or downward gradients, for
example with a chock.
Selector lever positions
D drive position
R Reverse
N neutral
P Park
Engaging selector lever posi-
tions
General
Page 159 of 498
157
3
3-1. CONTROLS
CONTROLS
3 Depress the brake pedal.
4 Touch the selector lever lock
and engage selector lever posi-
tion N.
5 Switch off drive-ready state.
Standby state then remains switched
on and a vehicle message is shown.
The vehicle can now roll.
Selector lever position P is auto-
matically engaged after approxi-
mately 35 minutes.
If there is a fault, it may not be pos-
sible to change the selector lever
position.
Unlock the transmission lockout
electronically if necessary, see
page 158.
Kick-down enables you to achieve
maximum performance.
Press the accelerator pedal down
beyond the regular full-throttle posi-
tion; resistance will be felt.
The gears can be changed manu-
ally in manual operation.
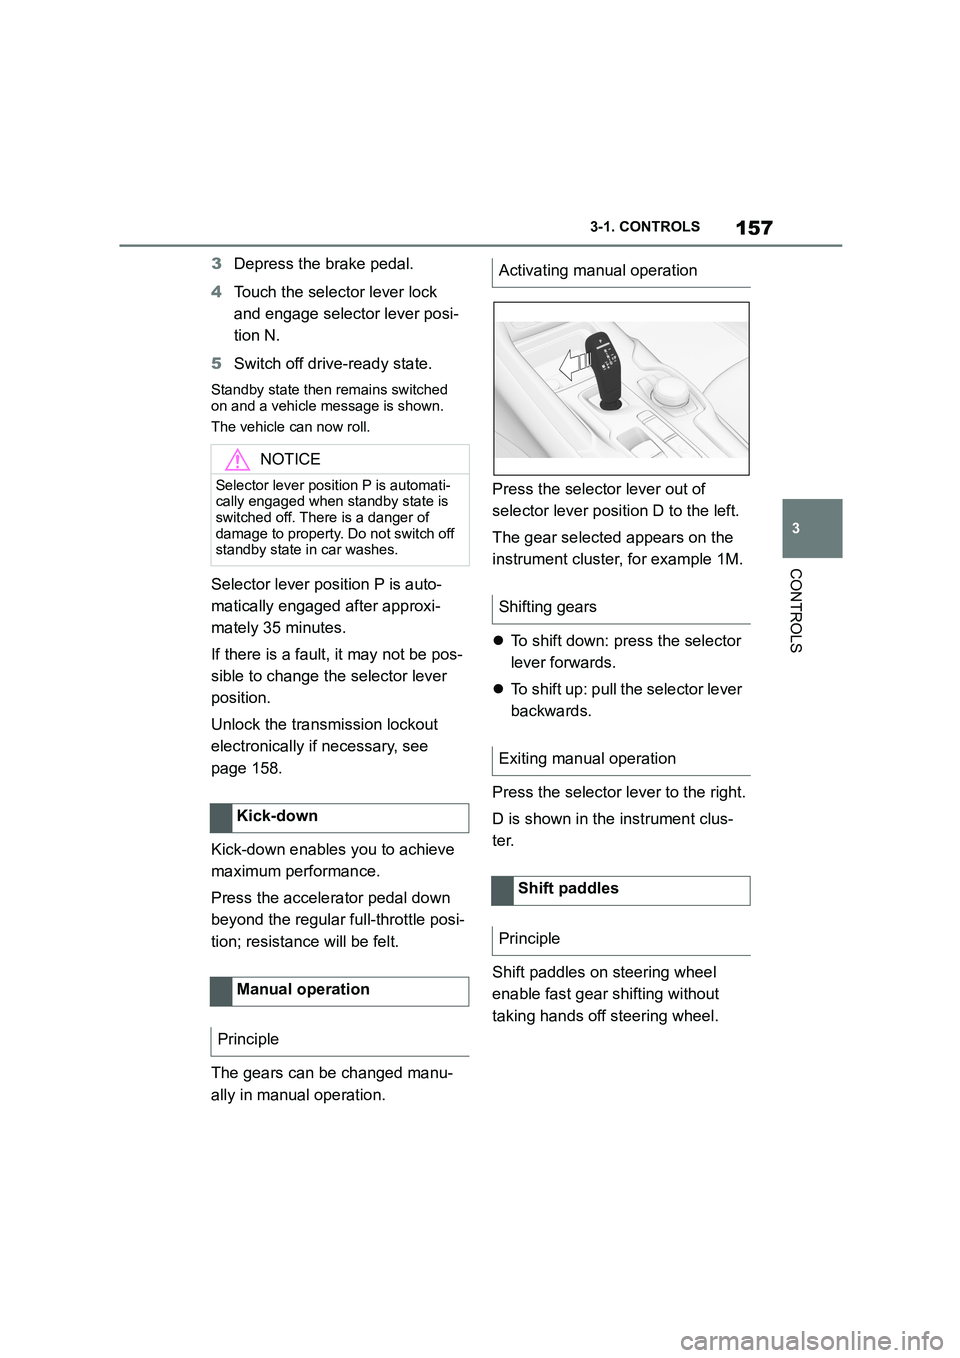
Press the selector lever out of
selector lever position D to the left.
The gear selected appears on the
instrument cluster, for example 1M.
To shift down: press the selector
lever forwards.
To shift up: pull the selector lever
backwards.
Press the selector lever to the right.
D is shown in the instrument clus-
ter.
Shift paddles on steering wheel
enable fast gear shifting without
taking hands off steering wheel.
NOTICE
Selector lever position P is automati- cally engaged when standby state is
switched off. There is a danger of
damage to property. Do not switch off standby state in car washes.
Kick-down
Manual operation
Principle
Activating manual operation
Shifting gears
Exiting manual operation
Shift paddles
Principle
Page 160 of 498
1583-1. CONTROLS
■Gearshift
Gear shifting is only carried out at
the appropriate engine RPM and
vehicle speed.
■Short-term manual operation
In selector lever position D, operat-
ing a shift paddle causes the sys-
tem to switch to manual operation
temporarily.
The gearbox reverts to automatic
operation from manual operation
after a certain period of time of
moderate driving without accelera-
tion or gear shifts using the shift
paddles.
Changing to automatic operation is
possible as follows:
Pull and hold the right shift pad-
dle until D is shown in the instru-
ment cluster.
In addition to pulling the right
shift paddle, pull the left shift
paddle.
■Permanent manual operation
In selector lever position M, operat-
ing a shift paddle causes the sys-
tem to switch permanently to
manual operation (mode).
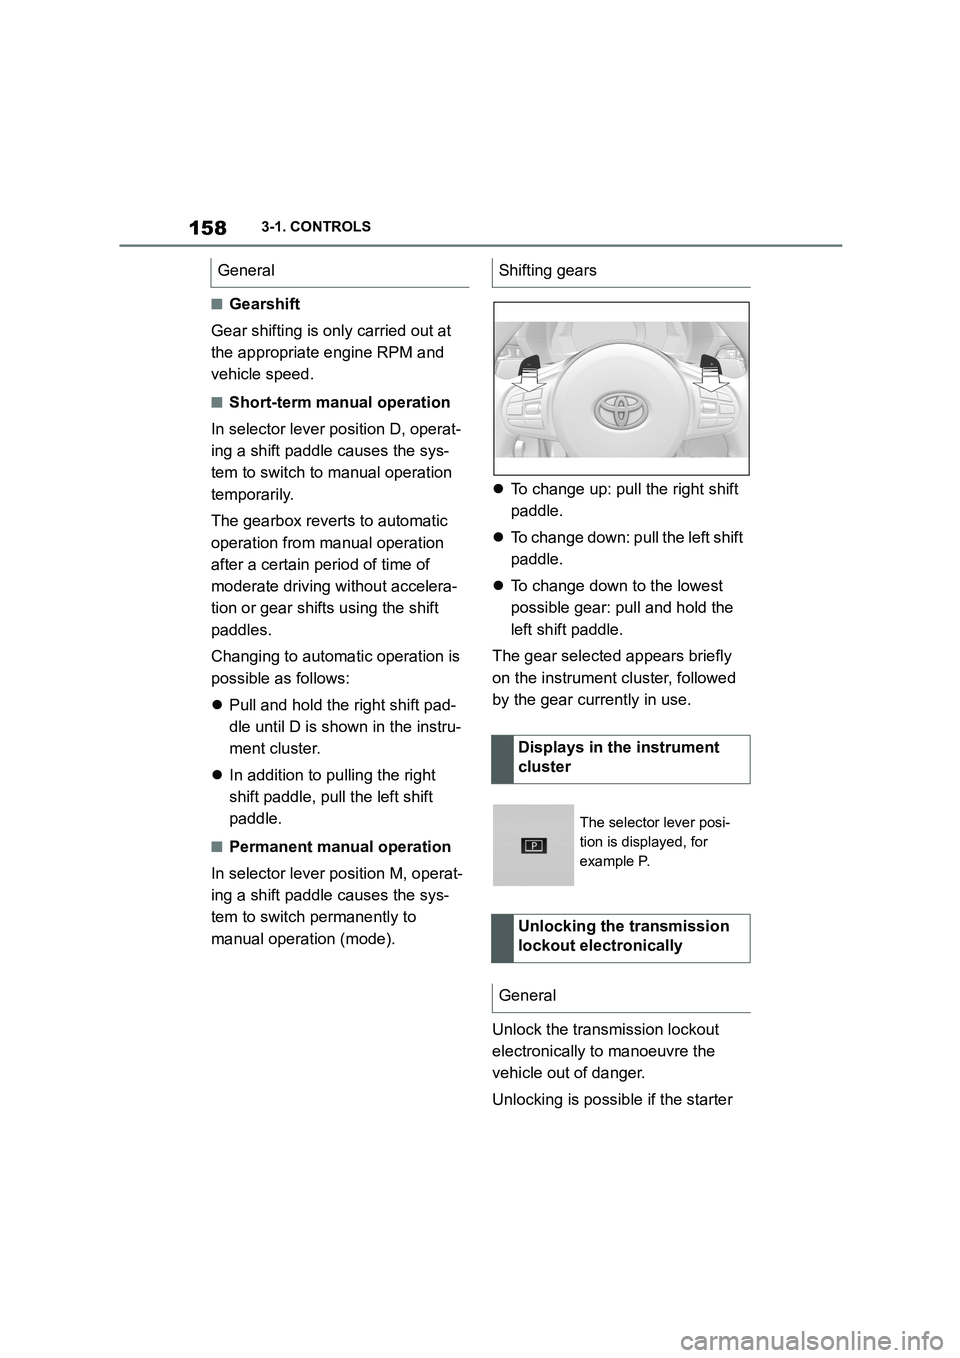
To change up: pull the right shift
paddle.
To change down: pull the left shift
paddle.
To change down to the lowest
possible gear: pull and hold the
left shift paddle.
The gear selected appears briefly
on the instrument cluster, followed
by the gear currently in use.
Unlock the transmission lockout
electronically to manoeuvre the
vehicle out of danger.
Unlocking is possible if the starter
GeneralShifting gears
Displays in the instrument
cluster
The selector lever posi-
tion is displayed, for
example P.
Unlocking the transmission
lockout electronically
General
Page 161 of 498
159
3
3-1. CONTROLS
CONTROLS
can turn the engine.
Before the transmission lockout is
released, apply the parking brake
to prevent the ve hicle from rolling
away.
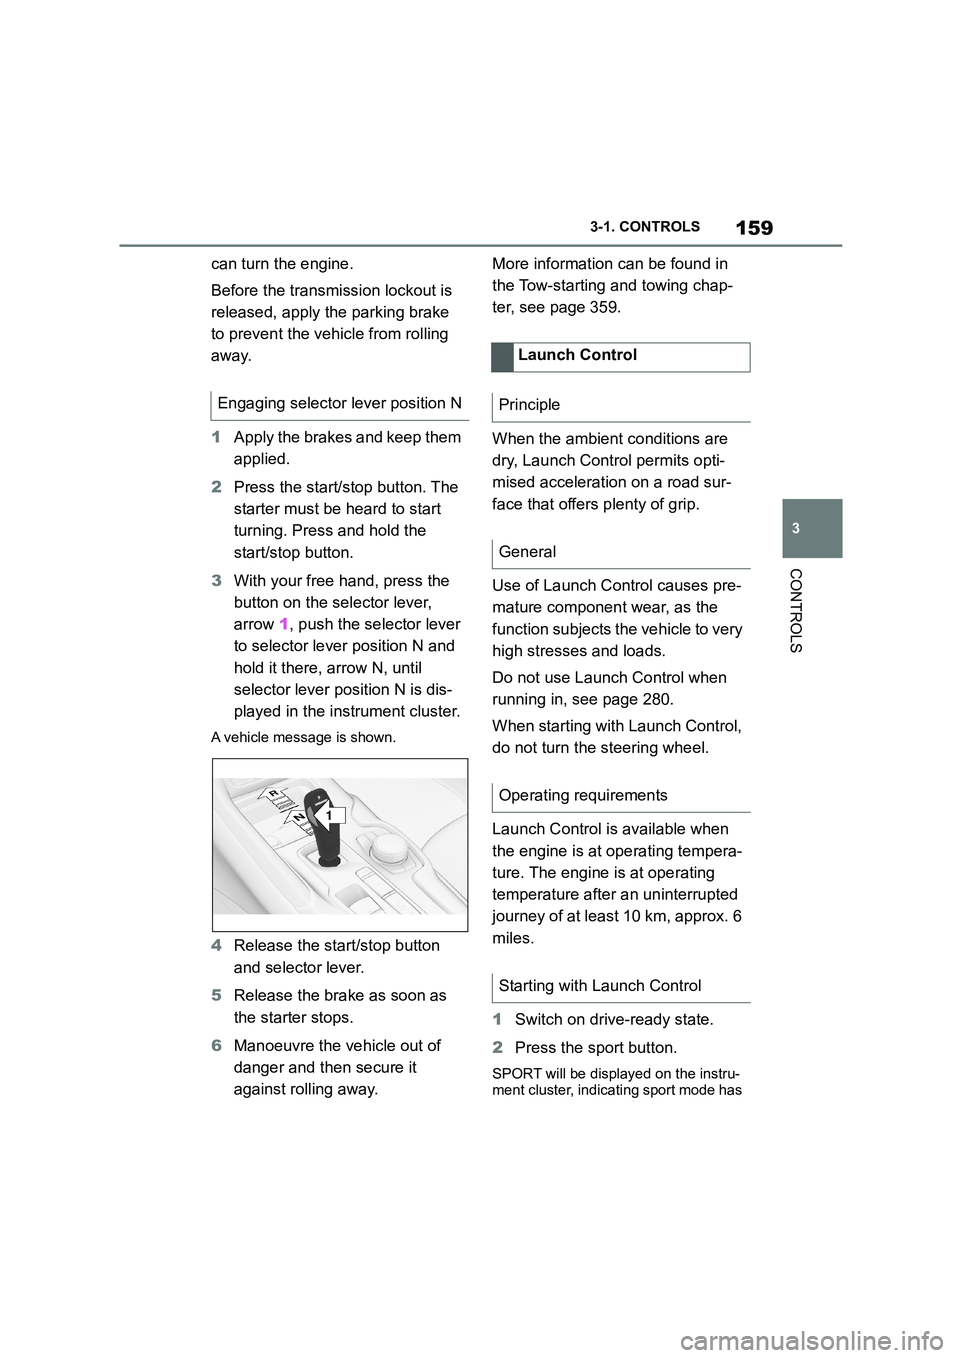
1 Apply the brakes and keep them
applied.
2 Press the start/stop button. The
starter must be heard to start
turning. Press and hold the
start/stop button.
3 With your free hand, press the
button on the selector lever,
arrow 1, push the selector lever
to selector lever position N and
hold it there, arrow N, until
selector lever position N is dis-
played in the instrument cluster.
A vehicle message is shown.
4 Release the start/stop button
and selector lever.
5 Release the brake as soon as
the starter stops.
6 Manoeuvre the vehicle out of
danger and then secure it
against rolling away.
More information can be found in
the Tow-starting and towing chap-
ter, see page 359.
When the ambient conditions are
dry, Launch Control permits opti-
mised acceleration on a road sur-
face that offers plenty of grip.
Use of Launch Control causes pre-
mature component wear, as the
function subjects t he vehicle to very
high stresses and loads.
Do not use Launch Control when
running in, see page 280.
When starting with Launch Control,
do not turn the steering wheel.
Launch Control is available when
the engine is at operating tempera-
ture. The engine is at operating
temperature after an uninterrupted
journey of at least 10 km, approx. 6
miles.
1 Switch on drive-ready state.
2 Press the sport button.
SPORT will be displayed on the instru-
ment cluster, indicating sport mode has
Engaging selector lever position N
1
R
N
Launch Control
Principle
General
Operating requirements
Starting with Launch Control