YAMAHA RHINO 700 2013 Owners Manual
Manufacturer: YAMAHA, Model Year: 2013, Model line: RHINO 700, Model: YAMAHA RHINO 700 2013Pages: 188, PDF Size: 4.9 MB
Page 121 of 188
8-8
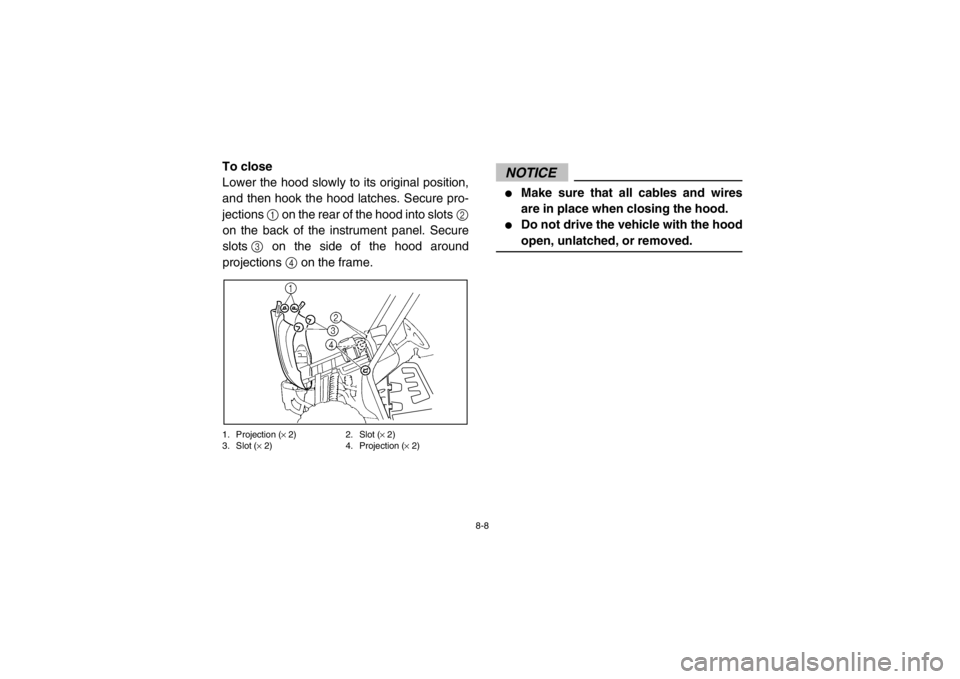
To close
Lower the hood slowly to its original position,
and then hook the hood latches. Secure pro-
jections 1 on the rear of the hood into slots 2
on the back of the instrument panel. Secure
slots 3 on the side of the hood around
projections 4 on the frame.1. Projection ( × 2) 2. Slot ( × 2)
3. Slot ( × 2) 4. Projection ( × 2)
NOTICE●
Make sure that all cables and wires
are in place when closing the hood.
●
Do not drive the vehicle with the hood
open, unlatched, or removed.
1RB7A_EE.book Page 8 Tuesday, April 24, 2012 9:07 AM
Page 122 of 188
8-9
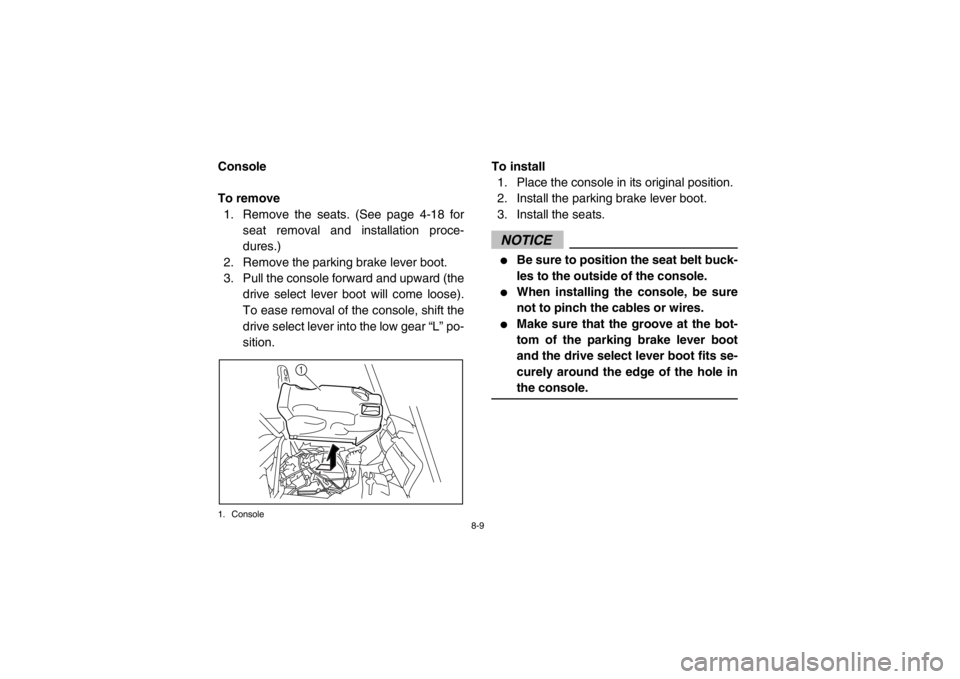
5B410011Console
To remove1. Remove the seats. (See page 4-18 for seat removal and installation proce-
dures.)
2. Remove the parking brake lever boot.
3. Pull the console forward and upward (the drive select lever boot will come loose).
To ease removal of the console, shift the
drive select lever into the low gear “L” po-
sition.1. Console
To install
1. Place the console in its original position.
2. Install the parking brake lever boot.
3. Install the seats.NOTICE●
Be sure to position the seat belt buck-
les to the outside of the console.
●
When installing the console, be sure
not to pinch the cables or wires.
●
Make sure that the groove at the bot-
tom of the parking brake lever boot
and the drive select lever boot fits se-
curely around the edge of the hole in
the console.
1
1RB7A_EE.book Page 9 Tuesday, April 24, 2012 9:07 AM
Page 123 of 188
8-10
5B410012Engine oil and oil filter cartridge
Check engine oil level before each operation.
In addition, change the oil and the oil filter car-
tridge at the intervals specified in the periodic
maintenance and lubrication chart.
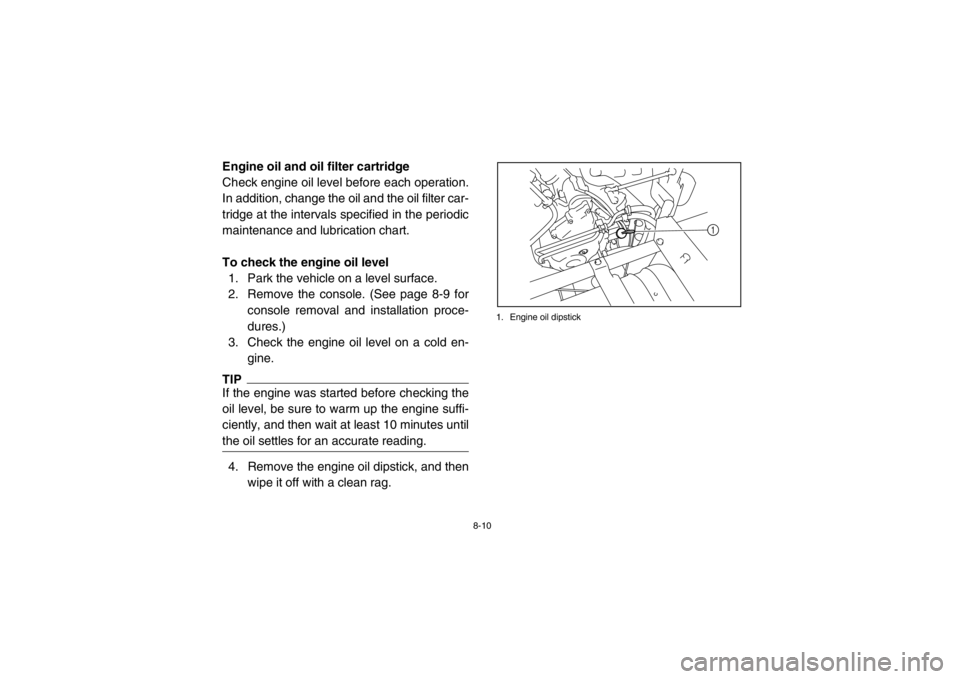
To check the engine oil level1. Park the vehicle on a level surface.
2. Remove the console. (See page 8-9 for console removal and installation proce-
dures.)
3. Check the engine oil level on a cold en-
gine. TIPIf the engine was started before checking the
oil level, be sure to warm up the engine suffi-
ciently, and then wait at least 10 minutes until
the oil settles for an accurate reading.4. Remove the engine oil dipstick, and thenwipe it off with a clean rag.
1. Engine oil dipstick
1
1RB7A_EE.book Page 10 Tuesday, April 24, 2012 9:07 AM
Page 124 of 188
8-11
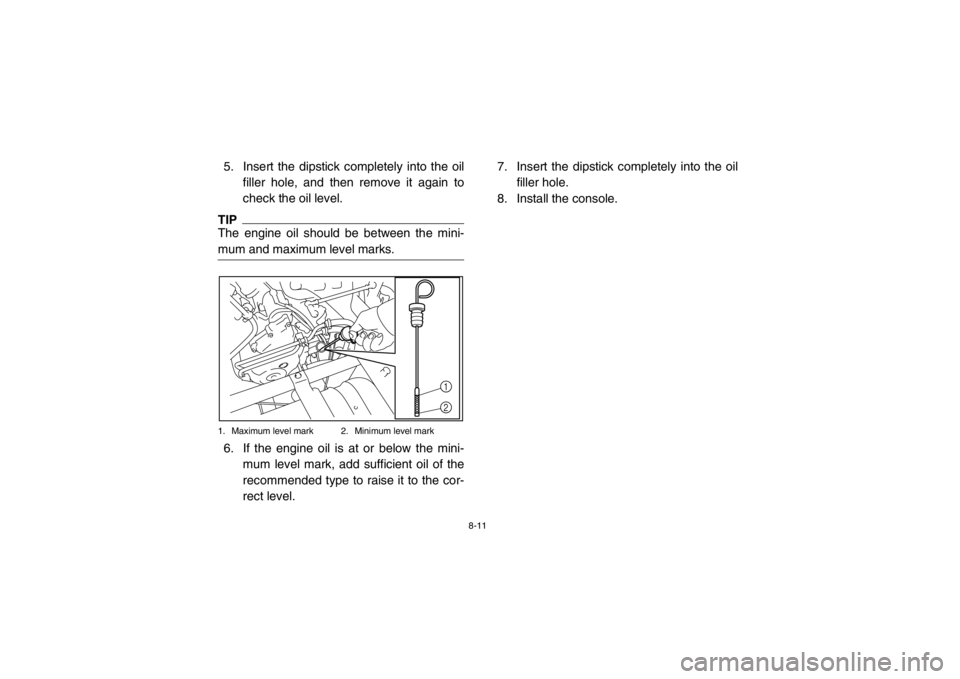
5. Insert the dipstick completely into the oilfiller hole, and then remove it again to
check the oil level. TIPThe engine oil should be between the mini-
mum and maximum level marks.1. Maximum level mark 2. Minimum level mark6. If the engine oil is at or below the mini-mum level mark, add sufficient oil of the
recommended type to raise it to the cor-
rect level. 7. Insert the dipstick completely into the oil
filler hole.
8. Install the console.
1
2
1RB7A_EE.book Page 11 Tuesday, April 24, 2012 9:07 AM
Page 125 of 188
8-12
To change the engine oil (with or without
oil filter cartridge replacement)1. Park the vehicle on a level surface.
2. Remove the console. (See page 8-10 for
console removal and installation proce-
dures.)
3. Start the engine, warm it up for several minutes, and then turn it off.
4. Place an oil pan under the engine to col-
lect the used oil, and then remove the
dipstick.
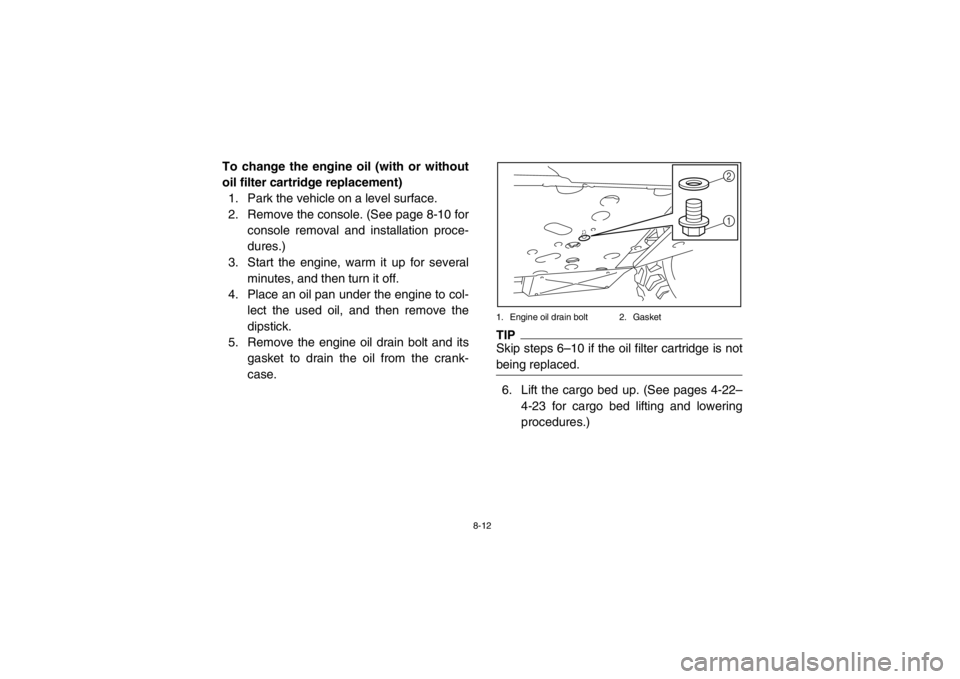
5. Remove the engine oil drain bolt and its
gasket to drain the oil from the crank-
case.
1. Engine oil drain bolt 2. GasketTIPSkip steps 6–10 if the oil filter cartridge is not
being replaced.6. Lift the cargo bed up. (See pages 4-22– 4-23 for cargo bed lifting and lowering
procedures.)
2
1
1RB7A_EE.book Page 12 Tuesday, April 24, 2012 9:07 AM
Page 126 of 188
8-13
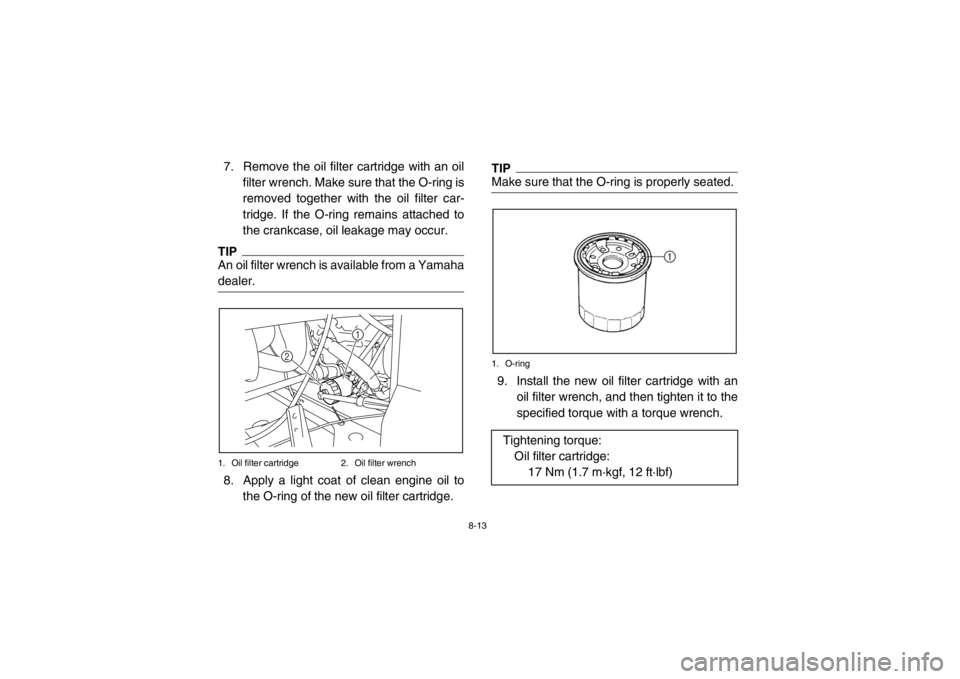
7. Remove the oil filter cartridge with an oilfilter wrench. Make sure that the O-ring is
removed together with the oil filter car-
tridge. If the O-ring remains attached to
the crankcase, oil leakage may occur.TIPAn oil filter wrench is available from a Yamaha
dealer.1. Oil filter cartridge 2. Oil filter wrench8. Apply a light coat of clean engine oil tothe O-ring of the new oil filter cartridge.
TIPMake sure that the O-ring is properly seated.1. O-ring9. Install the new oil filter cartridge with an oil filter wrench, and then tighten it to the
specified torque with a torque wrench.
1
2
Tightening torque: Oil filter cartridge: 17 Nm (1.7 m·kgf, 12 ft·lbf)
1RB7A_EE.book Page 13 Tuesday, April 24, 2012 9:07 AM
Page 127 of 188
8-14
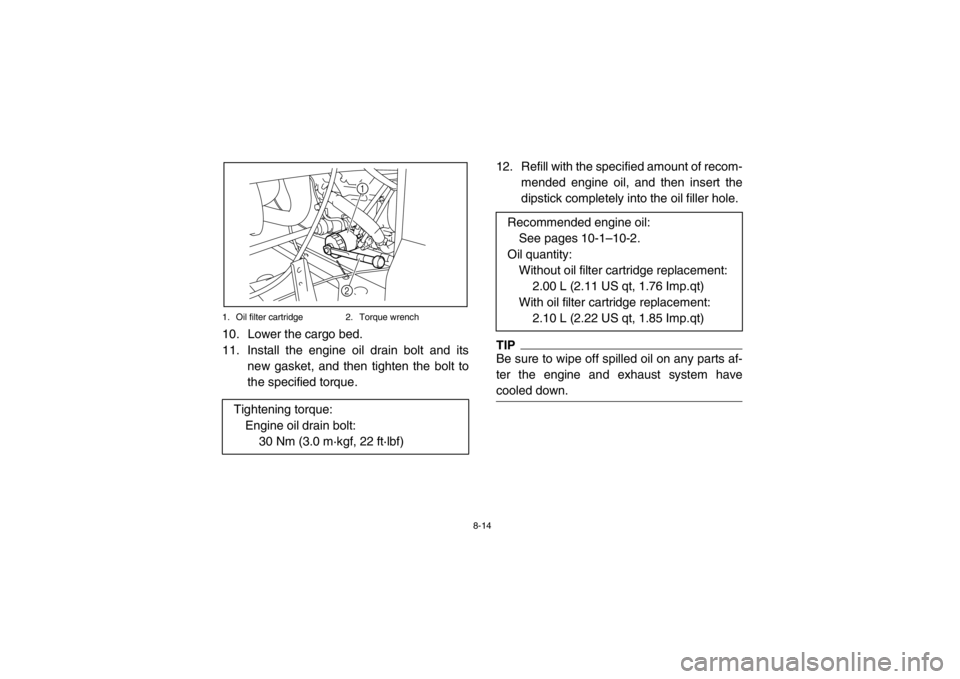
1. Oil filter cartridge 2. Torque wrench
10. Lower the cargo bed.
11. Install the engine oil drain bolt and its
new gasket, and then tighten the bolt to
the specified torque. 12. Refill with the specified amount of recom-
mended engine oil, and then insert the
dipstick completely into the oil filler hole.
TIPBe sure to wipe off spilled oil on any parts af-
ter the engine and exhaust system have
cooled down.
Tightening torque:Engine oil drain bolt: 30 Nm (3.0 m·kgf, 22 ft·lbf)
1
2
Recommended engine oil: See pages 10-1–10-2.
Oil quantity: Without oil filter cartridge replacement:
2.00 L (2.11 US qt, 1.76 Imp.qt)
With oil filter cartridge replacement: 2.10 L (2.22 US qt, 1.85 Imp.qt)
1RB7A_EE.book Page 14 Tuesday, April 24, 2012 9:07 AM
Page 128 of 188
8-15
NOTICE●
In order to prevent clutch slippage
(since the engine oil also lubricates
the clutch), do not mix any chemical
additives with oil. Do not use oils with
a diesel specification of “CD” or oils
of a higher quality than specified. In
addition, do not use oils labeled “EN-
ERGY CONSERVING II” or higher.
●
Make sure that no foreign material en-
ters the crankcase.
13. Start the engine, and then let it idle forseveral minutes while checking it for oil
leakage. If oil is leaking, immediately turn
the engine off and check for the cause.
14. Turn the engine off, wait at least 10 min- utes, and then check the oil level and cor-
rect it if necessary.
15. Install the console.
5B410013Final gear oil
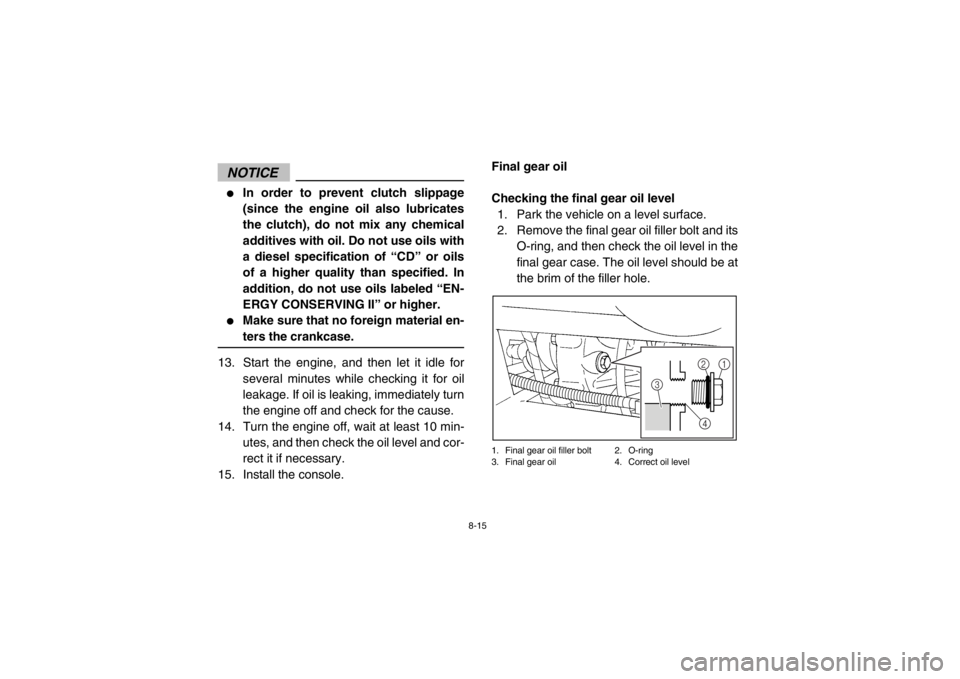
Checking the final gear oil level 1. Park the vehicle on a level surface.
2. Remove the final gear oil filler bolt and its O-ring, and then check the oil level in the
final gear case. The oil level should be at
the brim of the filler hole.1. Final gear oil filler bolt 2. O-ring
3. Final gear oil 4. Correct oil level
1
2
3
4
1RB7A_EE.book Page 15 Tuesday, April 24, 2012 9:07 AM
Page 129 of 188
8-16
3. If the oil is below the brim of the filler hole,add sufficient oil of the recommended
type to raise it to the correct level.
NOTICE: Be sure no foreign material
enters the final gear case.
4. Install the oil filler bolt and its new O-ring,
and then tighten the bolt to the specified
torque. Changing the final gear oil
1. Park the vehicle on a level surface.
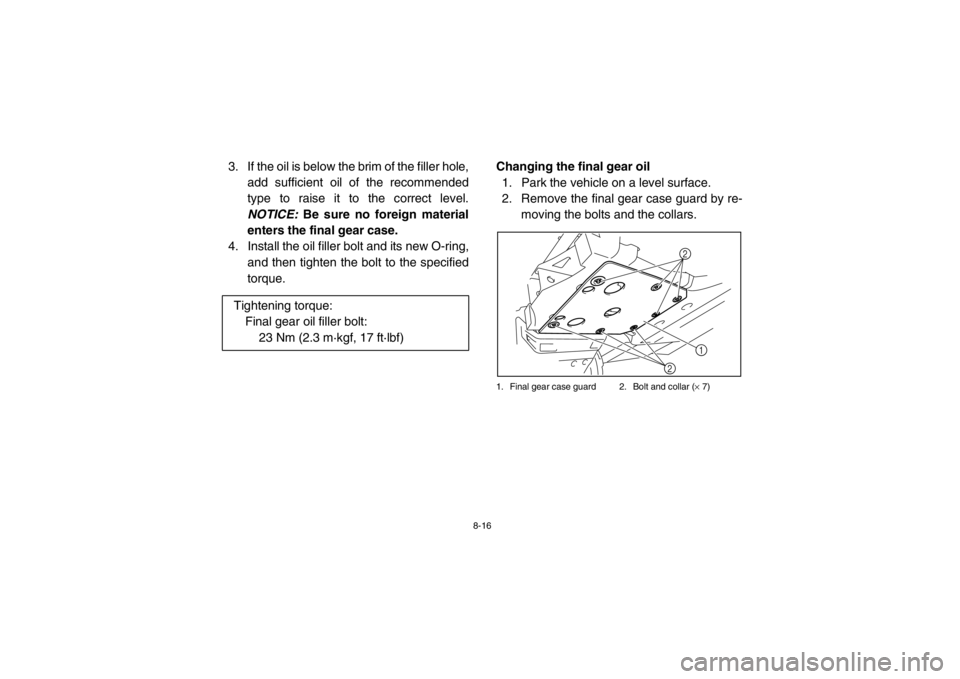
2. Remove the final gear case guard by re- moving the bolts and the collars.
1. Final gear case guard 2. Bolt and collar ( × 7)
Tightening torque:
Final gear oil filler bolt:
23 Nm (2.3 m·kgf, 17 ft·lbf)
2
1
2
1RB7A_EE.book Page 16 Tuesday, April 24, 2012 9:07 AM
Page 130 of 188
8-17
3. Place an oil pan under the final gear caseto collect the used oil.
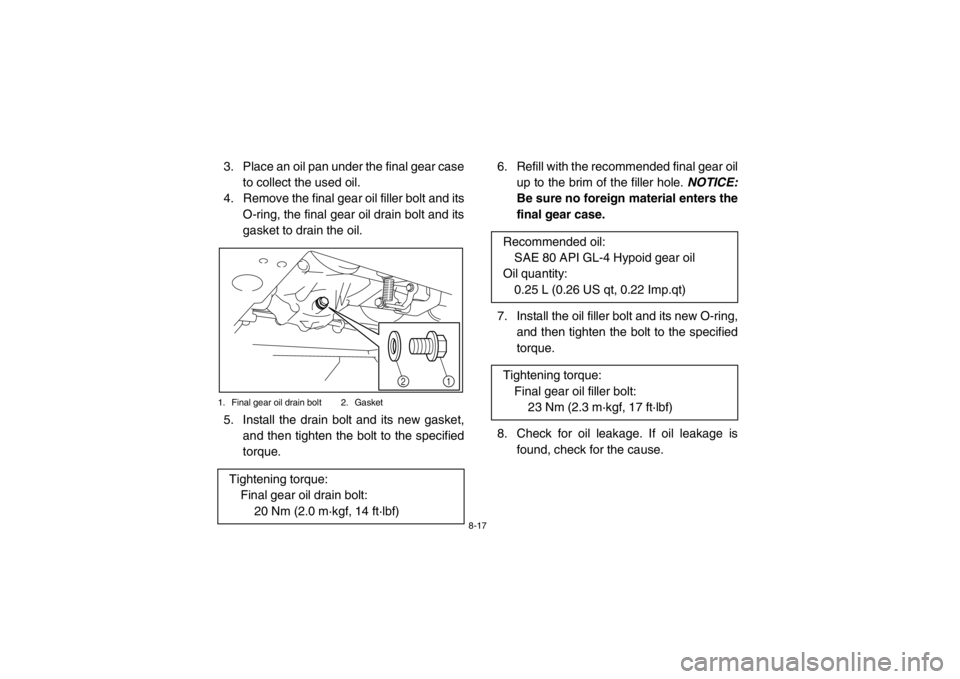
4. Remove the final gear oil filler bolt and its
O-ring, the final gear oil drain bolt and its
gasket to drain the oil.1. Final gear oil drain bolt 2. Gasket5. Install the drain bolt and its new gasket,and then tighten the bolt to the specified
torque. 6. Refill with the recommended final gear oil
up to the brim of the filler hole. NOTICE:
Be sure no foreign material enters the
final gear case.
7. Install the oil filler bolt and its new O-ring, and then tighten the bolt to the specified
torque.
8. Check for oil leakage. If oil leakage is found, check for the cause.
Tightening torque: Final gear oil drain bolt: 20 Nm (2.0 m·kgf, 14 ft·lbf)
21
Recommended oil:SAE 80 API GL-4 Hypoid gear oil
Oil quantity:
0.25 L (0.26 US qt, 0.22 Imp.qt)
Tightening torque: Final gear oil filler bolt: 23 Nm (2.3 m·kgf, 17 ft·lbf)
1RB7A_EE.book Page 17 Tuesday, April 24, 2012 9:07 AM