YAMAHA RHINO 700 2013 Owners Manual
Manufacturer: YAMAHA, Model Year: 2013, Model line: RHINO 700, Model: YAMAHA RHINO 700 2013Pages: 188, PDF Size: 4.9 MB
Page 91 of 188
7-3
Driver requirements●
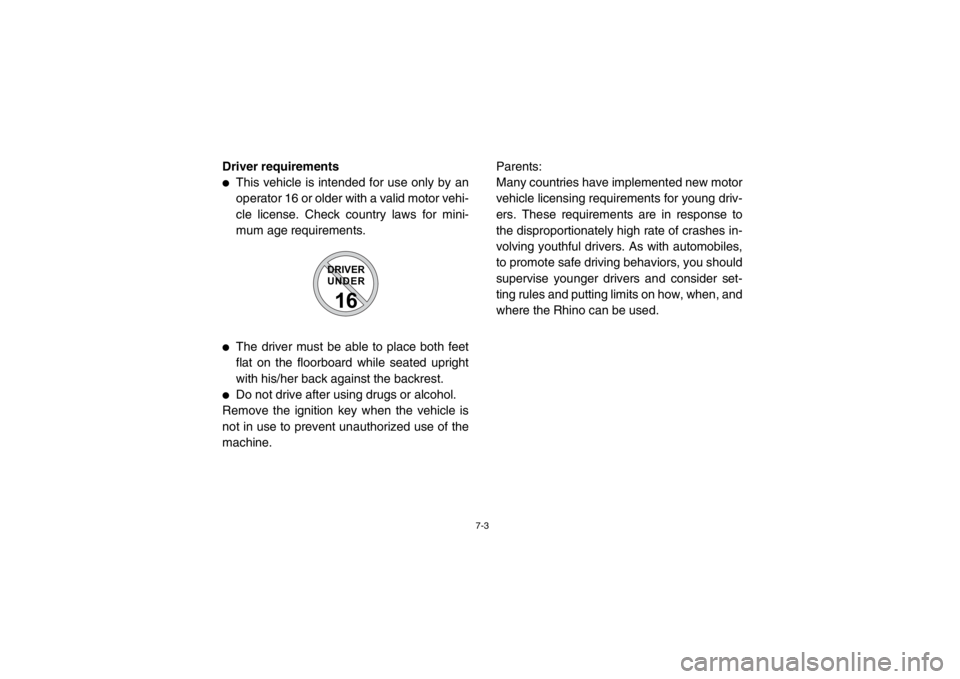
This vehicle is intended for use only by an
operator 16 or older with a valid motor vehi-
cle license. Check country laws for mini-
mum age requirements.
●
The driver must be able to place both feet
flat on the floorboard while seated upright
with his/her back against the backrest.
●
Do not drive after using drugs or alcohol.
Remove the ignition key when the vehicle is
not in use to prevent unauthorized use of the
machine. Parents:
Many countries have implemented new motor
vehicle licensing requirements for young driv-
ers. These requirements are in response to
the disproportionately high rate of crashes in-
volving youthful drivers. As with automobiles,
to promote safe driving behaviors, you should
supervise younger drivers and consider set-
ting rules and putting limits on how, when, and
where the Rhino can be used.
DRIVER
UNDER16
1RB7A_EE.book Page 3 Tuesday, April 24, 2012 9:07 AM
Page 92 of 188
7-4
Passenger requirements
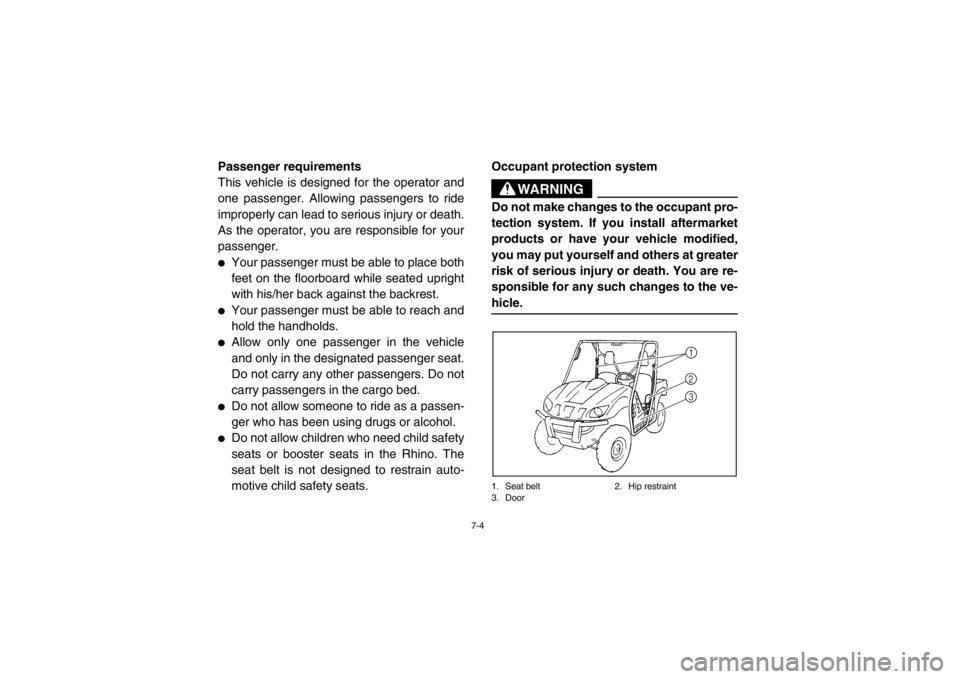
This vehicle is designed for the operator and
one passenger. Allowing passengers to ride
improperly can lead to serious injury or death.
As the operator, you are responsible for your
passenger.●
Your passenger must be able to place both
feet on the floorboard while seated upright
with his/her back against the backrest.
●
Your passenger must be able to reach and
hold the handholds.
●
Allow only one passenger in the vehicle
and only in the designated passenger seat.
Do not carry any other passengers. Do not
carry passengers in the cargo bed.
●
Do not allow someone to ride as a passen-
ger who has been using drugs or alcohol.
●
Do not allow children who need child safety
seats or booster seats in the Rhino. The
seat belt is not designed to restrain auto-
motive child safety seats.Occupant protection system
WARNING
Do not make changes to the occupant pro-
tection system. If you install aftermarket
products or have your vehicle modified,
you may put yourself and others at greater
risk of serious injury or death. You are re-
sponsible for any such changes to the ve-
hicle.1. Seat belt
2. Hip restraint
3. Door
1
32
1RB7A_EE.book Page 4 Tuesday, April 24, 2012 9:07 AM
Page 93 of 188
7-5
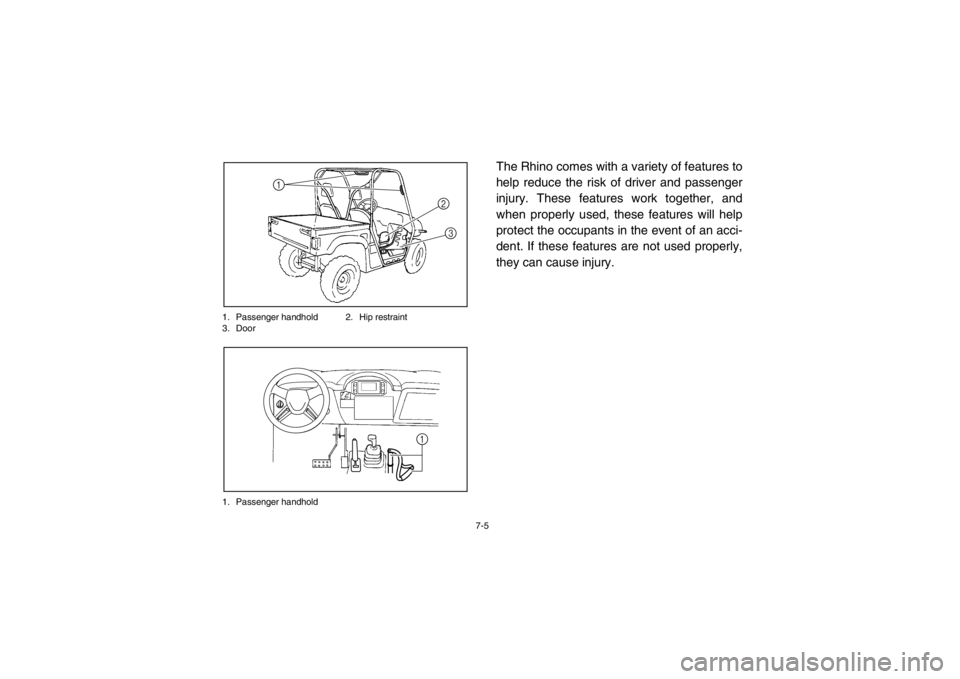
1. Passenger handhold 2. Hip restraint
3. Door
1. Passenger handhold
The Rhino comes with a variety of features to
help reduce the risk of driver and passenger
injury. These features work together, and
when properly used, these features will help
protect the occupants in the event of an acci-
dent. If these features are not used properly,
they can cause injury.
32
1
1
1RB7A_EE.book Page 5 Tuesday, April 24, 2012 9:07 AM
Page 94 of 188

7-6
Protective structure
The vehicle cage/frame provides a protective
structure that helps limit intrusions by branch-
es or other objects and may reduce your risk
of injury in accidents. The protective structure
will not protect occupants in all rollovers or ac-
cidents.
Body parts outside of vehicle can be struck by
passing objects or crushed during vehicle roll-
over. Do not put your hands or feet outside of
the vehicle for any reason. Do not hold onto
the door, cage/frame or hip restraint. Wear
your seat belt and helmet.
If you think or feel that the vehicle may tip or
roll, do not put your hands or feet outside the
vehicle for any reason. You will not be able to
stop the vehicle from tipping over using your
body. Any part of your body (arms, legs, or
head) outside of the vehicle can be crushed
by the vehicle cage/frame.Seat belts
Seat belts should be worn by both driver and
passenger. Driver must be sure that the pas-
senger is belted before driving.
●
Be sure the seat belt is not twisted, is
close-fitting across the hips and chest,
and is latched securely.
●
Do not wear the lap belt across the abdo-
men or stomach.
●
Do not put the shoulder belt behind the
back.
Failure to use seat belts properly may lead to
an increased likelihood and severity of injury.
1RB7A_EE.book Page 6 Tuesday, April 24, 2012 9:07 AM
Page 95 of 188
7-7
An unbelted occupant may strike the interior
of the vehicle, the protective structure, or oth-
er objects in an accident or during operation.
You may also fall completely out or be partial-
ly ejected from the vehicle, which may lead to
being crushed between the ground and the
vehicle. Wearing the seat belt helps you re-
main in the vehicle – the doors and handholds
are not a substitute for using a seat belt.
A crash can damage the restraint systems in
your vehicle. A damaged restraint system
may not properly protect the person using it,
resulting in serious injury or death in a crash.
To help make sure your restraint systems are
working properly after a crash, have them in-
spected and any necessary replacements
made as soon as possible.
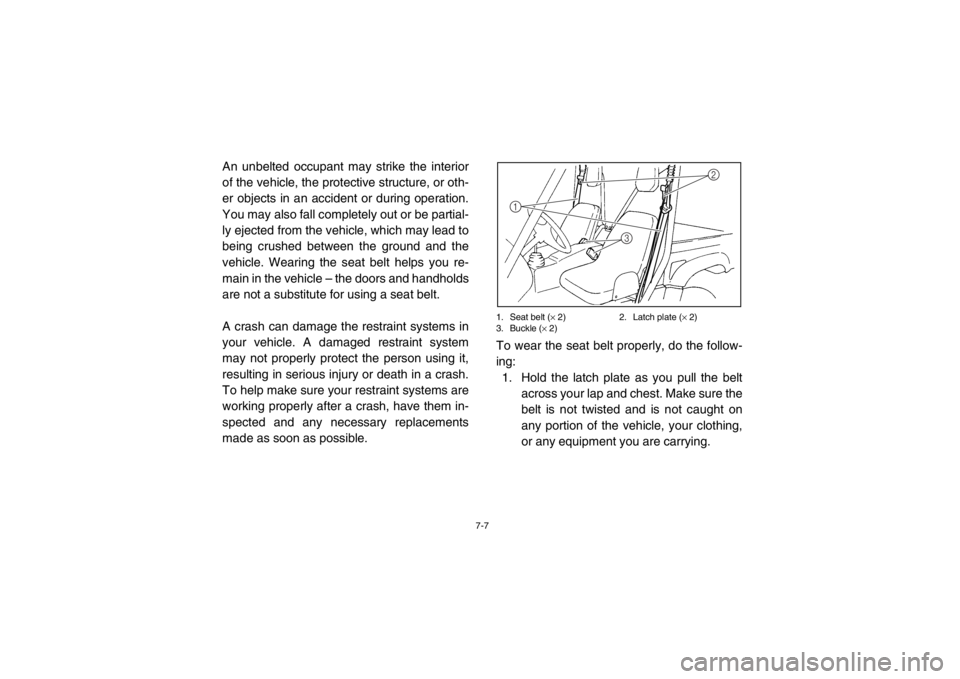
1. Seat belt (× 2) 2. Latch plate ( × 2)
3. Buckle ( × 2)To wear the seat belt properly, do the follow-
ing:
1. Hold the latch plate as you pull the belt across your lap and chest. Make sure the
belt is not twisted and is not caught on
any portion of the vehicle, your clothing,
or any equipment you are carrying.
1
2
3
1RB7A_EE.book Page 7 Tuesday, April 24, 2012 9:07 AM
Page 96 of 188
7-8
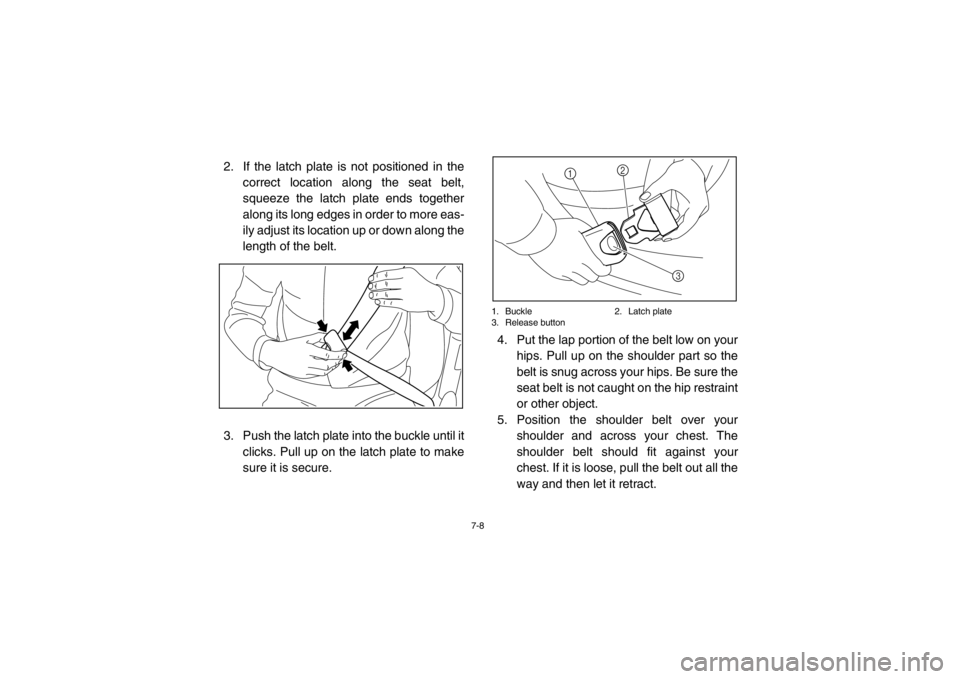
2. If the latch plate is not positioned in thecorrect location along the seat belt,
squeeze the latch plate ends together
along its long edges in order to more eas-
ily adjust its location up or down along the
length of the belt.
3. Push the latch plate into the buckle until it clicks. Pull up on the latch plate to make
sure it is secure.
1. Buckle 2. Latch plate
3. Release button4. Put the lap portion of the belt low on your
hips. Pull up on the shoulder part so the
belt is snug across your hips. Be sure the
seat belt is not caught on the hip restraint
or other object.
5. Position the shoulder belt over your shoulder and across your chest. The
shoulder belt should fit against your
chest. If it is loose, pull the belt out all the
way and then let it retract.
1
3
2
1RB7A_EE.book Page 8 Tuesday, April 24, 2012 9:07 AM
Page 97 of 188
7-9
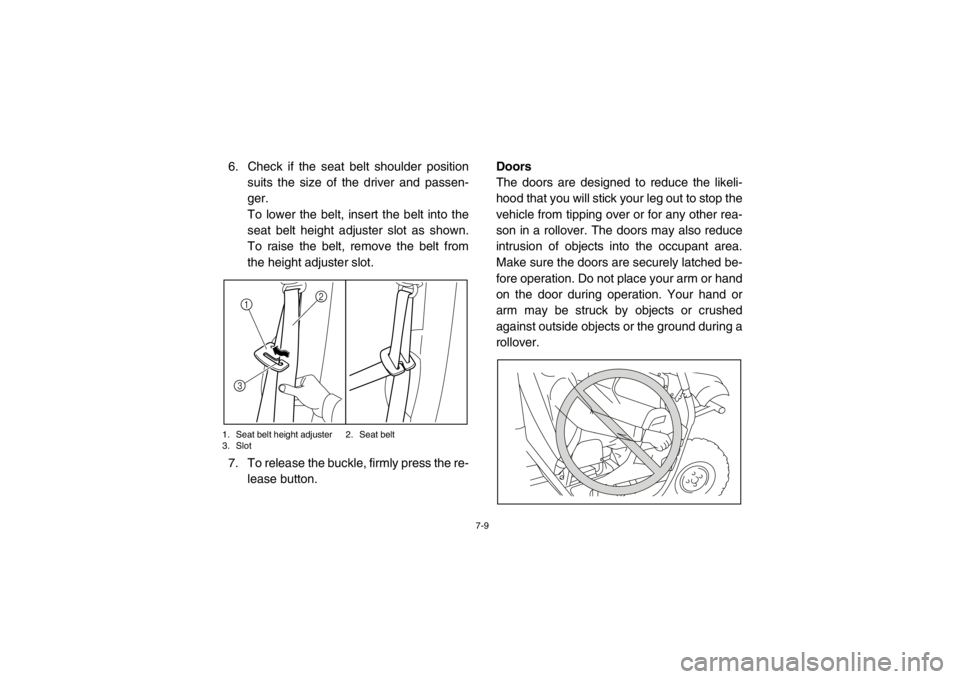
6. Check if the seat belt shoulder positionsuits the size of the driver and passen-
ger.
To lower the belt, insert the belt into the
seat belt height adjuster slot as shown.
To raise the belt, remove the belt from
the height adjuster slot.1. Seat belt height adjuster 2. Seat belt
3. Slot7. To release the buckle, firmly press the re-lease button. Doors
The doors are designed to reduce the likeli-
hood that you will stick your leg out to stop the
vehicle from tipping over or for any other rea-
son in a rollover. The doors may also reduce
intrusion of objects into the occupant area.
Make sure the doors are securely latched be-
fore operation. Do not place your arm or hand
on the door during operation. Your hand or
arm may be struck by objects or crushed
against outside objects or the ground during a
rollover.
1
2
3
1RB7A_EE.book Page 9 Tuesday, April 24, 2012 9:07 AM
Page 98 of 188
7-10
Passenger handholds
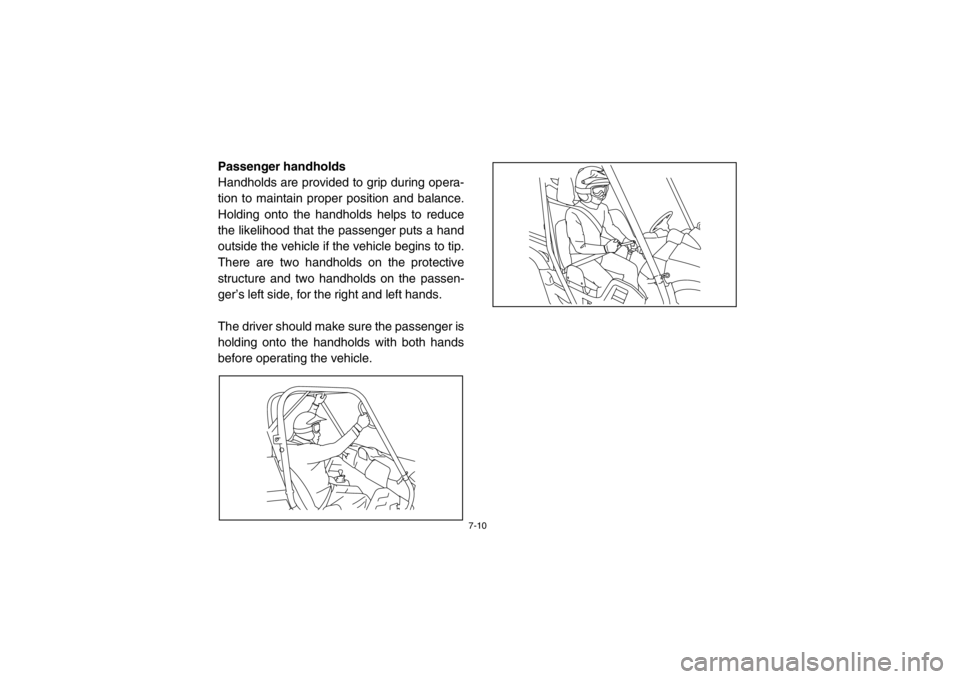
Handholds are provided to grip during opera-
tion to maintain proper position and balance.
Holding onto the handholds helps to reduce
the likelihood that the passenger puts a hand
outside the vehicle if the vehicle begins to tip.
There are two handholds on the protective
structure and two handholds on the passen-
ger’s left side, for the right and left hands.
The driver should make sure the passenger is
holding onto the handholds with both hands
before operating the vehicle.1RB7A_EE.book Page 10 Tuesday, April 24, 2012 9:07 AM
Page 99 of 188

7-11
Seat and hip restraints
The seat and hip restraints are designed to
help keep you in the vehicle. Do not hold onto
hip restraint when the vehicle is moving. Your
hand or arm may be struck by objects or
crushed against outside objects or the ground
during a rollover.Floorboard
The floorboard allows you to brace your feet,
which helps you keep your body in the vehicle
in the event of an accident or rollover. Keep
your feet on the floorboard during operation.1RB7A_EE.book Page 11 Tuesday, April 24, 2012 9:07 AM
Page 100 of 188
7-12
Steering wheel
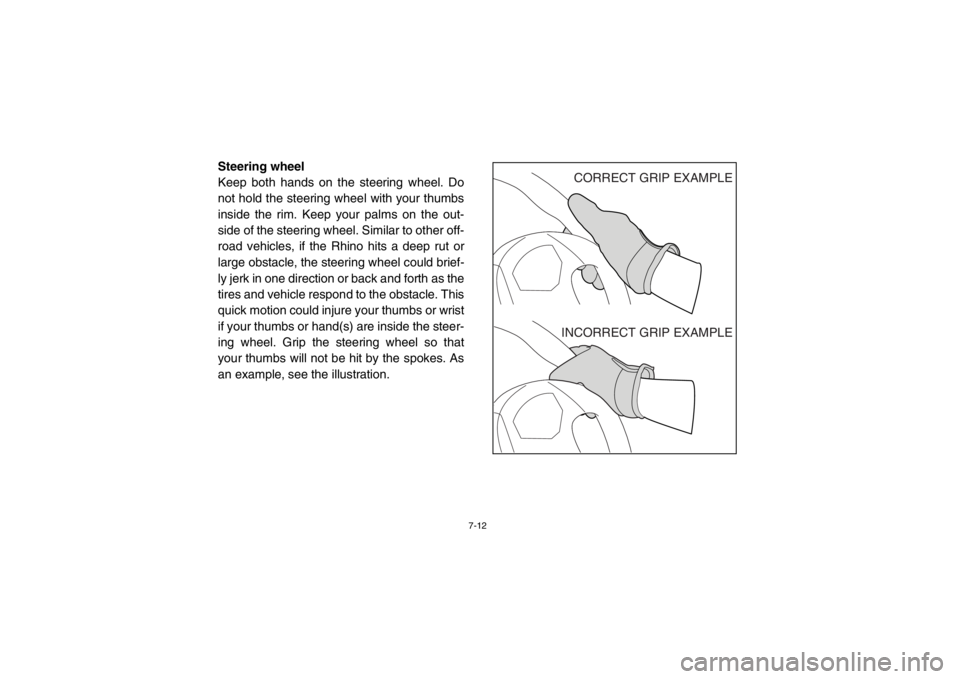
Keep both hands on the steering wheel. Do
not hold the steering wheel with your thumbs
inside the rim. Keep your palms on the out-
side of the steering wheel. Similar to other off-
road vehicles, if the Rhino hits a deep rut or
large obstacle, the steering wheel could brief-
ly jerk in one direction or back and forth as the
tires and vehicle respond to the obstacle. This
quick motion could injure your thumbs or wrist
if your thumbs or hand(s) are inside the steer-
ing wheel. Grip the steering wheel so that
your thumbs will not be hit by the spokes. As
an example, see the illustration.
CORRECT GRIP EXAMPLE
INCORRECT GRIP EXAMPLE
1RB7A_EE.book Page 12 Tuesday, April 24, 2012 9:07 AM