YAMAHA WR 450F 2005 Workshop Manual
Manufacturer: YAMAHA, Model Year: 2005, Model line: WR 450F, Model: YAMAHA WR 450F 2005Pages: 758, PDF Size: 17.3 MB
Page 51 of 758
GEN
INFO
BEDIENUNGSELEMENTE
UND DEREN FUNKTION
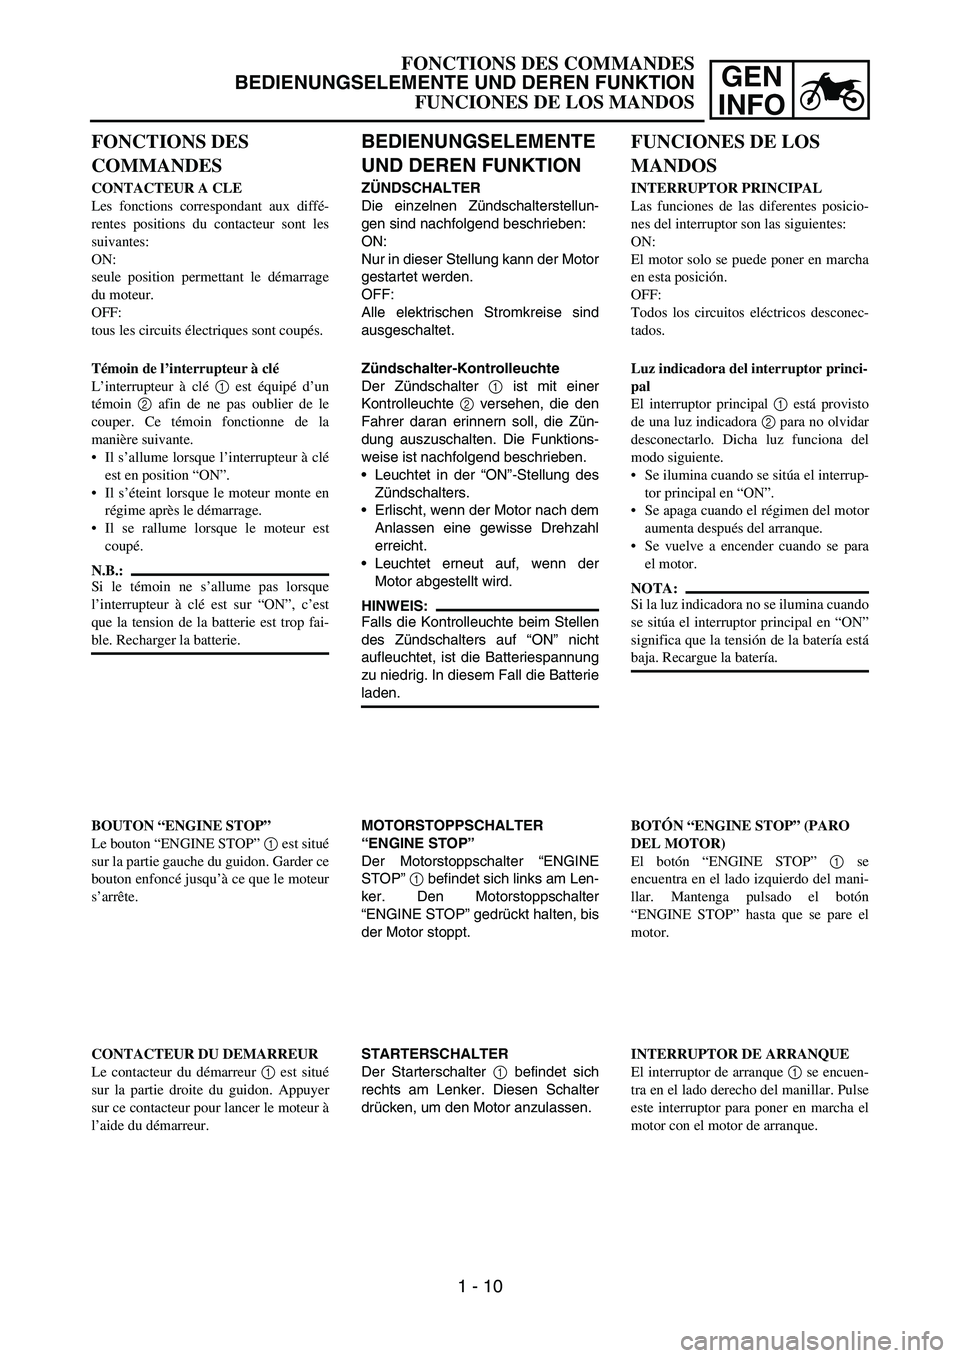
ZÜNDSCHALTER
Die einzelnen Zündschalterstellun-
gen sind nachfolgend beschrieben:
ON:
Nur in dieser Stellung kann der Motor
gestartet werden.
OFF:
Alle elektrischen Stromkreise sind
ausgeschaltet.
Zündschalter-Kontrolleuchte
Der Zündschalter 1 ist mit einer
Kontrolleuchte 2 versehen, die den
Fahrer daran erinnern soll, die Zün-
dung auszuschalten. Die Funktions-
weise ist nachfolgend beschrieben.
Leuchtet in der “ON”-Stellung des
Zündschalters.
Erlischt, wenn der Motor nach dem
Anlassen eine gewisse Drehzahl
erreicht.
Leuchtet erneut auf, wenn der
Motor abgestellt wird.
HINWEIS:
Falls die Kontrolleuchte beim Stellen
des Zündschalters auf “ON” nicht
aufleuchtet, ist die Batteriespannung
zu niedrig. In diesem Fall die Batterie
laden.
MOTORSTOPPSCHALTER
“ENGINE STOP”
Der Motorstoppschalter “ENGINE
STOP” 1 befindet sich links am Len-
ker. Den Motorstoppschalter
“ENGINE STOP” gedrückt halten, bis
der Motor stoppt.
STARTERSCHALTER
Der Starterschalter 1 befindet sich
rechts am Lenker. Diesen Schalter
drücken, um den Motor anzulassen.
FONCTIONS DES
COMMANDES
CONTACTEUR A CLE
Les fonctions correspondant aux diffé-
rentes positions du contacteur sont les
suivantes:
ON:
seule position permettant le démarrage
du moteur.
OFF:
tous les circuits électriques sont coupés.
Témoin de l’interrupteur à clé
L’interrupteur à clé 1 est équipé d’un
témoin 2 afin de ne pas oublier de le
couper. Ce témoin fonctionne de la
manière suivante.
Il s’allume lorsque l’interrupteur à clé
est en position “ON”.
Il s’éteint lorsque le moteur monte en
régime après le démarrage.
Il se rallume lorsque le moteur est
coupé.
N.B.:
Si le témoin ne s’allume pas lorsque
l’interrupteur à clé est sur “ON”, c’est
que la tension de la batterie est trop fai-
ble. Recharger la batterie.
BOUTON “ENGINE STOP”
Le bouton “ENGINE STOP” 1 est situé
sur la partie gauche du guidon. Garder ce
bouton enfoncé jusqu’à ce que le moteur
s’arrête.
CONTACTEUR DU DEMARREUR
Le contacteur du démarreur 1 est situé
sur la partie droite du guidon. Appuyer
sur ce contacteur pour lancer le moteur à
l’aide du démarreur.
FUNCIONES DE LOS
MANDOS
INTERRUPTOR PRINCIPAL
Las funciones de las diferentes posicio-
nes del interruptor son las siguientes:
ON:
El motor solo se puede poner en marcha
en esta posición.
OFF:
Todos los circuitos eléctricos desconec-
tados.
Luz indicadora del interruptor princi-
pal
El interruptor principal 1 está provisto
de una luz indicadora 2 para no olvidar
desconectarlo. Dicha luz funciona del
modo siguiente.
Se ilumina cuando se sitúa el interrup-
tor principal en “ON”.
Se apaga cuando el régimen del motor
aumenta después del arranque.
Se vuelve a encender cuando se para
el motor.
NOTA:
Si la luz indicadora no se ilumina cuando
se sitúa el interruptor principal en “ON”
significa que la tensión de la batería está
baja. Recargue la batería.
BOTÓN “ENGINE STOP” (PARO
DEL MOTOR)
El botón “ENGINE STOP” 1 se
encuentra en el lado izquierdo del mani-
llar. Mantenga pulsado el botón
“ENGINE STOP” hasta que se pare el
motor.
INTERRUPTOR DE ARRANQUE
El interruptor de arranque 1 se encuen-
tra en el lado derecho del manillar. Pulse
este interruptor para poner en marcha el
motor con el motor de arranque.
FONCTIONS DES COMMANDES
BEDIENUNGSELEMENTE UND DEREN FUNKTION
FUNCIONES DE LOS MANDOS
1 - 10
Page 52 of 758
1 - 11
GEN
INFO
CONTROL FUNCTIONS
EC152000
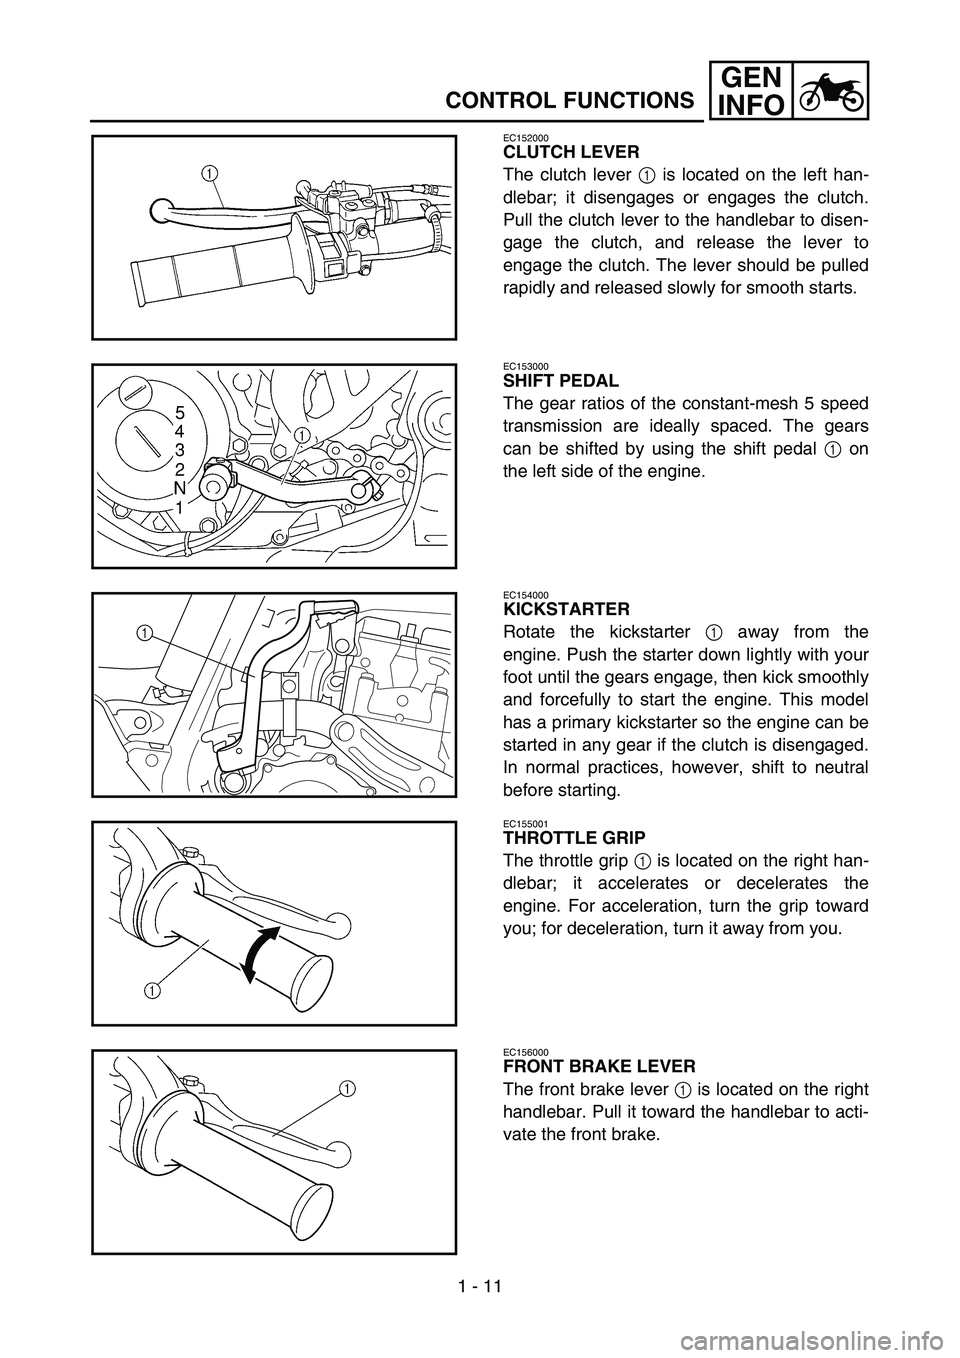
CLUTCH LEVER
The clutch lever 1 is located on the left han-
dlebar; it disengages or engages the clutch.
Pull the clutch lever to the handlebar to disen-
gage the clutch, and release the lever to
engage the clutch. The lever should be pulled
rapidly and released slowly for smooth starts.
EC153000
SHIFT PEDAL
The gear ratios of the constant-mesh 5 speed
transmission are ideally spaced. The gears
can be shifted by using the shift pedal 1 on
the left side of the engine.
EC154000
KICKSTARTER
Rotate the kickstarter 1 away from the
engine. Push the starter down lightly with your
foot until the gears engage, then kick smoothly
and forcefully to start the engine. This model
has a primary kickstarter so the engine can be
started in any gear if the clutch is disengaged.
In normal practices, however, shift to neutral
before starting.
1
EC155001
THROTTLE GRIP
The throttle grip 1 is located on the right han-
dlebar; it accelerates or decelerates the
engine. For acceleration, turn the grip toward
you; for deceleration, turn it away from you.
EC156000
FRONT BRAKE LEVER
The front brake lever 1 is located on the right
handlebar. Pull it toward the handlebar to acti-
vate the front brake.
Page 53 of 758
GEN
INFO
KUPPLUNGSHEBEL
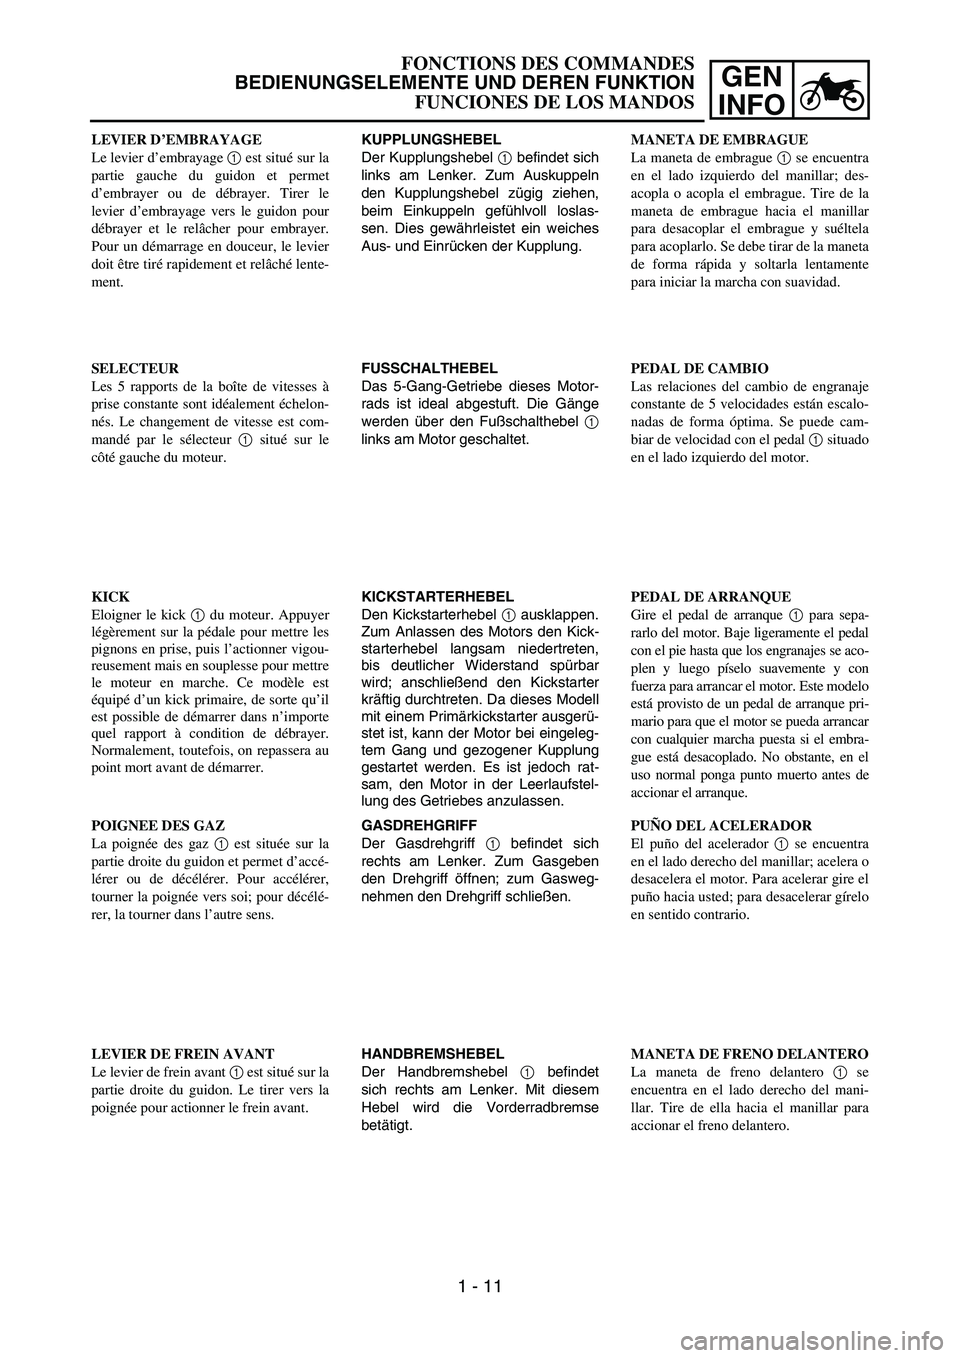
Der Kupplungshebel 1 befindet sich
links am Lenker. Zum Auskuppeln
den Kupplungshebel zügig ziehen,
beim Einkuppeln gefühlvoll loslas-
sen. Dies gewährleistet ein weiches
Aus- und Einrücken der Kupplung.
FUSSCHALTHEBEL
Das 5-Gang-Getriebe dieses Motor-
rads ist ideal abgestuft. Die Gänge
werden über den Fußschalthebel 1
links am Motor geschaltet.
KICKSTARTERHEBEL
Den Kickstarterhebel 1 ausklappen.
Zum Anlassen des Motors den Kick-
starterhebel langsam niedertreten,
bis deutlicher Widerstand spürbar
wird; anschließend den Kickstarter
kräftig durchtreten. Da dieses Modell
mit einem Primärkickstarter ausgerü-
stet ist, kann der Motor bei eingeleg-
tem Gang und gezogener Kupplung
gestartet werden. Es ist jedoch rat-
sam, den Motor in der Leerlaufstel-
lung des Getriebes anzulassen.
GASDREHGRIFF
Der Gasdrehgriff 1 befindet sich
rechts am Lenker. Zum Gasgeben
den Drehgriff öffnen; zum Gasweg-
nehmen den Drehgriff schließen.
HANDBREMSHEBEL
Der Handbremshebel 1 befindet
sich rechts am Lenker. Mit diesem
Hebel wird die Vorderradbremse
betätigt. LEVIER D’EMBRAYAGE
Le levier d’embrayage 1 est situé sur la
partie gauche du guidon et permet
d’embrayer ou de débrayer. Tirer le
levier d’embrayage vers le guidon pour
débrayer et le relâcher pour embrayer.
Pour un démarrage en douceur, le levier
doit être tiré rapidement et relâché lente-
ment.
SELECTEUR
Les 5 rapports de la boîte de vitesses à
prise constante sont idéalement échelon-
nés. Le changement de vitesse est com-
mandé par le sélecteur 1 situé sur le
côté gauche du moteur.
KICK
Eloigner le kick 1 du moteur. Appuyer
légèrement sur la pédale pour mettre les
pignons en prise, puis l’actionner vigou-
reusement mais en souplesse pour mettre
le moteur en marche. Ce modèle est
équipé d’un kick primaire, de sorte qu’il
est possible de démarrer dans n’importe
quel rapport à condition de débrayer.
Normalement, toutefois, on repassera au
point mort avant de démarrer.
POIGNEE DES GAZ
La poignée des gaz 1 est située sur la
partie droite du guidon et permet d’accé-
lérer ou de décélérer. Pour accélérer,
tourner la poignée vers soi; pour décélé-
rer, la tourner dans l’autre sens.
LEVIER DE FREIN AVANT
Le levier de frein avant 1 est situé sur la
partie droite du guidon. Le tirer vers la
poignée pour actionner le frein avant.MANETA DE EMBRAGUE
La maneta de embrague 1 se encuentra
en el lado izquierdo del manillar; des-
acopla o acopla el embrague. Tire de la
maneta de embrague hacia el manillar
para desacoplar el embrague y suéltela
para acoplarlo. Se debe tirar de la maneta
de forma rápida y soltarla lentamente
para iniciar la marcha con suavidad.
PEDAL DE CAMBIO
Las relaciones del cambio de engranaje
constante de 5 velocidades están escalo-
nadas de forma óptima. Se puede cam-
biar de velocidad con el pedal 1 situado
en el lado izquierdo del motor.
PEDAL DE ARRANQUE
Gire el pedal de arranque 1 para sepa-
rarlo del motor. Baje ligeramente el pedal
con el pie hasta que los engranajes se aco-
plen y luego píselo suavemente y con
fuerza para arrancar el motor. Este modelo
está provisto de un pedal de arranque pri-
mario para que el motor se pueda arrancar
con cualquier marcha puesta si el embra-
gue está desacoplado. No obstante, en el
uso normal ponga punto muerto antes de
accionar el arranque.
PUÑO DEL ACELERADOR
El puño del acelerador 1 se encuentra
en el lado derecho del manillar; acelera o
desacelera el motor. Para acelerar gire el
puño hacia usted; para desacelerar gírelo
en sentido contrario.
MANETA DE FRENO DELANTERO
La maneta de freno delantero 1 se
encuentra en el lado derecho del mani-
llar. Tire de ella hacia el manillar para
accionar el freno delantero.
FONCTIONS DES COMMANDES
BEDIENUNGSELEMENTE UND DEREN FUNKTION
FUNCIONES DE LOS MANDOS
1 - 11
Page 54 of 758
1 - 12
GEN
INFO
CONTROL FUNCTIONS
EC157000
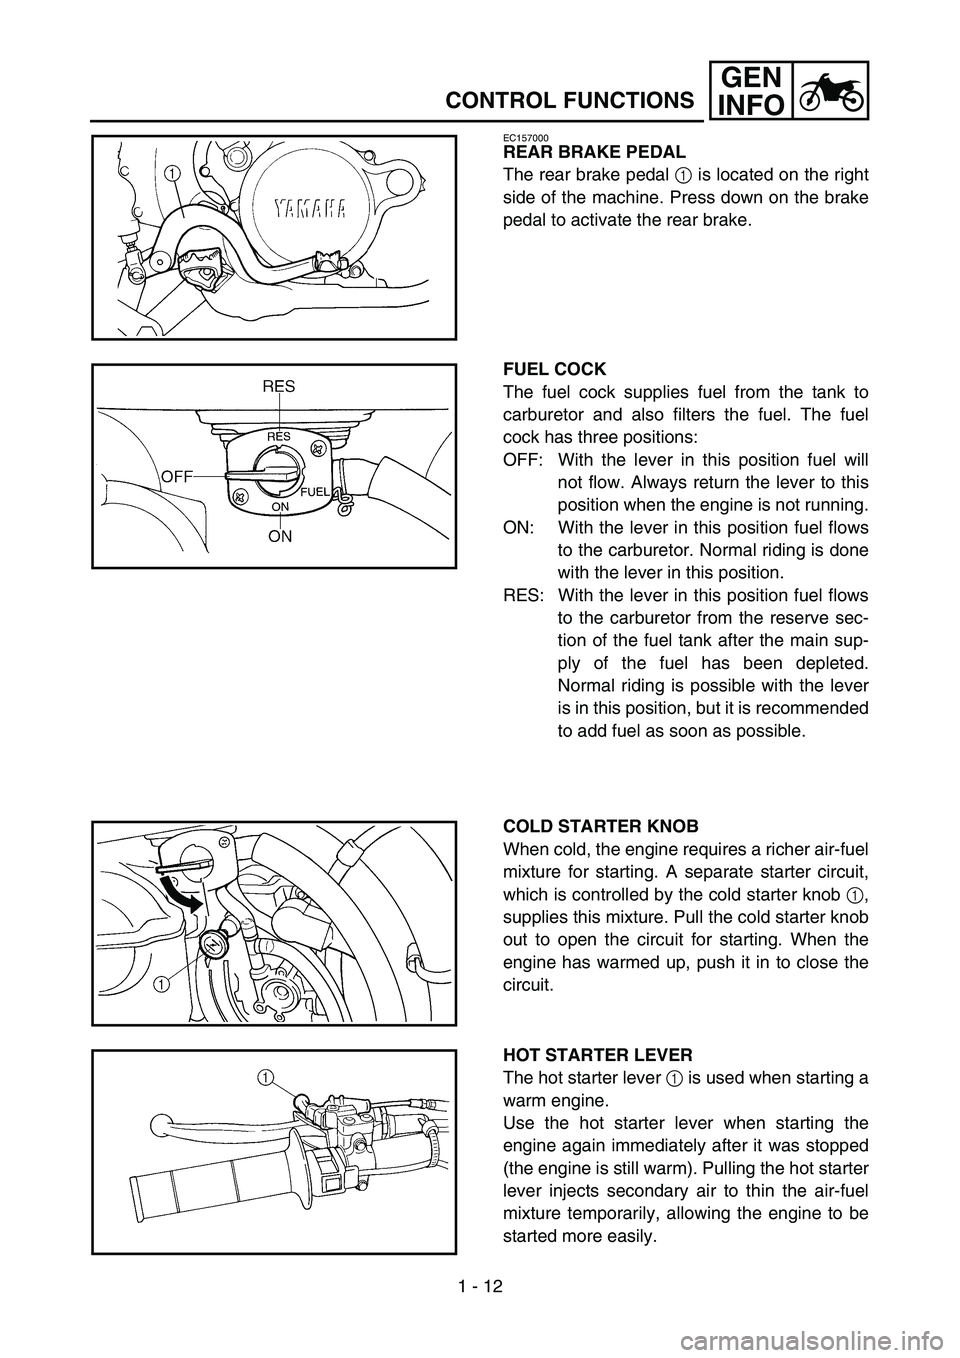
REAR BRAKE PEDAL
The rear brake pedal 1 is located on the right
side of the machine. Press down on the brake
pedal to activate the rear brake.
FUEL COCK
The fuel cock supplies fuel from the tank to
carburetor and also filters the fuel. The fuel
cock has three positions:
OFF: With the lever in this position fuel will
not flow. Always return the lever to this
position when the engine is not running.
ON: With the lever in this position fuel flows
to the carburetor. Normal riding is done
with the lever in this position.
RES: With the lever in this position fuel flows
to the carburetor from the reserve sec-
tion of the fuel tank after the main sup-
ply of the fuel has been depleted.
Normal riding is possible with the lever
is in this position, but it is recommended
to add fuel as soon as possible.
COLD STARTER KNOB
When cold, the engine requires a richer air-fuel
mixture for starting. A separate starter circuit,
which is controlled by the cold starter knob 1,
supplies this mixture. Pull the cold starter knob
out to open the circuit for starting. When the
engine has warmed up, push it in to close the
circuit.
HOT STARTER LEVER
The hot starter lever 1 is used when starting a
warm engine.
Use the hot starter lever when starting the
engine again immediately after it was stopped
(the engine is still warm). Pulling the hot starter
lever injects secondary air to thin the air-fuel
mixture temporarily, allowing the engine to be
started more easily.
Page 55 of 758
GEN
INFO
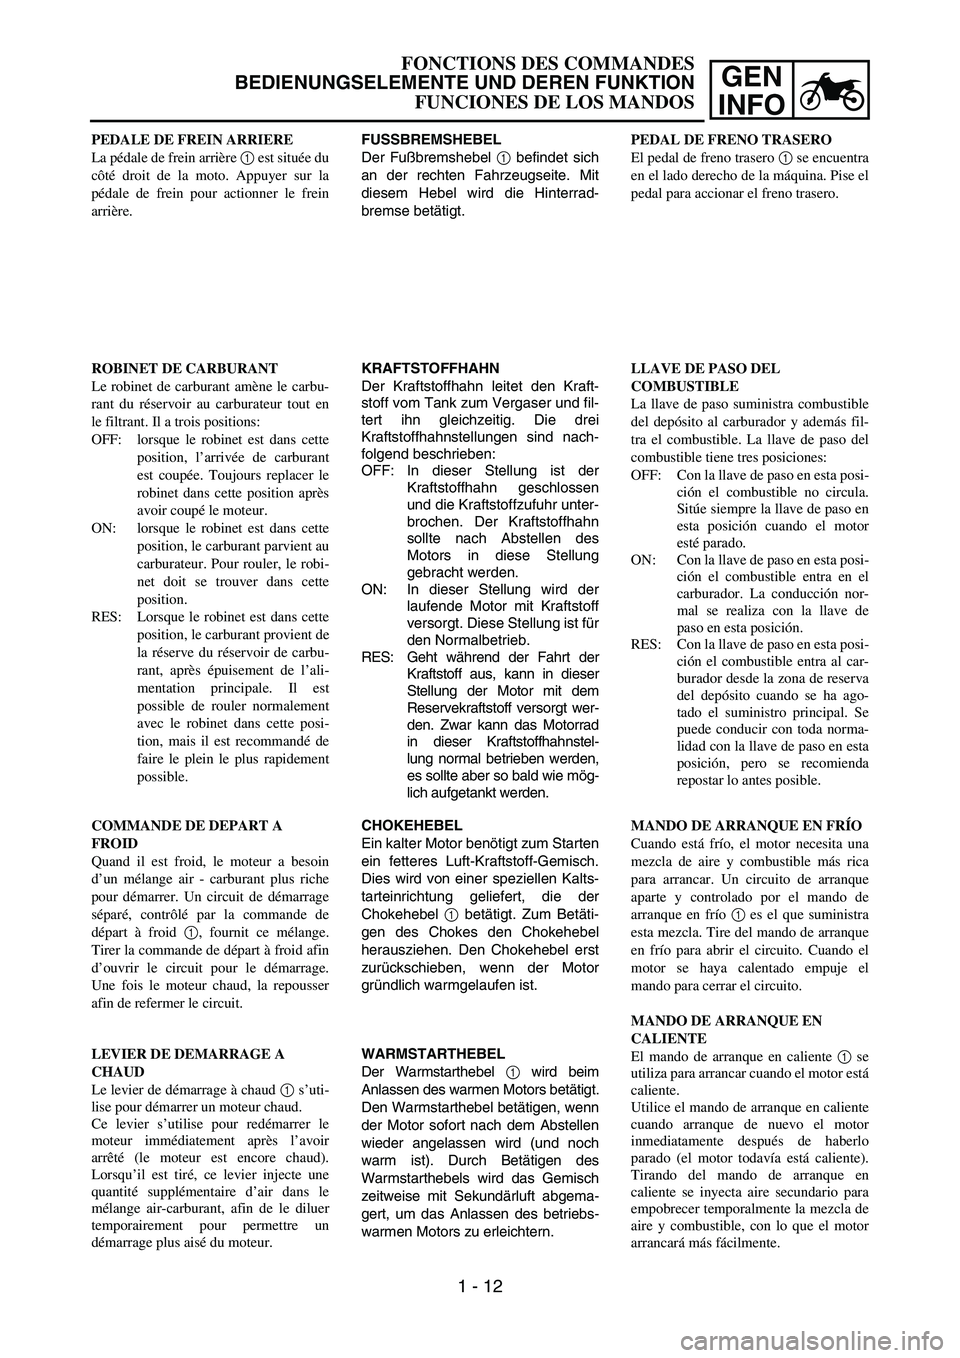
FUSSBREMSHEBEL
Der Fußbremshebel 1 befindet sich
an der rechten Fahrzeugseite. Mit
diesem Hebel wird die Hinterrad-
bremse betätigt.
KRAFTSTOFFHAHN
Der Kraftstoffhahn leitet den Kraft-
stoff vom Tank zum Vergaser und fil-
tert ihn gleichzeitig. Die drei
Kraftstoffhahnstellungen sind nach-
folgend beschrieben:
OFF: In dieser Stellung ist der
Kraftstoffhahn geschlossen
und die Kraftstoffzufuhr unter-
brochen. Der Kraftstoffhahn
sollte nach Abstellen des
Motors in diese Stellung
gebracht werden.
ON: In dieser Stellung wird der
laufende Motor mit Kraftstoff
versorgt. Diese Stellung ist für
den Normalbetrieb.
RES: Geht während der Fahrt der
Kraftstoff aus, kann in dieser
Stellung der Motor mit dem
Reservekraftstoff versorgt wer-
den. Zwar kann das Motorrad
in dieser Kraftstoffhahnstel-
lung normal betrieben werden,
es sollte aber so bald wie mög-
lich aufgetankt werden.
CHOKEHEBEL
Ein kalter Motor benötigt zum Starten
ein fetteres Luft-Kraftstoff-Gemisch.
Dies wird von einer speziellen Kalts-
tarteinrichtung geliefert, die der
Chokehebel 1 betätigt. Zum Betäti-
gen des Chokes den Chokehebel
herausziehen. Den Chokehebel erst
zurückschieben, wenn der Motor
gründlich warmgelaufen ist.
WARMSTARTHEBEL
Der Warmstarthebel 1 wird beim
Anlassen des warmen Motors betätigt.
Den Warmstarthebel betätigen, wenn
der Motor sofort nach dem Abstellen
wieder angelassen wird (und noch
warm ist). Durch Betätigen des
Warmstarthebels wird das Gemisch
zeitweise mit Sekundärluft abgema-
gert, um das Anlassen des betriebs-
warmen Motors zu erleichtern. PEDALE DE FREIN ARRIERE
La pédale de frein arrière 1 est située du
côté droit de la moto. Appuyer sur la
pédale de frein pour actionner le frein
arrière.
ROBINET DE CARBURANT
Le robinet de carburant amène le carbu-
rant du réservoir au carburateur tout en
le filtrant. Il a trois positions:
OFF: lorsque le robinet est dans cette
position, l’arrivée de carburant
est coupée. Toujours replacer le
robinet dans cette position après
avoir coupé le moteur.
ON: lorsque le robinet est dans cette
position, le carburant parvient au
carburateur. Pour rouler, le robi-
net doit se trouver dans cette
position.
RES: Lorsque le robinet est dans cette
position, le carburant provient de
la réserve du réservoir de carbu-
rant, après épuisement de l’ali-
mentation principale. Il est
possible de rouler normalement
avec le robinet dans cette posi-
tion, mais il est recommandé de
faire le plein le plus rapidement
possible.
COMMANDE DE DEPART A
FROID
Quand il est froid, le moteur a besoin
d’un mélange air - carburant plus riche
pour démarrer. Un circuit de démarrage
séparé, contrôlé par la commande de
départ à froid 1, fournit ce mélange.
Tirer la commande de départ à froid afin
d’ouvrir le circuit pour le démarrage.
Une fois le moteur chaud, la repousser
afin de refermer le circuit.
LEVIER DE DEMARRAGE A
CHAUD
Le levier de démarrage à chaud 1 s’uti-
lise pour démarrer un moteur chaud.
Ce levier s’utilise pour redémarrer le
moteur immédiatement après l’avoir
arrêté (le moteur est encore chaud).
Lorsqu’il est tiré, ce levier injecte une
quantité supplémentaire d’air dans le
mélange air-carburant, afin de le diluer
temporairement pour permettre un
démarrage plus aisé du moteur.PEDAL DE FRENO TRASERO
El pedal de freno trasero 1 se encuentra
en el lado derecho de la máquina. Pise el
pedal para accionar el freno trasero.
LLAVE DE PASO DEL
COMBUSTIBLE
La llave de paso suministra combustible
del depósito al carburador y además fil-
tra el combustible. La llave de paso del
combustible tiene tres posiciones:
OFF: Con la llave de paso en esta posi-
ción el combustible no circula.
Sitúe siempre la llave de paso en
esta posición cuando el motor
esté parado.
ON: Con la llave de paso en esta posi-
ción el combustible entra en el
carburador. La conducción nor-
mal se realiza con la llave de
paso en esta posición.
RES: Con la llave de paso en esta posi-
ción el combustible entra al car-
burador desde la zona de reserva
del depósito cuando se ha ago-
tado el suministro principal. Se
puede conducir con toda norma-
lidad con la llave de paso en esta
posición, pero se recomienda
repostar lo antes posible.
MANDO DE ARRANQUE EN FRÍO
Cuando está frío, el motor necesita una
mezcla de aire y combustible más rica
para arrancar. Un circuito de arranque
aparte y controlado por el mando de
arranque en frío 1 es el que suministra
esta mezcla. Tire del mando de arranque
en frío para abrir el circuito. Cuando el
motor se haya calentado empuje el
mando para cerrar el circuito.
MANDO DE ARRANQUE EN
CALIENTE
El mando de arranque en caliente 1 se
utiliza para arrancar cuando el motor está
caliente.
Utilice el mando de arranque en caliente
cuando arranque de nuevo el motor
inmediatamente después de haberlo
parado (el motor todavía está caliente).
Tirando del mando de arranque en
caliente se inyecta aire secundario para
empobrecer temporalmente la mezcla de
aire y combustible, con lo que el motor
arrancará más fácilmente.
FONCTIONS DES COMMANDES
BEDIENUNGSELEMENTE UND DEREN FUNKTION
FUNCIONES DE LOS MANDOS
1 - 12
Page 56 of 758
1 - 13
GEN
INFO
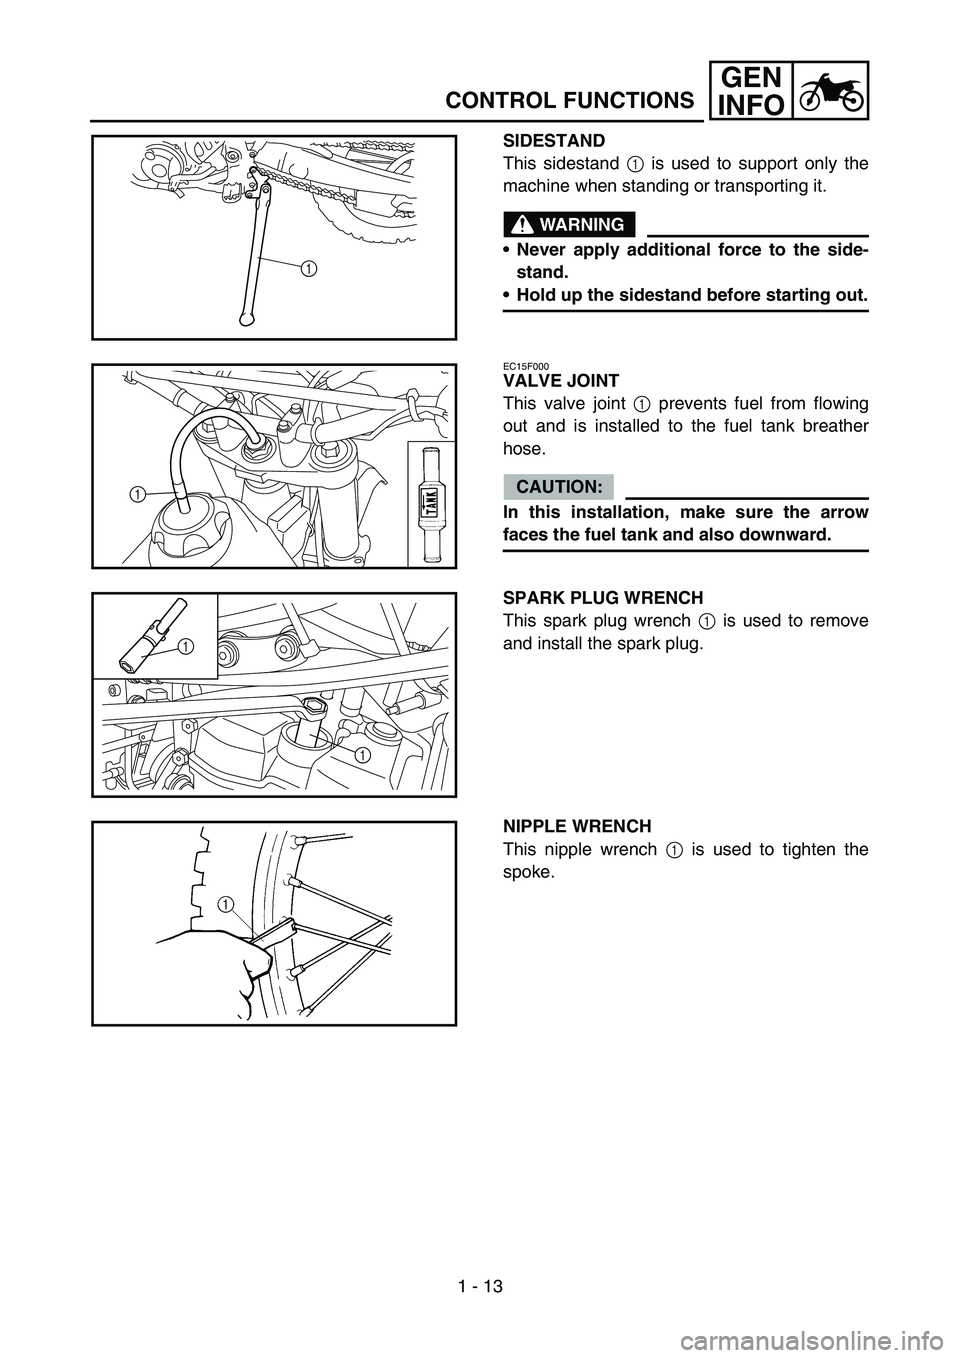
SIDESTAND
This sidestand 1 is used to support only the
machine when standing or transporting it.
WARNING
Never apply additional force to the side-
stand.
Hold up the sidestand before starting out.
1
EC15F000
VALVE JOINT
This valve joint 1 prevents fuel from flowing
out and is installed to the fuel tank breather
hose.
CAUTION:
In this installation, make sure the arrow
faces the fuel tank and also downward.
1
SPARK PLUG WRENCH
This spark plug wrench 1 is used to remove
and install the spark plug.
1
1
NIPPLE WRENCH
This nipple wrench 1 is used to tighten the
spoke.
CONTROL FUNCTIONS
Page 57 of 758
GEN
INFO
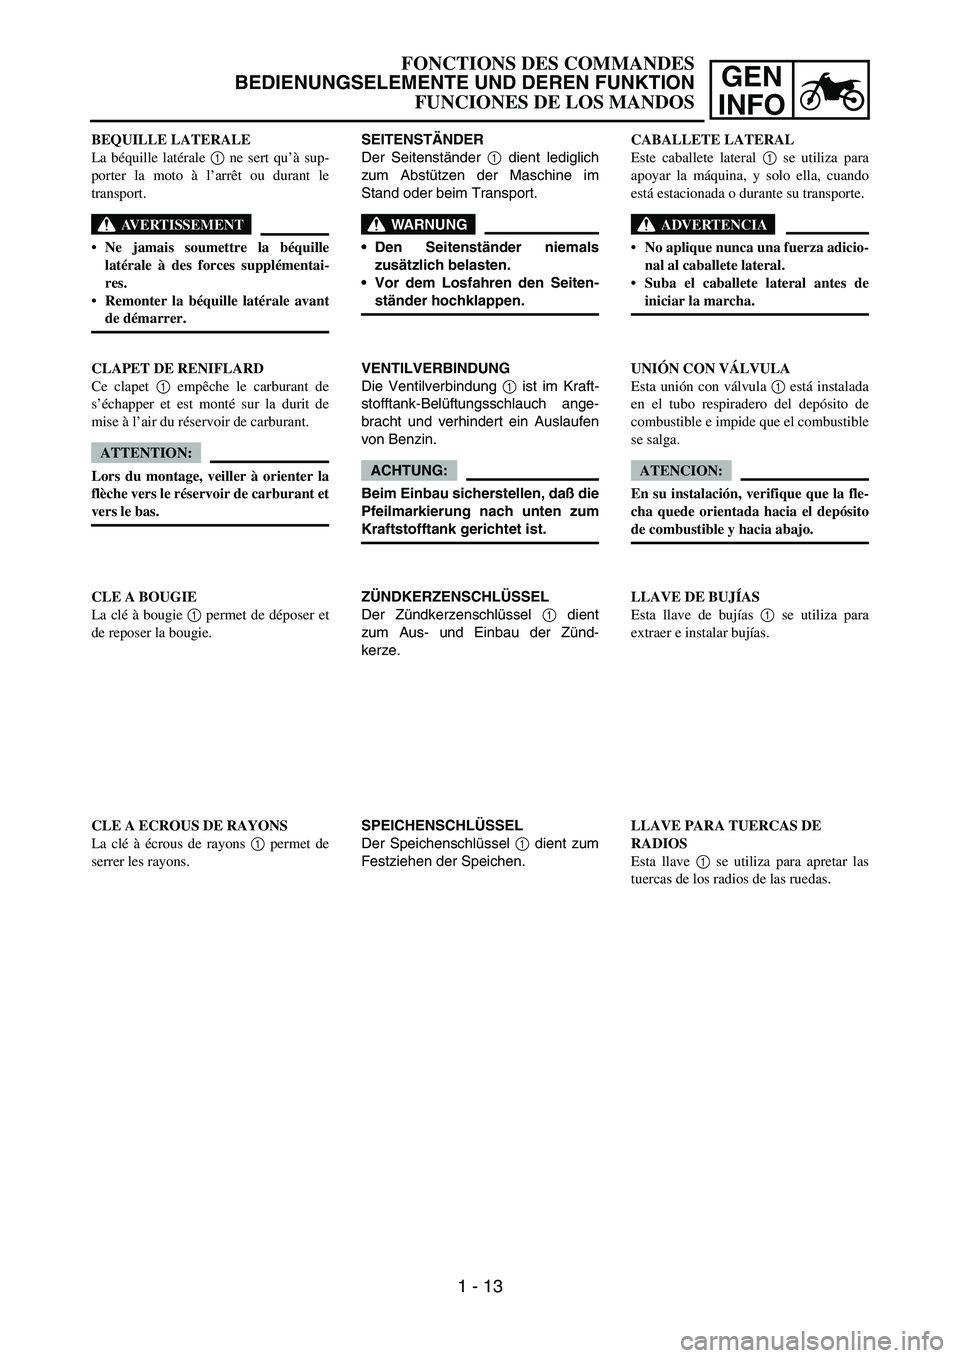
SEITENSTÄNDER
Der Seitenständer 1 dient lediglich
zum Abstützen der Maschine im
Stand oder beim Transport.
WARNUNG
Den Seitenständer niemals
zusätzlich belasten.
Vor dem Losfahren den Seiten-
ständer hochklappen.
VENTILVERBINDUNG
Die Ventilverbindung 1 ist im Kraft-
stofftank-Belüftungsschlauch ange-
bracht und verhindert ein Auslaufen
von Benzin.
ACHTUNG:
Beim Einbau sicherstellen, daß die
Pfeilmarkierung nach unten zum
Kraftstofftank gerichtet ist.
ZÜNDKERZENSCHLÜSSEL
Der Zündkerzenschlüssel 1 dient
zum Aus- und Einbau der Zünd-
kerze.
SPEICHENSCHLÜSSEL
Der Speichenschlüssel 1 dient zum
Festziehen der Speichen. BEQUILLE LATERALE
La béquille latérale 1 ne sert qu’à sup-
porter la moto à l’arrêt ou durant le
transport.
AVERTISSEMENT
Ne jamais soumettre la béquille
latérale à des forces supplémentai-
res.
Remonter la béquille latérale avant
de démarrer.
CLAPET DE RENIFLARD
Ce clapet 1 empêche le carburant de
s’échapper et est monté sur la durit de
mise à l’air du réservoir de carburant.
ATTENTION:
Lors du montage, veiller à orienter la
flèche vers le réservoir de carburant et
vers le bas.
CLE A BOUGIE
La clé à bougie 1 permet de déposer et
de reposer la bougie.
CLE A ECROUS DE RAYONS
La clé à écrous de rayons 1 permet de
serrer les rayons.CABALLETE LATERAL
Este caballete lateral 1 se utiliza para
apoyar la máquina, y solo ella, cuando
está estacionada o durante su transporte.
ADVERTENCIA
No aplique nunca una fuerza adicio-
nal al caballete lateral.
Suba el caballete lateral antes de
iniciar la marcha.
UNIÓN CON VÁLVULA
Esta unión con válvula 1 está instalada
en el tubo respiradero del depósito de
combustible e impide que el combustible
se salga.
ATENCION:
En su instalación, verifique que la fle-
cha quede orientada hacia el depósito
de combustible y hacia abajo.
LLAVE DE BUJÍAS
Esta llave de bujías 1 se utiliza para
extraer e instalar bujías.
LLAVE PARA TUERCAS DE
RADIOS
Esta llave 1 se utiliza para apretar las
tuercas de los radios de las ruedas.
FONCTIONS DES COMMANDES
BEDIENUNGSELEMENTE UND DEREN FUNKTION
FUNCIONES DE LOS MANDOS
1 - 13
Page 58 of 758
1 - 14
GEN
INFO
FUEL
Always use the recommended fuel as stated
below. Also, be sure to use new gasoline the
day of a race.
CAUTION:
Use only unleaded gasoline. The use of
leaded gasoline will cause severe damage
to the engine internal parts such as valves,
piston rings, and exhaust system, etc.
NOTE:
If knocking or pinging occurs, use a different
brand of gasoline or higher octane grade.
WARNING
For refueling, be sure to stop the engine
and use enough care not to spill any fuel.
Also be sure to avoid refueling close to a
fire.
Refuel after the engine, exhaust pipe, etc.
have cooled off.
Recommended fuel:
Premium unleaded gasoline
only with a research octane
number of 95 or higher.
FUEL
Page 59 of 758
GEN
INFO
KRAFTSTOFF
Nur den empfohlenen Kraftstoff tan-
ken. Am Anfang eines Renntages fri-
schen Kraftstoff einfüllen.
ACHTUNG:
Ausschließlich bleifreies Benzin
tanken. Der Gebrauch verbleiten
Kraftstoffs verursacht unreparier-
bare Schäden am Motor (z. B. den
Ventilen), am Auspuffsystem usw.
HINWEIS:
Tritt bei hoher Last (Vollgas) Motor-
klingeln (oder -klopfen) auf, Marken-
kraftstoff eines renommierten
Anbieters oder Benzin mit höherer
Oktanzahl verwenden.
WARNUNG
Zum Tanken den Motor abstel-
len und darauf achten, daß kein
Benzin verschüttet wird. Feuer
fernhalten.
Vor dem Tanken Motor, Auspuff
usw. abkühlen lassen.
Empfohlener Kraftstoff:
Bleifreies Superben-
zin mit einer Min-
destoktanzahl von 95
(ROZ)
CARBURANT
Toujours utiliser le carburant recom-
mandé, comme indiqué ci-après. Le jour
de la course, toujours utiliser de
l’essence fraîche.
ATTENTION:
Utiliser exclusivement de l’essence
sans plomb. L’utilisation d’essence
avec plomb endommagera gravement
les pièces internes du moteur telles
que soupapes, segments de piston, sys-
tème d’échappement, etc.
N.B.:
En cas de cognement ou de cliquetis, uti-
liser une autre marque d’essence ou une
essence d’un indice d’octane supérieur.
AVERTISSEMENT
Au moment de faire le plein, ne pas
oublier de couper le moteur. Procé-
der avec soin pour ne pas renverser
d’essence. Eviter de faire le plein à
proximité d’un feu.
Faire le plein lorsque le moteur, le
tube d’échappement, etc. sont
refroidis.
Carburant recommandé:
Essence super sans
plomb uniquement, avec
indice d’octane de
recherche égal ou supé-
rieur à 95.
COMBUSTIBLE
Utilice siempre el combustible recomen-
dado que se indica más abajo. Asi-
mismo, en las carreras utilice gasolina
nueva.
ATENCION:
Utilice únicamente gasolina sin plomo.
El uso de gasolina con plomo dañará
gravemente componentes internos del
motor como válvulas, aros de pistón,
sistema de escape, etc.
NOTA:
Si se produce autoencendido o picado,
utilice una gasolina de otra marca o de
mayor octanaje.
ADVERTENCIA
Para repostar pare el motor y evite
derramar combustible. Asimismo,
evite repostar cerca de un fuego.
Ponga gasolina cuando el motor, el
tubo de escape, etc. se hayan
enfriado.
Combustible recomendado:
Únicamente gasolina
súper sin plomo de 95
octanos como mínimo.
CARBURANT
KRAFTSTOFF
COMBUSTIBLE
1 - 14
Page 60 of 758
1 - 15
GEN
INFO
STARTING AND BREAK-IN
STARTING AND BREAK-IN
WARNING
Never start or run the engine in a closed
area. The exhaust fumes are poisonous;
they can cause loss of consciousness and
death in a very short time. Always operate
the machine in a well-ventilated area.
CAUTION:
The carburetor on this machine has a
built-in accelerator pump. Therefore,
when starting the engine, do not operate
the throttle or the spark plug will foul.
Unlike a two-stroke engine, this engine
cannot be kick started when the throttle is
open because the kickstarter may kick
back. Also, if the throttle is open the air/
fuel mixture may be too lean for the
engine to start.
Before starting the machine, perform the
checks in the pre-operation check list.
AIR FILTER MAINTENANCE
According to “AIR FILTER CLEANING” section
in the CHAPTER 3, apply the foam-air-filter oil
or its equivalent to the element. (Excess oil in
the element may adversely affect engine start-
ing.)
STARTING A COLD ENGINE
NOTE:
This model is equipped with an ignition circuit
cut-off system. The engine can be started
under the following conditions.
When the transmission is in neutral.
When the clutch is disengaged with the
transmission in any position. However, it is
recommended to shift into neutral before
starting the engine.
1. Inspect the coolant level.
2. Turn the fuel cock to “ON”.
3. Push the main switch to “ON”.
4. Shift the transmission into neutral.
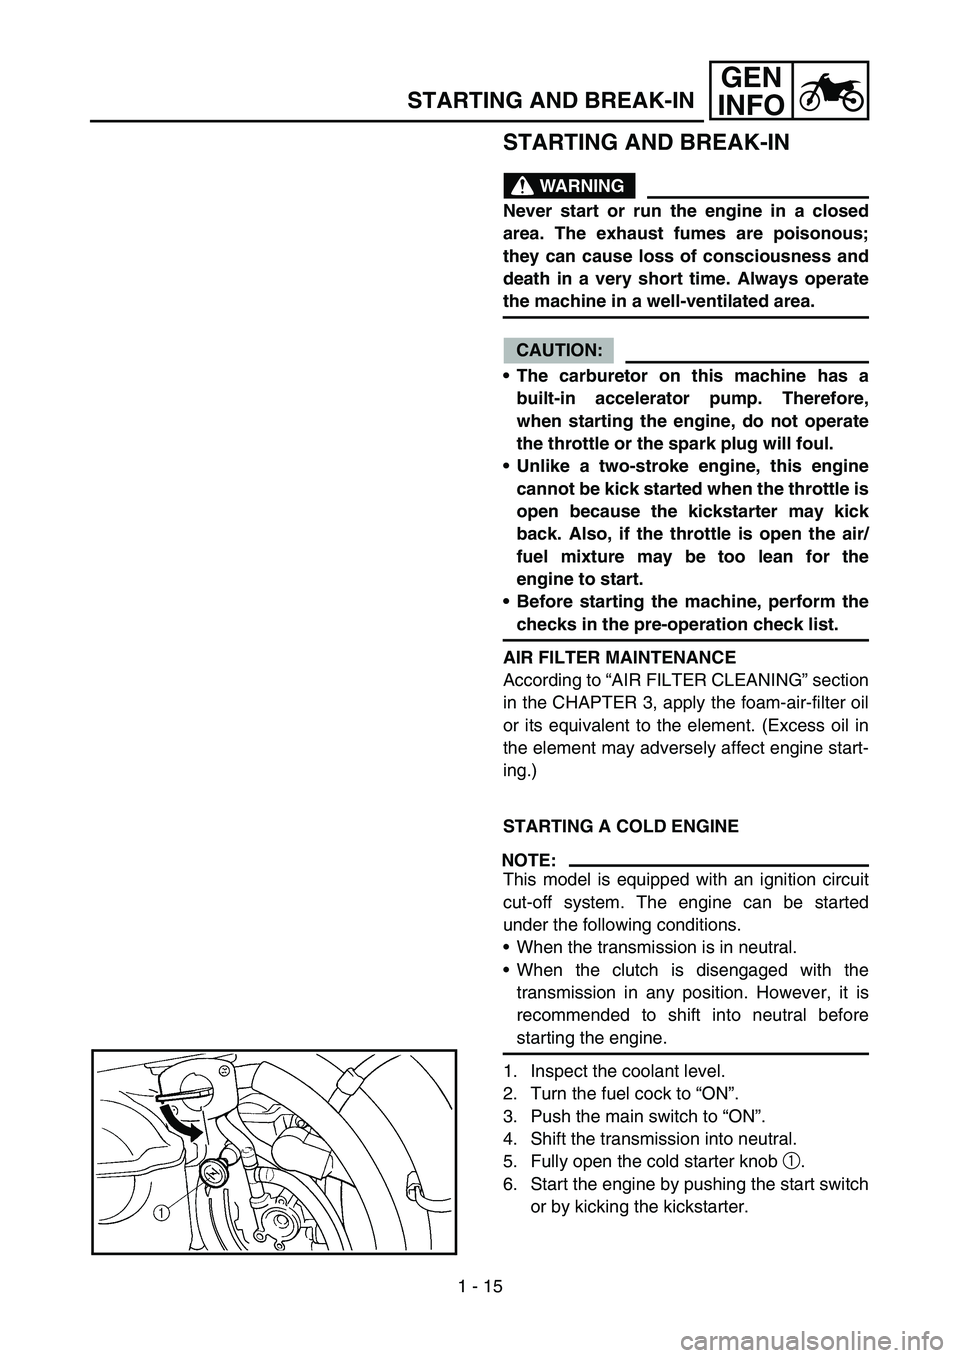
5. Fully open the cold starter knob 1.
6. Start the engine by pushing the start switch
or by kicking the kickstarter.