AUDI R8 2007 Manual PDF
Manufacturer: AUDI, Model Year: 2007, Model line: R8, Model: AUDI R8 2007Pages: 210, PDF Size: 8.1 MB
Page 71 of 210
Seats and storage69
Controls
Safety
Driving tips
General maintenance
Self-help
Technical data
Applies to vehicles: with electric seat adjustmentSeat adjustment
You can use the electrical adjustment to set the position,
angle and shape of the seat so that you can travel in a
safe and comfortable sitting position.Before adjusting your seat, please read and observe the
warnings ⇒.
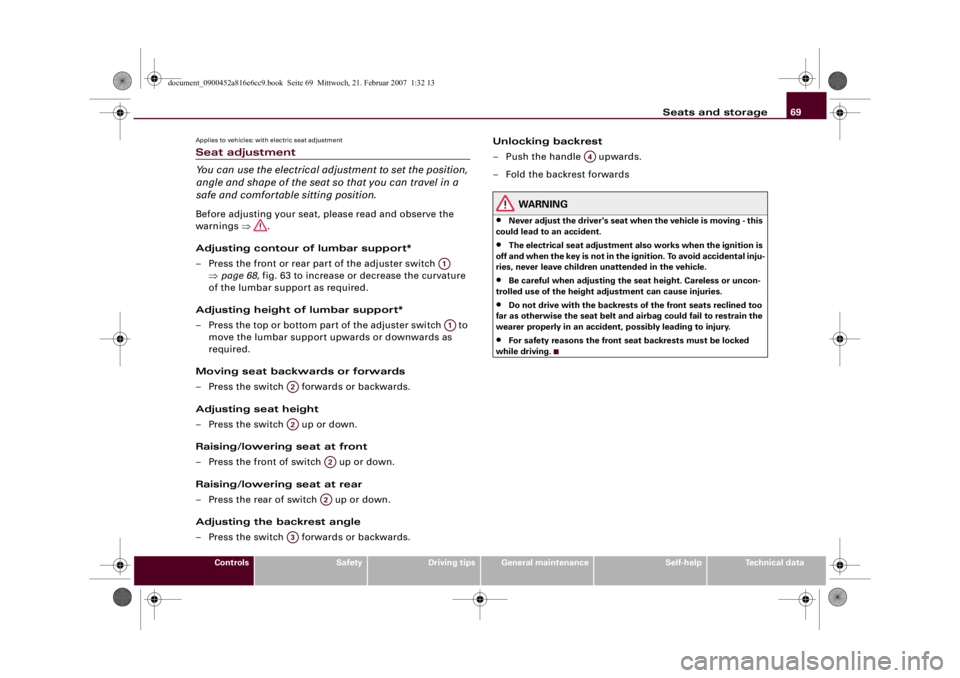
Adjusting contour of lumbar support*
– Press the front or rear part of the adjuster switch
⇒page 68, fig. 63 to increase or decrease the curvature
of the lumbar support as required.
Adjusting height of lumbar support*
– Press the top or bottom part of the adjuster switch to
move the lumbar support upwards or downwards as
required.
Moving seat backwards or forwards
– Press the switch forwards or backwards.
Adjusting seat height
– Press the switch up or down.
Raising/lowering seat at front
– Press the front of switch up or down.
Raising/lowering seat at rear
– Press the rear of switch up or down.
Adjusting the backrest angle
– Press the switch forwards or backwards.Unlocking backrest
– Push the handle upwards.
– Fold the backrest forwards
WARNING
•
Never adjust the driver's seat when the vehicle is moving - this
could lead to an accident.
•
The electrical seat adjustment also works when the ignition is
off and when the key is not in the ignition. To avoid accidental inju-
ries, never leave children unattended in the vehicle.
•
Be careful when adjusting the seat height. Careless or uncon-
trolled use of the height adjustment can cause injuries.
•
Do not drive with the backrests of the front seats reclined too
far as otherwise the seat belt and airbag could fail to restrain the
wearer properly in an accident, possibly leading to injury.
•
For safety reasons the front seat backrests must be locked
while driving.
A1A1
A2A2
A2A2
A3
A4
document_0900452a816e6cc9.book Seite 69 Mittwoch, 21. Februar 2007 1:32 13
Page 72 of 210
Seats and storage 70Bucket seatsApplies to vehicles: with bucket seatsSeat adjuster controls
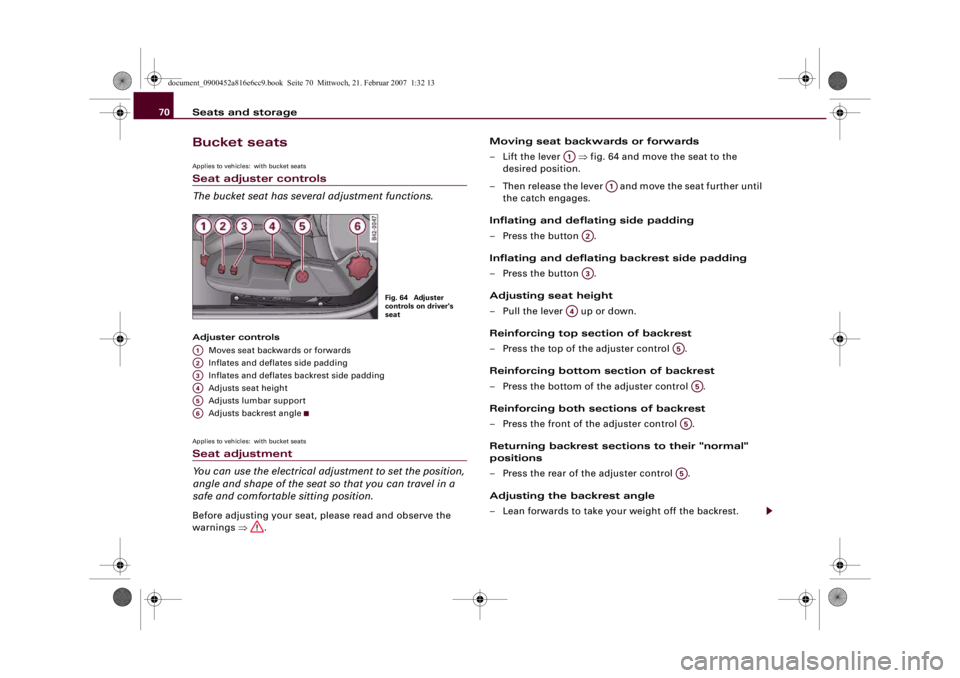
The bucket seat has several adjustment functions.Adjuster controls
Moves seat backwards or forwards
Inflates and deflates side padding
Inflates and deflates backrest side padding
Adjusts seat height
Adjusts lumbar support
Adjusts backrest angleApplies to vehicles: with bucket seatsSeat adjustment
You can use the electrical adjustment to set the position,
angle and shape of the seat so that you can travel in a
safe and comfortable sitting position.Before adjusting your seat, please read and observe the
warnings ⇒.Moving seat backwards or forwards
– Lift the lever ⇒fig. 64 and move the seat to the
desired position.
– Then release the lever and move the seat further until
the catch engages.
Inflating and deflating side padding
– Press the button .
Inflating and deflating backrest side padding
– Press the button .
Adjusting seat height
– Pull the lever up or down.
Reinforcing top section of backrest
– Press the top of the adjuster control .
Reinforcing bottom section of backrest
– Press the bottom of the adjuster control .
Reinforcing both sections of backrest
– Press the front of the adjuster control .
Returning backrest sections to their "normal"
positions
– Press the rear of the adjuster control .
Adjusting the backrest angle
– Lean forwards to take your weight off the backrest.
Fig. 64 Adjuster
controls on driver's
seat
A1A2A3A4A5A6
A1
A1
A2A3
A4
A5
A5
A5A5
document_0900452a816e6cc9.book Seite 70 Mittwoch, 21. Februar 2007 1:32 13
Page 73 of 210
Seats and storage71
Controls
Safety
Driving tips
General maintenance
Self-help
Technical data
– Turn the adjuster wheel to set the angle of the back-
rest as required.
Unlocking backrest
– Press one of the two levers ⇒page 68, fig. 63
upwards and fold down the backrest.
WARNING
•
Never adjust the driver's seat when the vehicle is moving - this
could lead to an accident.
•
The electrical seat adjustment also works when the ignition is
off and when the key is not in the ignition. To avoid accidental inju-
ries, never leave children unattended in the vehicle.
•
Be careful when adjusting the seat height. Careless or uncon-
trolled use of the seat adjustment can cause injuries.
•
Do not drive with the backrests of the front seats reclined too
far as otherwise the seat belt and airbag could fail to restrain the
wearer properly in an accident, possibly leading to injury.
•
For safety reasons the front seat backrests must be locked
while driving.
Head restraintsFront head restraints
In combination with properly worn seat belts, the head
restraints offer effective protection. However, they must
always be properly adjusted to suit the height of the occu-
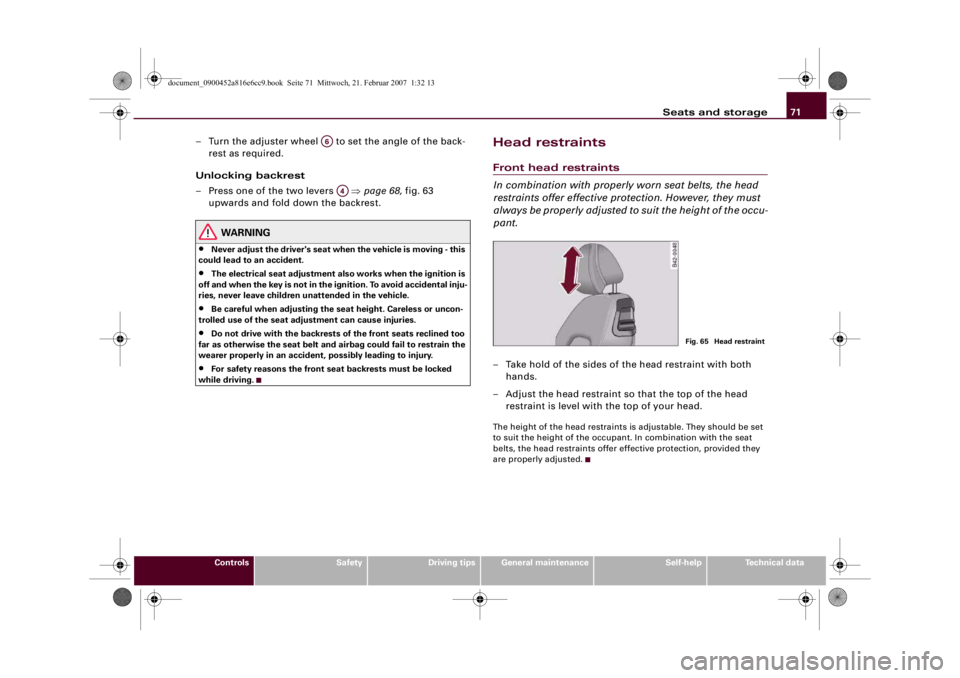
pant.– Take hold of the sides of the head restraint with both
hands.
– Adjust the head restraint so that the top of the head
restraint is level with the top of your head.The height of the head restraints is adjustable. They should be set
to suit the height of the occupant. In combination with the seat
belts, the head restraints offer effective protection, provided they
are properly adjusted.
A6
A4
Fig. 65 Head restraint
document_0900452a816e6cc9.book Seite 71 Mittwoch, 21. Februar 2007 1:32 13
Page 74 of 210
Seats and storage 72Cup holders
WARNING
•
Do not put any hot drinks in the cup holders while the vehicle
is moving. You could be scalded if the hot liquid is spilt.
•
Do not use hard china cups or glasses. These could cause injury
in the event of an accident.Caution
You should avoid putting open drinks containers in the cup holders.
The drinks could otherwise spill over and cause damage to e.g. the
electrical equipment or the seat covers.
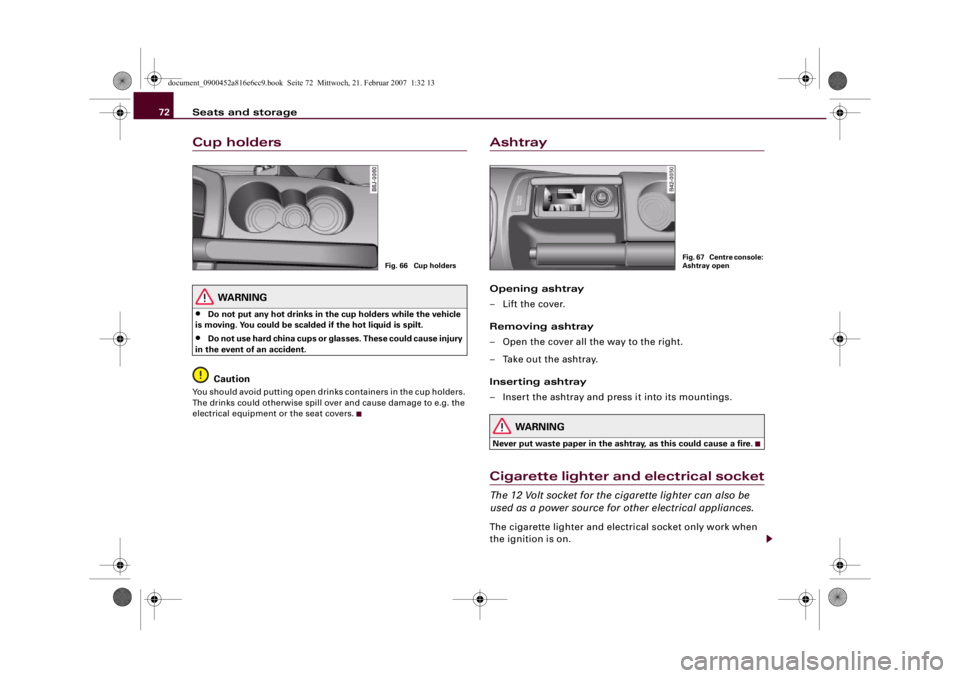
AshtrayOpening ashtray
– Lift the cover.
Removing ashtray
– Open the cover all the way to the right.
– Take out the ashtray.
Inserting ashtray
– Insert the ashtray and press it into its mountings.
WARNING
Never put waste paper in the ashtray, as this could cause a fire.Cigarette lighter and electrical socketThe 12 Volt socket for the cigarette lighter can also be
used as a power source for other electrical appliances.The cigarette lighter and electrical socket only work when
the ignition is on.
Fig. 66 Cup holders
Fig. 67 Centre console:
Ashtray open
document_0900452a816e6cc9.book Seite 72 Mittwoch, 21. Februar 2007 1:32 13
Page 75 of 210
Seats and storage73
Controls
Safety
Driving tips
General maintenance
Self-help
Technical data
Using cigarette lighter
– Open the ashtray cover to access the cigarette lighter
⇒page 72.
– Press in the cigarette lighter knob.
– Wait for the lighter to spring out.
– Pull out the cigarette lighter immediately.
– Use the glowing heater element of the cigarette lighter to
light your cigarette.
– Put the cigarette lighter back in its socket.
Operating electrical socket
– Open the cover to access the cigarette lighter.
– Take out the cigarette lighter.
– Insert the plug of the electrical appliance into the ciga-
rette lighter socket.The cigarette lighter employs a standard 12 Volt socket which can
also be used as a power source for electrical appliances. The appli-
ances connected to the socket must not exceed a power rating of
100 W.
WARNING
Take care when using the cigarette lighter. Carelessness or negli-
gence when using the cigarette lighter can cause burns.
Caution
Always use the correct type of plugs to avoid damaging the sockets.
Note
Using electrical appliances with the engine switched off will drain
the battery.Storage compartmentsGlove box
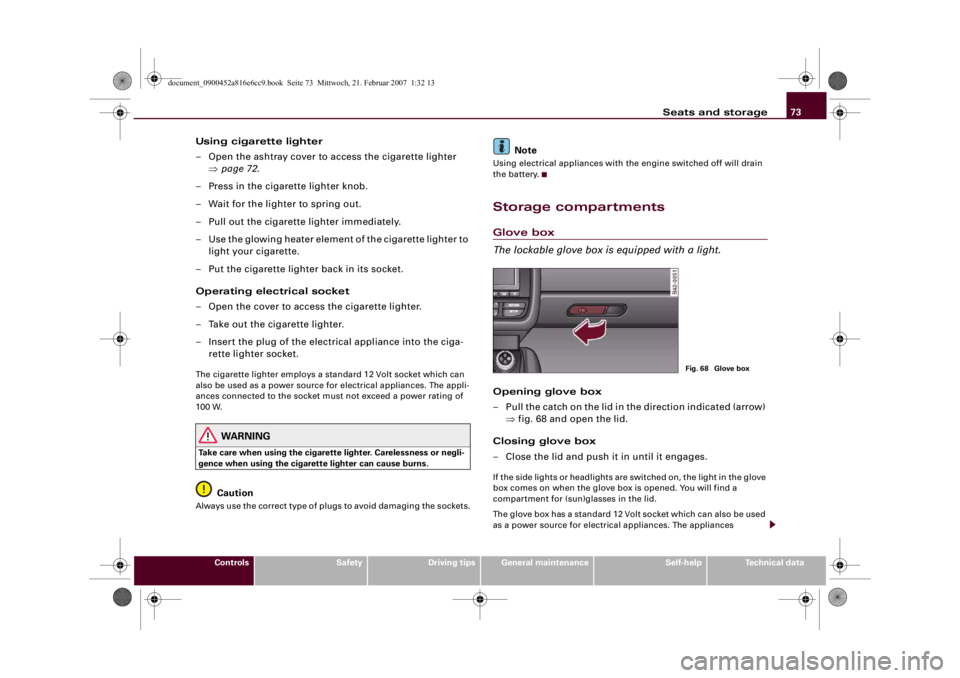
The lockable glove box is equipped with a light.Opening glove box
– Pull the catch on the lid in the direction indicated (arrow)
⇒fig. 68 and open the lid.
Closing glove box
– Close the lid and push it in until it engages.If the side lights or headlights are switched on, the light in the glove
box comes on when the glove box is opened. You will find a
compartment for (sun)glasses in the lid.
The glove box has a standard 12 Volt socket which can also be used
as a power source for electrical appliances. The appliances
Fig. 68 Glove box
document_0900452a816e6cc9.book Seite 73 Mittwoch, 21. Februar 2007 1:32 13
Page 76 of 210
Seats and storage 74connected to the socket must not exceed a power rating of 100 W.
The socket will only work when the ignition is switched on.
WARNING
To avoid the risk of injuries, always keep the glove box lid closed
when driving.Applies to vehicles: with storage compartments in the front seatsStorage compartments in the front seats
There is a fold-out drawer in the front part of each front
seat.Opening
– Pull the handle to open the compartment.
Closing
– Close the lid and push it in until it engages.
NoteThe storage compartment will hold a maximum weight of 1 kg.
document_0900452a816e6cc9.book Seite 74 Mittwoch, 21. Februar 2007 1:32 13
Page 77 of 210
Heating and cooling75
Controls
Safety
Driving tips
General maintenance
Self-help
Technical data
Heating and coolingAir conditionerControls
The air conditioner is designed to keep the passenger
compartment at the temperature you find most comfort-
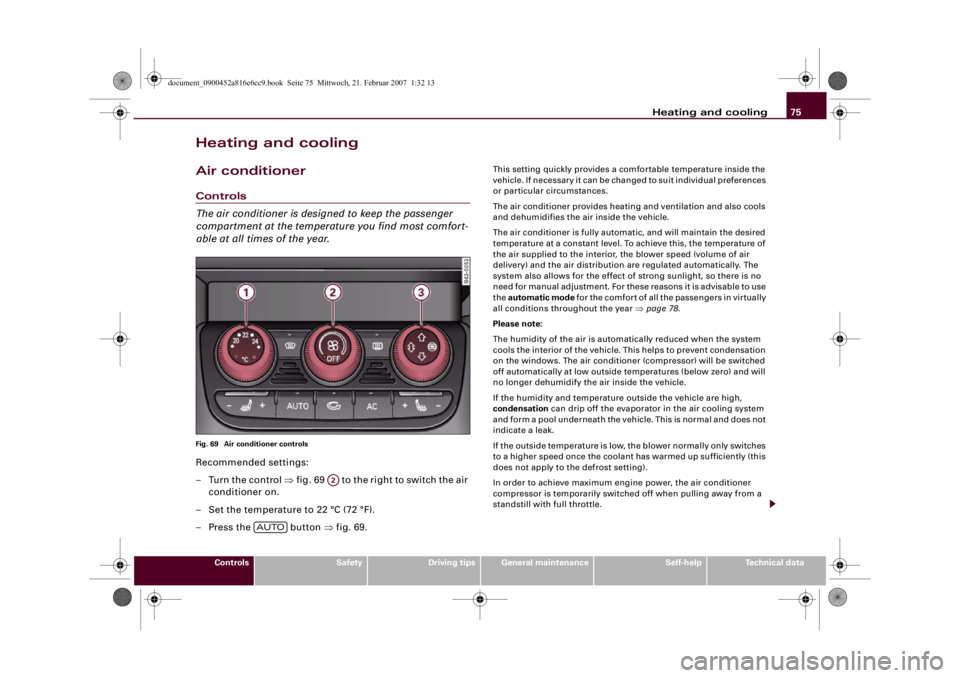
able at all times of the year.Fig. 69 Air conditioner controlsRecommended settings:
– Turn the control ⇒fig. 69 to the right to switch the air
conditioner on.
– Set the temperature to 22 °C (72 °F).
– Press the button ⇒fig. 69.
This setting quickly provides a comfortable temperature inside the
vehicle. If necessary it can be changed to suit individual preferences
or particular circumstances.
The air conditioner provides heating and ventilation and also cools
and dehumidifies the air inside the vehicle.
The air conditioner is fully automatic, and will maintain the desired
temperature at a constant level. To achieve this, the temperature of
the air supplied to the interior, the blower speed (volume of air
delivery) and the air distribution are regulated automatically. The
system also allows for the effect of strong sunlight, so there is no
need for manual adjustment. For these reasons it is advisable to use
the automatic mode for the comfort of all the passengers in virtually
all conditions throughout the year ⇒page 78.
Please note:
The humidity of the air is automatically reduced when the system
cools the interior of the vehicle. This helps to prevent condensation
on the windows. The air conditioner (compressor) will be switched
off automatically at low outside temperatures (below zero) and will
no longer dehumidify the air inside the vehicle.
If the humidity and temperature outside the vehicle are high,
condensation can drip off the evaporator in the air cooling system
and form a pool underneath the vehicle. This is normal and does not
indicate a leak.
If the outside temperature is low, the blower normally only switches
to a higher speed once the coolant has warmed up sufficiently (this
does not apply to the defrost setting).
In order to achieve maximum engine power, the air conditioner
compressor is temporarily switched off when pulling away from a
standstill with full throttle.
A2
AUTO
document_0900452a816e6cc9.book Seite 75 Mittwoch, 21. Februar 2007 1:32 13
Page 78 of 210
Heating and cooling 76The compressor also switches off if the coolant temperature is
excessively high, to ensure adequate engine cooling under extreme
loads.
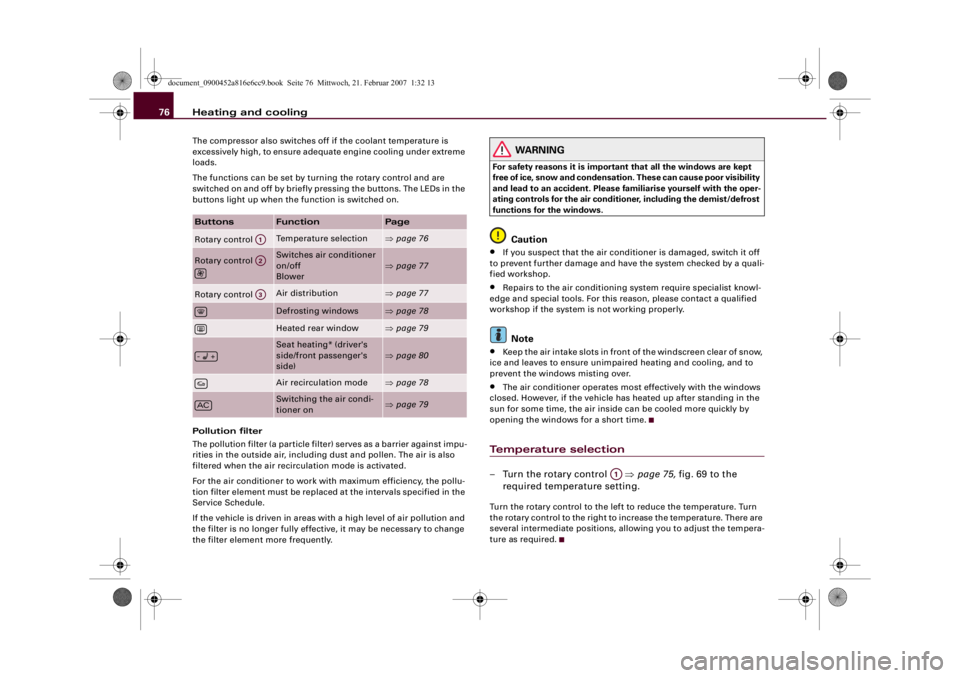
The functions can be set by turning the rotary control and are
switched on and off by briefly pressing the buttons. The LEDs in the
buttons light up when the function is switched on.
Pollution filter
The pollution filter (a particle filter) serves as a barrier against impu-
rities in the outside air, including dust and pollen. The air is also
filtered when the air recirculation mode is activated.
For the air conditioner to work with maximum efficiency, the pollu-
tion filter element must be replaced at the intervals specified in the
Service Schedule.
If the vehicle is driven in areas with a high level of air pollution and
the filter is no longer fully effective, it may be necessary to change
the filter element more frequently.
WARNING
For safety reasons it is important that all the windows are kept
free of ice, snow and condensation. These can cause poor visibility
and lead to an accident. Please familiarise yourself with the oper-
ating controls for the air conditioner, including the demist/defrost
functions for the windows.
Caution
•
If you suspect that the air conditioner is damaged, switch it off
to prevent further damage and have the system checked by a quali-
fied workshop.
•
Repairs to the air conditioning system require specialist knowl-
edge and special tools. For this reason, please contact a qualified
workshop if the system is not working properly.Note
•
Keep the air intake slots in front of the windscreen clear of snow,
ice and leaves to ensure unimpaired heating and cooling, and to
prevent the windows misting over.
•
The air conditioner operates most effectively with the windows
closed. However, if the vehicle has heated up after standing in the
sun for some time, the air inside can be cooled more quickly by
opening the windows for a short time.
Te m p e r a t u r e s e l e c t i o n– Turn the rotary control ⇒page 75, fig. 69 to the
required temperature setting.Turn the rotary control to the left to reduce the temperature. Turn
the rotary control to the right to increase the temperature. There are
several intermediate positions, allowing you to adjust the tempera-
ture as required.
Buttons
Function
Page
Rotary control
Temperature selection
⇒page 76
Rotary control
Switches air conditioner
on/off
Blower
⇒page 77
Rotary control
Air distribution
⇒page 77
Defrosting windows
⇒page 78
Heated rear window
⇒page 79
Seat heating* (driver's
side/front passenger's
side)
⇒page 80
Air recirculation mode
⇒page 78
Switching the air condi-
tioner on
⇒page 79
A1A2
A3
- +AC
A1
document_0900452a816e6cc9.book Seite 76 Mittwoch, 21. Februar 2007 1:32 13
Page 79 of 210
Heating and cooling77
Controls
Safety
Driving tips
General maintenance
Self-help
Technical data
Switching air conditioner on or offSwitching air conditioner on or off
– Turn the control ⇒page 75, fig. 69 clockwise to switch
the air conditioner on. The diode next to the word OFF
will go out.
– Turn the control ⇒page 75, fig. 69 anti-clockwise to
switch the air conditioner off. The diode next to the word
OFF will light up.
Regulating the blower speed
– Turn the control ⇒page 75, fig. 69 to the desired
setting for the blower speed (amount of air to be deliv-
ered).In automatic mode, the air conditioning system automatically regu-
lates the blower speed according to the interior temperature.
However, you can also adjust the blower speed manually.
Note
The blower speed will automatically be adjusted if the difference
between the selected temperature and the actual temperature in
the vehicle is too high. This ensures that the selected temperature
is reached as quickly as possible.
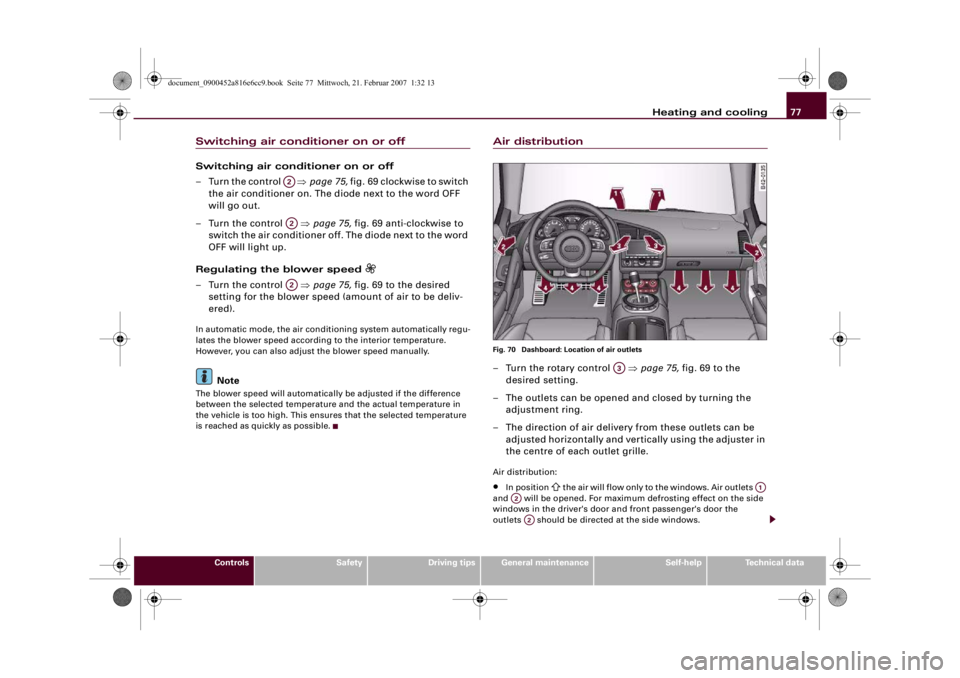
Air distributionFig. 70 Dashboard: Location of air outlets– Turn the rotary control ⇒page 75, fig. 69 to the
desired setting.
– The outlets can be opened and closed by turning the
adjustment ring.
– The direction of air delivery from these outlets can be
adjusted horizontally and vertically using the adjuster in
the centre of each outlet grille.Air distribution:•
In position
the air will flow only to the windows. Air outlets
and will be opened. For maximum defrosting effect on the side
windows in the driver's door and front passenger's door the
outlets should be directed at the side windows.
A2A2A2
A3
A1
A2A2
document_0900452a816e6cc9.book Seite 77 Mittwoch, 21. Februar 2007 1:32 13
Page 80 of 210
Heating and cooling 78•
In position
the air will flow only to the driver/front passenger.
Air outlets and will be opened.
•
In position
the air will flow only to the footwells. Air outlets
will be opened.
•
In position
the air will flow only to the windows and the foot-
wells. Air outlets , and will be opened.
In addition to this there are several other possible combinations
(using intermediate positions), allowing you to adjust the air distri-
bution to suit individual requirements.
Note
When the air conditioner is operating in the cooling mode, the air
should be directed mainly to outlets and . To ensure adequate
cooling effect, you should not close these outlets completely.Defrosting
The windscreen and side windows are defrosted or
demisted as quickly as possible.– To switch on, press the button ⇒page 75, fig. 69.
– To switch off, press the button again, or press the
button.The temperature is regulated automatically. The air output is
increased to maximum and most of the air comes out of outlets 1
⇒page 77.
A small, residual amount of air will emerge from outlets 2, if they are
open ⇒page 77.
The air recirculation mode is switched off when the button is
pressed.
Automatic mode
Standard operating mode for all seasons.Switching on automatic mode
– Set the desired temperature.
– Press the button ⇒page 75, fig. 69.The automatic mode maintains a constant temperature inside the
vehicle and dehumidifies the air. Air temperature, air delivery and
air distribution are regulated automatically to reach the desired
interior temperature as quickly as possible, and then to maintain
this temperature. The system automatically compensates for any
variations in the outside temperature and for the effect of direct
sunlight.Air recirculation mode
The air recirculation setting prevents fumes etc. from
entering the interior.Switching on the air recirculation mode
– Press the button ⇒page 75, fig. 69, ⇒.
Switching off the air recirculation mode
– Press the button again, or
– Press the button, or
– Press the button.In this setting, the air is drawn from the interior of the vehicle,
filtered and continuously recirculated. We recommend using the air
recirculation mode for a brief period in the following circumstances
⇒:
A2
A3
A4
A1
A2
A4
A2
A3
AUTO
AUTO
AUTO
AUTO
document_0900452a816e6cc9.book Seite 78 Mittwoch, 21. Februar 2007 1:32 13