AUDI R8 2007 Manual Online
Manufacturer: AUDI, Model Year: 2007, Model line: R8, Model: AUDI R8 2007Pages: 210, PDF Size: 8.1 MB
Page 81 of 210
Heating and cooling79
Controls
Safety
Driving tips
General maintenance
Self-help
Technical data When driving through a tunnel or in queues of traffic, to prevent
fumes entering the interior of the vehicle.
WARNING
For reasons of safety you should not leave the air recirculation
switched on for too long. This mode prevents fresh air from
entering the vehicle, so the windows can mist over if the air
cooling is switched off. Bad visibility can cause an accident.AC mode Activating the AC mode
– Press the button ⇒page 75, fig. 69.
Deactivating the AC mode
– Press the button again.In the AC mode, the air cooling system is switched on and the
heating and ventilation are regulated automatically.
Note
If the LED in the AC button should continue to light up when the AC
mode has been switched off (i.e. the air conditioner has been
switched off) this is due to a defect in one of the air conditioner
components. If a malfunction should occur, please contact a quali-
fied workshop.
Economical operation of the air conditioner
Economical operation of the air conditioner will help to
save fuel.When the air conditioner is operating in the cooling mode it
reduces engine power and increases fuel consumption. To
ensure that the cooling mode is activated only when really
necessary, please note the following points:
– Switch the AC mode off if you wish to save fuel.
– Switch the AC mode off if you decide to open the
windows while driving.
– If the vehicle has heated up after standing in the sun,
open the windows and doors for a short time to cool the
vehicle.
For the sake of the environmentBy saving fuel you also reduce the amount of pollutants emitted
from your vehicle.Rear window heating
The rear window heating helps to demist the rear window.– Press the
button ⇒page 75, fig. 69 to switch the rear
window heating on or off.
The rear window heating only works when the engine is running. An
indicator lamp in the button lights up when the rear window heater
is switched on.
The rear window heating switches off automatically after about
10 minutes.
ACACAC
document_0900452a816e6cc9.book Seite 79 Mittwoch, 21. Februar 2007 1:32 13
Page 82 of 210
Heating and cooling 80
For the sake of the environmentSwitch off the heated rear window manually as soon as the rear
window is clear. By saving electrical power you can also save fuel.Applies to vehicles: with seat heatingSeat heating The seat cushions and backrests of the front seats can be
heated electrically.– Press the button for seat heating ⇒page 75, fig. 69
to set the desired seat temperature.Possible settings range from 1 to 3. The selected seat heating
setting is indicated by LEDs above the button.
Caution
To avoid damaging the heating elements of the seat heating, please
do not kneel on the seat or apply sharp pressure at a single point.
- +
- +
document_0900452a816e6cc9.book Seite 80 Mittwoch, 21. Februar 2007 1:32 13
Page 83 of 210
Driving81
Controls
Safety
Driving tips
General maintenance
Self-help
Technical data
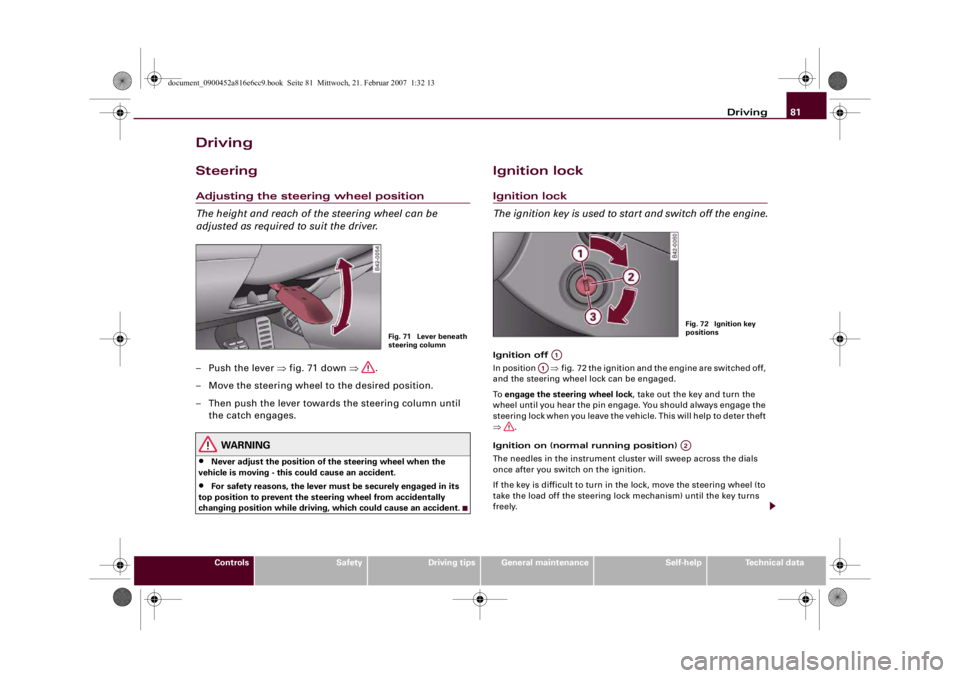
DrivingSteeringAdjusting the steering wheel position
The height and reach of the steering wheel can be
adjusted as required to suit the driver.–Push the lever ⇒fig. 71 down ⇒.
– Move the steering wheel to the desired position.
– Then push the lever towards the steering column until
the catch engages.
WARNING
•
Never adjust the position of the steering wheel when the
vehicle is moving - this could cause an accident.
•
For safety reasons, the lever must be securely engaged in its
top position to prevent the steering wheel from accidentally
changing position while driving, which could cause an accident.
Ignition lockIgnition lock
The ignition key is used to start and switch off the engine.Ignition off
In position ⇒fig. 72 the ignition and the engine are switched off,
and the steering wheel lock can be engaged.
To engage the steering wheel lock, take out the key and turn the
wheel until you hear the pin engage. You should always engage the
steering lock when you leave the vehicle. This will help to deter theft
⇒.
Ignition on (normal running position)
The needles in the instrument cluster will sweep across the dials
once after you switch on the ignition.
If the key is difficult to turn in the lock, move the steering wheel (to
take the load off the steering lock mechanism) until the key turns
freely.
Fig. 71 Lever beneath
steering column
Fig. 72 Ignition key
positions
A1
A1
A2
document_0900452a816e6cc9.book Seite 81 Mittwoch, 21. Februar 2007 1:32 13
Page 84 of 210
Driving 82Starting the engine
Turn the key to this position to start the engine. While the engine is
being started the headlights are switched back to side lights and
other major electrical equipment is switched off. After the engine
has started the ignition key returns to position by itself.
The ignition key has to be turned back to position before re-
starting the engine. The starter inhibitor in the ignition lock
prevents the starter motor from engaging when the engine is
running, as this could cause damage.
WARNING
•
Wait for the vehicle to come to a standstill before removing the
ignition key from the lock. Otherwise the steering lock could
engage suddenly, which could cause an accident.
•
Always take the key with you when leaving the vehicle – even
if you only intend to be gone for a short time. This is especially
important if children are left in the car. They might otherwise be
able to start the engine or use power-operated equipment such as
the electric windows - this could lead to injuries.Note
If the battery has been disconnected and then reconnected it will be
necessary to leave the key in position for about 5 seconds before
starting the engine.Starting the engineThe engine can only be started with an original Audi key.On vehicles with R tronic, the engine can be started in
neutral (N) or in any gear (1 - 6 or R).
– Apply the handbrake firmly ⇒.– Push the clutch pedal all the way down (vehicles with
manual gearbox).
– Press and hold the brake pedal.
– Turn the ignition key to position ⇒page 81, fig. 72
without pressing the accelerator.
– Release the ignition key as soon as the engine starts; the
starter motor must not be allowed to run on with the
engine. Neutral gear (N) will be engaged on vehicles with
Rtronic.
When starting from cold the engine may be a little noisy for the first
few seconds until oil pressure has built up in the hydraulic tappets.
This is quite normal, and no cause for concern.
If the engine fails to start straight-away, switch off the starter after
about 10 seconds and try again after about half a minute.
WARNING
•
Never run the engine in confined spaces. The exhaust gases are
toxic.
•
If the engine is running and a gear is engaged, you will need to
hold the car with the footbrake.Caution
Avoid high engine speeds, full throttle and extreme load conditions
until the engine has reached its normal operating temperature,
otherwise this can damage the engine.
For the sake of the environment
Do not warm up the engine when the vehicle is stationary. You
should drive off immediately whenever possible. This will help avoid
unnecessary exhaust emissions.
A3
A2A1
A2
A3
document_0900452a816e6cc9.book Seite 82 Mittwoch, 21. Februar 2007 1:32 13
Page 85 of 210
Driving83
Controls
Safety
Driving tips
General maintenance
Self-help
Technical data
Switching off the engineOn vehicles with R tronic, the engine can be switched off in
neutral (N) or in any gear (1 - 6 or R).
– Turn the ignition key to position ⇒page 81, fig. 72.
WARNING
•
Never switch off the engine until the vehicle is stationary.
•
The brake servo and the power steering system work only
when the engine is running. You need more strength to steer and
brake the vehicle when the engine is switched off. This would
mean a greater risk of accidents and serious injury, because you
cannot steer and brake in the normal manner.Caution
•
If the engine has been working hard for a long time, there is a risk
of heat building up in the engine compartment after the engine has
been switched off; this could cause engine damage. For this reason,
you should leave the engine idling for a few minutes or drive at a
moderate speed to let the engine cool down before switching it off
⇒page 139.
•
Because the engine can get very hot after working hard, do not
park the vehicle on surfaces which could catch fire (e.g. on grass or
at the forest edge).Note
After the engine is stopped the radiator fan may run on for up to
10 minutes, even if the ignition is switched off. The fan may also
start running again after some time if the coolant temperature rises
due to a build-up of heat, or if the engine is hot and the engine
compartment is heated up further by direct sunlight.
HandbrakeHandbrake
The handbrake should be applied firmly to prevent the
vehicle from accidentally rolling away.Applying the handbrake
– Pull the handbrake lever up all the way.
Releasing the handbrake
– Pull the lever up slightly and at the same time press in the
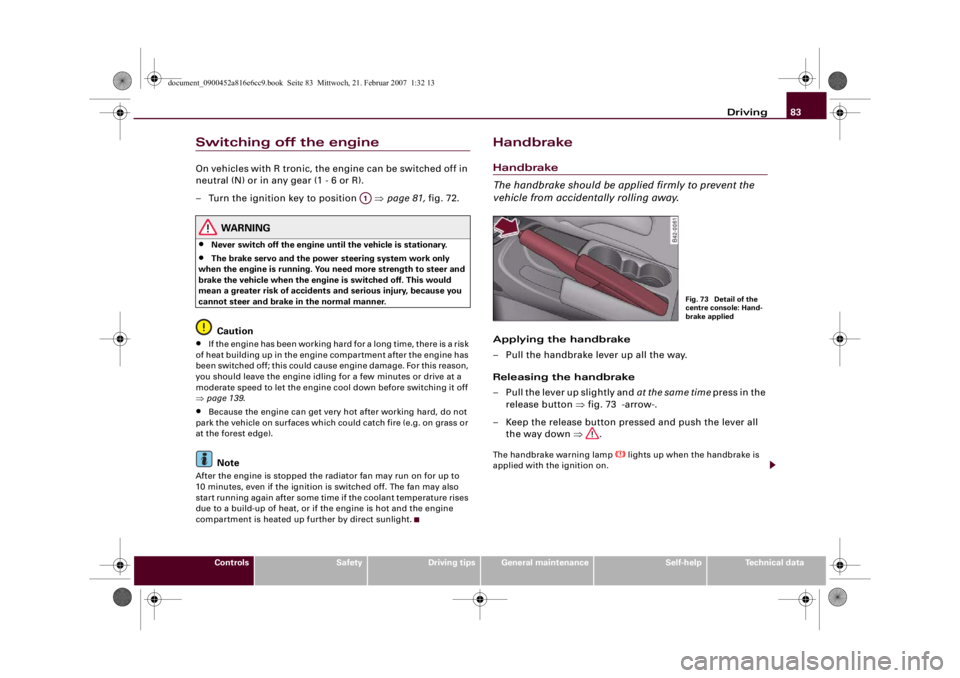
release button ⇒fig. 73 -arrow-.
– Keep the release button pressed and push the lever all
the way down ⇒.The handbrake warning lamp
lights up when the handbrake is
applied with the ignition on.
A1
Fig. 73 Detail of the
centre console: Hand-
brake applied
document_0900452a816e6cc9.book Seite 83 Mittwoch, 21. Februar 2007 1:32 13
Page 86 of 210
Driving 84
WARNING
Please note that the handbrake should be released all the way. If it
is only partially released this will cause overheating of the rear
brakes, which can impair the function of the brake system and
could lead to an accident.
Caution
Once the vehicle has come to a standstill, always apply the hand-
brake firmly and then engage a gear.Parking the car
Please note the following points to ensure there is no risk
of the car rolling away accidentally after it is parked.– Use the foot brake to stop the vehicle.
– Apply the handbrake firmly.
– Switch the engine off.
– Engage a gear ⇒.When parking on gradients
Turn the steering wheel so that the vehicle would roll into the kerb
if it did start to move accidentally.
WARNING
•
Do not leave anyone (especially children) in the vehicle when it
is locked. Locked doors could delay assistance in an emergency,
potentially putting lives at risk.
•
Never leave children unsupervised in the vehicle. They could,
for example, release the handbrake or put the gearbox in neutral.
The vehicle could then start moving and cause an accident.
Applies to vehicles: with hill hold assistDriving away on a slopeThe hill hold assist function makes it easier to drive away on a slope.
The system is activated when you press and hold the brake pedal for
a few seconds.
When you release the brake pedal the braking force will be main-
tained for a moment in order to hold the vehicle and make it easier
for you to drive away.
WARNING
•
If you do not drive away immediately after releasing the brake
pedal the vehicle could start to roll back. You should therefore
immediately press the brake pedal or apply the handbrake.
•
If the engine should stall you must immediately press the brake
pedal or apply the handbrake firmly.
•
If you are driving away on a slope in stop-and-go traffic press
and hold the brake pedal for a few seconds before driving off. This
will prevent the vehicle from rolling back unintentionally.Note
To find out whether your vehicle is equipped with the “hill hold
assist” function please contact an Audi R8 dealership or qualified
workshop.
document_0900452a816e6cc9.book Seite 84 Mittwoch, 21. Februar 2007 1:32 13
Page 87 of 210
Driving85
Controls
Safety
Driving tips
General maintenance
Self-help
Technical data
Parking aidApplies to vehicles: with 8-channel parking aidFront and rear parking aid
The parking aid warns you if there are any obstacles
behind or in front of the car.Description
The front and rear acoustic parking aid (8-channel parking aid) uses
ultrasonic sensors to measure the distance between the vehicle and
an obstacle. The sensors are located in the front and rear bumpers.
The measuring range of the sensors starts at approximately:
Activating
The parking aid is activated automatically when reverse gear is
engaged. This is confirmed by a short beep.
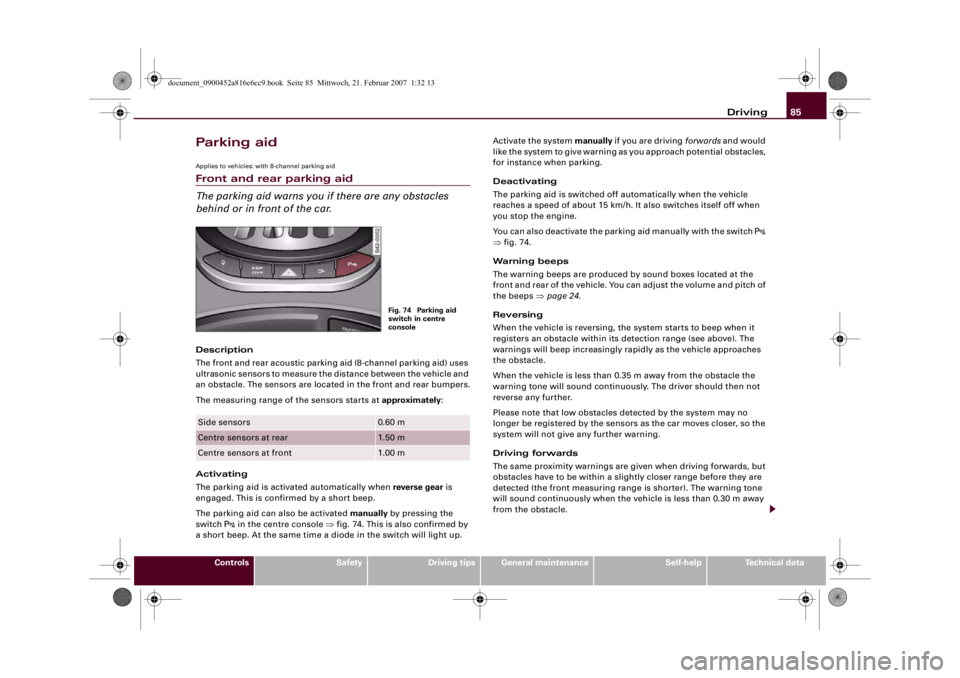
The parking aid can also be activated manually by pressing the
switch
in the centre console ⇒fig. 74. This is also confirmed by
a short beep. At the same time a diode in the switch will light up.Activate the system manually if you are driving forwards and would
like the system to give warning as you approach potential obstacles,
for instance when parking.
Deactivating
The parking aid is switched off automatically when the vehicle
reaches a speed of about 15 km/h. It also switches itself off when
you stop the engine.
You can also deactivate the parking aid manually with the switch
⇒fig. 74.
Warning beeps
The warning beeps are produced by sound boxes located at the
front and rear of the vehicle. You can adjust the volume and pitch of
the beeps ⇒page 24.
Reversing
When the vehicle is reversing, the system starts to beep when it
registers an obstacle within its detection range (see above). The
warnings will beep increasingly rapidly as the vehicle approaches
the obstacle.
When the vehicle is less than 0.35 m away from the obstacle the
warning tone will sound continuously. The driver should then not
reverse any further.
Please note that low obstacles detected by the system may no
longer be registered by the sensors as the car moves closer, so the
system will not give any further warning.
Driving forwards
The same proximity warnings are given when driving forwards, but
obstacles have to be within a slightly closer range before they are
detected (the front measuring range is shorter). The warning tone
will sound continuously when the vehicle is less than 0.30 m away
from the obstacle.
Side sensors
0.60 m
Centre sensors at rear
1.50 m
Centre sensors at front
1.00 mFig. 74 Parking aid
switch in centre
console
document_0900452a816e6cc9.book Seite 85 Mittwoch, 21. Februar 2007 1:32 13
Page 88 of 210
Driving 86Parking
If the parking manoeuvre involves shunting backwards and
forwards, the warning sound will be switched off temporarily while
you change gear. The warning beeps will start again as soon as the
vehicle comes closer to an obstacle.
Possible faults
If you hear a long beep when you engage reverse gear (or when you
activate the system using the switch) and the diode in the switch
starts flashing, there is a fault in the system. The long warning beep
is given just once to indicate the fault. If you try activating the
parking aid again, the warning beep will not sound and fault is only
indicated by the flashing diode. This also applies if you switch the
ignition off and then on again: the long warning beep will only
sound the first time you try activating the parking aid. Have the fault
rectified.
If there is a fault in the system there will be no confirming beep
when you activate the parking aid.
To ensure that the acoustic parking aid works properly, the sensors
must be kept clean and free of ice.
WARNING
•
The sensors have blind spots in which obstacles are not regis-
tered. It is particularly important to ensure that there are no small
children or animals near the vehicle when reversing, as the
sensors may not always be able to detect them.
•
The parking aid cannot replace the full concentration of the
driver. The driver is always responsible for safety during parking
and other manoeuvres.Caution
Please note that low obstacles detected by the system may no
longer be registered by the sensors as the car moves closer, so the
system will not give any further warning. Certain kinds of obstacles (such as wire fences, chains, thin painted posts or trailer draw bars,
etc) may not always be detected by the system, so take care not to
damage the vehicle in such cases.
Note
Your vehicle has low ground clearance. To help you prevent damage
to the vehicle, warning beeps will sound when you approach a steep
slope (e.g. in a car park or garage).Cruise control systemApplies to vehicles: with cruise control systemIntroduction
The cruise control system allows you to maintain a
constant speed.The cruise control system allows you to maintain any desired
constant cruising speed at speeds above about 30 km/h. Of course,
this is subject to power output and braking ability of the engine.
This helps to reduce fatigue, especially on long journeys.
The indicator lamp
in the instrument cluster lights up when the
cruise control system is operating.
The cruise control system is automatically deactivated immediately
by
•
pressing the brake pedal.
•
pressing the clutch pedal.
WARNING
For safety reasons the cruise control system should not be used in
dense traffic or poor road conditions (such as slippery surfaces,
heavy rain, loose grit or gravel) – this could cause an accident.
document_0900452a816e6cc9.book Seite 86 Mittwoch, 21. Februar 2007 1:32 13
Page 89 of 210
Driving87
Controls
Safety
Driving tips
General maintenance
Self-help
Technical data
Caution
do not move the gear lever into neutral without depressing the
clutch when the cruise control system is active. Otherwise the
engine could rev up and be damaged.
Note
The cruise control cannot maintain a constant speed when travel-
ling down steep hills. The vehicle tends to accelerate under its own
weight. Change down to a lower gear in good time or use the foot
brake to slow the vehicle.Applies to vehicles: with cruise control systemSetting speed
The desired cruising speed needs to be stored in the
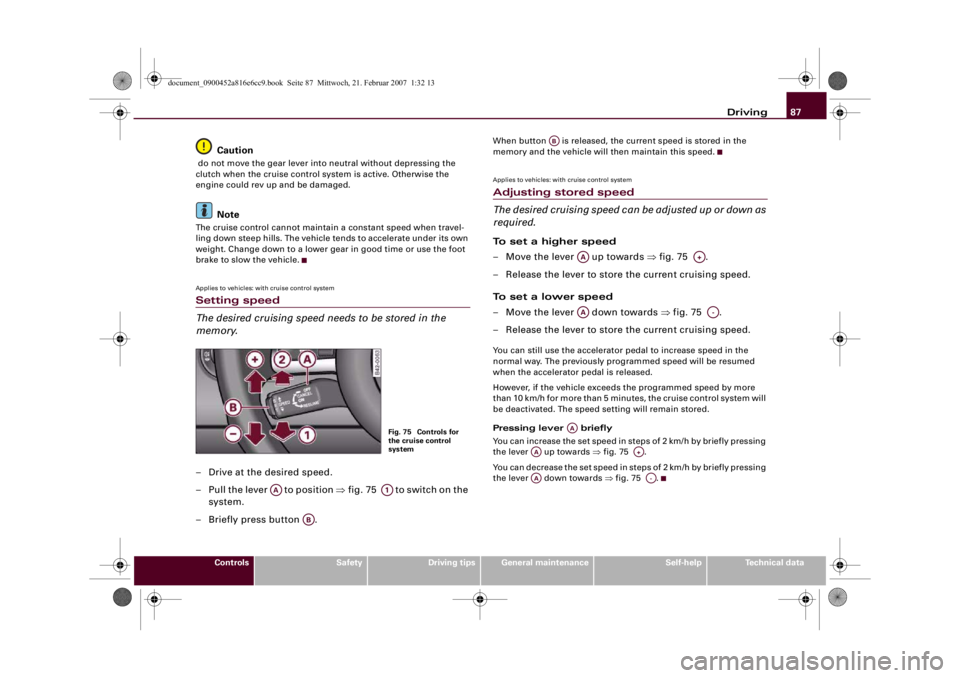
memory.– Drive at the desired speed.
– Pull the lever to position ⇒f i g . 7 5 to s w i t ch o n t h e
system.
– Briefly press button .
When button is released, the current speed is stored in the
memory and the vehicle will then maintain this speed.Applies to vehicles: with cruise control systemAdjusting stored speed
The desired cruising speed can be adjusted up or down as
required.To set a higher speed
– Move the lever up towards ⇒fig. 75 .
– Release the lever to store the current cruising speed.
To set a lower speed
– Move the lever down towards ⇒fig. 75 .
– Release the lever to store the current cruising speed.You can still use the accelerator pedal to increase speed in the
normal way. The previously programmed speed will be resumed
when the accelerator pedal is released.
However, if the vehicle exceeds the programmed speed by more
than 10 km/h for more than 5 minutes, the cruise control system will
be deactivated. The speed setting will remain stored.
Pressing lever briefly
You can increase the set speed in steps of 2 km/h by briefly pressing
the lever up towards ⇒fig. 75 .
You can decrease the set speed in steps of 2 km/h by briefly pressing
the lever down towards ⇒fig. 75 .
Fig. 75 Controls for
the cruise control
system
AA
A1
AB
AB
AA
A+
AA
A-
AA
AA
A+
AA
A-
document_0900452a816e6cc9.book Seite 87 Mittwoch, 21. Februar 2007 1:32 13
Page 90 of 210
Driving 88Applies to vehicles: with cruise control systemSwitching off cruise control temporarily– Press the brake pedal, or
– Press the clutch pedal, or
– Press the lever ⇒page 87, fig. 75 to position (click
stop not engaged).The speed stored at this point remains in the memory if the system
is only temporarily deactivated.
To resume the programmed cruising speed, release the clutch or
brake pedal and pull the lever to position .
If no speed was stored when the system was temporarily deacti-
vated, a new speed can be set as follows: drive at the desired
cruising speed and briefly press button ⇒page 87, fig. 75 (SET).
WARNING
Do not resume the programmed cruising speed if this is too high
for the traffic conditions - this can cause accidents.Applies to vehicles: with cruise control systemSwitching off cruise control– Press the lever A ⇒page 87, fig. 75 to position (click
stop engaged).The stored speed will be deleted once the ignition is switched off.
Note
Always switch off the cruise control system completely after each
journey. When beginning a new journey, the speed must be reset
⇒page 87.
Applies to vehicles: with Audi magnetic rideAudi magnetic rideThe damping effect of the shock absorbers can be
adjusted according to the driver's requirements, and will
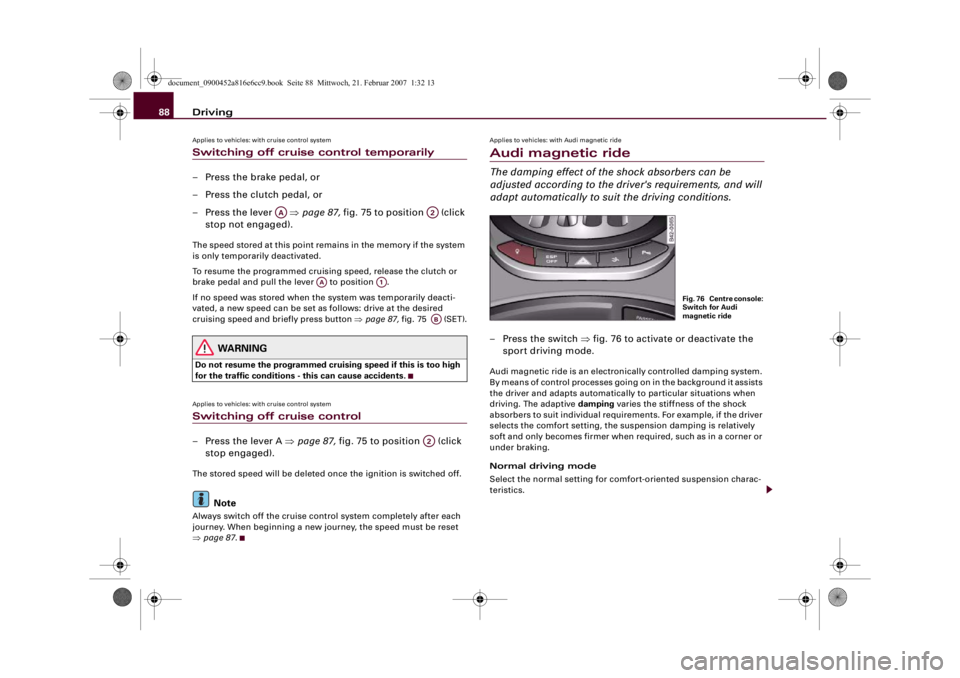
adapt automatically to suit the driving conditions.– Press the switch ⇒fig. 76 to activate or deactivate the
sport driving mode.Audi magnetic ride is an electronically controlled damping system.
By means of control processes going on in the background it assists
the driver and adapts automatically to particular situations when
driving. The adaptive damping varies the stiffness of the shock
absorbers to suit individual requirements. For example, if the driver
selects the comfort setting, the suspension damping is relatively
soft and only becomes firmer when required, such as in a corner or
under braking.
Normal driving mode
Select the normal setting for comfort-oriented suspension charac-
teristics.
AA
A2
AA
A1
ABA2
Fig. 76 Centre console:
Switch for Audi
magnetic ride
document_0900452a816e6cc9.book Seite 88 Mittwoch, 21. Februar 2007 1:32 13