rear BMW 525i 1997 E39 Workshop Manual
[x] Cancel search | Manufacturer: BMW, Model Year: 1997, Model line: 525i, Model: BMW 525i 1997 E39Pages: 1002
Page 572 of 1002
Downloaded from www.Manualslib.com manuals search engine
Manual Transmission Selector shaft seal, replacing
(transmission installed)
- Put transmission into second gear.
- Raise and safely support vehicle.
WARNING-
Make sure the car is stable and well supported at all times.
Use a professional automotive lift
orjack stands designed for
the purpose.
A floorjack is not adequate support
- 6-speed transmission: Remove rear engine splash shield
- Remove exhaust system and heat shields. See 180 Exhaust
System.
- Support transmission with transmission jack.
- Disconnect driveshaft at transmission and tie to side. See
260 Driveshaft.
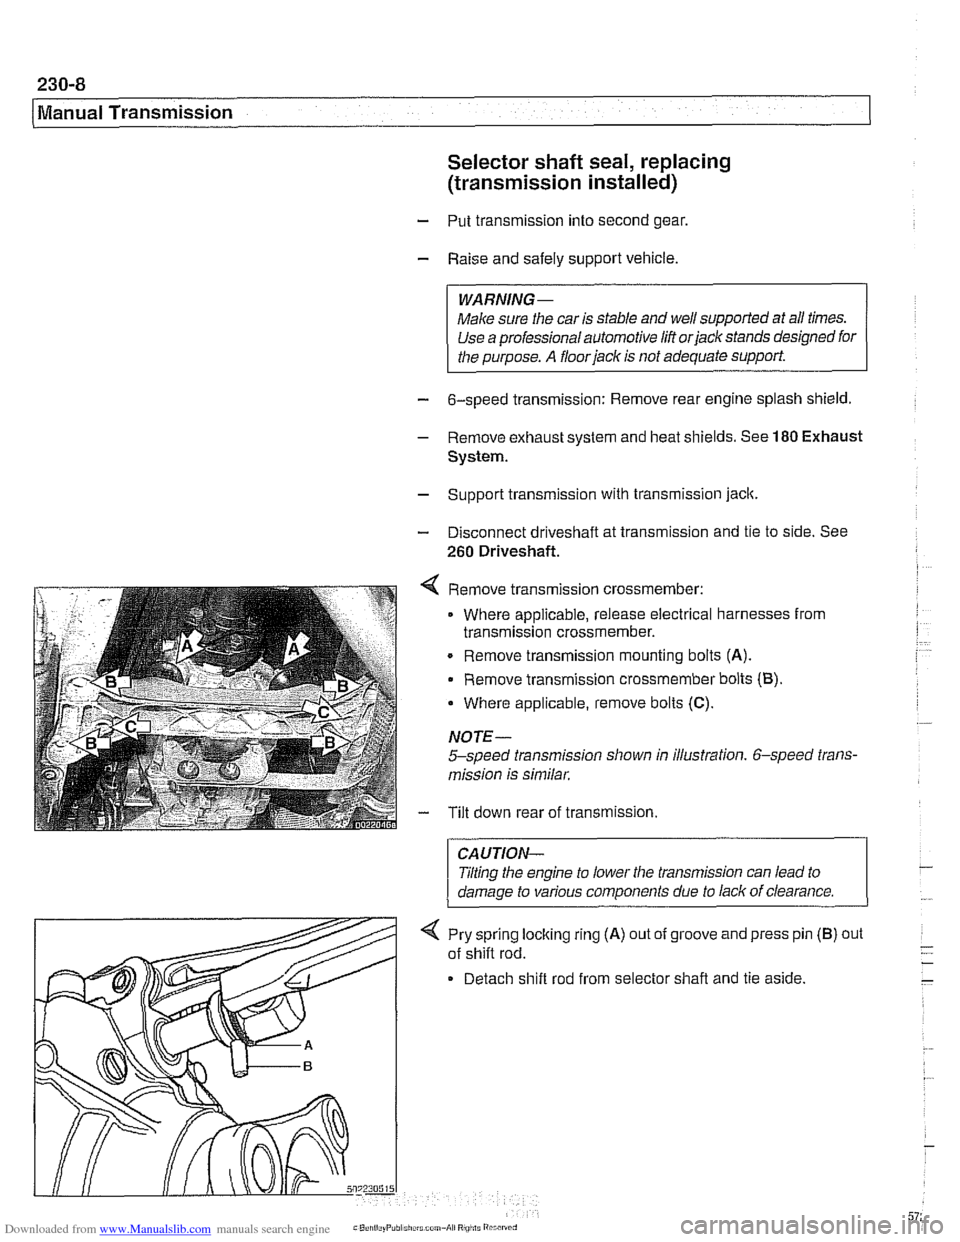
4 Remove transmission crossmember:
Where applicable, release electrical harnesses from
transmission crossmember.
. Remove transmission mounting bolts (A).
Remove transmission crossmember bolts (B).
Where applicable, remove bolts
(C).
NOTE-
5-speed transmission shown in illustration. 6-speed trans-
mission is similar.
- Tilt down rear of transmission.
CAUTION-
Jilting the engine to lower the transmission can lead to
damaae to various components due to lack of clearance.
-
4 Pry sprlng locking rlng (A) out of groove and press pin
of
sh~fl rod.
Detach
sh~ft rod from selector shafl and tie as~de.
(B) out
Page 574 of 1002
Downloaded from www.Manualslib.com manuals search engine
230-1 0
I Manual Transmission
Output shaft seal, replacing (5-speed
transmission) (transmission installed)
- Raise and safely support vehicle.
WARNING -
Make sure the car is stable and well supported at all times.
Use a professional automotive
lilt orjack stands designed
for the purpose.
A floorjack is not adequate support.
- Remove exhaust system and heat shields. See 180 Exhaust
System
Support transmission with transmission jack.
Disconnect driveshafi at transmission output flange, and
hang driveshaft to side. See
260 Driveshaft.
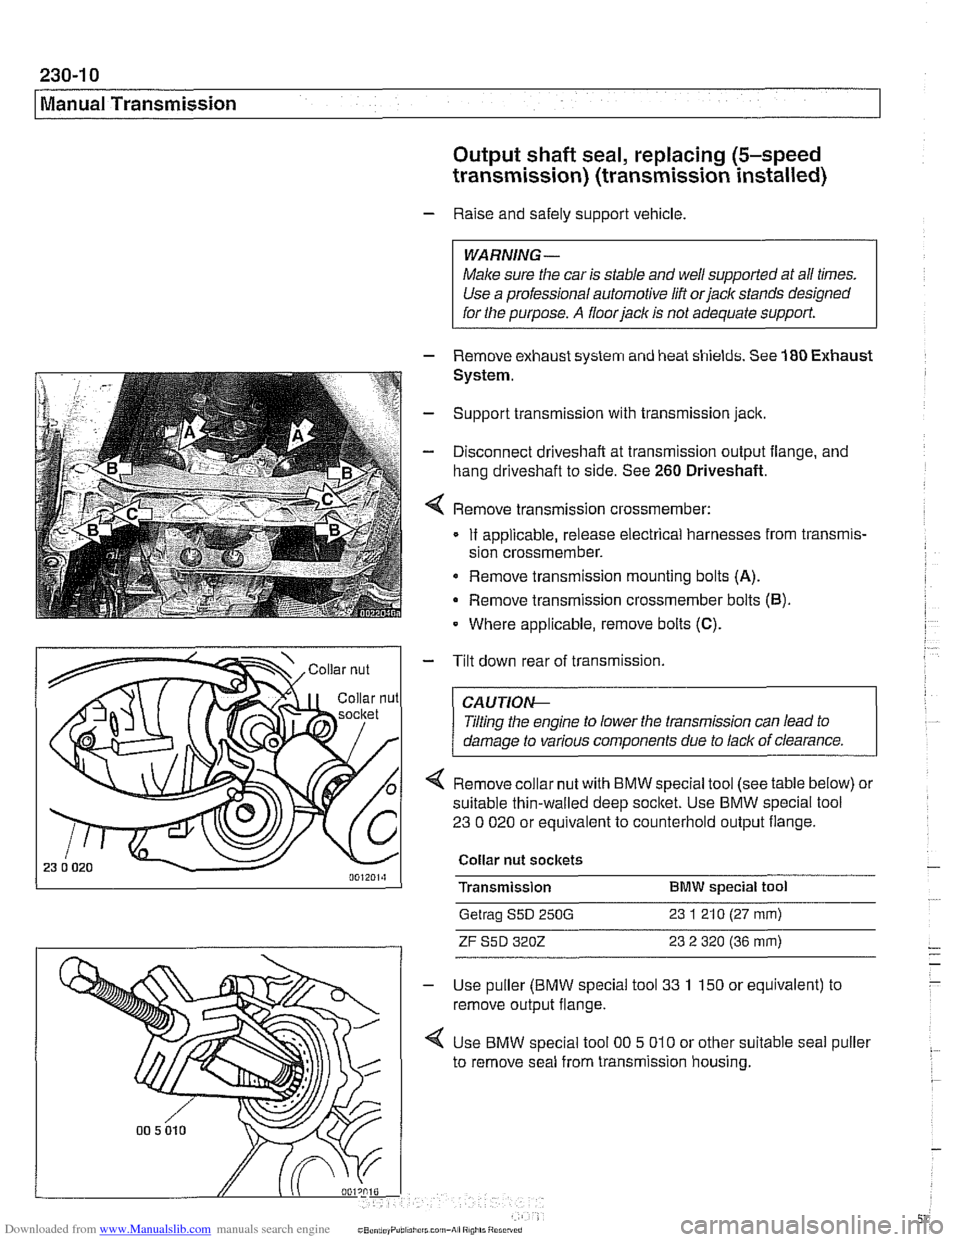
Remove transmission crossmember:
If applicable, release electrical harnesses from transmis-
sion crossmember.
Remove transmission mounting bolts
(A).
Remove transmission crossmember bolts (6).
Where applicable, remove bolts (C).
- Tilt down rear of transmission.
CAUTIOI\C
Tilting the engine to lower the transmission can lead to
damage to various components due to lack of clearance.
4 Remove collar nut with BMW special tool (see table below) or
suitable thin-walled deep
socltet. Use BMW special tool
23 0 020 or equivalent to counterhold output flange.
Collar nut sockets
Transmission
BMW special tool
Getrag S5D 250G 23 1 21 0 (27 mm)
ZF S5D 3202 23 2 320 (36 mm)
Use puller (BMW special tool 33 1 150 or equivalent) to
remove output flange.
Use BMW special tool
00 5 010 or other suitable seal puller
to remove seal from transmission housing.
Page 576 of 1002
Downloaded from www.Manualslib.com manuals search engine
230-12
/ Manual Transmission
Output shaft seal, replacing (6-speed
transmission) (transmission installed)
- Raise and safely support vehicle.
WARNING-
Make sure the car is stable and well supported at all times.
Use a professional automotive lift
orjack stands designed for
the purpose.
A floorjack is not adequate support.
- Remove exhaust system and heat shields. See 180 Exhaust
System.
- Support transmission with transmission jack
- Disconnect driveshaft at transmission output flange, and
hang driveshaft to side. See
260 Driveshaft.
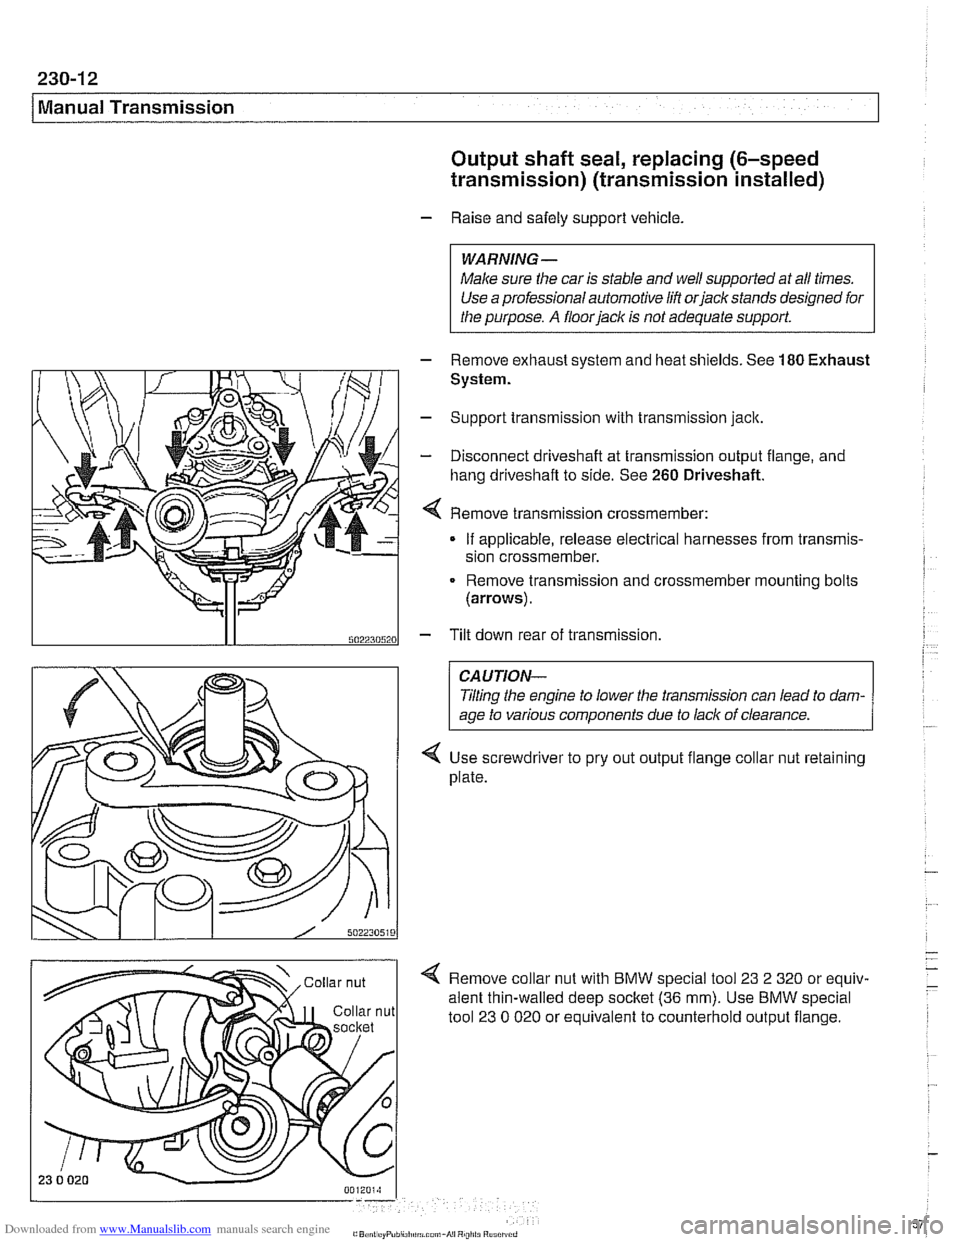
Remove transmission crassmember:
If applicable, release electrical harnesses from transmis-
sion crossmember.
Remove transmission and crossmember mounting bolts
(arrows).
5022305201 - Tilt down rear of transmission
CAUTION-
Tlting the engine to lower the transmission can lead to dam-
age to various components due to lack of clearance.
Use screwdriver to pry out output flange collar nut retaining
plate.
Remove collar nut with BMW special tool
23 2 320 or equiv-
alent thin-walled deep socltet
(36 mm). Use BMW special
tool
23 0 020 or equivalent to counterhold output flange.
Page 581 of 1002
Downloaded from www.Manualslib.com manuals search engine
--.
- - Manual Transmission
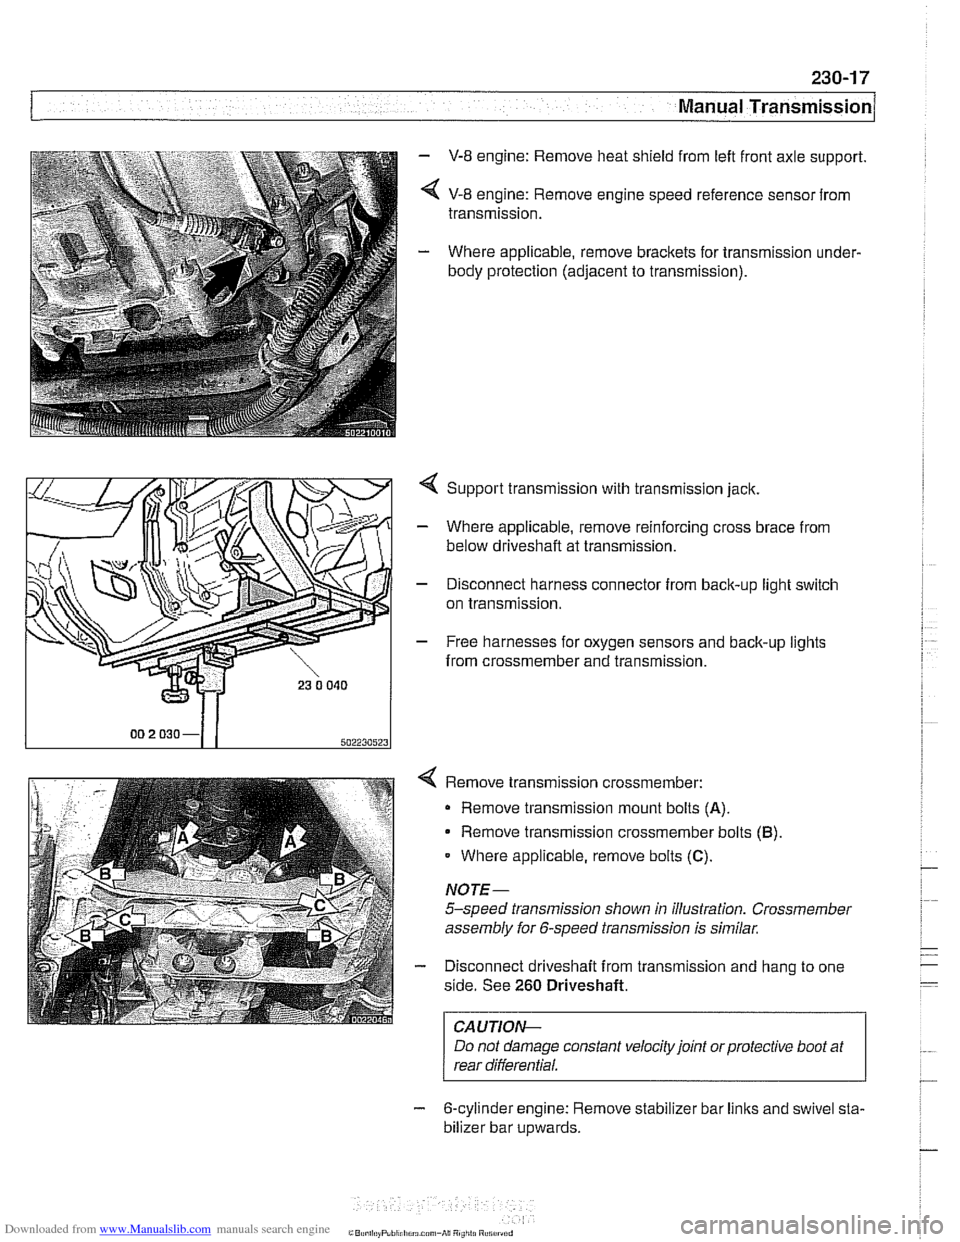
- V-8 engine: Remove heat shield from left front axle support.
< V-8 engine: Remove engine speed reference sensor from
transmission.
- Where applicable, remove brackets for transmission under-
body protection (adjacent to transmission).
4 Support transmission with transmission jack.
- Where applicable, remove reinforcing cross brace from
below driveshaft at transmission.
- Disconnect harness connector from back-up light switch
on transmission.
- Free harnesses for oxygen sensors and back-up lights
from crossmember and transmission.
Remove transmission crossmember: Remove transmission mount bolts
(A).
Remove transmission crossmember bolts (B)
Where applicable, remove bolts (C).
NOTE-
5-speed transmission shown in illustration. Crossmember
assembly for 6-speed transmission is similar.
Disconnect driveshaft from transmission and hang to one
side. See
260 Driveshaft.
I CAUTION- I
Do not damage constant velocity joint orprotective boot at
rear differential.
- 6-cylinder engine: Remove stabilizer bar links and swivel sta-
bilizer bar
u~wards.
Page 582 of 1002
Downloaded from www.Manualslib.com manuals search engine
230-1 8
Manual Transmission
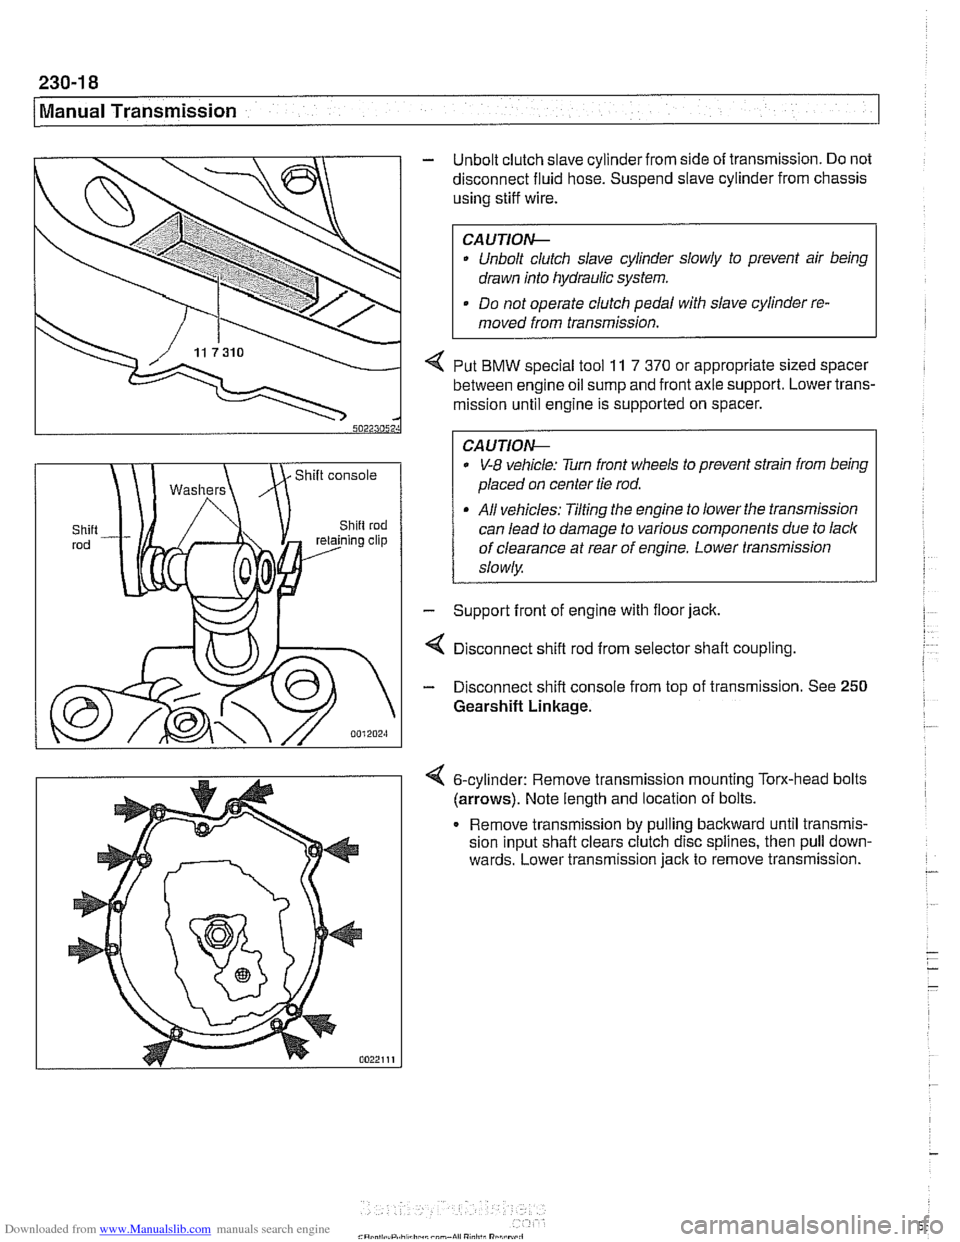
- Unbolt clutch slave cylinder from side of transmission. Do not
disconnect fluid hose. Suspend slave cylinder from chassis
using stiff wire.
CA UTIOG
Unbolt clutch slave cylinder slowly to prevent air being
drawn into hydraulic system.
. Do not operate clutch pedal with slave cylinder re-
moved from transmission.
4 Put BMW special tool 11 7 370 or appropriate sized spacer
between engine oil sump and front axle support. Lower trans-
mission until engine is supported on spacer.
0 V-8 vehicle: Turn front wheels to prevent strain from being
placed on center tie rod.
All vehicles: Tilting the engine to lower the transmission
can lead to damage to various components due to lack
of clearance at rear of engine. Lower transmission
slowly
- Support front of engine with floor jack.
4 Disconnect shift rod from selector shaft coupling
- Disconnect shift console from top of transmission. See 250
Gearshift Linkage.
6-cylinder: Remove transrnisslon mounting Torx-head bolts
(arrows). Note length and locatlon of bolts.
Remove
transrnlssion by pulling backward untll transmls-
sion Input shaft clears clutch d~sc spl~nes, then pull down-
wards. Lower
transmlsslon jack to remove transrnlsslon. -
- - -
-
Page 583 of 1002
Downloaded from www.Manualslib.com manuals search engine
Manual Transmission
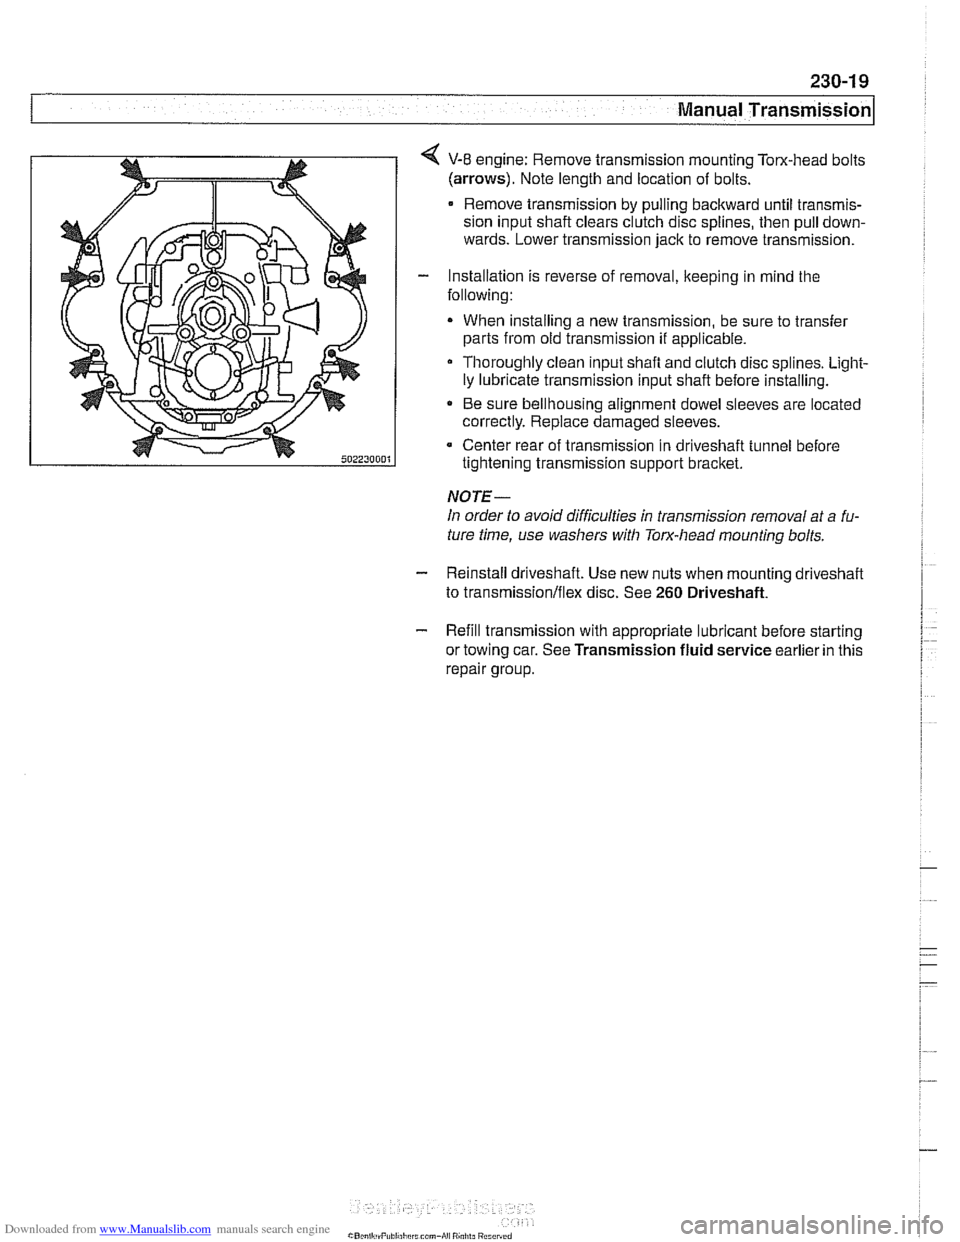
4 V-8 engine: Remove transmission mounting Tom-head bolts
(arrows). Note length and location of bolts.
Remove transmission by pulling backward until transmis-
sion input shaft clears clutch disc splines, then pull down-
wards. Lower transmission jack to remove transmission.
- Installation is reverse of removal, keeping in mind the
following:
When installing a new transmission, be sure to transfer
parts from old transmission
if applicable.
Thoroughly clean input shafl and clutch disc splines. Light-
ly lubricate transmission input shaft before installing.
* Be sure bellhousing alignment dowel sleeves are located
correctly. Replace damaged sleeves.
Center rear of transmission in driveshaft tunnel before
tightening transmission support bracket.
NOTE-
In order to avoid difficulties in transmission removal at a fu-
ture time, use washers with Torx-head mounting bolts.
- Reinstall driveshaft. Use new nuts when mounting driveshaff
to transmission/flex disc. See 260 Driveshaft.
- Refill transmission with appropriate lubricant before starting
or towing car. See Transmission fluid service earlier in this
repair group.
Page 586 of 1002
Downloaded from www.Manualslib.com manuals search engine
240-2
/ ~utomatic Transmission
This section covers maintenance and replacement of the
automatic transmission for
E39 models.
Automatic transmission internal repairs are not covered.
Such repairs require special service equipment and knowl-
edge. If it is determined that transmission internal
sewice is
required, consult an authorized BMW dealer about a factory
reconditioned unit or a transmission rebuild.
CAUTION-
ATF does not circulate unless the engine is running. When
towing an automatic transmission vehicle, use a flat bed truck
or raise the rear wheels off the ground.
Special tools
Some special tools are required for the removal and installa-
tion of an automatic transmission on the
E39 BMW models.
While these tools are not absolutely necessary, they are es-
pecially helpful when dealing with the removal and replace-
ment of the torque converter.
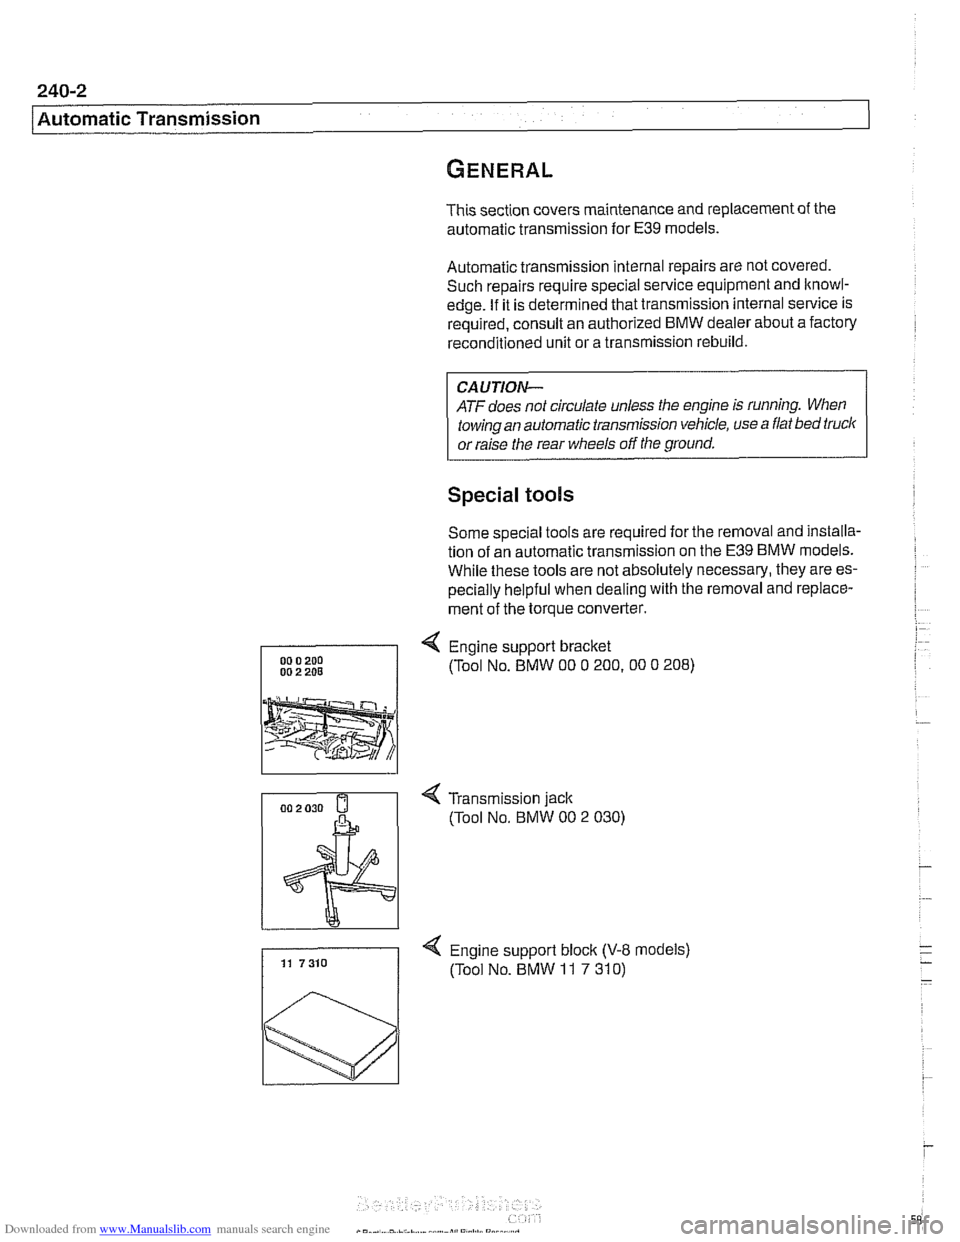
4 Engine support bracket
(Tool No. BMW
00 0 200.00 0 208)
4 Transmission jack
(Tool No.
BMW 00 2 030)
4 Engine support block (V-8 models) 11 7310 (Tool No. BMW 11 7 310)
Page 588 of 1002
Downloaded from www.Manualslib.com manuals search engine
Automatic Transmission
Automatic transmission applications
Automatic transmissions are identified by code letters found
on a data plate located on the side or rear of the transmission
case. See table below for application information.
Automatic transmission applications
Model Year Engine Transmission
5281 to 911999 M52 A4S 310R
5281 from 911999
M52 TU A5S 360R
5251 to 312001 M54 A5S 390R
5251 from 312001 M54 ASS 3252
530i to 312001 M54
ASS 390R
530i from 312001 M54
A5S 3252
540i from 111997 M62
TU A5S 4402
Automatic transmission basic components
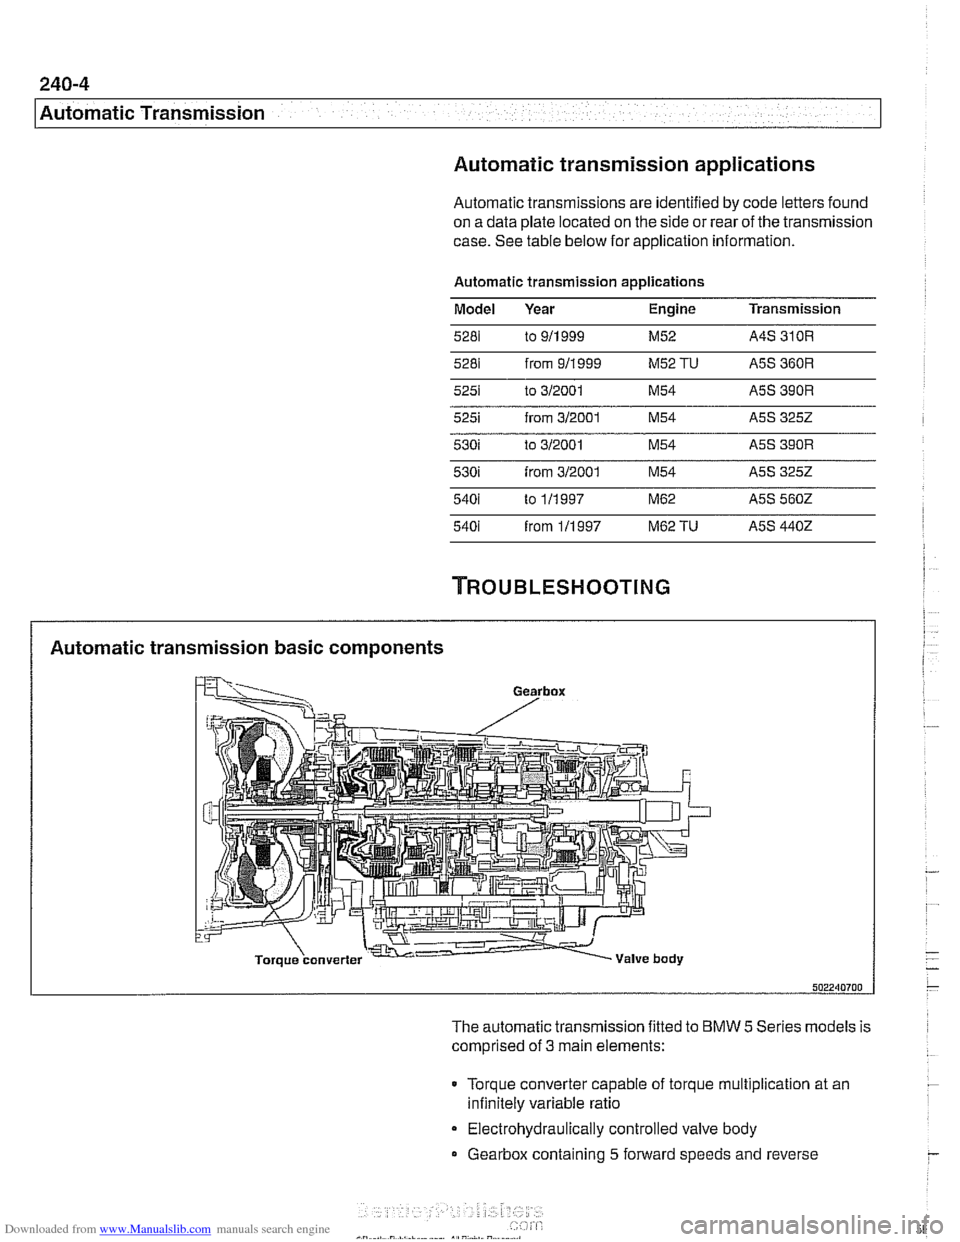
The automatic transmission fitted to BMW 5 Series models is
comprised of
3 main elements:
0 Torque converter capable of torque multiplication at an
infinitely variable ratio
Electrohydraulically controlled valve body
0 Gearbox containing 5 forward speeds and reverse
Page 595 of 1002
Downloaded from www.Manualslib.com manuals search engine
Automatic ~ransmissionl
II I
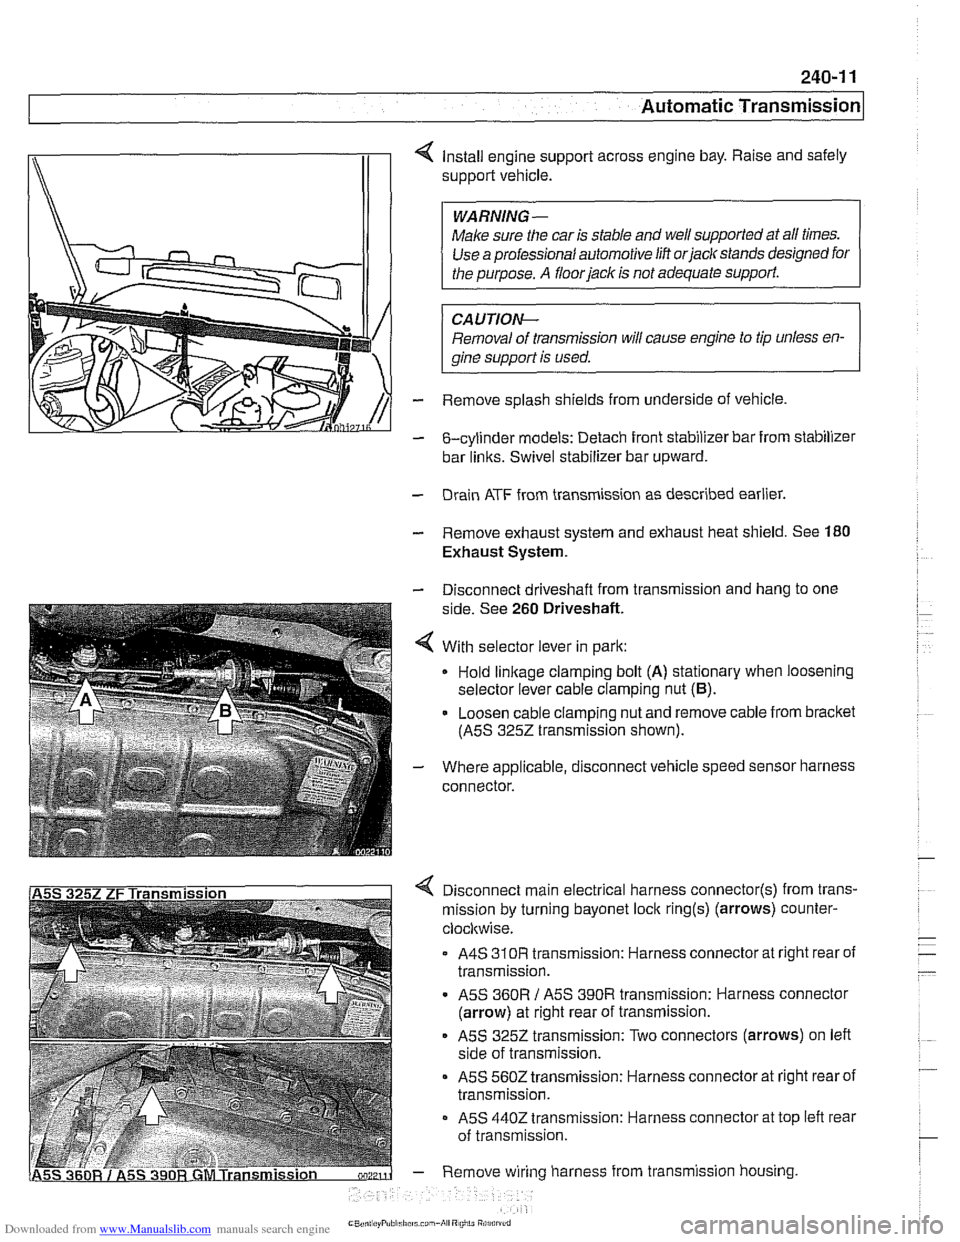
4 Install engine support across engine bay. Raise and safely
support vehicle.
Make sure the car is stable and
we1 supported at all times.
Use a professional automotive lift
orjaclc stands designed for
CAUTIOI\C
Removal of transmission will cause engine to tip unless en-
gine support is used.
- Remove splash shields from underside of vehicle.
- &cylinder models: Detach front stabilizer bar from stabilizer
bar
links. Swivel stabilizer bar upward.
- Drain ATF from transmission as described earlier.
- Remove exhaust system and exhaust heat shield. See 180
Exhaust System.
- Disconnect driveshaft from transmission and hang to one
side. See
260 Driveshaft.
4 With selector lever in park:
Hold
linkage clamping bolt (A) stationary when loosening
selector lever cable clamping nut
(6).
- Loosen cable clamping nut and remove cable from bracket
(ASS
3252 transmission shown).
- Where applicable, disconnect vehicle speed sensor harness
connector.
4 Disconnect main electrical harness connector(s) from trans-
mission by turning bayonet lock
ring(s) (arrows) counter-
clocltwise.
A4S
310R transmission: Harness connector at right rear of
transmission.
ASS
360R / ASS 390R transmission: Harness connector
(arrow) at right rear of transmission.
ASS 3252 transmission: Two connectors (arrows) on left
side of transmission.
ASS 5602 transmission: Harness connector at right rear of
transmission.
- ASS 4402 transmission: Harness connector at top left rear
of transmission.
- Remove wiring harness from transmission housing
Page 601 of 1002
Downloaded from www.Manualslib.com manuals search engine
Gearshift ~inkaael
Gearshift lever, removing
(manual transmission)
Use the accompanying illustration as a guide when removing
and installing the gearshift linkage.
- Remove shift knob by pulling knob straight off shift lever.
NOTE-
Pull up on the shift knob with about 90 lbs. of force. Do not
twist
knob or locating key can be damaged.
- Squeeze sides of shift boot to unclip from center console.
Pull boot up and off shift lever.
- Remove sound insulation at base of shift lever.
- Raise vehicle to gain access to underside of vehicle.
- --
WARNING-
Male sure the car is stable and well supported at all tfmes.
Use a professional automotwe hft orjaclc stands designed for
the purpose.
A floorjaclc 1s not adequate support.
- Remove complete exhaust system. See 180 Exhaust
System.
- Remove driveshaft. See 260 Driveshaft.
- Support transmission with transmission jack. Remove
crossmember from rear of transmission.
- Lower rear of transmission to access gearshift linkage.
CA UTIOI\C
Tilting the engine to lower the transmission can lead to
damage to various components due to lack of clearance.
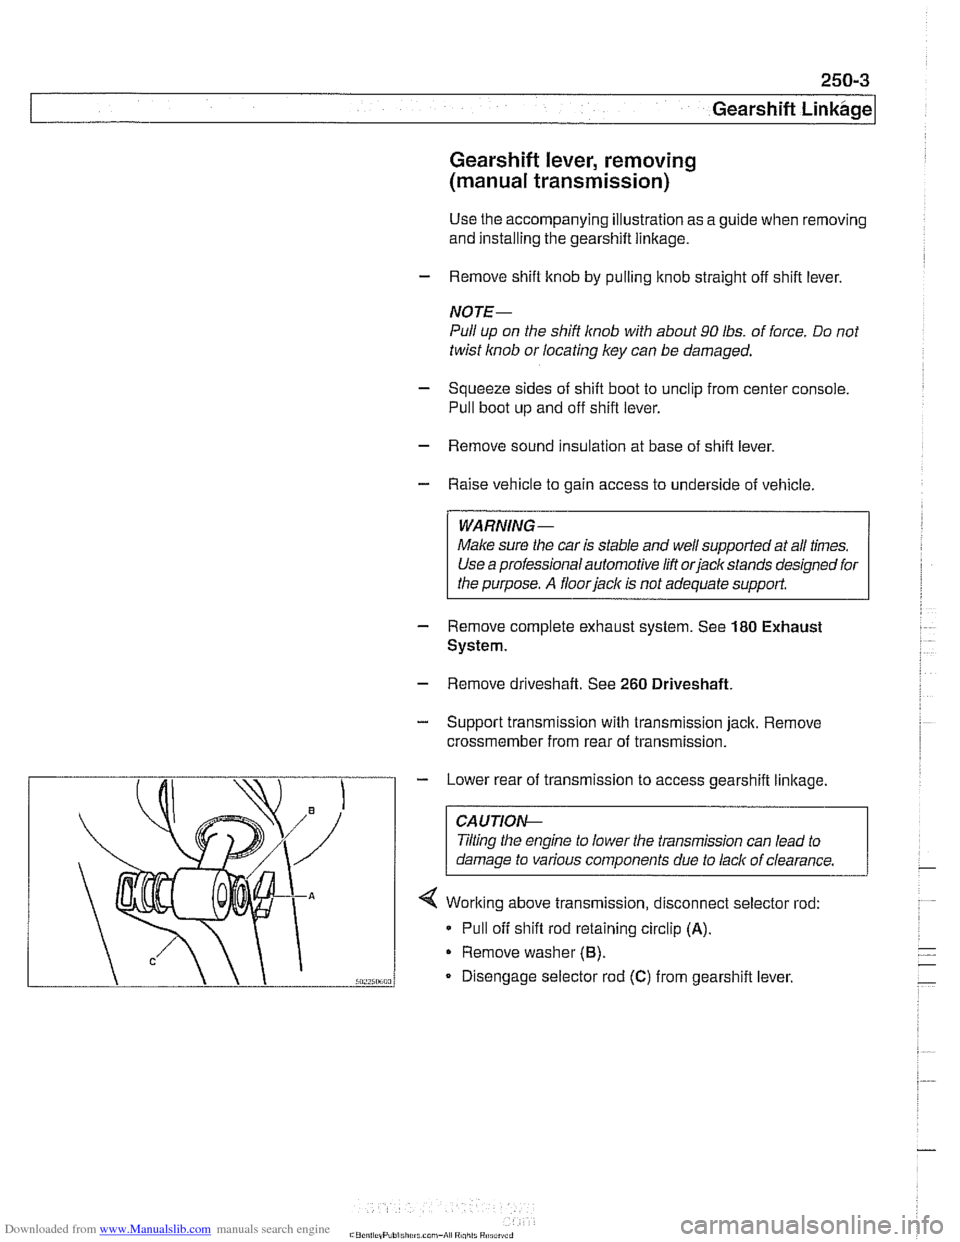
4 Working above transmission, disconnect selector rod:
* Pull off shift rod retaining circlip (A).
Remove washer (6).
Disengage selector rod (C) from gearshift lever.