engine BMW MOTORRAD G 650 XCHALLENGE 2007 Rider's Manual (in English)
[x] Cancel search | Manufacturer: BMW MOTORRAD, Model Year: 2007, Model line: G 650 XCHALLENGE, Model: BMW MOTORRAD G 650 XCHALLENGE 2007Pages: 138, PDF Size: 2.23 MB
Page 62 of 138
General instructionsBMW Motorrad recommends
the use of parts and accessories
for your motorcycle that are ap-
proved by BMW for this purpose.
Genuine BMW parts and ac-
cessories and other products
which BMW has approved can
be obtained from your authorised
BMW Motorrad dealer, together
with expert advice on their install-
ation and use.
These parts and products have
been tested by BMW for safety,
function and suitability. BMW
accepts product liability for them.
Conversely, BMW is unable to
accept any liability whatsoever
for parts and accessories which it
has not approved.
BMW Motorrad cannot
assess each non-BMW
product to determine wheth-
er it can be used on or in con-
nection with BMW motorcycleswithout constituting a safety haz-
ard. Country-specific official au-
thorisation does not suffice as
assurance. Tests conducted by
these instances cannot make
provision for all operating con-
ditions experienced by BMW mo-
torcycles and, consequently, they
are not sufficient in some circum-
stances.
Use only parts and accessor-
ies approved by BMW for your
motorcycle.
Whenever you are planning
modifications, comply with all
the legal requirements. Make
sure that the motorcycle does
not infringe national road-vehicle
construction and use regulations.
Power socket
OE
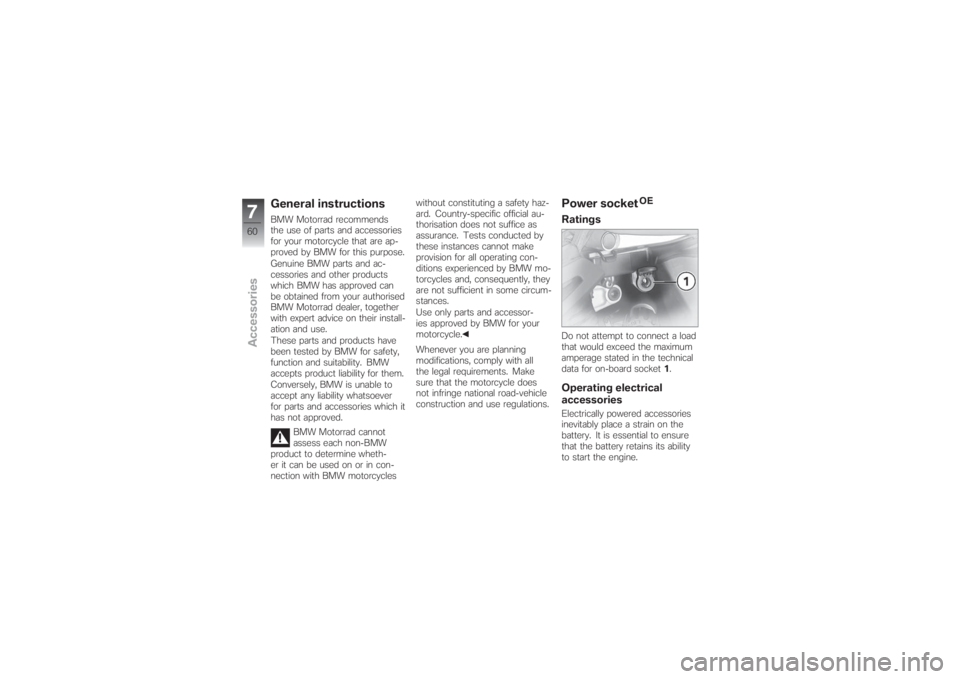
RatingsDo not attempt to connect a load
that would exceed the maximum
amperage stated in the technical
data for on-board socket1.Operating electrical
accessoriesElectrically powered accessories
inevitably place a strain on the
battery. It is essential to ensure
that the battery retains its ability
to start the engine.
760zAccessories
Page 65 of 138
Maintenance
Maintenance
Notes................................ 64
Toolkit . . ............................. 64
Engine oil............................ 65
Brake system ........................ 67
Brake pads . . ........................ 68
Brake fluid........................... 69
Coolant . ............................. 71
Clutch . . ............................. 72
Tyres................................ 73
Rims................................. 73
Chain................................ 73
Wheels . ............................. 75
BMW Motorrad auxiliary stand....... 81
BMW Motorrad front-wheel
stand................................ 82Fuses . . .............................. 84
Bulbs . . .............................. 86
Air filter .............................. 92
Jump starting ........................ 95
Battery . .............................. 96
Number-plate carrier............... 100
863zMaintenance
Page 67 of 138
10 Screwdriver, small
Replacing turn indicator bulbsOn-board toolkit service
kitYour authorised BMW Motor-
rad dealer can provide the on-
board toolkit service kit that you
will need if you are considering
undertaking more extensive work.
You will find information on un-
dertaking work of this nature in
the Repair Manual on the CD or
DVD also obtainable from your
authorised BMW Motorrad deal-
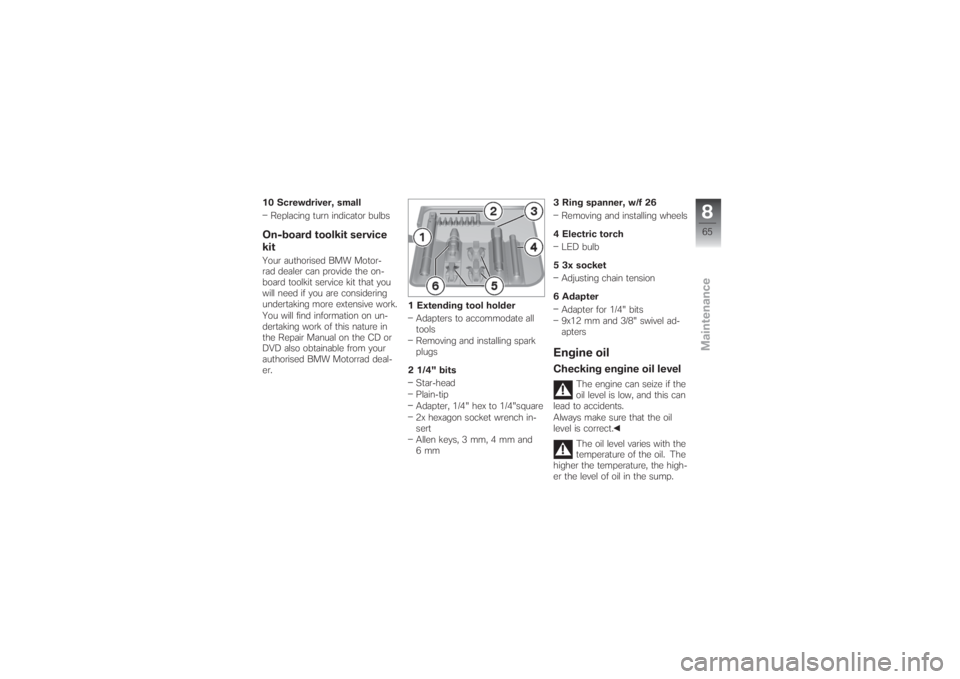
er.1 Extending tool holder
Adapters to accommodate all
tools
Removing and installing spark
plugs
2 1/4" bits
Star-head
Plain-tip
Adapter, 1/4" hex to 1/4"square
2x hexagon socket wrench in-
sert
Allen keys, 3 mm, 4 mm and
6mm3 Ring spanner, w/f 26
Removing and installing wheels
4 Electric torch
LED bulb
5 3x socket
Adjusting chain tension
6 Adapter
Adapter for 1/4" bits
9x12 mm and 3/8" swivel ad-
apters
Engine oilChecking engine oil level
The engine can seize if the
oil level is low, and this can
lead to accidents.
Always make sure that the oil
level is correct.
The oil level varies with the
temperature of the oil. The
higher the temperature, the high-
er the level of oil in the sump.
865zMaintenance
Page 68 of 138
Checking the oil level with the
engine cold or after no more than
a short ride will lead to misinter-
pretation; this in turn, means that
the engine will be operated with
the incorrect quantity of oil.
In order to ensure that the en-
gine oil level is read correctly,
check the oil level only after a
lengthy trip.
Allow the engine to idle until
the fan starts up, then allow it
to idle one minute longer.
Make sure the ground is level
and firm and hold the motor-
cycle upright.
Switch off the engine.
Wipe the area around the oil
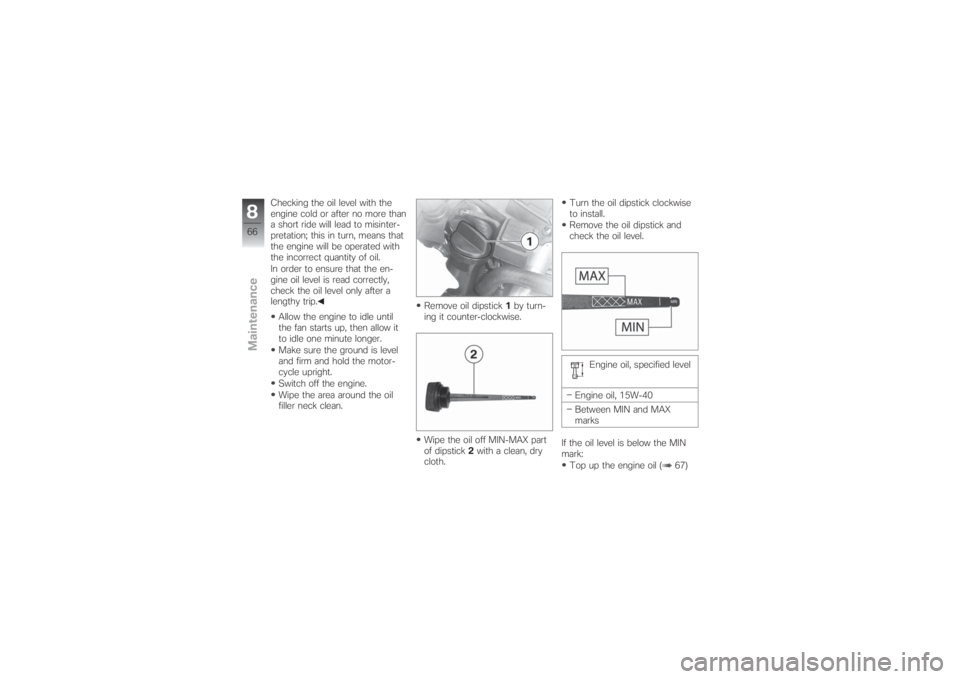
filler neck clean.Remove oil dipstick1by turn-
ing it counter-clockwise.
Wipe the oil off MIN-MAX part
of dipstick2with a clean, dry
cloth.Turn the oil dipstick clockwise
to install.
Remove the oil dipstick and
check the oil level.
Engine oil, specified level
Engine oil, 15W-40
Between MIN and MAX
marks
If the oil level is below the MIN
mark:
Top up the engine oil ( 67)
866zMaintenance
Page 69 of 138
If the oil level is above the MAX
mark:
Have the oil level corrected by
a specialist workshop, prefer-
ably an authorised BMW Mo-
torrad dealer.Topping up engine oil
Damage to the engine
can result if it is operated
without enough oil, but the same
also applies if the oil level is too
high.
Always make sure that the oil
level is correct.
Wipe the area around the filler
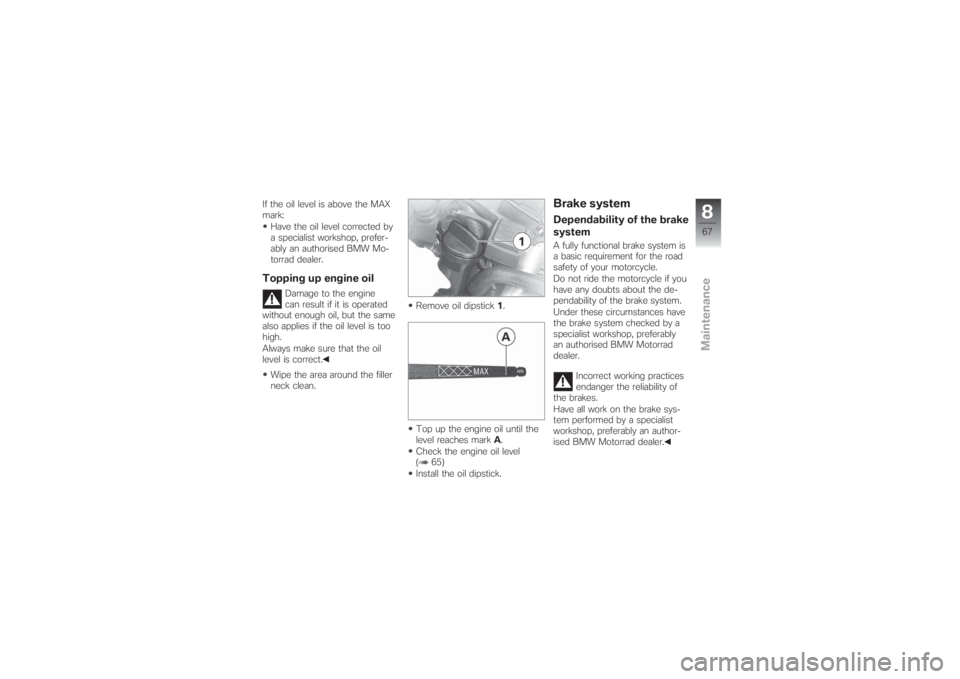
neck clean.Remove oil dipstick1.
Top up the engine oil until the
level reaches markA.
Check the engine oil level
( 65)
Install the oil dipstick.
Brake systemDependability of the brake
systemA fully functional brake system is
a basic requirement for the road
safety of your motorcycle.
Do not ride the motorcycle if you
have any doubts about the de-
pendability of the brake system.
Under these circumstances have
the brake system checked by a
specialist workshop, preferably
an authorised BMW Motorrad
dealer.
Incorrect working practices
endanger the reliability of
the brakes.
Have all work on the brake sys-
tem performed by a specialist
workshop, preferably an author-
ised BMW Motorrad dealer.
867zMaintenance
Page 74 of 138
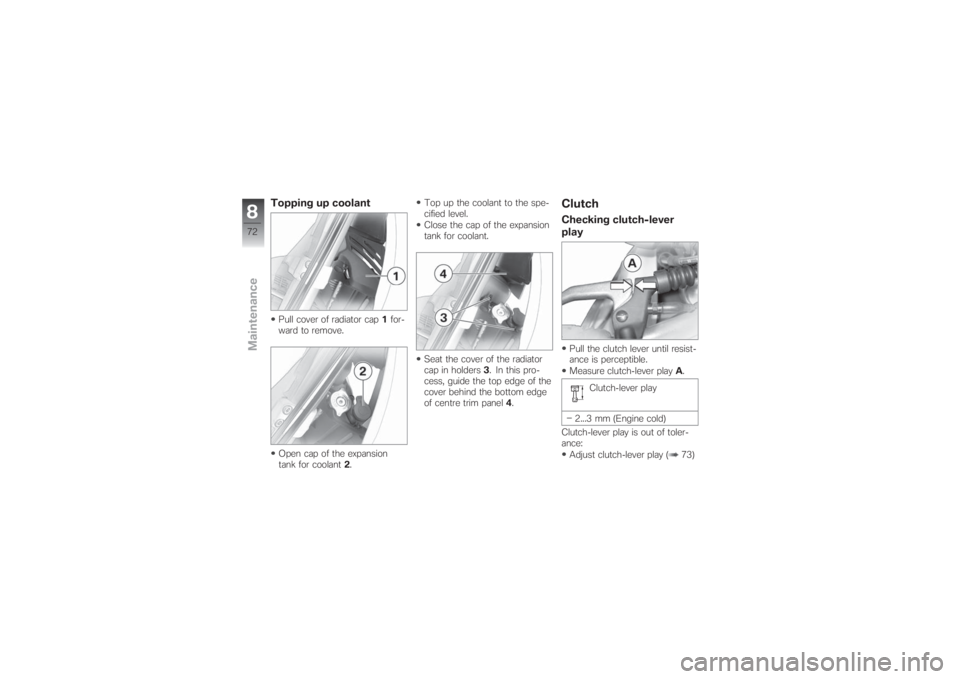
Topping up coolantPull cover of radiator cap1for-
ward to remove.
Open cap of the expansion
tank for coolant2.Top up the coolant to the spe-
cified level.
Close the cap of the expansion
tank for coolant.
Seat the cover of the radiator
cap in holders3. In this pro-
cess, guide the top edge of the
cover behind the bottom edge
of centre trim panel4.
ClutchChecking clutch-lever
playPull the clutch lever until resist-
ance is perceptible.
Measure clutch-lever playA.
Clutch-lever play
2...3 mm (Engine cold)
Clutch-lever play is out of toler-
ance:
Adjust clutch-lever play ( 73)
872zMaintenance
Page 86 of 138
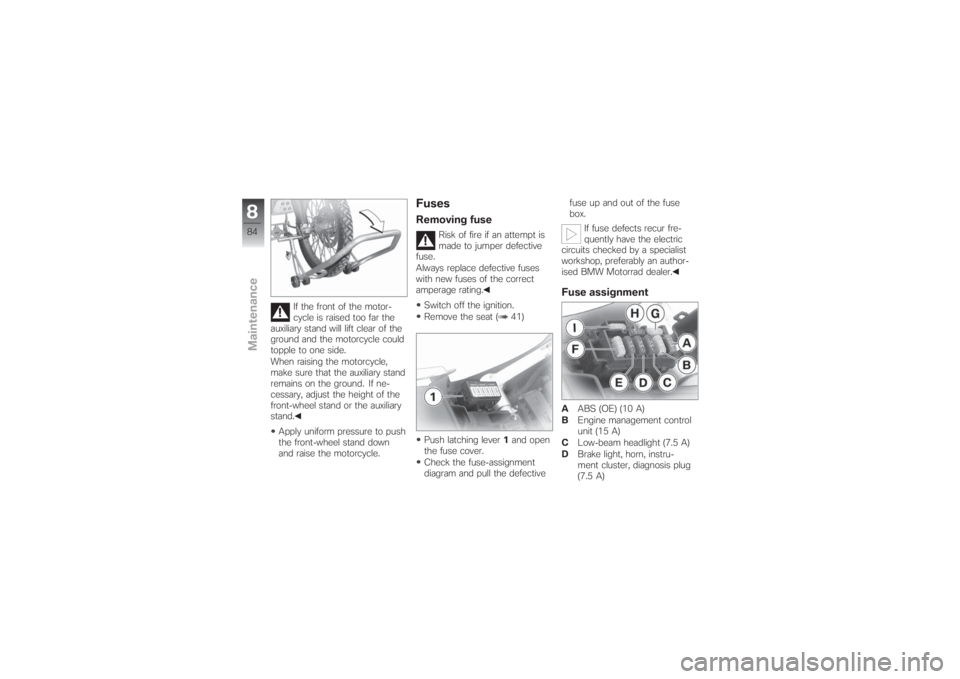
If the front of the motor-
cycle is raised too far the
auxiliary stand will lift clear of the
ground and the motorcycle could
topple to one side.
When raising the motorcycle,
make sure that the auxiliary stand
remains on the ground. If ne-
cessary, adjust the height of the
front-wheel stand or the auxiliary
stand.
Apply uniform pressure to push
the front-wheel stand down
and raise the motorcycle.
FusesRemoving fuse
Risk of fire if an attempt is
made to jumper defective
fuse.
Always replace defective fuses
with new fuses of the correct
amperage rating.
Switch off the ignition.
Remove the seat ( 41)
Push latching lever1and open
the fuse cover.
Check the fuse-assignment
diagram and pull the defectivefuse up and out of the fuse
box.
If fuse defects recur fre-
quently have the electric
circuits checked by a specialist
workshop, preferably an author-
ised BMW Motorrad dealer.
Fuse assignmentAABS (OE) (10 A)
BEngine management control
unit (15 A)
CLow-beam headlight (7.5 A)
DBrake light, horn, instru-
ment cluster, diagnosis plug
(7.5 A)
884zMaintenance
Page 97 of 138
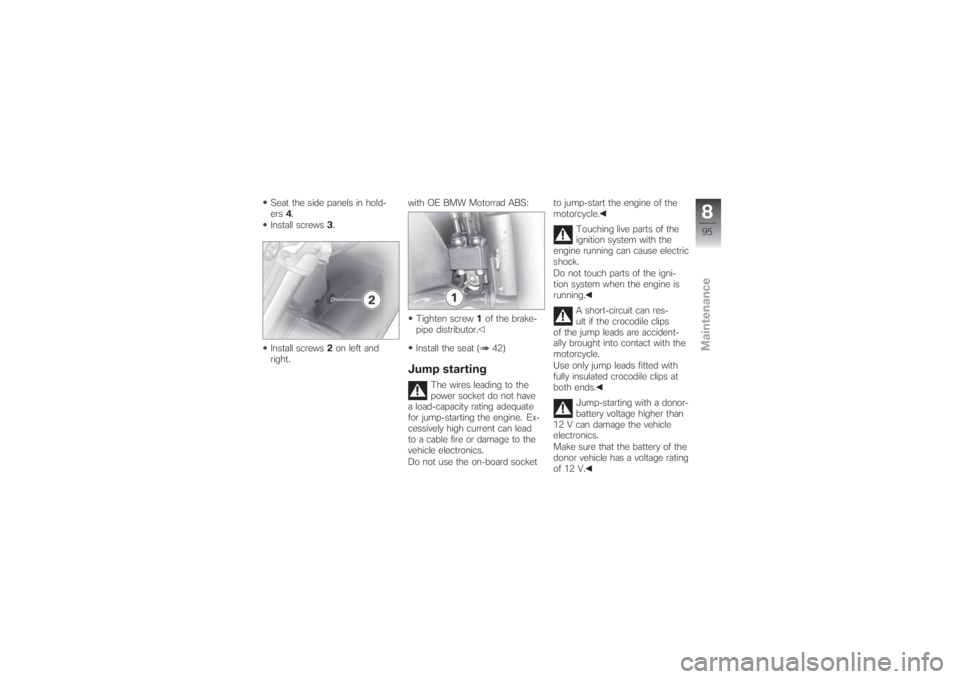
Seat the side panels in hold-
ers4.
Install screws3.
Install screws2on left and
right.with OE BMW Motorrad ABS:
Tighten screw1of the brake-
pipe distributor.
Install the seat ( 42)
Jump starting
The wires leading to the
power socket do not have
a load-capacity rating adequate
for jump-starting the engine. Ex-
cessively high current can lead
to a cable fire or damage to the
vehicle electronics.
Do not use the on-board socketto jump-start the engine of the
motorcycle.
Touching live parts of the
ignition system with the
engine running can cause electric
shock.
Do not touch parts of the igni-
tion system when the engine is
running.
A short-circuit can res-
ult if the crocodile clips
of the jump leads are accident-
ally brought into contact with the
motorcycle.
Use only jump leads fitted with
fully insulated crocodile clips at
both ends.
Jump-starting with a donor-
battery voltage higher than
12 V can damage the vehicle
electronics.
Make sure that the battery of the
donor vehicle has a voltage rating
of 12 V.
895zMaintenance
Page 98 of 138
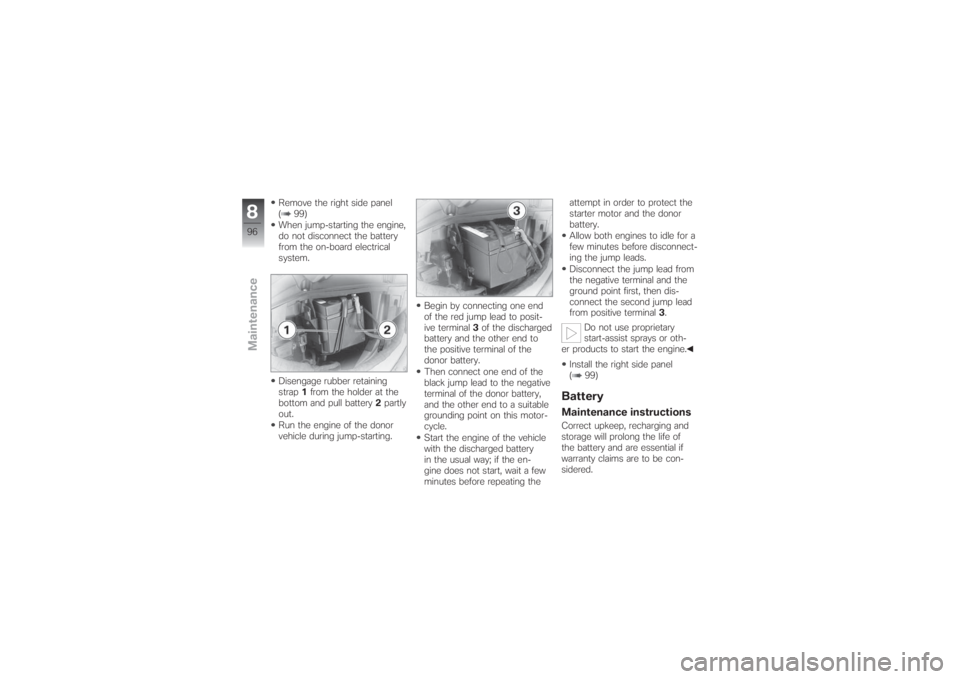
Remove the right side panel
( 99)
When jump-starting the engine,
do not disconnect the battery
from the on-board electrical
system.
Disengage rubber retaining
strap1from the holder at the
bottom and pull battery2partly
out.
Run the engine of the donor
vehicle during jump-starting.Begin by connecting one end
of the red jump lead to posit-
ive terminal3of the discharged
battery and the other end to
the positive terminal of the
donor battery.
Then connect one end of the
black jump lead to the negative
terminal of the donor battery,
and the other end to a suitable
grounding point on this motor-
cycle.
Start the engine of the vehicle
with the discharged battery
in the usual way; if the en-
gine does not start, wait a few
minutes before repeating theattempt in order to protect the
starter motor and the donor
battery.
Allow both engines to idle for a
few minutes before disconnect-
ing the jump leads.
Disconnect the jump lead from
the negative terminal and the
ground point first, then dis-
connect the second jump lead
from positive terminal3.
Do not use proprietary
start-assist sprays or oth-
er products to start the engine.
Install the right side panel
( 99)
BatteryMaintenance instructionsCorrect upkeep, recharging and
storage will prolong the life of
the battery and are essential if
warranty claims are to be con-
sidered.
896zMaintenance
Page 109 of 138
Technical data
Technical data
Troubleshooting chart . . ........... 108
Threaded fasteners ................ 109
Engine . . ........................... 110
Fuel ................................ 111
Engine oil.......................... 111
Clutch . . ........................... 112
Transmission ...................... 112
Rear-wheel drive................... 113
Running gear ...................... 113
Brakes . . ........................... 114
Wheels and tyres . . ................ 115
Electrics ........................... 117
Frame . . ........................... 118
Dimensions . . ...................... 119
Weights . ........................... 119Riding specifications............... 120
10107zTechnical data