CHERY TIGGO 2009 Service Repair Manual
Manufacturer: CHERY, Model Year: 2009,
Model line: TIGGO,
Model: CHERY TIGGO 2009
Pages: 1903, PDF Size: 33.38 MB
CHERY TIGGO 2009 Service Repair Manual
TIGGO 2009
CHERY
CHERY
https://www.carmanualsonline.info/img/53/56852/w960_56852-0.png
CHERY TIGGO 2009 Service Repair Manual
Trending: turn signal bulb, check engine, hood open, diagram, battery, traction control, check oil
Page 1791 of 1903
Downloaded from www.Manualslib.com manuals search engine Electrical Schematics
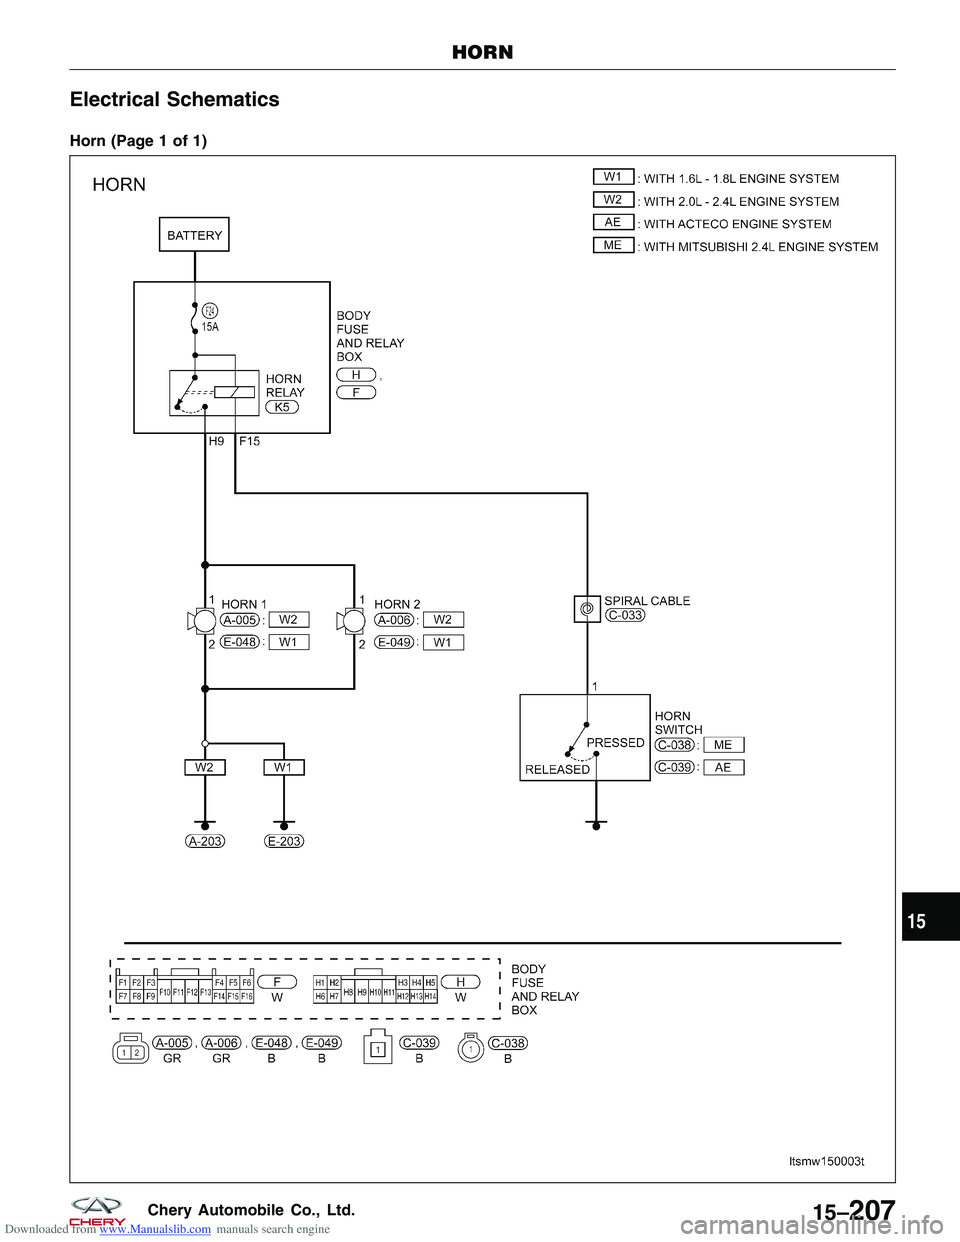
Horn (Page 1 of 1)
HORN
LTSMW150003T
15
15–207Chery Automobile Co., Ltd.
Page 1792 of 1903
Downloaded from www.Manualslib.com manuals search engine Horn
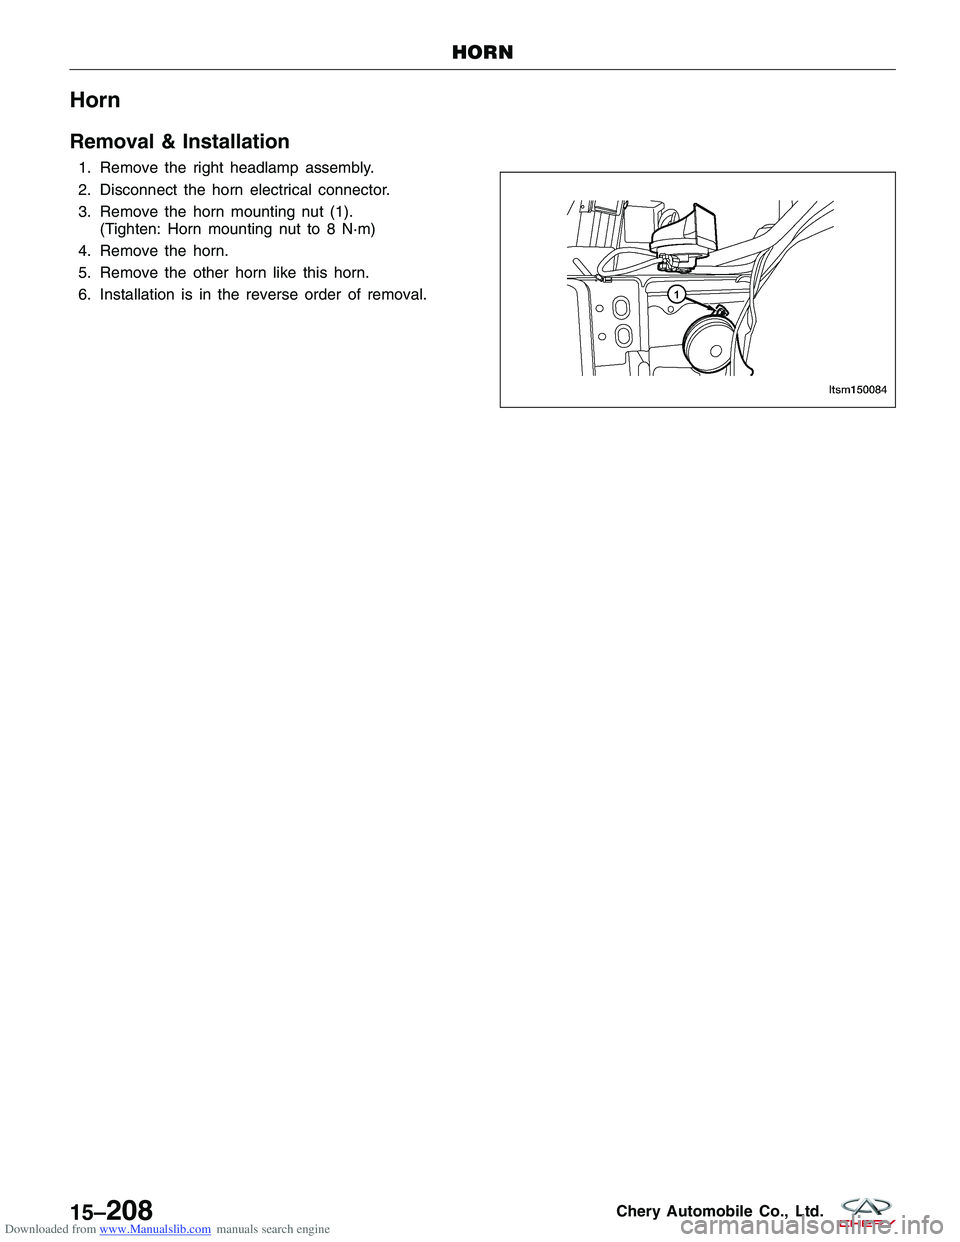
Removal & Installation
1. Remove the right headlamp assembly.
2. Disconnect the horn electrical connector.
3. Remove the horn mounting nut (1).(Tighten: Horn mounting nut to 8 N·m)
4. Remove the horn.
5. Remove the other horn like this horn.
6. Installation is in the reverse order of removal.
HORN
LTSM150084
15–208Chery Automobile Co., Ltd.
Page 1793 of 1903
Downloaded from www.Manualslib.com manuals search engine MIRRORS
Description
The mirrors are controlled by a single switch assembly located on the driver’s door trim panel. A three-position switch
selects the right or left power mirror for adjustment. A momentary joystick directional switch allows the driver to adjust
the selected power mirror in the Up & Down or Right & Left directions. The heated mirror system is controlled by the
Body Control Module (BCM). When there is water vapor on the mirrors, the heated mirrors will eliminate the water
vapor.
Operation
Use the mirror select switch, located on the driver’s door trim panel to adjust the view obtained in the outside mirrors.
Rotate the joystick for Left or Right mirror selection. Select a mirror and press the joystick that correspond with the
direction that you want the mirror to move.
15
15–209Chery Automobile Co., Ltd.
Page 1794 of 1903
Downloaded from www.Manualslib.com manuals search engine Electrical Schematics
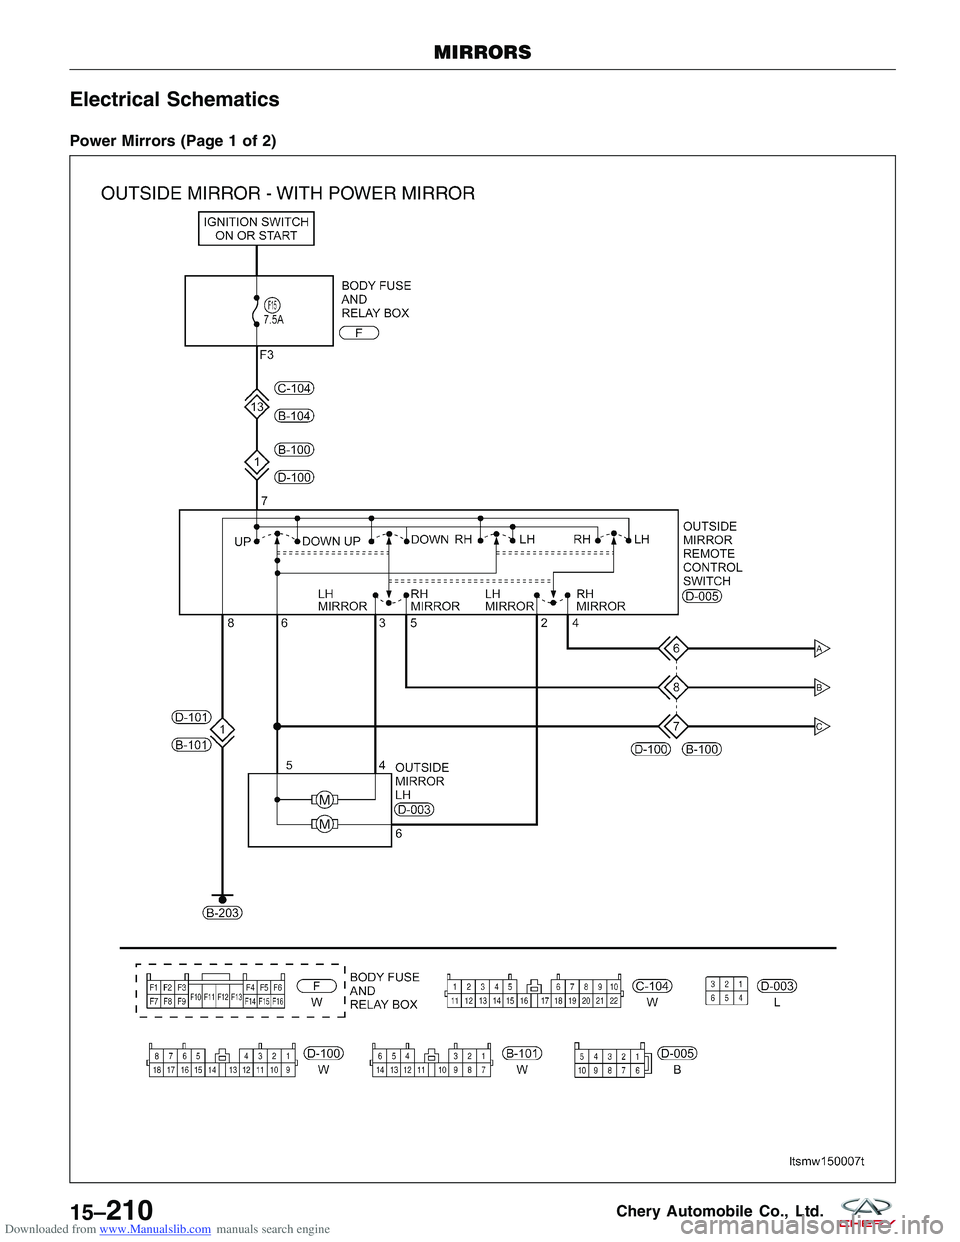
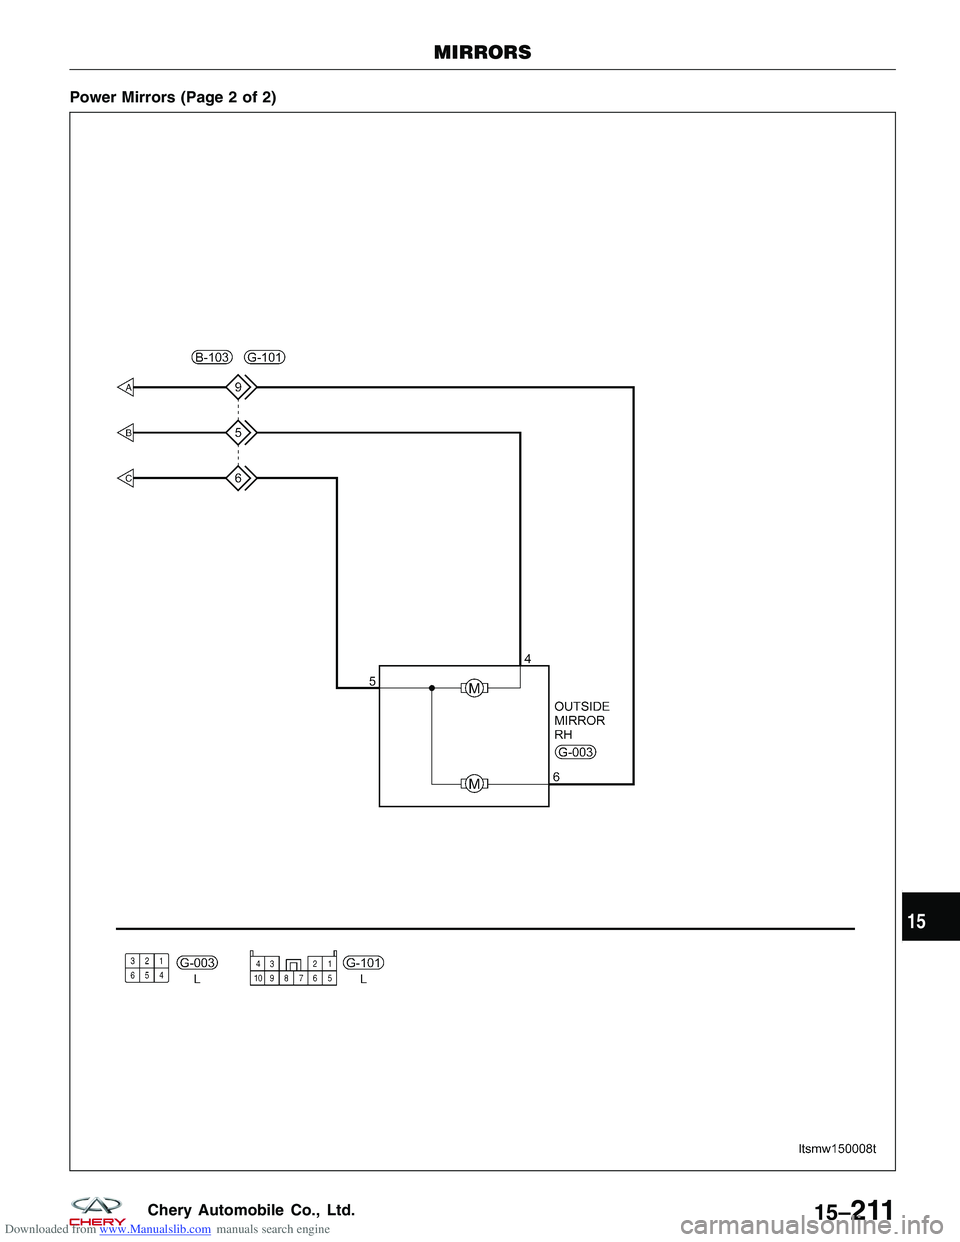
Power Mirrors (Page 1 of 2)
MIRRORS
LTSMW150007T
15–210Chery Automobile Co., Ltd.
Page 1795 of 1903
Downloaded from www.Manualslib.com manuals search engine Power Mirrors (Page 2 of 2)
MIRRORS
LTSMW150008T
15
15–211Chery Automobile Co., Ltd.
Page 1796 of 1903
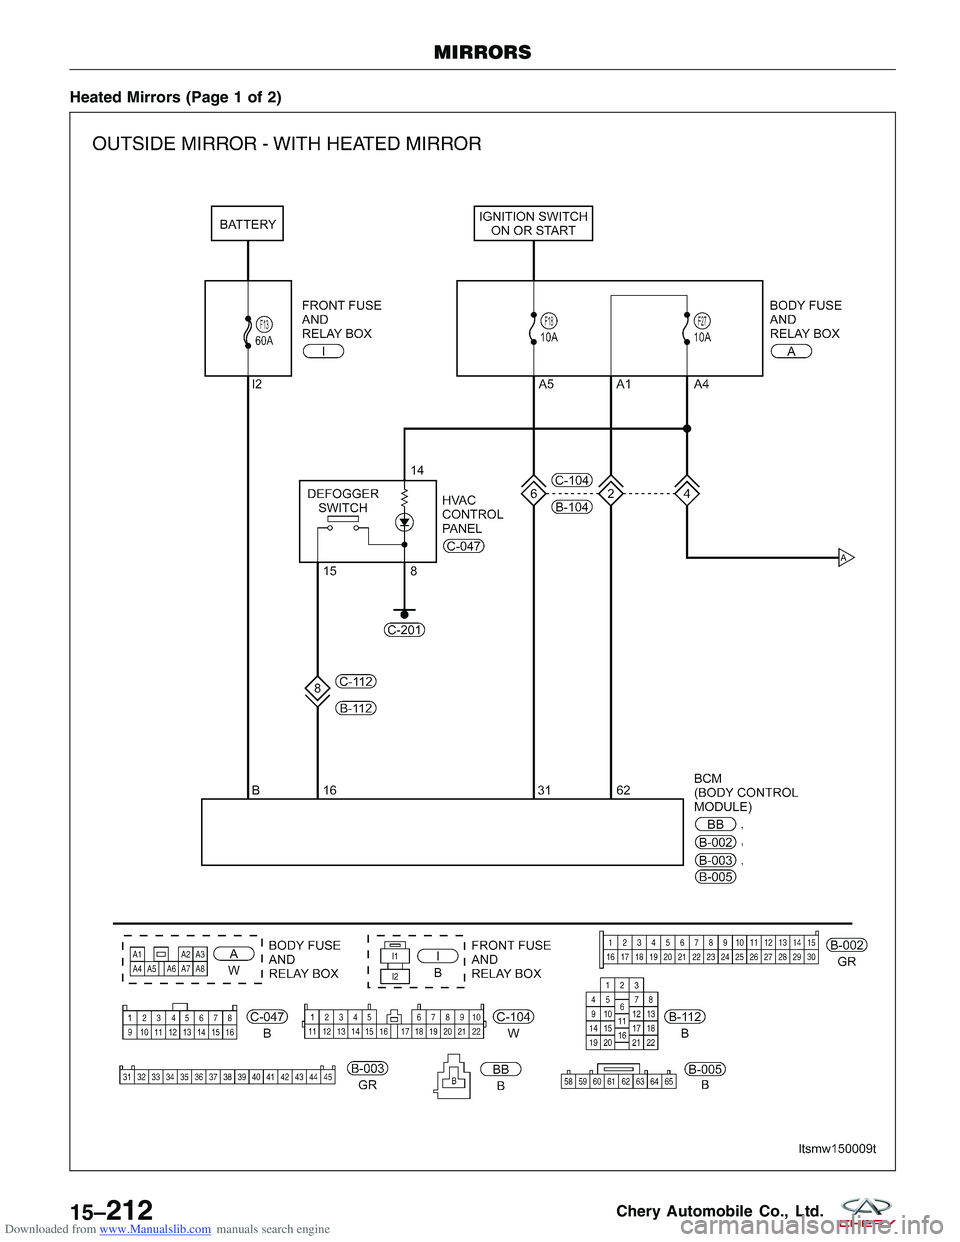
Downloaded from www.Manualslib.com manuals search engine Heated Mirrors (Page 1 of 2)
MIRRORS
LTSMW150009T
15–212Chery Automobile Co., Ltd.
Page 1797 of 1903
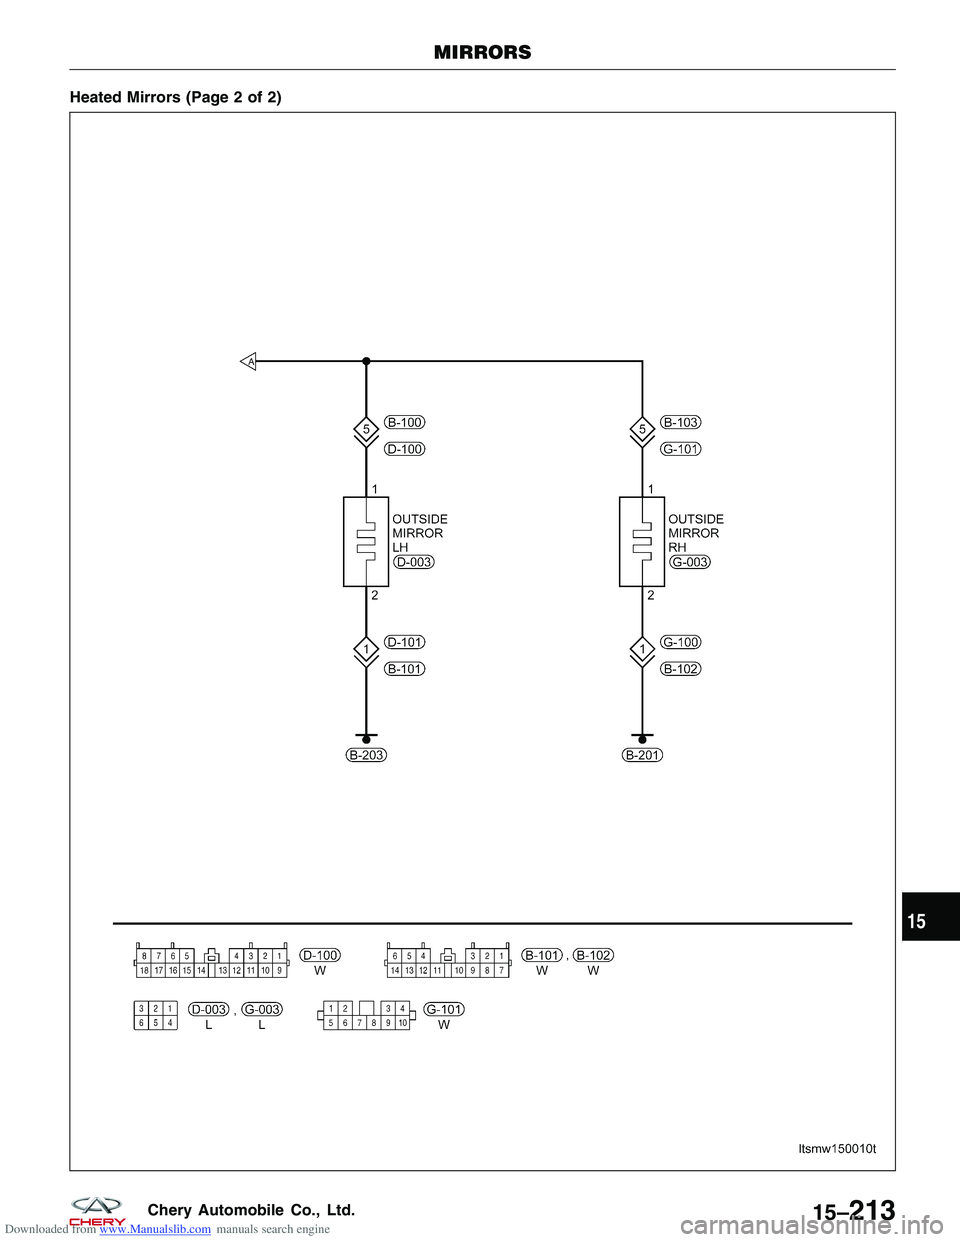
Downloaded from www.Manualslib.com manuals search engine Heated Mirrors (Page 2 of 2)
MIRRORS
LTSMW150010T
15
15–213Chery Automobile Co., Ltd.
Page 1798 of 1903
Downloaded from www.Manualslib.com manuals search engine Outside Mirror
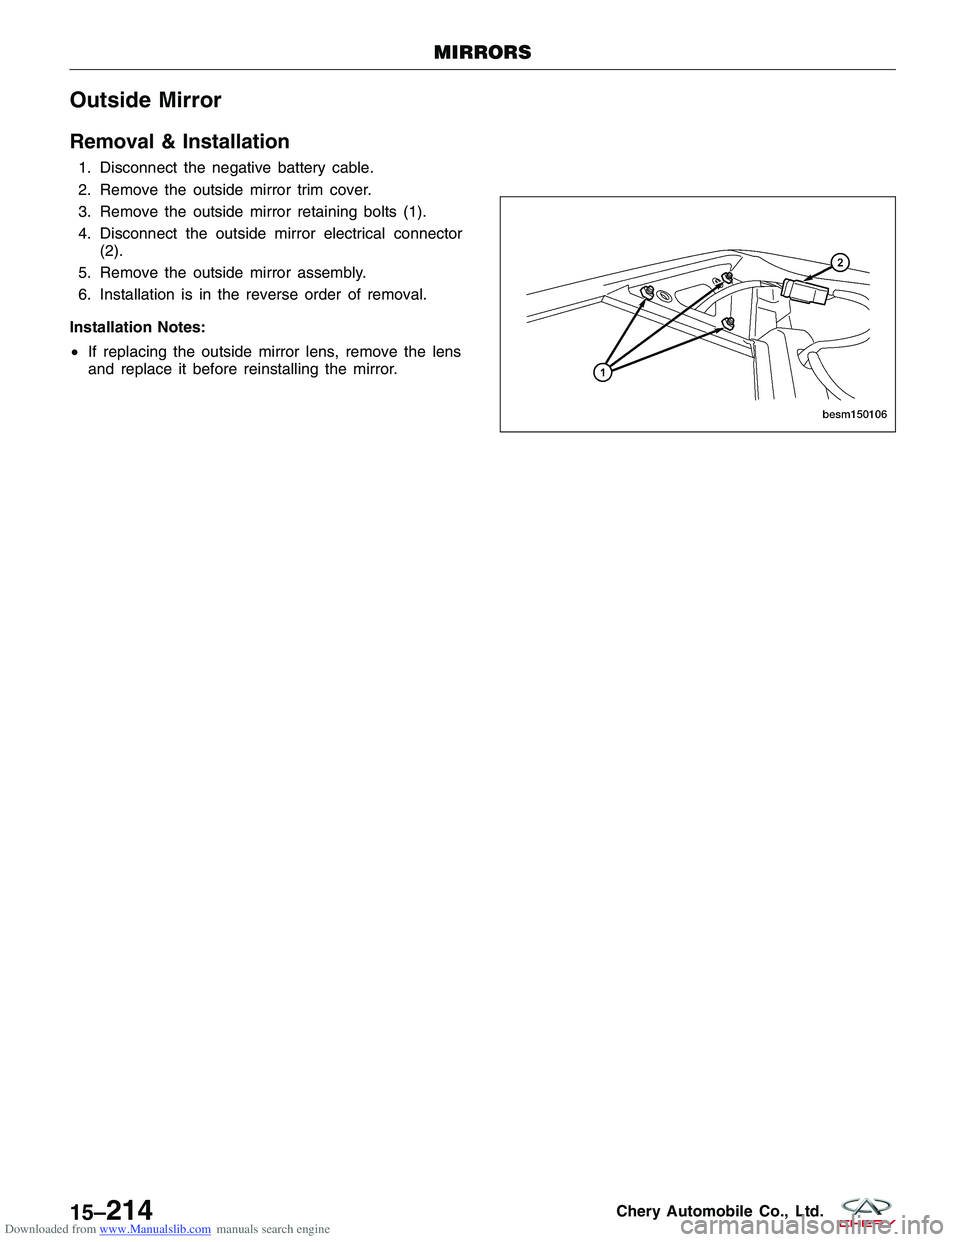
Removal & Installation
1. Disconnect the negative battery cable.
2. Remove the outside mirror trim cover.
3. Remove the outside mirror retaining bolts (1).
4. Disconnect the outside mirror electrical connector(2).
5. Remove the outside mirror assembly.
6. Installation is in the reverse order of removal.
Installation Notes:
• If replacing the outside mirror lens, remove the lens
and replace it before reinstalling the mirror.
MIRRORS
BESM150106
15–214Chery Automobile Co., Ltd.
Page 1799 of 1903
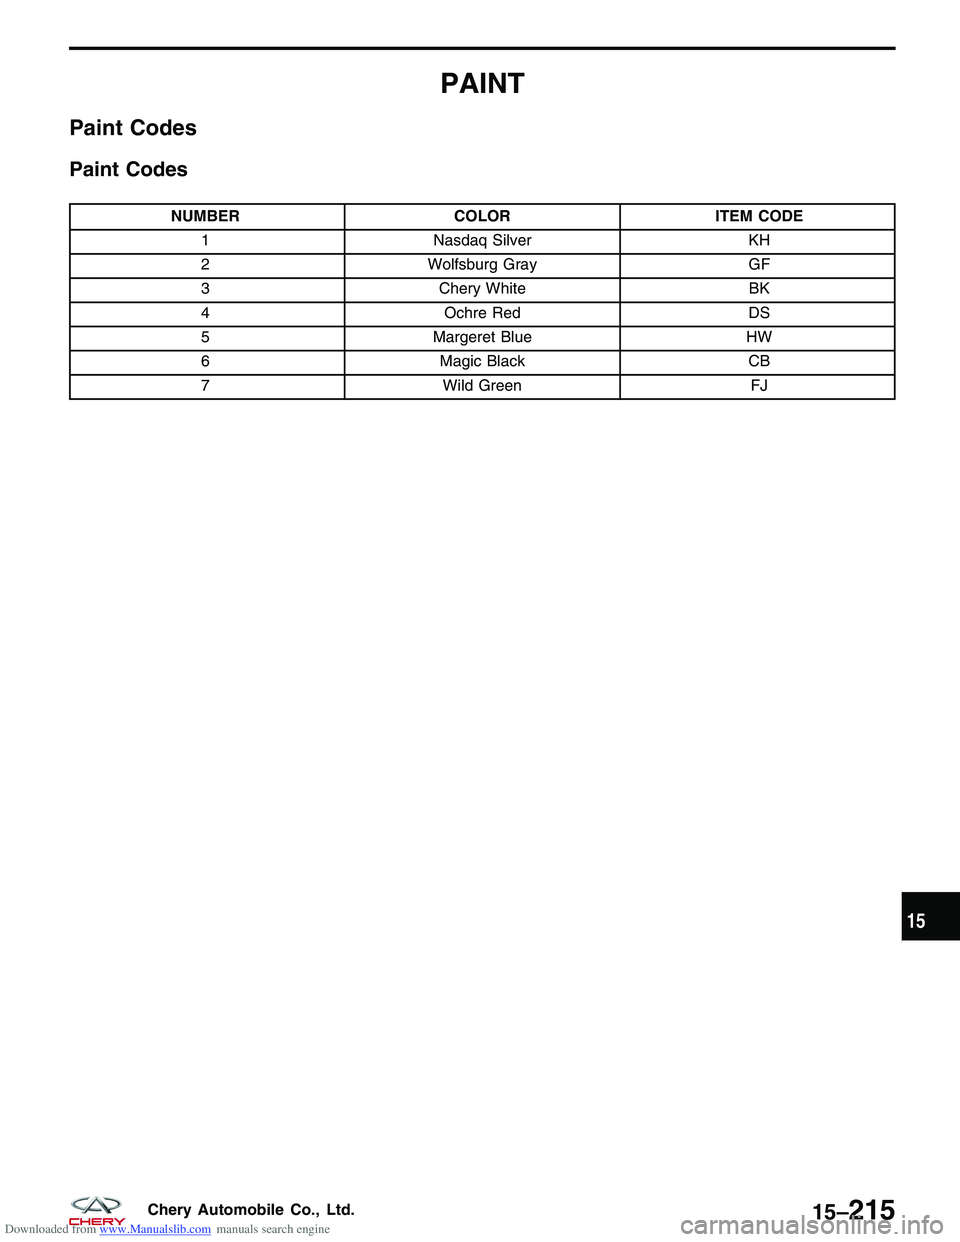
Downloaded from www.Manualslib.com manuals search engine PAINT
Paint Codes
Paint Codes
NUMBERCOLORITEM CODE
1 Nasdaq Silver KH
2 Wolfsburg Gray GF
3 Chery White BK
4 Ochre Red DS
5 Margeret Blue HW
6 Magic Black CB
7 Wild Green FJ
15
15–215Chery Automobile Co., Ltd.
Page 1800 of 1903
Downloaded from www.Manualslib.com manuals search engine RADIATOR SUPPORT
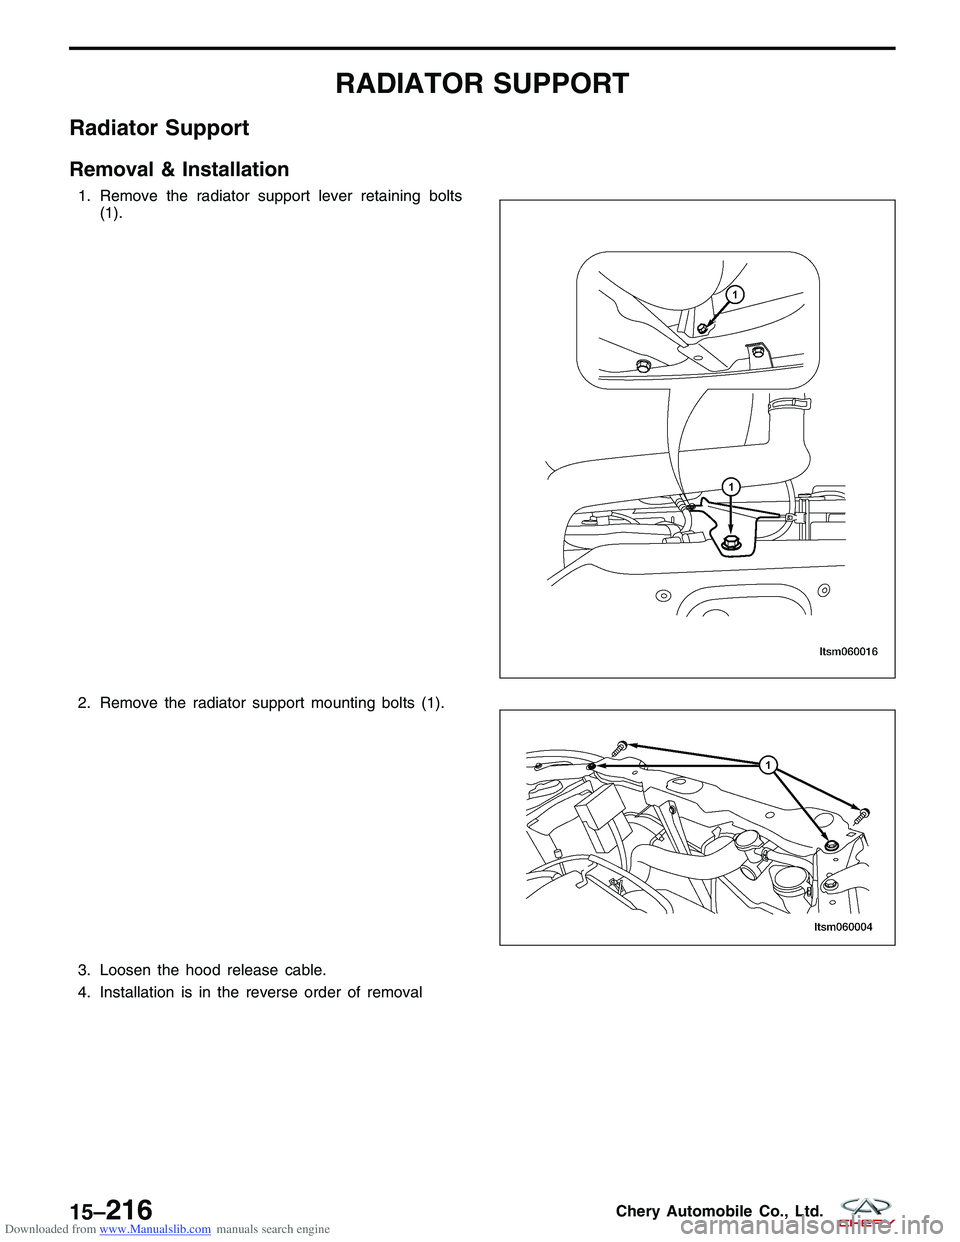
Radiator Support
Removal & Installation
1. Remove the radiator support lever retaining bolts(1).
2. Remove the radiator support mounting bolts (1).
3. Loosen the hood release cable.
4. Installation is in the reverse order of removal
LTSM060016
LTSM060004
15–216Chery Automobile Co., Ltd.
Trending: trunk, check oil, spark, park assist, immobilizer, coolant level, 4WD
