FIAT DUCATO 244 2002 3.G Connect NavPlus Manual
Manufacturer: FIAT, Model Year: 2002, Model line: DUCATO 244, Model: FIAT DUCATO 244 2002 3.GPages: 246, PDF Size: 3.39 MB
Page 81 of 246
CONNECT Nav
80
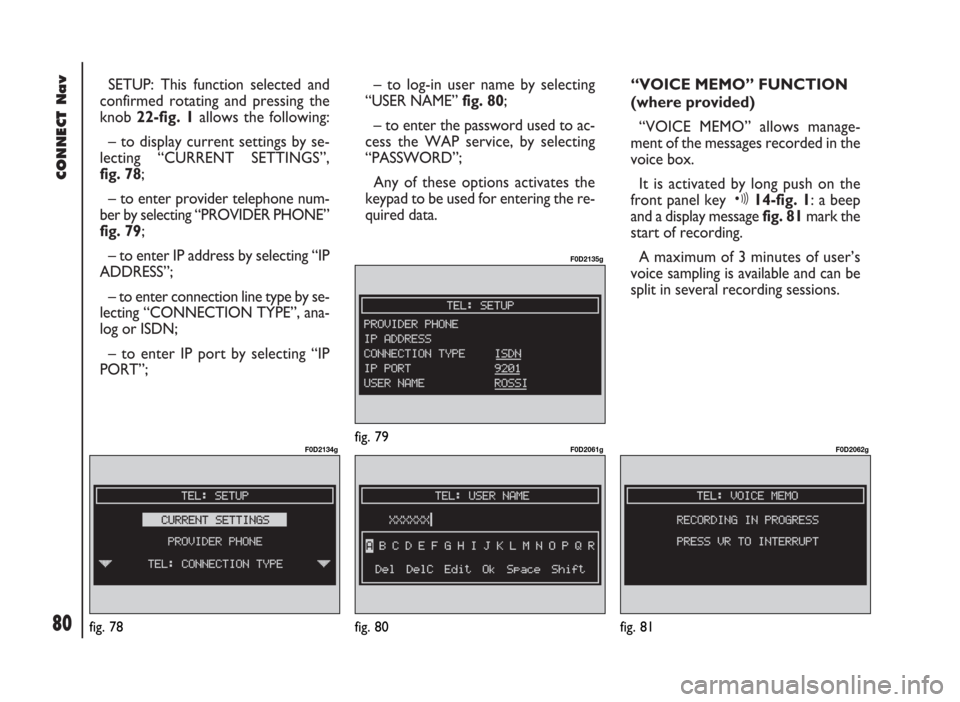
SETUP: This function selected and
confirmed rotating and pressing the
knob 22-fig. 1 allows the following:
– to display current settings by se-
lecting “CURRENT SETTINGS”,
fig. 78;
– to enter provider telephone num-
ber by selecting “PROVIDER PHONE”
fig. 79;
– to enter IP address by selecting “IP
ADDRESS”;
– to enter connection line type by se-
lecting “CONNECTION TYPE”, ana-
log or ISDN;
– to enter IP port by selecting “IP
PORT”;– to log-in user name by selecting
“USER NAME” fig. 80;
– to enter the password used to ac-
cess the WAP service, by selecting
“PASSWORD”;
Any of these options activates the
keypad to be used for entering the re-
quired data.“VOICE MEMO” FUNCTION
(where provided)
“VOICE MEMO” allows manage-
ment of the messages recorded in the
voice box.
It is activated by long push on the
front panel key ô14-fig. 1: a beep
and a display message fig. 81mark the
start of recording.
A maximum of 3 minutes of user’s
voice sampling is available and can be
split in several recording sessions.
fig. 78
F0D2134g
fig. 80
F0D2061g
fig. 81
F0D2062gfig. 79
F0D2135g
Page 82 of 246
A further push on ô14-fig. 1stops
sampling. Next sampling will be
queued after the previous one. After
3 minutes recording operation is
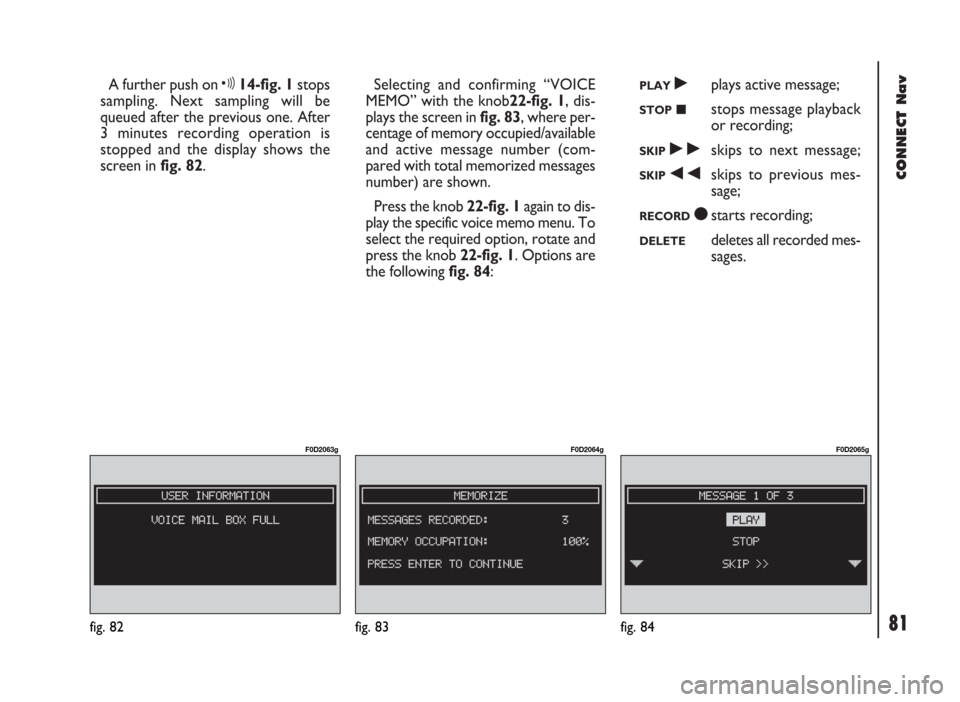
stopped and the display shows the
screen in fig. 82. Selecting and confirming “VOICE
MEMO” with the knob22-fig. 1, dis-
plays the screen in fig. 83, where per-
centage of memory occupied/available
and active message number (com-
pared with total memorized messages
number) are shown.
Press the knob 22-fig. 1again to dis-
play the specific voice memo menu. To
select the required option, rotate and
press the knob 22-fig. 1. Options are
the following fig. 84:PLAY˙plays active message;
STOP■stops message playback
or recording;
SKIP˜skips to next message;
SKIP÷skips to previous mes-
sage;
RECORDçstarts recording;
DELETEdeletes all recorded mes-
sages.
CONNECT Nav
81fig. 82
F0D2063g
fig. 83
F0D2064g
fig. 84
F0D2065g
Page 83 of 246
CONNECT Nav
82
MESSAGES
SMS - (Short Message Service)
“MESSAGES” function allows read-
ing and sending short messages (max-
imum length is 160 characters) by
GSM phone.
Read and sent messages are stored
into two separate boxes, which how-
ever share a common memory sec-
tion; so the sum of sent and read
stored messages must not exceed the
maximum number of allowed SMSs (it
depends on the SIM card.
Telephone module stops input of
new messages when the buffer is full
and the “DIAL” option is disabled.
In this case the display shows a string
with the following warning message:
“FURTHER MESSAGES CANNOT BE
STORED OR RECEIVED”.Selecting and confirming “MES-
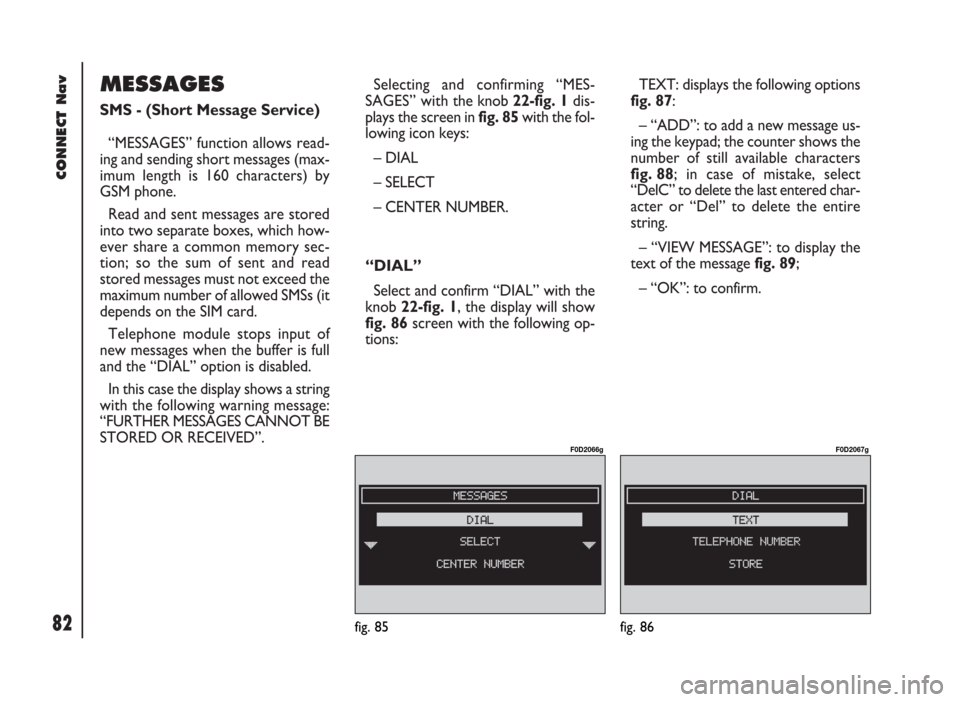
SAGES” with the knob 22-fig. 1dis-
plays the screen in fig. 85with the fol-
lowing icon keys:
– DIAL
– SELECT
– CENTER NUMBER.
“DIAL”
Select and confirm “DIAL” with the
knob 22-fig. 1, the display will show
fig. 86 screen with the following op-
tions:TEXT: displays the following options
fig. 87:
– “ADD”: to add a new message us-
ing the keypad; the counter shows the
number of still available characters
fig. 88; in case of mistake, select
“DelC” to delete the last entered char-
acter or “Del” to delete the entire
string.
– “VIEW MESSAGE”: to display the
text of the message fig. 89;
– “OK”: to confirm.
fig. 85
F0D2066g
fig. 86
F0D2067g
Page 84 of 246
CONNECT Nav
83
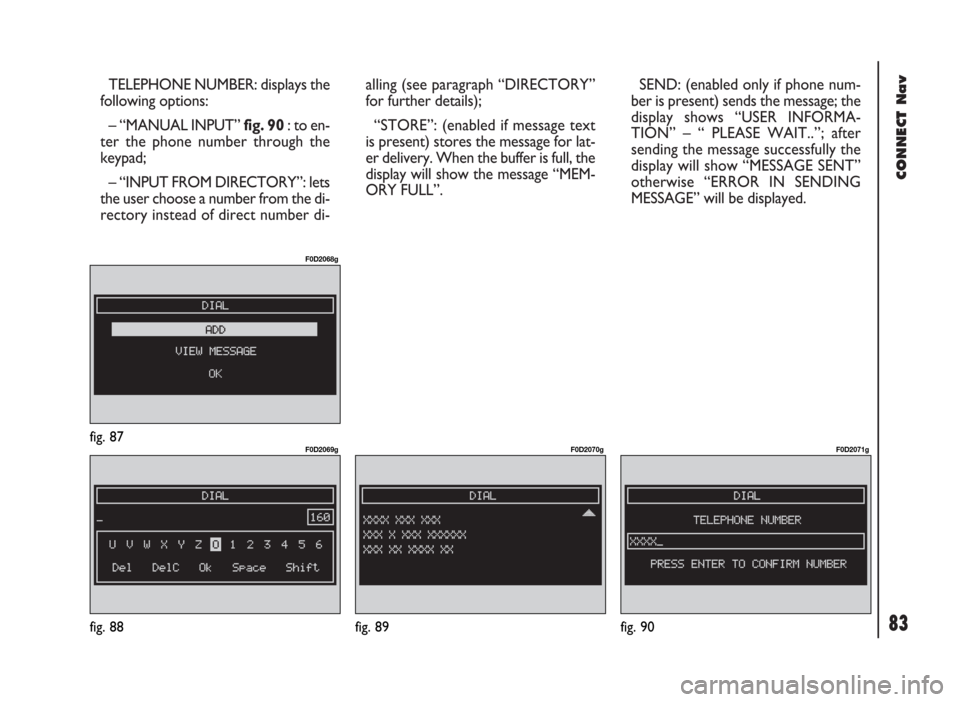
TELEPHONE NUMBER: displays the
following options:
– “MANUAL INPUT” fig. 90 : to en-
ter the phone number through the
keypad;
– “INPUT FROM DIRECTORY”: lets
the user choose a number from the di-
rectory instead of direct number di-alling (see paragraph “DIRECTORY”
for further details);
“STORE”: (enabled if message text
is present) stores the message for lat-
er delivery. When the buffer is full, the
display will show the message “MEM-
ORY FULL”.SEND: (enabled only if phone num-
ber is present) sends the message; the
display shows “USER INFORMA-
TION” – “ PLEASE WAIT..”; after
sending the message successfully the
display will show “MESSAGE SENT”
otherwise “ERROR IN SENDING
MESSAGE” will be displayed.
fig. 87
F0D2068g
fig. 88
F0D2069g
fig. 90
F0D2071g
fig. 89
F0D2070g
Page 85 of 246
CONNECT Nav
84
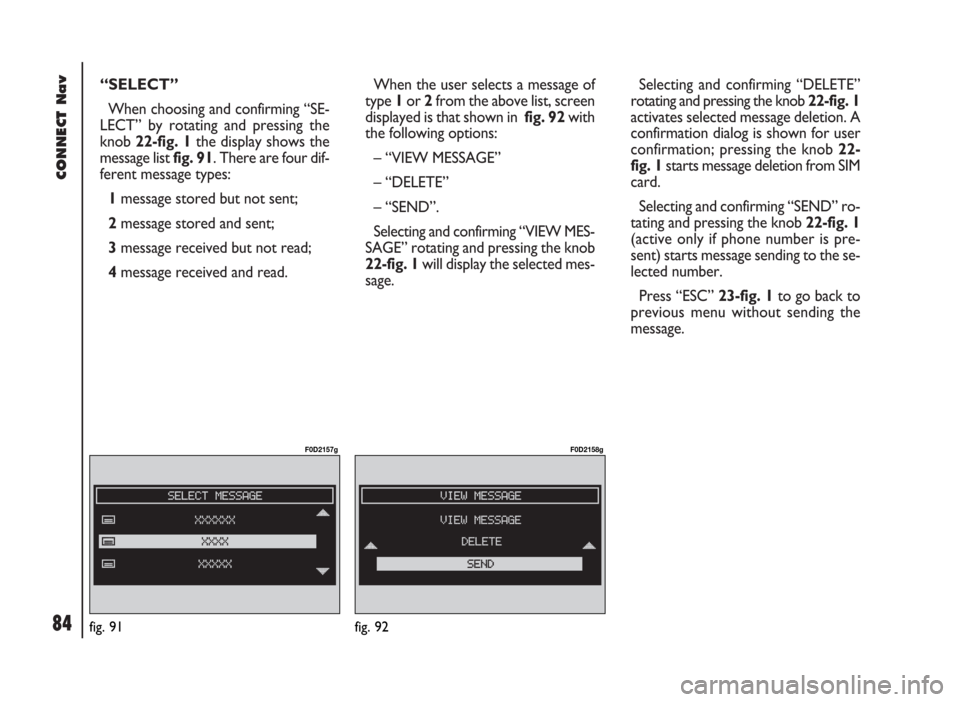
“SELECT”
When choosing and confirming “SE-
LECT” by rotating and pressing the
knob 22-fig. 1the display shows the
message list fig. 91. There are four dif-
ferent message types:
1message stored but not sent;
2message stored and sent;
3message received but not read;
4message received and read.When the user selects a message of
type 1or 2from the above list, screen
displayed is that shown in fig. 92with
the following options:
– “VIEW MESSAGE”
– “DELETE”
– “SEND”.
Selecting and confirming “VIEW MES-
SAGE” rotating and pressing the knob
22-fig. 1will display the selected mes-
sage. Selecting and confirming “DELETE”
rotating and pressing the knob 22-fig. 1
activates selected message deletion. A
confirmation dialog is shown for user
confirmation; pressing the knob 22-
fig. 1starts message deletion from SIM
card.
Selecting and confirming “SEND” ro-
tating and pressing the knob 22-fig. 1
(active only if phone number is pre-
sent) starts message sending to the se-
lected number.
Press “ESC” 23-fig. 1to go back to
previous menu without sending the
message.
fig. 91
F0D2157g
fig. 92
F0D2158g
Page 86 of 246
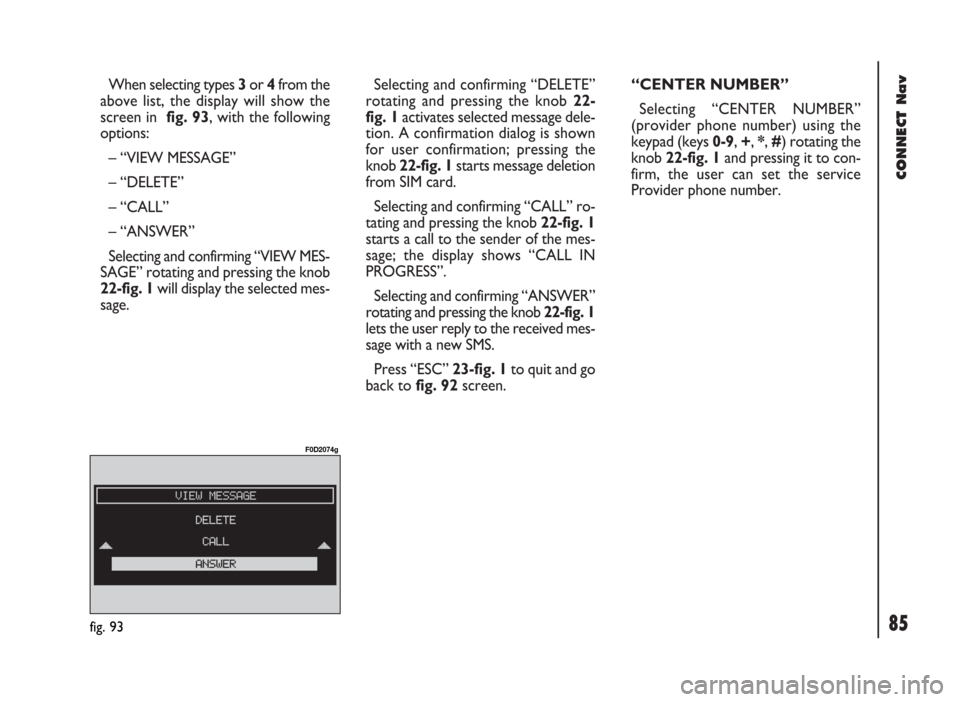
When selecting types 3or 4from the
above list, the display will show the
screen in fig. 93, with the following
options:
– “VIEW MESSAGE”
– “DELETE”
– “CALL”
– “ANSWER”
Selecting and confirming “VIEW MES-
SAGE” rotating and pressing the knob
22-fig. 1will display the selected mes-
sage. Selecting and confirming “DELETE”
rotating and pressing the knob 22-
fig. 1activates selected message dele-
tion. A confirmation dialog is shown
for user confirmation; pressing the
knob 22-fig. 1starts message deletion
from SIM card.
Selecting and confirming “CALL” ro-
tating and pressing the knob 22-fig. 1
starts a call to the sender of the mes-
sage; the display shows “CALL IN
PROGRESS”.
Selecting and confirming “ANSWER”
rotating and pressing the knob 22-fig. 1
lets the user reply to the received mes-
sage with a new SMS.
Press “ESC” 23-fig. 1to quit and go
back to fig. 92screen.“CENTER NUMBER”
Selecting “CENTER NUMBER”
(provider phone number) using the
keypad (keys 0-9, +, *, #) rotating the
knob 22-fig. 1and pressing it to con-
firm, the user can set the service
Provider phone number.
CONNECT Nav
85fig. 93
F0D2074g
Page 87 of 246
CONNECT Nav
86
“PHONE OPTION”
FUNCTION
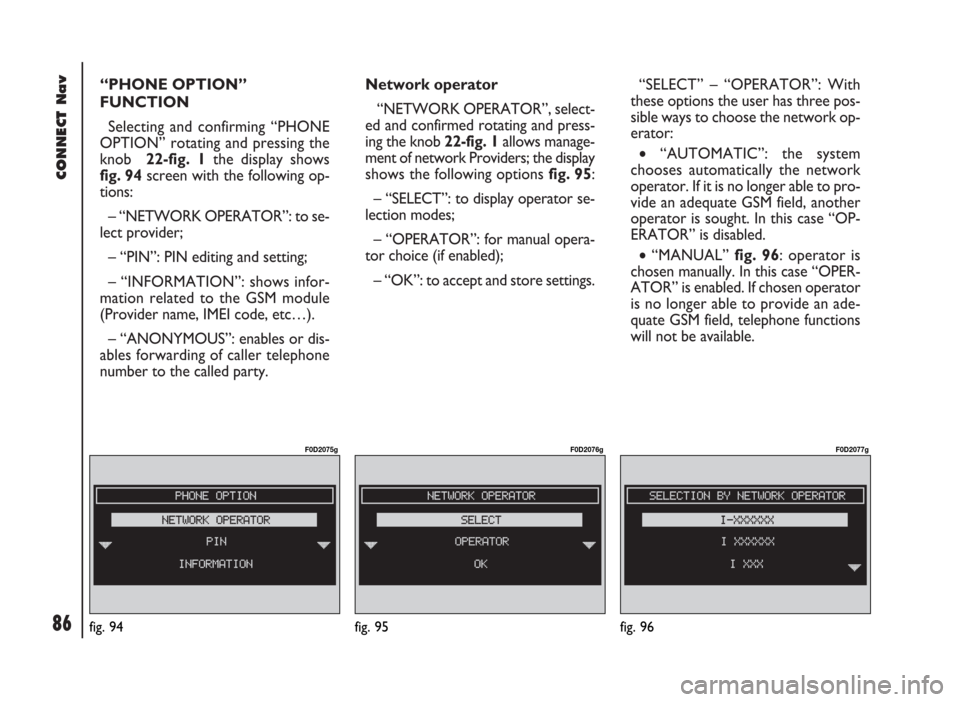
Selecting and confirming “PHONE
OPTION” rotating and pressing the
knob 22-fig. 1the display shows
fig. 94screen with the following op-
tions:
– “NETWORK OPERATOR”: to se-
lect provider;
– “PIN”: PIN editing and setting;
– “INFORMATION”: shows infor-
mation related to the GSM module
(Provider name, IMEI code, etc…).
– “ANONYMOUS”: enables or dis-
ables forwarding of caller telephone
number to the called party.Network operator
“NETWORK OPERATOR”, select-
ed and confirmed rotating and press-
ing the knob 22-fig. 1allows manage-
ment of network Providers; the display
shows the following options fig. 95:
– “SELECT”: to display operator se-
lection modes;
– “OPERATOR”: for manual opera-
tor choice (if enabled);
– “OK”: to accept and store settings.“SELECT” – “OPERATOR”: With
these options the user has three pos-
sible ways to choose the network op-
erator:
•“AUTOMATIC”: the system
chooses automatically the network
operator. If it is no longer able to pro-
vide an adequate GSM field, another
operator is sought. In this case “OP-
ERATOR” is disabled.
•“MANUAL” fig. 96: operator is
chosen manually. In this case “OPER-
ATOR” is enabled. If chosen operator
is no longer able to provide an ade-
quate GSM field, telephone functions
will not be available.
fig. 94
F0D2075g
fig. 95
F0D2076g
fig. 96
F0D2077g
Page 88 of 246
CONNECT Nav
87
•“PREFERENTIAL”: operator is cho-
sen manually. In this case “OPERA-
TOR” is enabled, and if chosen oper-
ator is no longer able to provide an ad-
equate GSM field, the system auto-
matically looks for another available
operator.
“OK”: always active (“automatic”,
“manual”, “preferential”) after valid op-
erator selection. Select and confirm
this option to accept and store previ-
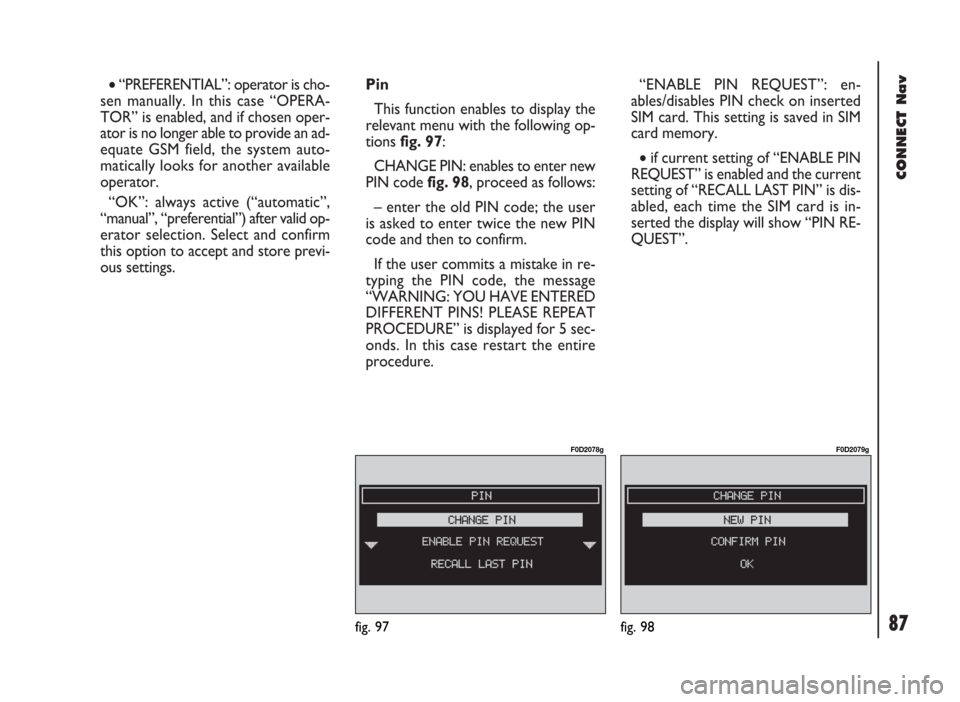
ous settings.Pin
This function enables to display the
relevant menu with the following op-
tions fig. 97:
CHANGE PIN: enables to enter new
PIN code fig. 98, proceed as follows:
– enter the old PIN code; the user
is asked to enter twice the new PIN
code and then to confirm.
If the user commits a mistake in re-
typing the PIN code, the message
“WARNING: YOU HAVE ENTERED
DIFFERENT PINS! PLEASE REPEAT
PROCEDURE” is displayed for 5 sec-
onds. In this case restart the entire
procedure.“ENABLE PIN REQUEST”: en-
ables/disables PIN check on inserted
SIM card. This setting is saved in SIM
card memory.
•if current setting of “ENABLE PIN
REQUEST” is enabled and the current
setting of “RECALL LAST PIN” is dis-
abled, each time the SIM card is in-
serted the display will show “PIN RE-
QUEST”.
fig. 97
F0D2078g
fig. 98
F0D2079g
Page 89 of 246
CONNECT Nav
88
“RECALL LAST PIN”: stores the first
PIN entered, sending it automatically
to the SIM card when required. This
setting is saved in system settings,
when inserting the SIM card the dis-
play will not show “PIN REQUEST”.
“OK”: to accept and store settings.Information
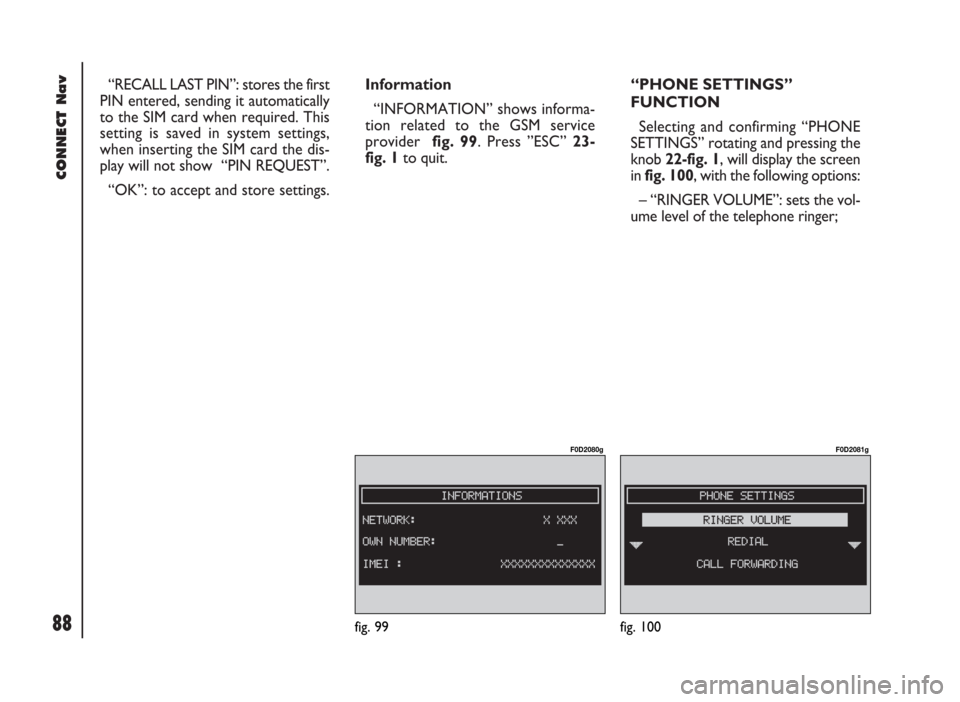
“INFORMATION” shows informa-
tion related to the GSM service
provider fig. 99. Press ”ESC” 23-
fig. 1to quit.“PHONE SETTINGS”
FUNCTION
Selecting and confirming “PHONE
SETTINGS” rotating and pressing the
knob 22-fig. 1, will display the screen
in fig. 100, with the following options:
– “RINGER VOLUME”: sets the vol-
ume level of the telephone ringer;
fig. 99
F0D2080g
fig. 100
F0D2081g
Page 90 of 246
CONNECT Nav
89
– “REDIAL”: in case of busy line, re-
dials automatically the called number
(for a preset number of times); to stop
redialling press key 2-fig. 1at length.
– “CALL FORWARDING”: enables
or disables call divert;
– “CALL FORWARDING NO.”: al-
lows input of the phone number to
which call is diverted.
– “ENABLE CALL WAITING”: en-
ables or disables incoming call an-
nouncement;A beep will be heard to indicate an
incoming call during an active phone
conversation. To accept the incoming
call press the knob 22-fig. 1; the first
call will wait until the second conver-
sation is ended or until the first caller
hangs up the phone.
To refuse the incoming call press
“ESC” 23-fig. 1; no interference with
the active call will be generated.
– “OK”: to accept and store settings.When the user modifies the call for-
warding settings, the display shows
“WARNING! OPERATION IN
PROGRESS: PLEASE WAIT …”.
When this operation is ended, the dis-
play shows “CALL FORWARDING -
OPERATION CONCLUDED”.
Should it be impossible to modify set-
tings, the display shows “CALL FOR-
WARDING” – “OPERATION NOT
PERFORMED”.