FORD TRANSIT 2006 7.G Body And Equipment Mounting Section Manual
Manufacturer: FORD, Model Year: 2006, Model line: TRANSIT, Model: FORD TRANSIT 2006 7.GPages: 234, PDF Size: 33.19 MB
Page 211 of 234
5.6 Glass, Frames and Mechanisms
5.6.1 Rear Windows
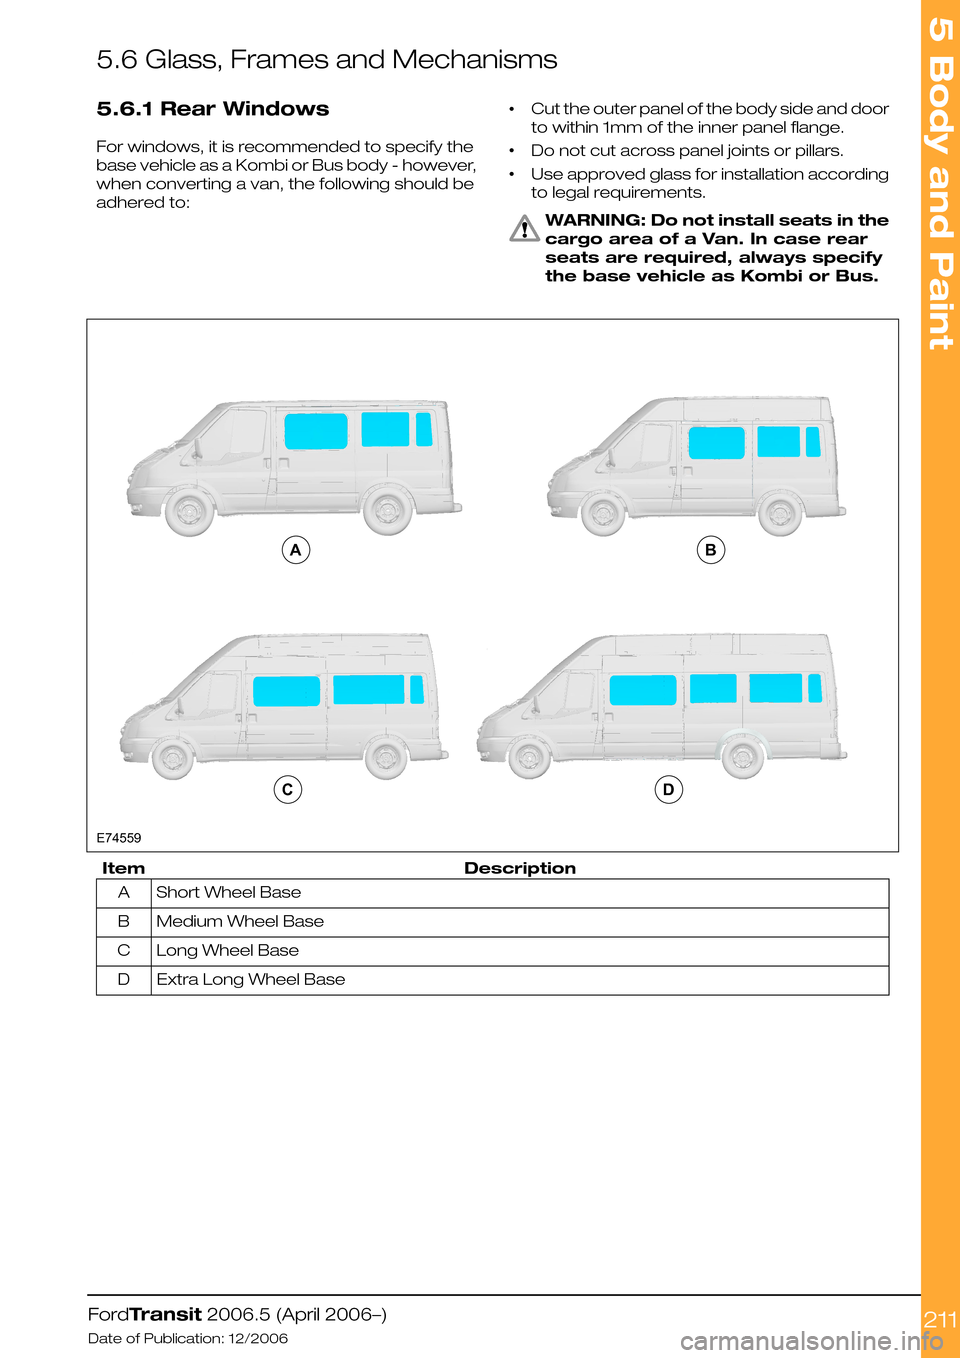
For windows, it is recommended to specify the
base vehicle as a Kombi or Bus body - however,
when converting a van, the following should be
adhered to:
•Cut the outer panel of the body side and door
to within 1mm of the inner panel flange.
•Do not cut across panel joints or pillars.
•Use approved glass for installation according
to legal requirements.
WARNING: Do not install seats in the
cargo area of a Van. In case rear
seats are required, always specify
the base vehicle as Kombi or Bus.
DescriptionItem
Short Wheel BaseA
Medium Wheel BaseB
Long Wheel BaseC
Extra Long Wheel BaseD
FordTransit 2006.5 (April 2006–)
Date of Publication: 12/2006
5 Body and Paint
211E74559ABCD
Page 212 of 234
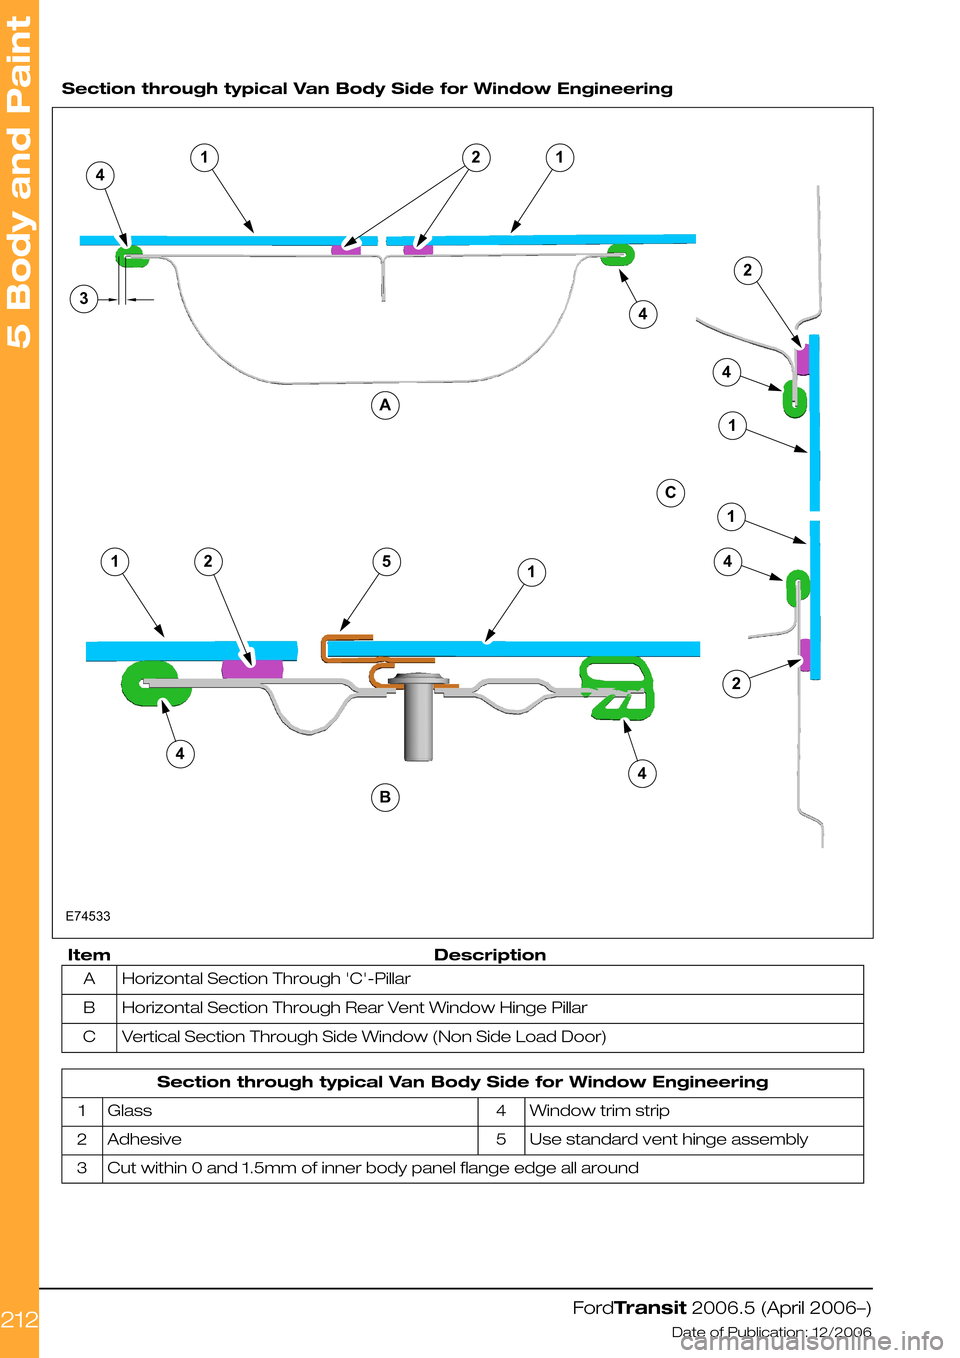
Section through typical Van Body Side for Window Engineering
DescriptionItem
Horizontal Section Through 'C'-PillarA
Horizontal Section Through Rear Vent Window Hinge PillarB
Vertical Section Through Side Window (Non Side Load Door)C
Section through typical Van Body Side for Window Engineering
Window trim strip4Glass1
Use standard vent hinge assembly5Adhesive2
Cut within 0 and 1.5mm of inner body panel flange edge all around3
FordTransit 2006.5 (April 2006–)
Date of Publication: 12/2006
5 Body and Paint
2121413ABC21251424444211E74533
Page 213 of 234
5.6.2 Heated Windshield and
Heated Rear Window
WARNING: The base system should
not be tampered with (controlled by
Central Junction Box and multiplex
architecture) and no feeds taken
from the associated wiring or
controller.
These options are not suitable for aftermarket
or Vehicle Converter fit.
NOTE: For further information please contact
your local National Sales Company
representative, or Local Ford Dealer. If they are
unable to help you then please contact the
Vehicle Converter Advisory Service at
[email protected].
FordTransit 2006.5 (April 2006–)
Date of Publication: 12/2006
5 Body and Paint
213
Page 214 of 234
5.7 Roof Opening Panel
5.7.1 Driver's Standing Head
Room
When planning cab walk-through capability on a
Van, Bus or Kombi, select the Special Vehicle
option, which replaces the front headlining and
parcel shelf in Vans and provides the maximum
height headlining for increased standing head
room height.
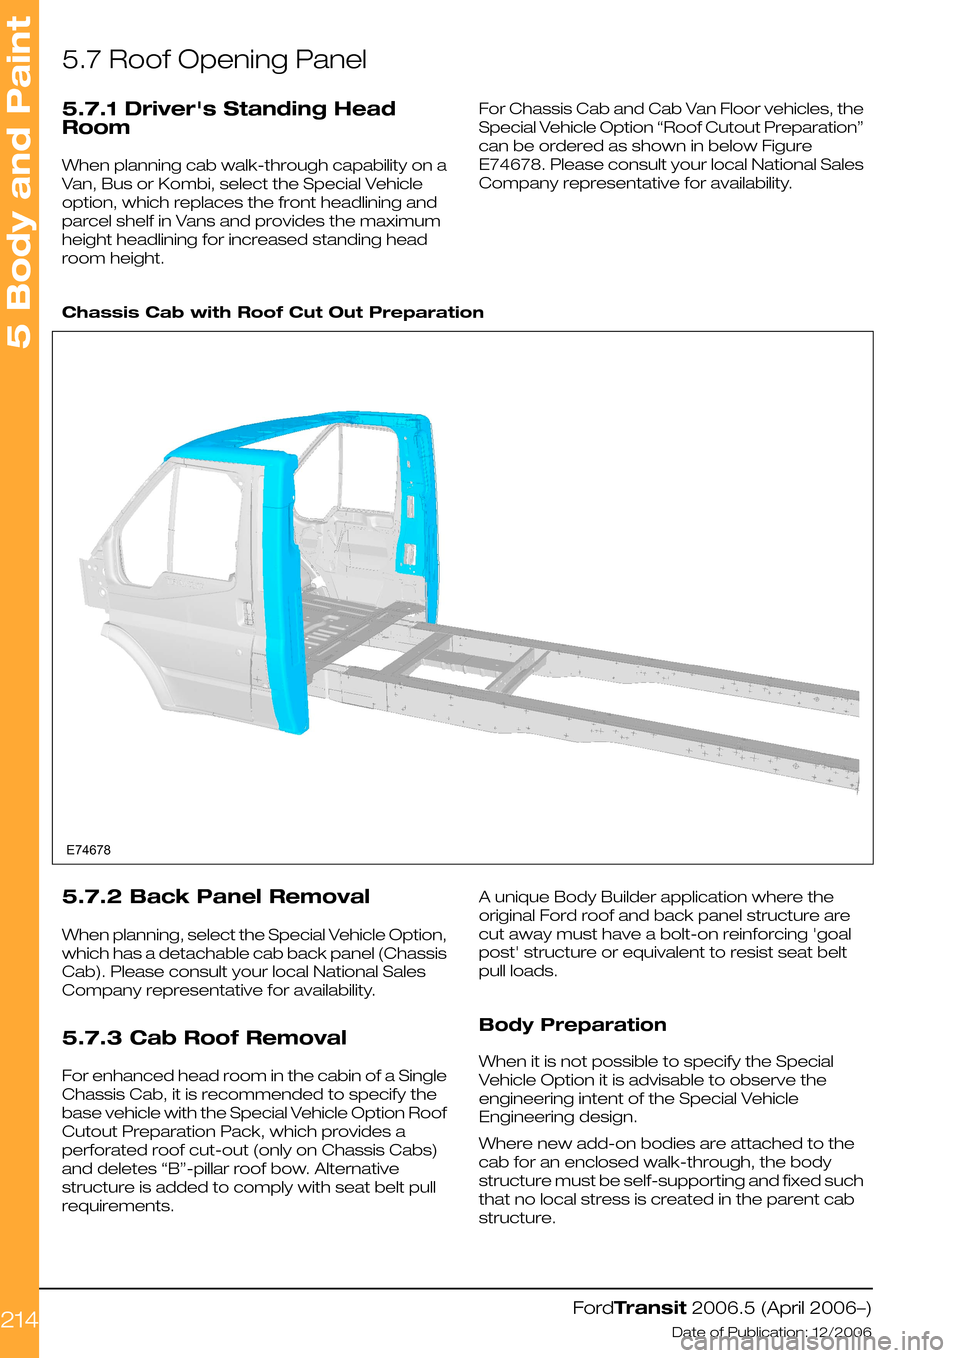
For Chassis Cab and Cab Van Floor vehicles, the
Special Vehicle Option “Roof Cutout Preparation”
can be ordered as shown in below Figure
E74678. Please consult your local National Sales
Company representative for availability.
Chassis Cab with Roof Cut Out Preparation
5.7.2 Back Panel Removal
When planning, select the Special Vehicle Option,
which has a detachable cab back panel (Chassis
Cab). Please consult your local National Sales
Company representative for availability.
5.7.3 Cab Roof Removal
For enhanced head room in the cabin of a Single
Chassis Cab, it is recommended to specify the
base vehicle with the Special Vehicle Option Roof
Cutout Preparation Pack, which provides a
perforated roof cut-out (only on Chassis Cabs)
and deletes “B”-pillar roof bow. Alternative
structure is added to comply with seat belt pull
requirements.
A unique Body Builder application where the
original Ford roof and back panel structure are
cut away must have a bolt-on reinforcing 'goal
post' structure or equivalent to resist seat belt
pull loads.
Body Preparation
When it is not possible to specify the Special
Vehicle Option it is advisable to observe the
engineering intent of the Special Vehicle
Engineering design.
Where new add-on bodies are attached to the
cab for an enclosed walk-through, the body
structure must be self-supporting and fixed such
that no local stress is created in the parent cab
structure.
FordTransit 2006.5 (April 2006–)
Date of Publication: 12/2006
5 Body and Paint
214E74678
Page 215 of 234
Use metal fasteners through double thickness
flanges for example with nuts, bolts and spreader
plates where possible.
“Pop” type rivet structural value is only as good
as the material or thickness of the body panels,
therefore ensure the application is suitably
engineered.
Protect all metal edges to comply with interior
projection legislation.
Corrosion protect all cut or drilled metal edges
and repair any paint damage.
5.7.4 Roof Ventilation
General
Apertures must not cut through roof bows.
Ventilators must prevent direct entry of water
and dust.
A shut-off system should be available to prevent
fume ingress.
Interior and exterior projection legal requirements
must be maintained.
Sun Roof
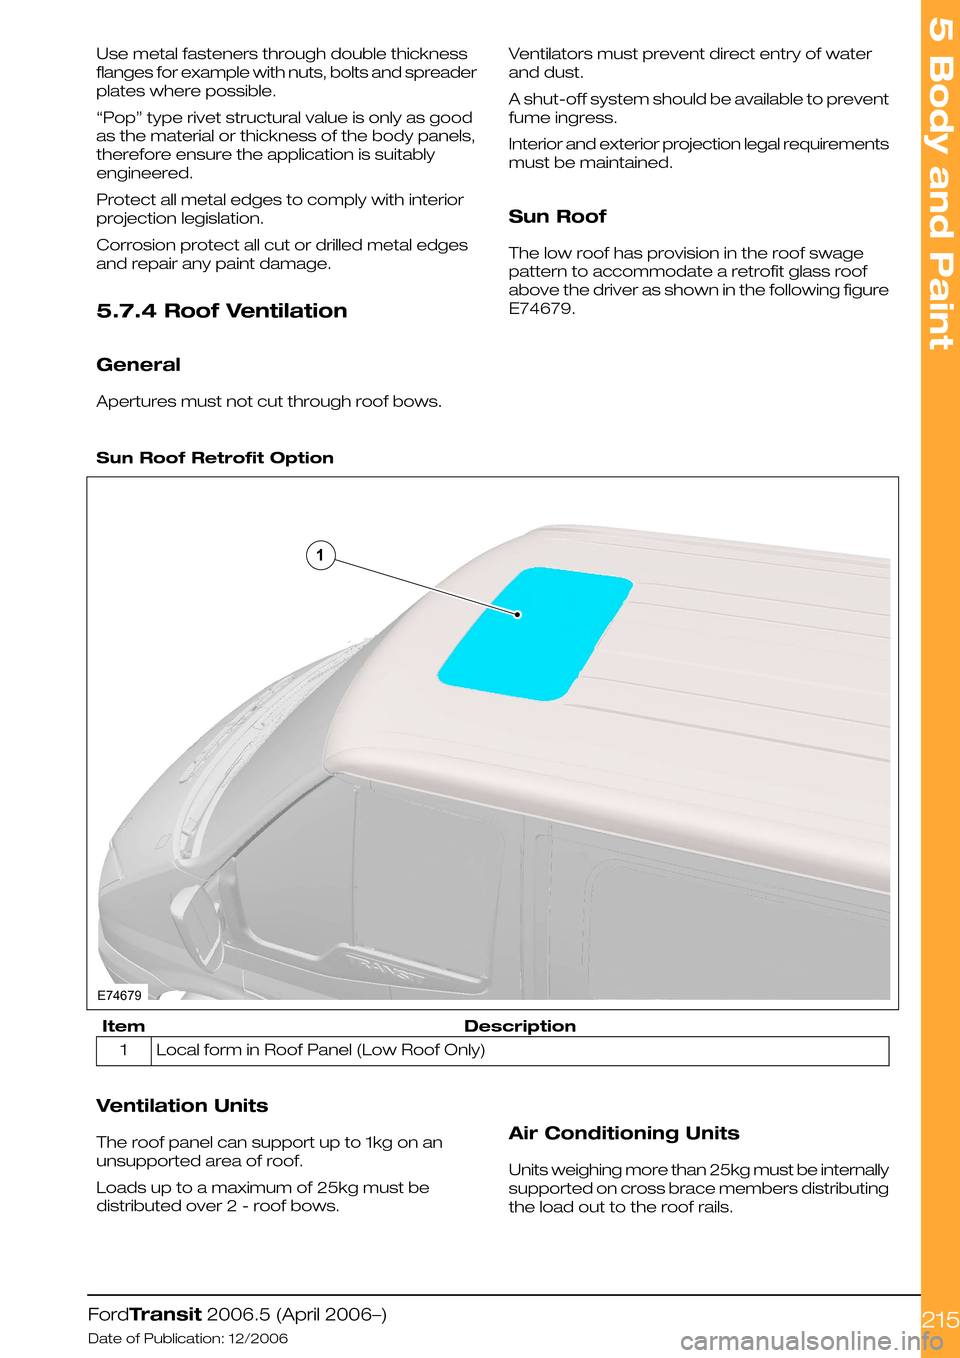
The low roof has provision in the roof swage
pattern to accommodate a retrofit glass roof
above the driver as shown in the following figure
E74679.
Sun Roof Retrofit Option
DescriptionItem
Local form in Roof Panel (Low Roof Only)1
Ventilation Units
The roof panel can support up to 1kg on an
unsupported area of roof.
Loads up to a maximum of 25kg must be
distributed over 2 - roof bows.
Air Conditioning Units
Units weighing more than 25kg must be internally
supported on cross brace members distributing
the load out to the roof rails.
FordTransit 2006.5 (April 2006–)
Date of Publication: 12/2006
5 Body and Paint
215E746791
Page 216 of 234
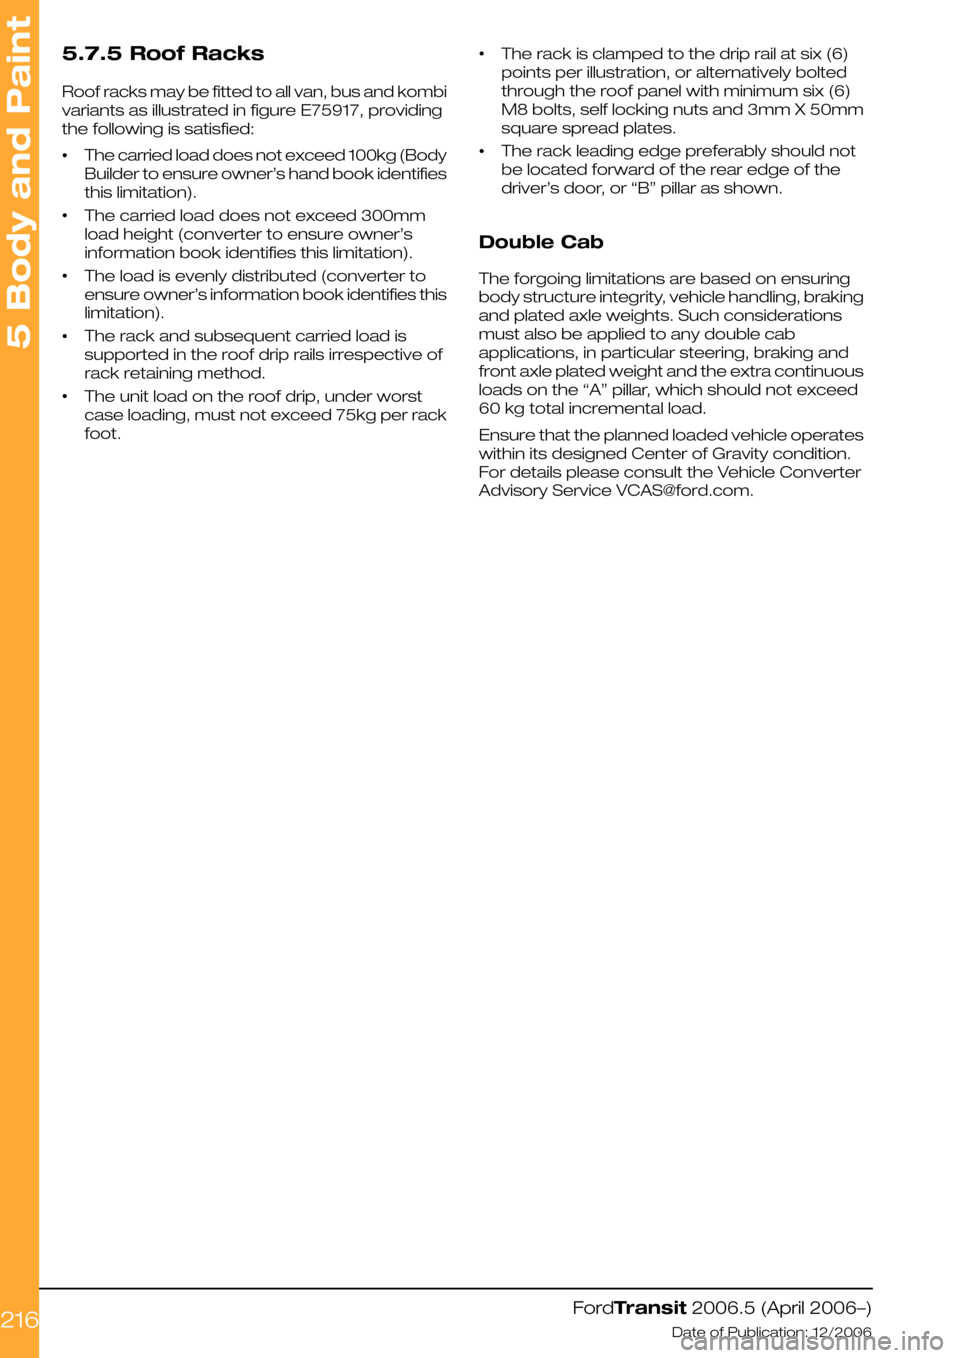
5.7.5 Roof Racks
Roof racks may be fitted to all van, bus and kombi
variants as illustrated in figure E75917, providing
the following is satisfied:
•The carried load does not exceed 100kg (Body
Builder to ensure owner’s hand book identifies
this limitation).
•The carried load does not exceed 300mm
load height (converter to ensure owner’s
information book identifies this limitation).
•The load is evenly distributed (converter to
ensure owner’s information book identifies this
limitation).
•The rack and subsequent carried load is
supported in the roof drip rails irrespective of
rack retaining method.
•The unit load on the roof drip, under worst
case loading, must not exceed 75kg per rack
foot.
•The rack is clamped to the drip rail at six (6)
points per illustration, or alternatively bolted
through the roof panel with minimum six (6)
M8 bolts, self locking nuts and 3mm X 50mm
square spread plates.
•The rack leading edge preferably should not
be located forward of the rear edge of the
driver’s door, or “B” pillar as shown.
Double Cab
The forgoing limitations are based on ensuring
body structure integrity, vehicle handling, braking
and plated axle weights. Such considerations
must also be applied to any double cab
applications, in particular steering, braking and
front axle plated weight and the extra continuous
loads on the “A” pillar, which should not exceed
60 kg total incremental load.
Ensure that the planned loaded vehicle operates
within its designed Center of Gravity condition.
For details please consult the Vehicle Converter
Advisory Service [email protected].
FordTransit 2006.5 (April 2006–)
Date of Publication: 12/2006
5 Body and Paint
216
Page 217 of 234
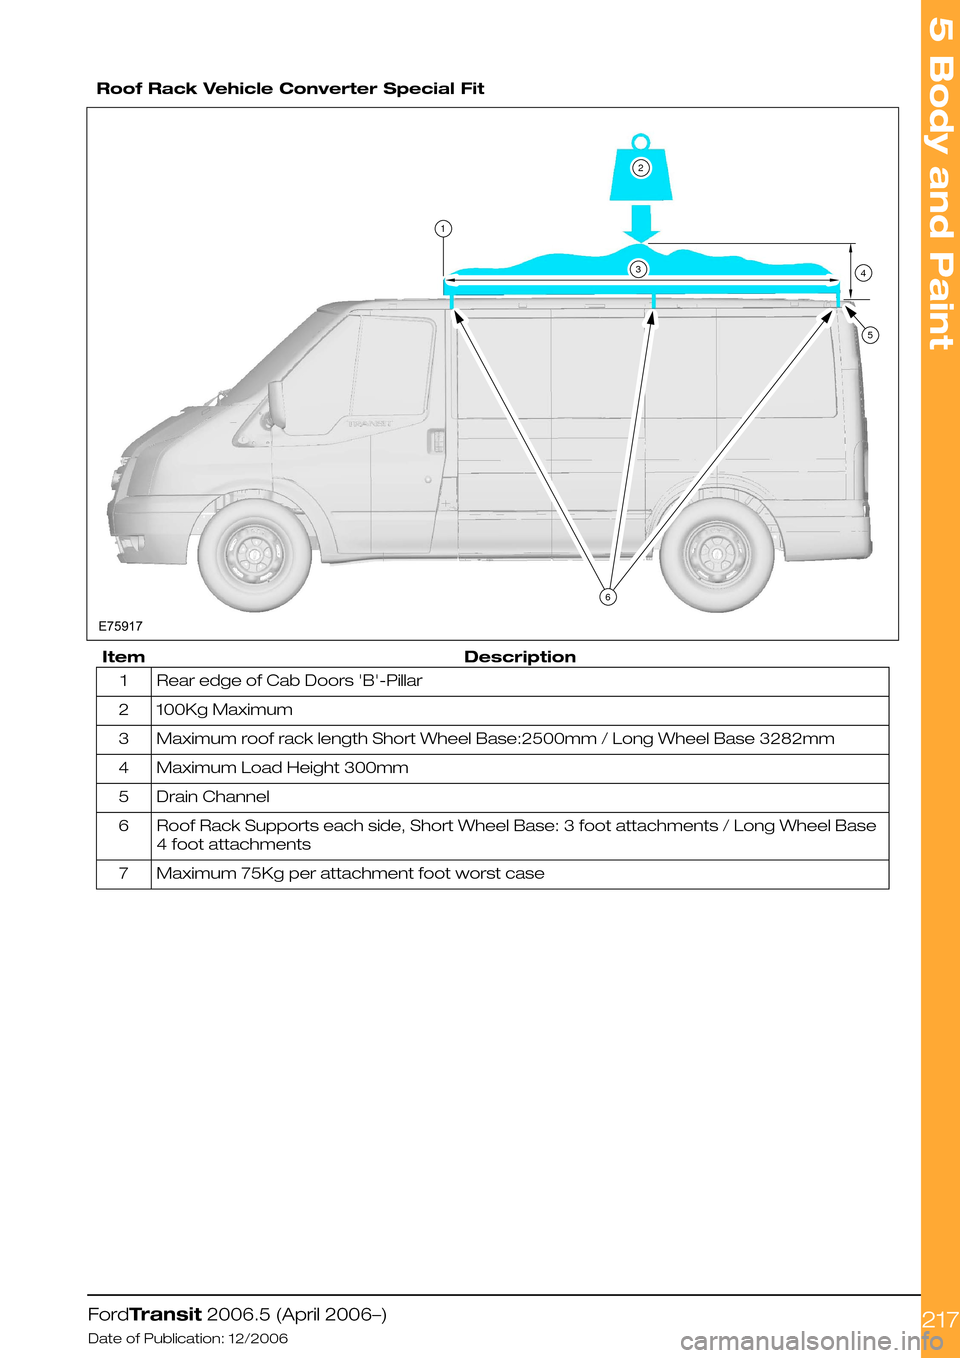
Roof Rack Vehicle Converter Special Fit
DescriptionItem
Rear edge of Cab Doors 'B'-Pillar1
100Kg Maximum2
Maximum roof rack length Short Wheel Base:2500mm / Long Wheel Base 3282mm3
Maximum Load Height 300mm4
Drain Channel5
Roof Rack Supports each side, Short Wheel Base: 3 foot attachments / Long Wheel Base
4 foot attachments
6
Maximum 75Kg per attachment foot worst case7
FordTransit 2006.5 (April 2006–)
Date of Publication: 12/2006
5 Body and Paint
217123564E75917
Page 218 of 234
5.8 Air Bag Supplemental Restraint System (SRS)
5.8.1 Air Bags
Front Seats
Side airbags are not compatible with swiveling
front seats.
Do not specify the base vehicle with side airbags
when planning to retrofit a swiveling device on
the front seats and/or an armrest on the outer
side of the front seats, this may affect the function
and/or deployment of the side airbags.
The airbag sensors for side airbags are located
nearby the bottom of the B-pillar
WARNING: Modifications or
reinforcements in the area of the
sensors may affect the side airbag
fire timing and result in uncontrolled
side air bag deployment.
Please note that vehicles not equipped with side
airbags but equipped with front airbags only are
not affected.
Drilling or grinding operations in this area are only
permitted when battery cables are disconnected.
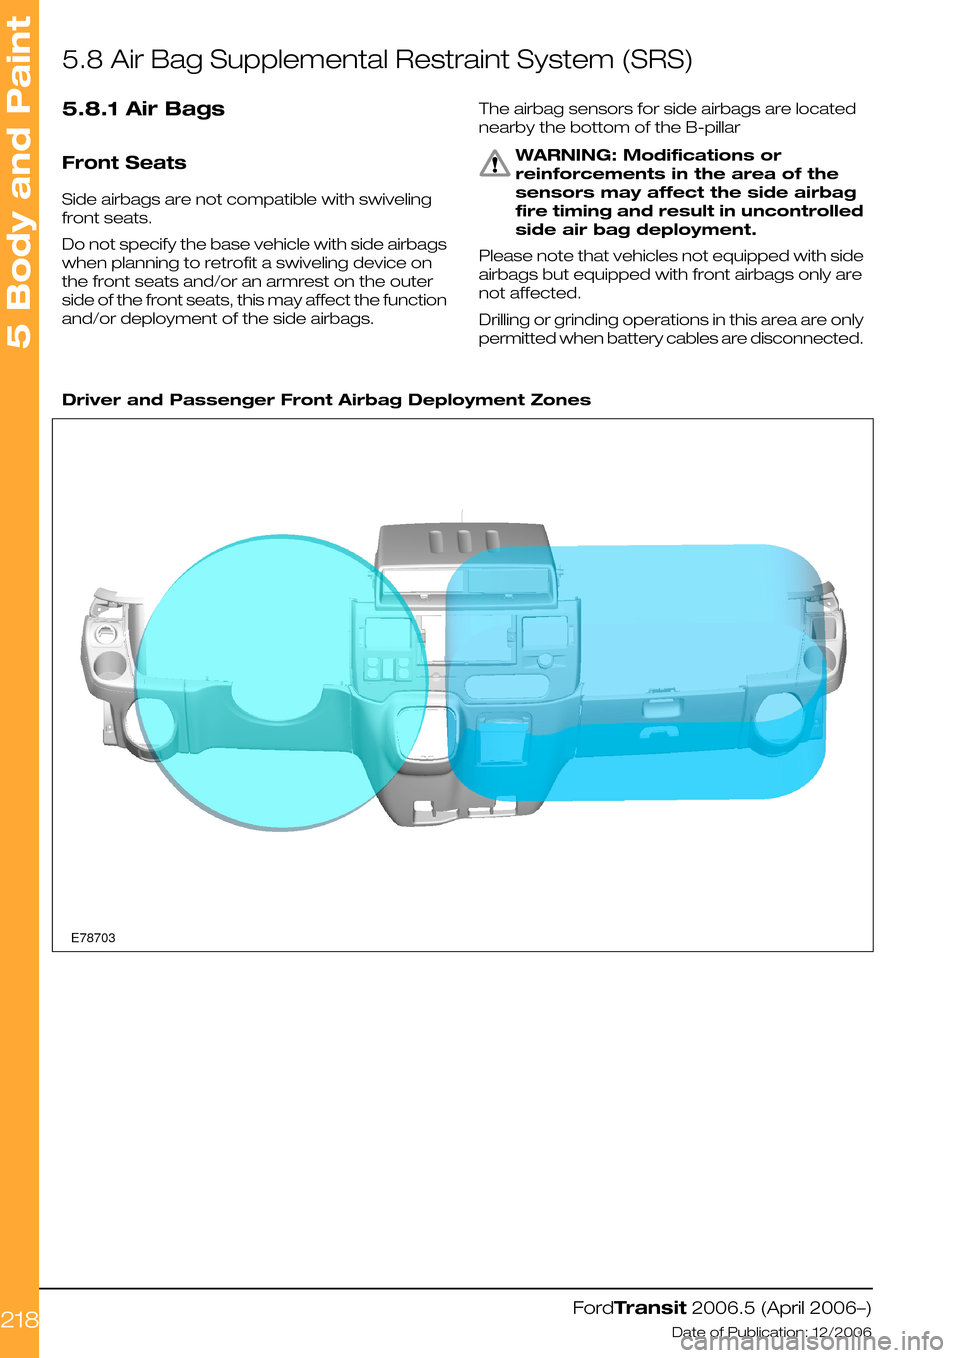
Driver and Passenger Front Airbag Deployment Zones
FordTransit 2006.5 (April 2006–)
Date of Publication: 12/2006
5 Body and Paint
218E78703
Page 219 of 234
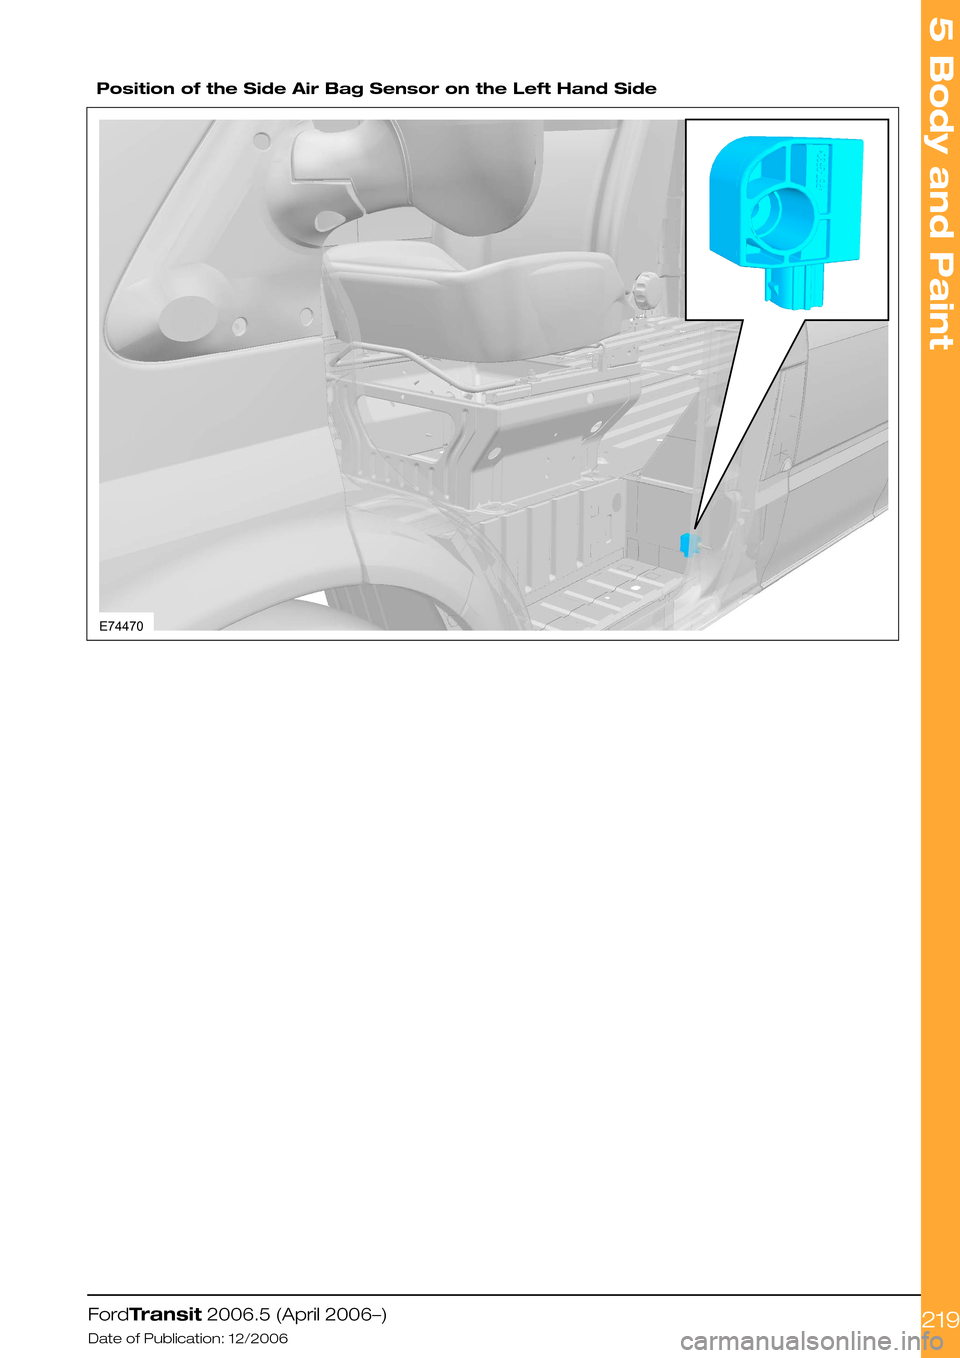
Position of the Side Air Bag Sensor on the Left Hand Side
FordTransit 2006.5 (April 2006–)
Date of Publication: 12/2006
5 Body and Paint
219E74470
Page 220 of 234
5.9 Safety Belt System
WARNING: Follow removal and
installation procedures for the seat
belt system to ensure correct
function of the restraints system.
The removal and reinstallation of the seat belt,
strainer or any component of the seat belt system
should be avoided. In case the removal and
re-installation system is required during the
conversion, however, follow the guidelines for
removal and installation of the seat belt system
as described in the workshop manual. Please
consult your local National Sales Company
representative for further information
When removing the seat belt system, a seat belt
webbing forked retainer should be applied to the
webbing 200mm below the webbing button stop.
This prevents a situation where all the webbing
runs back into the retractor and the retractor
becomes locked.
When reinstalling, fit the retractor to the body first
and gently pull the webbing out of the retractor
to allow fitment of the D loop. Then remove the
forked retainer. If the retractor is locked, allow a
small amount of webbing to reel back into the
retractor to allow the webbing lock to release. Do
not attempt to release the retractor by pulling on
the webbing with significant force or by manually
interfering with the locking mechanism.
FordTransit 2006.5 (April 2006–)
Date of Publication: 12/2006
5 Body and Paint
220