GEELY FC 2008 Workshop Manual
Manufacturer: GEELY, Model Year: 2008, Model line: FC, Model: GEELY FC 2008Pages: 419, PDF Size: 13.87 MB
Page 151 of 419

Brake--Vacuum booster assembly140 10. Connect brake main pumpAssemble U-shaped joint pin in U-shaped joint and brake pedal, and assemble fixing clamp to U-shaped
joint pin.11. Assemble brake main pump
12. Assemble carbon canister assembly [4G18-1129020]
13. Assemble air filter assembly [64000033]
14. Add brake liquid in liquid storage tank
15. Discharge the air in brake main pump
16. Discharge the air in brake system
17. Check and adjust the height of brake pedal
18. Check the pedal free travel
19. Check the height from pedal to floor
20. Check the liquid level in storage tank
21. Check whether the brake liquid leaks
Page 152 of 419

Brake--Front brake assemblyFront brake assemblyOverhaul1. Disassemble front wheels.
2. Discharge brake liquid.Note: do not spill the brake liquid on paint surface of automobile body, if having, wash it cleanly.3. Disassemble brake branch pump assembly.(a) Disassemble the bolts and gaskets of brake hose joint on
brake branch pump, then disassemble brake hose.
Hint: the gasket has two types: two sheets type or one
type.
(b) Fix sliding pin of cylinder body to disassemble two bolts.4. Disassemble brake block of front wheels.(a) Disassemble brake block with muffle gasket.
(b) Disassemble muffle gasket from every brake block.5. Disassemble support sheet of brake block.
6. Disassemble sliding pin of brake branch pump.Disassemble sliding pin on branch pump bracket.7. Disassemble dustproof cover on brake branch pump.Disassemble two dustproof covers from brake branch pump
of disk.8. Disassemble left front brake branch pump.Disassemble two bolts and brake branch pump bracket.9. Disassemble dustproof cover of branch pump.Use screw driver to disassemble oil seal loop and dustproof
cover.10. Disassemble the piston of brake branch pump.(a) Put a cloth or similar thing between piston and branch pump.
(b) Use compressed air to disassemble piston from branch
pump.
Warning: when using compressed air, do not put your
finger at the front of piston.
Note: you could not be splashed by brake liquid.11. Disassemble oil seal of piston.Use screw driver to disassemble oil seal of piston from branch
pump.12. Disassemble exhaust bolt of branch pump.Brake branch pump
Dustproof cover141
Page 153 of 419

Brake--Front brake assembly13. Check the brake branch pump and pistonCheck whether there is rust or scratch in cylinder of branch
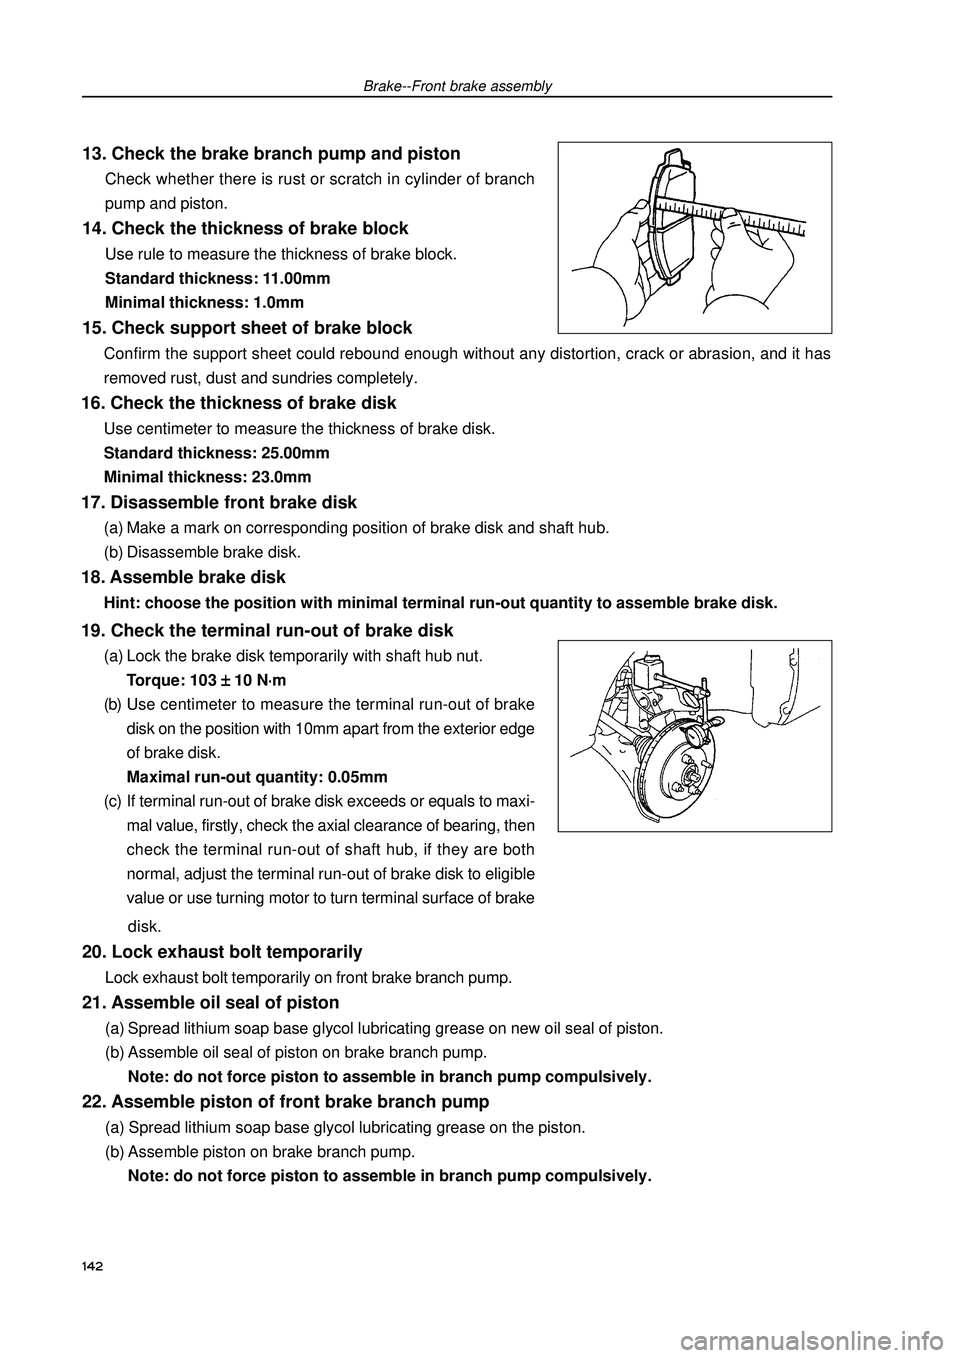
pump and piston.14. Check the thickness of brake blockUse rule to measure the thickness of brake block.
Standard thickness: 11.00mm
Minimal thickness: 1.0mm15. Check support sheet of brake block
142Confirm the support sheet could rebound enough without any distortion, crack or abrasion, and it has
removed rust, dust and sundries completely.16. Check the thickness of brake diskUse centimeter to measure the thickness of brake disk.
Standard thickness: 25.00mm
Minimal thickness: 23.0mm17. Disassemble front brake disk(a) Make a mark on corresponding position of brake disk and shaft hub.
(b) Disassemble brake disk.18. Assemble brake diskHint: choose the position with minimal terminal run-out quantity to assemble brake disk.19. Check the terminal run-out of brake disk(a) Lock the brake disk temporarily with shaft hub nut.
Torque: 103
± ± ± ±
± 10 N
⋅ ⋅⋅ ⋅
⋅m
(b) Use centimeter to measure the terminal run-out of brake
disk on the position with 10mm apart from the exterior edge
of brake disk.
Maximal run-out quantity: 0.05mm
(c) If terminal run-out of brake disk exceeds or equals to maxi-
mal value, firstly, check the axial clearance of bearing, then
check the terminal run-out of shaft hub, if they are both
normal, adjust the terminal run-out of brake disk to eligible
value or use turning motor to turn terminal surface of brake
disk.20. Lock exhaust bolt temporarilyLock exhaust bolt temporarily on front brake branch pump.21. Assemble oil seal of piston(a) Spread lithium soap base glycol lubricating grease on new oil seal of piston.
(b) Assemble oil seal of piston on brake branch pump.
Note: do not force piston to assemble in branch pump compulsively.22. Assemble piston of front brake branch pump(a) Spread lithium soap base glycol lubricating grease on the piston.
(b) Assemble piston on brake branch pump.
Note: do not force piston to assemble in branch pump compulsively.
Page 154 of 419

Brake--Front brake assembly23.Assemble dustproof cover of branch pump..(a) After spreading lithium soap base glycol lubricating grease
on new dustproof cover of branch pump, assembling it in
brake branch pump.
Hint: dustproof cover should be assembled in branch
pump firmly.
(b) Use wrench to assemble fixing loop.
Note: do not damage dustproof cover.24. Assemble brake branch pump bracket.Use two bolts to assemble brake branch pump bracket.
Torque: 106
± ±± ±
± 10 N
⋅ ⋅⋅ ⋅
⋅m25. Assemble dustproof cover of brake branch pump
bracket.(a) Spread lithium soap base glycol lubricating grease on new
dustproof cover.
(b) Assemble two dustproof covers in front brake branch pump
bracket.26. Assemble sliding pin of front brake branch pump.(a) Spread lithium soap base glycol lubricating grease on the
surface of sliding part and sliding pin.
(b) Assemble two sliding pins in front brake branch pump
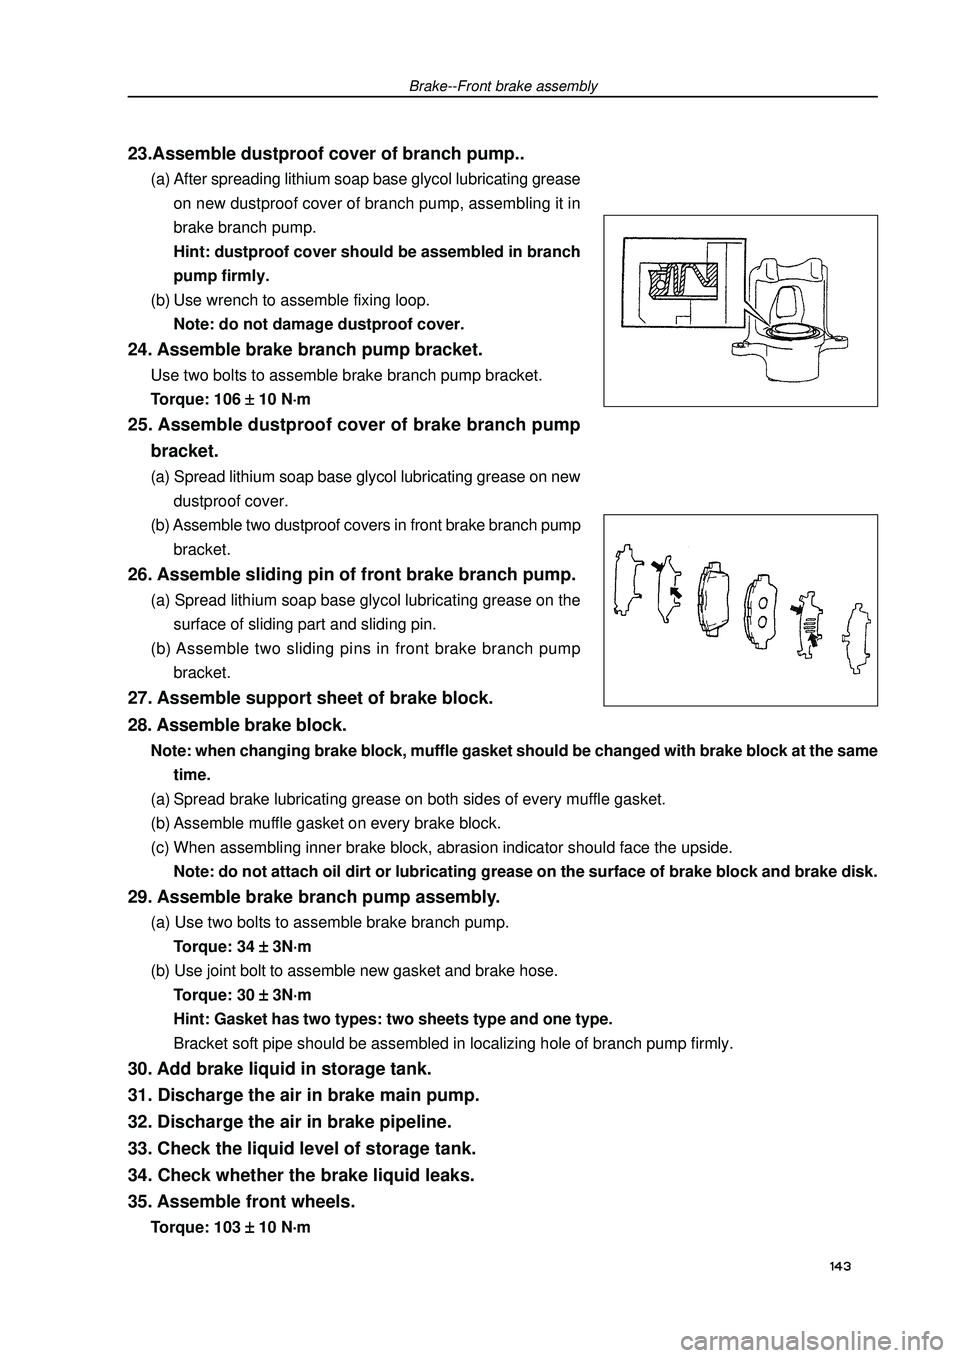
bracket.27. Assemble support sheet of brake block.143 28. Assemble brake block.Note: when changing brake block, muffle gasket should be changed with brake block at the same
time.
(a) Spread brake lubricating grease on both sides of every muffle gasket.
(b) Assemble muffle gasket on every brake block.
(c) When assembling inner brake block, abrasion indicator should face the upside.
Note: do not attach oil dirt or lubricating grease on the surface of brake block and brake disk.29. Assemble brake branch pump assembly.(a) Use two bolts to assemble brake branch pump.
Torque: 34
± ±± ±
± 3N
⋅ ⋅⋅ ⋅
⋅m
(b) Use joint bolt to assemble new gasket and brake hose.
Torque: 30
± ±± ±
± 3N
⋅ ⋅⋅ ⋅
⋅m
Hint: Gasket has two types: two sheets type and one type.
Bracket soft pipe should be assembled in localizing hole of branch pump firmly.30. Add brake liquid in storage tank.
31. Discharge the air in brake main pump.
32. Discharge the air in brake pipeline.
33. Check the liquid level of storage tank.
34. Check whether the brake liquid leaks.
35. Assemble front wheels.Torque: 103
± ±± ±
± 10 N
⋅ ⋅⋅ ⋅
⋅m
Page 155 of 419

Brake--Rear brake assemblyRear brake assembly
OverhaulHint: overhaul procedure for right side is same as the left side.1. Disassemble rear wheels.
2. Discharge brake liquid.Note: do not spill the brake liquid on paint surface of automobile body, if having, wash it cleanly.3. Disassemble brake block of rear wheels.(a) Disassemble fixing clamp of anti-vibration spring.
(b) Disassemble two guide pins of brake block and brake block
with muffle gasket.
(c) Take down muffle gasket from every brake block.4. Disassemble left rear brake branch pump.(a) Disassemble the joint, bolt and gasket of brake hose of brake
branch pump, then disassemble brake hose.
Hint: gasket has two types: two sheets type and one
sheet type
(b) Disassemble two bolts and brake branch pump.5. Disassemble the bushing of brake branch pump.Disassemble two bushings from brake branch pump.6. Disassemble dustproof bushing of rear brake.Disassemble three dustproof bushings.7. Disassemble dustproof cover of branch pump.Use screw driver to disassemble fixing loop and dustproof cover.8. Disassemble the piston of brake branch pump.(a) Put a cloth or similar thing between the piston and branch
pump.
(b) Use compressed air to disassemble piston from branch
pump.
Warning: when using compressed air, do not put your
fingers at the front of piston.
Note: do not let brake liquid splash on you.9. Disassemble oil seal of piston.144
Page 156 of 419

Brake--Rear brake assemblyUse screw driver to disassemble oil seal of piston from brake
branch pump.
Note: do not damage cylinder wall and slot.10. Disassemble exhaust bolt of branch pump.
11. Check whether there is any dust or scratch on
branch pump and piston.
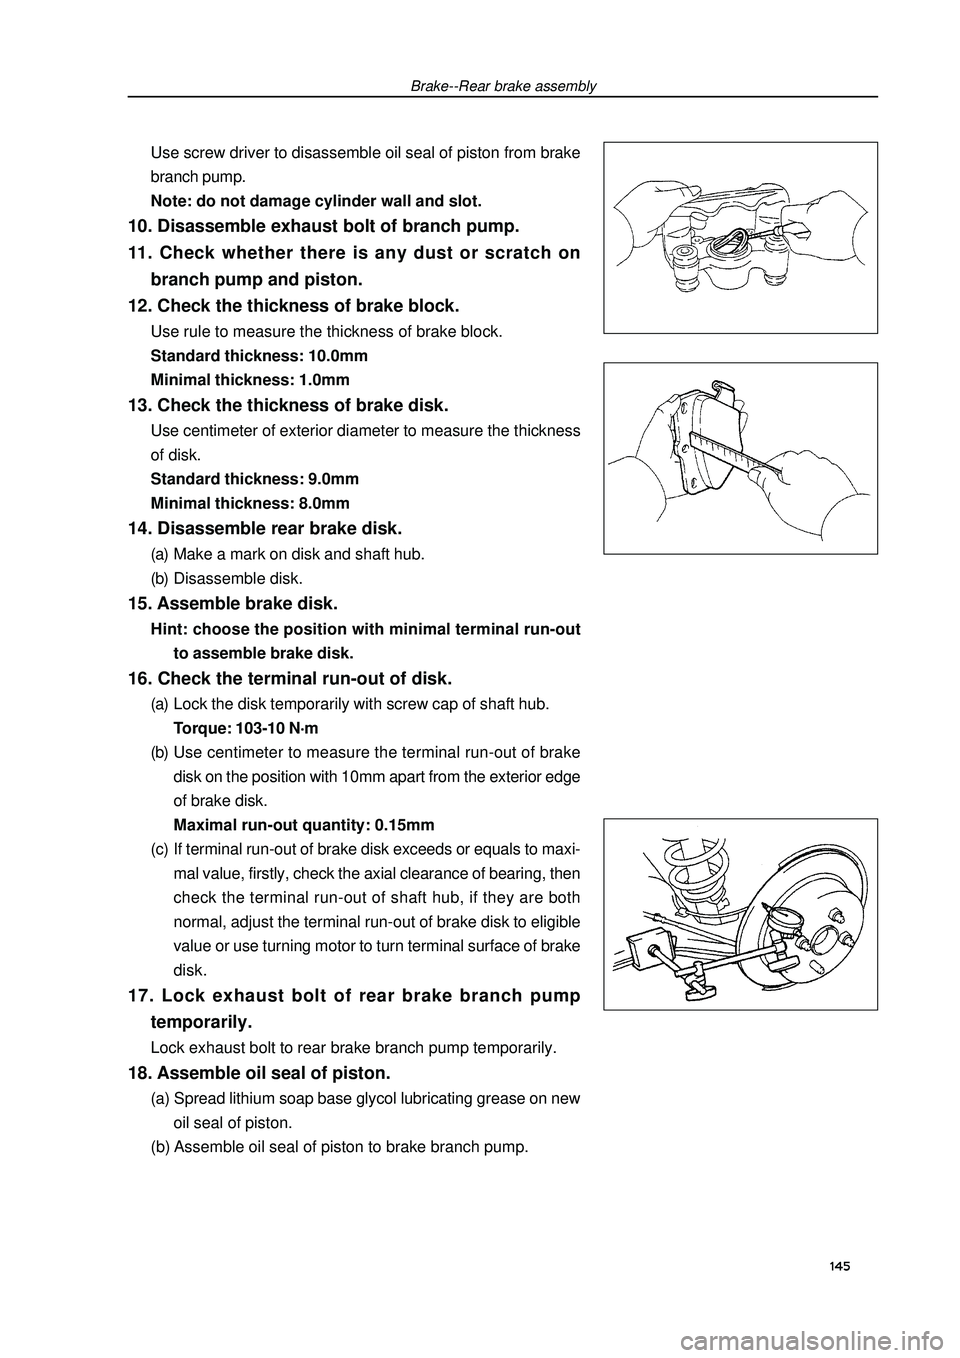
12. Check the thickness of brake block.Use rule to measure the thickness of brake block.
Standard thickness: 10.0mm
Minimal thickness: 1.0mm13. Check the thickness of brake disk.Use centimeter of exterior diameter to measure the thickness
of disk.
Standard thickness: 9.0mm
Minimal thickness: 8.0mm14. Disassemble rear brake disk.(a) Make a mark on disk and shaft hub.
(b) Disassemble disk.15. Assemble brake disk.Hint: choose the position with minimal terminal run-out
to assemble brake disk.16. Check the terminal run-out of disk.(a) Lock the disk temporarily with screw cap of shaft hub.
Torque: 103-10 N
⋅ ⋅⋅ ⋅
⋅m
(b) Use centimeter to measure the terminal run-out of brake
disk on the position with 10mm apart from the exterior edge
of brake disk.
Maximal run-out quantity: 0.15mm
(c) If terminal run-out of brake disk exceeds or equals to maxi-
mal value, firstly, check the axial clearance of bearing, then
check the terminal run-out of shaft hub, if they are both
normal, adjust the terminal run-out of brake disk to eligible
value or use turning motor to turn terminal surface of brake
disk.17. Lock exhaust bolt of rear brake branch pump
temporarily.Lock exhaust bolt to rear brake branch pump temporarily.18. Assemble oil seal of piston.(a) Spread lithium soap base glycol lubricating grease on new
oil seal of piston.
(b) Assemble oil seal of piston to brake branch pump.145
Page 157 of 419

Brake--Rear brake assembly19. Assemble piston of Rear brake branch pump(a) Spread lithium soap base glycol lubricating grease on the
piston.
(b) Assemble piston on brake branch pump.
Note: do not force piston to assemble in branch pump
compulsively.20. Assemble dustproof cover of branch pump.(a) Spread lithium soap base glycol lubricating grease on new
dustproof cover of branch pump.
(b) Assemble dustproof cover in brake branch pump.
Hint: dustproof cover should be assembled in branch
pump firmly.
(c) Use screw driver to assemble fixing loop.
Note: do not damage dustproof cover.21. Assemble dustproof bushing of rear brake.(a) Spread lithium soap base glycol lubricating grease on the
surface of three dustproof bushings.
(b) Assemble three dustproof bushings in brake branch pump.22. Assemble the bushing of brake branch pump
bracket.Assemble two bushings of brake branch pump bracket.23. Assemble brake branch pump.(a) Assemble branch pump with two bolts.
Torque: 47
± ±± ±
± 4N
⋅ ⋅⋅ ⋅
⋅m
(b) Assemble new gasket and brake hose with joint bolt.
Torque: 30
± ±± ±
± 3N
⋅ ⋅⋅ ⋅
⋅m
Hint:�zGasket has two types: two sheets type and one
sheet type.�zBrake soft pipe should be assembled in localizing
hole of branch pump firmly.146Brake branch pump
Dustproof cover
Dustproof cover
Brake branch pump
Page 158 of 419

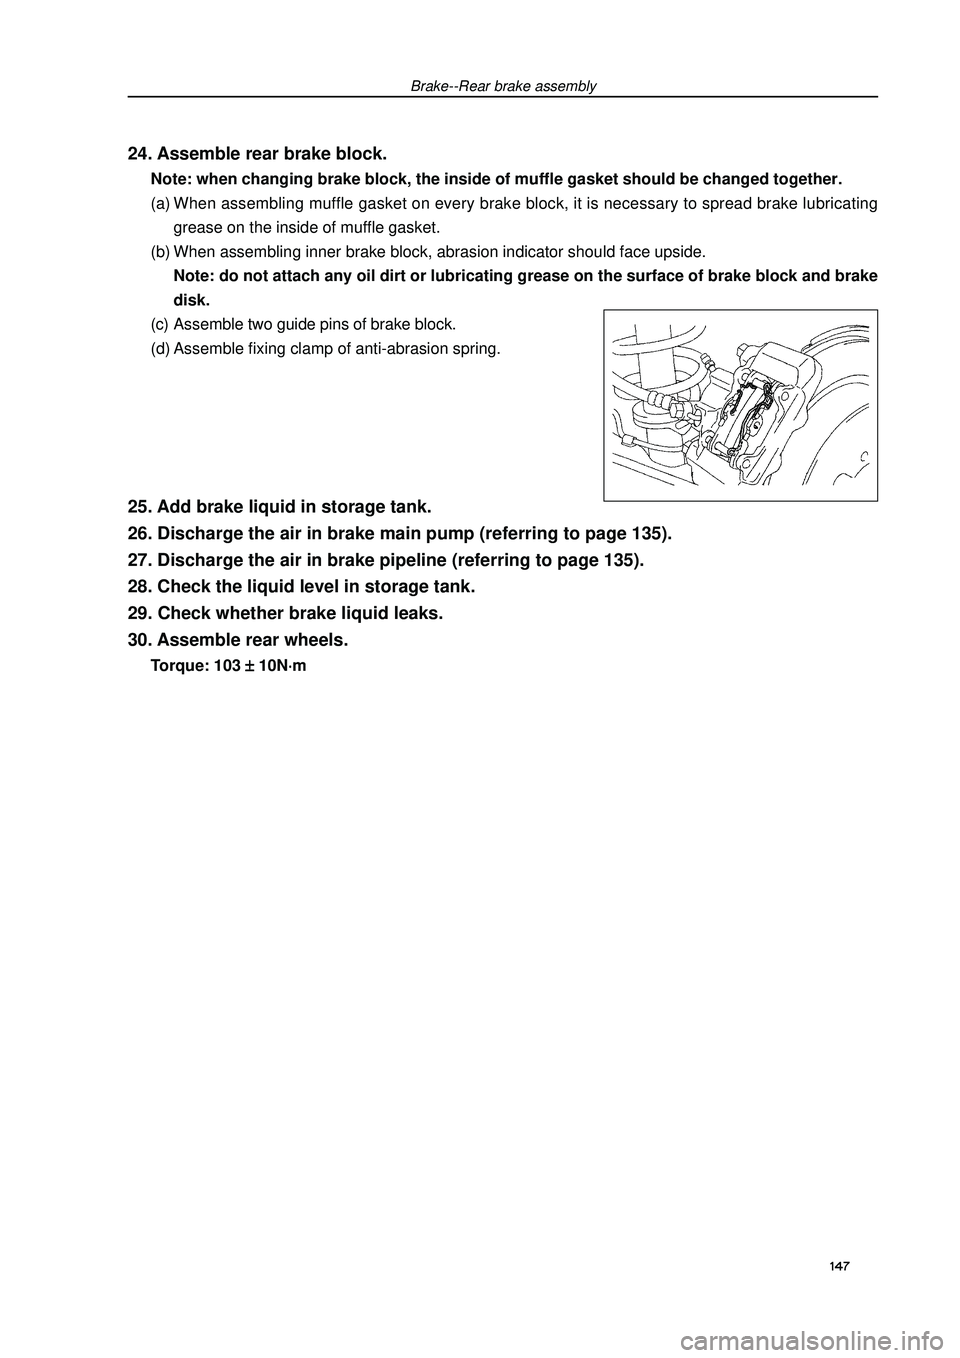
Brake--Rear brake assembly24. Assemble rear brake block.Note: when changing brake block, the inside of muffle gasket should be changed together.
(a) When assembling muffle gasket on every brake block, it is necessary to spread brake lubricating
grease on the inside of muffle gasket.
(b) When assembling inner brake block, abrasion indicator should face upside.
Note: do not attach any oil dirt or lubricating grease on the surface of brake block and brake
disk.
(c) Assemble two guide pins of brake block.
(d) Assemble fixing clamp of anti-abrasion spring.25. Add brake liquid in storage tank.
26. Discharge the air in brake main pump (referring to page 135).
27. Discharge the air in brake pipeline (referring to page 135).
28. Check the liquid level in storage tank.
29. Check whether brake liquid leaks.
30. Assemble rear wheels.Torque: 103
± ±± ±
± 10N
⋅ ⋅⋅ ⋅
⋅m147
Page 159 of 419

Hydraulic control unit (equipping with ABS)Inspection on automobile1. Connect handle tester(a) Connect handle tester to DLC3.
(b) Start the engine and make it run at idling speed.
(c) Handle tester should choose “Active test” module.
Hint: details could refer to operating instruction for handle tester.2. Check the function of hydraulic .(a) Start the motor relay, and check hydraulic motor should have working sound.
(b) Stop the motor relay.
(c) Step brake pedal for 15 minutes, and check brake pedal should not be stepped down.
(d) Start the motor relay, and check brake pedal should not have any pulse.
Note: Time when motor relay locates ON could not exceed 5 seconds, when it is necessary to
operate continually, interval time should be over 20 seconds.
(e) Stop the motor relay and release brake pedal.3. Check the function of right front wheel.Note: forbid making electromagnetic valve be ON in following situations.
(a) Make following operation when brake pedal is stepped down.
(b) Make electromagnetic valve SFRH and SFRR be ON at the same time, and check the brake pedal
should not be stepped down.
Note: Time when motor relay locates ON could not exceed 5 seconds, when it is necessary to
operate continually, interval time should be over 20 seconds.
(c) Make electromagnetic valve SFRH and SFRR be OFF at the same time, and check the brake pedal
should be able to be stepped down.
(d) Make electromagnetic valve SFRH and SFRR be ON at the same time, and check whether the brake
pedal could return.
Note: Time when motor relay locates ON could not exceed 5 seconds, when it is necessary to
operate continually, interval time should be over 20 seconds.
(e) Make motor relay be OFF and release brake pedal.4. Check the function of other wheels.Check the electromagnetic valves of other wheels by same procedure.
Hint:
Left front wheel: SFLH,SFLR
Right rear wheel: SRRH,SRRR
Left rear wheel: SRLH, SRLRChange1. Discharge brake liquid.Note: do not leave brake liquid on paint surface of automobile body, if having, wash it cleanly.2. Disassemble right front wheel.Brake--Hydraulic pressure control unit148
Page 160 of 419

Brake--Hydraulic pressure control unit3. Disassemble gasket of right wheel wing.
4. Disassemble hydraulic control unit and bracket.(a) Disassemble the joint and bolt.
(b) Turn the locking bolt of joint of hydraulic control unit, and
disassemble the joint.
(c) Use special tool to disassemble the brake oil pipe on hy-
draulic control unit.
(d) Use label to mark the name of every oil pipe, and tie it on
oil pipe.
(e) Disassemble screw caps, two bolts and hydraulic control
unit and bracket.5. Disassemble hydraulic control unit assembly.Disassemble three bolts and hydraulic control unit from the bracket.6. Assemble hydraulic control unit assembly.Assemble three bolts and hydraulic control unit on the bracket with three bolts.
Torque: 4.7 N
⋅ ⋅⋅ ⋅
⋅m149Connect the front
of main cylinder
Connect the back
of main cylinder
Connect 2#
brake pipe
Connect the front left
Connect 2#
brake pipeConnect the front right