GENESIS G80 2021 Workshop Manual
Manufacturer: GENESIS, Model Year: 2021, Model line: G80, Model: GENESIS G80 2021Pages: 604, PDF Size: 11.47 MB
Page 51 of 604
03
3-21
• Seat Heater Balance
You may lower the seat warmer
setting, or may turn the seat warmer
off for either the seatback or seat
cushion, when the seat warmer is on.
To use this function, it must be
enabled from the Settings menu in the
infotainment system screen. Select:
-Setup -> Vehicle Settings -> Seat -> Heated/Ventilated Features -> Seat Heater Balance
• When touching the icon for more than
1.5 seconds with the seat warmer
operating, the seat warmer will turn
OFF.
• The seat warmer defaults to the OFF
position whenever the Engine Start/
Stop button is pressed to the ON
position.
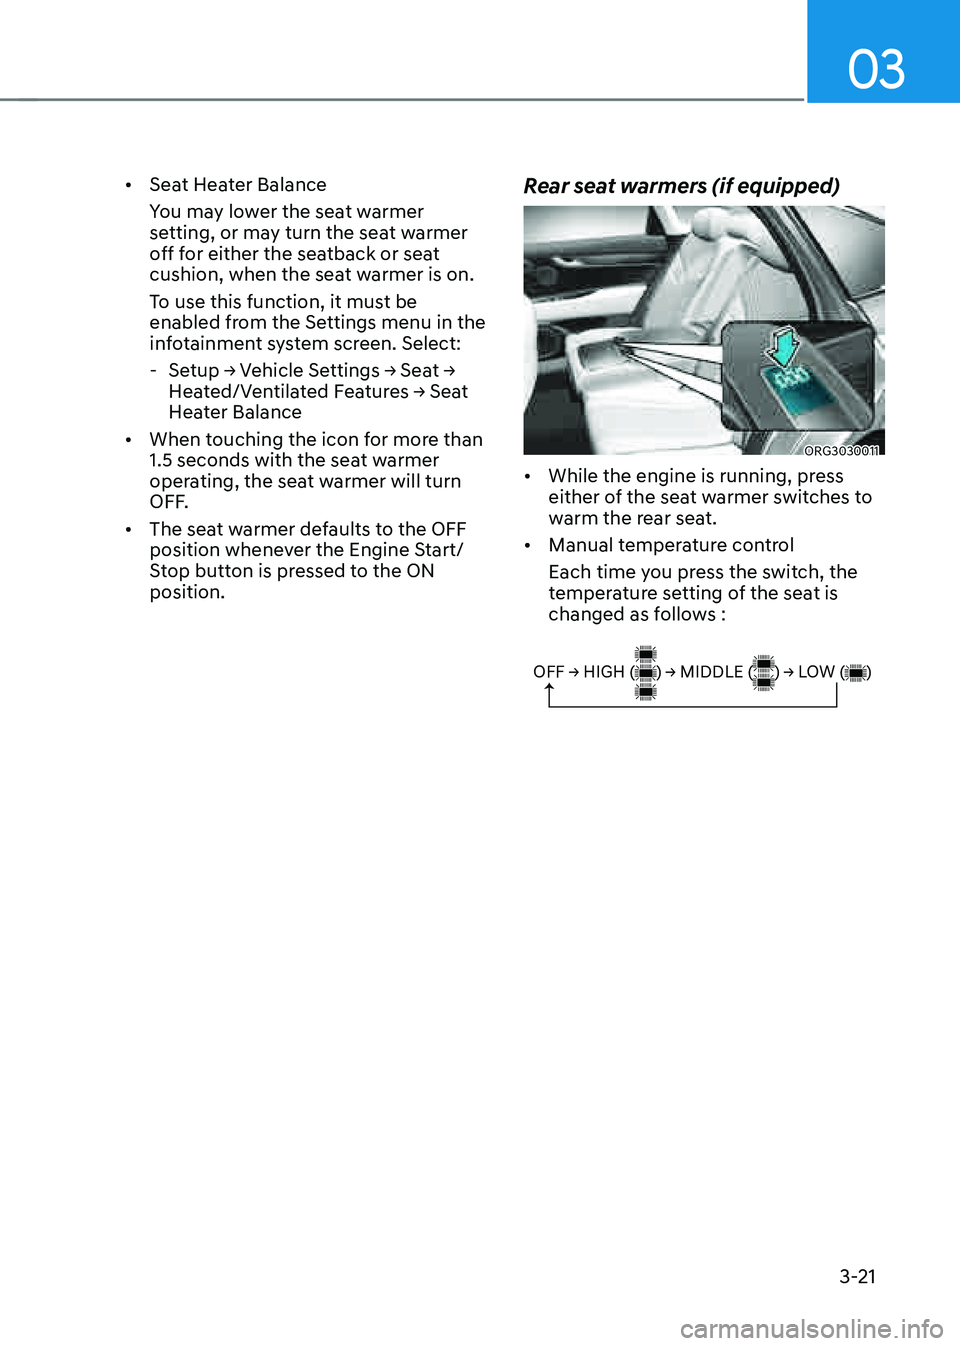
Rear seat warmers (if equipped)
ORG3030011
• While the engine is running, press
either of the seat warmer switches to
warm the rear seat.
• Manual temperature control
Each time you press the switch, the
temperature setting of the seat is
changed as follows :
OFF → HIGH ( ) → MIDDLE ( ) → LOW ( )
Page 52 of 604
Safety System
3-22
• Automatic temperature control
The seat warmer starts to
automatically control the seat
temperature in order to prevent
low temperature burns after being
manually turned ON.
OFF → HIGH ( ) → MIDDLE ( ) → LOW ( )
30 min 60 min
You may manually push the switch to
increase seat temperature. However,
the seat temperature is automatically
adjusted again.
• When pressing the switch for more
than 1.5 seconds with the seat warmer
operating, the seat warmer will turn
OFF.
• The seat warmer defaults to the OFF
position whenever the Engine Start/
Stop button is pressed to the ON
position.
•
ORG3030066N
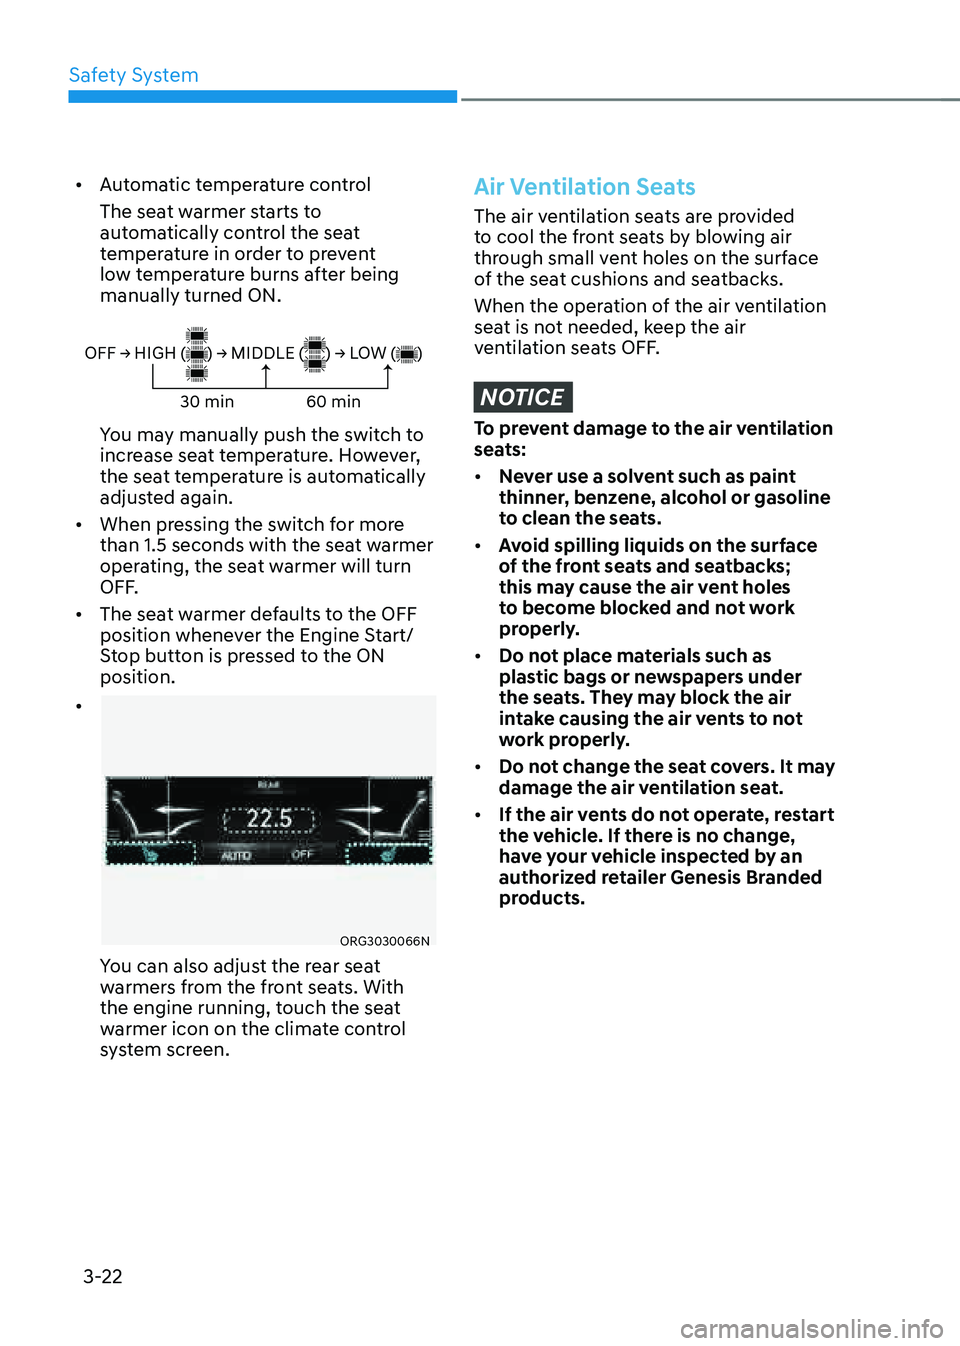
You can also adjust the rear seat
warmers from the front seats. With
the engine running, touch the seat
warmer icon on the climate control
system screen.
Air Ventilation Seats
The air ventilation seats are provided
to cool the front seats by blowing air
through small vent holes on the surface
of the seat cushions and seatbacks.
When the operation of the air ventilation
seat is not needed, keep the air
ventilation seats OFF.
NOTICE
To prevent damage to the air ventilation
seats:
• Never use a solvent such as paint
thinner, benzene, alcohol or gasoline
to clean the seats.
• Avoid spilling liquids on the surface
of the front seats and seatbacks;
this may cause the air vent holes
to become blocked and not work
properly.
• Do not place materials such as
plastic bags or newspapers under
the seats. They may block the air
intake causing the air vents to not
work properly.
• Do not change the seat covers. It may
damage the air ventilation seat.
• If the air vents do not operate, restart
the vehicle. If there is no change,
have your vehicle inspected by an
authorized retailer Genesis Branded
products.
Page 53 of 604
03
3-23
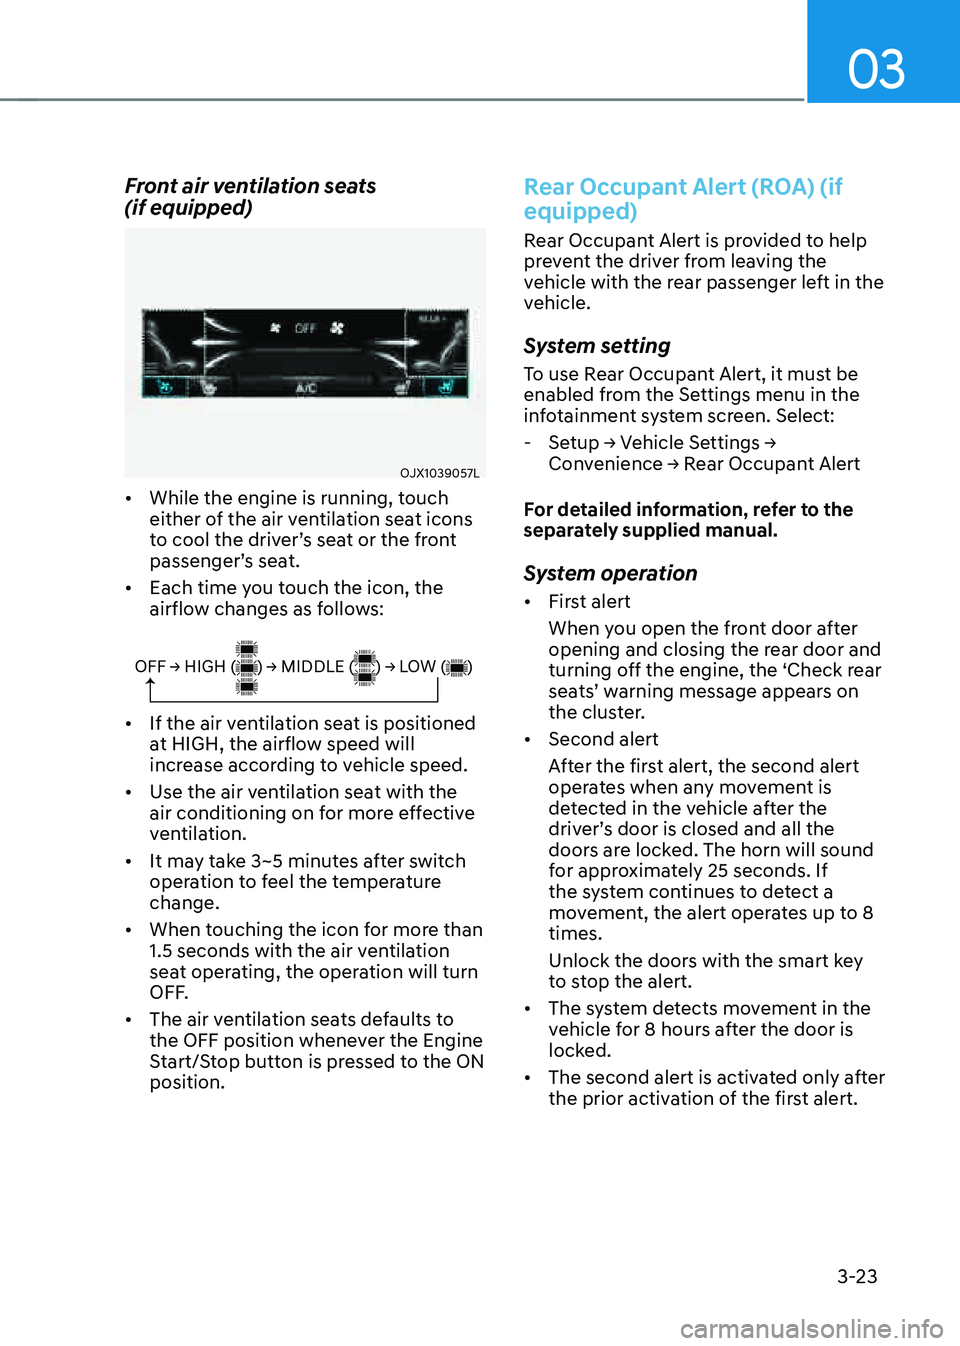
Front air ventilation seats
(if equipped)
OJX1039057L
• While the engine is running, touch
either of the air ventilation seat icons
to cool the driver’s seat or the front
passenger’s seat.
• Each time you touch the icon, the
airflow changes as follows:
OFF → HIGH ( ) → MIDDLE ( ) → LOW ( )
• If the air ventilation seat is positioned
at HIGH, the airflow speed will
increase according to vehicle speed.
• Use the air ventilation seat with the
air conditioning on for more effective
ventilation.
• It may take 3~5 minutes after switch
operation to feel the temperature
change.
• When touching the icon for more than
1.5 seconds with the air ventilation
seat operating, the operation will turn
OFF.
• The air ventilation seats defaults to
the OFF position whenever the Engine
Start/Stop button is pressed to the ON
position.
Rear Occupant Alert (ROA) (if
equipped)
Rear Occupant Alert is provided to help
prevent the driver from leaving the
vehicle with the rear passenger left in the
vehicle.
System setting
To use Rear Occupant Alert, it must be
enabled from the Settings menu in the
infotainment system screen. Select:
-Setup -> Vehicle Settings -> Convenience -> Rear Occupant Alert
For detailed information, refer to the
separately supplied manual.
System operation
• First alert
When you open the front door after
opening and closing the rear door and
turning off the engine, the ‘Check rear
seats’ warning message appears on
the cluster.
• Second alert
After the first alert, the second alert
operates when any movement is
detected in the vehicle after the
driver’s door is closed and all the
doors are locked. The horn will sound
for approximately 25 seconds. If
the system continues to detect a
movement, the alert operates up to 8
times.
Unlock the doors with the smart key
to stop the alert.
• The system detects movement in the
vehicle for 8 hours after the door is
locked.
• The second alert is activated only after
the prior activation of the first alert.
Page 54 of 604
Safety System
3-24
System precautions
• Make sure that all the windows are
closed. If the window is open, the
alert may operate by the sensor
detecting an unintended movement
(e.g. wind or bugs).
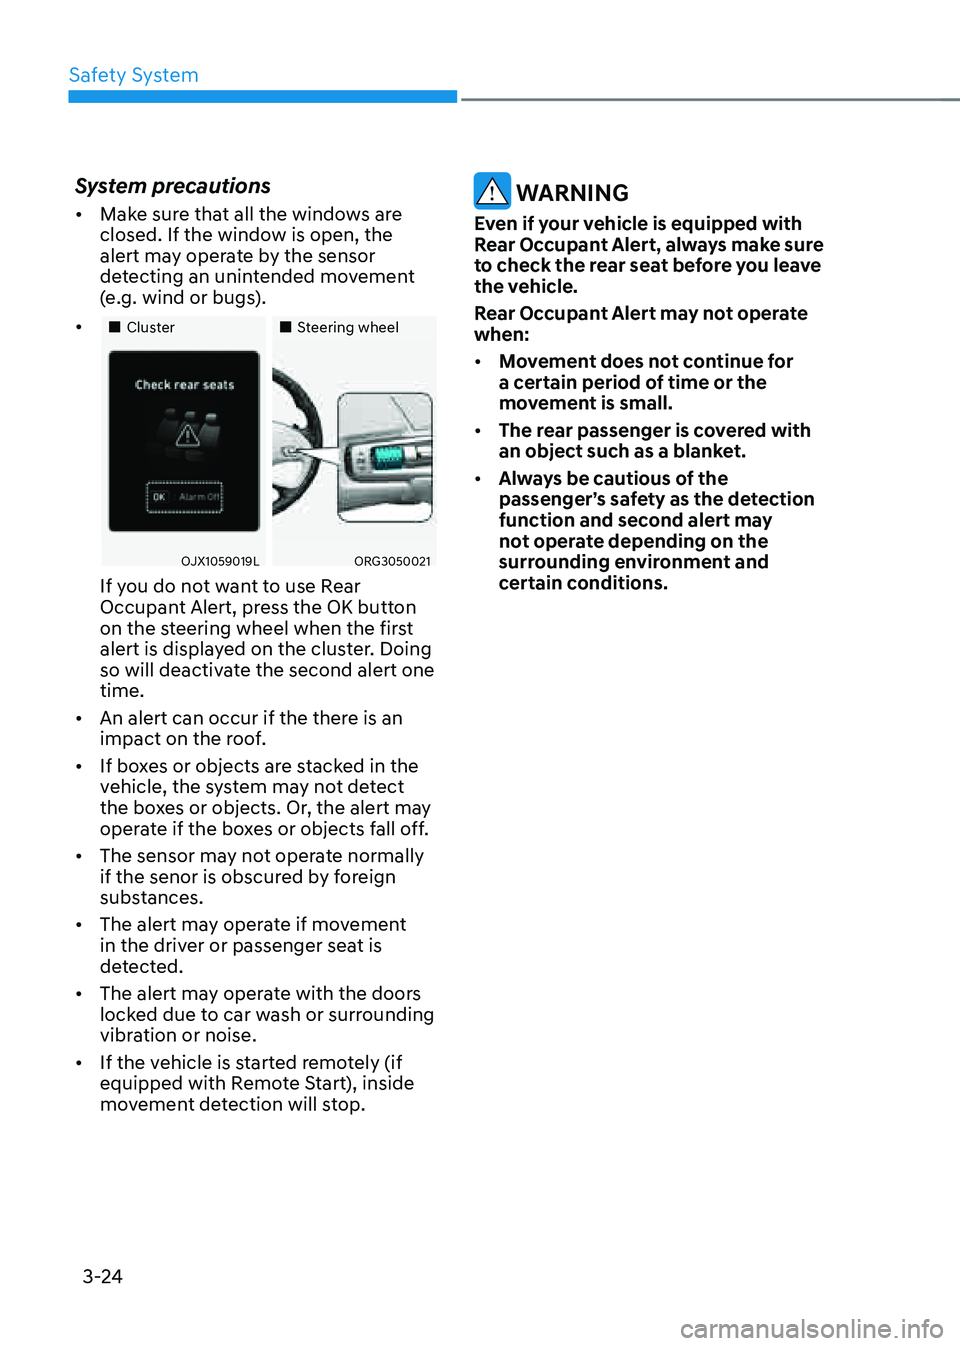
• „„Cluster„„Steering wheel
OJX1059019LORG3050021
If you do not want to use Rear
Occupant Alert, press the OK button
on the steering wheel when the first
alert is displayed on the cluster. Doing
so will deactivate the second alert one
time.
• An alert can occur if the there is an
impact on the roof.
• If boxes or objects are stacked in the
vehicle, the system may not detect
the boxes or objects. Or, the alert may
operate if the boxes or objects fall off.
• The sensor may not operate normally
if the senor is obscured by foreign
substances.
• The alert may operate if movement
in the driver or passenger seat is
detected.
• The alert may operate with the doors
locked due to car wash or surrounding
vibration or noise.
• If the vehicle is started remotely (if
equipped with Remote Start), inside
movement detection will stop.
WARNING
Even if your vehicle is equipped with
Rear Occupant Alert, always make sure
to check the rear seat before you leave
the vehicle.
Rear Occupant Alert may not operate
when:
• Movement does not continue for
a certain period of time or the
movement is small.
• The rear passenger is covered with
an object such as a blanket.
• Always be cautious of the
passenger’s safety as the detection
function and second alert may
not operate depending on the
surrounding environment and
certain conditions.
Page 55 of 604

03
3-25
This section describes how to use the
seat belts properly. It also describes
some of the things not to do when using
seat belts.
Seat Belt Safety Precautions
Always fasten your seat belt and make
sure all passengers have fastened their
seat belts before starting any trip. Air
bags are designed to supplement the
seat belt as an additional safety device,
but they are not a substitute. Most
countries require all occupants of a
vehicle to wear seat belts.
WARNING
Seat belts must be used by ALL
passengers whenever the vehicle is
moving. Take the following precautions
when adjusting and wearing seat belts:
• Children under the age of 13 should
be properly restrained in the rear
seats.
• NEVER allow children to ride in the
front passenger seat, unless the air
bag is deactivated. If a child is seated
in the front passenger seat, move
the seat as far back as possible and
properly restrain them in the seat.
• NEVER allow an infant or child to be
carried on an occupant’s lap.
• NEVER ride with the seatback
reclined when the vehicle is moving.
• Do not allow children to share a seat
or seat belt.
• Do not wear the shoulder belt under
your arm or behind your back.
• NEVER wear a seat belt over fragile
objects. If there is a sudden stop or
impact, the seat belt can damage it.
• Do not use the seat belt if it is
twisted. A twisted seat belt will not
protect you properly in an accident.
• Do not use a seat belt if the webbing
or hardware is damaged.
• Do not latch the seat belt into the
buckles of other seats.
• NEVER unfasten the seat belt
while driving. This may cause loss
of vehicle control resulting in an
accident.
• Make sure there is nothing in the
buckle interfering with the seat belt
latch mechanism. This may prevent
the seat belt from fastening securely.
• No modifications or additions
should be made by the user which
will either prevent the seat belt
adjusting devices from operating to
remove slack, or prevent the seat
belt assembly from being adjusted to
remove slack.
WARNING
Damaged seat belts and seat belt
assemblies will not operate properly.
Always replace:
• Frayed, contaminated, or damaged
webbing.
• Damaged hardware.
• The entire seat belt assembly after it
has been worn in an accident, even
if damage to webbing or assembly is
not apparent.
SEAT BELTS
Page 56 of 604
Safety System
3-26
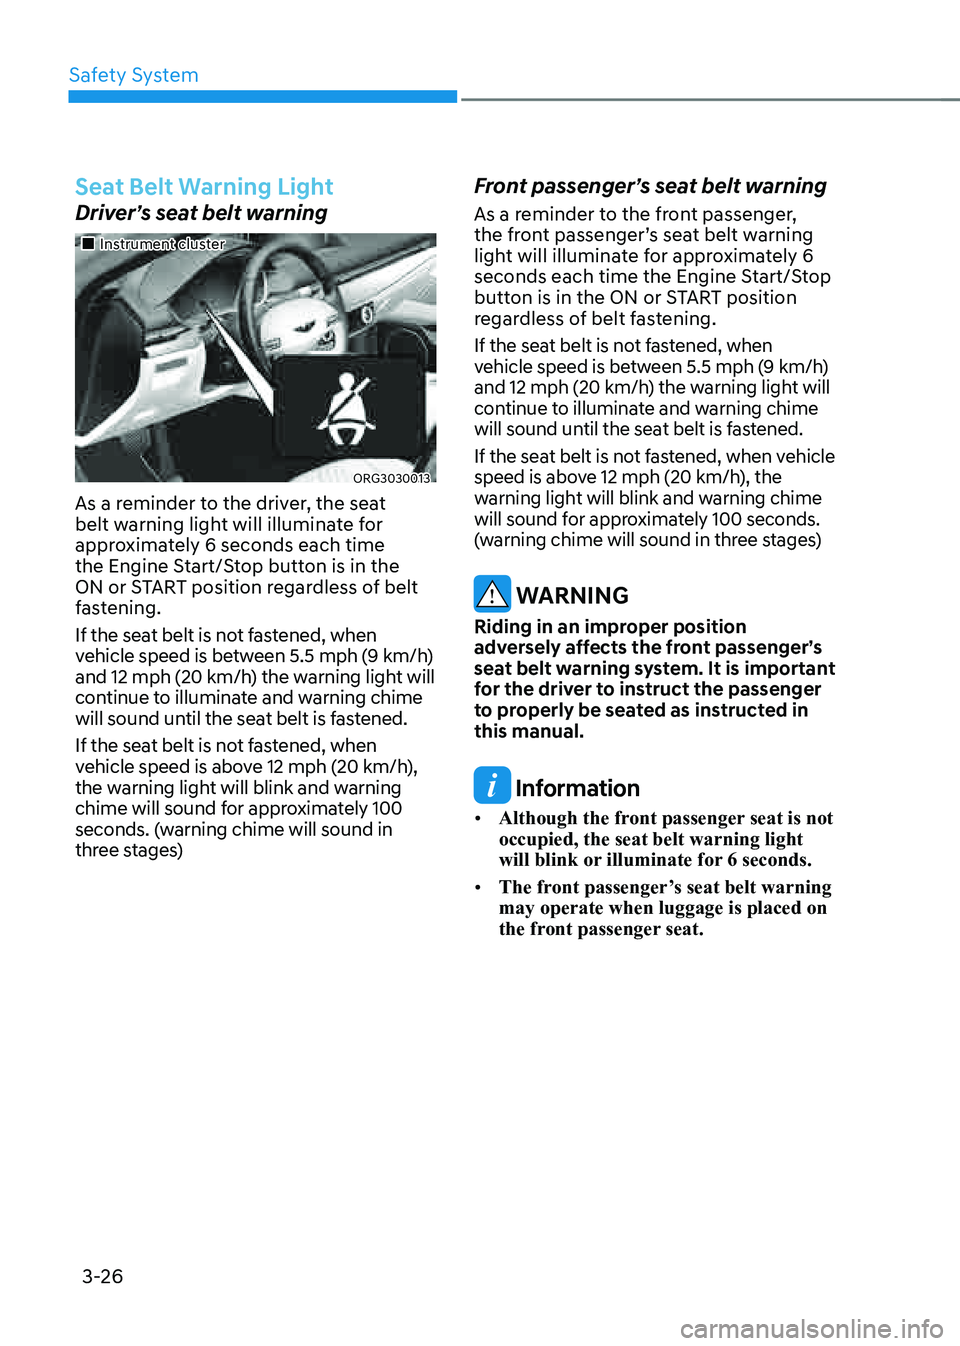
Seat Belt Warning Light
Driver’s seat belt warning
„„Instrument cluster
ORG3030013
As a reminder to the driver, the seat
belt warning light will illuminate for
approximately 6 seconds each time
the Engine Start/Stop button is in the
ON or START position regardless of belt
fastening.
If the seat belt is not fastened, when
vehicle speed is between 5.5 mph (9 km/h)
and 12 mph (20 km/h) the warning light will
continue to illuminate and warning chime
will sound until the seat belt is fastened.
If the seat belt is not fastened, when
vehicle speed is above 12 mph (20 km/h),
the warning light will blink and warning
chime will sound for approximately 100
seconds. (warning chime will sound in
three stages)
Front passenger’s seat belt warning
As a reminder to the front passenger,
the front passenger’s seat belt warning
light will illuminate for approximately 6
seconds each time the Engine Start/Stop
button is in the ON or START position
regardless of belt fastening.
If the seat belt is not fastened, when
vehicle speed is between 5.5 mph (9 km/h)
and 12 mph (20 km/h) the warning light will
continue to illuminate and warning chime
will sound until the seat belt is fastened.
If the seat belt is not fastened, when vehicle
speed is above 12 mph (20 km/h), the
warning light will blink and warning chime
will sound for approximately 100 seconds.
(warning chime will sound in three stages)
WARNING
Riding in an improper position
adversely affects the front passenger’s
seat belt warning system. It is important
for the driver to instruct the passenger
to properly be seated as instructed in
this manual.
Information
• Although the front passenger seat is not
occupied, the seat belt warning light
will blink or illuminate for 6 seconds.
• The front passenger’s seat belt warning
may operate when luggage is placed on
the front passenger seat.
Page 57 of 604

03
3-27
Seat Belt Restraint System
WARNING
Improperly positioned seat belts may
increase the risk of serious injury
in an accident. Take the following
precautions when adjusting the seat
belt:
• Position the lap portion of the seat
belt as low as possible across your
hips, not on your waist, so that it fits
snugly.
• Position one arm under the shoulder
belt and the other over the belt, as
shown in the illustration.
• Always position the shoulder belt
anchor into the locked position at the
appropriate height.
• NEVER position the shoulder belt
across your neck or face.
Seat Belt-Driver’s 3-point system
with emergency locking retractor
OHI038140
To fasten your seat belt:
Pull it out of the retractor and insert the
metal tab (1) into the buckle (2). There
will be an audible “click” when the tab
locks into the buckle.
OHI038137
You should place the lap belt (1) portion
across your hips and the shoulder belt (2)
portion across your chest.
The seat belt automatically adjusts to the
proper length after the lap belt portion
is adjusted manually so that it fits snugly
around your hips. If you lean forward in
a slow, easy motion, the belt will extend
and move with you.
If there is a sudden stop or impact, the
belt will lock into position. It will also lock
if you try to lean forward too quickly.
Page 58 of 604

Safety System
3-28
NOTICE
If you are not able to smoothly pull
enough of the seat belt out from the
retractor, firmly pull the seat belt out
and release it. After release, you will be
able to pull the belt out smoothly.
WARNING
OHI038182L
Improperly positioned seat belts may
increase the risk of serious injury
in an accident. Take the following
precautions when adjusting the seat
belt:
• Position the lap portion of the seat
belt as low as possible across your
hips, not on your waist, so that it
fits snugly. This allows your strong
pelvic bones to absorb the force of
the crash, reducing the chance of
internal injuries.
• Position one arm under the shoulder
belt and the other over the belt, as
shown in the illustration.
• Always position the shoulder belt
anchor into the locked position at the
appropriate height.
• Never position the shoulder belt
across your neck or face.Height adjustment
You can adjust the height of the shoulder
belt anchor to one of the four different
positions for maximum comfort and
safety.
The shoulder portion should be adjusted
so it lies across your chest and midway
over your shoulder nearest the door, not
over your neck.
„„Front seat
ORG3030014
To adjust the height of the seat belt
anchor, lower or raise the height adjuster
into an appropriate position.
To raise the height adjuster, pull it up
(1). To lower it, push it down (3) while
pressing the height adjuster button (2).
Release the button to lock the anchor
into position. Try sliding the height
adjuster to make sure that it has locked
into position.
Page 59 of 604
03
3-29
OHI038142
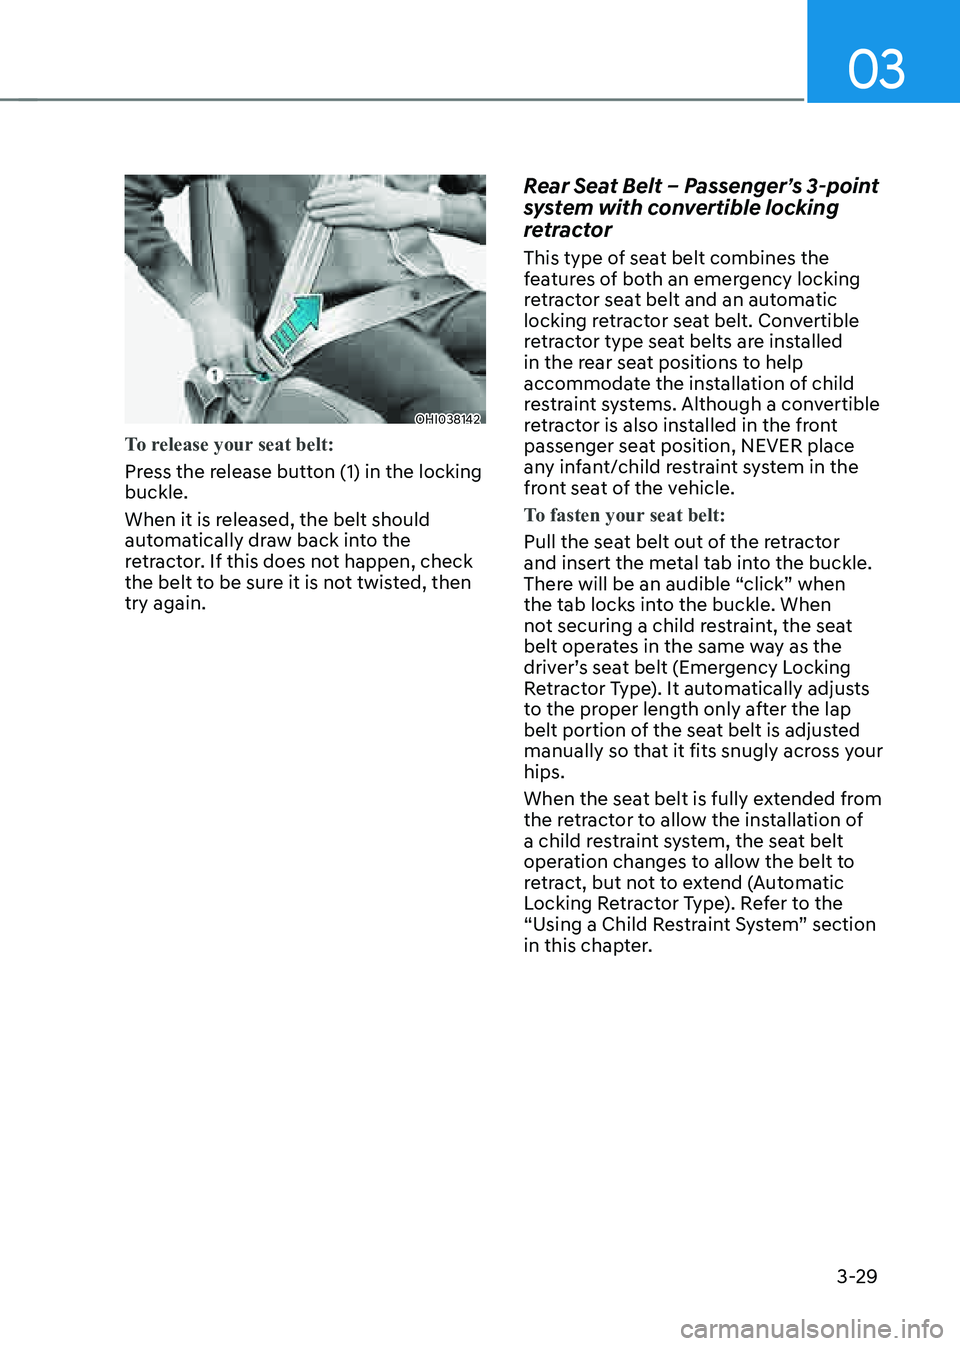
To release your seat belt:
Press the release button (1) in the locking
buckle.
When it is released, the belt should
automatically draw back into the
retractor. If this does not happen, check
the belt to be sure it is not twisted, then
try again.
Rear Seat Belt – Passenger’s 3-point
system with convertible locking
retractor
This type of seat belt combines the
features of both an emergency locking
retractor seat belt and an automatic
locking retractor seat belt. Convertible
retractor type seat belts are installed
in the rear seat positions to help
accommodate the installation of child
restraint systems. Although a convertible
retractor is also installed in the front
passenger seat position, NEVER place
any infant/child restraint system in the
front seat of the vehicle.
To fasten your seat belt:
Pull the seat belt out of the retractor
and insert the metal tab into the buckle.
There will be an audible “click” when
the tab locks into the buckle. When
not securing a child restraint, the seat
belt operates in the same way as the
driver’s seat belt (Emergency Locking
Retractor Type). It automatically adjusts
to the proper length only after the lap
belt portion of the seat belt is adjusted
manually so that it fits snugly across your
hips.
When the seat belt is fully extended from
the retractor to allow the installation of
a child restraint system, the seat belt
operation changes to allow the belt to
retract, but not to extend (Automatic
Locking Retractor Type). Refer to the
“Using a Child Restraint System” section
in this chapter.
Page 60 of 604

Safety System
3-30
NOTICE
Although the seat belt retractor
provides the same level of protection
for seated passengers in either
emergency or automatic locking
modes, the emergency locking mode
allows seated passengers to move
freely in their seat while keeping
some tension on the belt. During a
collision or sudden stop, the retractor
automatically locks the belt to help
restrain your body.
To deactivate the automatic locking
mode, unbuckle the seat belt and allow
the belt to fully retract.
Rear center seat belt (if equipped)
ORG3030015
3. Take out the buckle (2), which is
stored between the seat/seatback
cushions.
4. Insert the metal plate (1) into the
buckle (2), until it clicks.
You can make sure its secure
fastening by pulling the seatbelt
webbing. The buckle with ‘CENTER’
mark should be used for the 3-point
seatbelt.
5. Restore the buckle between the seat/
seatback cushion after unfastening
the seatbelt.