GENESIS G90 2021 Owner's Manual
Manufacturer: GENESIS, Model Year: 2021, Model line: G90, Model: GENESIS G90 2021Pages: 538, PDF Size: 13.02 MB
Page 181 of 538
3-80
Convenient features of your vehicle
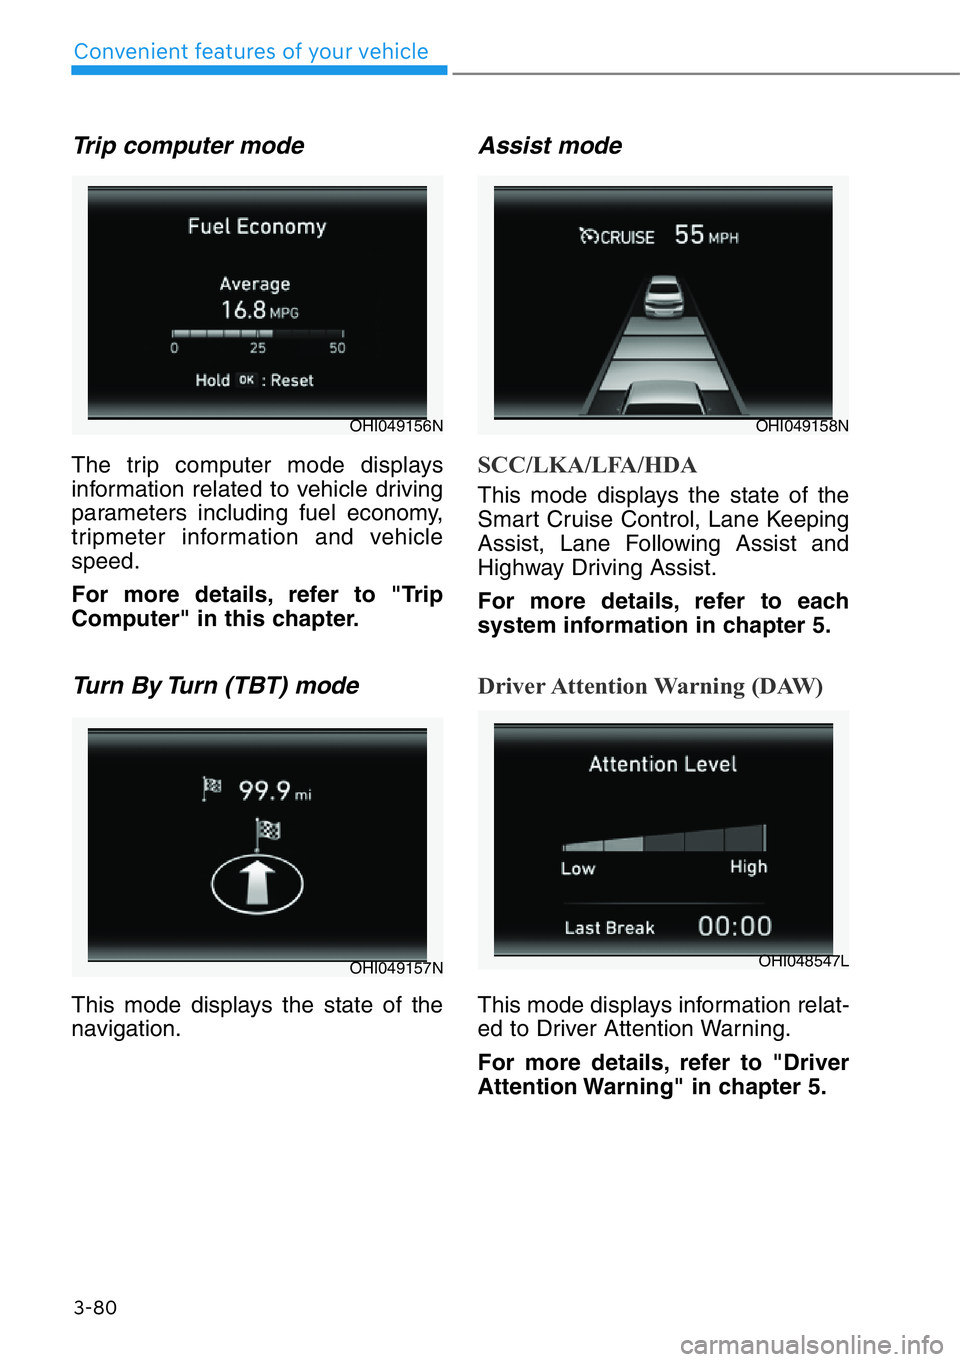
Trip computer mode
The trip computer mode displays
information related to vehicle driving
parameters including fuel economy,
tripmeter information and vehicle
speed.
For more details, refer to "Trip
Computer" in this chapter.
Turn By Turn (TBT) mode
This mode displays the state of the
navigation.
Assist mode
SCC/LKA/LFA/HDA
This mode displays the state of the
Smart Cruise Control, Lane Keeping
Assist, Lane Following Assist and
Highway Driving Assist.
For more details, refer to each
system information in chapter 5.
Driver Attention Warning (DAW)
This mode displays information relat-
ed to Driver Attention Warning.
For more details, refer to "Driver
Attention Warning" in chapter 5.
OHI049156N
OHI049157N
OHI049158N
OHI048547L
Page 182 of 538
3-81
03
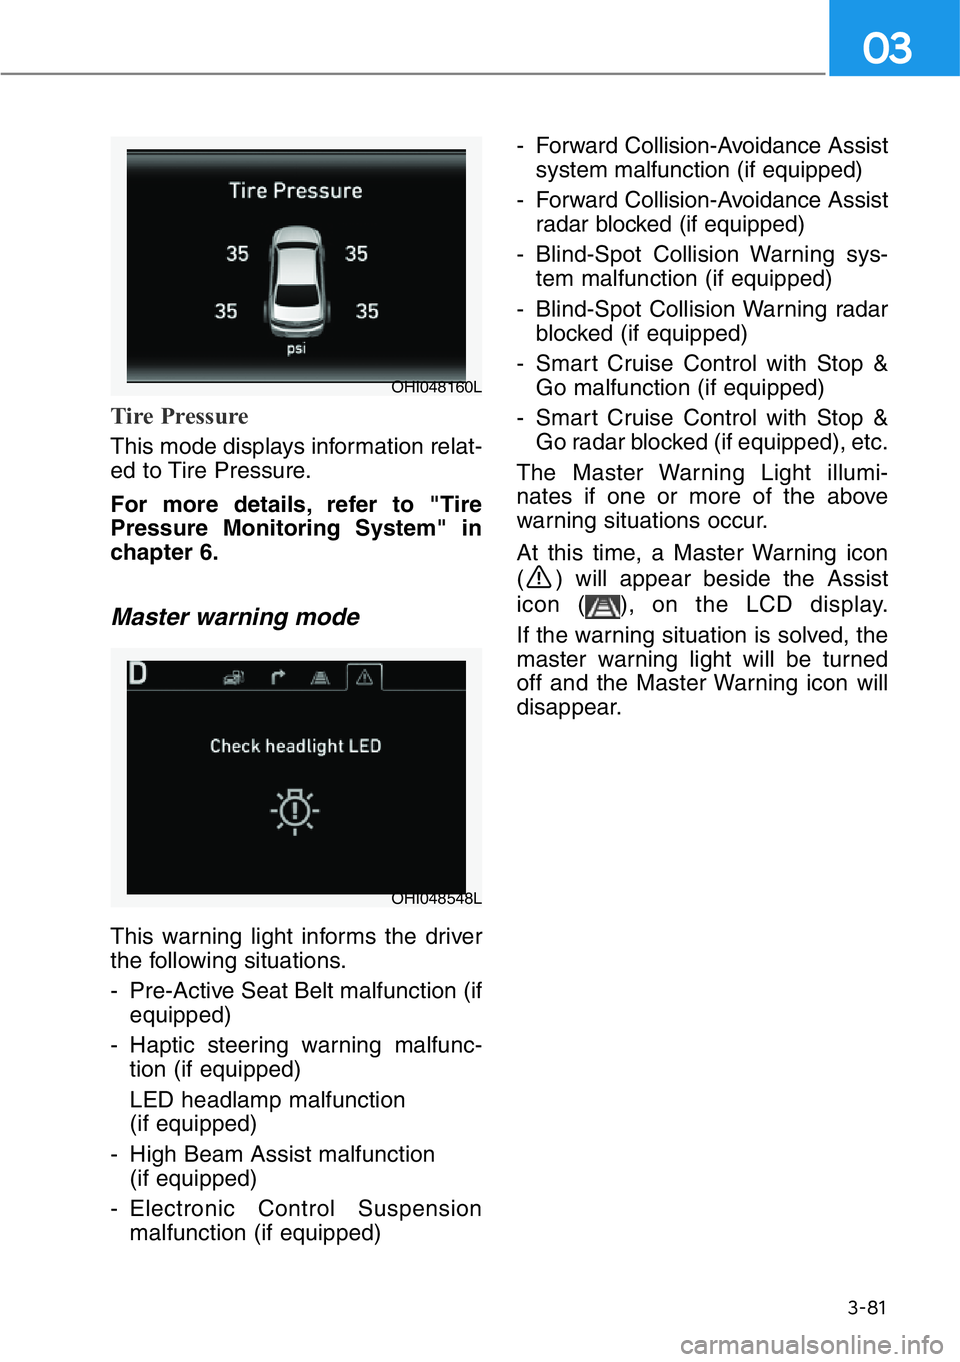
Tire Pressure
This mode displays information relat-
ed to Tire Pressure.
For more details, refer to "Tire
Pressure Monitoring System" in
chapter 6.
Master warning mode
This warning light informs the driver
the following situations.
- Pre-Active Seat Belt malfunction (if
equipped)
- Haptic steering warning malfunc-
tion (if equipped)
LED headlamp malfunction
(if equipped)
- High Beam Assist malfunction
(if equipped)
- Electronic Control Suspension
malfunction (if equipped)- Forward Collision-Avoidance Assist
system malfunction (if equipped)
- Forward Collision-Avoidance Assist
radar blocked (if equipped)
- Blind-Spot Collision Warning sys-
tem malfunction (if equipped)
- Blind-Spot Collision Warning radar
blocked (if equipped)
- Smart Cruise Control with Stop &
Go malfunction (if equipped)
- Smart Cruise Control with Stop &
Go radar blocked (if equipped), etc.
The Master Warning Light illumi-
nates if one or more of the above
warning situations occur.
At this time, a Master Warning icon
( ) will appear beside the Assist
icon ( ), on the LCD display.
If the warning situation is solved, the
master warning light will be turned
off and the Master Warning icon will
disappear.
OHI048160L
OHI048548L
Page 183 of 538
The trip computer is a microcomput-
er-controlled driver information sys-
tem that displays information related
to driving.
Information
• Some driving information stored in
the trip computer resets if the bat-
tery is disconnected.
• The vehicle must be driven for a
minimum of 0.19 miles (300 meters)
since the last ignition key cycle
before the average fuel economy will
be recalculated.
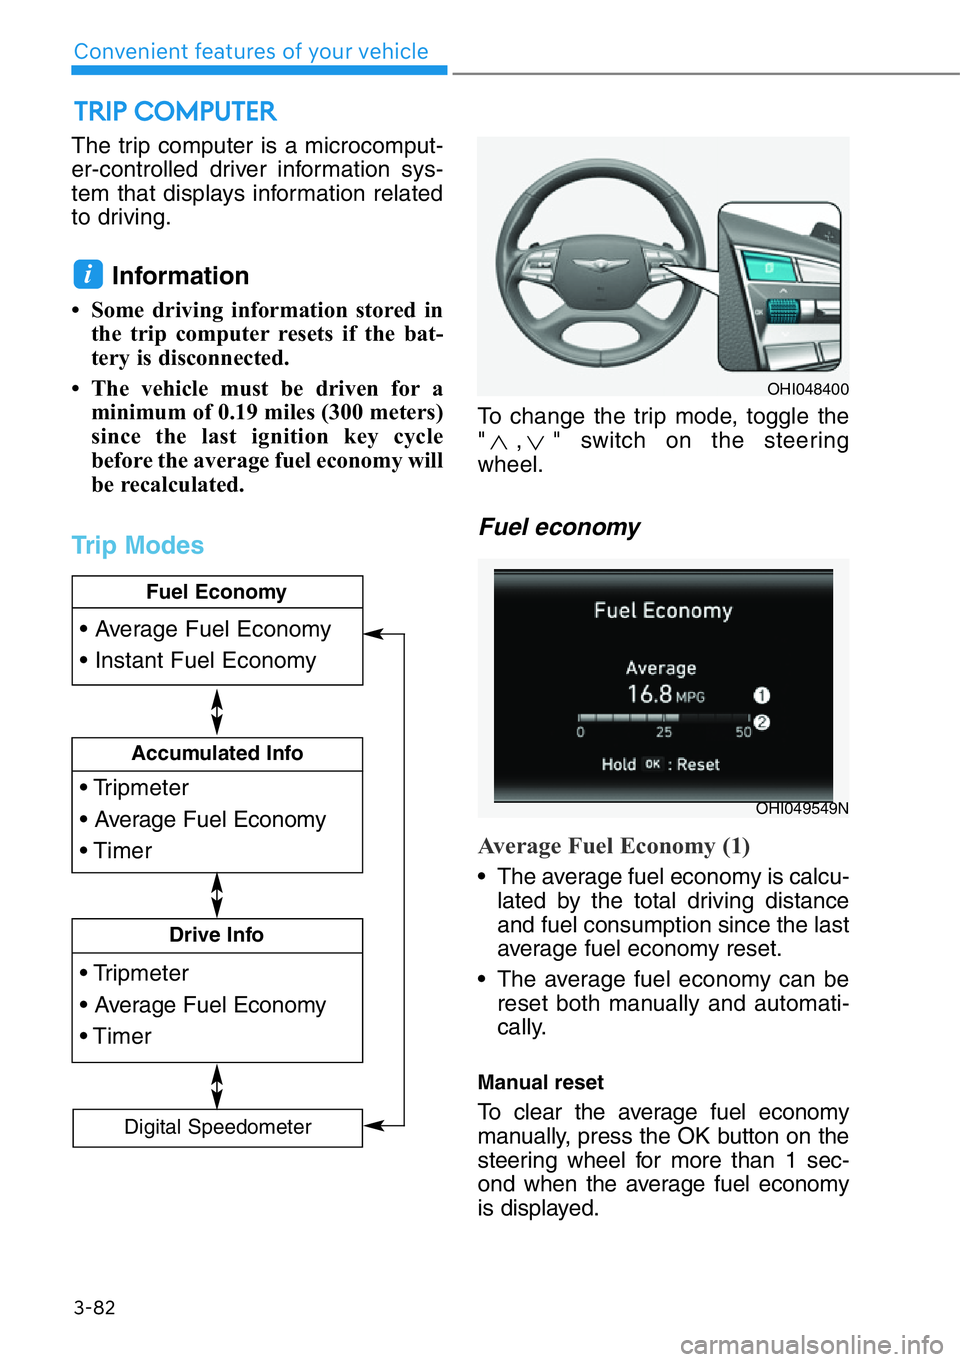
Trip Modes
To change the trip mode, toggle the
" , " switch on the steering
wheel.
Fuel economy
Average Fuel Economy (1)
• The average fuel economy is calcu-
lated by the total driving distance
and fuel consumption since the last
average fuel economy reset.
• The average fuel economy can be
reset both manually and automati-
cally.
Manual reset
To clear the average fuel economy
manually, press the OK button on the
steering wheel for more than 1 sec-
ond when the average fuel economy
is displayed.
i
TRIP COMPUTER
3-82
Convenient features of your vehicle
• Tripmeter
• Average Fuel Economy
• Timer
Accumulated Info
• Tripmeter
• Average Fuel Economy
• Timer
Drive Info
• Average Fuel Economy
• Instant Fuel Economy
Fuel Economy
Digital Speedometer
OHI048400
OHI049549N
Page 184 of 538
3-83
03
Automatic reset
To automatically reset the average
fuel economy, select between "After
Ignition" or "After Refueling" from the
Settings menu in the AVN system
screen
- After ignition: When the engine has
been OFF for 4 hours or longer the
average fuel economy will reset
automatically.
- After refueling: The average fuel
economy will reset automatically
after adding 1.6 gallons (6 liters) of
fuel or more and after driving speed
exceeds 1 mph (1 km/h).
For more details, scan the QR
code in a separately supplied
simple manual.
Instant Fuel Economy (2)
The instantaneous fuel economy is
displayed according to the bar graph
in the LCD display while driving.
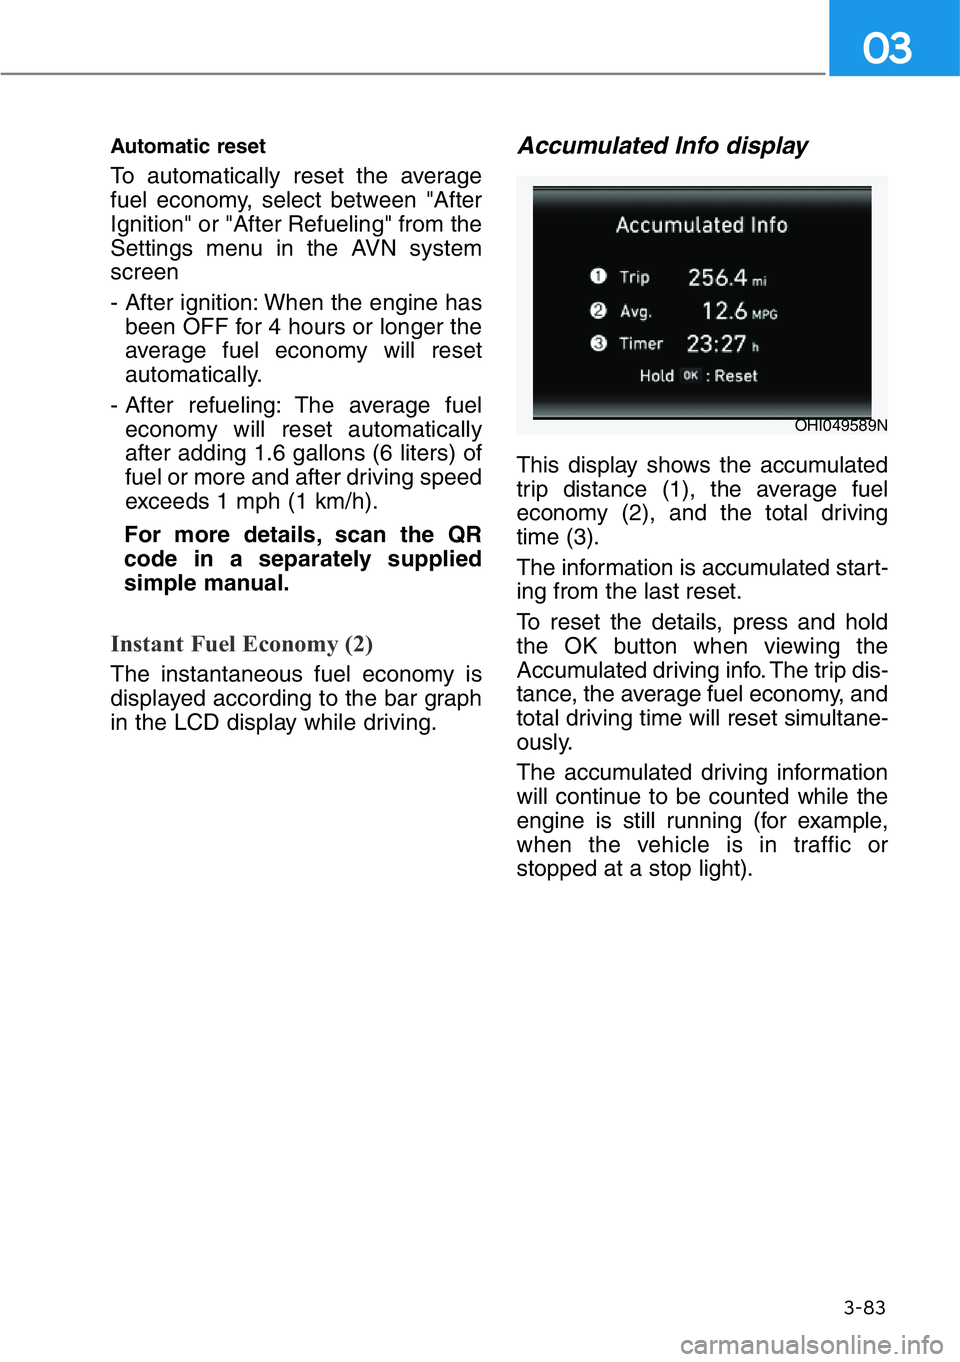
Accumulated Info display
This display shows the accumulated
trip distance (1), the average fuel
economy (2), and the total driving
time (3).
The information is accumulated start-
ing from the last reset.
To reset the details, press and hold
the OK button when viewing the
Accumulated driving info. The trip dis-
tance, the average fuel economy, and
total driving time will reset simultane-
ously.
The accumulated driving information
will continue to be counted while the
engine is still running (for example,
when the vehicle is in traffic or
stopped at a stop light).
OHI049589N
Page 185 of 538
3-84
Convenient features of your vehicle
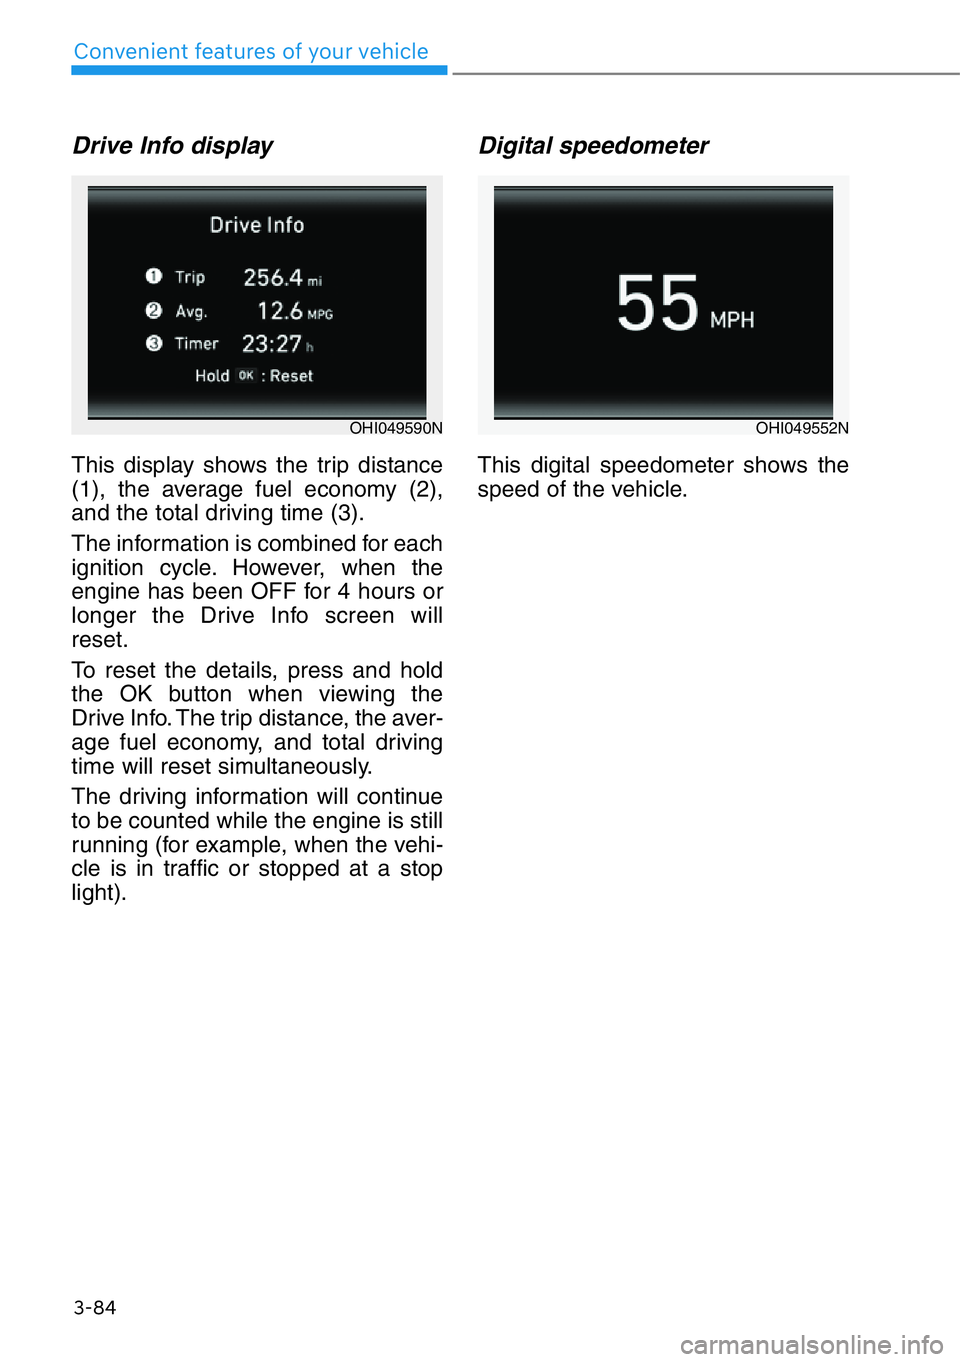
Drive Info display
This display shows the trip distance
(1), the average fuel economy (2),
and the total driving time (3).
The information is combined for each
ignition cycle. However, when the
engine has been OFF for 4 hours or
longer the Drive Info screen will
reset.
To reset the details, press and hold
the OK button when viewing the
Drive Info. The trip distance, the aver-
age fuel economy, and total driving
time will reset simultaneously.
The driving information will continue
to be counted while the engine is still
running (for example, when the vehi-
cle is in traffic or stopped at a stop
light).
Digital speedometer
This digital speedometer shows the
speed of the vehicle.
OHI049590NOHI049552N
Page 186 of 538
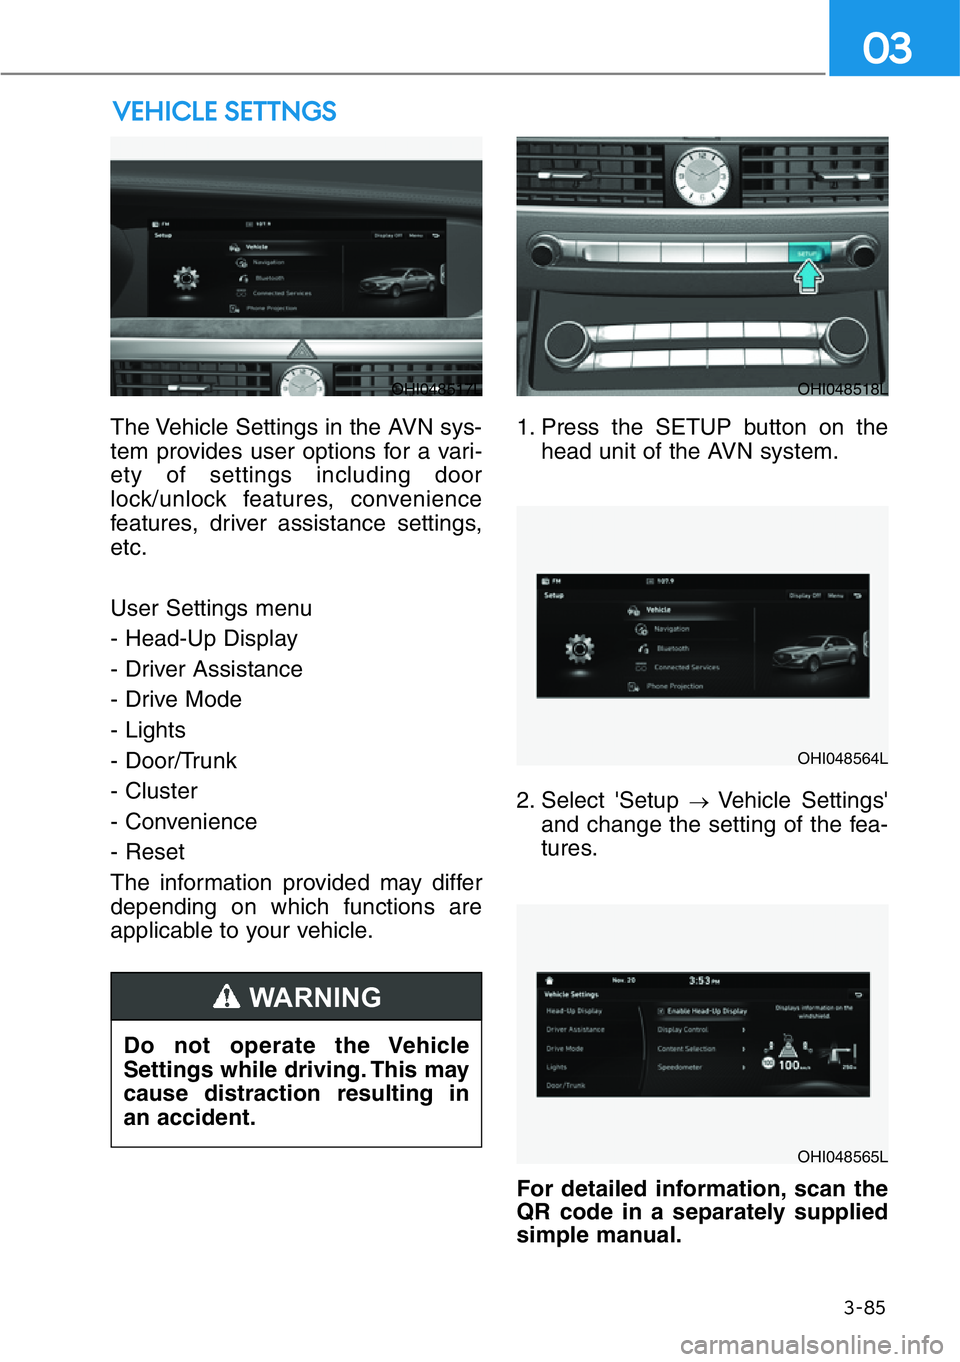
The Vehicle Settings in the AVN sys-
tem provides user options for a vari-
ety of settings including door
lock/unlock features, convenience
features, driver assistance settings,
etc.
User Settings menu
- Head-Up Display
- Driver Assistance
- Drive Mode
- Lights
- Door/Trunk
- Cluster
- Convenience
- Reset
The information provided may differ
depending on which functions are
applicable to your vehicle.1. Press the SETUP button on the
head unit of the AVN system.
2. Select 'Setup
→Vehicle Settings'
and change the setting of the fea-
tures.
For detailed information, scan the
QR code in a separately supplied
simple manual.
VEHICLE SETTNGS
3-85
03
OHI048517LOHI048518L
OHI048564L
OHI048565L
Do not operate the Vehicle
Settings while driving. This may
cause distraction resulting in
an accident.
WARNING
Page 187 of 538
3-86
Convenient features of your vehicle
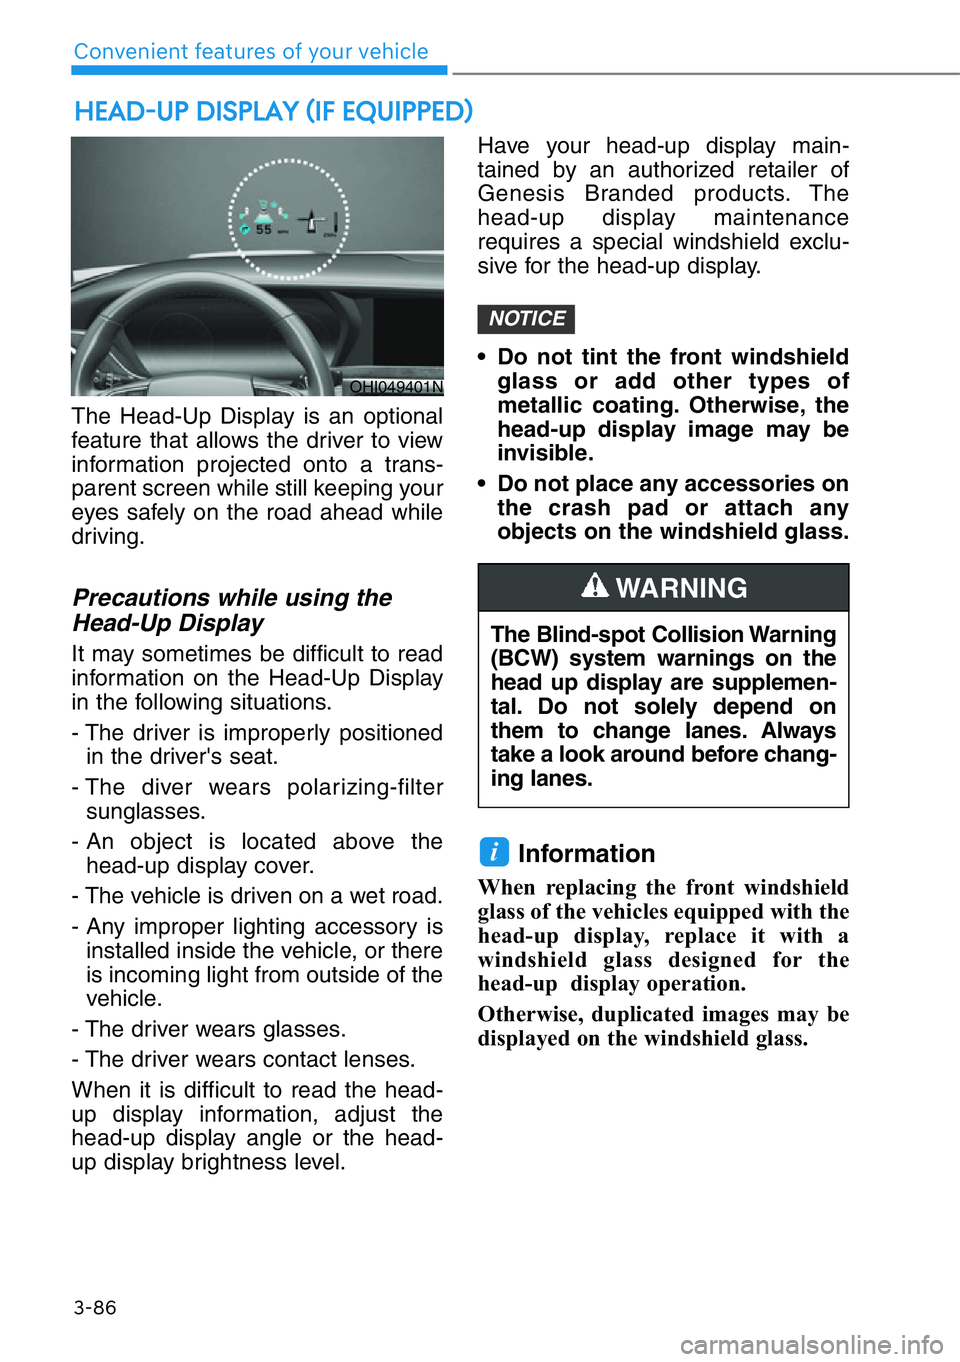
The Head-Up Display is an optional
feature that allows the driver to view
information projected onto a trans-
parent screen while still keeping your
eyes safely on the road ahead while
driving.
Precautions while using the
Head-Up Display
It may sometimes be difficult to read
information on the Head-Up Display
in the following situations.
- The driver is improperly positioned
in the driver's seat.
- The diver wears polarizing-filter
sunglasses.
- An object is located above the
head-up display cover.
- The vehicle is driven on a wet road.
- Any improper lighting accessory is
installed inside the vehicle, or there
is incoming light from outside of the
vehicle.
- The driver wears glasses.
- The driver wears contact lenses.
When it is difficult to read the head-
up display information, adjust the
head-up display angle or the head-
up display brightness level.Have your head-up display main-
tained by an authorized retailer of
Genesis Branded products. The
head-up display maintenance
requires a special windshield exclu-
sive for the head-up display.
• Do not tint the front windshield
glass or add other types of
metallic coating. Otherwise, the
head-up display image may be
invisible.
• Do not place any accessories on
the crash pad or attach any
objects on the windshield glass.
Information
When replacing the front windshield
glass of the vehicles equipped with the
head-up display, replace it with a
windshield glass designed for the
head-up display operation.
Otherwise, duplicated images may be
displayed on the windshield glass.
i
NOTICE
HEAD-UP DISPLAY (IF EQUIPPED)
The Blind-spot Collision Warning
(BCW) system warnings on the
head up display are supplemen-
tal. Do not solely depend on
them to change lanes. Always
take a look around before chang-
ing lanes.
WARNING
OHI049401N
Page 188 of 538
3-87
03
Head-up display ON/OFF
The Head-up display can be turned
ON and OFF by selecting or dese-
lecting ‘Enable Head-Up Display’
from the Settings menu in the AVN
system screen. Select:
- Setup →Vehicle Settings →Head-
Up Display →Enable Head-Up
Display
For detailed information, scan the
QR code in a separately supplied
simple manual.
Head-up display setting
The driver can change the head-up
display settings from Settings menu
in the AVN system screen as follows.
• Display Control
• Content Selection
• Speedometer
For detailed information, scan the
QR code in a separately supplied
simple manual.
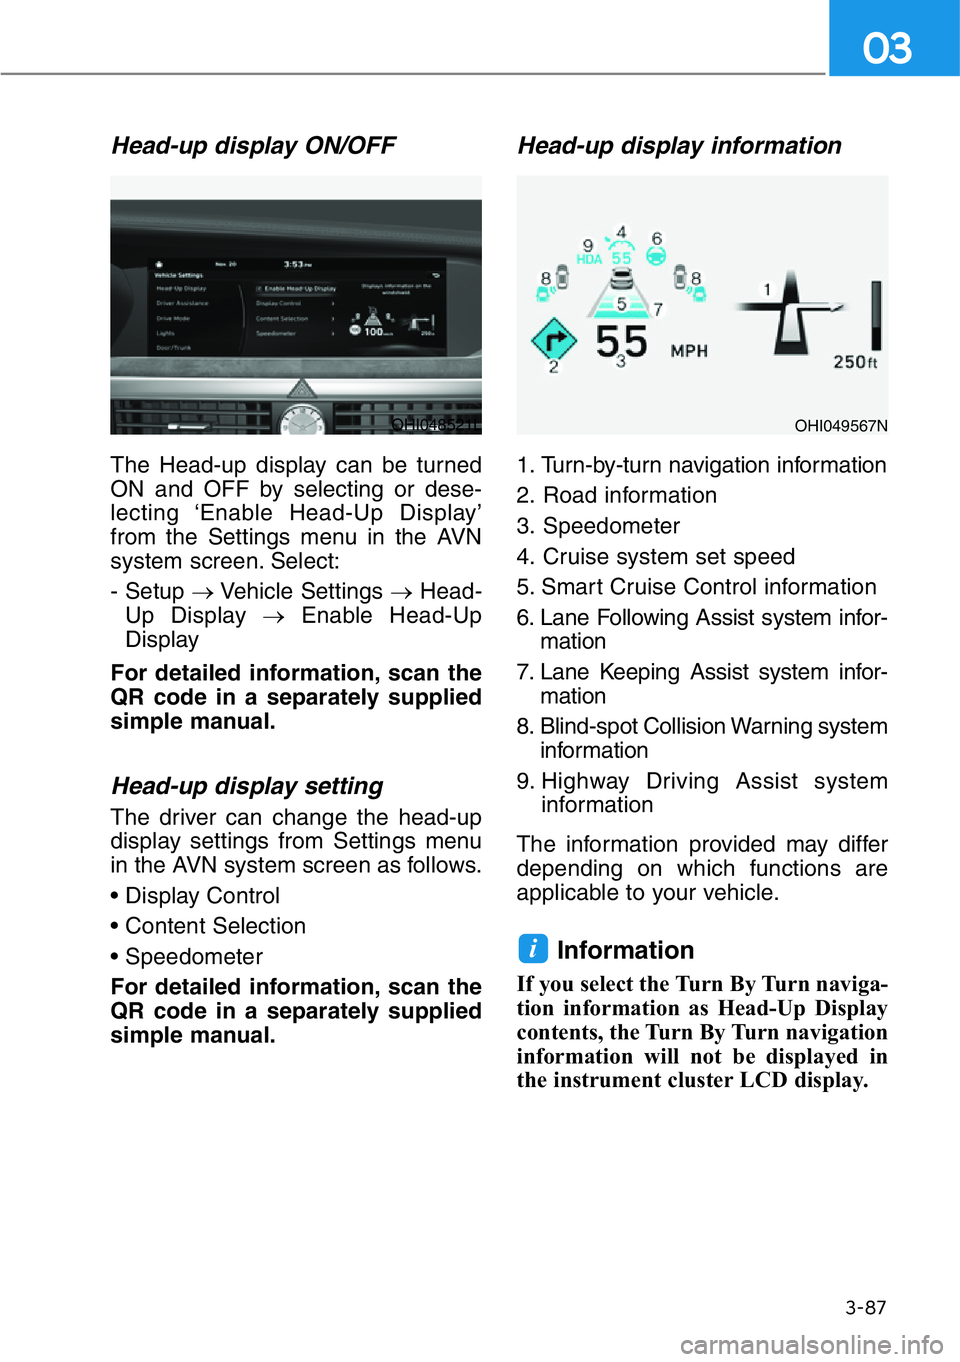
Head-up display information
1. Turn-by-turn navigation information
2. Road information
3. Speedometer
4. Cruise system set speed
5. Smart Cruise Control information
6. Lane Following Assist system infor-
mation
7. Lane Keeping Assist system infor-
mation
8. Blind-spot Collision Warning system
information
9. Highway Driving Assist system
information
The information provided may differ
depending on which functions are
applicable to your vehicle.
Information
If you select the Turn By Turn naviga-
tion information as Head-Up Display
contents, the Turn By Turn navigation
information will not be displayed in
the instrument cluster LCD display.
i
OHI048521LOHI049567N
Page 189 of 538
3-88
Convenient features of your vehicle
LIGHTING
Exterior Lights
Lighting control
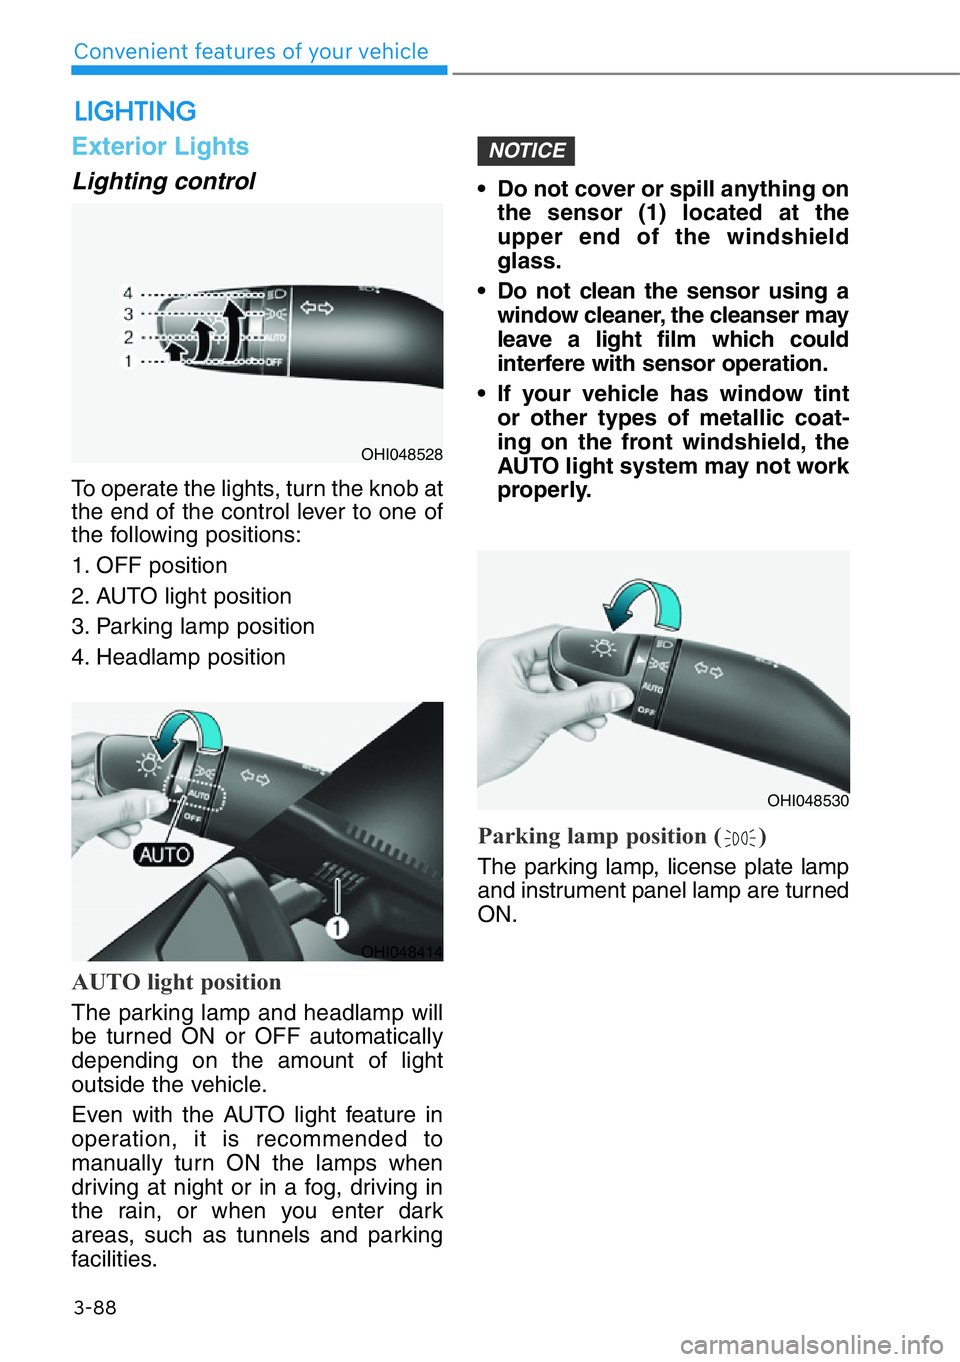
To operate the lights, turn the knob at
the end of the control lever to one of
the following positions:
1. OFF position
2. AUTO light position
3. Parking lamp position
4. Headlamp position
AUTO light position
The parking lamp and headlamp will
be turned ON or OFF automatically
depending on the amount of light
outside the vehicle.
Even with the AUTO light feature in
operation, it is recommended to
manually turn ON the lamps when
driving at night or in a fog, driving in
the rain, or when you enter dark
areas, such as tunnels and parking
facilities.• Do not cover or spill anything on
the sensor (1) located at the
upper end of the windshield
glass.
• Do not clean the sensor using a
window cleaner, the cleanser may
leave a light film which could
interfere with sensor operation.
• If your vehicle has window tint
or other types of metallic coat-
ing on the front windshield, the
AUTO light system may not work
properly.
Parking lamp position ( )
The parking lamp, license plate lamp
and instrument panel lamp are turned
ON.
NOTICE
OHI048528
OHI048414
OHI048530
Page 190 of 538
3-89
03
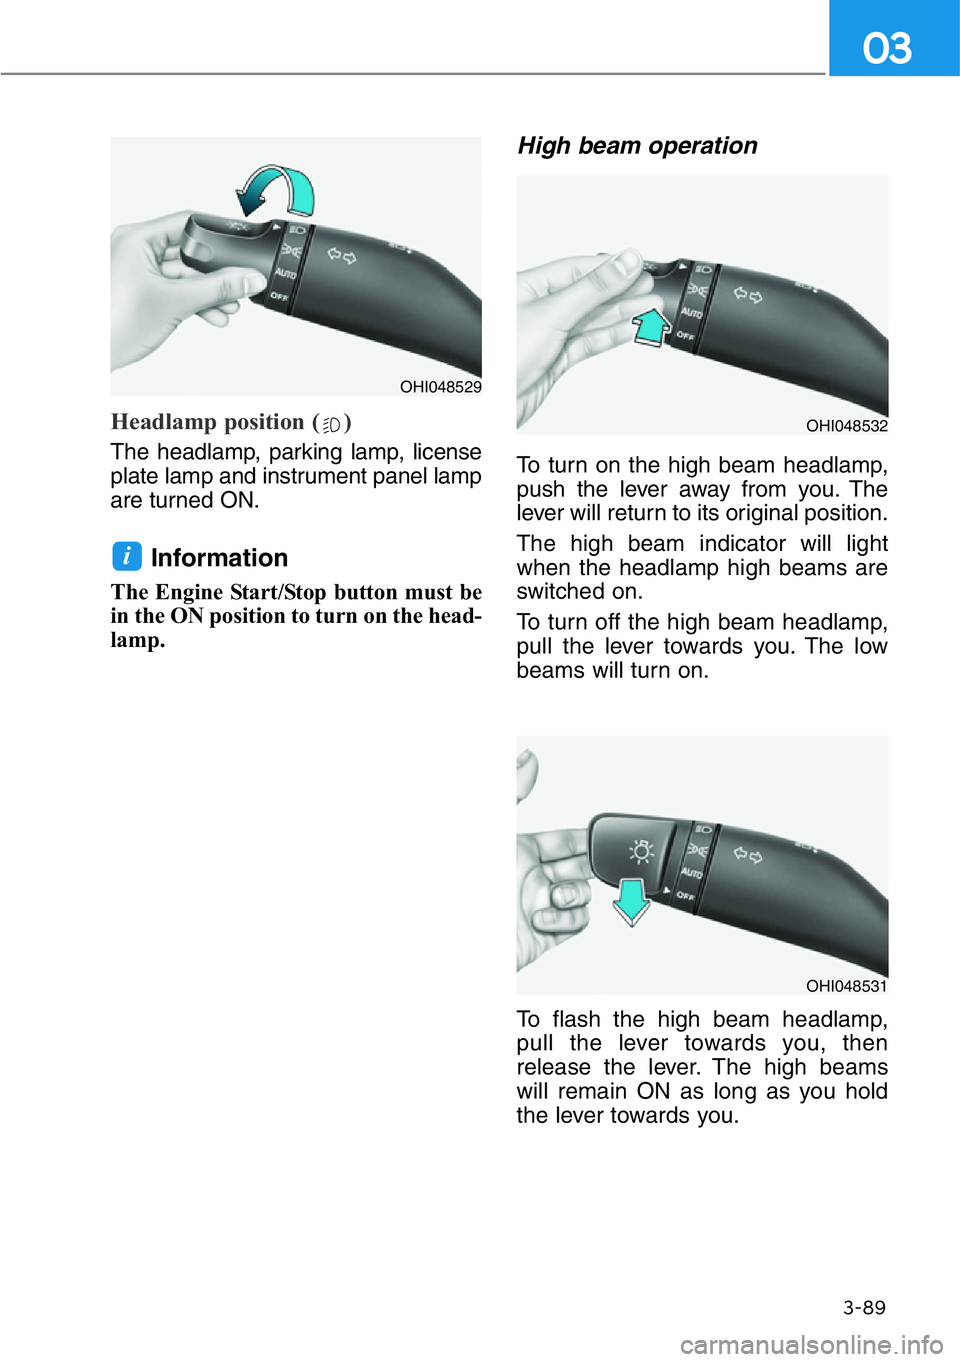
Headlamp position ( )
The headlamp, parking lamp, license
plate lamp and instrument panel lamp
are turned ON.
Information
The Engine Start/Stop button must be
in the ON position to turn on the head-
lamp.
High beam operation
To turn on the high beam headlamp,
push the lever away from you. The
lever will return to its original position.
The high beam indicator will light
when the headlamp high beams are
switched on.
To turn off the high beam headlamp,
pull the lever towards you. The low
beams will turn on.
To flash the high beam headlamp,
pull the lever towards you, then
release the lever. The high beams
will remain ON as long as you hold
the lever towards you.
i
OHI048529
OHI048532
OHI048531