HONDA ACCORD HYBRID 2014 9.G Owners Manual
Manufacturer: HONDA, Model Year: 2014, Model line: ACCORD HYBRID, Model: HONDA ACCORD HYBRID 2014 9.GPages: 561, PDF Size: 20.3 MB
Page 261 of 561
uuAudio System Basic OperationuPlaying Hard Disc Drive (HDD) Audio
260
Features
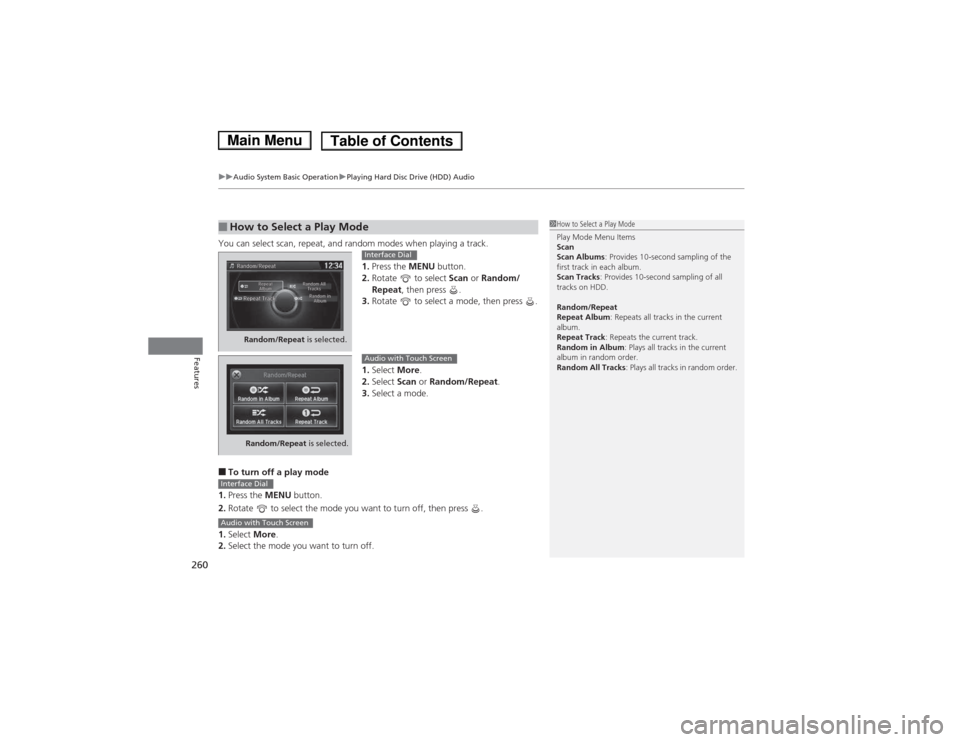
You can select scan, repeat, and random modes when playing a track. 1.Press the MENU button.
2. Rotate to select Scan or Random/
Repeat , then press .
3. Rotate to select a mode, then press .
1. Select More.
2. Select Scan or Random/Repeat .
3. Select a mode.
■ To turn off a play mode
1. Press the MENU button.
2. Rotate to select the mode you want to turn off, then press .
1. Select More.
2. Select the mode you want to turn off.
■How to Select a Play Mode1How to Select a Play Mode Play Mode Menu Items Scan Scan Albums : Provides 10-second sampling of the
first track in each album.
Scan Tracks : Provides 10-second sampling of all
tracks on HDD.
Random/Repeat
Repeat Album : Repeats all tracks in the current
album.
Repeat Track : Repeats the current track.
Random in Album : Plays all tracks in the current
album in random order.
Random All Tracks : Plays all tracks in random order.
Random/Repeat is selected.
Interface Dial
Random/Repeat is selected.
Audio with Touch Screen
Interface Dial
Audio with Touch Screen
Main MenuTable of Contents
Page 262 of 561
Continued261
uuAudio System Basic OperationuPlaying Hard Disc Drive (HDD) Audio
Features
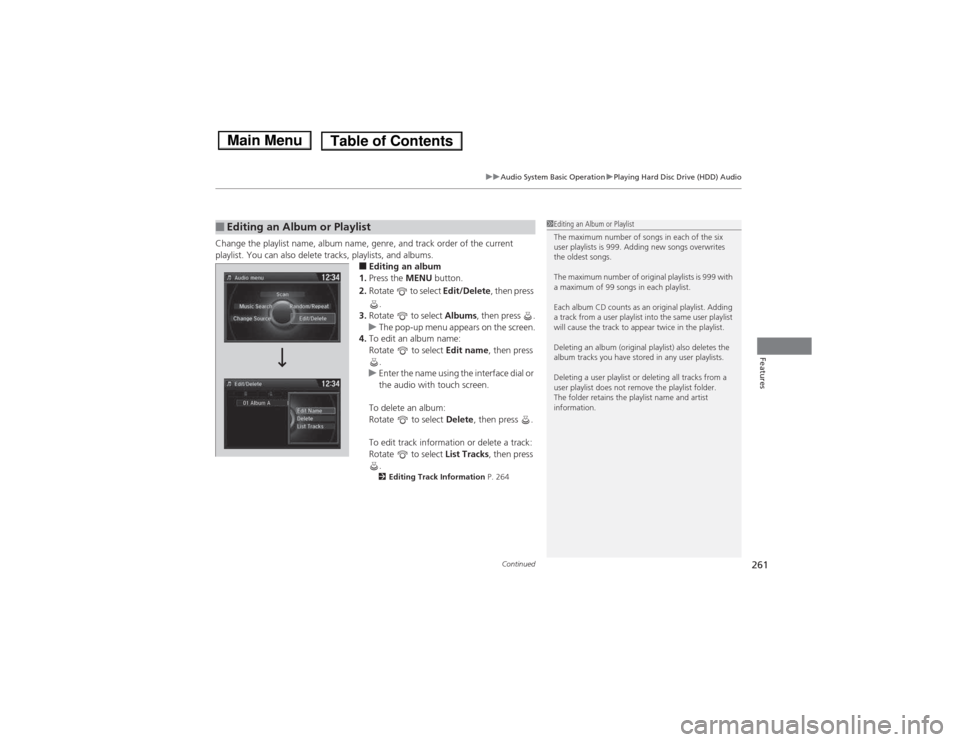
Change the playlist name, album name, genre, and track order of the current
playlist. You can also delete tracks, playlists, and albums.
■Editing an album
1. Press the MENU button.
2. Rotate to select Edit/Delete, then press
.
3. Rotate to select Albums, then press .
uThe pop-up menu appears on the screen.
4. To edit an album name:
Rotate to select Edit name, then press
.
uEnter the name using the interface dial or
the audio with touch screen.
To delete an album:
Rotate to select Delete, then press .
To edit track information or delete a track:
Rotate to select List Tracks, then press
.
2 Editing Track Information P. 264
■Editing an Album or Playlist1Editing an Album or Playlist
The maximum number of songs in each of the six
user playlists is 999. Adding new songs overwrites
the oldest songs.
The maximum number of original playlists is 999 with
a maximum of 99 songs in each playlist.
Each album CD counts as an original playlist. Adding
a track from a user playlist into the same user playlist
will cause the track to appear twice in the playlist.
Deleting an album (original playlist) also deletes the
album tracks you have stored in any user playlists.
Deleting a user playlist or deleting all tracks from a
user playlist does not remove the playlist folder.
The folder retains the playlist name and artist information.
Main MenuTable of Contents
Page 263 of 561
262
uuAudio System Basic OperationuPlaying Hard Disc Drive (HDD) Audio
Features
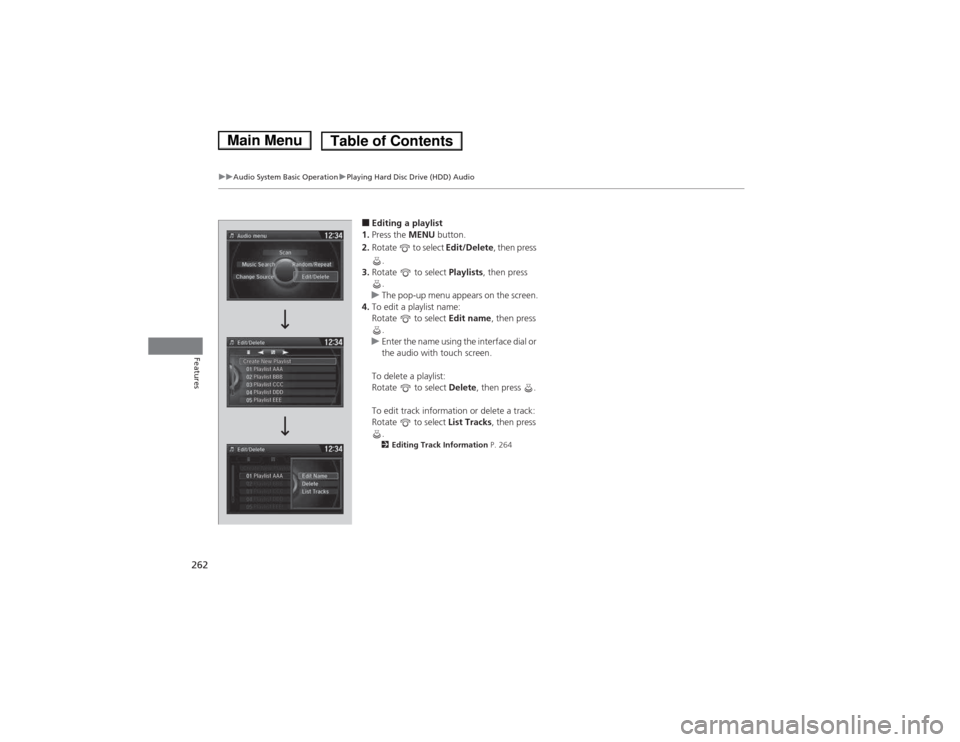
■Editing a playlist
1. Press the MENU button.
2. Rotate to select Edit/Delete, then press
.
3. Rotate to select Playlists, then press
.
uThe pop-up menu appears on the screen.
4. To edit a playlist name:
Rotate to select Edit name, then press
.
uEnter the name using the interface dial or
the audio with touch screen.
To delete a playlist:
Rotate to select Delete, then press .
To edit track information or delete a track:
Rotate to select List Tracks, then press
.
2 Editing Track Information P. 264
Main MenuTable of Contents
Page 264 of 561
263
uuAudio System Basic OperationuPlaying Hard Disc Drive (HDD) Audio
Continued
Features
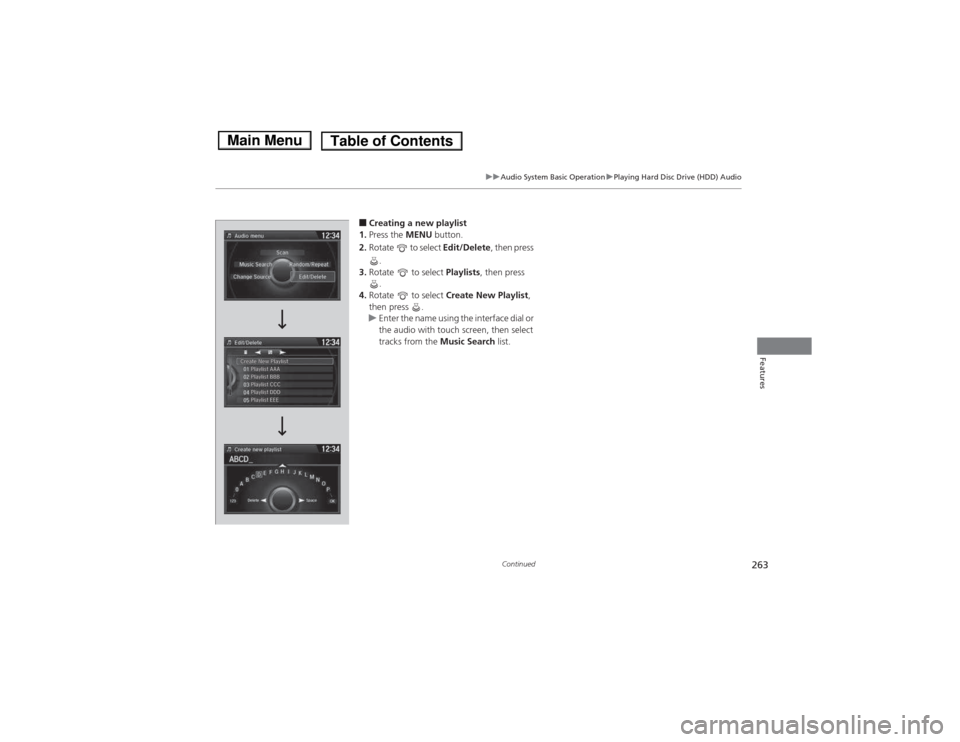
■Creating a new playlist
1. Press the MENU button.
2. Rotate to select Edit/Delete, then press
.
3. Rotate to select Playlists, then press
.
4. Rotate to select Create New Playlist ,
then press .
uEnter the name using the interface dial or
the audio with touch screen, then select
tracks from the Music Search list.
Main MenuTable of Contents
Page 265 of 561
264
uuAudio System Basic OperationuPlaying Hard Disc Drive (HDD) Audio
Features
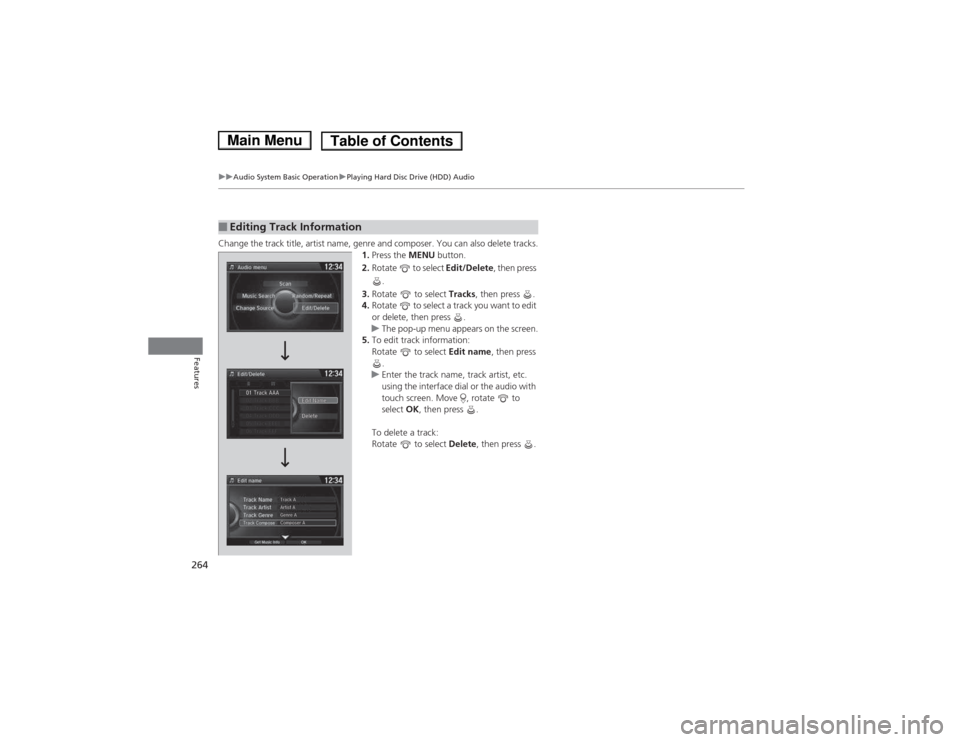
Change the track title, artist name, genre and composer. You can also delete tracks.1.Press the MENU button.
2. Rotate to select Edit/Delete, then press
.
3. Rotate to select Tracks, then press .
4. Rotate to select a track you want to edit
or delete, then press .
uThe pop-up menu appears on the screen.
5. To edit track information:
Rotate to select Edit name, then press
.
uEnter the track name, track artist, etc.
using the interface dial or the audio with
touch screen. Move , rotate to select OK, then press .
To delete a track:
Rotate to select Delete, then press .
■Editing Track Information
Main MenuTable of Contents
Page 266 of 561
265
uuAudio System Basic OperationuPlaying Hard Disc Drive (HDD) Audio
Continued
Features
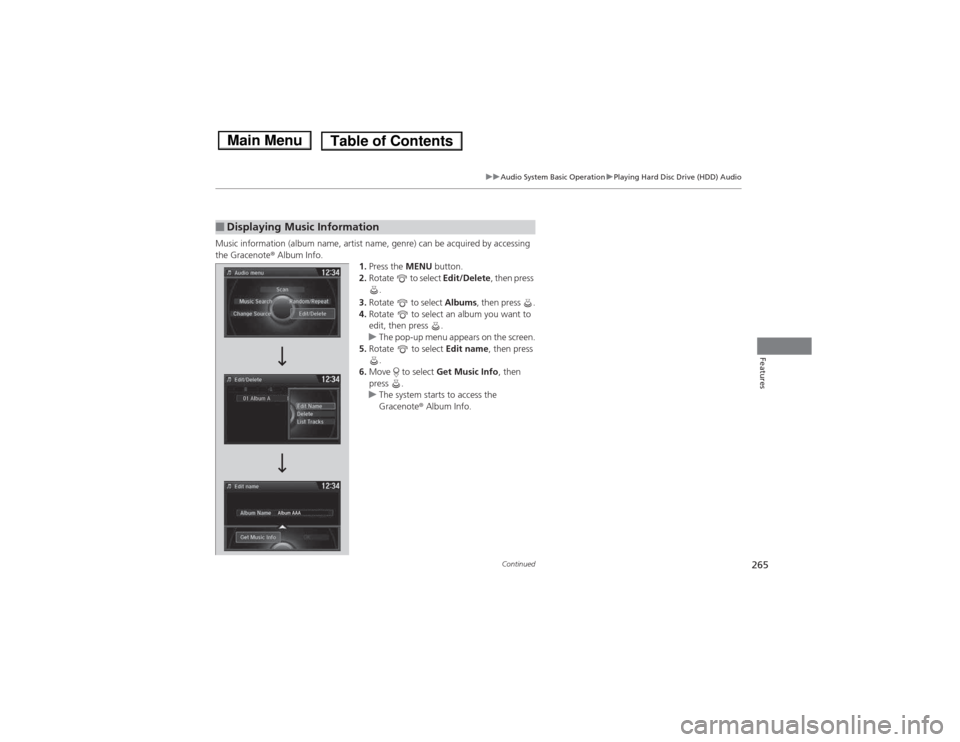
Music information (album name, artist name, genre) can be acquired by accessing
the Gracenote® Album Info.
1.Press the MENU button.
2. Rotate to select Edit/Delete, then press
.
3. Rotate to select Albums, then press .
4. Rotate to select an album you want to
edit, then press .
uThe pop-up menu appears on the screen.
5. Rotate to select Edit name, then press
.
6. Move to select Get Music Info, then
press .
uThe system starts to access the
Gracenote ® Album Info.
■Displaying Music Information
Main MenuTable of Contents
Page 267 of 561
uuAudio System Basic OperationuPlaying Hard Disc Drive (HDD) Audio
266
Features
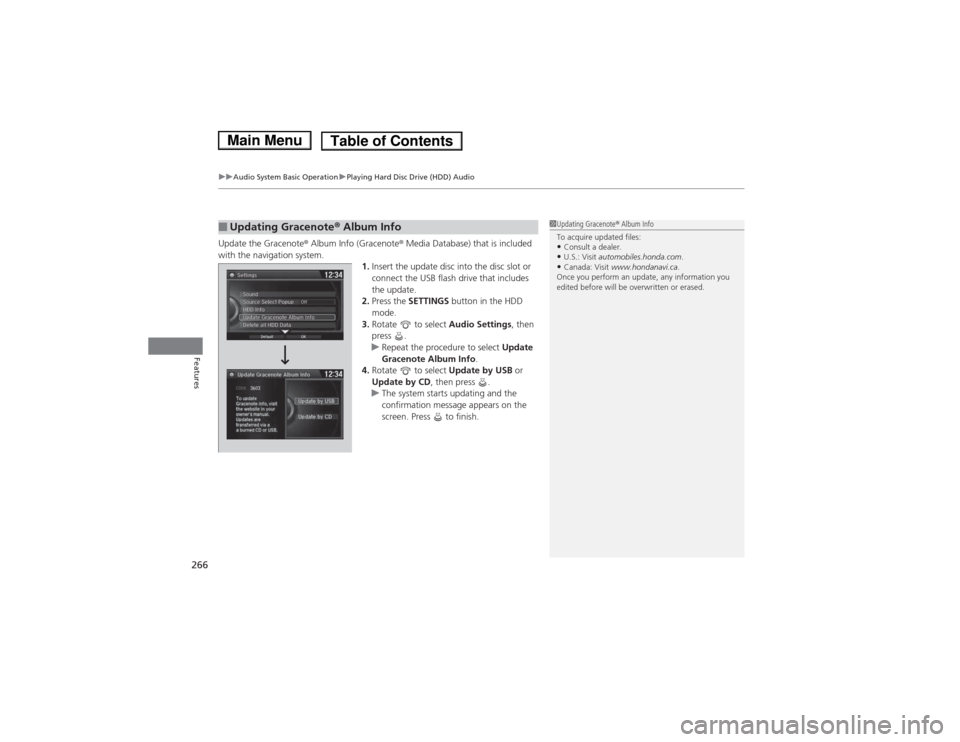
Update the Gracenote ® Album Info (Gracenote ® Media Database) that is included
with the navigation system. 1.Insert the update disc into the disc slot or
connect the USB flash drive that includes the update.
2. Press the SETTINGS button in the HDD
mode.
3. Rotate to select Audio Settings, then
press .
uRepeat the procedure to select Update
Gracenote Album Info .
4. Rotate to select Update by USB or
Update by CD , then press .
uThe system starts updating and the
confirmation message appears on the
screen. Press to finish.
■Updating Gracenote ® Album Info1Updating Gracenote ® Album Info
To acquire updated files: • Consult a dealer.
• U.S.: Visit automobiles.honda.com .
• Canada: Visit www.hondanavi.ca .
Once you perform an update, any information you
edited before will be overwritten or erased.
Main MenuTable of Contents
Page 268 of 561
267
uuAudio System Basic OperationuPlaying an iPod
Continued
Features
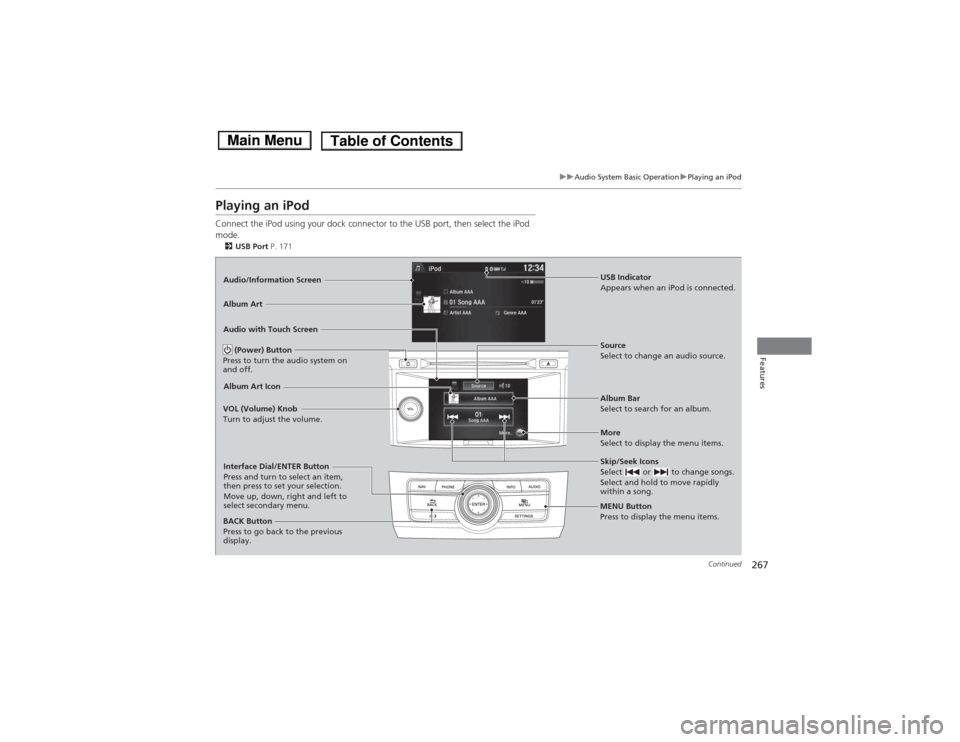
Playing an iPod
Connect the iPod using your dock connector to the USB port, then select the iPod
mode.2 USB Port P. 171
Audio/Information Screen
Audio with Touch Screen
MENU Button
Press to display the menu items.
Album Bar
Select to search for an album.
Source
Select to change an audio source.
Skip/Seek Icons
Select or to change songs.
Select and hold to move rapidly
within a song.
More
Select to display the menu items.
(Power) Button
Press to turn the audio system on and off.
BACK Button
Press to go back to the previous
display.
VOL (Volume) Knob
Turn to adjust the volume.
Interface Dial/ENTER Button
Press and turn to select an item,
then press to set your selection.
Move up, down, right and left to
select secondary menu.
USB Indicator
Appears when an iPod is connected.
Album Art
Album Art Icon
Main MenuTable of Contents
Page 269 of 561
uuAudio System Basic OperationuPlaying an iPod
268
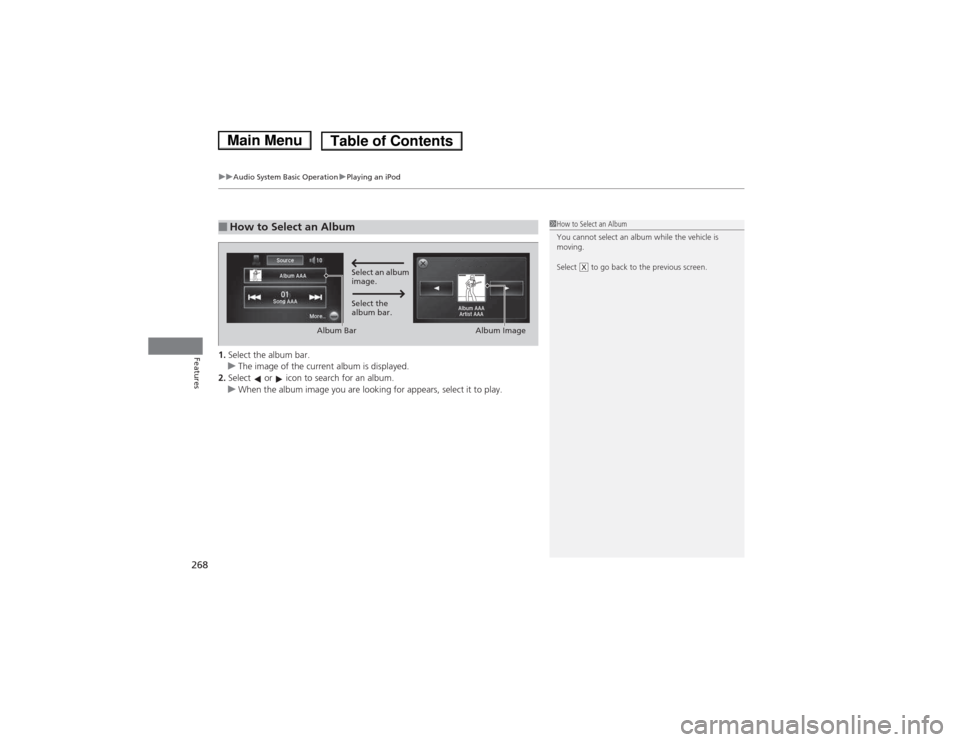
Features1. Select the album bar.uThe image of the current album is displayed.
2. Select or icon to search for an album.
uWhen the album image you are looking for appears, select it to play.
■How to Select an Album1How to Select an Album
You cannot select an album while the vehicle is
moving.
Select to go back to the previous screen.
XSelect an album
image.
Select the
album bar.
Album Bar
Album Image
Main MenuTable of Contents
Page 270 of 561
Continued269
uuAudio System Basic OperationuPlaying an iPod
Features
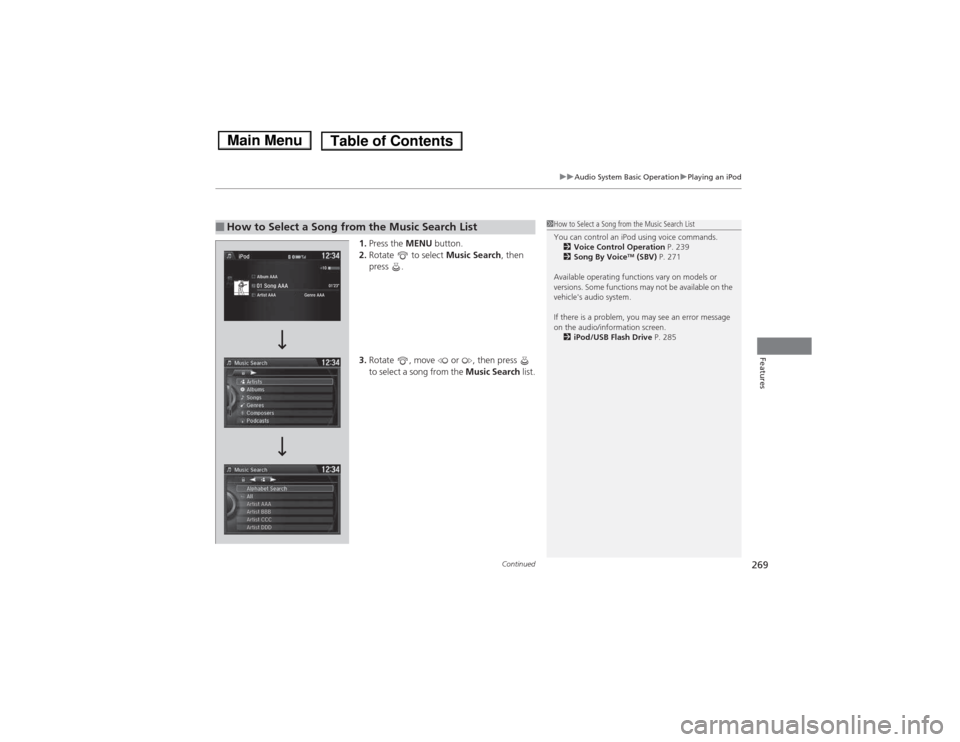
1.Press the MENU button.
2. Rotate to select Music Search, then
press .
3. Rotate , move or , then press
to select a song from the Music Search list.
■How to Select a Song from the Music Search List1How to Select a Song from the Music Search List
You can control an iPod using voice commands.
2 Voice Control Operation P. 239
2 Song By Voice TM
(SBV) P. 271
Available operating functions vary on models or
versions. Some functions may not be available on the
vehicle's audio system.
If there is a problem, you may see an error message
on the audio/information screen. 2 iPod/USB Flash Drive P. 285
Main MenuTable of Contents