HONDA PRELUDE 1992 Workshop Manual
Manufacturer: HONDA, Model Year: 1992, Model line: PRELUDE, Model: HONDA PRELUDE 1992Pages: 225, PDF Size: 2.1 MB
Page 51 of 225
Keys and Locks, Seat Adjustments
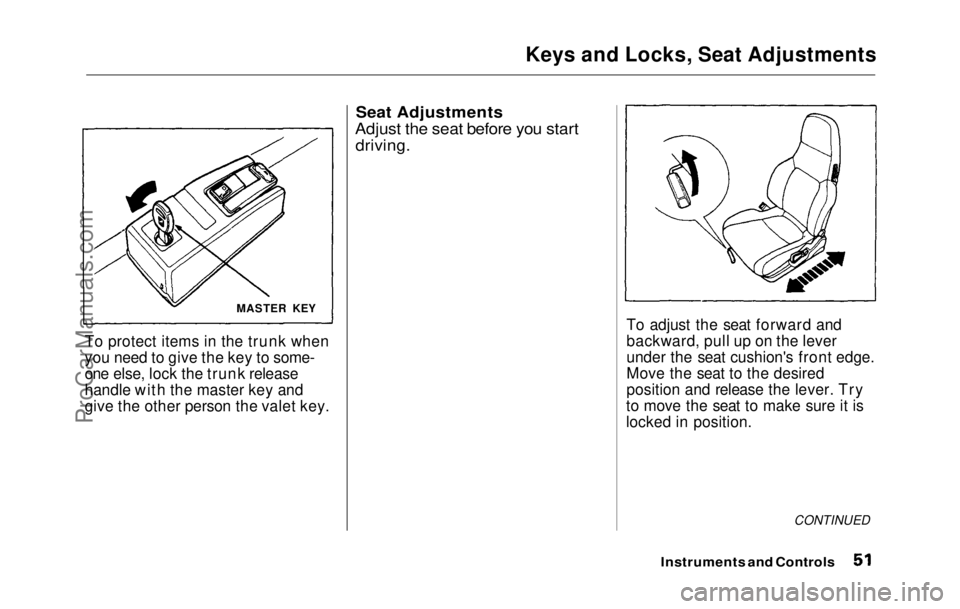
To protect items in the trunk when
you need to give the key to some-
one else, lock the trunk release
handle with the master key and
give the other person the valet key.
Seat Adjustments
Adjust the seat before you start
driving.
To adjust the seat forward and
backward, pull up on the lever
under the seat cushion's front edge.
Move the seat to the desired
position and release the lever. Try
to move the seat to make sure it is
locked in position.
CONTINUED
Instruments and Controls
MASTER KEYProCarManuals.comMain Menu Table of Contents s t
Page 52 of 225
Seat Adjustments
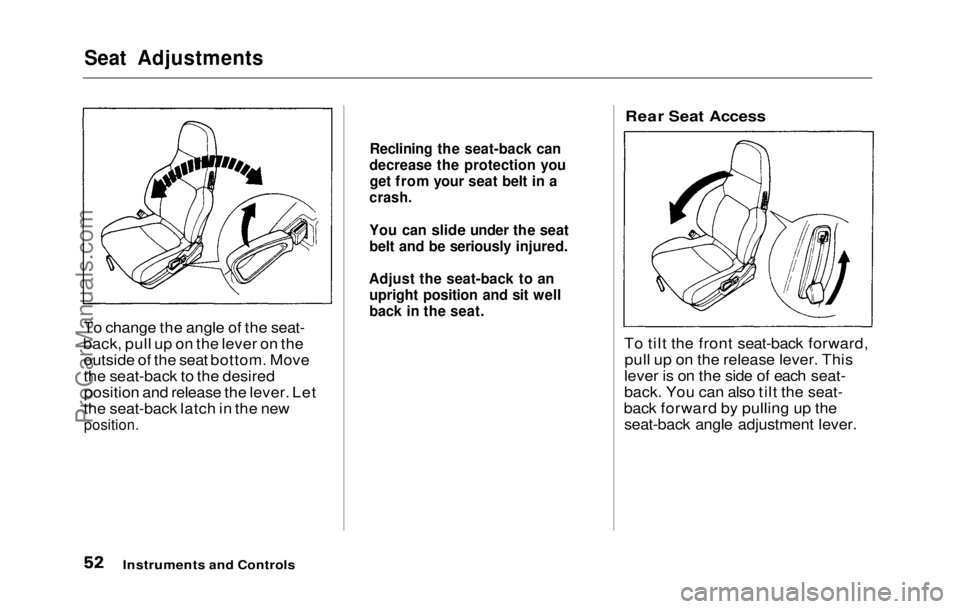
To change the angle of the seat-
back, pull up on the lever on the outside of the seat bottom. Move
the seat-back to the desiredposition and release the lever. Let
the seat-back latch in the new
position.
Rear Seat Access
To tilt the front seat-back forward, pull up on the release lever. This
lever is on the side of each seat-
back. You can also tilt the seat-
back forward by pulling up the seat-back angle adjustment lever.
Instruments and Controls
Reclining the seat-back can
decrease the protection you get from your seat belt in a
crash.
You can slide under the seat
belt an d
be seriously injured.
Adjust the seat-back to an upright position and sit well
back in the seat.ProCarManuals.comMain Menu Table of Contents s t
Page 53 of 225
Seat Adjustments
Additional Driver's Seat
Adjustments
The driver's seat in the Si and
Si 4WS models in the U. S., and the SR and SR 4WS models in Canada
has additional features.
They are: lumbar support adjust-
ment, fine adjustment of seat-back
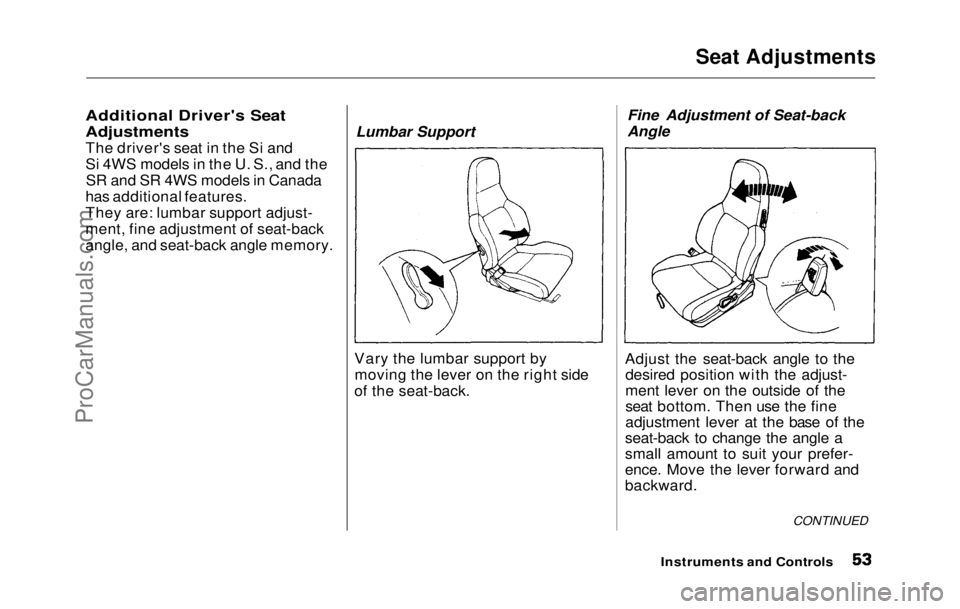
angle, and seat-back angle memory. Lumbar Support
Vary the lumbar support by moving the lever on the right side
of the seat-back. Fine Adjustment of Seat-back
Angle
Adjust the seat-back angle to the desired position with the adjust-
ment lever on the outside of the
seat bottom. Then use the fine
adjustment lever at the base of the
seat-back to change the angle a
small amount to suit your prefer-
ence. Move the lever forward and
backward.
Instruments and Controls
CONTINUEDProCarManuals.comMain Menu Table of Contents s t
Page 54 of 225
Seat Adjustments, Seat Heaters
Seat-back Angle Memory
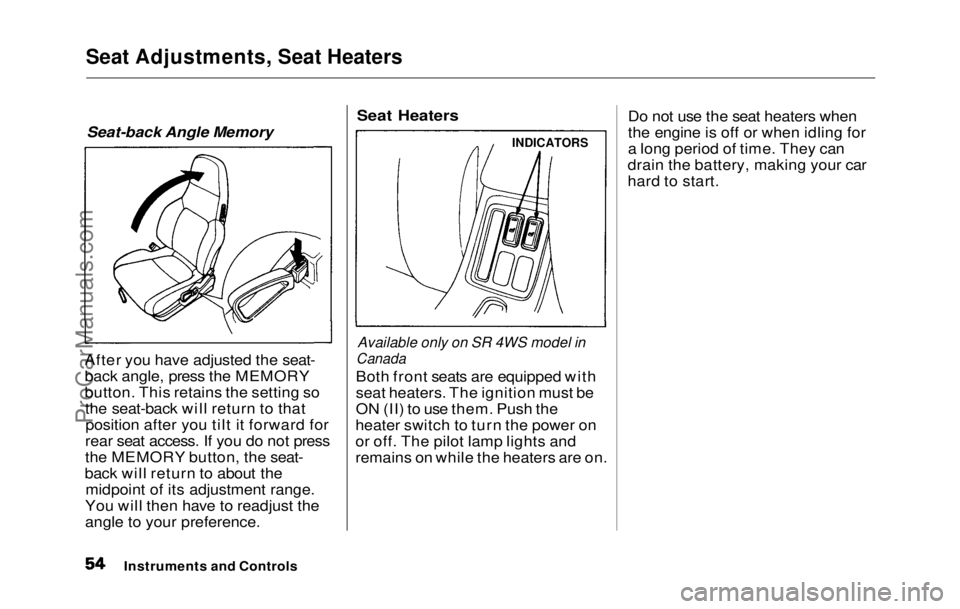
After you have adjusted the seat-
back angle, press the MEMORY
button. This retains the setting so the seat-back will return to thatposition after you tilt it forward for
rear seat access. If you do not press
the MEMORY button, the seat-
back will return to about the midpoint of its adjustment range.
You will then have to readjust the
angle to your preference.
Seat Heaters
Available only on SR 4WS model in
Canada
Both fron
t
seats are equipped with
seat heaters. The ignition must be
ON (II) to use them. Push the
heater switch to turn the power on
or off. The pilot lamp lights and
remains on while the heaters are on. Do not use the seat heaters when
the engine is off or when idling for
a long period of time. They can
drain the battery, making your car
hard to start.
Instruments and Controls
INDICATORSProCarManuals.comMain Menu Table of Contents s t
Page 55 of 225
Folding Rear Seat
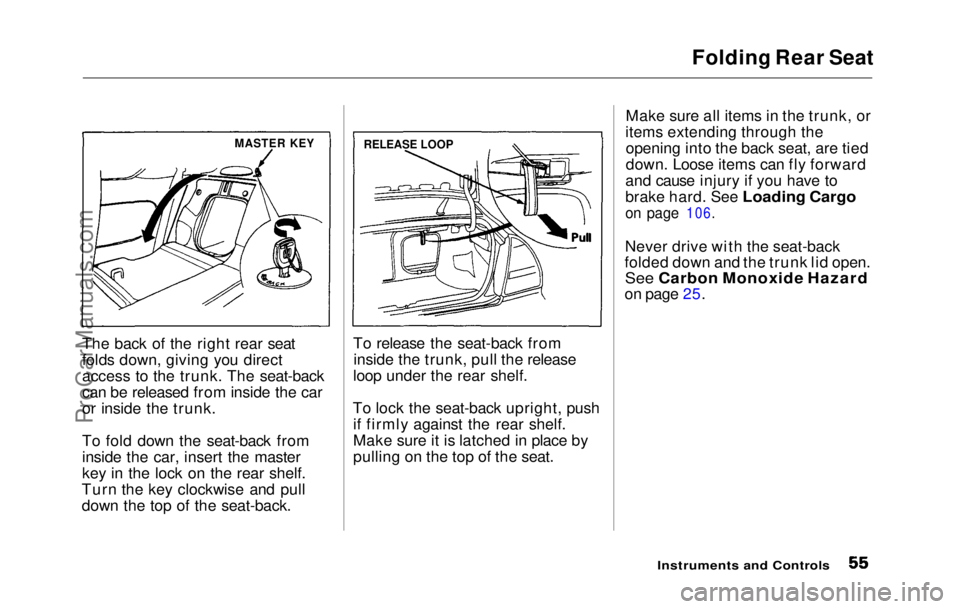
The back of the right rear seat
folds down, giving you direct
access to the trunk. The seat-back
can be released from inside the car
or inside the trunk.
To fold down the seat-back from
inside the car, insert the master
key in the lock on the rear shelf.
Turn the key clockwise and pull
down the top of the seat-back. To release the seat-back from
inside the trunk, pull the release
loop under the rear shelf.
To lock the seat-back upright, push if firmly against the rear shelf.
Make sure it is latched in place by
pulling on the top of the seat. Make sure all items in the trunk, or
items extending through the opening into the back seat, are tied
down. Loose items can fly forward
and cause injury if you have to
brake hard. See Loading Cargo
on page 106.
Never driv e
with the seat-back
folded down and the trunk lid open.
See Carbon Monoxide Hazard
on page 25.
Instruments and Controls
MASTER KEY
RELEASE LOOPProCarManuals.comMain Menu Table of Contents s t
Page 56 of 225
Hazard Warning, Rear Window Defogger
Hazard Warning
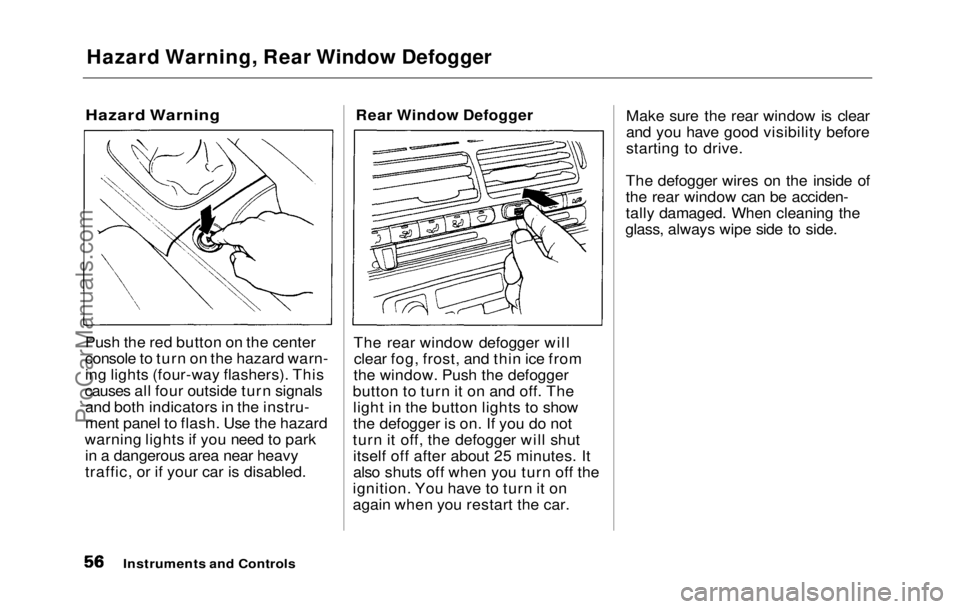
Push the red button on the center
console to turn on the hazard warn-
ing lights (four-way flashers). This
causes all four outside turn signals and both indicators in the instru-
ment panel to flash. Use the hazard
warning lights if you need to park in a dangerous area near heavy
traffic, or if your car is disabled. Rear Window Defogger
The rear window defogger will clear fog, frost, and thin ice from
the window. Push the defogger
button to turn it on and off. The light in the button lights to show
the defogger is on. If you do not
turn it off, the defogger will shut itself off after about 25 minutes. It
also shuts off when you turn off the
ignition. You have to turn it on
again when you restart the car. Make sure the rear window is clear
and you have good visibility before
starting to drive.
The defogger wires on the inside of
the rear window can be acciden-
tally damaged. When cleaning the
glass, always wipe side to side.
Instruments and ControlsProCarManuals.comMain Menu Table of Contents s t
Page 57 of 225
Power Windows
Your car's windows are electri-
cally-powered. Turn the ignition
switch to ON (II) to raise or lower
any window.Each door has a switch that
controls its window. To open the
window, push the switch down and hold it. Release the switch when
you want the window to stop. Close
the window by pushing the switch
up and holding it.
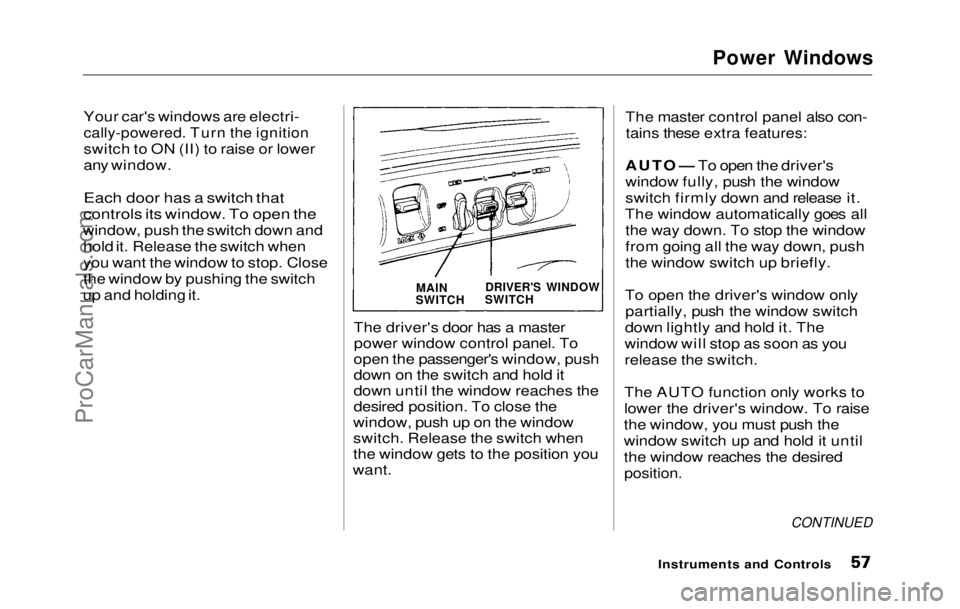
The driver's
door has a master
power window control panel. To
open the passenger's window, push
down on the switch and hold it
down until the window reaches the
desired position. To close the
window, push up on the window
switch. Release the switch when
the window gets to the position you
want. The master control panel also con-
tains these extra features:
AUTO — To open the driver's
window fully, push the window
switch firmly down and release it.
The window automatically goes all the way down. To stop the window
from going all the way down, push
the window switch up briefly.
To open the driver's window only partially, push the window switch
down lightly and hold it. The
window will stop as soon as you
release the switch.
The AUTO function only works to
lower the driver's window. To raise
the window, you must push the
window switch up and hold it until
the window reaches the desired
position.
CONTINUED
Instruments and Controls
DRIVER'S WINDOW
SWITCH
MAIN
SWITCHProCarManuals.comMain Menu Table of Contents s t
Page 58 of 225
Power Windows, Sunroof
The MAIN switch controls power
to the passenger's window. With
this switch off, the passenger's
window cannot be raised or lower- ed. The MAIN switch does not
affect the driver's window. Keep
the MAIN switch off when you
have childre n
in the car so they do
not injure themselves by operating
the windows unintentionally. The power window system has a
key-off delay function. The win-
dows will still operate for up to ten
minutes after you turn off the igni-
tion. Opening either front door can-
cels the delay function. You must
turn the ignition on again before
you can raise or lower the windows.
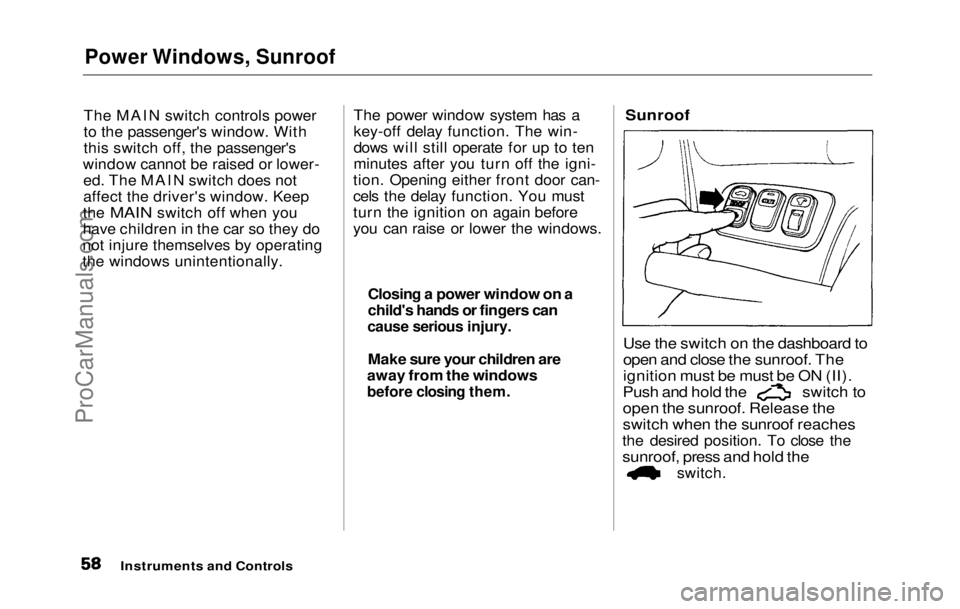
Sunroof
Use the switch on the dashboard to
open and close the sunroof. The
ignition must be must be ON (II).
Push and hold the switch to
open the sunroof. Release the
switch
when
the sunroof reaches
the desired position. To close the
sunroof, press and hold the
switch.
Instruments and Controls
Closing a power window on a
child's hands or fingers can
cause serious injury.
Make sure your children are
away from the windows
before closing them.ProCarManuals.comMain Menu Table of Contents s t
Page 59 of 225
Sunroof, Mirrors
The sunroof has a key-off delay.
You can still open and close the sunroof for up to ten minutes after
you turn off the ignition. The key- off delay cancels as soon as you
open either
front door. You must
then turn the ignition ON (II) for
the sunroof to operate.
If you try to open the sunroof in
below-freezing temperatures, or
when it is covered with snow or ice,
you can damage the sunroof panel
or motor.
Mirrors
Keep the inside and outside mirrors
clean and adjusted for best visibili-
ty. Be sure to adjust the mirrors
before you start driving.
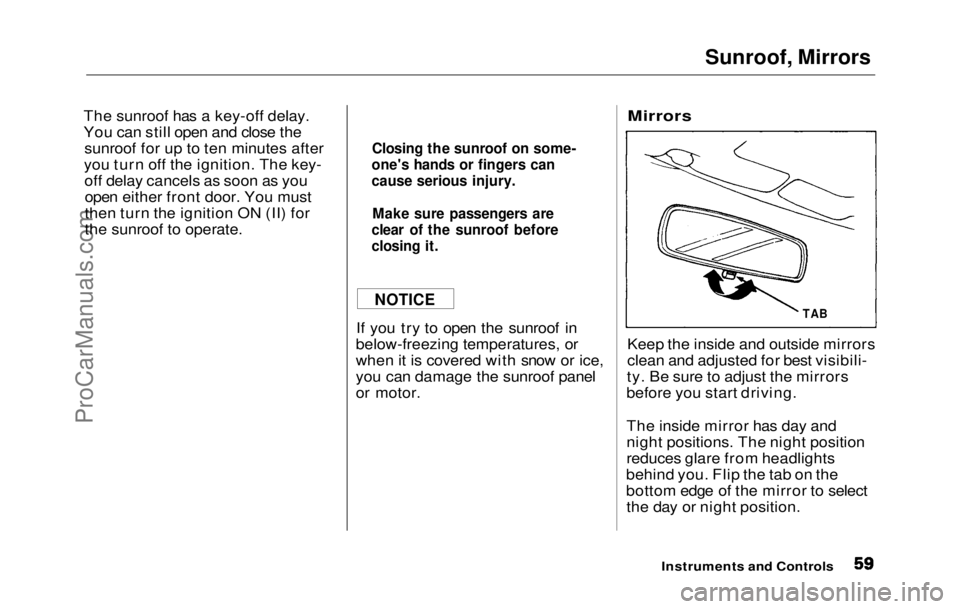
The inside mirror has day and
night positions. The night position
reduces glare from headlights
behind you. Flip the tab on the
bottom edge of the mirror to select the day or night position.
Instruments and Controls
Closing the sunroof on some-
one's hands or fingers can
cause serious injury.
Make sure passengers are
clear of the sunroof before
closing it.
NOTICE
TABProCarManuals.comMain Menu Table of Contents s t
Page 60 of 225
Mirrors
Adjusting the Power Mirrors
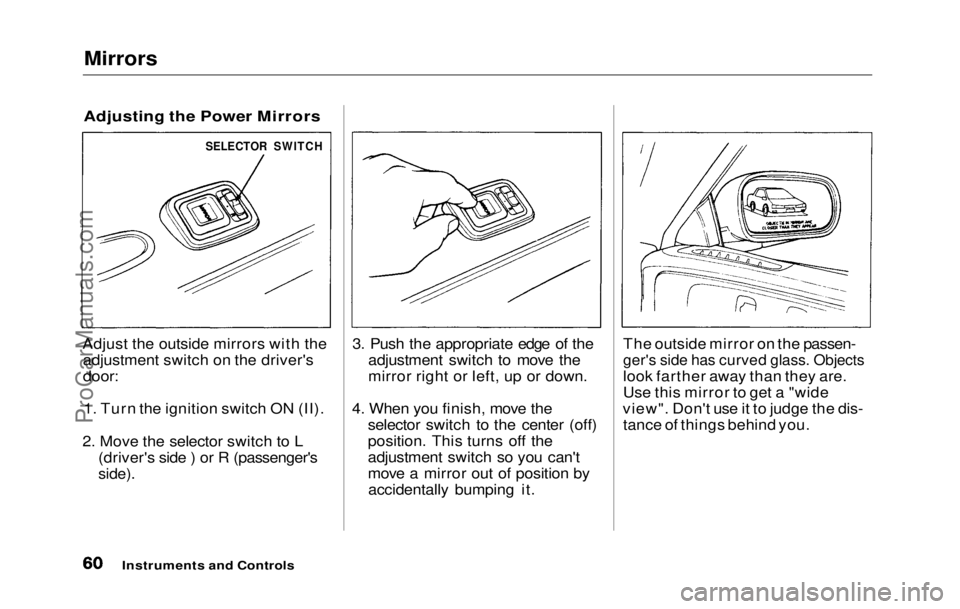
Adjust the outside mirrors with the adjustment switch on the driver's
door:
1. Turn the ignition switch ON (II).
2. Move the selector switch to L (driver's side ) or R (passenger's
side).
3. Push the appropriate edge of the
adjustment switch to move the
mirror right or left, up or down.
4. When you finish, move the selector switch to the center (off)
position. This turns off the
adjustment switch so you can't
move a mirror out of position byaccidentally bumping it. The outside mirror on the passen-
ger's side has curved glass. Objects
look farther away than they are.
Use this mirror to get a "wide
view". Don't use it to judge the dis- tance of things behind you.
Instruments and Controls
SELECTOR SWITCHProCarManuals.comMain Menu Table of Contents s t