INFINITI QX56 2011 Factory Service Manual
Manufacturer: INFINITI, Model Year: 2011, Model line: QX56, Model: INFINITI QX56 2011Pages: 5598, PDF Size: 94.53 MB
Page 5081 of 5598

DIAGNOSIS AND REPAIR WORKFLOWSTR-13
< BASIC INSPECTION >
C
DE
F
G H
I
J
K L
M A
STR
NP
O
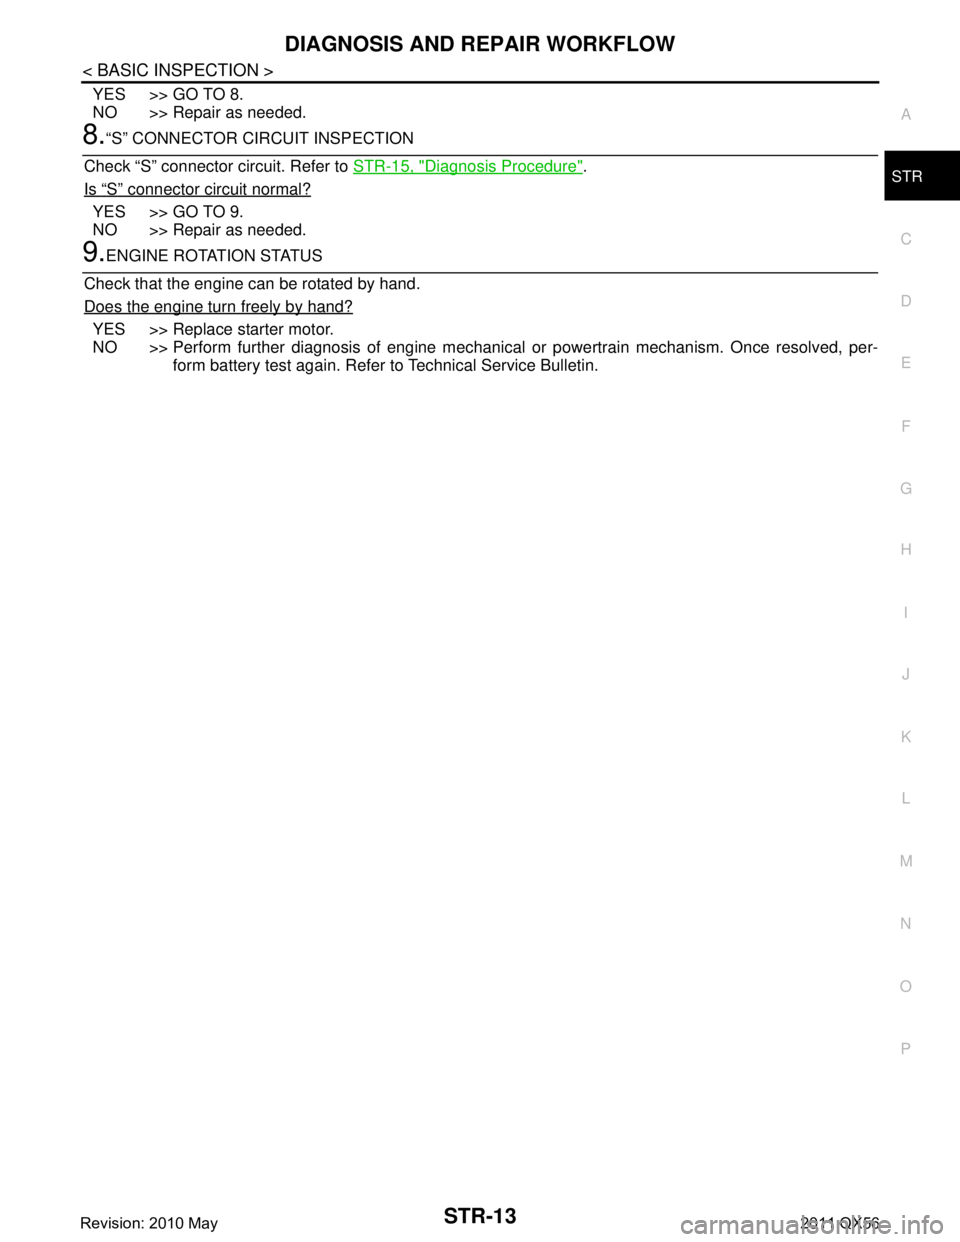
YES >> GO TO 8.
NO >> Repair as needed.
8.“S” CONNECTOR CIRCUIT INSPECTION
Check “S” connector circuit. Refer to STR-15, "
Diagnosis Procedure".
Is
“S” connector circuit normal?
YES >> GO TO 9.
NO >> Repair as needed.
9.ENGINE ROTATION STATUS
Check that the engine can be rotated by hand.
Does the engine turn freely by hand?
YES >> Replace starter motor.
NO >> Perform further diagnosis of engine mechanical or powertrain mechanism. Once resolved, per-
form battery test again. Refer to Technical Service Bulletin.
Revision: 2010 May2011 QX56
Page 5082 of 5598

STR-14
< DTC/CIRCUIT DIAGNOSIS >
B TERMINAL CIRCUIT
DTC/CIRCUIT DIAGNOSIS
B TERMINAL CIRCUIT
Diagnosis ProcedureINFOID:0000000006275524
CAUTION:
Perform diagnosis under the condition that engine cannot start by the following procedure.
1. Remove fuel pump fuse.
2. Crank or start the engine (where possi ble) until the fuel pressure is released.
1.CHECK “B” TERMINAL CIRCUIT
1. Turn ignition switch OFF.
2. Check that starter motor “B” terminal connection is clean and tight.
3. Check voltage between starter motor “B” terminal and ground.
Is the inspection result normal?
YES >> GO TO 2.
NO >> Check harness between battery and starter motor for open circuit.
2.CHECK BATTERY CABLE CONNECTION STATUS (VOLTAGE DROP TEST)
1. Shift A/T selector lever to “P” or “N” position.
2. Check voltage between battery positive terminal and starter motor “B” terminal.
Is the inspection result normal?
YES >> GO TO 3.
NO >> Check harness between the battery and the starter motor for poor continuity.
3.CHECK GROUND CIRCUIT STATUS (VOLTAGE DROP TEST)
1. Shift A/T selector lever to “P” or “N” position.
2. Check voltage between starter motor case and battery negative terminal.
Is the inspection result normal?
YES >> “B” terminal circuit is OK. Further inspection is necessary. Refer to STR-11, "Work Flow".
NO >> Check the starter motor case and ground for poor continuity.
(+) (–) Voltage
Starter motor “B” terminal
F57 2 Ground Battery voltage
(+) (–)
ConditionVoltage (V)
(Approx.)
Starter motor “B” terminal
Battery positive terminal F57 2 When the ignition switch
is in START position Less than 0.5
(+) (–) Condition Voltage (V)
(Approx.)
Starter motor case Battery negative terminal When the ignition switch is in START position Less than 0.2
Revision: 2010 May2011 QX56
Page 5083 of 5598

S CONNECTOR CIRCUITSTR-15
< DTC/CIRCUIT DIAGNOSIS >
C
DE
F
G H
I
J
K L
M A
STR
NP
O
S CONNECTOR CIRCUIT
Diagnosis ProcedureINFOID:0000000006275525
CAUTION:
Perform diagnosis under the cond
ition that engine cannot start by the following procedure.
1. Remove fuel pump fuse.
2. Crank or start the engine (where possi ble) until the fuel pressure is released.
1.CHECK “S” CONNECTOR CIRCUIT
1. Turn ignition switch OFF.
2. Disconnect starter motor connector.
3. Shift A/T selector lever to “P” or “N” position.
4. Check voltage between starter motor harness connector and ground.
Is the inspection result normal?
YES >> “S” connector circuit is OK. Furt her inspection is necessary. Refer to STR-11, "Work Flow".
NO >> GO TO 2.
2.CHECK HARNESS CONTI NUITY (OPEN CIRCUIT)
1. Turn ignition switch OFF.
2. Disconnect IPDM E/R harness connector.
3. Check continuity between starter motor harness connector and IPDM E/R harness connector.
Is the inspection result normal?
YES >> Further inspection is necessary. Refer to SEC-48, "Work Flow".
NO >> Repair the harness or connector.
(+)
(–) Condition Voltage
Starter motor
Connector Terminal
F55 1 Ground When the ignition switch
is in START position Battery voltage
Starter motor harness IPDM E/R
Continuity
Connector Terminal Connector Terminal
F55 1 E10 3 Existed
Revision: 2010 May2011 QX56
Page 5084 of 5598

STR-16
< SYMPTOM DIAGNOSIS >
STARTING SYSTEM
SYMPTOM DIAGNOSIS
STARTING SYSTEM
Symptom TableINFOID:0000000006275526
Symptom Reference
No normal cranking Refer to STR-11, "
Work Flow".
Starter motor does not rotate
Revision: 2010 May2011 QX56
Page 5085 of 5598

STARTER MOTORSTR-17
< REMOVAL AND INSTALLATION >
C
DE
F
G H
I
J
K L
M A
STR
NP
O
REMOVAL AND INSTALLATION
STARTER MOTOR
Exploded ViewINFOID:0000000006275527
REMOVAL
DISASSEMBLY
1. Starter motor 2. “S” connector 3. “B” terminal harness
4. “B” terminal nut 5. Starter motor mounting bolt 6. Cylinder block
: Engine front
Refer to GI-4, "
Components" for symbols in the figure.
JMBIA2970GB
Revision: 2010 May2011 QX56
Page 5086 of 5598

STR-18
< REMOVAL AND INSTALLATION >
STARTER MOTOR
Type: M001T30671
Removal and InstallationINFOID:0000000006275528
REMOVAL
1. Disconnect the battery cable from the negative terminal. Refer to PG-164, "Removal and Installation".
2. Remove engine cover. Refer to EM-25, "
Removal and Installation".
3. Remove intake manifold. Refer to EM-30, "
Removal and Installation".
4. Remove “B” terminal nut, and then “B” terminal harness.
5. Remove harness clip of “S ” connector from heater pipe.
6. Disconnect “S” connector.
7. Remove starter motor mounting bolts.
8. Remove starter motor upward from the vehicle.
INSTALLATION
Note the following item, and then install in the reverse order of removal.
CAUTION:
Be careful to tighten “B” terminal nut carefully.
InspectionINFOID:0000000006275534
INSPECTION AFTER DISASSEMBLY
JPBIA2426GB
1. Magnetic switch assembly 2. Adjusting plate 3. “B” terminal extension
4. Gear case assembly 5. Stopper ring 6. Stopper
7. Pinion assembly 8. Internal gear 9. Yoke assembly
10. Armature assembly 11. Brush holder assembly 12. Metal RR
13. Rear cover 14. Through bolt 15. Packing
16. Ball 17. Planetary gear 18. Gear shaft
19. Dust cover kit 20. Shift lever
: High-temperature grease point
Refer to GI-4, "
Components" for symbols not described on the above.
Revision: 2010 May2011 QX56
Page 5087 of 5598

STARTER MOTORSTR-19
< REMOVAL AND INSTALLATION >
C
DE
F
G H
I
J
K L
M A
STR
NP
O
Pinion/Clutch Check
1. Inspect pinion teeth.
Replace pinion if teeth are worn or damaged. (Also check condition of ring gear teeth.)
2. Inspect reduction gear teeth. Replace reduction gear if teeth are worn or dam aged. (Also check condition of armature shaft gear
teeth.)
3. Check to see if pinion locks in one directi on and rotates smoothly in the opposite direction.
If it locks or rotates in both directions, or unusual resistance is evident, replace.
Revision: 2010 May2011 QX56
Page 5088 of 5598

STR-20
< SERVICE DATA AND SPECIFICATIONS (SDS)
SERVICE DATA AND SPECIFICATIONS (SDS)
SERVICE DATA AND SPECIFICATIONS (SDS)
SERVICE DATA AND SPECIFICATIONS (SDS)
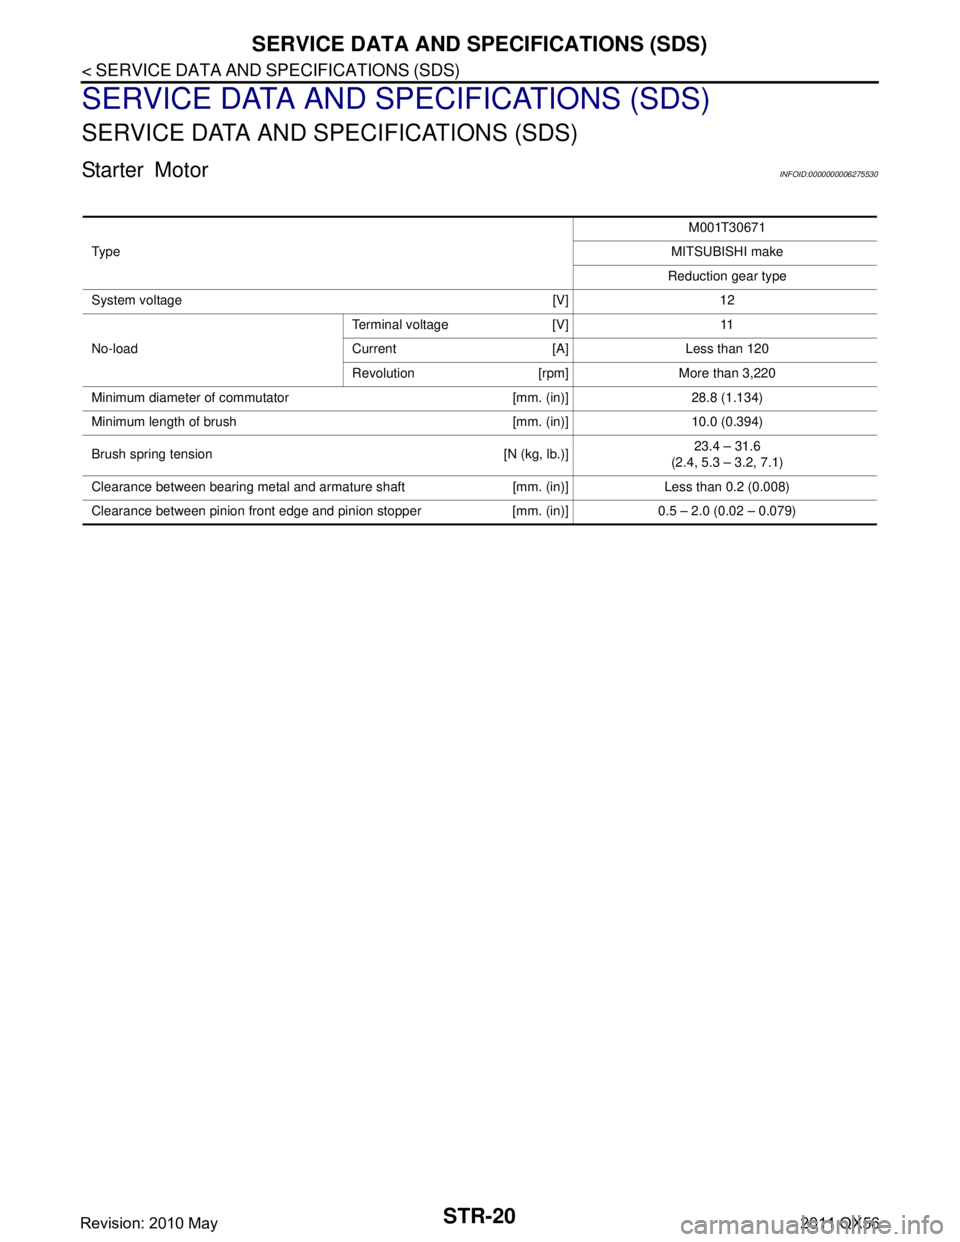
Starter MotorINFOID:0000000006275530
Ty p eM001T30671
MITSUBISHI make
Reduction gear type
System voltage [V] 12
No-load Terminal voltage [V] 11
Current [A] Less than 120
Revolution [rpm] More than 3,220
Minimum diameter of commutator [mm. (in)] 28.8 (1.134)
Minimum length of brush [mm. (in)] 10.0 (0.394)
Brush spring tension [N (kg, lb.)] 23.4 – 31.6
(2.4, 5.3 – 3.2, 7.1)
Clearance between bearing metal and armature shaft [mm. (in)] Less than 0.2 (0.008)
Clearance between pinion front edge and pinion stopper [mm. (in)] 0.5 – 2.0 (0.02 – 0.079)
Revision: 2010 May2011 QX56
Page 5089 of 5598

TM-1
TRANSMISSION & DRIVELINE
CEF
G H
I
J
K L
M
SECTION TM
A
B
TM
N
O P
CONTENTS
TRANSAXLE & TRANSMISSION
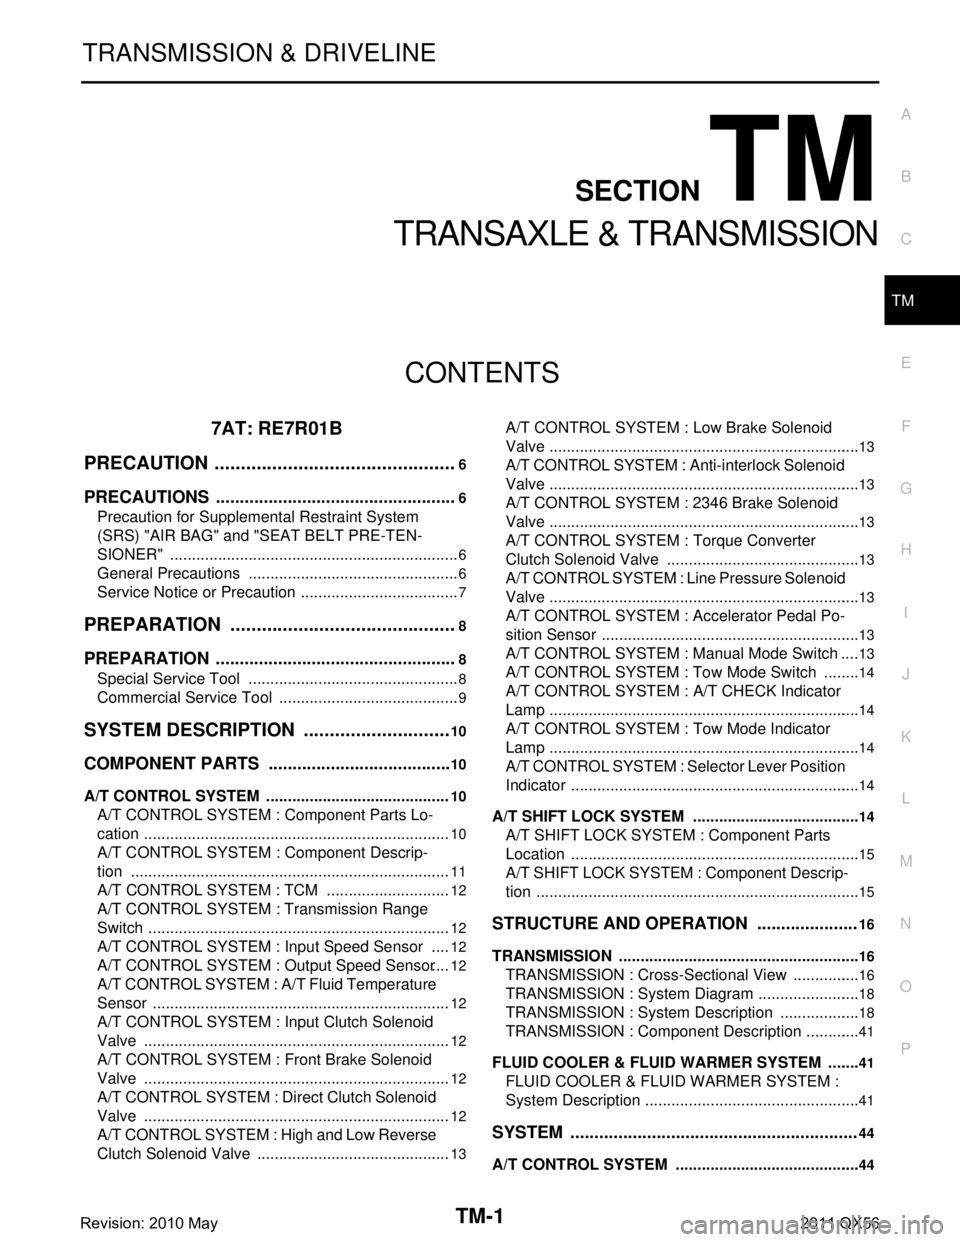
7AT: RE7R01B
PRECAUTION ................ ...............................
6
PRECAUTIONS .............................................. .....6
Precaution for Supplemental Restraint System
(SRS) "AIR BAG" and "SEAT BELT PRE-TEN-
SIONER" ............................................................. ......
6
General Precautions .................................................6
Service Notice or Precaution .....................................7
PREPARATION ............................................8
PREPARATION .............................................. .....8
Special Service Tool ........................................... ......8
Commercial Service Tool ..........................................9
SYSTEM DESCRIPTION .............................10
COMPONENT PARTS ................................... ....10
A/T CONTROL SYSTEM ...........................................10
A/T CONTROL SYSTEM : Component Parts Lo-
cation ................................................................... ....
10
A/T CONTROL SYSTEM : Component Descrip-
tion ...................................................................... ....
11
A/T CONTROL SYSTEM : TCM .............................12
A/T CONTROL SYSTEM : Transmission Range
Switch .................................................................. ....
12
A/T CONTROL SYSTEM : Input Speed Sensor .....12
A/T CONTROL SYSTEM : Output Speed Sensor ....12
A/T CONTROL SYSTEM : A/ T Fluid Temperature
Sensor ................................................................. ....
12
A/T CONTROL SYSTEM : Input Clutch Solenoid
Valve ................................................................... ....
12
A/T CONTROL SYSTEM : Front Brake Solenoid
Valve ................................................................... ....
12
A/T CONTROL SYSTEM : Direct Clutch Solenoid
Valve ................................................................... ....
12
A/T CONTROL SYSTEM : High and Low Reverse
Clutch Solenoid Valve ......................................... ....
13
A/T CONTROL SYSTEM : Low Brake Solenoid
Valve .................................................................... ....
13
A/T CONTROL SYSTEM : Anti-interlock Solenoid
Valve ........................................................................
13
A/T CONTROL SYSTEM : 2346 Brake Solenoid
Valve ........................................................................
13
A/T CONTROL SYSTEM : Torque Converter
Clutch Solenoid Valve ......................................... ....
13
A/T CONTROL SYSTEM : Line Pressure Solenoid
Valve .................................................................... ....
13
A/T CONTROL SYSTEM : Accelerator Pedal Po-
sition Sensor ........................................................ ....
13
A/T CONTROL SYSTEM : Manual Mode Switch ....13
A/T CONTROL SYSTEM : To w Mode Switch .........14
A/T CONTROL SYSTEM : A/T CHECK Indicator
Lamp .................................................................... ....
14
A/T CONTROL SYSTEM : Tow Mode Indicator
Lamp .................................................................... ....
14
A/T CONTROL SYSTEM : Selector Lever Position
Indicator ............................................................... ....
14
A/T SHIFT LOCK SYSTEM ................................... ....14
A/T SHIFT LOCK SYSTEM : Component Parts
Location ...................................................................
15
A/T SHIFT LOCK SYSTEM : Component Descrip-
tion ...........................................................................
15
STRUCTURE AND OPERATION .....................16
TRANSMISSION .................................................... ....16
TRANSMISSION : Cross-Sectional View ................16
TRANSMISSION : System Diagram ........................18
TRANSMISSION : System Description ...................18
TRANSMISSION : Component Description .............41
FLUID COOLER & FLUID WARMER SYSTEM .... ....41
FLUID COOLER & FLUID WARMER SYSTEM :
System Description ..................................................
41
SYSTEM ............................................................44
A/T CONTROL SYSTEM ....................................... ....44
Revision: 2010 May2011 QX56
Page 5090 of 5598

TM-2
A/T CONTROL SYSTEM : System Diagram ..........44
A/T CONTROL SYSTEM : System Description ......44
A/T CONTROL SYSTEM : Fail-Safe ......................45
A/T CONTROL SYSTEM : Protection Control ..... ...47
LINE PRESSURE CONTROL ................................ ...48
LINE PRESSURE CONTROL : System Diagram ...48
LINE PRESSURE CONTROL : System Descrip-
tion ....................................................................... ...
48
SHIFT CHANGE CONTROL .................................. ...49
SHIFT CHANGE CONTROL : System Diagram .....50
SHIFT CHANGE CONTROL : System Description
...
50
SHIFT PATTERN CONTROL ................................. ...53
SHIFT PATTERN CONTROL : System Diagram ...54
SHIFT PATTERN CONTROL : System Descrip-
tion ..........................................................................
54
LOCK-UP CONTROL ............................................. ...56
LOCK-UP CONTROL : System Diagram ................56
LOCK-UP CONTROL : System Description ...........56
A/T SHIFT LOCK SYSTEM .......................................57
A/T SHIFT LOCK SYSTEM : System Description ...58
ON BOARD DIAGNOSTIC (OBD) SYSTEM .....60
Diagnosis Description .......................................... ...60
DIAGNOSIS SYSTEM (TCM) ............................61
CONSULT-III Function (TRANSMISSION) .......... ...61
ECU DIAGNOSIS INFORMATION ..............68
TCM ................................................................. ...68
Reference Value .................................................. ...68
Fail-Safe .................................................................74
Protection Control ...................................................76
DTC Inspection Priority Chart .................................77
DTC Index ..............................................................78
WIRING DIAGRAM .....................................80
A/T CONTROL SYSTEM ................................ ...80
Wiring Diagram .................................................... ...80
A/T SHIFT LOCK SYSTEM ...............................85
Wiring Diagram .................................................... ...85
BASIC INSPECTION ...................................88
DIAGNOSIS AND REPAIR WORK FLOW ..... ...88
Diagnosis Flow .................................................... ...88
Question sheet .......................................................89
ADDITIONAL SERVICE WHEN REPLACING
TRANSMISSION ASSEMBLY ...........................
91
Description ........................................................... ...91
Special Repair Requirement ...................................91
ADDITIONAL SERVICE WHEN REPLACING
CONTROL VALVE & TCM ................................
92
Description ........................................................... ...92
Special Repair Requirement ...................................92
CALIBRATION OF DECEL G SENSOR ...........93
Description ........................................................... ...93
Special Repair Requirement ...................................93
A/T FLUID ..........................................................94
Changing .............................................................. ...94
Adjustment ..............................................................95
A/T FLUID COOLER .........................................97
Cleaning ............................................................... ...97
Inspection ................................................................99
STALL TEST ....................................................100
Inspection and Judgment ..................................... .100
A/T POSITION ..................................................101
Inspection ............................................................. .101
Adjustment ............................................................101
DTC/CIRCUIT DIAGNOSIS .......................102
U0300 CAN COMMUNICATION DATA ......... ..102
Description ........................................................... .102
DTC Logic .............................................................102
Diagnosis Procedure .............................................102
U1000 CAN COMM CIRCUIT ...........................103
Description ........................................................... .103
DTC Logic .............................................................103
Diagnosis Procedure .............................................103
P0615 STARTER RELAY .................................104
Description ........................................................... .104
DTC Logic .............................................................104
Diagnosis Procedure .............................................104
P0705 TRANSMISSION RANGE SWITCH A ..106
DTC Logic .............................................................106
Diagnosis Procedure .............................................106
P0710 TRANSMISSION FLUID TEMPERA-
TURE SENSOR A .............................................
107
DTC Logic ............................................................ .107
Diagnosis Procedure .............................................107
P0717 INPUT SPEED SENSOR A ...................109
DTC Logic ............................................................ .109
Diagnosis Procedure .............................................109
P0720 OUTPUT SPEED SENSOR ...................110
DTC Logic ............................................................ .110
Diagnosis Procedure .............................................110
P0725 ENGINE SPEED ....................................112
Description ........................................................... .112
DTC Logic .............................................................112
Diagnosis Procedure .............................................112
P0729 6GR INCORRECT RATIO .....................114
Revision: 2010 May2011 QX56