JAGUAR X308 1998 2.G Workshop Manual
X308 1998 2.G
JAGUAR
JAGUAR
https://www.carmanualsonline.info/img/21/7640/w960_7640-0.png
JAGUAR X308 1998 2.G Workshop Manual
Page 1947 of 2490
Exterior Lighting - Low Beam HeadlampVehicles Without: Headlamp
Leveling
Removal and Installation
Removal
Installation
1. Remove headlamp assembly fo r access. Refer to 86.41.33.
2. Release bulb holder securing tangs and withdraw holder for
access.
3. Invert headlamp assembly.
4. Release headlamp unit adju sting screws and pivot.
1. Install headlamp unit adjusting screws and pivot in locating
seats.
2. Invert headlamp assembly.
3. Install headlamp assembly bulb holder.
Page 1949 of 2490
Exterior Lighting - Low Beam HeadlampVehicles With: Headlamp Leveling
Removal and Installation
Removal
Installation
1.
Remove headlamp assembly for access. Refer to 86.41.33.
2. Release bulb holder securing tangs and withdraw holder for
access.
3. Invert headlamp assembly.
4. Release headlamp unit adjusting screws and pivot.
5. Remove actuator.
1. Release headlamp unit from leveling actuator adjusting screw.
2. Rotate actuator 1/4 turn inward, tilt forward end
downward and withdraw assembly from headlamp.
1. Install headlamp unit adjusting screws and pivot in locating
seats.
2. Invert headlamp assembly and install bulb holder.
3. With forward end tilted downward, position actuator assembly on
headlamp mounting.
4. Align actuator with headlamp and rotate it 1/4 turn outwards to
engage and fully seat in mounting.
5. Install headlamp assembly. Refer to 86.41.33.
6. Align headlamp beams.
Page 1950 of 2490
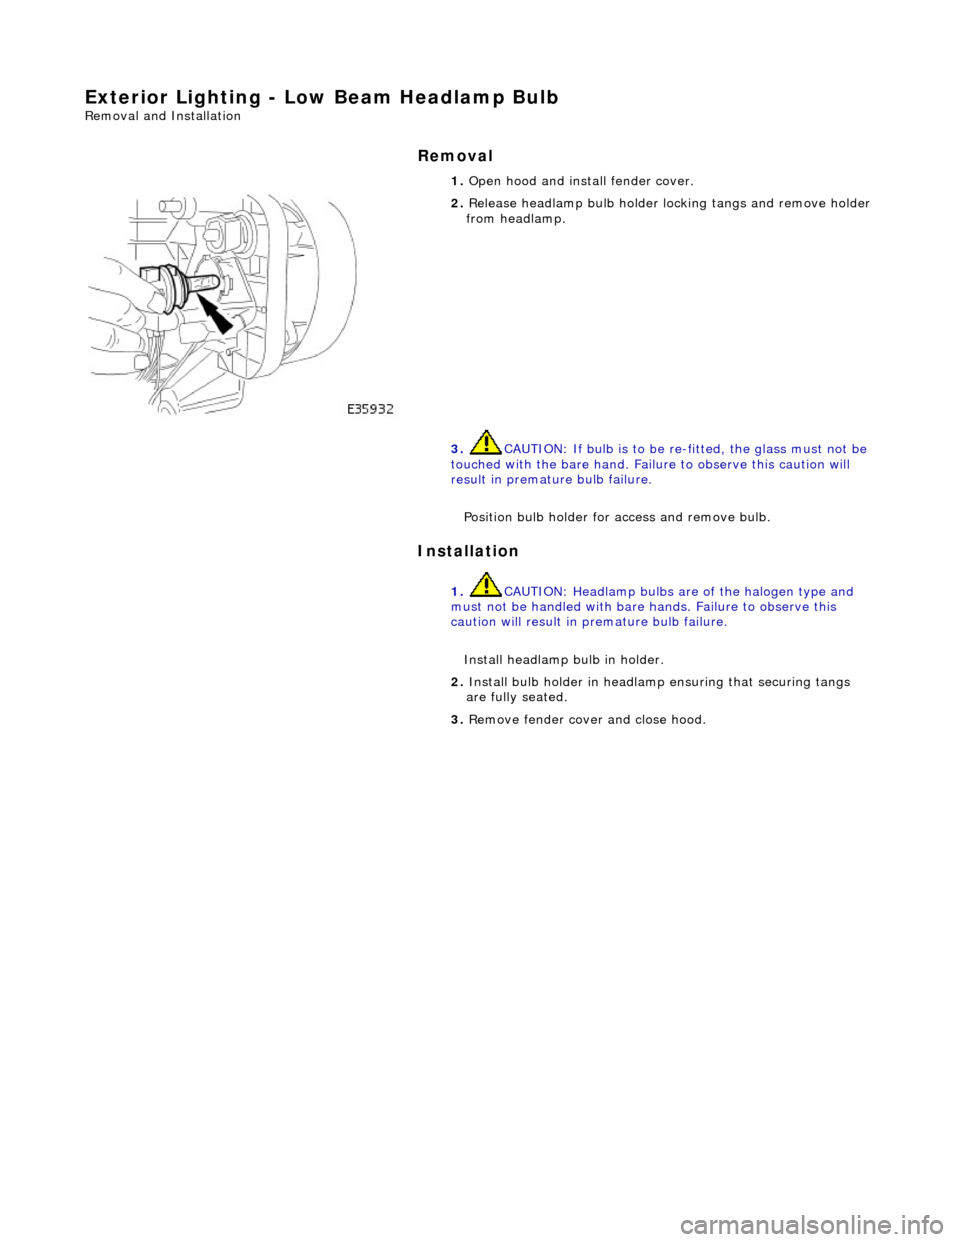
Exterior Lighting - Low Beam Headlamp Bulb
Removal and Installation
Removal
Installation
1.
Open hood and install fender cover.
2. Release headlamp bulb holder locking tangs and remove holder from headlamp.
3. CAUTION: If bulb is to be re -fitted, the glass must not be
touched with the bare hand. Failure to observe this caution will
result in premature bulb failure.
Position bulb holder for access and remove bulb.
1. CAUTION: Headlamp bulbs are of the halogen type and
must not be handled with bare hands. Failure to observe this
caution will result in premature bulb failure.
Install headlamp bulb in holder.
2. Install bulb holder in headlamp ensuring that securing tangs
are fully seated.
3. Remove fender cover and close hood.
Page 1951 of 2490
Exterior Lighting - Rear Lamp Assembly
Removal and Installation
Removal
Installation
1.
Depress retaining tang and remove rear lamp interior trim
finisher.
2. Disconnect rear lamp harness multiplug.
3. Remove three nuts securing rear lamp assembly to BIW and
remove lamp from vehicle.
1. Check that rubber seals ar e undamaged and correctly
positioned on rear lamp assembly.
2. Install rear lamp as sembly in BIW aperture, ensuring that
rubber seals seat correctly.
3. Install three nuts securing lamp assembly to BIW.
4. Connect harness multiplug to rear lamp assembly.
5. Install interior trim finisher on rear lamp assembly ensuring
that retaining tang engages correctly.
Page 1954 of 2490
Exterior Lighting - Rear Side Marker Lamp
Removal and Installation
Removal
Installation
1. Applying firm thumb pressure to front of lens, pivot lamp
assembly for access to rear end.
2. Exercising care to avoid dama ging paintwork, use a small
screwdriver to press and re lease rear retaining clip.
3. Withdraw lamp from bumper for access and disconnect harness connector.
1. Position lamp at bumper ap erture and connect harness
connector.
2. Engage front end tang of lamp in bumper aperture.
3. Pivot lamp assembly and firmly seat rear retaining clip in
bumper aperture.
Page 1956 of 2490
Installation
1. Install bulb in holder.
2. Install bulb and bulb holder in lamp assembly and rotate 1/4
turn clockwise to seat and retain.
3. Position lamp at bumper ap erture and connect harness
connector.
4. Engage front end tang in bumper aperture.
5. Pivot lamp assembly and firmly seat rear retaining clip in
bumper aperture.
Page 1957 of 2490
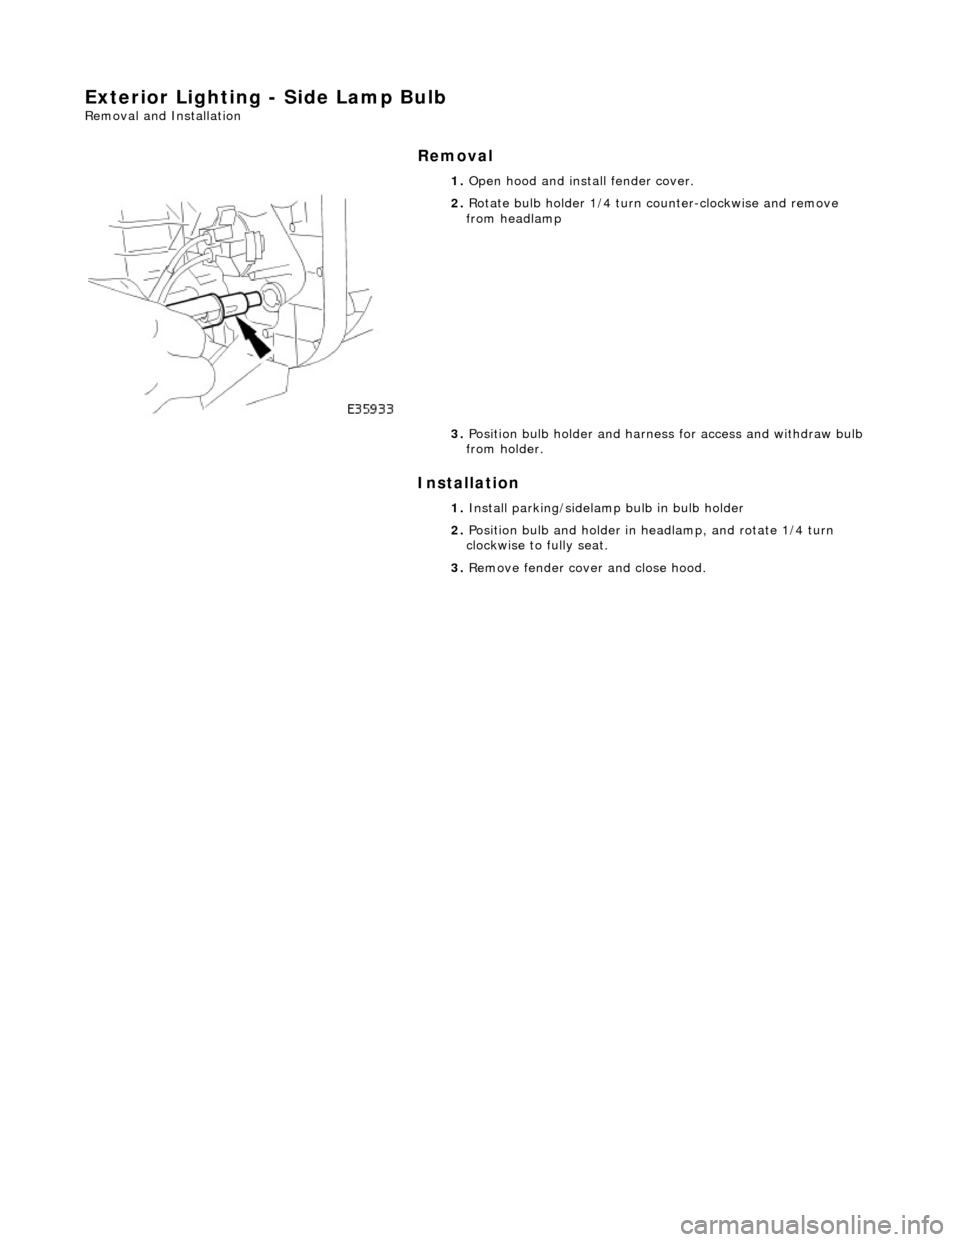
Exterior Lighting - Side Lamp Bulb
Removal and Installation
Removal
Installation
1.
Open hood and install fender cover.
2. Rotate bulb holder 1/4 turn counter-clockwise and remove
from headlamp
3. Position bulb holder and harne ss for access and withdraw bulb
from holder.
1. Install parking/sidelamp bulb in bulb holder
2. Position bulb and holder in headlamp, and rotate 1/4 turn
clockwise to fully seat.
3. Remove fender cover and close hood.
Page 1958 of 2490
Exterior Lighting - Side Lamp/Front Turn Signal Lamp
Removal and Installation
Removal
Installation
1. Applying firm hand pressure to inner end, pivot indicator lamp
assembly for access to outer end.
2. Exercising care to avoid dama ging paintwork, use a small
screwdriver at outer end of lamp, to press and release retaining clip.
3. Withdraw lamp from bumper for access and disconnect harness multiplug.
1. Position direction indicator la mp at bumper aperture and
connect harness multiplug.
2. Engage inner end tang of lamp in bumper aperture.
3. Pivot lamp assembly and firmly seat outer retaining clip in
bumper aperture.
Page 1959 of 2490
Exterior Lighting - Side Turn Signal Lamp
Removal and Installation
Removal
Installation
1. Remove side repeater lamp.
Applying downward pressure, compress retaining clips and
release lamp upper edge from fender.
Withdraw lamp from panel and disconnect harness
connector.
1. Position lamp at fender and connect harness connector.
2. Position lower edge of lamp in fender aperture and apply
downward pressure to compress clip.
3. Pivot lamp to seat upper edge in fender.
Page 1966 of 2490
Interior Lighting - Door Courtesy Lamp Bulb
Removal and Installation
Removal
Installation
1. Using a thin plastic bl ade, carefully release lens retaining tang
from guard lamp assembly.
2. Withdraw lens from gu ard lamp assembly.
3. Remove bulb from bulb holder.
1. Install bulb in holder.
2. Position lens on guard lamp assembly.
3. Press lens firmly to fully seat securing tang in guard lamp
assembly..


