JAGUAR X308 1998 2.G Workshop Manual
X308 1998 2.G
JAGUAR
JAGUAR
https://www.carmanualsonline.info/img/21/7640/w960_7640-0.png
JAGUAR X308 1998 2.G Workshop Manual
Page 1780 of 2490
Air Distribution and Filtering - Passenger Side Blower Motor
Removal and Installation
Removal
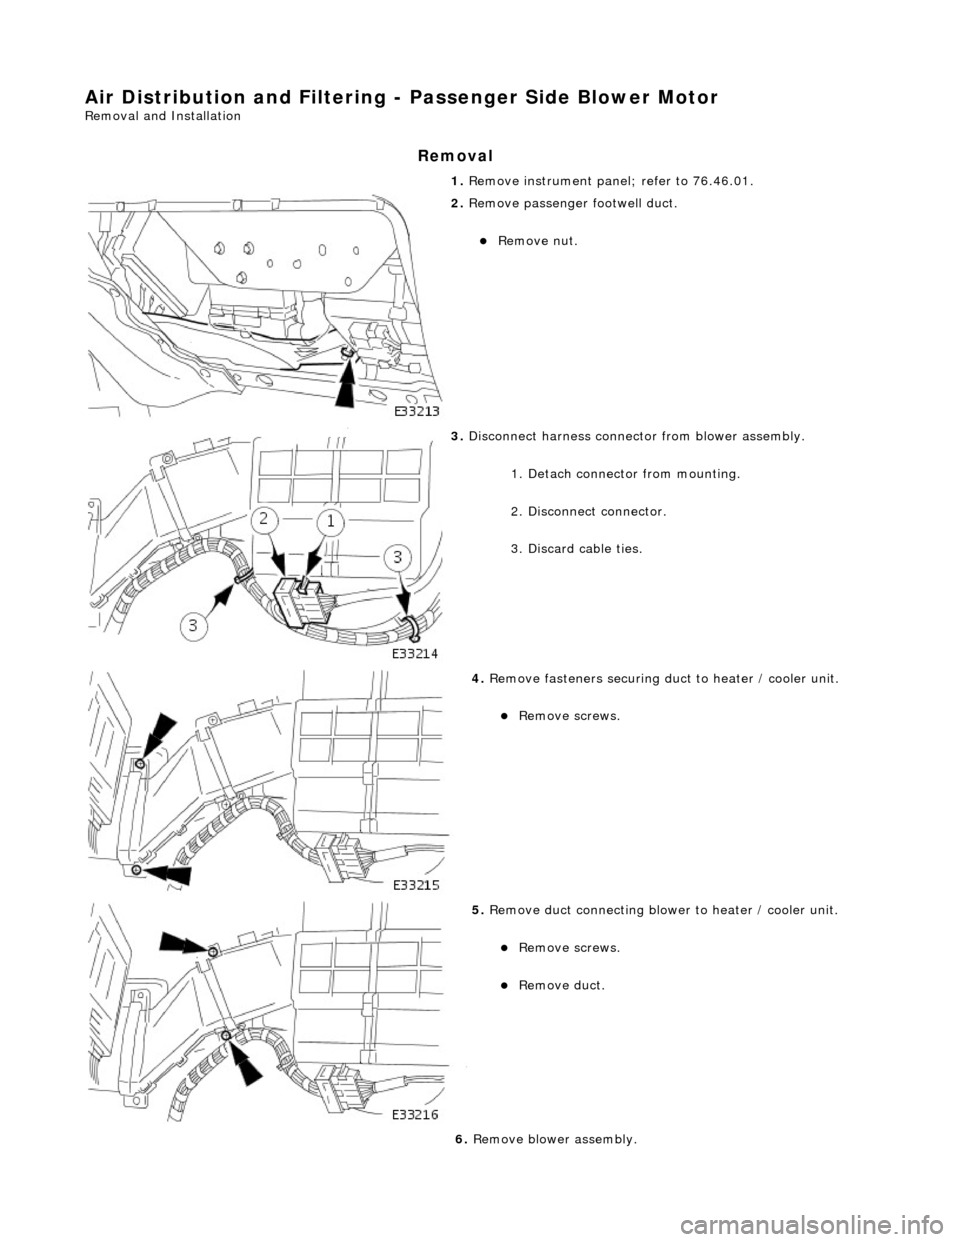
1. Remove instrument panel; refer to 76.46.01.
2. Remove passenger footwell duct.
Remove nut.
3. Disconnect harness connector from blower assembly.
1. Detach connector from mounting.
2. Disconnect connector.
3. Discard cable ties.
4. Remove fasteners securing duct to heater / cooler unit.
Remove screws.
5. Remove duct connecting blower to heater / cooler unit.
Remove screws.
Remove duct.
6. Remove blower assembly.
Page 1781 of 2490
Installation
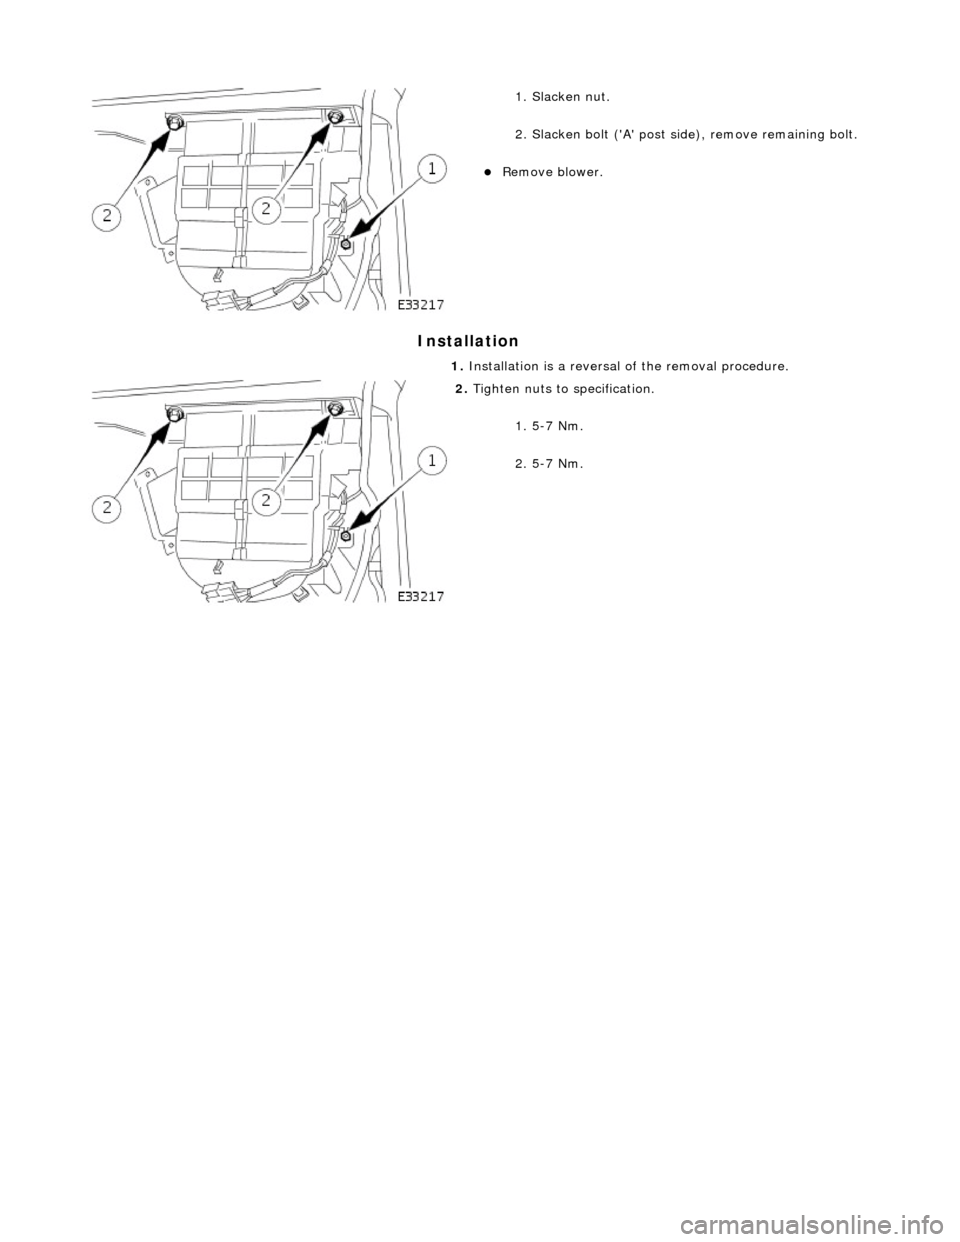
1. Slacken nut.
2. Slacken bolt ('A' post side), remove remaining bolt.
Remove blower.
1. Installation is a reversal of the removal procedure.
2. Tighten nuts to specification.
1. 5-7 Nm.
2. 5-7 Nm.
Page 1788 of 2490
Heating and Ventilation - Heater Core and Evaporator Core Housing
Removal and Installation
Removal
1. Disconnect battery ground cable (IMPORTANT, see SRO
86.15.19 for further information).
2. Recover refrigerant from air co nditioning system; refer to
82.30.30.
3. Drain radiator coolant only; refer to 26.10.01 or (SC)
26.10.01.
4. Remove instrument panel for access, refer to 76.46.01.
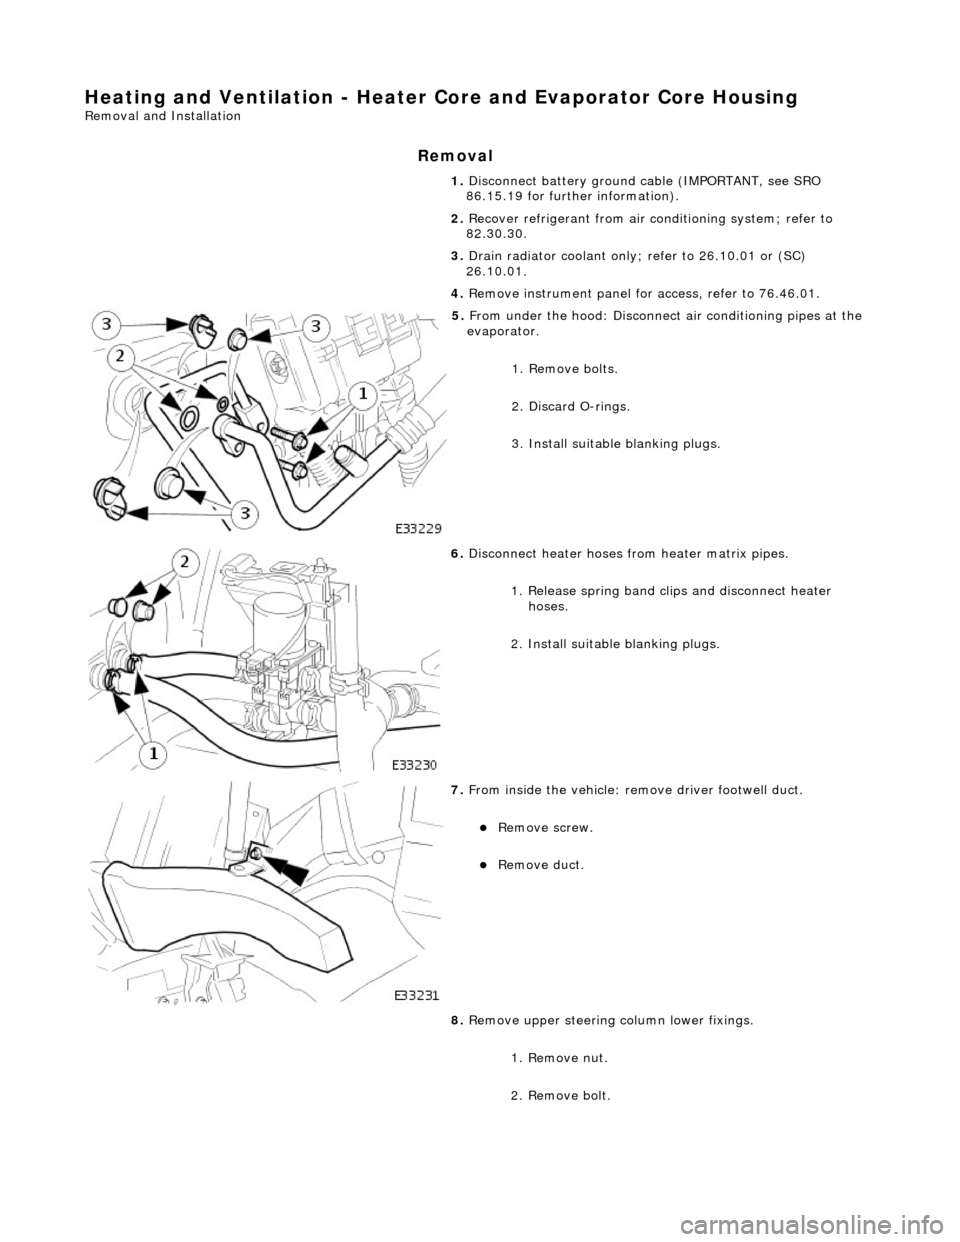
5. From under the hood: Disconnect air conditioning pipes at the
evaporator.
1. Remove bolts.
2. Discard O-rings.
3. Install suitable blanking plugs.
6. Disconnect heater hoses from heater matrix pipes.
1. Release spring band clips and disconnect heater hoses.
2. Install suitable blanking plugs.
7. From inside the vehicle: re move driver footwell duct.
Remove screw.
Remove duct.
8. Remove upper steering column lower fixings.
1. Remove nut.
2. Remove bolt.
Page 1789 of 2490
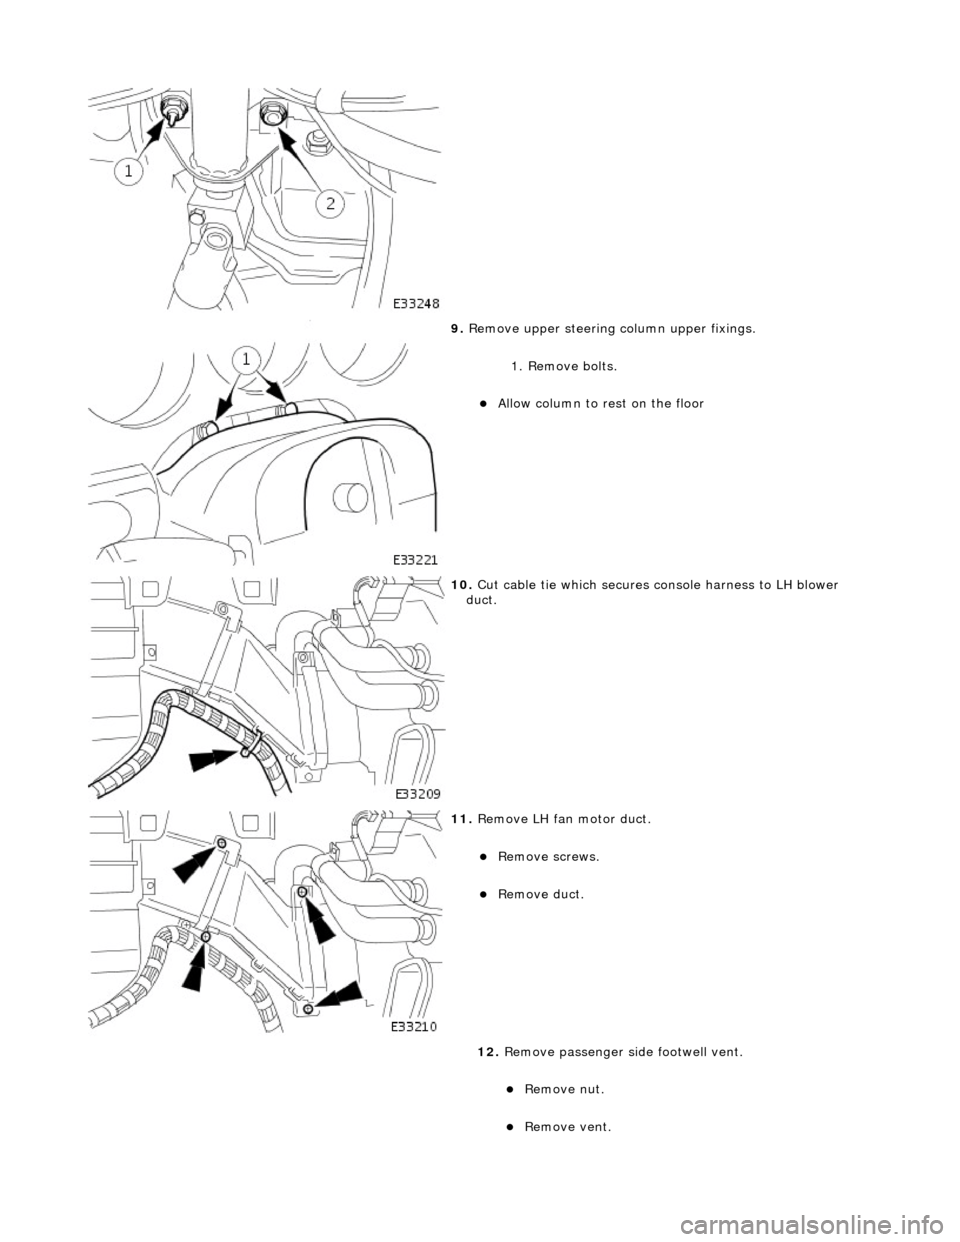
9. Remove upper steering column upper fixings.
1. Remove bolts.
Allow column to rest on the floor
10. Cut cable tie which secures console harness to LH blower
duct.
11. Remove LH fan motor duct.
Remove screws.
Remove duct.
12. Remove passenger si de footwell vent.
Remove nut.
Remove vent.
Page 1790 of 2490
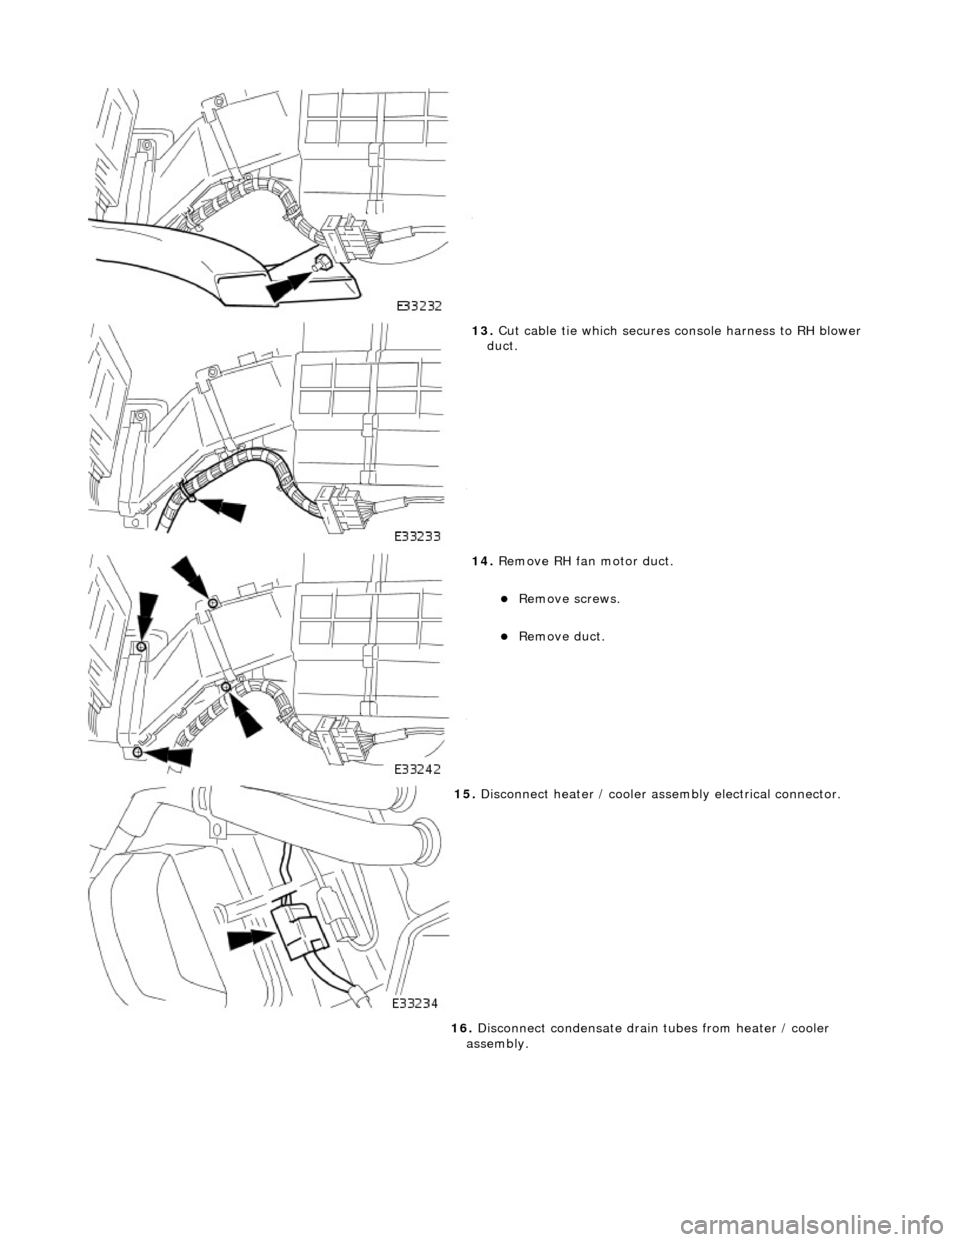
13. Cut cable tie which secures console harness to RH blower
duct.
14. Remove RH fan motor duct.
Remove screws.
Remove duct.
15. Disconnect heater / cooler assembly electrical connector.
16. Disconnect condensate drain tubes from heater / cooler
assembly.
Page 1791 of 2490
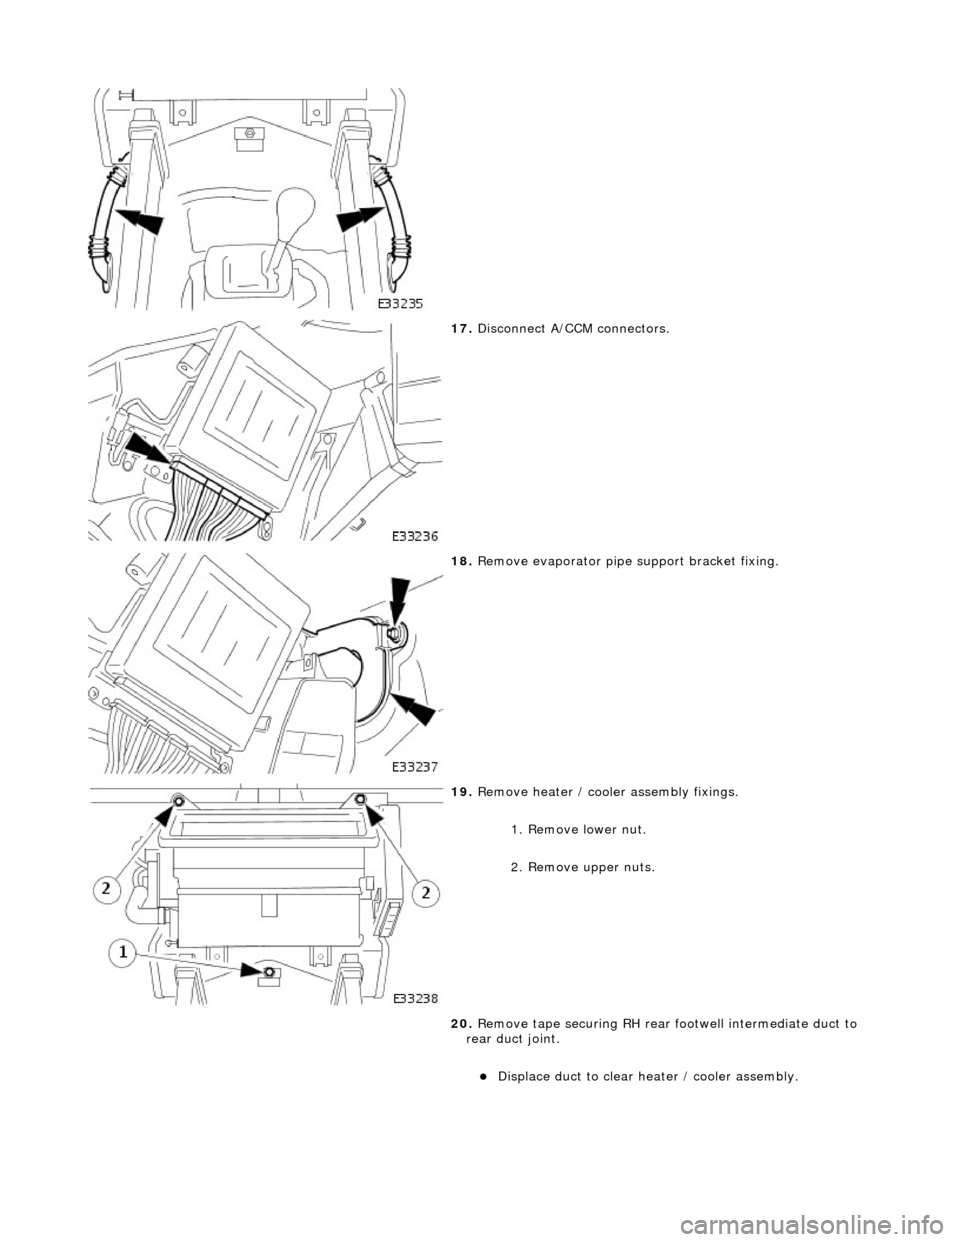
17. Disconnect A/CCM connectors.
18. Remove evaporator pipe support bracket fixing.
19. Remove heater / cooler assembly fixings.
1. Remove lower nut.
2. Remove upper nuts.
20. Remove tape securing RH rear footwell intermediate duct to
rear duct joint.
Displace duct to clear heater / cooler assembly.
Page 1792 of 2490
Installation
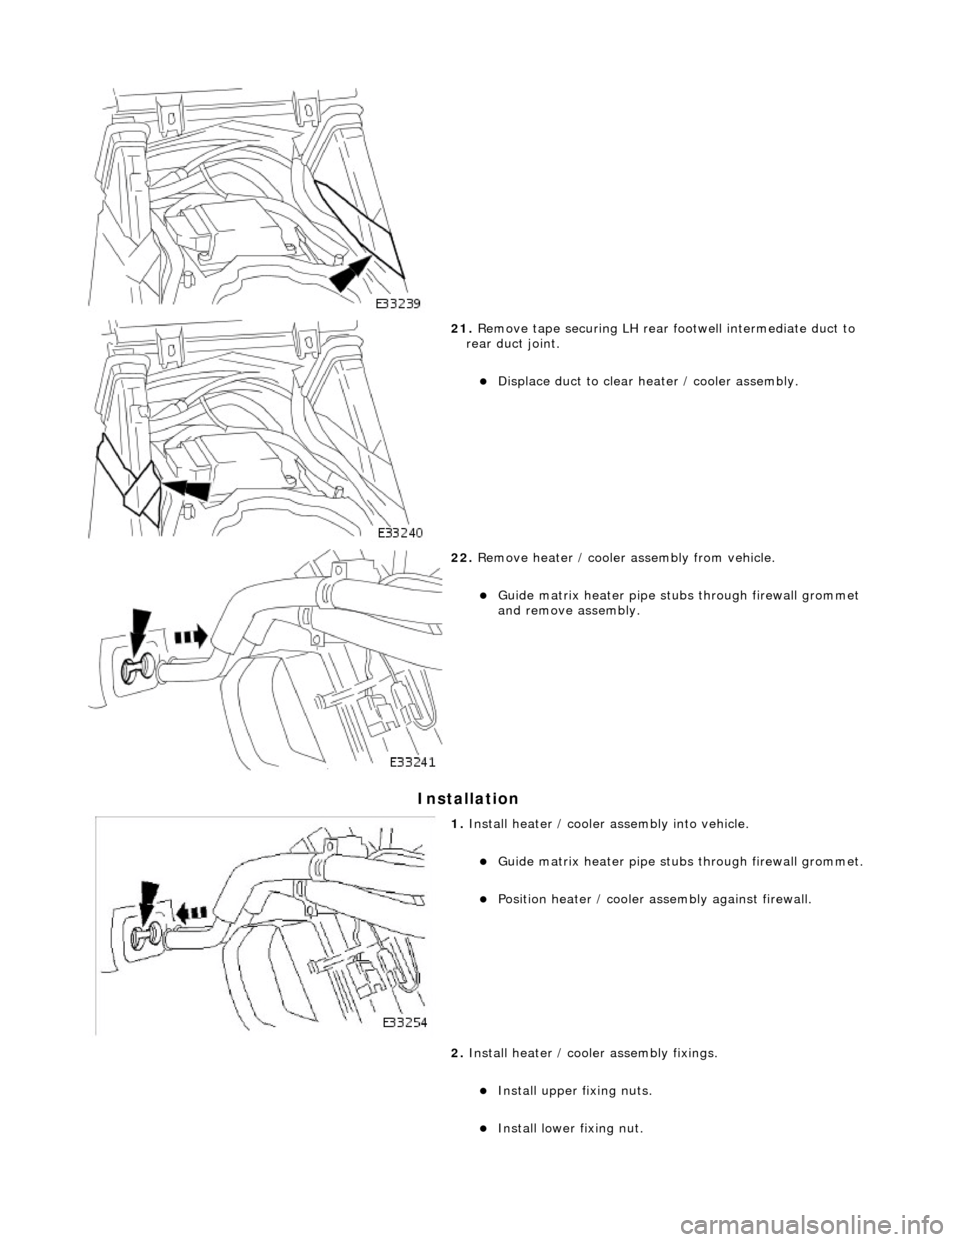
21. Remove tape securing LH rear footwell intermediate duct to
rear duct joint.
Displace duct to clear heater / cooler assembly.
22. Remove heater / cooler assembly from vehicle.
Guide matrix heater pipe stubs through firewall grommet
and remove assembly.
1. Install heater / cooler assembly into vehicle.
Guide matrix heater pipe stubs through firewall grommet.
Position heater / cooler as sembly against firewall.
2. Install heater / cooler assembly fixings.
Install upper fixing nuts.
Install lower fixing nut.
Page 1794 of 2490
7. Position LH rear footwell inte rmediate duct to rear duct.
Secure with suitable cloth tape.
8. Connect heater / cooler assembly electrical connector.
9. Install LH fan motor duct.
Install duct.
Install screws.
10. Install cable tie to secure console harness to LH blower duct.
Page 1795 of 2490
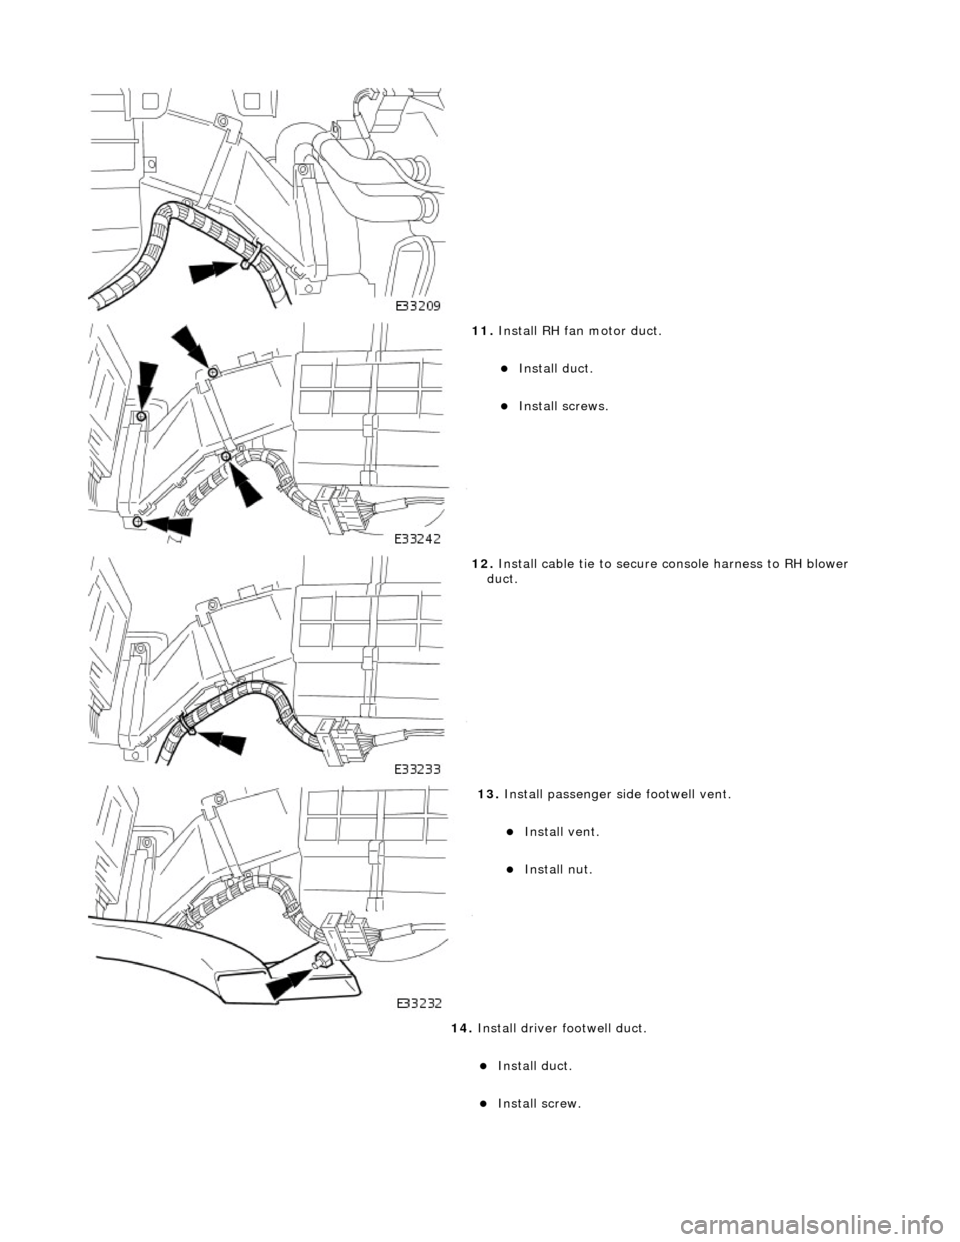
11. Install RH fan motor duct.
Install duct.
Install screws.
12. Install cable tie to secure console harness to RH blower
duct.
13. Install passenger side footwell vent.
Install vent.
Install nut.
14. Install driver footwell duct.
Install duct.
Install screw.
Page 1796 of 2490
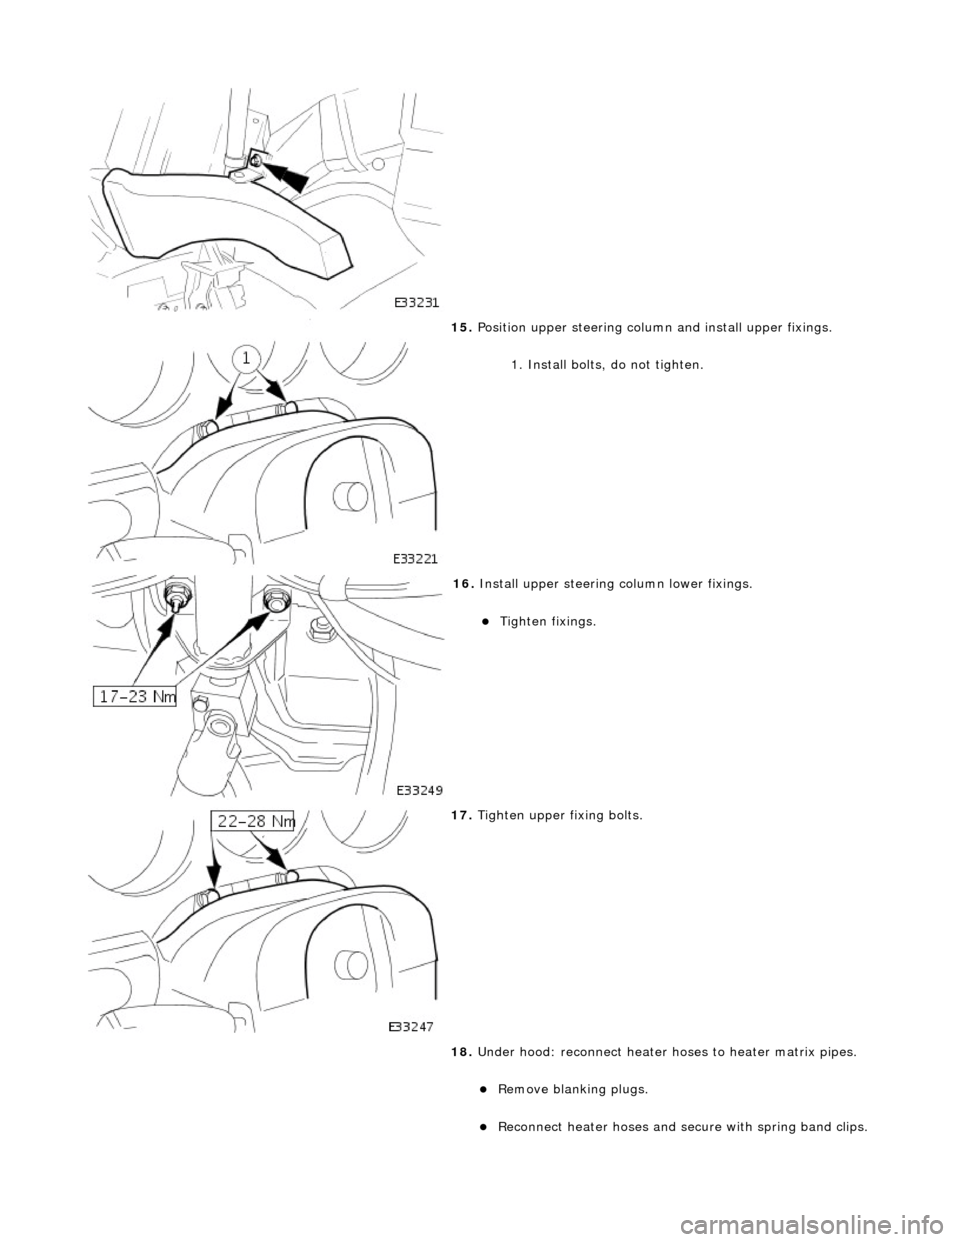
15. Position upper steering column and install upper fixings.
1. Install bolts, do not tighten.
16. Install upper steering column lower fixings.
Tighten fixings.
17. Tighten upper fi xing bolts.
18. Under hood: reconnect heater ho ses to heater matrix pipes.
Remove blanking plugs.
Reconnect heater hoses and secure with spring band clips.
