Ground JAGUAR X308 1998 2.G Workshop Manual
[x] Cancel search | Manufacturer: JAGUAR, Model Year: 1998, Model line: X308, Model: JAGUAR X308 1998 2.GPages: 2490, PDF Size: 69.81 MB
Page 2183 of 2490
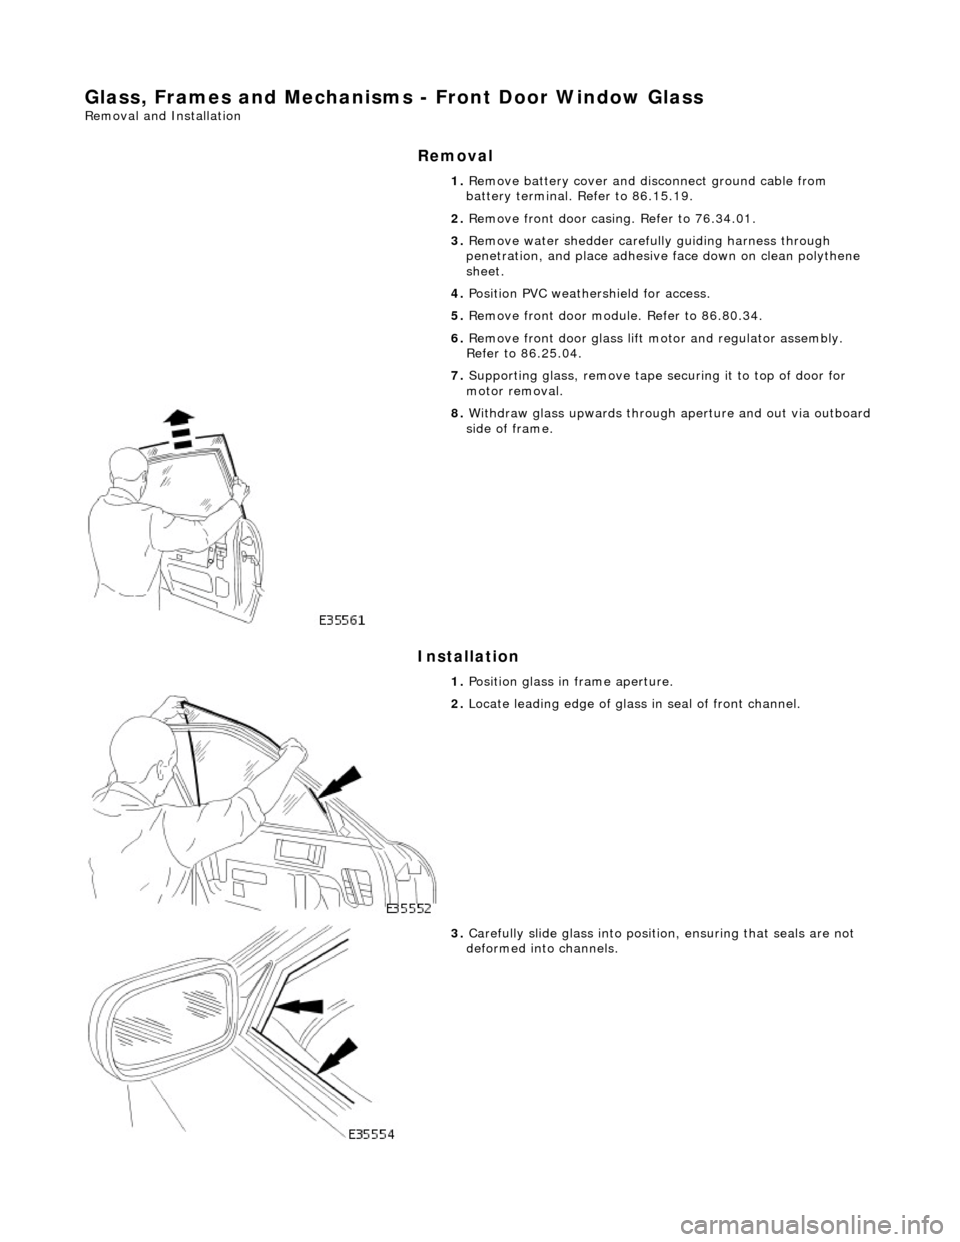
Glass, Frames and Mechanisms - Front Door Window Glass
Removal and Installation
Removal
Installation
1. Remove battery cover and disc onnect ground cable from
battery terminal. Refer to 86.15.19.
2. Remove front door casing. Refer to 76.34.01.
3. Remove water shedder carefu lly guiding harness through
penetration, and place adhesive face down on clean polythene
sheet.
4. Position PVC weathe rshield for access.
5. Remove front door modu le. Refer to 86.80.34.
6. Remove front door glass lift motor and regulator assembly.
Refer to 86.25.04.
7. Supporting glass, remove tape securing it to top of door for
motor removal.
8. Withdraw glass upwards through aperture and out via outboard side of frame.
1. Position glass in frame aperture.
2. Locate leading edge of glass in seal of front channel.
3. Carefully slide glass into position, ensuring that seals are not
deformed into channels.
Page 2184 of 2490
4.
Fully raise glass and using linen tape, secure to top of door
frame.
5. Fit door glass lift motor. Refer to 86.25.04.
6. Fit door module. Refer to 86.80.34.
7. Reposition PVC inne r weathershield.
8. Position water shedder and carefully pass harness multiplugs
through penetration.
9. Ensuring door mating surfaces ar e clean and dry, firmly seat
water shedder.
10. Fit door casing. Refer to 76.34.01.
11. Connect ground cable to batter y terminal and fit cover to
battery. Refer to 86.15.15.
Page 2186 of 2490
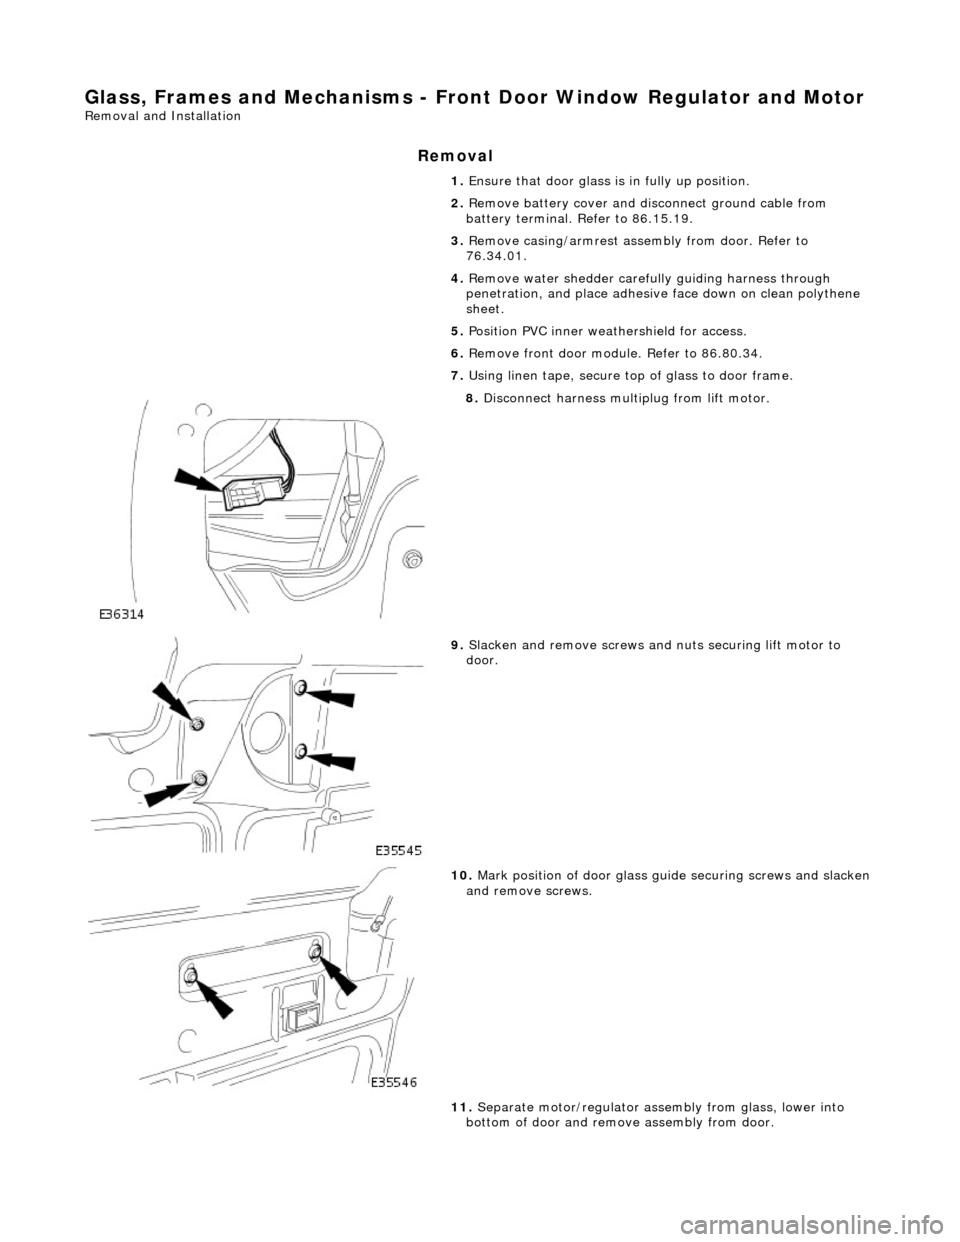
Glass, Frames and Mechanisms - Front Door Window Regulator and Motor
Removal and Installation
Removal
1. Ensure that door glass is in fully up position.
2. Remove battery cover and disc onnect ground cable from
battery terminal. Refer to 86.15.19.
3. Remove casing/armrest asse mbly from door. Refer to
76.34.01.
4. Remove water shedder carefu lly guiding harness through
penetration, and place adhesive face down on clean polythene
sheet.
5. Position PVC inner weat hershield for access.
6. Remove front door modu le. Refer to 86.80.34.
7. Using linen tape, secure to p of glass to door frame.
8. Disconnect harness mult iplug from lift motor.
9. Slacken and remove screws and nuts securing lift motor to
door.
10. Mark position of door glass gu ide securing screws and slacken and remove screws.
11. Separate motor/regulator assembly from glass, lower into
bottom of door and remove assembly from door.
Page 2188 of 2490
supply from motor multiplug.
15.
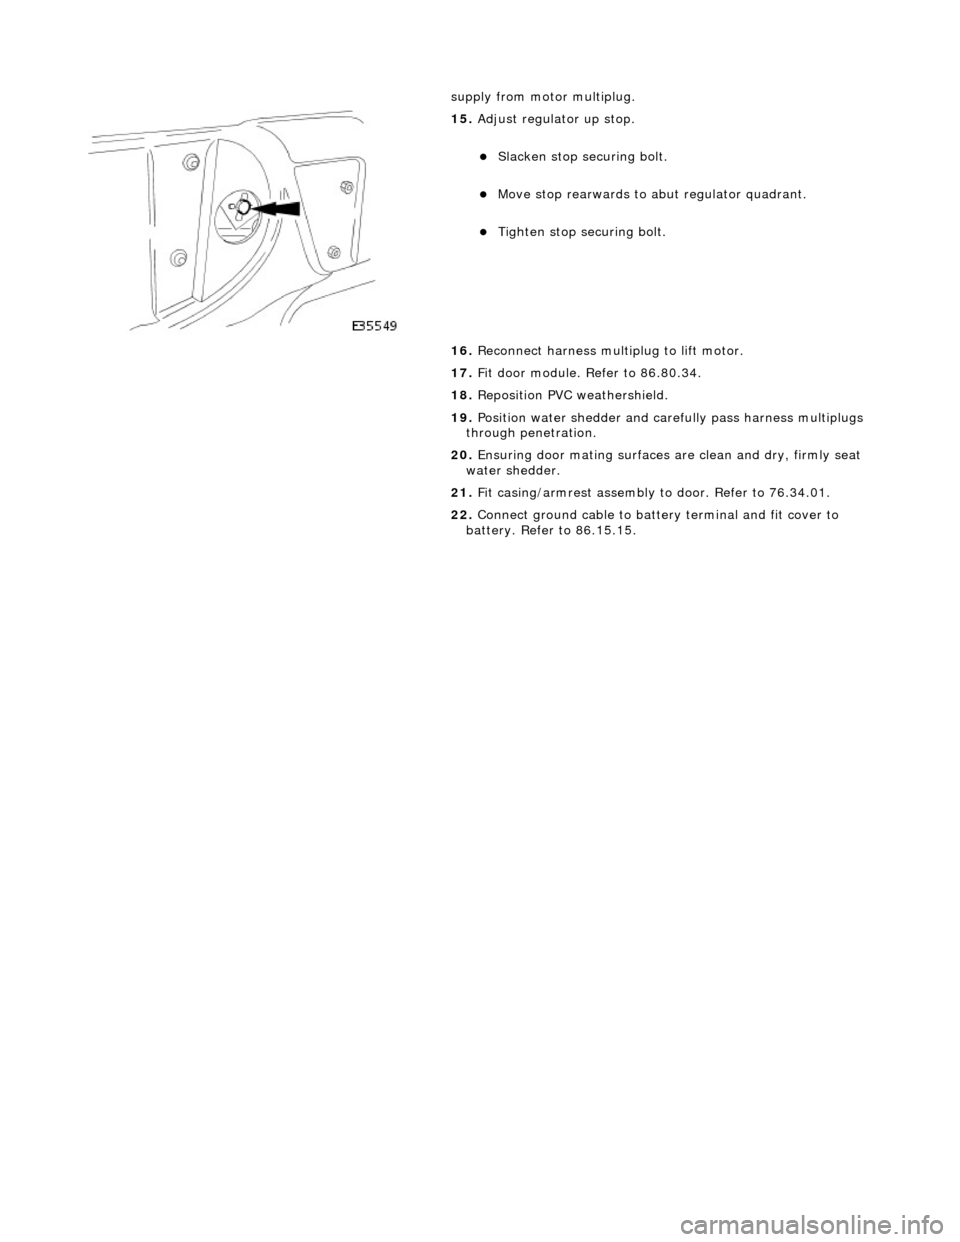
Adjust regulator up stop.
пЃ¬Slacken stop securing bolt.
пЃ¬Move stop rearwards to abut regulator quadrant.
пЃ¬Tighten stop securing bolt.
16. Reconnect harness multiplug to lift motor.
17. Fit door module. Refer to 86.80.34.
18. Reposition PVC weathershield.
19. Position water shedder and carefully pass harness multiplugs
through penetration.
20. Ensuring door mating surfaces ar e clean and dry, firmly seat
water shedder.
21. Fit casing/armrest assembly to door. Refer to 76.34.01.
22. Connect ground cable to batter y terminal and fit cover to
battery. Refer to 86.15.15.
Page 2191 of 2490
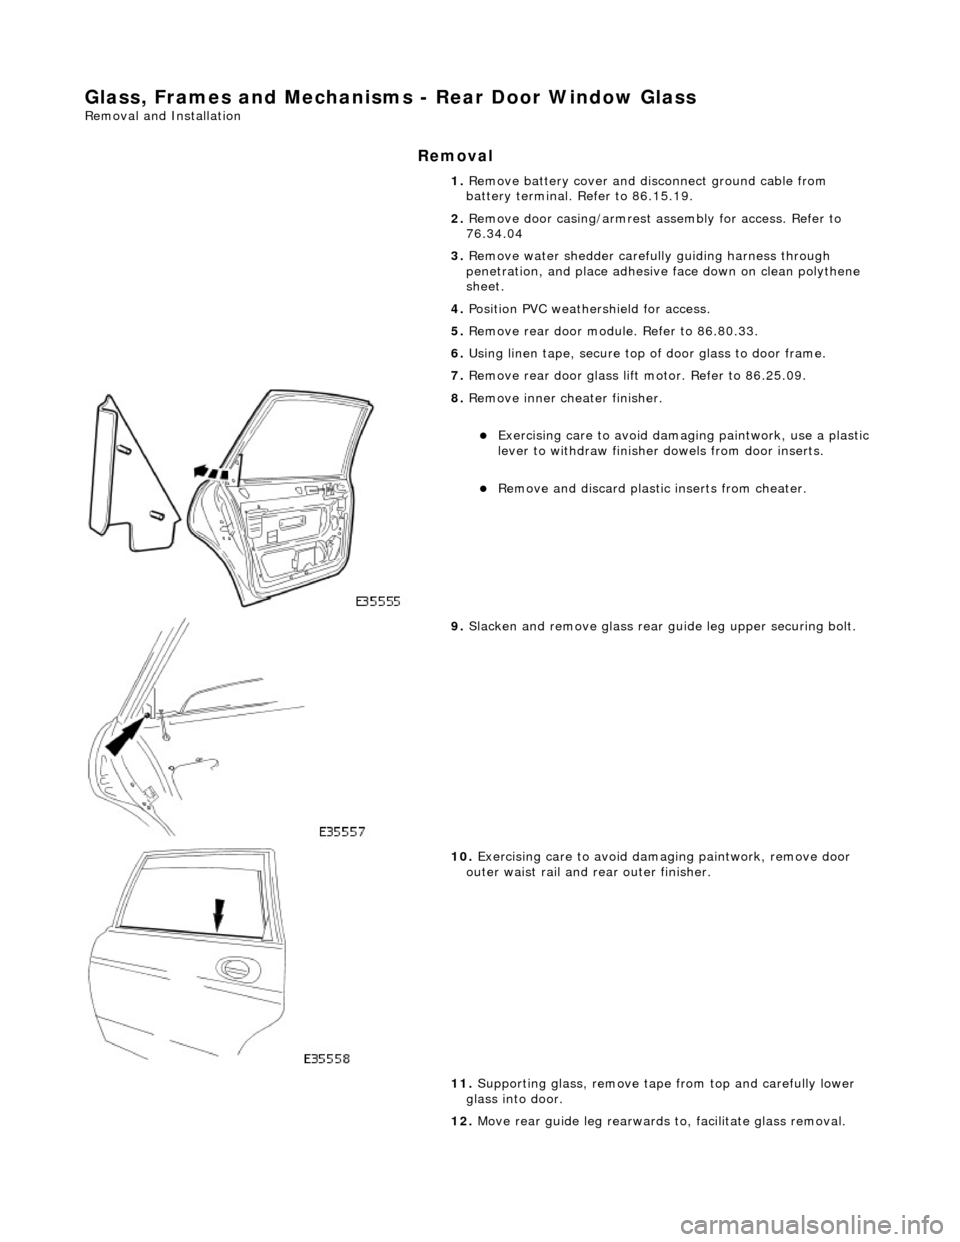
Glass, Frames and Mechanisms - Rear Door Window Glass
Removal and Installation
Removal
1. Remove battery cover and disc onnect ground cable from
battery terminal. Refer to 86.15.19.
2. Remove door casing/armrest as sembly for access. Refer to
76.34.04
3. Remove water shedder carefu lly guiding harness through
penetration, and place adhesive face down on clean polythene
sheet.
4. Position PVC weathe rshield for access.
5. Remove rear door module. Refer to 86.80.33.
6. Using linen tape, secure top of door glass to door frame.
7. Remove rear door glass lift motor. Refer to 86.25.09.
8. Remove inner cheater finisher.
пЃ¬Exercising care to avoid dama ging paintwork, use a plastic
lever to withdraw finisher dowels from door inserts.
пЃ¬Remove and discard plasti c inserts from cheater.
9. Slacken and remove glass rear guide leg upper securing bolt.
10. Exercising care to avoid damaging paintwork, remove door
outer waist rail and rear outer finisher.
11. Supporting glass, remove tape from top and carefully lower
glass into door.
12. Move rear guide leg rearwards to, facilitate glass removal.
Page 2193 of 2490
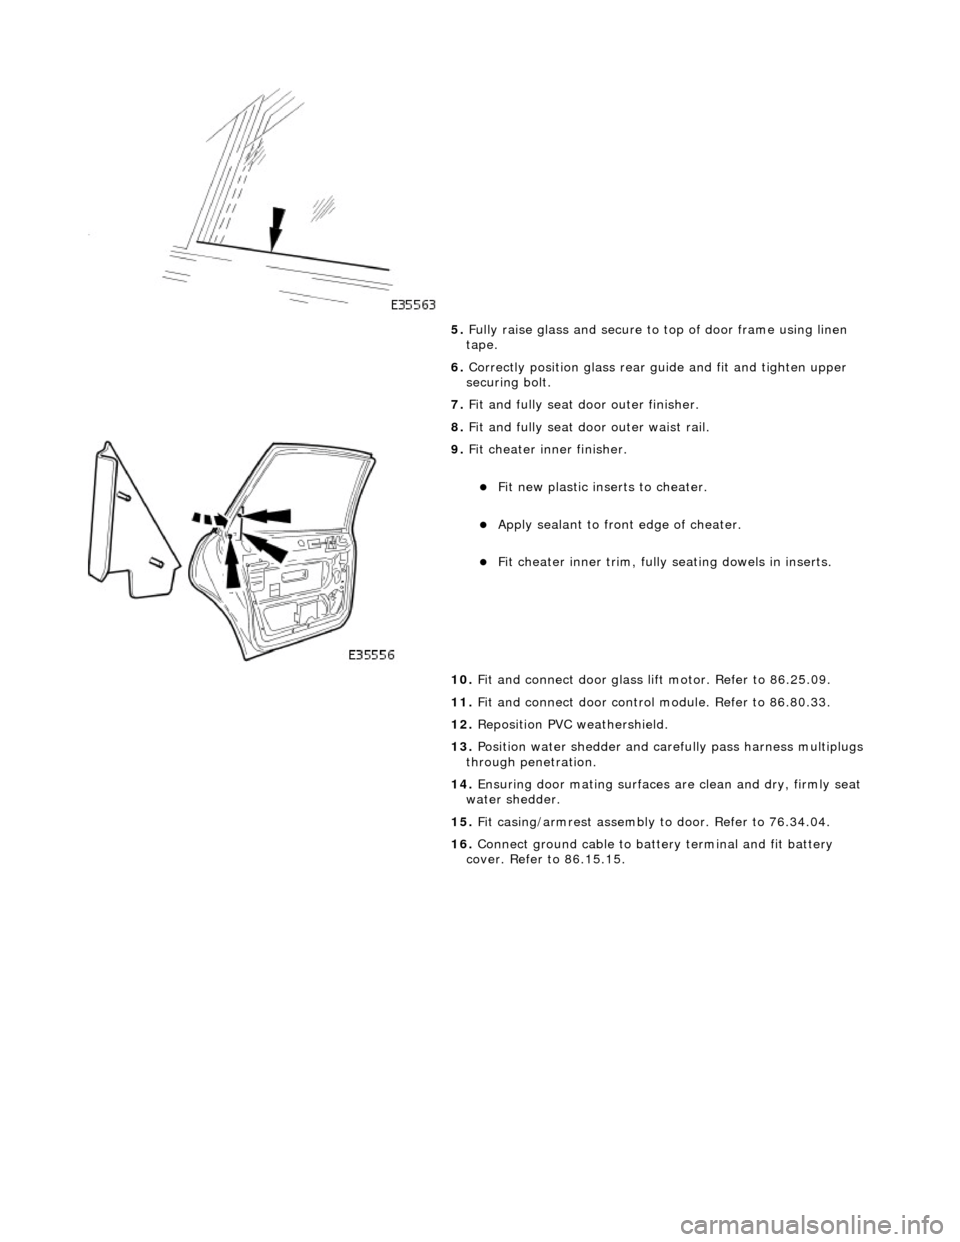
5. Fully raise glass and secure to top of door frame using linen
tape.
6. Correctly position glass rear guide and fit and tighten upper
securing bolt.
7. Fit and fully seat d oor outer finisher.
8. Fit and fully seat door outer waist rail.
9. Fit cheater i nner finisher.
пЃ¬Fit new plastic inserts to cheater.
пЃ¬Apply sealant to front edge of cheater.
пЃ¬Fit cheater inner trim, fully se ating dowels in inserts.
10. Fit and connect door glass lift motor. Refer to 86.25.09.
11. Fit and connect door control module. Refer to 86.80.33.
12. Reposition PVC weathershield.
13. Position water shedder and carefully pass harness multiplugs
through penetration.
14. Ensuring door mating surfaces ar e clean and dry, firmly seat
water shedder.
15. Fit casing/armrest assembly to door. Refer to 76.34.04.
16. Connect ground cable to batt ery terminal and fit battery
cover. Refer to 86.15.15.
Page 2195 of 2490
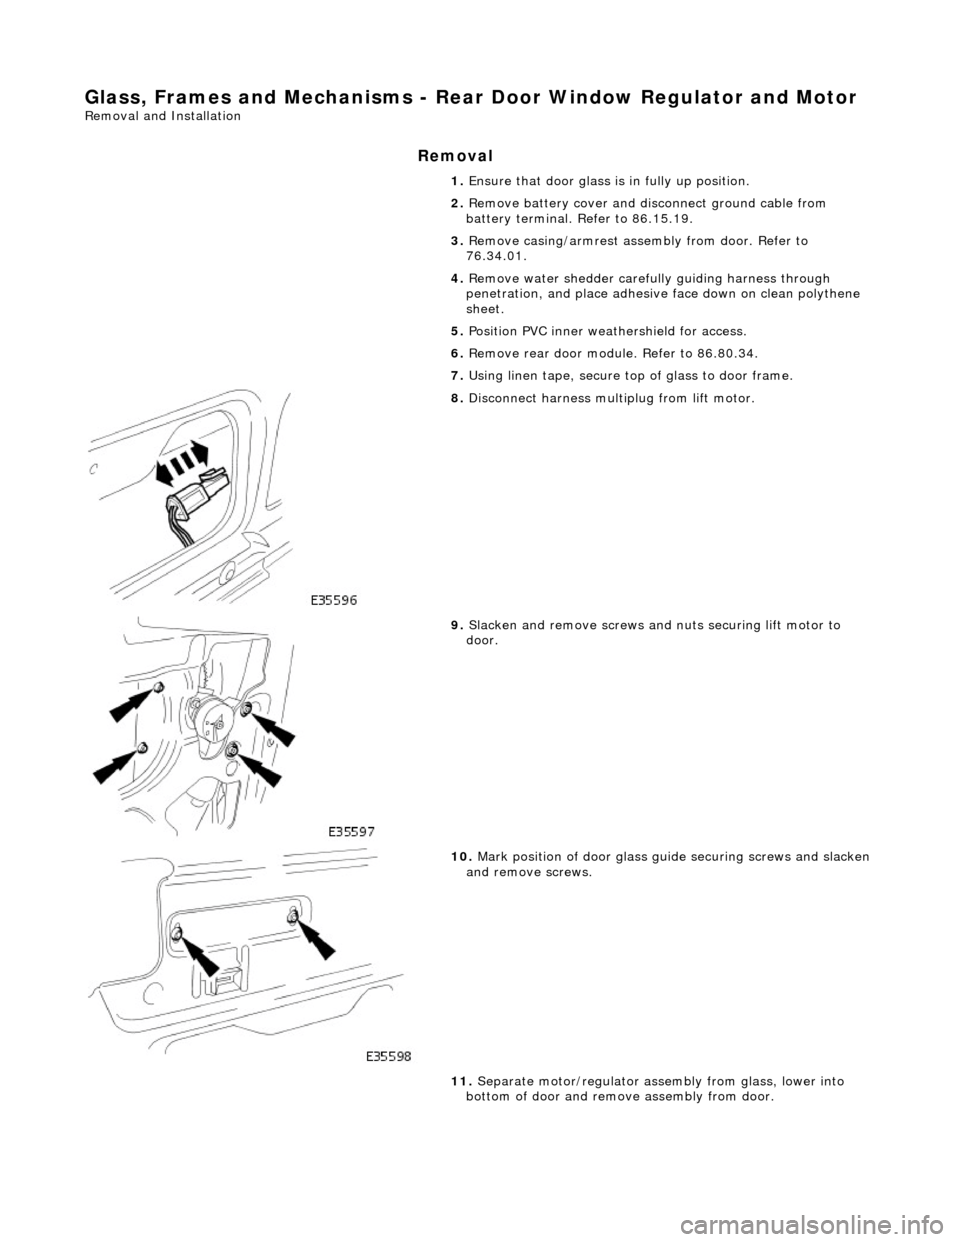
Glass, Frames and Mechanisms - Rear Door Window Regulator and Motor
Removal and Installation
Removal
1. Ensure that door glass is in fully up position.
2. Remove battery cover and disc onnect ground cable from
battery terminal. Refer to 86.15.19.
3. Remove casing/armrest asse mbly from door. Refer to
76.34.01.
4. Remove water shedder carefu lly guiding harness through
penetration, and place adhesive face down on clean polythene
sheet.
5. Position PVC inner weat hershield for access.
6. Remove rear door module. Refer to 86.80.34.
7. Using linen tape, secure to p of glass to door frame.
8. Disconnect harness mult iplug from lift motor.
9. Slacken and remove screws and nuts securing lift motor to
door.
10. Mark position of door glass gu ide securing screws and slacken and remove screws.
11. Separate motor/regulator assembly from glass, lower into
bottom of door and remove assembly from door.
Page 2197 of 2490
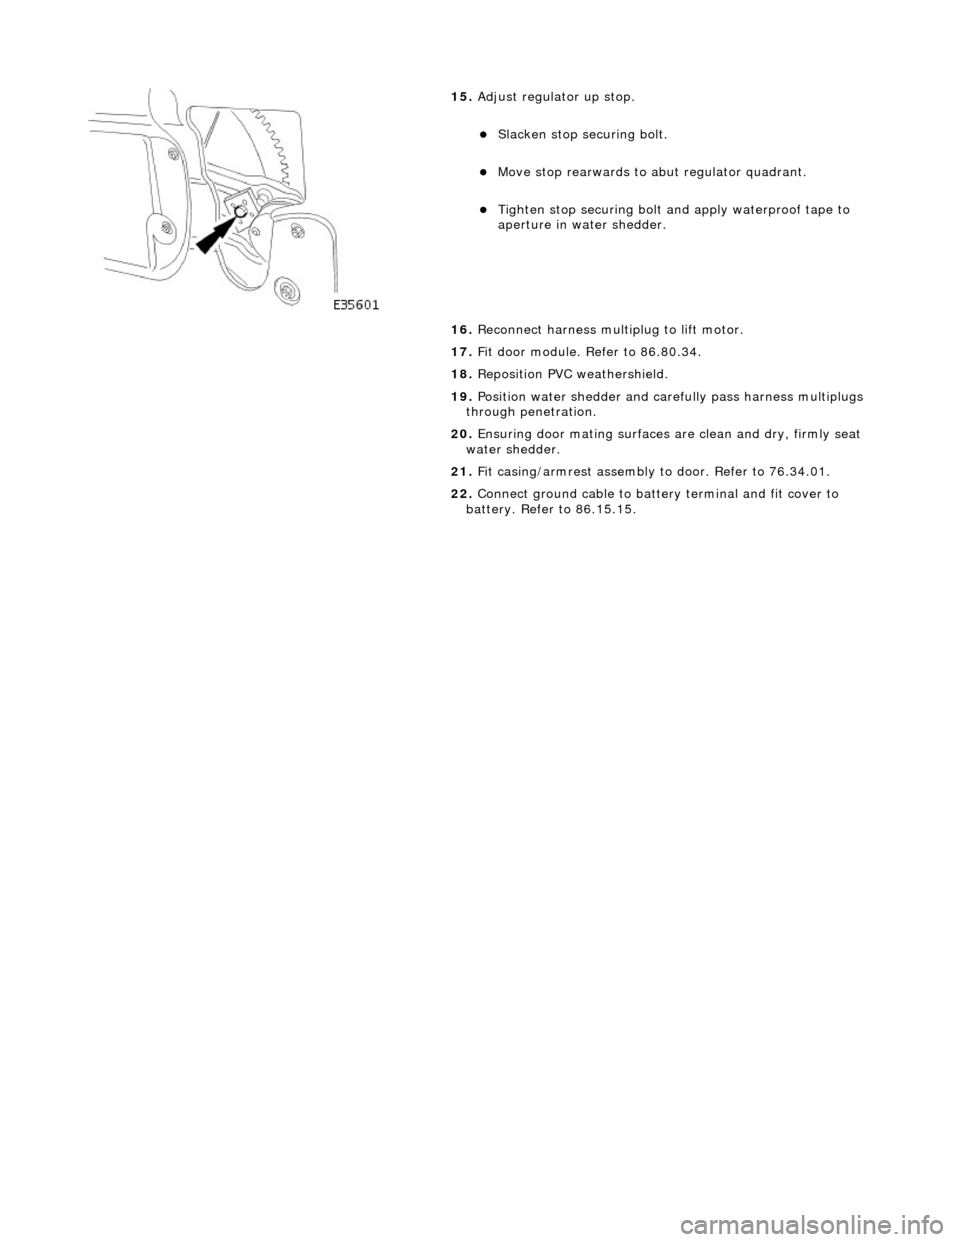
15. Adjust regulator up stop.
пЃ¬Slacken stop securing bolt.
пЃ¬Move stop rearwards to abut regulator quadrant.
пЃ¬Tighten stop securing bolt an d apply waterproof tape to
aperture in water shedder.
16. Reconnect harness multiplug to lift motor.
17. Fit door module. Refer to 86.80.34.
18. Reposition PVC weathershield.
19. Position water shedder and carefully pass harness multiplugs
through penetration.
20. Ensuring door mating surfaces ar e clean and dry, firmly seat
water shedder.
21. Fit casing/armrest assembly to door. Refer to 76.34.01.
22. Connect ground cable to batter y terminal and fit cover to
battery. Refer to 86.15.15.
Page 2220 of 2490
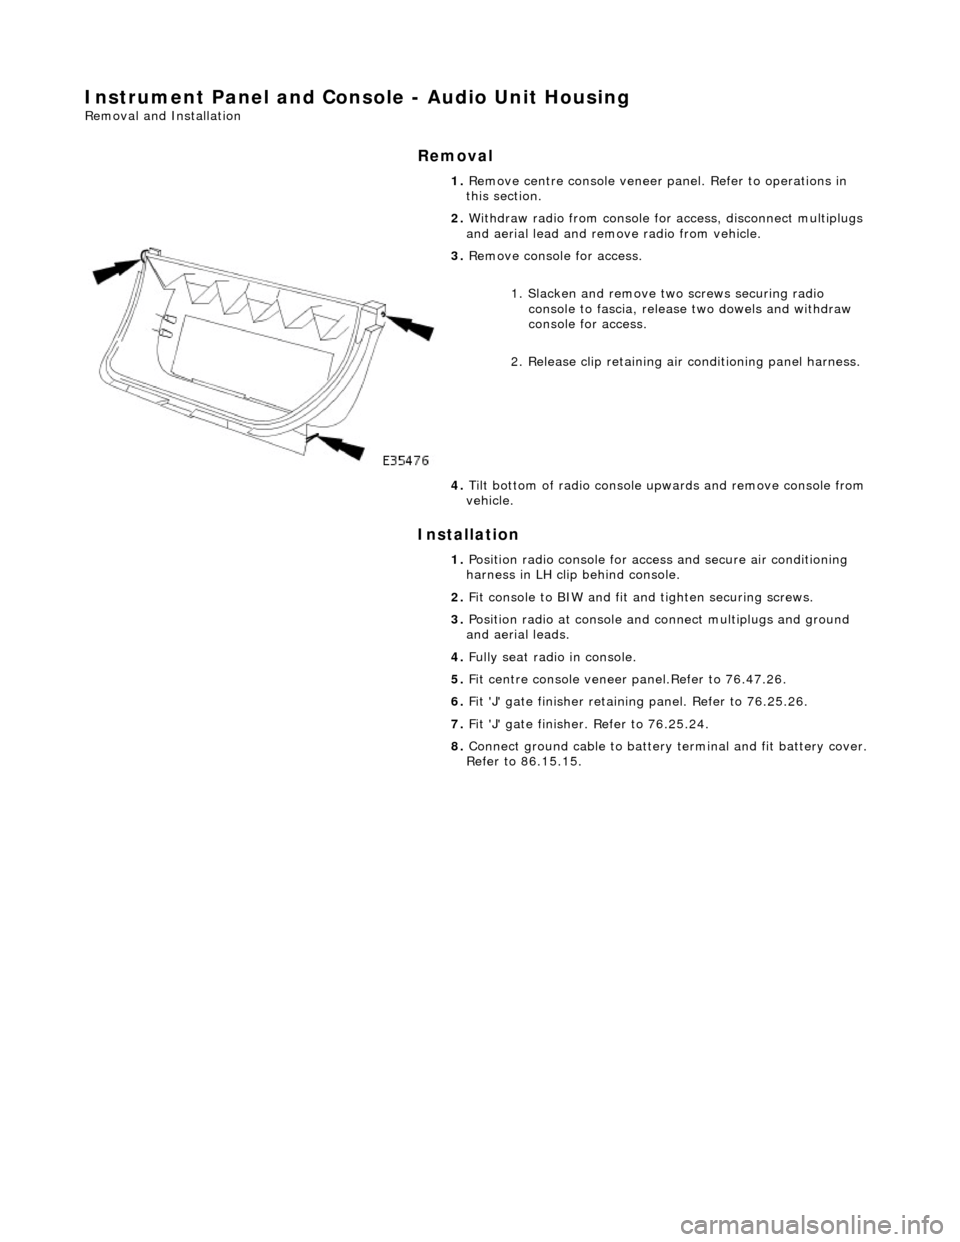
Instrument Panel and Console - Audio Unit Housing
Removal and Installation
Removal
Installation
1.
Remove centre console veneer pa nel. Refer to operations in
this section.
2. Withdraw radio from console for access, disconnect multiplugs
and aerial lead and remo ve radio from vehicle.
3. Remove console for access.
1. Slacken and remove tw o screws securing radio
console to fascia, release two dowels and withdraw
console for access.
2. Release clip retaining air conditioning panel harness.
4. Tilt bottom of radio console upwards and remove console from
vehicle.
1. Position radio console for access and secure air conditioning
harness in LH clip behind console.
2. Fit console to BIW and fit an d tighten securing screws.
3. Position radio at console and connect multiplugs and ground
and aerial leads.
4. Fully seat radio in console.
5. Fit centre console veneer panel.Refer to 76.47.26.
6. Fit 'J' gate finisher retain ing panel. Refer to 76.25.26.
7. Fit 'J' gate finisher . Refer to 76.25.24.
8. Connect ground cable to battery terminal and fit battery cover.
Refer to 86.15.15.
Page 2221 of 2490

Instrument Panel and Console - Climate Control Assembly Housing
Removal and Installation
Removal
Installation
1. Move 'J' gate selector to position 'D.'
2. Remove battery cover and disc onnect ground cable from
battery terminal. Refer to 86.15.19.
3. Remove 'J' gate finish er. Refer to 76.25.24.
4. Remove 'J' gate finisher reta ining plate.Refer to 76.25.26.
5. Remove centre console veneer panel. Refer to 76.47.26.
6. Remove radio and console. Refer to operations in this section.
7. Disconnect air conditioning panel flying lead multiplug (blue)
in LH side of transmission tunnel.
8. Slacken and remove remaining screw securing air
conditioning panel console to BIW.
9. Withdraw air conditioning panel and console for access and
disconnect the harness multiplug behind panel.
10. Remove air conditioning panel from vehicle.
11. Remove panel from console.
1. Fit air conditioning panel to console.