JAGUAR XF 2009 1.G Owners Manual
Manufacturer: JAGUAR, Model Year: 2009, Model line: XF, Model: JAGUAR XF 2009 1.GPages: 391, PDF Size: 19.32 MB
Page 211 of 391
211
Maintenance
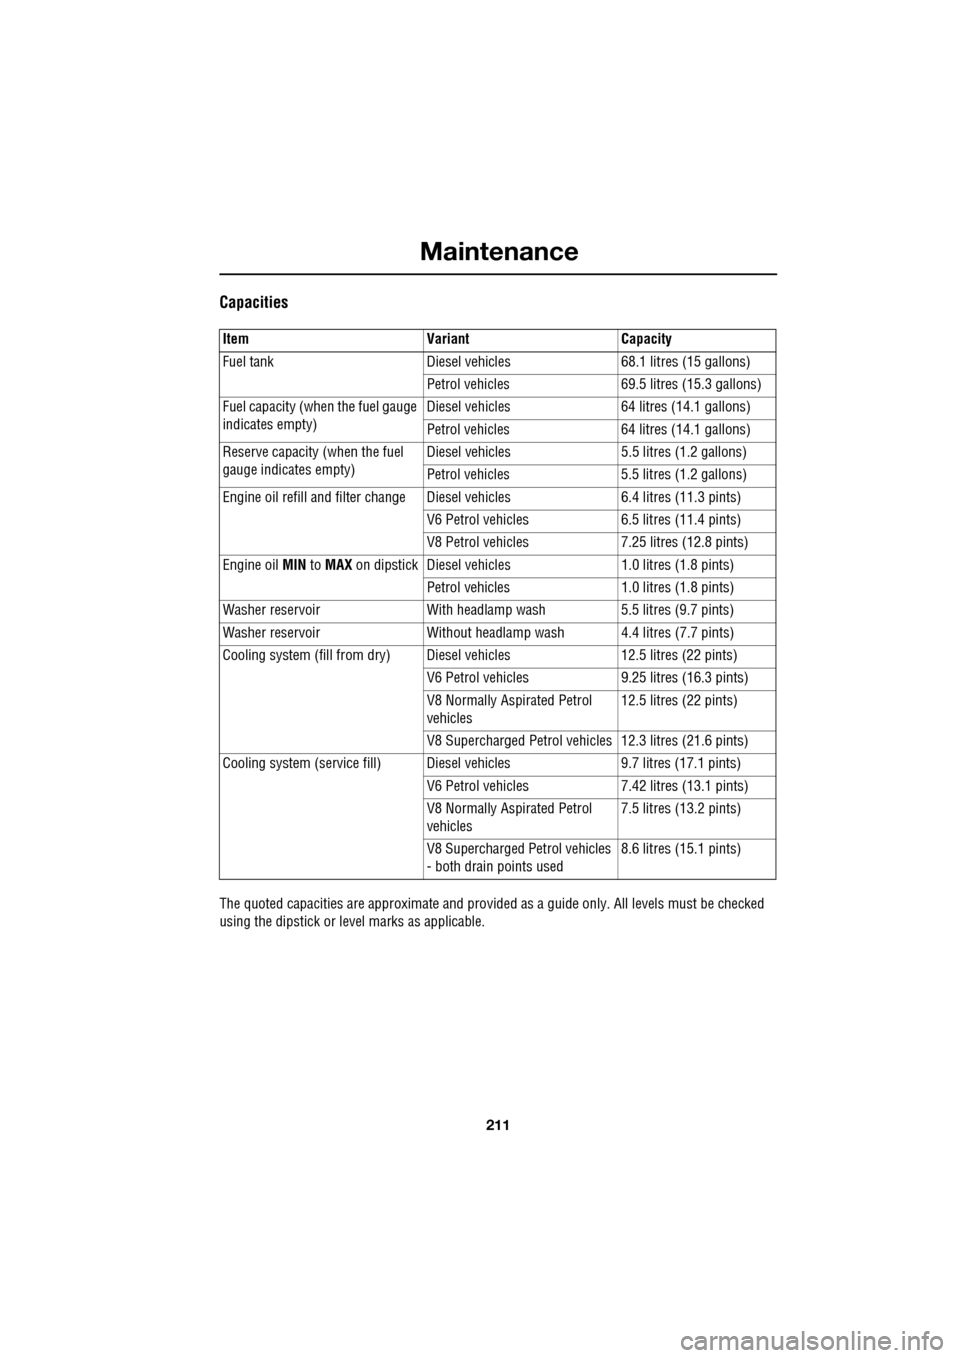
Capacities
The quoted capacities are approximate and provided as a guide only. All levels must be checked
using the dipstick or le vel marks as applicable.
Item Variant Capacity
Fuel tank Diesel vehicles 68.1 litres (15 gallons)
Petrol vehicles 69.5 litres (15.3 gallons)
Fuel capacity (when the fuel gauge
indicates empty) Diesel vehicles 64
litres (14.1 gallons)
Petrol vehicles 64 litres (14.1 gallons)
Reserve capacity (when the fuel
gauge indicates empty) Diesel vehicles 5.5 litres (1.2 gallons)
Petrol vehicles 5.5 li
tres (1.2 gallons)
Engine oil refill and filter change Diesel vehicles 6.4 litres (11.3 pints)
V6 Petrol vehicles 6.5 litres (11.4 pints)
V8 Petrol vehicles 7.25 litres (12.8 pints)
Engine oil MIN to MAX on dipstick Diesel vehicl es1.0 litres (1.8 pints)
Petrol vehicles 1.0 litres (1.8 pints)
Washer reservoir With headlamp wash 5.5 litres (9.7 pints)
Washer reservoir Without headlamp wash 4.4 litres (7.7 pints)
Cooling system (fill from dry) Diesel vehicles 12.5 litres (22 pints)
V6 Petrol vehicles 9.25 litres (16.3 pints)
V8 Normally As pirated Petrol
vehicles 12.5 litres (22 pints)
V8 Supercharged Petrol vehi cles 12.3 litres (21.6 pints)
Cooling system (service fill) Diesel vehicles 9.7 litres (17.1 pints)
V6 Petrol vehicles 7.42 litres (13.1 pints)
V8 Normally As pirated Petrol
vehicles 7.5 litres (13.2 pints)
V8 Supercharged Petrol vehicles
- both drain points used 8.6 litres (15.1 pints)
Page 212 of 391
Vehicle battery
212
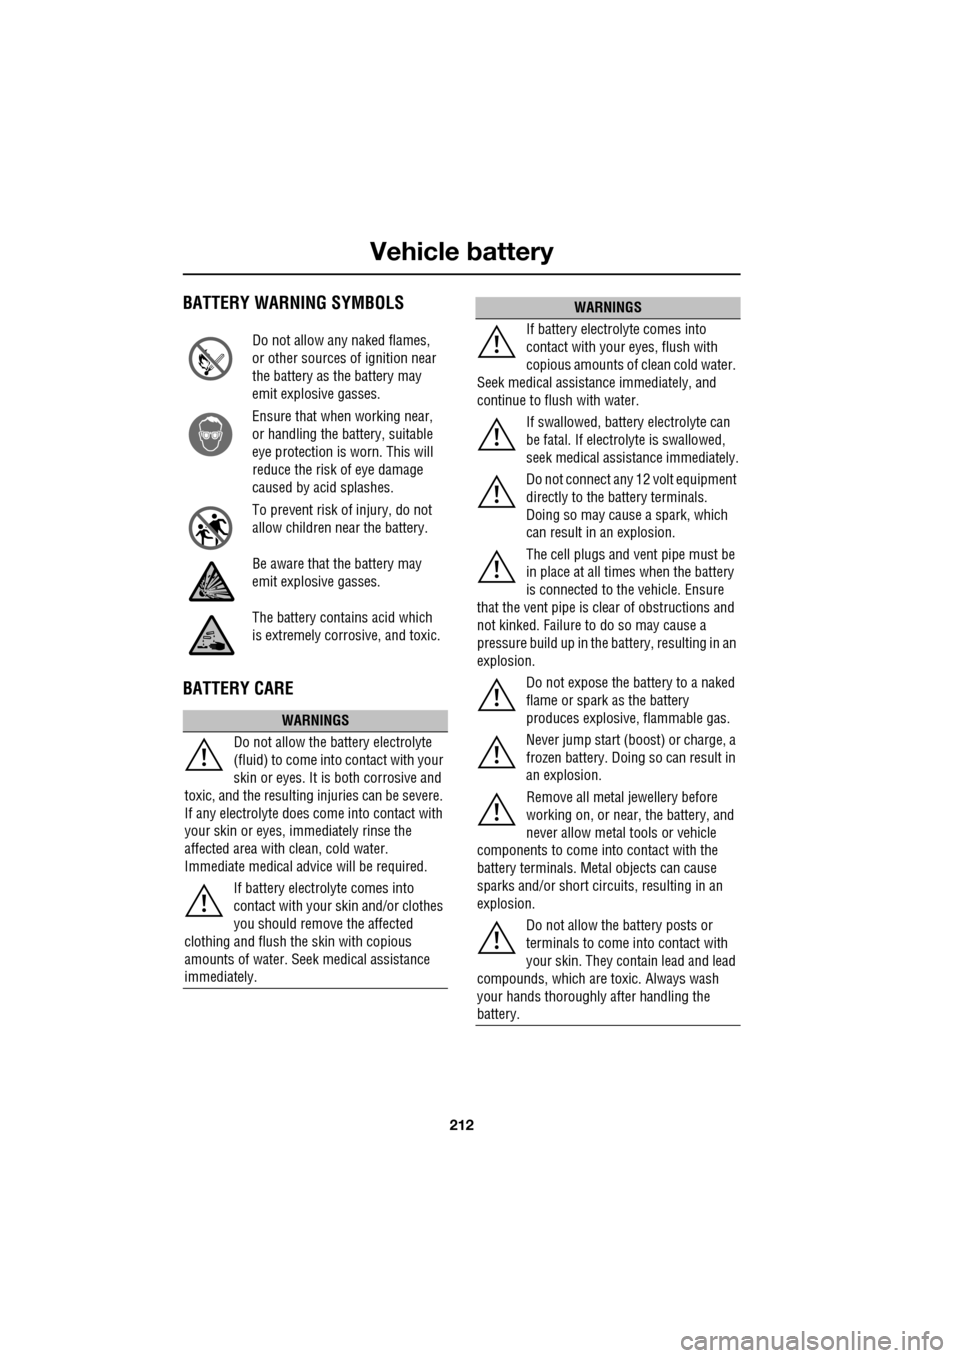
BATTERY WARNING SYMBOLS
BATTERY CARE
Do not allow any naked flames,
or other sources of ignition near
the battery as the battery may
emit explosive gasses.
Ensure that when working near,
or handling the battery, suitable
eye protection is worn. This will
reduce the risk of eye damage
caused by acid splashes.
To prevent risk of injury, do not
allow children near the battery.
Be aware that the battery may
emit explosive gasses.
The battery contains acid which
is extremely corrosive, and toxic.
WARNINGS
Do not allow the battery electrolyte
(fluid) to come into contact with your
skin or eyes. It is both corrosive and
toxic, and the resulting injuries can be severe.
If any electrolyte does come into contact with
your skin or eyes, immediately rinse the
affected area with clean, cold water.
Immediate medical advice will be required.
If battery electrolyte comes into
contact with your skin and/or clothes
you should remove the affected
clothing and flush the skin with copious
amounts of water. Seek medical assistance
immediately.
If battery electrolyte comes into
contact with your eyes, flush with
copious amounts of clean cold water.
Seek medical assistance immediately, and
continue to flush with water.
If swallowed, battery electrolyte can
be fatal. If electrolyte is swallowed,
seek medical assistance immediately.
Do not connect any 12 volt equipment
directly to the battery terminals.
Doing so may cause a spark, which
can result in an explosion.
The cell plugs and vent pipe must be
in place at all times when the battery
is connected to the vehicle. Ensure
that the vent pipe is clear of obstructions and
not kinked. Failure to do so may cause a
pressure build up in the battery, resulting in an
explosion.
Do not expose the battery to a naked
flame or spark as the battery
produces explosive , flammable gas.
Never jump start (boost) or charge, a
frozen battery. Doing so can result in
an explosion.
Remove all metal jewellery before
working on, or near , the battery, and
never allow metal tools or vehicle
components to come into contact with the
battery terminals. Metal objects can cause
sparks and/or short circuits, resulting in an
explosion.
Do not allow the battery posts or
terminals to come into contact with
your skin. They cont ain lead and lead
compounds, which are toxic. Always wash
your hands thoroughly after handling the
battery.
WARNINGS
Page 213 of 391
213
Vehicle battery
Your vehicle is fitted with a low maintenance
battery, which is located under the floor of the
luggage compartment.
In hot climates more frequent checks of the
battery electrolyte level and condition are
required. If necessary, the battery cells can be
topped up using di stilled water.
When the ignition is switched on, but without
the engine running, BATTERY NOT CHARGING
is displayed in the mess age centre. The battery
will only charge when the engine is running.
Note: Do not connect any 12 volt equipment
(e.g. a 12 volt inspection lamp), directly to the
battery terminals. Use the accessory socket
located in the cubby box, for connecting Jaguar
approved accessories.
Battery Monitoring System (BMS)
Your vehicle is equipped with a Battery
Monitoring System (BMS) which manages the
battery charging system and, if excessive
battery discharge is o ccurring when the engine
isn't running, shuts down non-essential
electrical systems to protect battery power.
In the event that too many electrical systems
are operational when the engine is not running,
and the battery charge is insufficient, the audio
and entertainment systems (if active) and
climate control system will be switched off.
This will be confirmed by a low battery warning
message displayed on the touch-screen. If this
occurs, switch on and run the engine for at
least five minutes, preferably with all auxiliary
electrical systems switched off (e.g. lights,
wipers, climate control, seat heaters etc.).
Note: The audio system can be operated
during this five minute period when the engine
is running.
If the engine is switched off before the five
minute period ends and the audio system is
switched on, the warning message will
re-appear on the touch-sc reen and the audio,
entertainment and climate control systems will
switch off again. For this reason, it is important
that the engine is left running for the full five
minute period.
Charging faults
If there is a fault in the battery charging system,
CHARGING FAULT is displayed with red
backlighting in the mess age centre. If this
occurs, switch off all non-essential electrical
systems and seek qualified assistance at the
earliest opportunity.
CAUTION
Do not allow battery electrolyte to come
into contact with fabrics or painted
surfaces. If battery electrolyte comes into
contact with any surfac e, the surface should
be washed down immedi ately with copious
amounts of clean water. Battery electrolyte is
both corrosive and toxic, and can damage a
wide range of materials if left.
Page 214 of 391
Vehicle battery
214
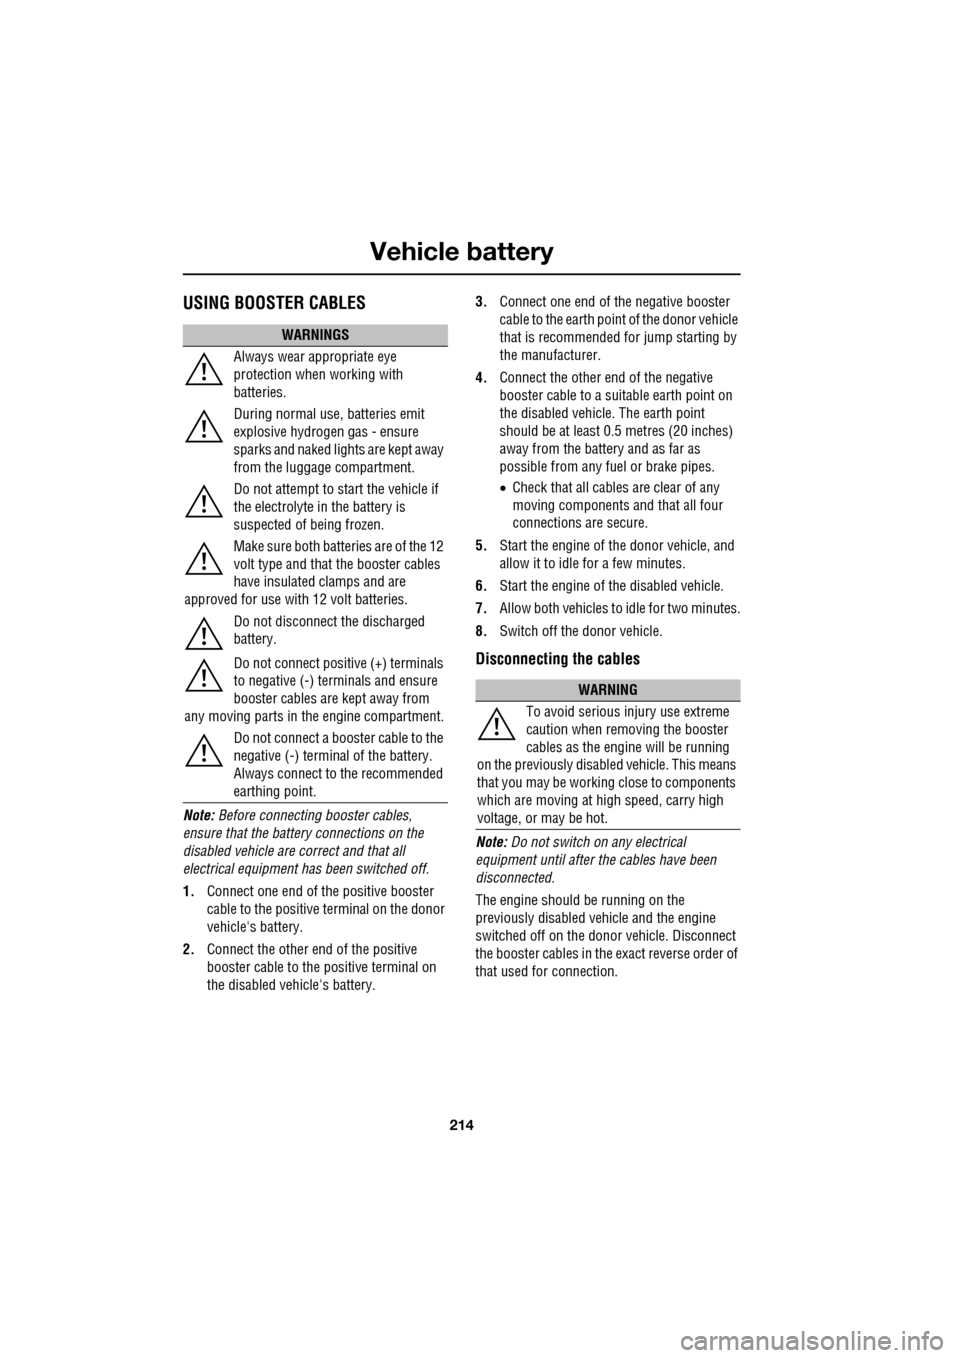
USING BOOSTER CABLES
Note: Before connecti ng booster cables,
ensure that the battery connections on the
disabled vehicle are correct and that all
electrical equipment has been switched off.
1. Connect one end of the positive booster
cable to the positive terminal on the donor
vehicle's battery.
2. Connect the other end of the positive
booster cable to the positive terminal on
the disabled vehicle's battery. 3.
Connect one end of th e negative booster
cable to the earth point of the donor vehicle
that is recommended for jump starting by
the manufacturer.
4. Connect the other end of the negative
booster cable to a suitable earth point on
the disabled vehicle. The earth point
should be at least 0.5 metres (20 inches)
away from the battery and as far as
possible from any fu el or brake pipes.
• Check that all cables are clear of any
moving components and that all four
connections are secure.
5. Start the engine of the donor vehicle, and
allow it to idle for a few minutes.
6. Start the engine of the disabled vehicle.
7. Allow both vehicles to idle for two minutes.
8. Switch off the donor vehicle.
Disconnecting the cables
Note: Do not switch on any electrical
equipment until after th e cables have been
disconnected.
The engine should be running on the
previously disabled ve hicle and the engine
switched off on the donor vehicle. Disconnect
the booster cables in the exact reverse order of
that used for connection.
WARNINGS
Always wear appropriate eye
protection when working with
batteries.
During normal use, batteries emit
explosive hydrogen gas - ensure
sparks and naked lights are kept away
from the luggage compartment.
Do not attempt to start the vehicle if
the electrolyte in the battery is
suspected of being frozen.
Make sure both batt eries are of the 12
volt type and that the booster cables
have insulated clamps and are
approved for use with 12 volt batteries.
Do not disconnect the discharged
battery.
Do not connect posit ive (+) terminals
to negative (-) terminals and ensure
booster cables are kept away from
any moving parts in the engine compartment.
Do not connect a booster cable to the
negative (-) terminal of the battery.
Always connect to the recommended
earthing point.
WARNING
To avoid serious in jury use extreme
caution when removing the booster
cables as the engine will be running
on the previously disabl ed vehicle. This means
that you may be workin g close to components
which are moving at high speed, carry high
voltage, or may be hot.
Page 215 of 391
215
Vehicle battery
CHARGING THE VEHICLE BATTERY
CHANGING THE VEHICLE BATTERY
Battery disposal
Used batteries must be disposed of
correctly as they contain a number of
harmful substances. Seek advice on
disposal from your Dealer/
Authorised Repairer, and/or your local
authority.
WARNING
Ensure that the correct type of battery
charger is used. Using an unsuitable
charger may damage the battery and
could cause the battery to explode.
Always charge the battery in a well
ventilated area, away from any naked
flames, sparks or other ignition
sources. During charging, the battery can
produce a highly explosiv e and flammable gas.
CAUTIONS
Battery disconnecti on, removal and
replacement, should only be carried out
by qualified personne l. Consult your
Dealer/Authorised Repairer.
If the battery has been removed from
the vehicle to be charged, the Battery
Monitoring System will automatically
recalibrate. During this time, Low Battery
warning messages may appear.
Always follow the instructions supplied
with the battery charger. Failure to do so
may result in damage to the battery.
WARNING
Use caution when lifting the battery
our of, or into, the vehicle. It is heavy
and may cause injury when lifting or if
dropped.
Do not tilt the battery more than 45°,
as it may cause damage and may
cause the electrolyte to leak out.
Battery electrolyte is highly corrosive and
toxic.
CAUTIONS
Battery disconnect ion, removal and
replacement, should only be carried out
by qualified personnel. Consult your Dealer/
Authorised Repairer.
If the vehicle battery is replaced by a
new battery, the vehicle electrical
system must be reset to the new battery by
qualified personnel. Fa ilure to reset the
electrical system, may result in Low Battery
warning messages. Consult your Dealer/
Authorised Repairer.
Only a replacement battery of the same
type and specification as the original
should be fitted. Other batteries may vary in
size or have different terminal positions, which
could cause a fire hazard when connected to
the vehicle's electrical system.
Do not rest the battery on any part of the
vehicle, as it may cause damage due to
its weight.
Do not run the engine with the battery
disconnected. Doing so may damage
the charging system.
Page 216 of 391
Wheels and tyres
216
GENERAL INFORMATION
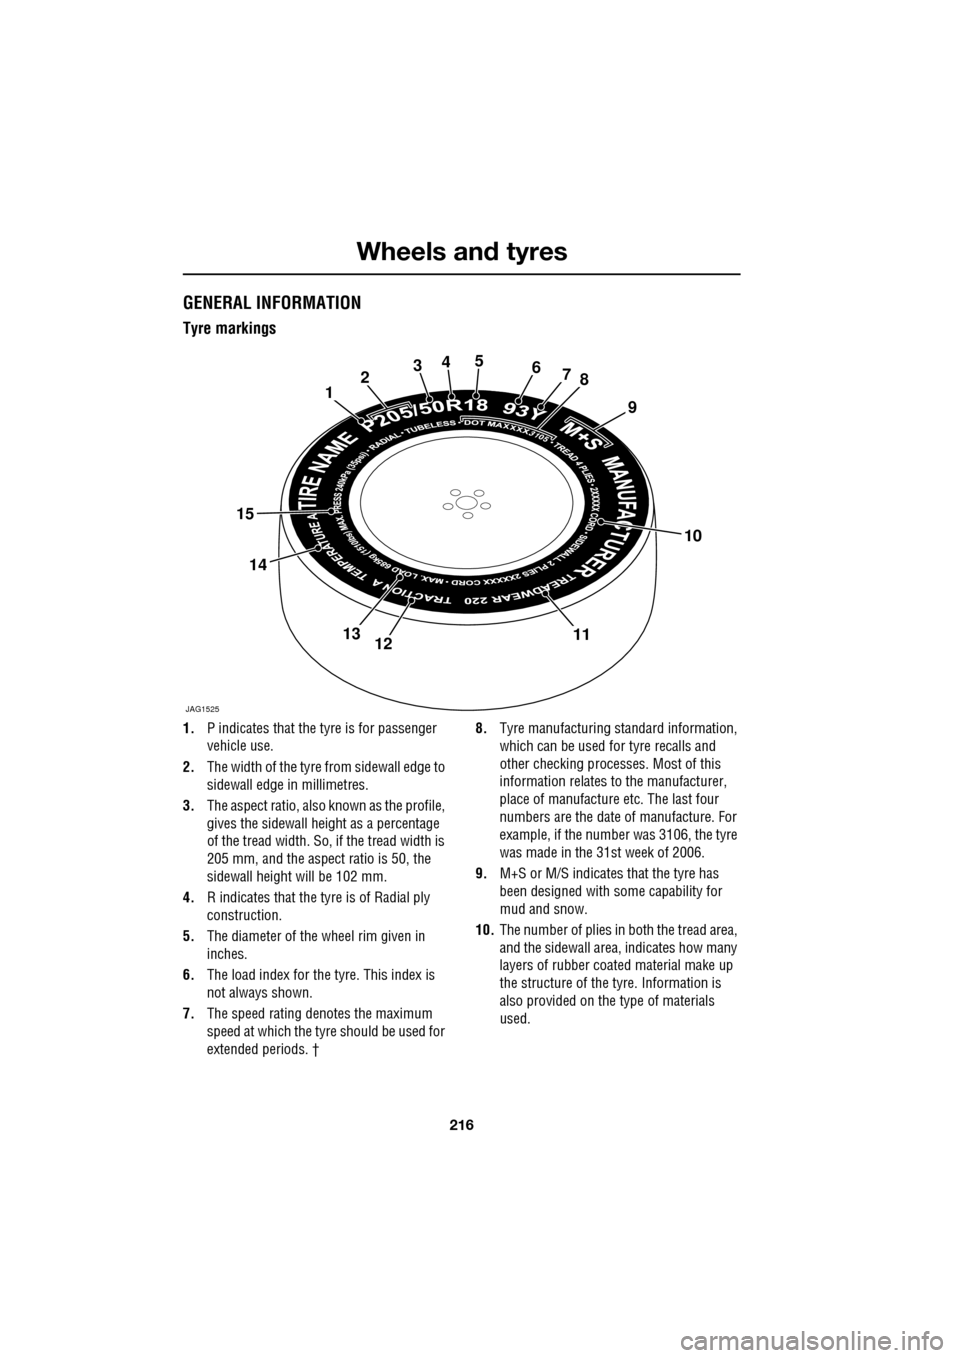
Tyre markings
1.P indicates that the tyre is for passenger
vehicle use.
2. The width of the tyre fr om sidewall edge to
sidewall edge in millimetres.
3. The aspect ratio, also known as the profile,
gives the sidewall height as a percentage
of the tread width. So, if the tread width is
205 mm, and the aspect ratio is 50, the
sidewall height will be 102 mm.
4. R indicates that the ty re is of Radial ply
construction.
5. The diameter of the wheel rim given in
inches.
6. The load index for the tyre. This index is
not always shown.
7. The speed rating denotes the maximum
speed at which the tyre should be used for
extended periods. † 8.
Tyre manufacturing standard information,
which can be used for tyre recalls and
other checking processe s. Most of this
information relates to the manufacturer,
place of manufacture etc. The last four
numbers are the date of manufacture. For
example, if the number was 3106, the tyre
was made in the 31st week of 2006.
9. M+S or M/S indicates that the tyre has
been designed with some capability for
mud and snow.
10. The number of plies in both the tread area,
and the sidewall area, indicates how many
layers of rubber coat ed material make up
the structure of the tyre. Information is
also provided on the type of materials
used.
JAG1525
12345678
9
10
111213
14
15
Page 217 of 391
217
Wheels and tyres
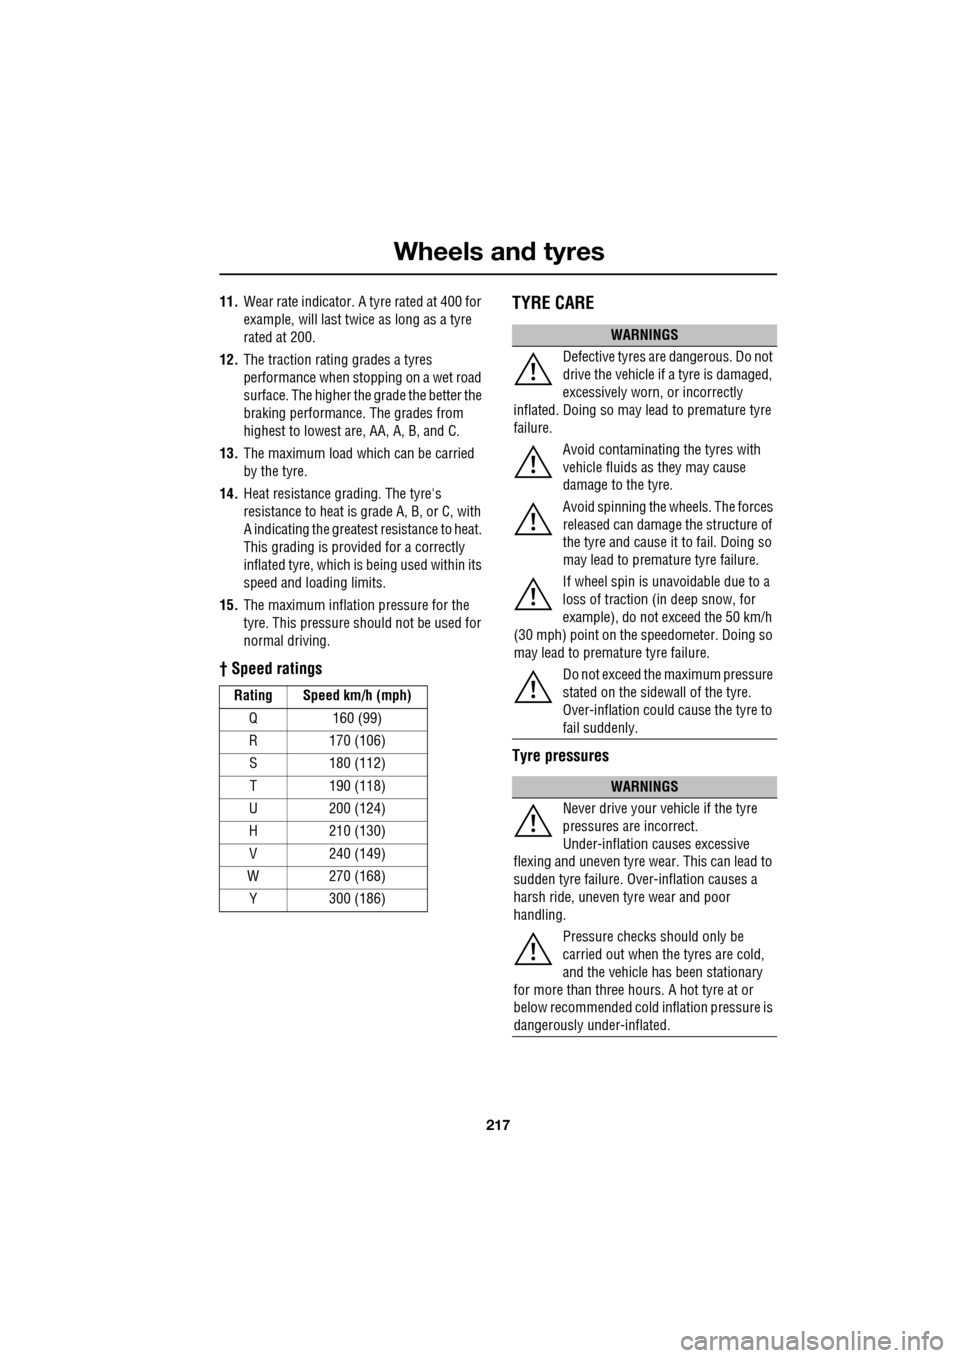
11.Wear rate indicator. A tyre rated at 400 for
example, will last twice as long as a tyre
rated at 200.
12. The traction rating grades a tyres
performance when stopping on a wet road
surface. The higher the grade the better the
braking performance. The grades from
highest to lowest are, AA, A, B, and C.
13. The maximum load which can be carried
by the tyre.
14. Heat resistance grading. The tyre's
resistance to heat is grade A, B, or C, with
A indicating the greatest resistance to heat.
This grading is provided for a correctly
inflated tyre, which is being used within its
speed and loading limits.
15. The maximum inflation pressure for the
tyre. This pressure should not be used for
normal driving.
† Speed ratings
TYRE CARE
Tyre pressures
Rating Speed km/h (mph)
Q 160 (99)
R 170 (106)S 180 (112)
T 190 (118)
U 200 (124)
H 210 (130)
V 240 (149)
W 270 (168) Y 300 (186)
WARNINGS
Defective tyres are dangerous. Do not
drive the vehicle if a tyre is damaged,
excessively worn, or incorrectly
inflated. Doing so may lead to premature tyre
failure.
Avoid contaminating the tyres with
vehicle fluids as they may cause
damage to the tyre.
Avoid spinning the wh eels. The forces
released can damage the structure of
the tyre and cause it to fail. Doing so
may lead to premature tyre failure.
If wheel spin is unavoidable due to a
loss of traction (i n deep snow, for
example), do not exceed the 50 km/h
(30 mph) point on the speedometer. Doing so
may lead to premature tyre failure.
Do not exceed the maximum pressure
stated on the sidewall of the tyre.
Over-inflation could cause the tyre to
fail suddenly.
WARNINGS
Never drive your vehicle if the tyre
pressures are incorrect.
Under-inflation causes excessive
flexing and uneven tyre we ar. This can lead to
sudden tyre failure. Ov er-inflation causes a
harsh ride, uneven tyre wear and poor
handling.
Pressure checks should only be
carried out when the tyres are cold,
and the vehicle has been stationary
for more than three hours. A hot tyre at or
below recommended cold inflation pressure is
dangerously under-inflated.
Page 218 of 391
Wheels and tyres
218
All of the vehicle's tyres (including the spare)
should be checked regularly for damage, wear
and distortion. If you are in any doubt about the
condition of a tyre, have it checked immediately
by a tyre repair centre or your
Dealer/Authorised repairer.
Checking the tyre pressures
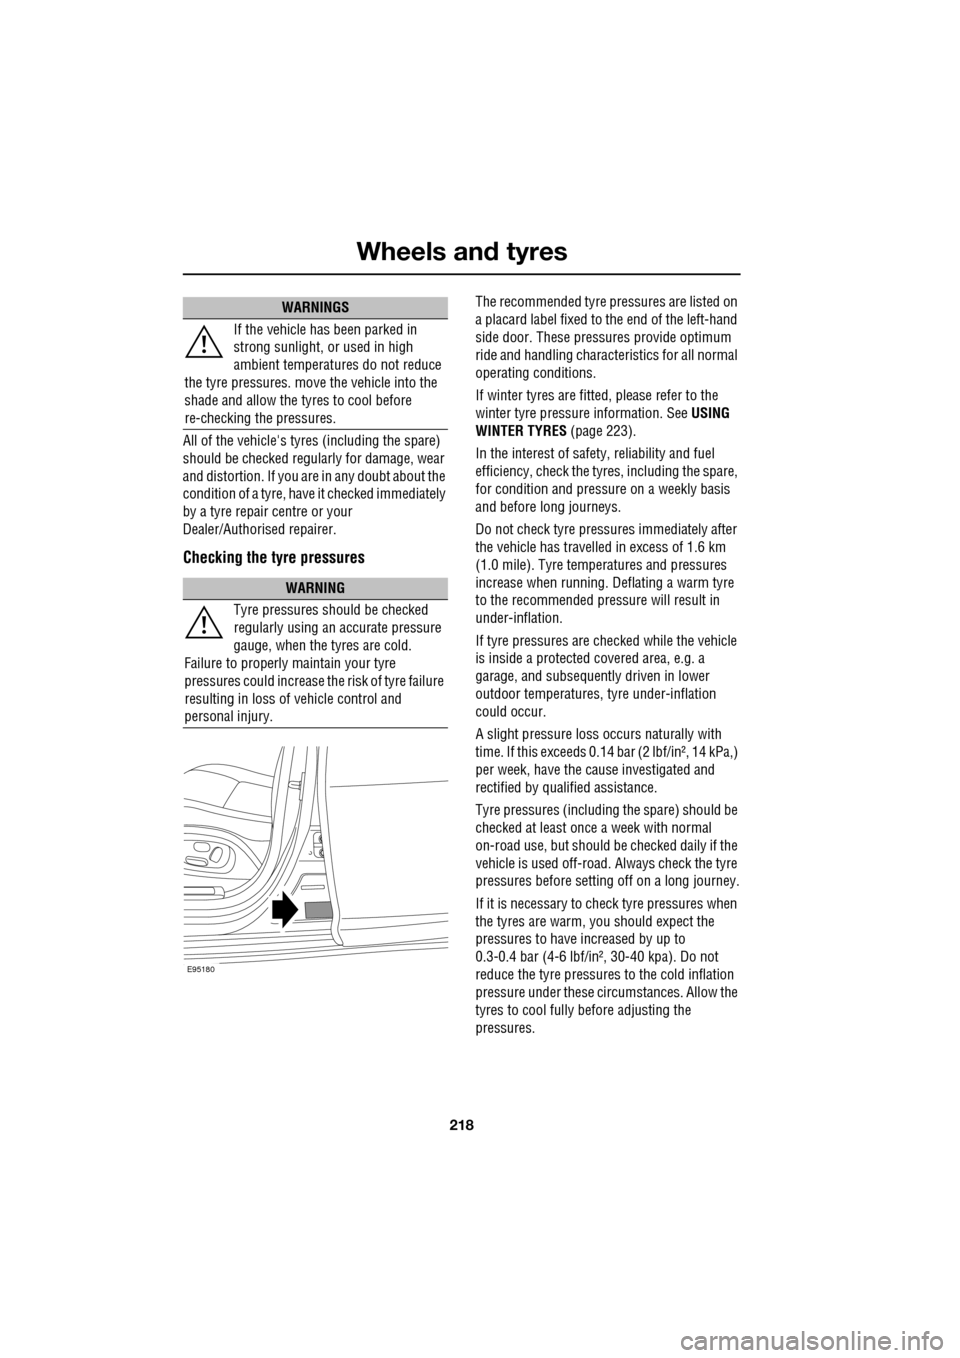
The recommended tyre pressures are listed on
a placard label fixed to the end of the left-hand
side door. These pressures provide optimum
ride and handling charac teristics for all normal
operating conditions.
If winter tyres are fitted, please refer to the
winter tyre pressure information. SeeUSING
WINTER TYRES (page 223).
In the interest of safe ty, reliability and fuel
efficiency, check the tyres, including the spare,
for condition and pressu re on a weekly basis
and before long journeys.
Do not check tyre pressures immediately after
the vehicle has travelled in excess of 1.6 km
(1.0 mile). Tyre temperatures and pressures
increase when running. Deflating a warm tyre
to the recommended pressure will result in
under-inflation.
If tyre pressures are checked while the vehicle
is inside a protected covered area, e.g. a
garage, and subsequent ly driven in lower
outdoor temperatures, tyre under-inflation
could occur.
A slight pressure loss occurs naturally with
time. If this exceeds 0.14 bar (2 lbf/in², 14 kPa,)
per week, have the cause investigated and
rectified by qualified assistance.
Tyre pressures (including the spare) should be
checked at least once a week with normal
on-road use, but should be checked daily if the
vehicle is used off-road. Always check the tyre
pressures before setti ng off on a long journey.
If it is necessary to check tyre pressures when
the tyres are warm, you should expect the
pressures to have increased by up to
0.3-0.4 bar (4-6 lbf/in², 30-40 kpa). Do not
reduce the tyre pressures to the cold inflation
pressure under these circumstances. Allow the
tyres to cool fully before adjusting the
pressures.
If the vehicle has been parked in
strong sunlight, or used in high
ambient temperatures do not reduce
the tyre pressures. move the vehicle into the
shade and allow the tyres to cool before
re-checking the pressures.
WARNING
Tyre pressures should be checked
regularly using an accurate pressure
gauge, when the tyres are cold.
Failure to properly maintain your tyre
pressures could increase the risk of tyre failure
resulting in loss of vehicle control and
personal injury.
WARNINGS
E95180
Page 219 of 391
219
Wheels and tyres
The following procedure should be used to
check and adjust the tyres pressures.
1.Remove the valve cap.
2. Firmly attach a tyre pressure gauge/inflator
to the valve.
3. Read the tyre pressure from the gauge,
and add air if required.
4. If air is added to the tyre, remove the gauge
and re-attach it be fore reading the
pressure. Failure to do so may result in an
inaccurate reading.
5. If the tyre pressure is too high, remove the
gauge and allow air out of the tyre by
pressing the centre of the valve. Refit the
gauge to the valve and check the pressure.
6. Repeat the process a dding or removing air
as required until the correct tyre pressure
is reached.
7. Refit the valve cap.
Note: It is an offence in certain countries to
drive a vehicle with incorrect tyre pressures.
Note: It is the driver's responsibility to ensure
that the tyre pressures are correct.
Tyre valves
Keep the valve caps screwed down firmly to
prevent water or dirt entering the valve. Check
the valves for leaks when checking the tyre
pressures.
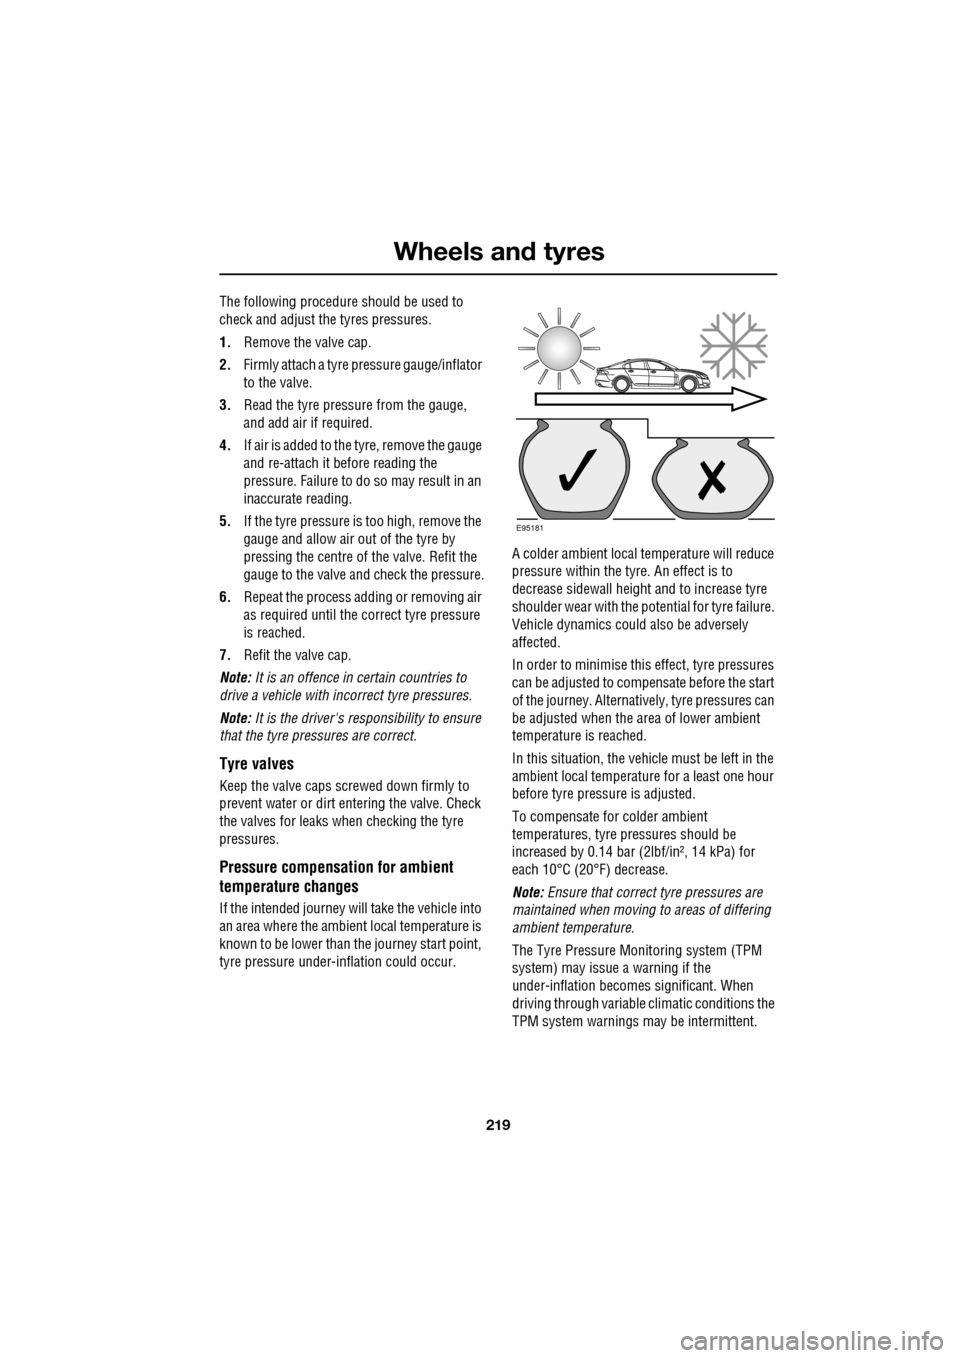
Pressure compensation for ambient
temperature changes
If the intended journey will take the vehicle into
an area where the ambien t local temperature is
known to be lower than the journey start point,
tyre pressure under-i nflation could occur. A colder ambient local temperature will reduce
pressure within the tyre. An effect is to
decrease sidewall height
and to increase tyre
shoulder wear with the potential for tyre failure.
Vehicle dynamics could also be adversely
affected.
In order to minimise this effect, tyre pressures
can be adjusted to compensate before the start
of the journey. Alternatively, tyre pressures can
be adjusted when the area of lower ambient
temperature is reached.
In this situation, the vehicle must be left in the
ambient local temperature for a least one hour
before tyre pressu re is adjusted.
To compensate for colder ambient
temperatures, tyre pressures should be
increased by 0.14 bar (2lbf/in², 14 kPa) for
each 10°C (20°F) decrease.
Note: Ensure that correct tyre pressures are
maintained when moving to areas of differing
ambient temperature.
The Tyre Pressure M onitoring system (TPM
system) may issue a warning if the
under-inflation becomes significant. When
driving through variable climatic conditions the
TPM system warnings may be intermittent.
E95181
Page 220 of 391
Wheels and tyres
220
Tyre pressure compensation chart - high
ambient temperatures
Tyre pressures during long term vehicle
storage
To minimise the possibility and effects of flat
spots during storage, the tyres may be inflated
to the maximum pressure indicated on the tyre
wall.
Note: Before using the st ored vehicle on the
road again, ensure that correct tyre pressures
are restored.
Flat spots
If the vehicle is stati onary for a long period,
when the ambient temperature is high, the
tyres may form flat spots. When the vehicle is
driven, these flat spots will cause a vibration
which will steadily disappear as the tyres warm
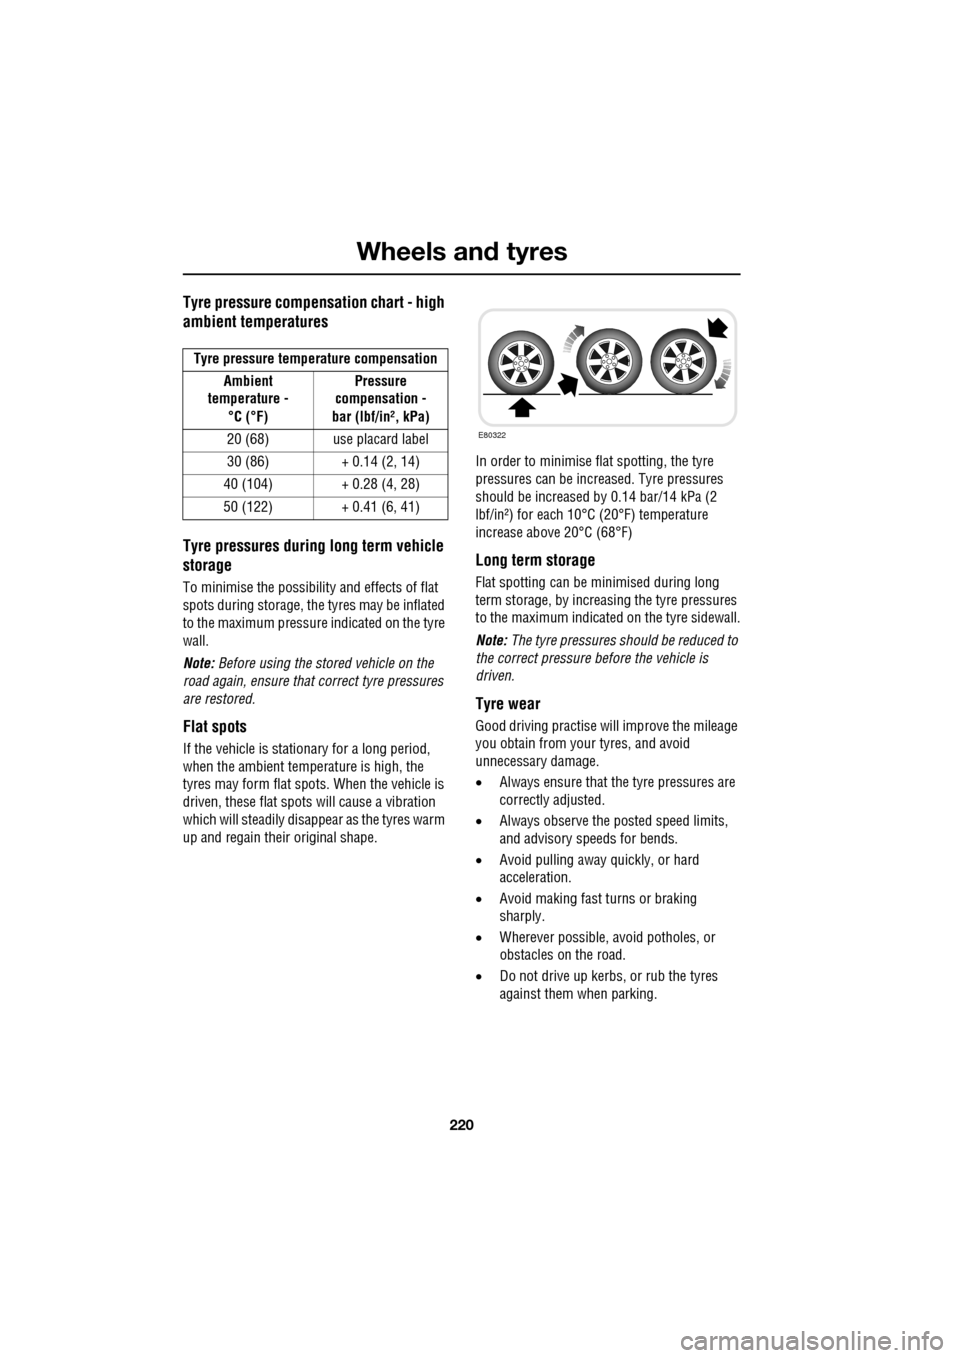
up and regain their original shape. In order to minimise flat spotting, the tyre
pressures can be increa
sed. Tyre pressures
should be increased by 0.14 bar/14 kPa (2
lbf/in²) for each 10°C (20°F) temperature
increase above 20°C (68°F)
Long term storage
Flat spotting can be minimised during long
term storage, by increasing the tyre pressures
to the maximum indicated on the tyre sidewall.
Note: The tyre pressures s hould be reduced to
the correct pressure before the vehicle is
driven.
Tyre wear
Good driving practise will improve the mileage
you obtain from your tyres, and avoid
unnecessary damage.
• Always ensure that the tyre pressures are
correctly adjusted.
• Always observe the posted speed limits,
and advisory speeds for bends.
• Avoid pulling away quickly, or hard
acceleration.
• Avoid making fast turns or braking
sharply.
• Wherever possible, avoid potholes, or
obstacles on the road.
• Do not drive up kerbs, or rub the tyres
against them when parking.
Tyre pressure temperature compensation
Ambient
temperature -
°C (°F) Pressure
compensation -
bar (lbf/in², kPa)
20 (68) use placard label
30 (86) + 0.14 (2, 14)
40 (104) + 0.28 (4, 28)
50 (122) + 0.41 (6, 41)
E80322