JAGUAR XFR 2010 1.G Workshop Manual
XFR 2010 1.G
JAGUAR
JAGUAR
https://www.carmanualsonline.info/img/21/7642/w960_7642-0.png
JAGUAR XFR 2010 1.G Workshop Manual
Page 1009 of 3039
23.
24.
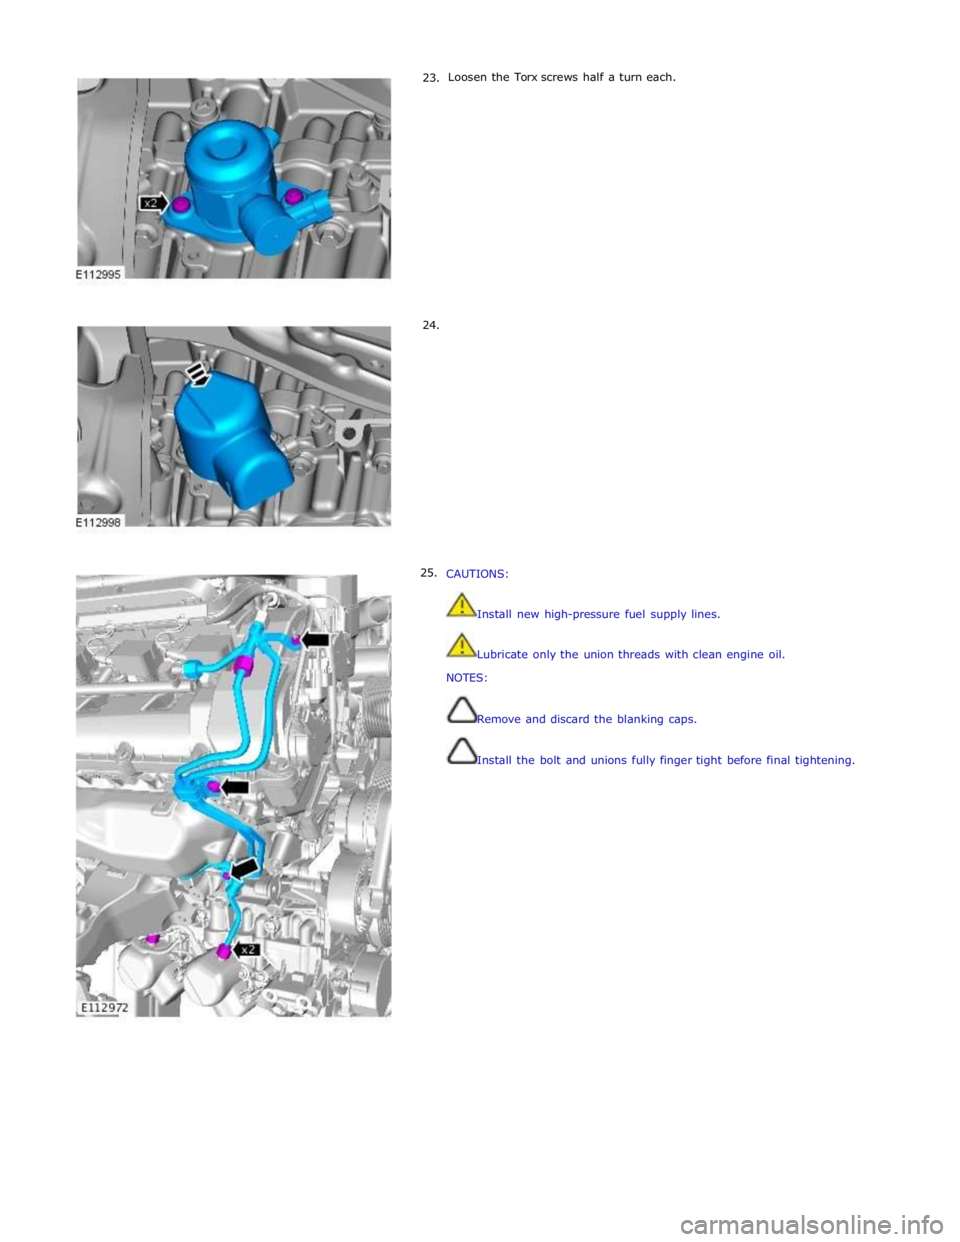
25. Loosen the Torx screws half a turn each.
CAUTIONS:
Install new high-pressure fuel supply lines.
Lubricate only the union threads with clean engine oil.
NOTES:
Remove and discard the blanking caps.
Install the bolt and unions fully finger tight before final tightening.
Page 1017 of 3039
49. CAUTIONS:
Install all the bolts finger tight before final tightening.
The bolts can only be used 3 times, mark the bolts with a center punch.
If 2 punch marks are visible, discard the bolts.
Install the bolts in the noted position.
NOTES:
Make sure that the crankshaft is not rotated.
Make sure the crankshaft and flexplate mating faces are clean before
installation.
Tighten the retaining bolts working diagonally.
Torque:
Stage 1:45 Nm Stage 2:90°
50. Refer to: Engine (303-01D Engine - V8 S/C 5.0L Petrol, Installation).
51. Refer to: Crankshaft Pulley (303-01D Engine - V8 S/C 5.0L Petrol, Removal and Installation).
52. Lower the vehicle.
53. Refer to: Battery Disconnect and Connect (414-01 Battery, Mounting and Cables, General Procedures).
Page 1018 of 3039
Engine - V8 S/C 5.0L Petrol - Oil Pump
Removal and Installation
Removal Published: 07-Oct-2011
1. Refer to: Battery Disconnect and Connect (414-01 Battery, Mounting and Cables, General Procedures).
2. WARNING: Make sure to support the vehicle with axle stands.
Raise and support the vehicle.
3. Refer to: Oil Pan Extension (303-01C Engine - V8 5.0L Petrol, Removal and Installation).
4. NOTE: Tsubaki timing drive only.
5. NOTE: INA timing drive only.
Page 1024 of 3039
9. CAUTION: Make sure that the tensioner spring is
correctly located.
NOTE: INA timing drive only.
Torque: 21 Nm
10. Refer to: Oil Pan Extension (303-01C Engine - V8 5.0L Petrol, Removal and Installation).
11. Refer to: Battery Disconnect and Connect (414-01 Battery, Mounting and Cables, General Procedures).
Page 1025 of 3039

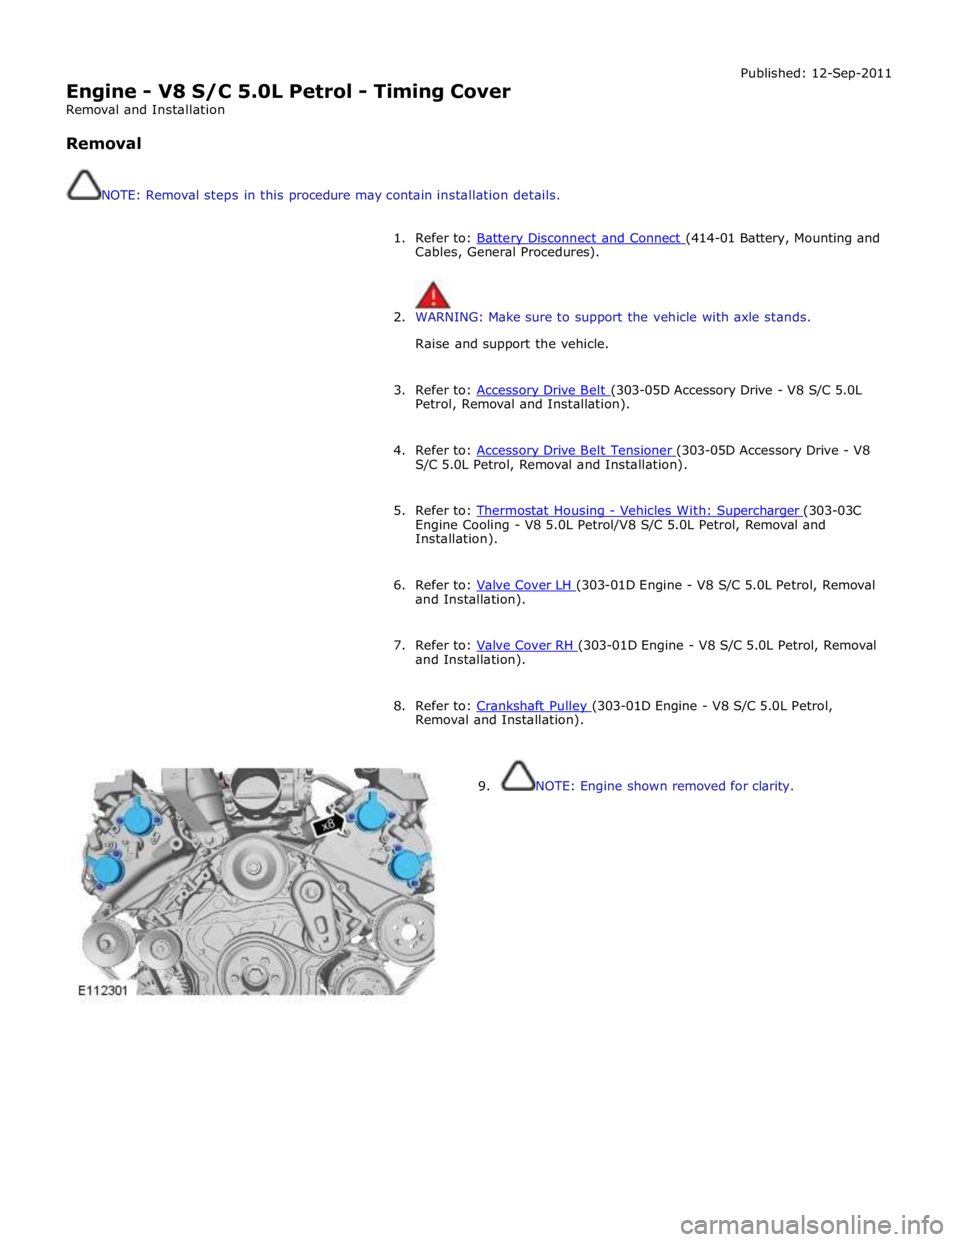
Engine - V8 S/C 5.0L Petrol - Timing Cover
Removal and Installation
Removal
NOTE: Removal steps in this procedure may contain installation details. Published: 12-Sep-2011
1. Refer to: Battery Disconnect and Connect (414-01 Battery, Mounting and Cables, General Procedures).
2. WARNING: Make sure to support the vehicle with axle stands.
Raise and support the vehicle.
3. Refer to: Accessory Drive Belt (303-05D Accessory Drive - V8 S/C 5.0L Petrol, Removal and Installation).
4. Refer to: Accessory Drive Belt Tensioner (303-05D Accessory Drive - V8 S/C 5.0L Petrol, Removal and Installation).
5. Refer to: Thermostat Housing - Vehicles With: Supercharger (303-03C Engine Cooling - V8 5.0L Petrol/V8 S/C 5.0L Petrol, Removal and
Installation).
6. Refer to: Valve Cover LH (303-01D Engine - V8 S/C 5.0L Petrol, Removal and Installation).
7. Refer to: Valve Cover RH (303-01D Engine - V8 S/C 5.0L Petrol, Removal and Installation).
8. Refer to: Crankshaft Pulley (303-01D Engine - V8 S/C 5.0L Petrol, Removal and Installation).
9. NOTE: Engine shown removed for clarity.
Page 1026 of 3039
10.
11.
12. NOTE: Engine shown removed for clarity.
NOTE: Engine shown removed for clarity.
NOTE: Engine shown removed for clarity. www.JagDocs.com
Page 1031 of 3039
12.
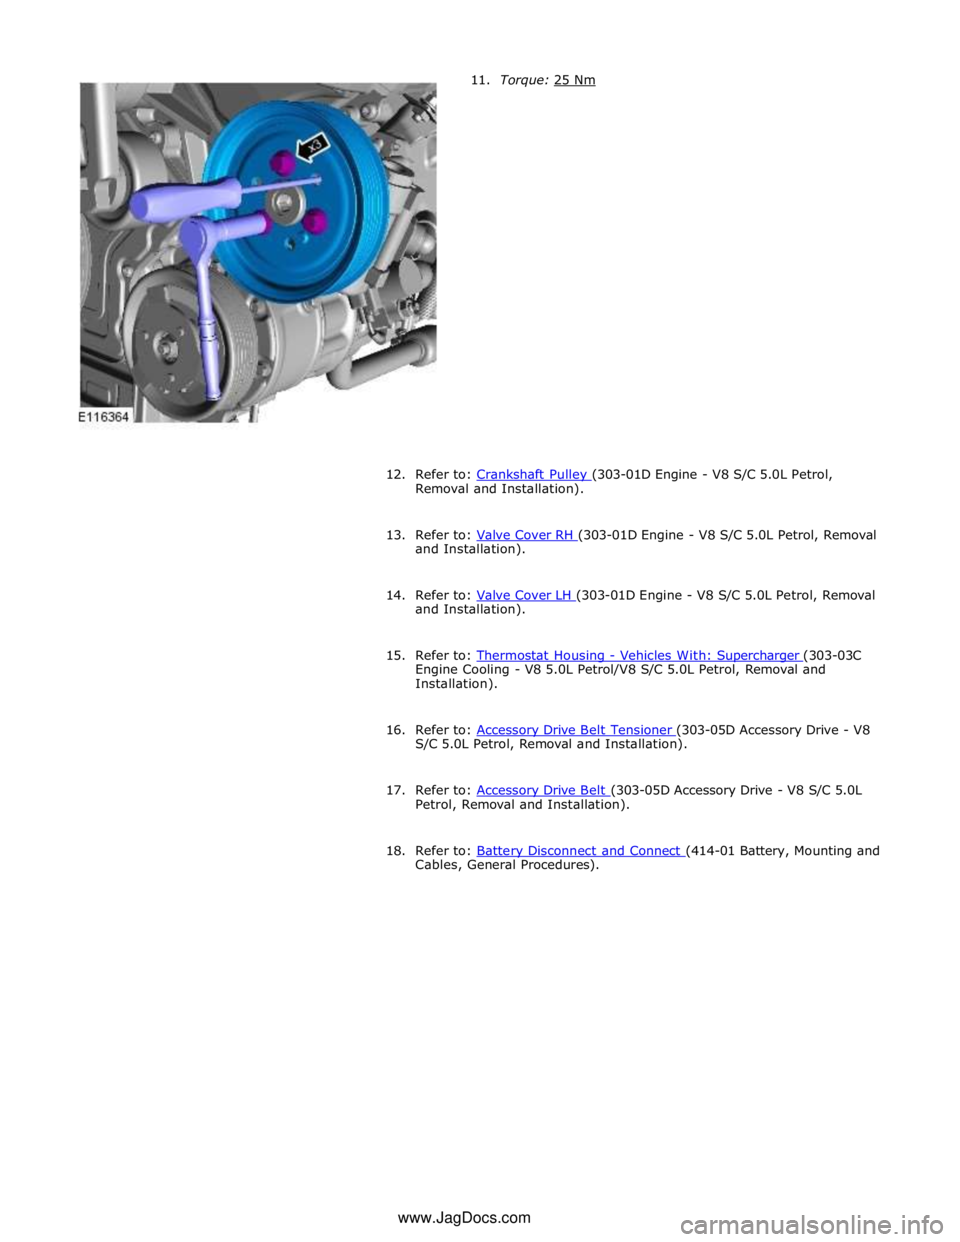
Refer to: Crankshaft Pulley (303-01D Engine - V8 S/C 5.0L Petrol, Removal and Installation).
13. Refer to: Valve Cover RH (303-01D Engine - V8 S/C 5.0L Petrol, Removal and Installation).
14. Refer to: Valve Cover LH (303-01D Engine - V8 S/C 5.0L Petrol, Removal and Installation).
15. Refer to: Thermostat Housing - Vehicles With: Supercharger (303-03C Engine Cooling - V8 5.0L Petrol/V8 S/C 5.0L Petrol, Removal and
Installation).
16. Refer to: Accessory Drive Belt Tensioner (303-05D Accessory Drive - V8 S/C 5.0L Petrol, Removal and Installation).
17. Refer to: Accessory Drive Belt (303-05D Accessory Drive - V8 S/C 5.0L Petrol, Removal and Installation).
18. Refer to: Battery Disconnect and Connect (414-01 Battery, Mounting and Cables, General Procedures). www.JagDocs.com
Page 1032 of 3039
Engine - V8 S/C 5.0L Petrol - Timing Drive Components
Removal and Installation
Special Tool(s)
303-1445
Timing Tool – Camshaft Alignment
303-1447
Timing Tool
303-1448
Locking Tool
303-1452
Camshaft Rotating Tool
303-1482
Tensioner Tool Removal
CAUTION: Check all timing components for wear and install new components if required.
NOTES:
Removal steps in this procedure may contain installation details. Published: 12-Jun-2014
Page 1033 of 3039
Some variation in the illustrations may occur, but the essential information is always correct.
1. Disconnect the battery ground cable.
Refer to: Battery Disconnect and Connect (414-01 Battery, Mounting and Cables, General Procedures).
2. WARNING: Make sure to support the vehicle with axle stands.
Raise and support the vehicle.
3. Refer to: Timing Cover (303-01C Engine - V8 5.0L Petrol, Removal and Installation).
4.
5. CAUTION: Only rotate the crankshaft clockwise.
Install the special tool.
Special Tool(s): 303-1447
Page 1044 of 3039
10.
11. Make sure the tensioner piston is fully extended. Then fully
depress and lock the tensioner piston with the grenade pin
before installation, failure to do this may result in damage
to the engine.
CAUTION: Do not release the timing chain tensioner
locking pin at this stage.
Torque: 10 Nm


