JAGUAR XFR 2010 1.G Workshop Manual
XFR 2010 1.G
JAGUAR
JAGUAR
https://www.carmanualsonline.info/img/21/7642/w960_7642-0.png
JAGUAR XFR 2010 1.G Workshop Manual
Trending: B102, remote start, Key, Actuator, Electrical relay, Transmission mount, ignition
Page 351 of 3039
Front Suspension - Rear Lower Arm Bushing
Removal and Installation
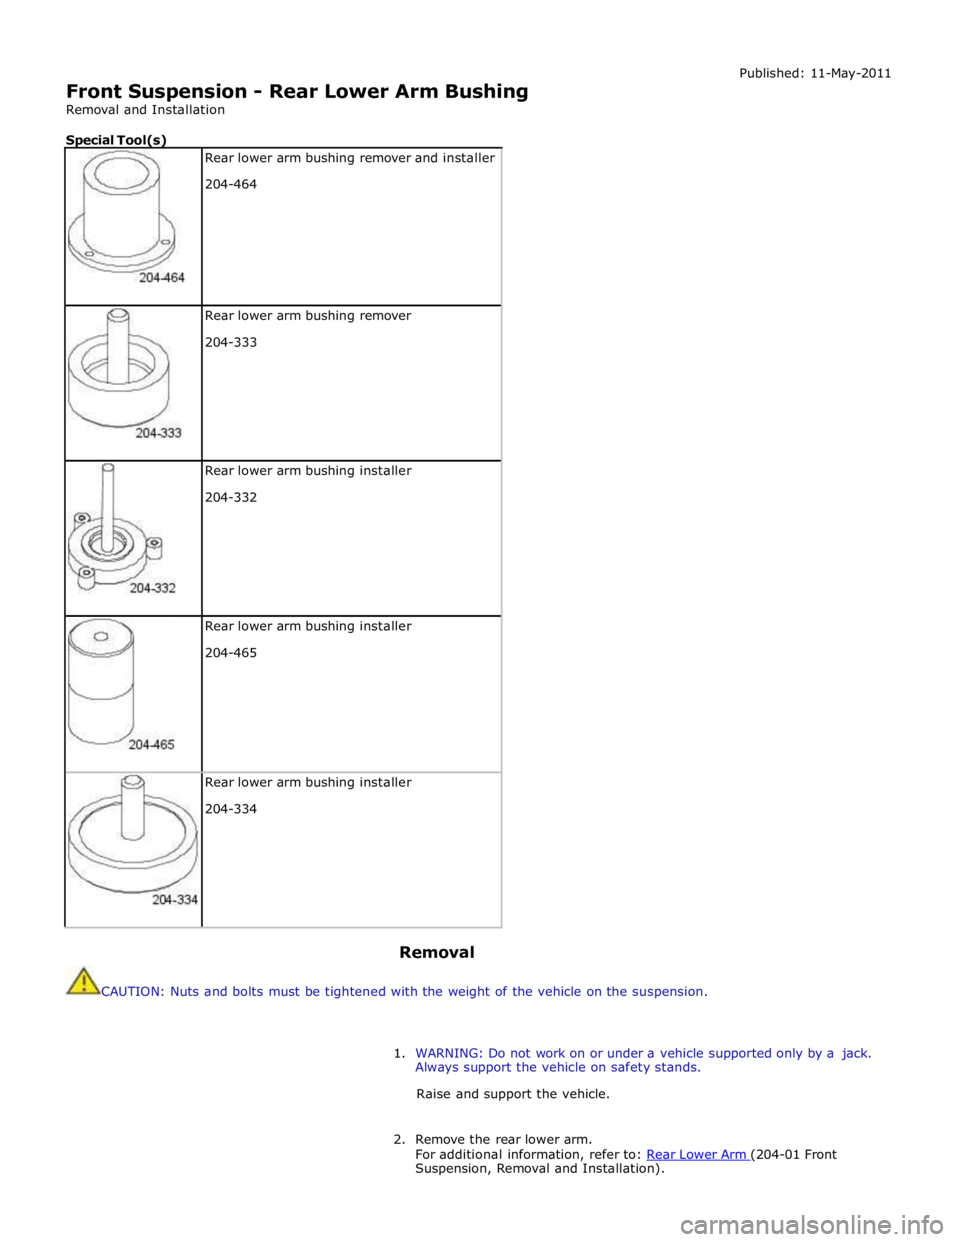
Special Tool(s)
Rear lower arm bushing remover and installer
204-464
Rear lower arm bushing remover
204-333
Rear lower arm bushing installer
204-332
Rear lower arm bushing installer
204-465
Rear lower arm bushing installer
204-334
Removal
CAUTION: Nuts and bolts must be tightened with the weight of the vehicle on the suspension. Published: 11-May-2011
1. WARNING: Do not work on or under a vehicle supported only by a jack.
Always support the vehicle on safety stands.
Raise and support the vehicle.
2. Remove the rear lower arm.
For additional information, refer to: Rear Lower Arm (204-01 Front Suspension, Removal and Installation).
Page 352 of 3039
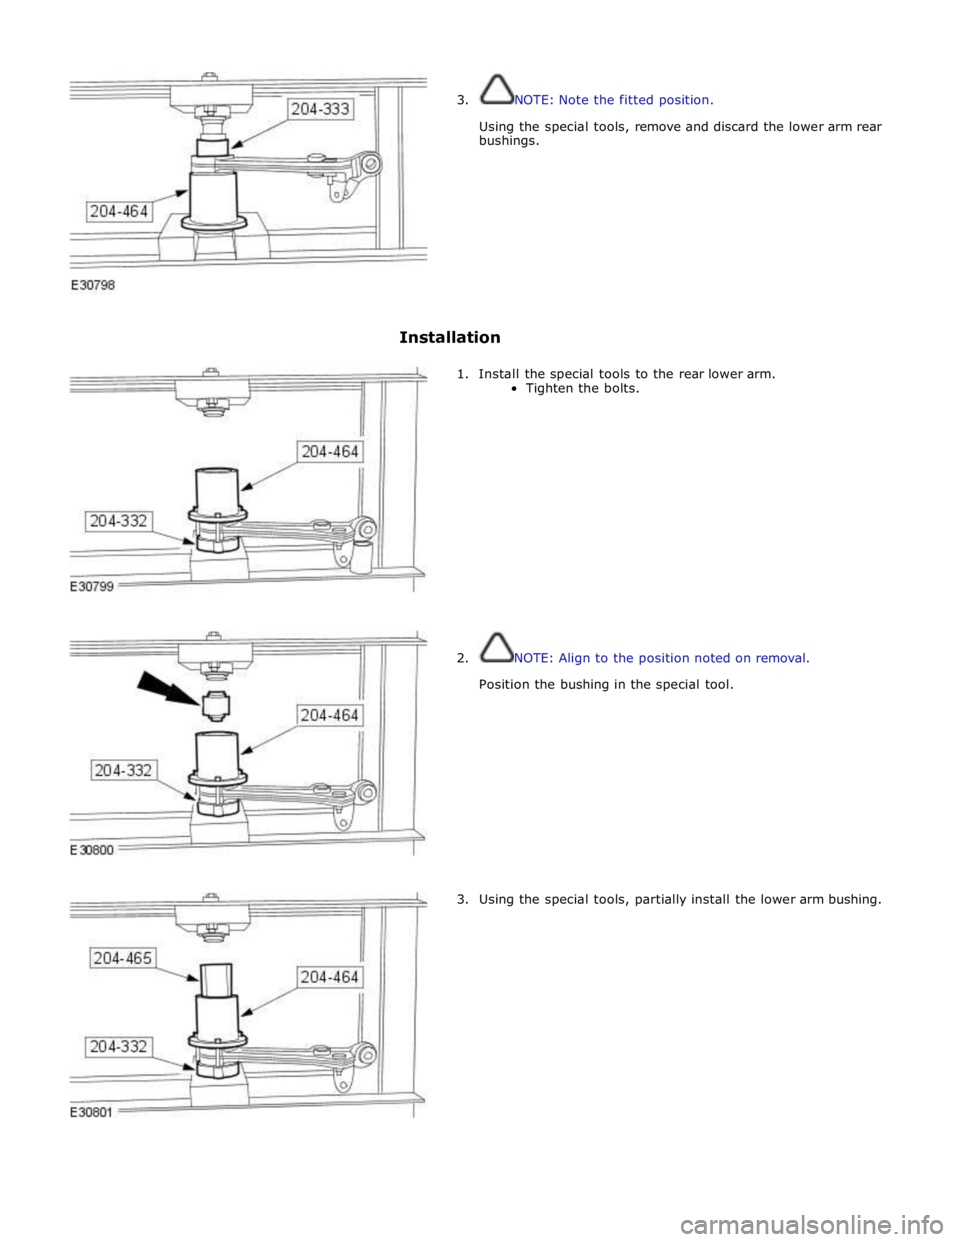
3. NOTE: Note the fitted position.
Using the special tools, remove and discard the lower arm rear
bushings.
Installation
1. Install the special tools to the rear lower arm.
Tighten the bolts.
2. NOTE: Align to the position noted on removal.
Position the bushing in the special tool.
3. Using the special tools, partially install the lower arm bushing.
Page 353 of 3039
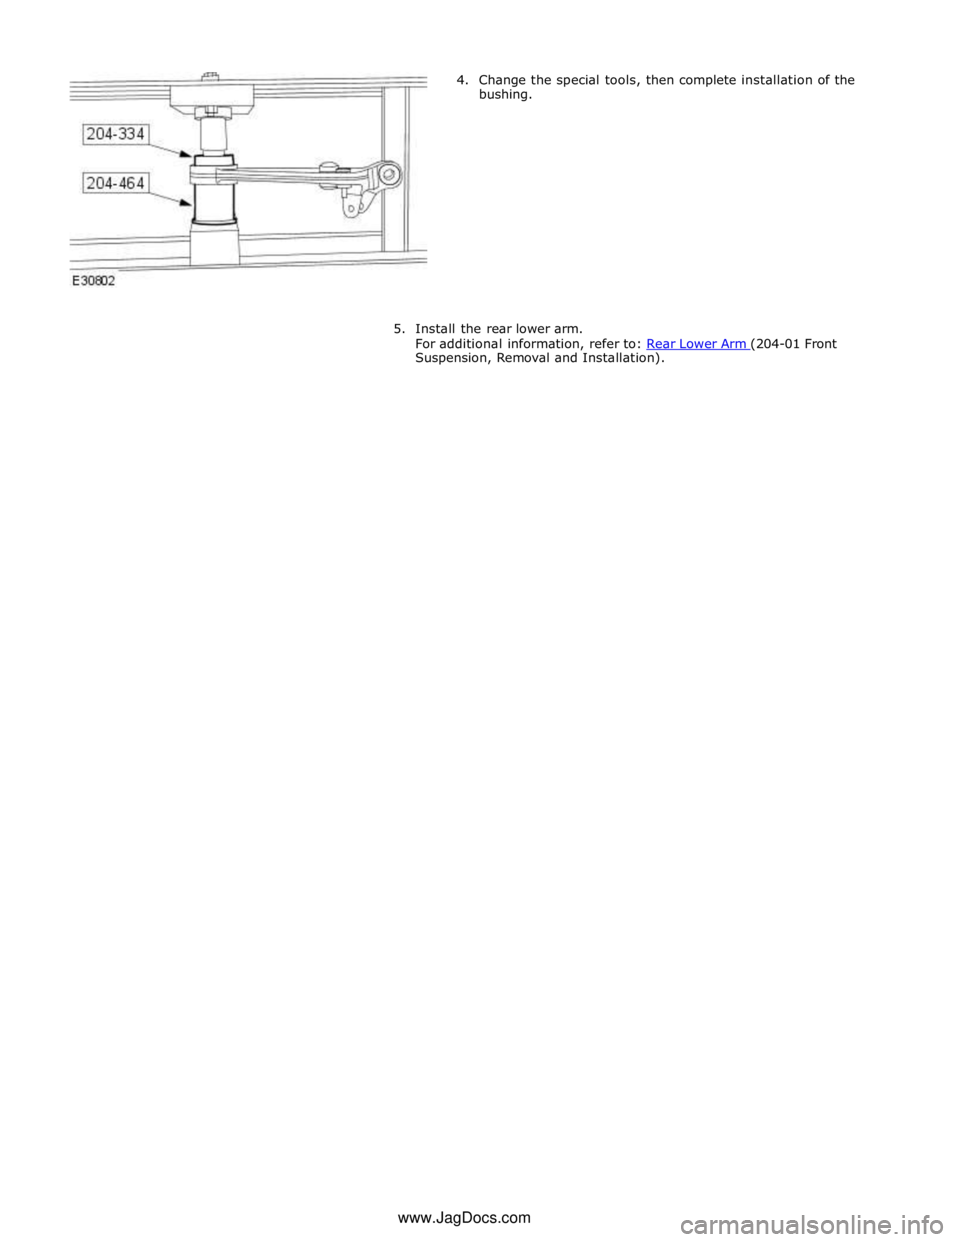
Suspension, Removal and Installation). www.JagDocs.com
Page 354 of 3039
Front Suspension - Shock Absorber Bushing
Removal and Installation
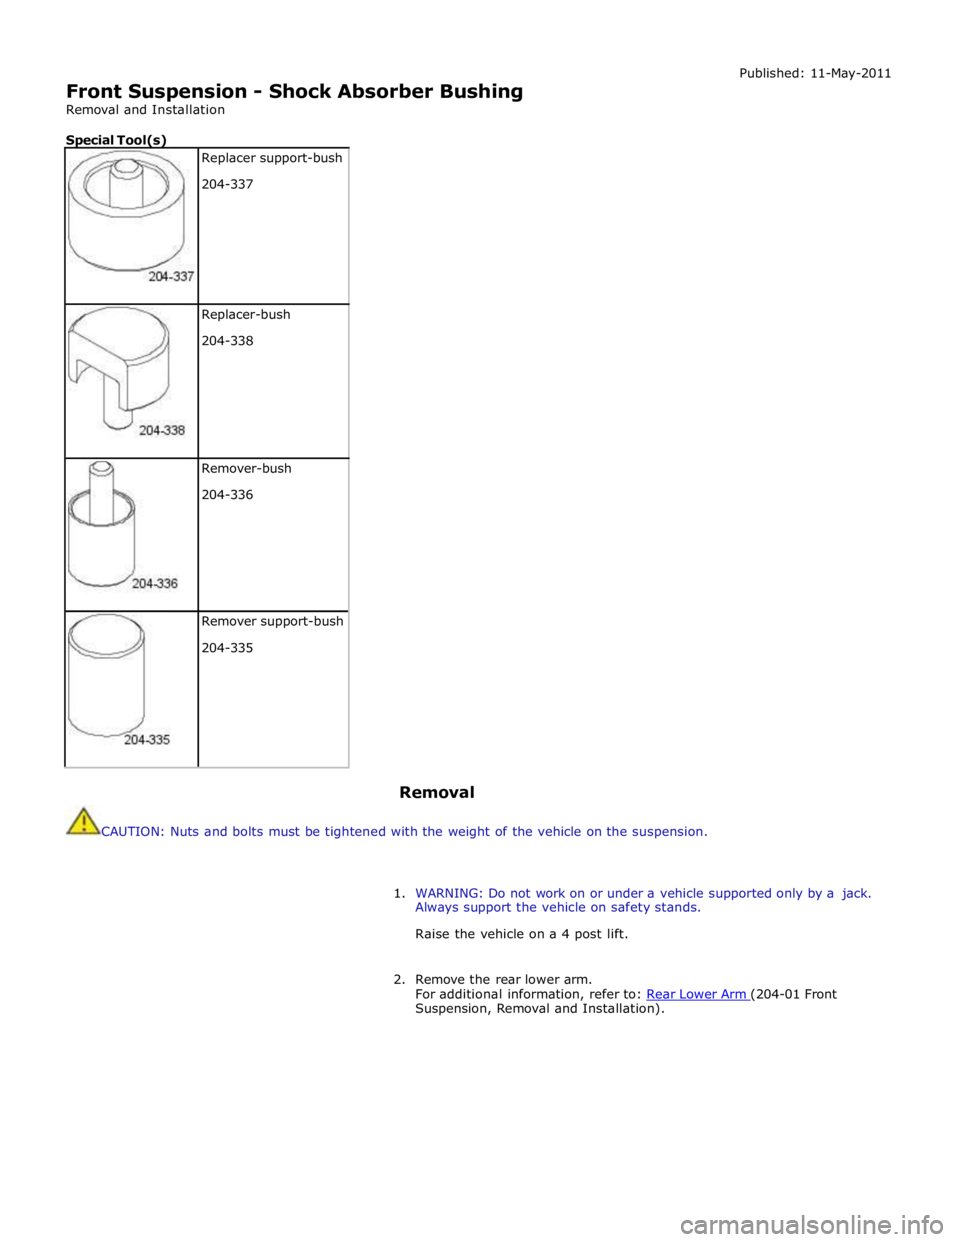
Special Tool(s)
Replacer support-bush
204-337
Replacer-bush
204-338
Remover-bush
204-336
Remover support-bush
204-335
Removal
CAUTION: Nuts and bolts must be tightened with the weight of the vehicle on the suspension. Published: 11-May-2011
1. WARNING: Do not work on or under a vehicle supported only by a jack.
Always support the vehicle on safety stands.
Raise the vehicle on a 4 post lift.
2. Remove the rear lower arm.
For additional information, refer to: Rear Lower Arm (204-01 Front Suspension, Removal and Installation).
Page 355 of 3039
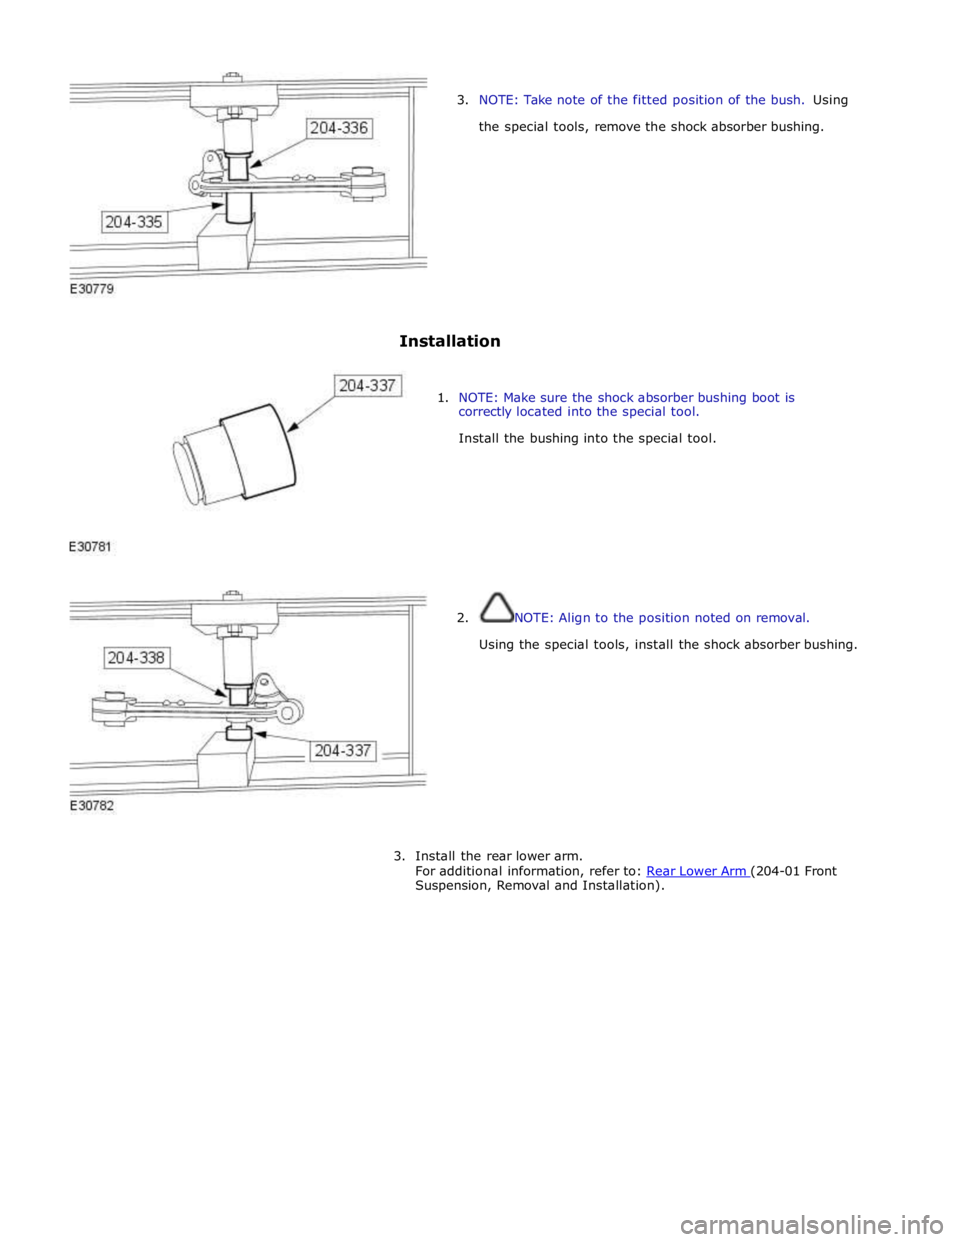
3. NOTE: Take note of the fitted position of the bush. Using
the special tools, remove the shock absorber bushing.
Installation
1. NOTE: Make sure the shock absorber bushing boot is
correctly located into the special tool.
Install the bushing into the special tool.
2. NOTE: Align to the position noted on removal.
Using the special tools, install the shock absorber bushing.
3. Install the rear lower arm.
For additional information, refer to: Rear Lower Arm (204-01 Front Suspension, Removal and Installation).
Page 356 of 3039
Published: 06-Jun-2013
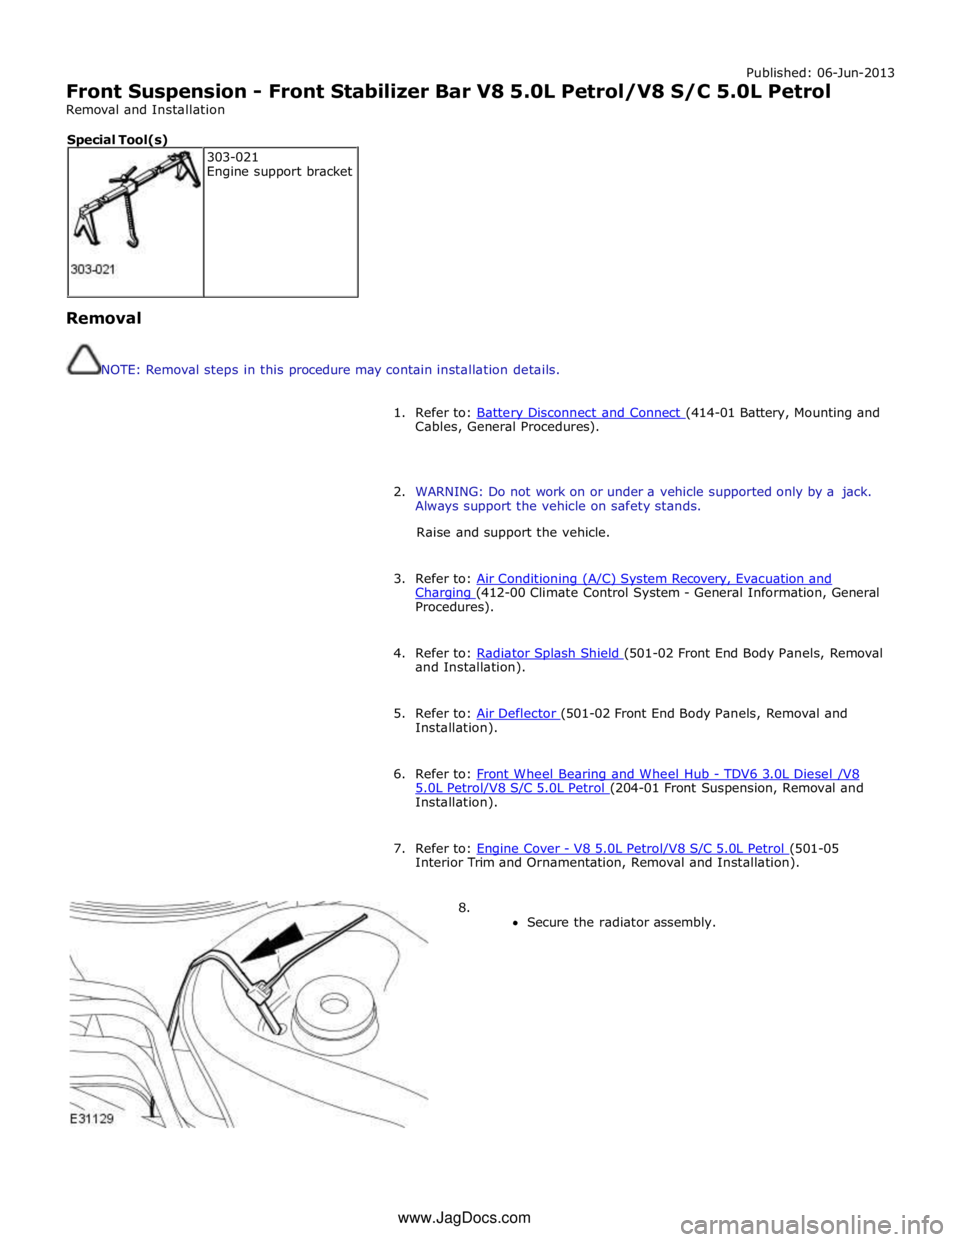
Front Suspension - Front Stabilizer Bar V8 5.0L Petrol/V8 S/C 5.0L Petrol
Removal and Installation
Removal
NOTE: Removal steps in this procedure may contain installation details.
1. Refer to: Battery Disconnect and Connect (414-01 Battery, Mounting and Cables, General Procedures).
2. WARNING: Do not work on or under a vehicle supported only by a jack.
Always support the vehicle on safety stands.
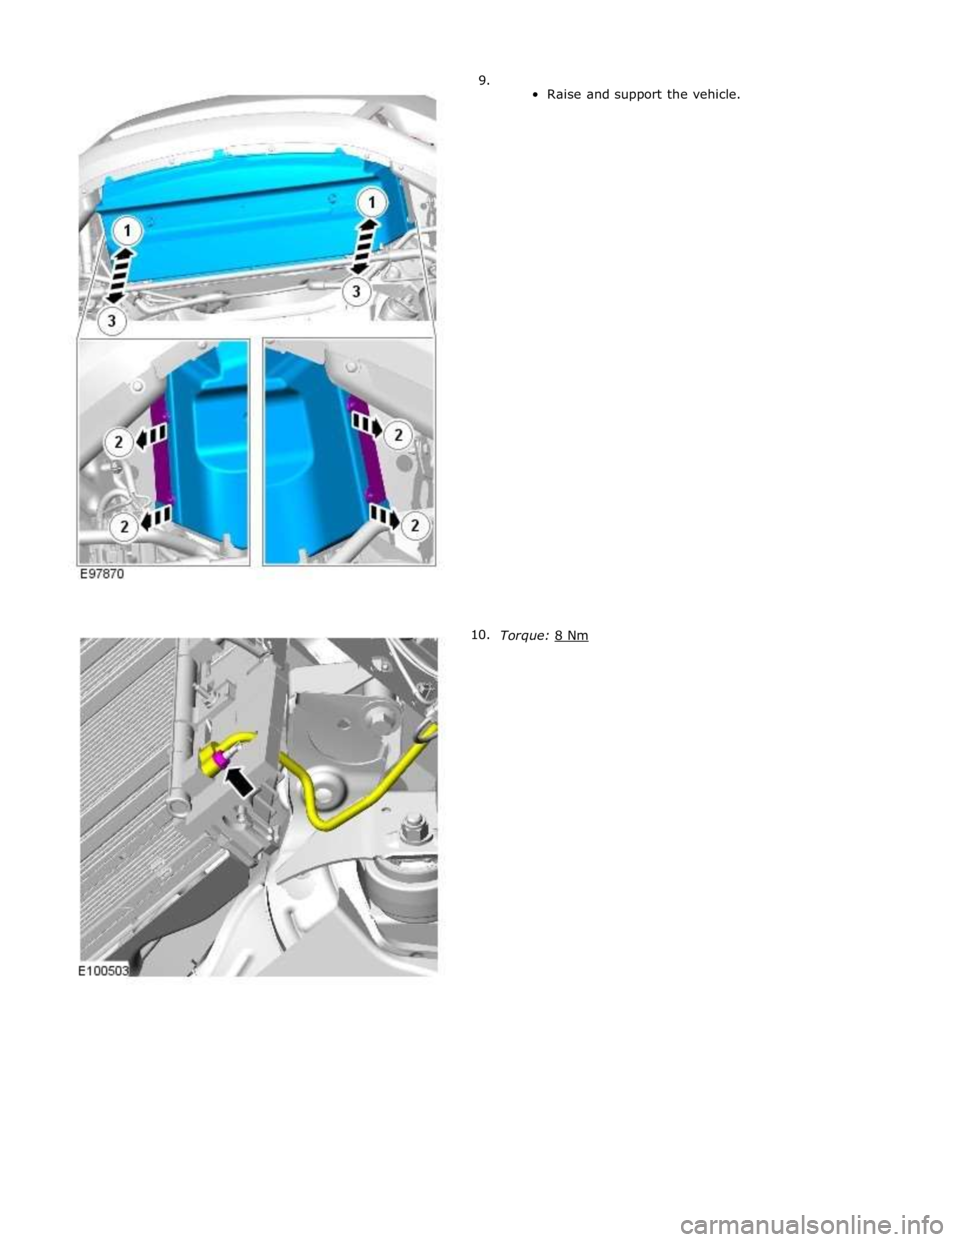
Raise and support the vehicle.
3. Refer to: Air Conditioning (A/C) System Recovery, Evacuation and Charging (412-00 Climate Control System - General Information, General Procedures).
4. Refer to: Radiator Splash Shield (501-02 Front End Body Panels, Removal and Installation).
5. Refer to: Air Deflector (501-02 Front End Body Panels, Removal and Installation).
6. Refer to: Front Wheel Bearing and Wheel Hub - TDV6 3.0L Diesel /V8 5.0L Petrol/V8 S/C 5.0L Petrol (204-01 Front Suspension, Removal and Installation).
7. Refer to: Engine Cover - V8 5.0L Petrol/V8 S/C 5.0L Petrol (501-05 Interior Trim and Ornamentation, Removal and Installation).
8.
Secure the radiator assembly. 303-021
Engine support bracket Special Tool(s) www.JagDocs.com
Page 357 of 3039
Page 358 of 3039
11.
12.
13.
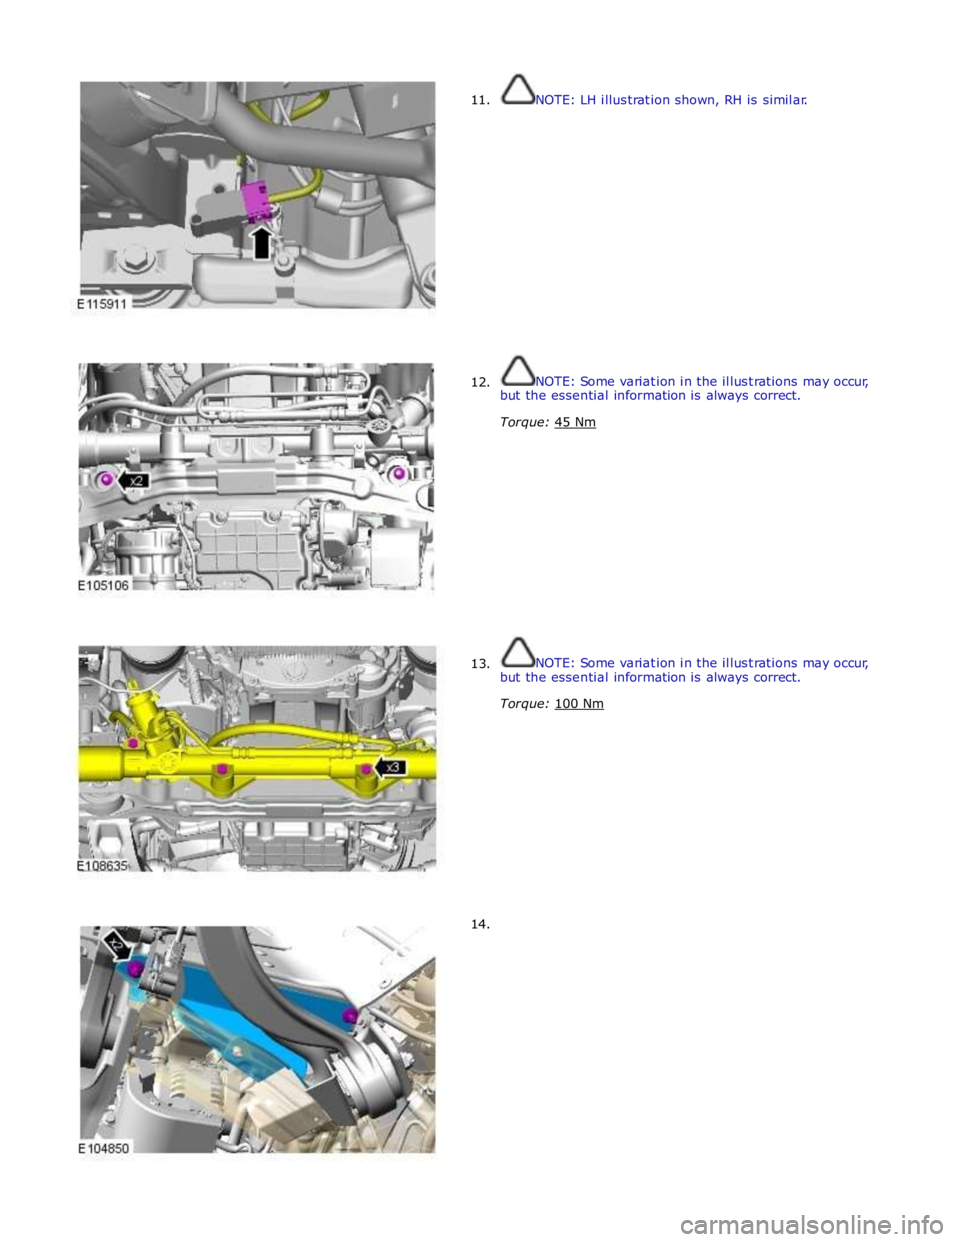
14. NOTE: LH illustration shown, RH is similar.
NOTE: Some variation in the illustrations may occur,
but the essential information is always correct.
Torque: 45 Nm
NOTE: Some variation in the illustrations may occur,
but the essential information is always correct.
Torque: 100 Nm
Page 359 of 3039
Page 360 of 3039
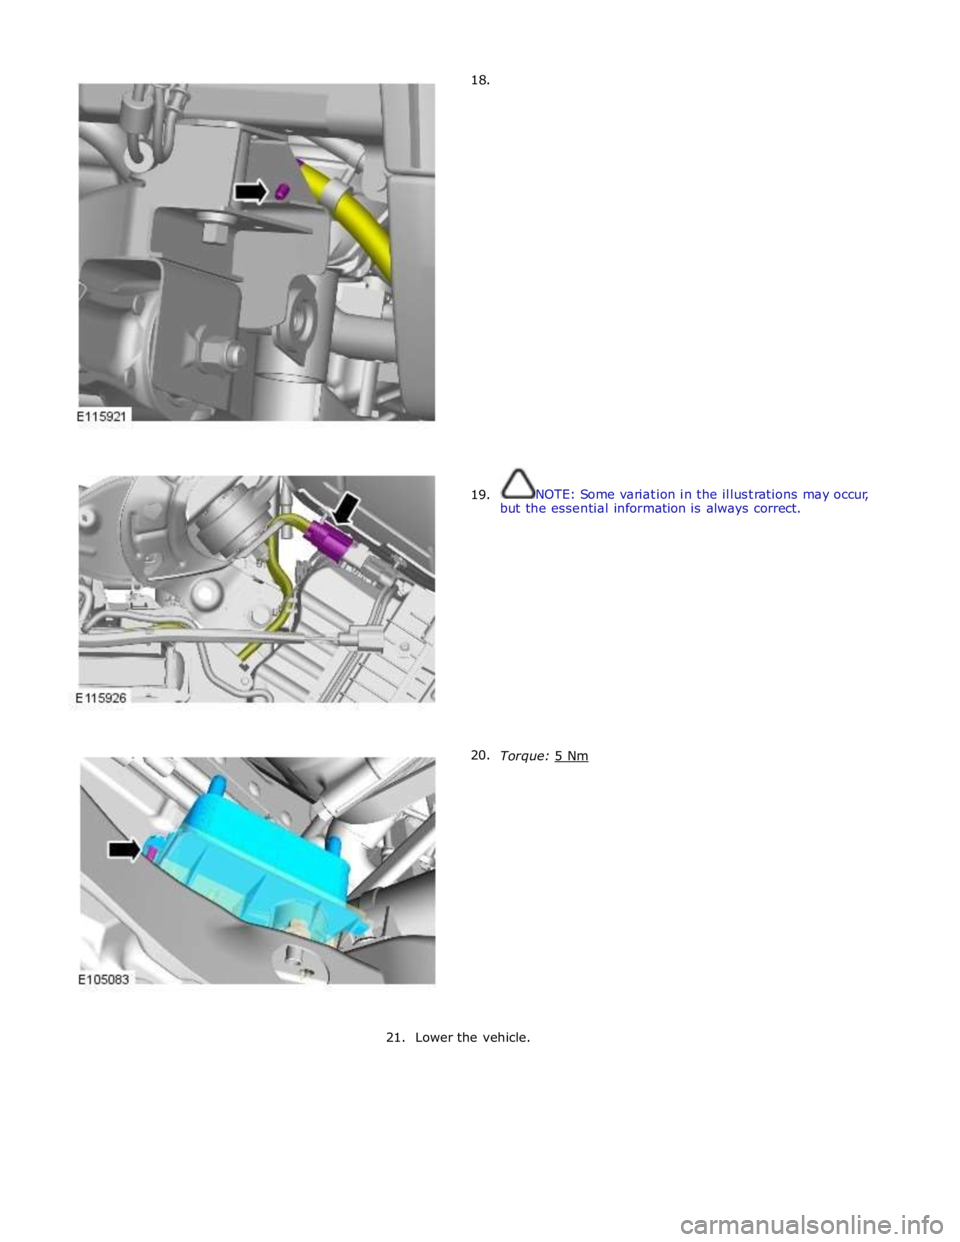
18.
19.
20.
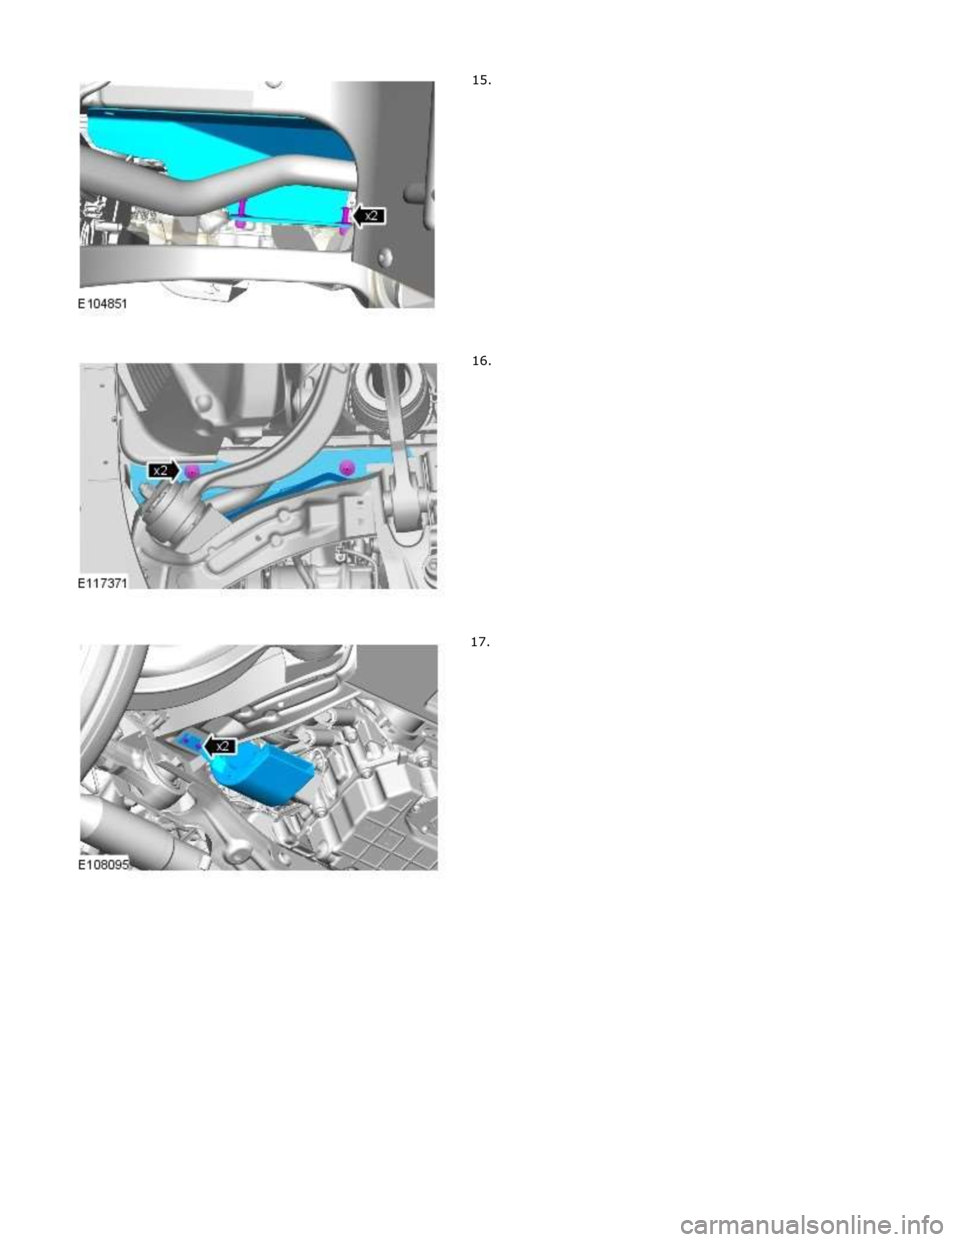
NOTE: Some variation in the illustrations may occur,
but the essential information is always correct.
Torque: 5 Nm
21.
Lower the vehicle.
Trending: hood open, manual transmission, warning light, belt, washer reservoir, light, C1a04-22
