headlights Lancia Musa 2007 Owner handbook (in English)
[x] Cancel search | Manufacturer: LANCIA, Model Year: 2007, Model line: Musa, Model: Lancia Musa 2007Pages: 346, PDF Size: 5.15 MB
Page 8 of 346

7
SAFETY
DEVICES
CORRECT
USE OF
THE CAR
WARNING
LIGHTS AND
MESSAGES
IN AN
EMERGENCY
CAR
MAINTENANCE
TECHNICALSPECIFICATIONS
INDEX
DASHBOARD
AND
CONTROLSSYMBOLS ............................................................ 8
THE LANCIA CODE SYSTEM .............................. 8
KEY KIT AND DOOR LOCKING ......................... 10
IGNITION SWITCH .............................................. 20
DASHBOARD ........................................................ 23
INSTRUMENT PANEL ......................................... 26
INSTRUMENTS .................................................... 27
MULTIFUNCTION DISPLAY
(On two-line mode panel) ..................................... 29
MULTIFUNCTION DISPLAY
(On three-line comfort panel) ............................... 37
STEERING WHEEL ADJUSTMENT .................... 69
SEAT ADJUSTMENT ........................................... 70
HEAD RESTRAINTS ............................................ 77
REARVIEW MIRRORS .......................................... 79
HEATING/CLIMATE CONTROL SYSTEM .......... 81
MANUAL CLIMATE CONTROL SYSTEM ........... 83
AUTOMATIC TWO-ZONE CLIMATE
CONTROL SYSTEM ............................................ 88
EXTERNAL LIGHTS ............................................ 99
WINDOW WASHING ............................................ 104
CRUISE CONTROL ............................................. 109
CEILING LIGHTS ................................................ 112
LIGHT CONTROL BUTTONS .............................. 115INERTIAL FUEL CUT-OFF
SWITCH ................................................................ 117
INTERIOR FITTINGS .......................................... 118
SMOKERS’ KIT ..................................................... 123
SUN VISORS ......................................................... 123
SUNROOF ............................................................. 124
POWER WINDOWS ............................................. 126
REAR WINDOW WINDERS .................................. 129
BOOT .................................................................... 129
BONNET ............................................................... 134
ROOF/SKI RACKS ................................................ 136
HEADLIGHTS ...................................................... 136
ABS SYSTEM ....................................................... 138
ESP SYSTEM ....................................................... 140
ASR SYSTEM ........................................................ 142
EOBD SYSTEM .................................................... 144
TYRE PRESSURE MONITORING
SYSTEM - T.P.M.S................................................. 145
SOUND SYSTEM .................................................. 147
ACCESSORIES PURCHASED BY THE OWNER .. 149
“DUALDRIVE” ELECTRIC POWER
STEERING SYSTEM ............................................ 150
PARKING SENSORS ............................................ 152
AT THE FILLING STATION ................................ 154
PROTECTING THE ENVIRONMENT .................. 156
DASHBOARD AND CONTROLS
Page 30 of 346

MULTIFUNCTION DISPLAY
(On two-line mode panel)
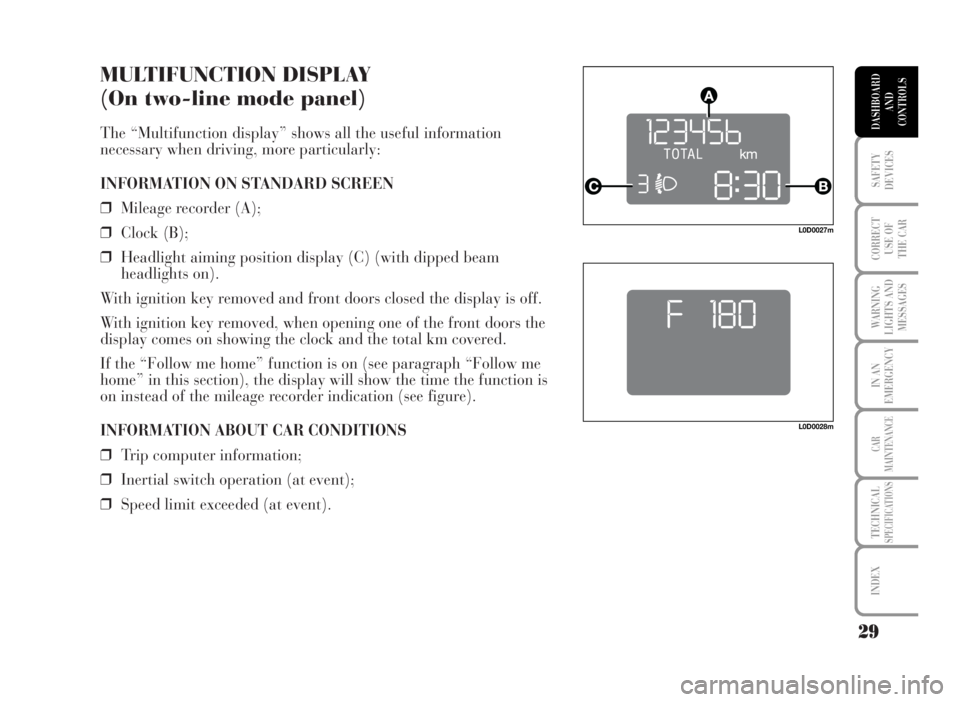
The “Multifunction display” shows all the useful information
necessary when driving, more particularly:
INFORMATION ON STANDARD SCREEN
❒Mileage recorder (A);
❒Clock (B);
❒Headlight aiming position display (C) (with dipped beam
headlights on).
With ignition key removed and front doors closed the display is off.
With ignition key removed, when opening one of the front doors the
display comes on showing the clock and the total km covered.
If the “Follow me home” function is on (see paragraph “Follow me
home” in this section), the display will show the time the function is
on instead of the mileage recorder indication (see figure).
INFORMATION ABOUT CAR CONDITIONS
❒Trip computer information;
❒Inertial switch operation (at event);
❒Speed limit exceeded (at event).
29
SAFETY
DEVICES
CORRECT
USE OF
THE CAR
WARNING
LIGHTS AND
MESSAGES
IN AN
EMERGENCY
CAR
MAINTENANCE
TECHNICALSPECIFICATIONS
INDEX
DASHBOARD
AND
CONTROLS
L0D0028m
L0D0027m
Page 38 of 346

MULTIFUNCTION DISPLAY
(On three-line comfort panel)
The “Multifunction display” shows all the useful information
necessary when driving, more particularly:
INFORMATION ON STANDARD SCREEN
❒Date A.
❒Mileage recorder B.
❒Clock C.
❒External temperature D.
When the ignition key is removed only the time is displayed; when
opening one of the front doors the display comes on showing the
odometer indication.
INFORMATION ABOUT CAR CONDITIONS (at event)
❒Scheduled maintenance programme intervals.
❒ Trip computer information.
❒To adjust the intensity of the instrument dimmer/ menus/
instrument panel, sound system and automatic two-zone climate
control system display.
❒Display of failure/warning messages/function activation.
❒Display of the CITY mode (if selected).
❒Headlight aiming position display (with dipped beam headlights
on) E.
❒Symbol for possible ice on road.
37
SAFETY
DEVICES
CORRECT
USE OF
THE CAR
WARNING
LIGHTS AND
MESSAGES
IN AN
EMERGENCY
CAR
MAINTENANCE
TECHNICALSPECIFICATIONS
INDEX
DASHBOARD
AND
CONTROLS
FOH9000m
Page 42 of 346

41
SAFETY
DEVICES
CORRECT
USE OF
THE CAR
WARNING
LIGHTS AND
MESSAGES
IN AN
EMERGENCY
CAR
MAINTENANCE
TECHNICALSPECIFICATIONS
INDEX
DASHBOARD
AND
CONTROLS
ACCESS TO MENU SCREEN
After the “Initial check”, it is possible to access the menu screen pressing the button
Q.
To surf the menu press buttons +or–.
IMPORTANT If after entering the menu no setting/adjustment is performed within 60 seconds, the system exits
the menu automatically and returns to previously displayed screen.
In this case the last selected but not confirmed setting (through button
Q) is not stored and therefore the
operation shall be repeated.
When the car is running, it is possible to access only the reduced menu (for setting “Speed limit” and “Daylight
sensor automatic headlights”).
When the car is stationary access to the whole menu is enabled.
The following diagram shows the cases described.
Q= Press “MODE” button for less than two seconds
R= Press “MODE” button for over two seconds
Page 46 of 346

45
SAFETY
DEVICES
CORRECT
USE OF
THE CAR
WARNING
LIGHTS AND
MESSAGES
IN AN
EMERGENCY
CAR
MAINTENANCE
TECHNICALSPECIFICATIONS
INDEX
DASHBOARD
AND
CONTROLS
DAYLIGHT SENSOR AUTOMATIC HEADLIGHTS (Light Sensor) (where provided)
With this function it is possible to adjust the light sensor sensitivity according to 3 levels (level 1 = min. level,
level 2 = average level, level 3 = max. level); the higher the sensitivity is, the lower is the external light intensity
required to switch on the lights. This operation can be performed also with the car moving. The car is delivered
with this setting on level “2”. To set the light level required, proceed as follows:
R
Q
Q
– +
R
– +
See “Initial check”
and “Access to
menu screen”
Menu screen
Return to menu
screen Use the + or – buttons to set the light
sensor sensitivity.
Set selection flashes.
Return to previously
displayed
screen, e.g.:
Q= Press “MODE” button for less than two seconds
R= Press “MODE” button for over two seconds
QR
Page 100 of 346

99
SAFETY
DEVICES
CORRECT
USE OF
THE CAR
WARNING
LIGHTS AND
MESSAGES
IN AN
EMERGENCY
CAR
MAINTENANCE
TECHNICALSPECIFICATIONS
INDEX
DASHBOARD
AND
CONTROLS
EXTERNAL LIGHTS
The left-hand stalk controls the external lights and the direction
indicators.
The external lights can only be switched on when the ignition key is
at MAR.
LIGHTS SWITCHED OFF
Turn the knurled ring to
å.
SIDELIGHTS
Turn the knurled ring to 6.
The warning light 3on the instrument cluster will come on.
DIPPED BEAM HEADLIGHTS
Turn the knurled ring to 2.
L0D0066m
L0D0067m
L0D0068m
Page 101 of 346

100
SAFETY
DEVICES
CORRECT
USE OF
THE CAR
WARNING
LIGHTS AND
MESSAGES
IN AN
EMERGENCY
CAR
MAINTENANCE
TECHNICALSPECIFICATIONS
INDEX
DASHBOARD
AND
CONTROLS
MAIN BEAM HEADLIGHTS
When the knurled ring is at 2pull the lever towards the steering
wheel (stable position).
The warning light 1on the instrument cluster will come on.
Pulling the lever towards the steering wheel again, the main beams
are turned off (and the dipped beams on).
FLASHING THE HEADLIGHTS
Pull the lever towards the steering wheel (unstable position)
regardless of the position of the knurled ring.
IMPORTANT Check on the display that stable position is not
engaged.
L0D0069m
L0D0070m
Page 104 of 346

103
SAFETY
DEVICES
CORRECT
USE OF
THE CAR
WARNING
LIGHTS AND
MESSAGES
IN AN
EMERGENCY
CAR
MAINTENANCE
TECHNICALSPECIFICATIONS
INDEX
DASHBOARD
AND
CONTROLS
AUTOMATIC HEADLIGHTS SENSOR (daylight sensor)
(where provided)
It detects the changes of the external light intensity of the car
according to the light sensitivity set: greater is the sensitivity, smaller
is the amount of external light necessary to control the switching-on
of the exterior headlights. The daylight sensor sensitivity can be
adjusted with the “Set-up menu” of “multifunction display”.
Activation
Turn the knurled ring to
2A: in this way, the automatic activation of
the side/taillights and dipped beam headlights is simultaneously
enabled according to the external luminosity.
When the daylight sensor is on, the display shows the preset
sensitivity level. During displaying, the sensitivity level can be
adjusted using buttons +and–.
Deactivation
As a result of the sensor control, the dipped beam headlights will
switch off and, after about 10 seconds, sidelights will switch off too.
If during automatic light activation,
main beam headlights have been switched on (manually), they will go
off at automatic light switching off.
IMPORTANT The light sensor is not able to detect the fog presence,
lights shall therefore be switched on manually.
L0D0072m
L0D0025m
Page 117 of 346

116
SAFETY
DEVICES
CORRECT
USE OF
THE CAR
WARNING
LIGHTS AND
MESSAGES
IN AN
EMERGENCY
CAR
MAINTENANCE
TECHNICALSPECIFICATIONS
INDEX
DASHBOARD
AND
CONTROLS
REAR FOG LIGHTS
These are turned on, with the dipped beam headlights or front fog
lights on, pressing button 4.
They are turned off pressing the button again or turning off the
dipped beam headlights or front fog lights
PARKING LIGHTS/NUMBER PLATE LIGHTS
They turn on only with the ignition key at STOP or removed, keeping
buttonFpressed for about 1 second.
IT is possible to select the parking lights only on side of the car
moving the direction indicator stalk to the required side.
L0D0083m
L0D0084m
Page 137 of 346

136
SAFETY
DEVICES
CORRECT
USE OF
THE CAR
WARNING
LIGHTS AND
MESSAGES
IN AN
EMERGENCY
CAR
MAINTENANCE
TECHNICALSPECIFICATIONS
INDEX
DASHBOARD
AND
CONTROLS
ROOF/SKI RACKS (where provided)
IMPORTANT Use roof/ski racks provided at Lineaccesori Lancia.
Always attain to the installation instructions provided with the kit
and have the roof racks installed by skilled personnel.
IMPORTANT Never exceed the max. permissible loads (see section
“Technical specifications”).
After few kilometers, check that fastening screws are firmly tightened.
HEADLIGHTS
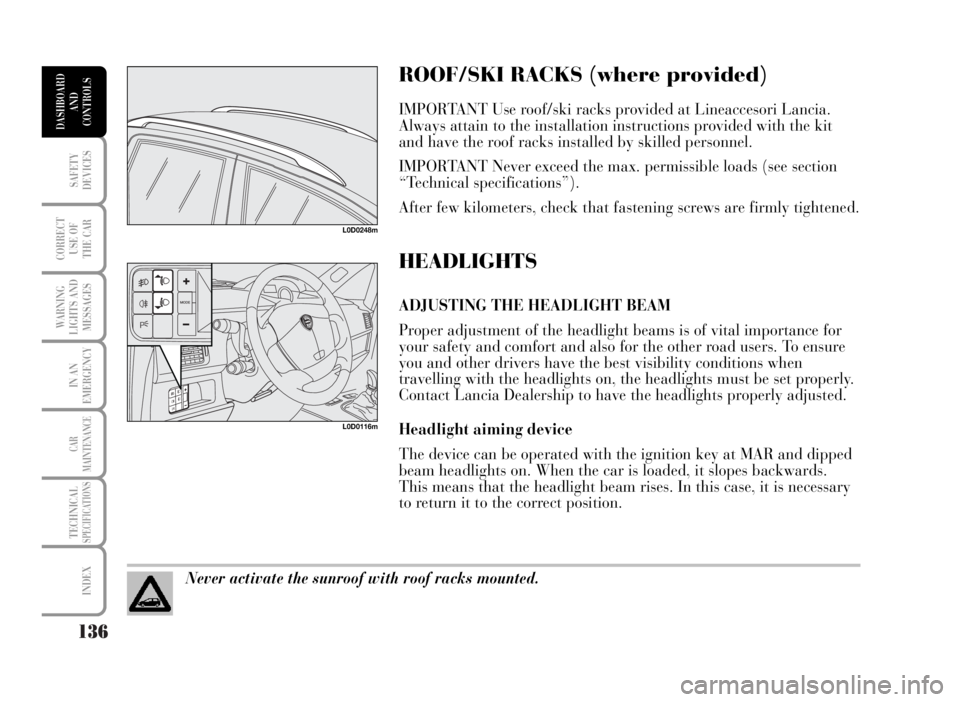
ADJUSTING THE HEADLIGHT BEAM
Proper adjustment of the headlight beams is of vital importance for
your safety and comfort and also for the other road users. To ensure
you and other drivers have the best visibility conditions when
travelling with the headlights on, the headlights must be set properly.
Contact Lancia Dealership to have the headlights properly adjusted.
Headlight aiming device
The device can be operated with the ignition key at MAR and dipped
beam headlights on. When the car is loaded, it slopes backwards.
This means that the headlight beam rises. In this case, it is necessary
to return it to the correct position.
L0D0116m L0D0248m
Never activate the sunroof with roof racks mounted.