technical specifications Lancia Musa 2009 Owner handbook (in English)
[x] Cancel search | Manufacturer: LANCIA, Model Year: 2009, Model line: Musa, Model: Lancia Musa 2009Pages: 218, PDF Size: 3.7 MB
Page 58 of 218
57
SAFETY
DEVICES
STARTING
AND
DRIVING
WARNING
LIGHTS AND
MESSAGES
IN AN
EMERGENCY
MAINTENANCE
AND CARE
TECHNICALSPECIFICATIONS
INDEX
DASHBOARD
AND CONTROLS
The distribution mode set is indicated
by the LEDs that light up on the se-
lected buttons.
In combined function mode the rele-
vant function is enabled simultane-
ously with those already set by press-
ing the corresponding button. If a
button is pressed for a function that
is active, the operation is cancelled
and the corresponding LED goes off.
To restore automatic air distribution
control after a manual selection, press
buttonAUTO.
When the driver selects air distribu-
tion to the windscreen, the air distri-
bution on the passenger’s side too is
aligned to the windscreen. The pas-
senger can select a different distribu-
tion mode by pressing the corre-
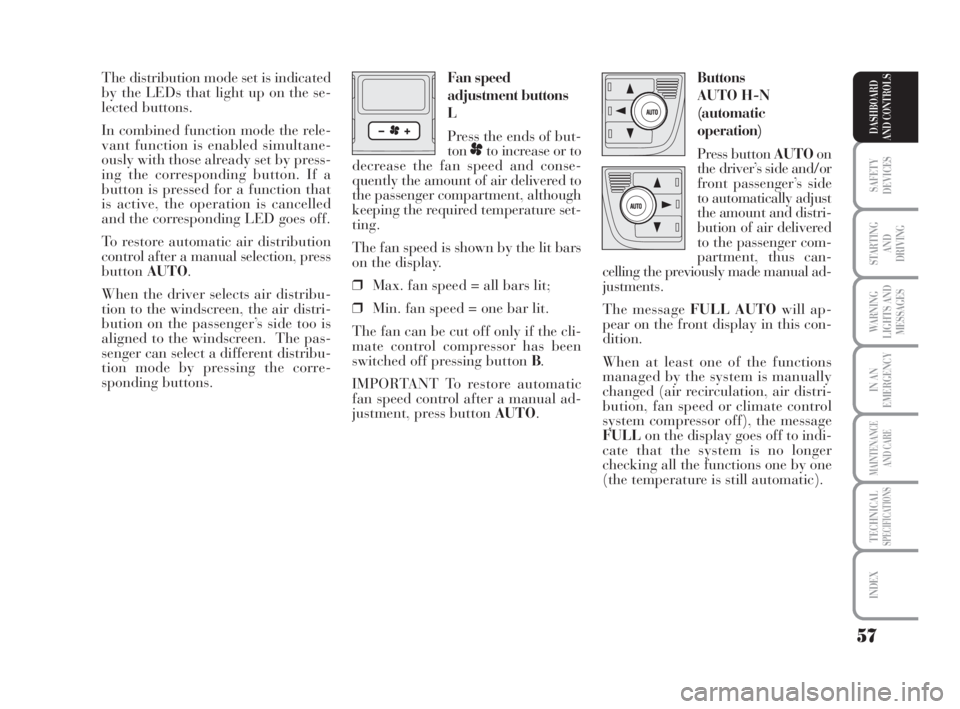
sponding buttons.Buttons
AUTO H-N
(automatic
operation)
Press button AUTOon
the driver’s side and/or
front passenger’s side
to automatically adjust
the amount and distri-
bution of air delivered
to the passenger com-
partment, thus can-
celling the previously made manual ad-
justments.
The message FULL AUTOwill ap-
pear on the front display in this con-
dition.
When at least one of the functions
managed by the system is manually
changed (air recirculation, air distri-
bution, fan speed or climate control
system compressor off), the message
FULLon the display goes off to indi-
cate that the system is no longer
checking all the functions one by one
(the temperature is still automatic). Fan speed
adjustment buttons
L
Press the ends of but-
ton
pto increase or to
decrease the fan speed and conse-
quently the amount of air delivered to
the passenger compartment, although
keeping the required temperature set-
ting.
The fan speed is shown by the lit bars
on the display.
❒Max. fan speed = all bars lit;
❒Min. fan speed = one bar lit.
The fan can be cut off only if the cli-
mate control compressor has been
switched off pressing button B.
IMPORTANT To restore automatic
fan speed control after a manual ad-
justment, press button AUTO.
038-094 MUSA 1ed GB 11-07-2008 14:10 Pagina 57
Page 59 of 218
58
SAFETY
DEVICES
STARTING
AND
DRIVING
WARNING
LIGHTS AND
MESSAGES
IN AN
EMERGENCY
MAINTENANCE
AND CARE
TECHNICALSPECIFICATIONS
INDEX
DASHBOARD
AND CONTROLS
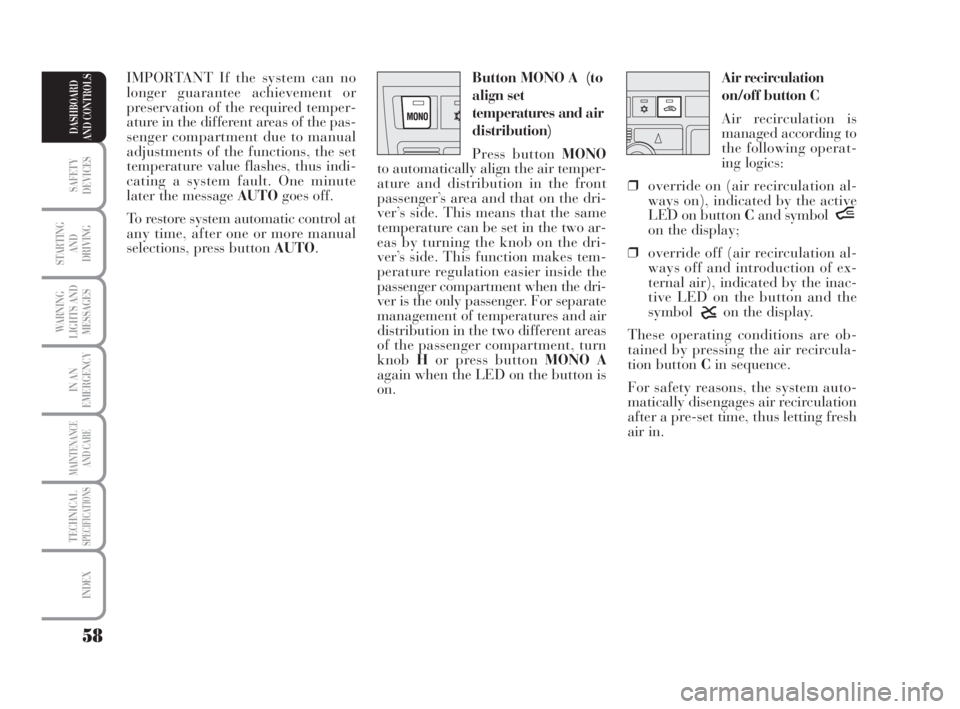
Air recirculation
on/off button C
Air recirculation is
managed according to
the following operat-
ing logics:
❒override on (air recirculation al-
ways on), indicated by the active
LED on button Cand symbol
íon the display;
❒override off (air recirculation al-
ways off and introduction of ex-
ternal air), indicated by the inac-
tive LED on the button and the
symbol
êon the display.
These operating conditions are ob-
tained by pressing the air recircula-
tion button Cin sequence.
For safety reasons, the system auto-
matically disengages air recirculation
after a pre-set time, thus letting fresh
air in. Button MONO A (to
align set
temperatures and air
distribution)
Press button MONO
to automatically align the air temper-
ature and distribution in the front
passenger’s area and that on the dri-
ver’s side. This means that the same
temperature can be set in the two ar-
eas by turning the knob on the dri-
ver’s side. This function makes tem-
perature regulation easier inside the
passenger compartment when the dri-
ver is the only passenger. For separate
management of temperatures and air
distribution in the two different areas
of the passenger compartment, turn
knobHor press button MONO A
again when the LED on the button is
on. IMPORTANT If the system can no
longer guarantee achievement or
preservation of the required temper-
ature in the different areas of the pas-
senger compartment due to manual
adjustments of the functions, the set
temperature value flashes, thus indi-
cating a system fault. One minute
later the message AUTOgoes off.
To restore system automatic control at
any time, after one or more manual
selections, press button AUTO.
038-094 MUSA 1ed GB 11-07-2008 14:10 Pagina 58
Page 60 of 218
59
SAFETY
DEVICES
STARTING
AND
DRIVING
WARNING
LIGHTS AND
MESSAGES
IN AN
EMERGENCY
MAINTENANCE
AND CARE
TECHNICALSPECIFICATIONS
INDEX
DASHBOARD
AND CONTROLS
IMPORTANT Air recirculation ON
enables faster achievement of the de-
sired conditions (for passenger com-
partment heating or cooling). It is
however inadvisable to use it on
rainy/cold days as it would consider-
ably increase the possibility of the
windows misting inside, especially if
the climate control compressor is off.
Recirculation is forced to off (i.e. air
is introduced from the outside) when
the outside temperature is inferior to
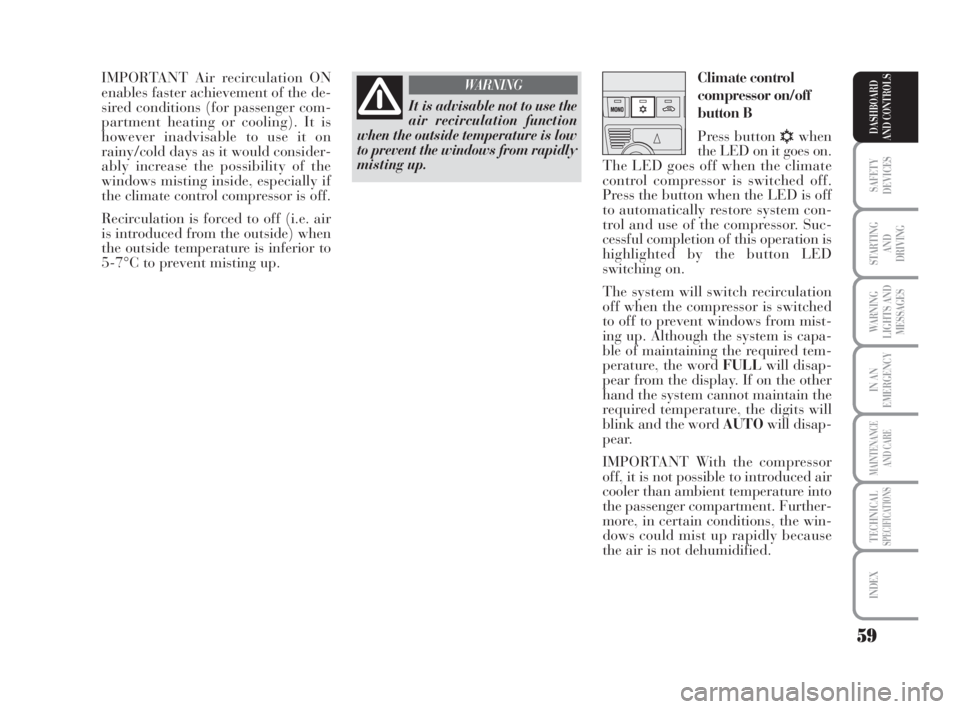
5-7°C to prevent misting up.Climate control
compressor on/off
button B
Press button
√when
the LED on it goes on.
The LED goes off when the climate
control compressor is switched off.
Press the button when the LED is off
to automatically restore system con-
trol and use of the compressor. Suc-
cessful completion of this operation is
highlighted by the button LED
switching on.
The system will switch recirculation
off when the compressor is switched
to off to prevent windows from mist-
ing up. Although the system is capa-
ble of maintaining the required tem-
perature, the word FULLwill disap-
pear from the display. If on the other
hand the system cannot maintain the
required temperature, the digits will
blink and the word AUTOwill disap-
pear.
IMPORTANT With the compressor
off, it is not possible to introduced air
cooler than ambient temperature into
the passenger compartment. Further-
more, in certain conditions, the win-
dows could mist up rapidly because
the air is not dehumidified.
It is advisable not to use the
air recirculation function
when the outside temperature is low
to prevent the windows from rapidly
misting up.
WARNING
038-094 MUSA 1ed GB 11-07-2008 14:10 Pagina 59
Page 61 of 218
60
SAFETY
DEVICES
STARTING
AND
DRIVING
WARNING
LIGHTS AND
MESSAGES
IN AN
EMERGENCY
MAINTENANCE
AND CARE
TECHNICALSPECIFICATIONS
INDEX
DASHBOARD
AND CONTROLS
IMPORTANT The fast window
demisting/defrosting function remains
engaged for approx. 3 minutes start-
ing from the time when the engine
coolant exceeds 50°C (petrol versions)
or 35°C (Multijet versions).
When this function is active, the LED
of the corresponding button switches
on and that of the rear window
demister. The text FULL AUTOgoes
off on the display.
You can only adjust the fan speed and
switch the rear window demister off
manually when this function is active.
To restore operating conditions before
this function is activated, press but-
tonF, the air recirculation button C,
the compressor button Bor button
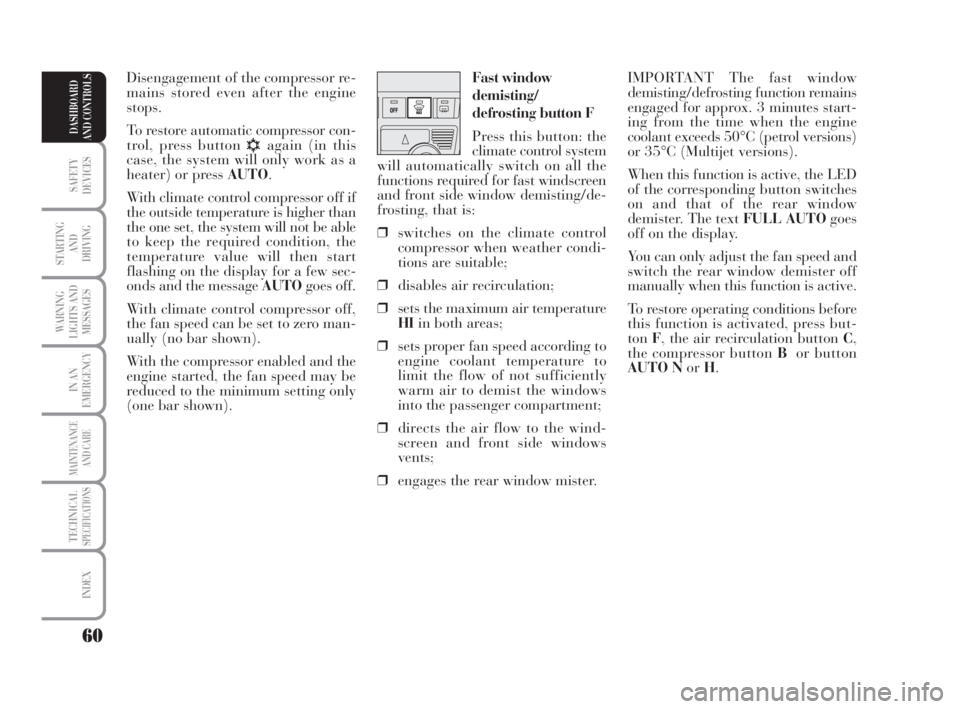
AUTO NorH. Fast window
demisting/
defrosting button F
Press this button: the
climate control system
will automatically switch on all the
functions required for fast windscreen
and front side window demisting/de-
frosting, that is:
❒switches on the climate control
compressor when weather condi-
tions are suitable;
❒disables air recirculation;
❒sets the maximum air temperature
HIin both areas;
❒sets proper fan speed according to
engine coolant temperature to
limit the flow of not sufficiently
warm air to demist the windows
into the passenger compartment;
❒directs the air flow to the wind-
screen and front side windows
vents;
❒engages the rear window mister.Disengagement of the compressor re-
mains stored even after the engine
stops.
To restore automatic compressor con-
trol, press button
√again (in this
case, the system will only work as a
heater) or press AUTO.
With climate control compressor off if
the outside temperature is higher than
the one set, the system will not be able
to keep the required condition, the
temperature value will then start
flashing on the display for a few sec-
onds and the message AUTOgoes off.
With climate control compressor off,
the fan speed can be set to zero man-
ually (no bar shown).
With the compressor enabled and the
engine started, the fan speed may be
reduced to the minimum setting only
(one bar shown).
038-094 MUSA 1ed GB 11-07-2008 14:10 Pagina 60
Page 62 of 218
61
SAFETY
DEVICES
STARTING
AND
DRIVING
WARNING
LIGHTS AND
MESSAGES
IN AN
EMERGENCY
MAINTENANCE
AND CARE
TECHNICALSPECIFICATIONS
INDEX
DASHBOARD
AND CONTROLS
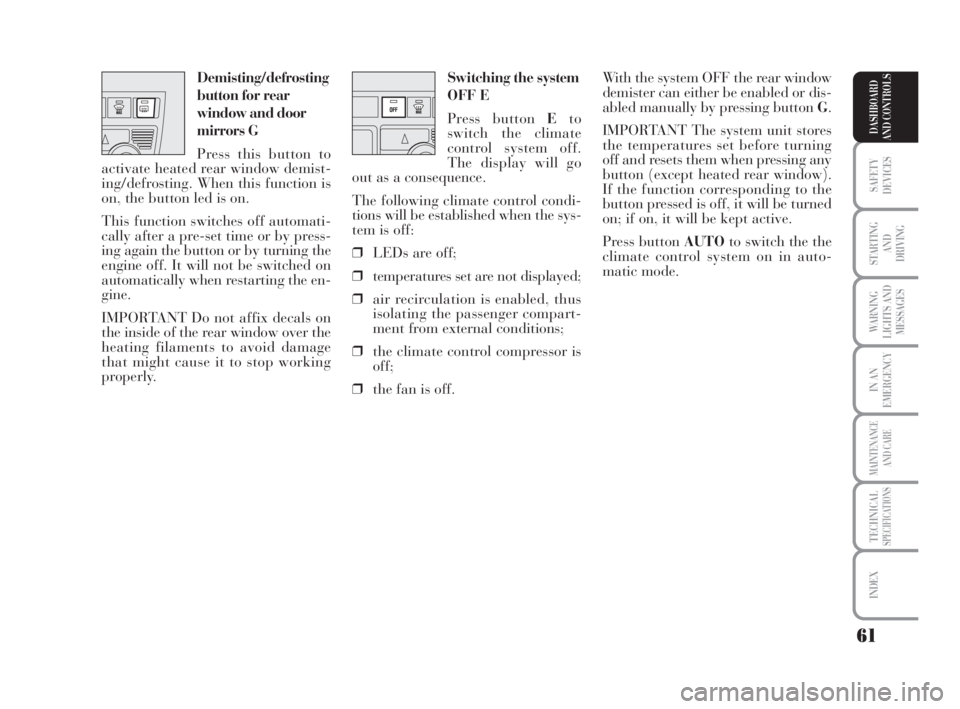
Switching the system
OFF E
Press button Eto
switch the climate
control system off.
The display will go
out as a consequence.
The following climate control condi-
tions will be established when the sys-
tem is off:
❒LEDs are off;
❒temperatures set are not displayed;
❒air recirculation is enabled, thus
isolating the passenger compart-
ment from external conditions;
❒the climate control compressor is
off;
❒the fan is off.With the system OFF the rear window
demister can either be enabled or dis-
abled manually by pressing button G.
IMPORTANT The system unit stores
the temperatures set before turning
off and resets them when pressing any
button (except heated rear window).
If the function corresponding to the
button pressed is off, it will be turned
on; if on, it will be kept active.
Press button AUTOto switch the the
climate control system on in auto-
matic mode. Demisting/defrosting
button for rear
window and door
mirrors G
Press this button to
activate heated rear window demist-
ing/defrosting. When this function is
on, the button led is on.
This function switches off automati-
cally after a pre-set time or by press-
ing again the button or by turning the
engine off. It will not be switched on
automatically when restarting the en-
gine.
IMPORTANT Do not affix decals on
the inside of the rear window over the
heating filaments to avoid damage
that might cause it to stop working
properly.
038-094 MUSA 1ed GB 11-07-2008 14:10 Pagina 61
Page 63 of 218
62
SAFETY
DEVICES
STARTING
AND
DRIVING
WARNING
LIGHTS AND
MESSAGES
IN AN
EMERGENCY
MAINTENANCE
AND CARE
TECHNICALSPECIFICATIONS
INDEX
DASHBOARD
AND CONTROLS
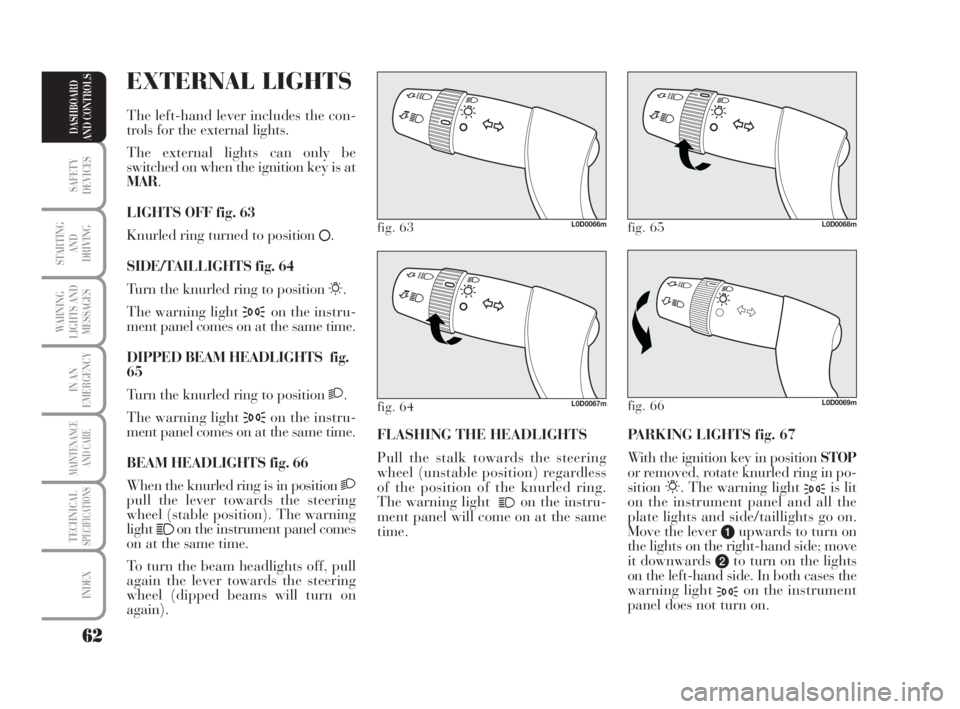
PARKING LIGHTS fig. 67
With the ignition key in position STOP
or removed, rotate knurled ring in po-
sition
6. The warning light 3is lit
on the instrument panel and all the
plate lights and side/taillights go on.
Move the lever
aupwards to turn on
the lights on the right-hand side; move
it downwards
bto turn on the lights
on the left-hand side. In both cases the
warning light
3on the instrument
panel does not turn on. FLASHING THE HEADLIGHTS
Pull the stalk towards the steering
wheel (unstable position) regardless
of the position of the knurled ring.
The warning light
1on the instru-
ment panel will come on at the same
time.
fig. 63L0D0066m
fig. 66L0D0069m
fig. 65L0D0068m
fig. 64L0D0067m
EXTERNAL LIGHTS
The left-hand lever includes the con-
trols for the external lights.
The external lights can only be
switched on when the ignition key is at
MAR.
LIGHTS OFF fig. 63
Knurled ring turned to position
å.
SIDE/TAILLIGHTS fig. 64
Turn the knurled ring to position
6.
The warning light
3on the instru-
ment panel comes on at the same time.
DIPPED BEAM HEADLIGHTS fig.
65
Turn the knurled ring to position
2.
The warning light
3on the instru-
ment panel comes on at the same time.
BEAM HEADLIGHTS fig. 66
When the knurled ring is in position
2pull the lever towards the steering
wheel (stable position). The warning
light
1on the instrument panel comes
on at the same time.
To turn the beam headlights off, pull
again the lever towards the steering
wheel (dipped beams will turn on
again).
038-094 MUSA 1ed GB 11-07-2008 14:10 Pagina 62
Page 64 of 218
63
SAFETY
DEVICES
STARTING
AND
DRIVING
WARNING
LIGHTS AND
MESSAGES
IN AN
EMERGENCY
MAINTENANCE
AND CARE
TECHNICALSPECIFICATIONS
INDEX
DASHBOARD
AND CONTROLS
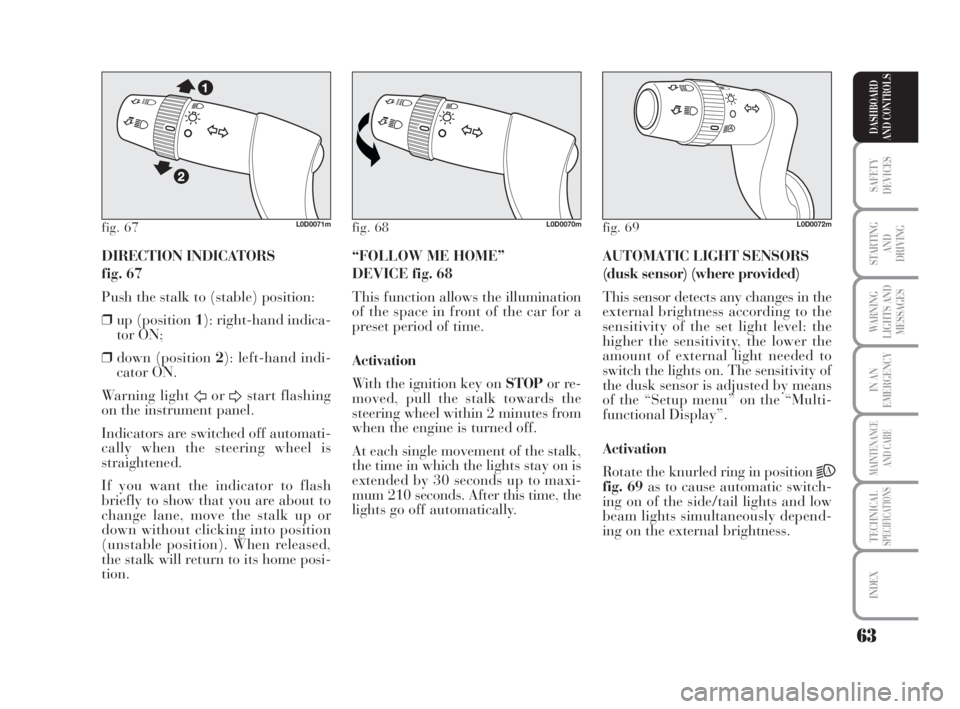
DIRECTION INDICATORS
fig. 67
Push the stalk to (stable) position:
❒up (position 1): right-hand indica-
tor ON;
❒down (position 2): left-hand indi-
cator ON.
Warning light
ForDstart flashing
on the instrument panel.
Indicators are switched off automati-
cally when the steering wheel is
straightened.
If you want the indicator to flash
briefly to show that you are about to
change lane, move the stalk up or
down without clicking into position
(unstable position). When released,
the stalk will return to its home posi-
tion.AUTOMATIC LIGHT SENSORS
(dusk sensor) (where provided)
This sensor detects any changes in the
external brightness according to the
sensitivity of the set light level: the
higher the sensitivity, the lower the
amount of external light needed to
switch the lights on. The sensitivity of
the dusk sensor is adjusted by means
of the “Setup menu” on the “Multi-
functional Display”.
Activation
Rotate the knurled ring in position
2A
fig. 69as to cause automatic switch-
ing on of the side/tail lights and low
beam lights simultaneously depend-
ing on the external brightness. “FOLLOW ME HOME”
DEVICE fig. 68
This function allows the illumination
of the space in front of the car for a
preset period of time.
Activation
With the ignition key on STOPor re-
moved, pull the stalk towards the
steering wheel within 2 minutes from
when the engine is turned off.
At each single movement of the stalk,
the time in which the lights stay on is
extended by 30 seconds up to maxi-
mum 210 seconds. After this time, the
lights go off automatically.
fig. 67L0D0071mfig. 68L0D0070mfig. 69L0D0072m
038-094 MUSA 1ed GB 11-07-2008 14:10 Pagina 63
Page 65 of 218
64
SAFETY
DEVICES
STARTING
AND
DRIVING
WARNING
LIGHTS AND
MESSAGES
IN AN
EMERGENCY
MAINTENANCE
AND CARE
TECHNICALSPECIFICATIONS
INDEX
DASHBOARD
AND CONTROLS
WINDOW
WASHING
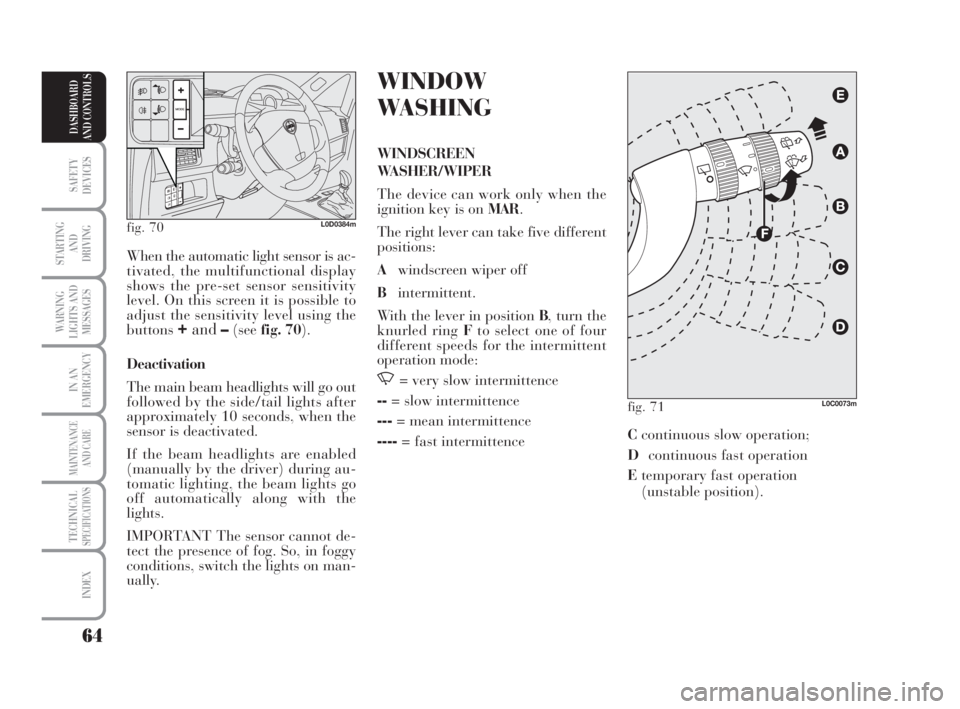
WINDSCREEN
WASHER/WIPER
The device can work only when the
ignition key is on MAR.
The right lever can take five different
positions:
Awindscreen wiper off
Bintermittent.
With the lever in position B, turn the
knurled ring Fto select one of four
different speeds for the intermittent
operation mode:
,= very slow intermittence
--= slow intermittence
---= mean intermittence
----= fast intermittence When the automatic light sensor is ac-
tivated, the multifunctional display
shows the pre-set sensor sensitivity
level. On this screen it is possible to
adjust the sensitivity level using the
buttons
+and–(seefig. 70).
Deactivation
The main beam headlights will go out
followed by the side/tail lights after
approximately 10 seconds, when the
sensor is deactivated.
If the beam headlights are enabled
(manually by the driver) during au-
tomatic lighting, the beam lights go
off automatically along with the
lights.
IMPORTANT The sensor cannot de-
tect the presence of fog. So, in foggy
conditions, switch the lights on man-
ually.
fig. 70L0D0384m
fig. 71L0C0073m
Ccontinuous slow operation;
Dcontinuous fast operation
Etemporary fast operation
(unstable position).
038-094 MUSA 1ed GB 11-07-2008 14:10 Pagina 64
Page 66 of 218
65
SAFETY
DEVICES
STARTING
AND
DRIVING
WARNING
LIGHTS AND
MESSAGES
IN AN
EMERGENCY
MAINTENANCE
AND CARE
TECHNICALSPECIFICATIONS
INDEX
DASHBOARD
AND CONTROLS
Operation in position Eis limited to
the time during which the lever is
kept in that position manually..
When released, the stalk will return
to position Aand the wiper will be
automatically stopped.
IMPORTANT Replace wiper blades
as specified in section “Car
maintenance”.RAIN SENSOR
(where provided)
The rain sensor is located behind the
driving mirror in contact with the
windscreen and has the purpose of
automatically adjust the frequency of
the windscreen wiper strokes as to the
rain intensity.
IMPORTANT Keep the window clean
in the sensor area.
Activation
Move the right lever down by one
click.
The activation of the rain sensor is
signalled by a control acquisition
“stroke”.
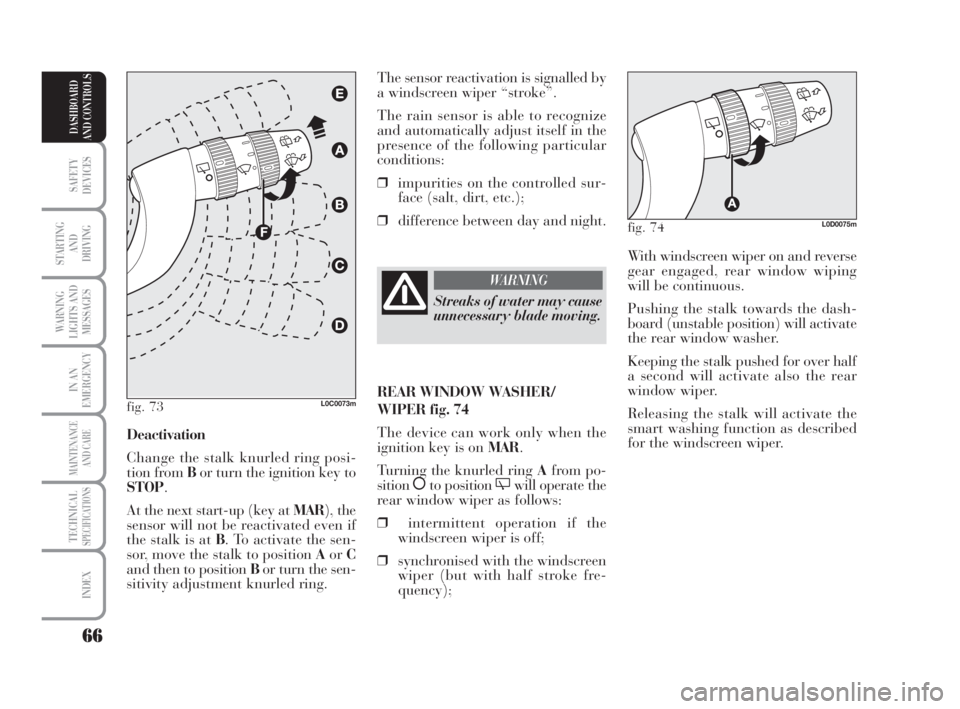
Turn the knurled ring F-fig. 73to in-
crease the rain sensor sensitivity.
The increase of the sensitivity of the
rain sensor is signalled by a control
and acquisition “stroke”.
By operating the windscreen washer
with the rain sensor enabled, a smart
washing cycle is carried out, without
the additional stroke after 5 seconds;
once completed, the sensor resumes its
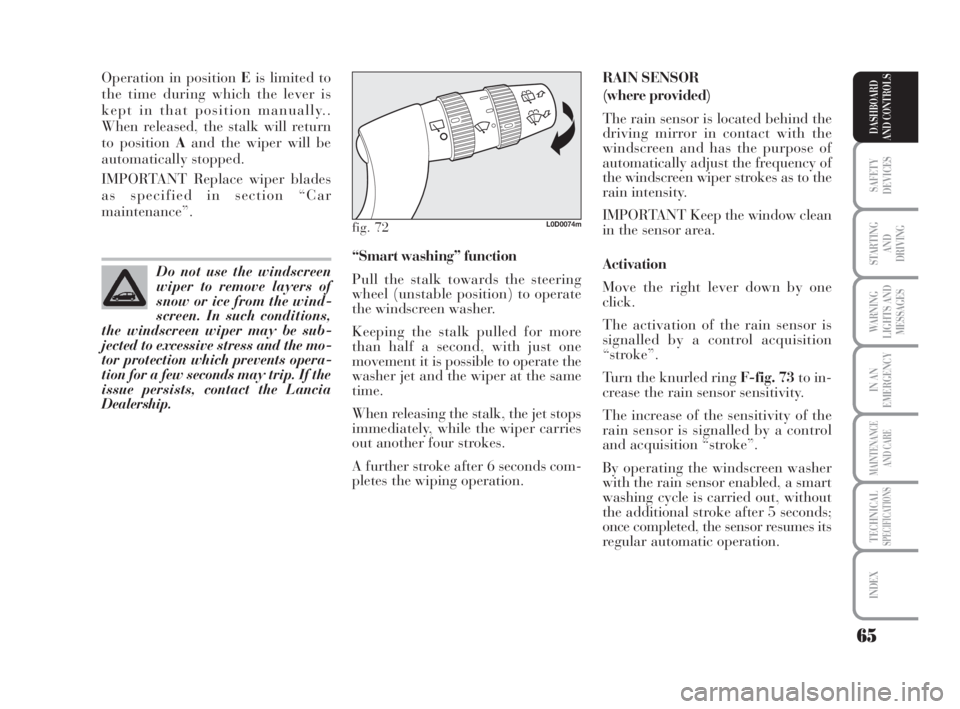
regular automatic operation. “Smart washing” function
Pull the stalk towards the steering
wheel (unstable position) to operate
the windscreen washer.
Keeping the stalk pulled for more
than half a second, with just one
movement it is possible to operate the
washer jet and the wiper at the same
time.
When releasing the stalk, the jet stops
immediately, while the wiper carries
out another four strokes.
A further stroke after 6 seconds com-
pletes the wiping operation. Do not use the windscreen
wiper to remove layers of
snow or ice from the wind-
screen. In such conditions,
the windscreen wiper may be sub-
jected to excessive stress and the mo-
tor protection which prevents opera-
tion for a few seconds may trip. If the
issue persists, contact the Lancia
Dealership.
fig. 72L0D0074m
038-094 MUSA 1ed GB 11-07-2008 14:10 Pagina 65
Page 67 of 218
66
SAFETY
DEVICES
STARTING
AND
DRIVING
WARNING
LIGHTS AND
MESSAGES
IN AN
EMERGENCY
MAINTENANCE
AND CARE
TECHNICALSPECIFICATIONS
INDEX
DASHBOARD
AND CONTROLS
With windscreen wiper on and reverse
gear engaged, rear window wiping
will be continuous.
Pushing the stalk towards the dash-
board (unstable position) will activate
the rear window washer.
Keeping the stalk pushed for over half
a second will activate also the rear
window wiper.
Releasing the stalk will activate the
smart washing function as described
for the windscreen wiper. The sensor reactivation is signalled by
a windscreen wiper “stroke”.
The rain sensor is able to recognize
and automatically adjust itself in the
presence of the following particular
conditions:
❒impurities on the controlled sur-
face (salt, dirt, etc.);
❒difference between day and night.
Deactivation
Change the stalk knurled ring posi-
tion from Bor turn the ignition key to
STOP.
At the next start-up (key at MAR), the
sensor will not be reactivated even if
the stalk is at B. To activate the sen-
sor, move the stalk to position AorC
and then to position Bor turn the sen-
sitivity adjustment knurled ring.
fig. 73L0C0073m
Streaks of water may cause
unnecessary blade moving.
WARNING
REAR WINDOW WASHER/
WIPER fig. 74
The device can work only when the
ignition key is on MAR.
Turning the knurled ring Afrom po-
sition
åto position 'will operate the
rear window wiper as follows:
❒intermittent operation if the
windscreen wiper is off;
❒synchronised with the windscreen
wiper (but with half stroke fre-
quency);
fig. 74L0D0075m
038-094 MUSA 1ed GB 11-07-2008 14:10 Pagina 66