key LAND ROVER FREELANDER 2001 Workshop Manual
[x] Cancel search | Manufacturer: LAND ROVER, Model Year: 2001, Model line: FREELANDER, Model: LAND ROVER FREELANDER 2001Pages: 1007, PDF Size: 23.47 MB
Page 13 of 1007

CONTENTS
10 CONTENTS
REAR AXLE & FINAL DRIVE ................................................................... 51-1
REPAIRS
Differential assembly ..................................................................................................................... 51-1
Cover - rear - differential ................................................................................................................. 51-2
Bush - differential mounting - front ................................................................................................. 51-3
Bush - differential mounting - rear ................................................................................................. 51-4
Oil seal - pinion .............................................................................................................................. 51-5
Oil seal - differential housing ......................................................................................................... 51-6
STEERING ................................................................................................ 57-1
ADJUSTMENTS
Power assisted steering (PAS) system - bleed............................................................................... 57-1
Cable - key interlock - adjust .......................................................................................................... 57-1
Front wheel alignment - check & adjust .......................................................................................... 57-2
Alignment - rear wheel - check & adjust ......................................................................................... 57-3
Power steering - pressure test ........................................................................................................ 57-4
REPAIRS
Power steering rack ........................................................................................................................ 57-5
Gaiter - PAS rack ............................................................................................................................ 57-8
Oil cooler - Td4 & K1.8 models ....................................................................................................... 57-9
Oil cooler - KV6 models .................................................................................................................. 57-10
Drive belt - K1.8 .............................................................................................................................. 57-11
Pump - steering - KV6 .................................................................................................................... 57-12
Pump - steering - K1.8 .................................................................................................................... 57-14
Pump - steering - Td4 ..................................................................................................................... 57-15
Nacelle - column ............................................................................................................................. 57-16
Column lock & ignition/starter switch assembly .............................................................................. 57-17
Cable - key interlock ....................................................................................................................... 57-18
Column assembly - inner & outer ................................................................................................... 57-19
Ball joint - track rod ......................................................................................................................... 57-23
Track rod......................................................................................................................................... 57-24
Steering wheel ................................................................................................................................ 57-25
FRONT SUSPENSION .............................................................................. 60-1
REPAIRS
Anti roll bar...................................................................................................................................... 60-1
Ball joint link - anti roll bar .............................................................................................................. 60-2
Mounting rubbers - anti roll bar - set .............................................................................................. 60-2
Bearing - hub ................................................................................................................................. 60-3
Damper .......................................................................................................................................... 60-7
Lower arm assembly ...................................................................................................................... 60-10
Rear beam ..................................................................................................................................... 60-13
Bush - lower arm - front .................................................................................................................. 60-15
Bush - lower arm - rear ................................................................................................................... 60-16
Page 20 of 1007

CONTENTS
CONTENTS 17
BODY SEALING MATERIALS ................................................................. 77-3-1
MATERIALS AND APPLICATIONS
........................................................................................................................................................ 77-3-1
APPROVED MATERIALS
........................................................................................................................................................ 77-3-3
APPLICATION EQUIPMENT
Application Equipment .................................................................................................................... 77-3-5
CORROSION PREVENTION AND SEALING .......................................... 77-4-1
CORROSION PREVENTION
Cavity wax treatment areas and injection holes - 3 door ................................................................ 77-4-1
Key to Figure, cavity wax treatment areas and injection holes - 3 door .......................................... 77-4-2
Sill cavity wax injection holes - 5 door ............................................................................................ 77-4-3
Door cavity wax treatment areas and injection hole - 5 door .......................................................... 77-4-4
Corrosion Prevention ...................................................................................................................... 77-4-5
SEALING
Underbody sealer treatment areas ................................................................................................. 77-4-7
Underbody sealer............................................................................................................................ 77-4-8
INTERNAL SEALING
Expanding foam acoustic seals ...................................................................................................... 77-4-27
Expanding foam acoustic seals ...................................................................................................... 77-4-28
LEAK DETECTION
Water Leaks .................................................................................................................................... 77-4-31
PAINTING ................................................................................................. 77-5-1
PANEL PROCEDURES
Panel Preparation ........................................................................................................................... 77-5-1
PAINT PROCEDURES
Paint preparation............................................................................................................................. 77-5-2
Page 28 of 1007
INTRODUCTION
01-3
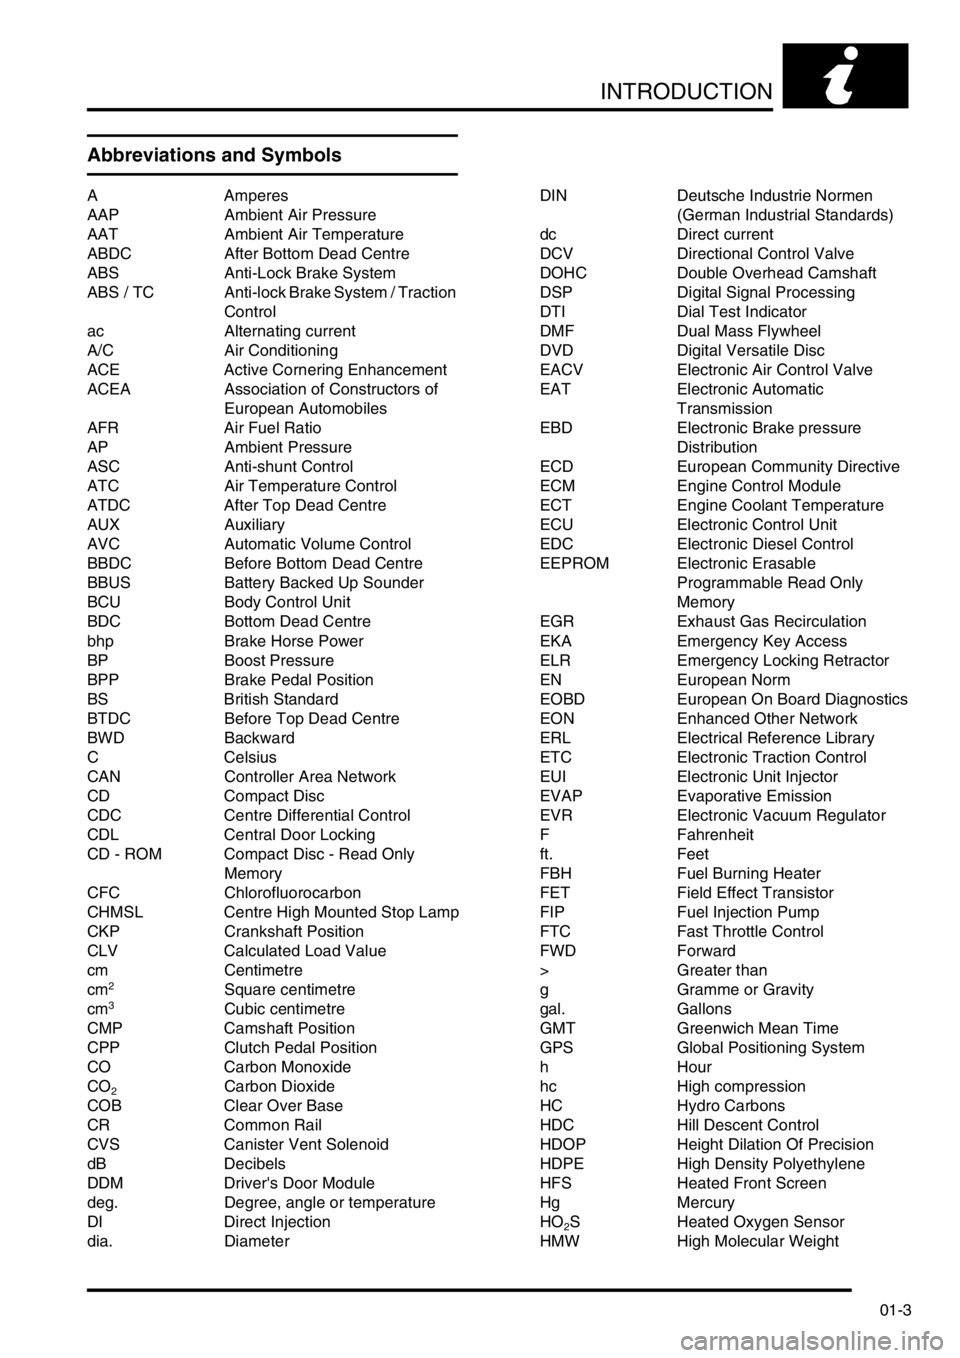
Abbreviations and Symbols
A Amperes
AAP Ambient Air Pressure
AAT Ambient Air Temperature
ABDC After Bottom Dead Centre
ABS Anti-Lock Brake System
ABS / TC Anti-lock Brake System / Traction
Control
ac Alternating current
A/C Air Conditioning
ACE Active Cornering Enhancement
ACEA Association of Constructors of
European Automobiles
AFR Air Fuel Ratio
AP Ambient Pressure
ASC Anti-shunt Control
ATC Air Temperature Control
ATDC After Top Dead Centre
AUX Auxiliary
AVC Automatic Volume Control
BBDC Before Bottom Dead Centre
BBUS Battery Backed Up Sounder
BCU Body Control Unit
BDC Bottom Dead Centre
bhp Brake Horse Power
BP Boost Pressure
BPP Brake Pedal Position
BS British Standard
BTDC Before Top Dead Centre
BWD Backward
C Celsius
CAN Controller Area Network
CD Compact Disc
CDC Centre Differential Control
CDL Central Door Locking
CD - ROM Compact Disc - Read Only
Memory
CFC Chlorofluorocarbon
CHMSL Centre High Mounted Stop Lamp
CKP Crankshaft Position
CLV Calculated Load Value
cm Centimetre
cm
2Square centimetre
cm3Cubic centimetre
CMP Camshaft Position
CPP Clutch Pedal Position
CO Carbon Monoxide
CO
2Carbon Dioxide
COB Clear Over Base
CR Common Rail
CVS Canister Vent Solenoid
dB Decibels
DDM Driver's Door Module
deg. Degree, angle or temperature
DI Direct Injection
dia. DiameterDIN Deutsche Industrie Normen
(German Industrial Standards)
dc Direct current
DCV Directional Control Valve
DOHC Double Overhead Camshaft
DSP Digital Signal Processing
DTI Dial Test Indicator
DMF Dual Mass Flywheel
DVD Digital Versatile Disc
EACV Electronic Air Control Valve
EAT Electronic Automatic
Transmission
EBD Electronic Brake pressure
Distribution
ECD European Community Directive
ECM Engine Control Module
ECT Engine Coolant Temperature
ECU Electronic Control Unit
EDC Electronic Diesel Control
EEPROM Electronic Erasable
Programmable Read Only
Memory
EGR Exhaust Gas Recirculation
EKA Emergency Key Access
ELR Emergency Locking Retractor
EN European Norm
EOBD European On Board Diagnostics
EON Enhanced Other Network
ERL Electrical Reference Library
ETC Electronic Traction Control
EUI Electronic Unit Injector
EVAP Evaporative Emission
EVR Electronic Vacuum Regulator
F Fahrenheit
ft. Feet
FBH Fuel Burning Heater
FET Field Effect Transistor
FIP Fuel Injection Pump
FTC Fast Throttle Control
FWD Forward
> Greater than
g Gramme or Gravity
gal. Gallons
GMT Greenwich Mean Time
GPS Global Positioning System
hHour
hc High compression
HC Hydro Carbons
HDC Hill Descent Control
HDOP Height Dilation Of Precision
HDPE High Density Polyethylene
HFS Heated Front Screen
Hg Mercury
HO
2S Heated Oxygen Sensor
HMW High Molecular Weight
Page 41 of 1007
GENERAL INFORMATION
03-10
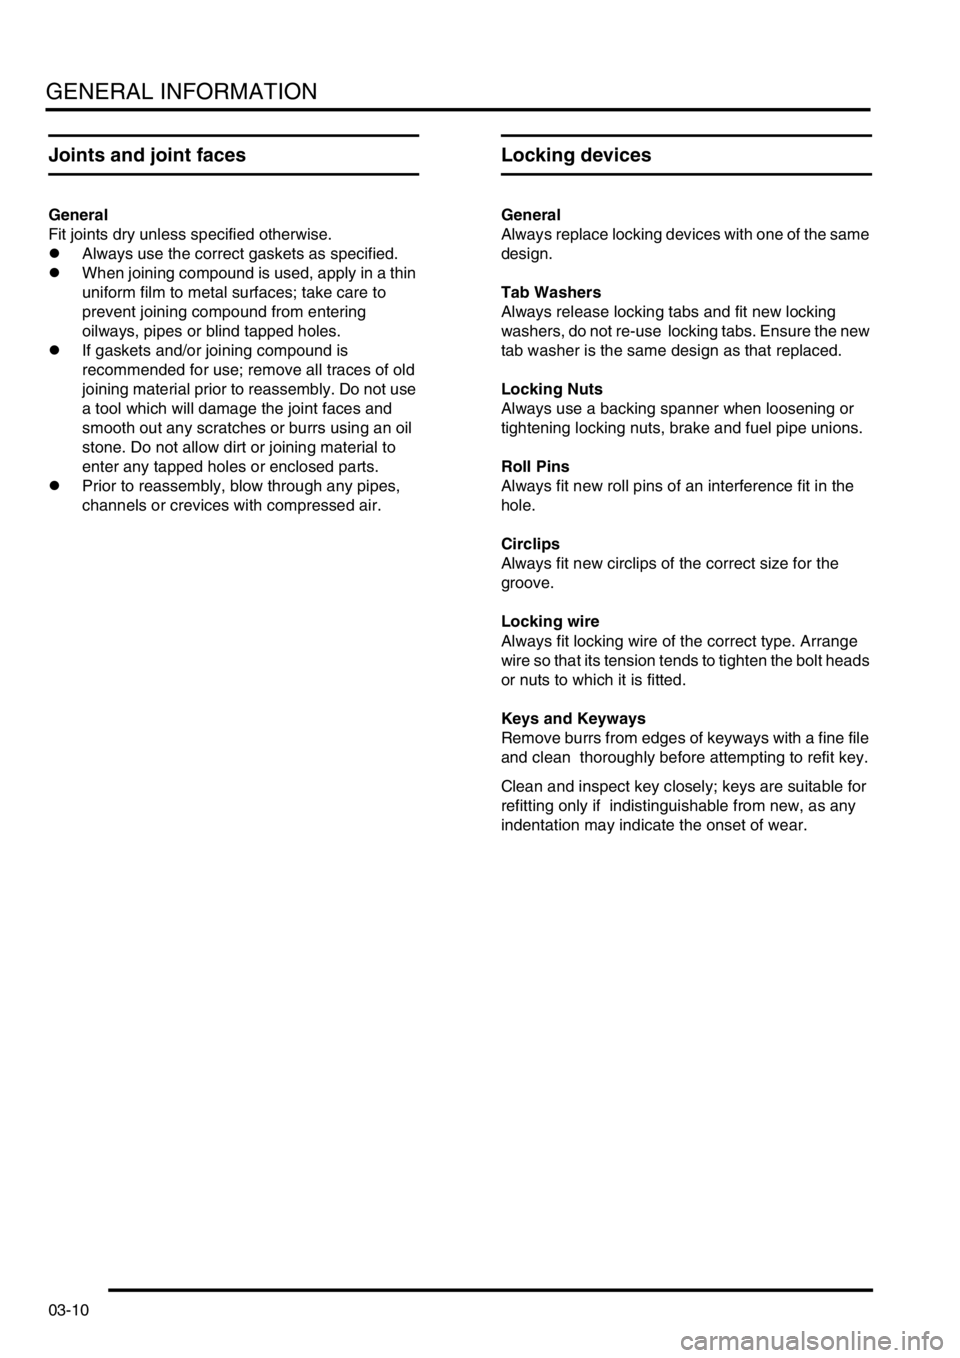
Joints and joint faces
General
Fit joints dry unless specified otherwise.
lAlways use the correct gaskets as specified.
lWhen joining compound is used, apply in a thin
uniform film to metal surfaces; take care to
prevent joining compound from entering
oilways, pipes or blind tapped holes.
lIf gaskets and/or joining compound is
recommended for use; remove all traces of old
joining material prior to reassembly. Do not use
a tool which will damage the joint faces and
smooth out any scratches or burrs using an oil
stone. Do not allow dirt or joining material to
enter any tapped holes or enclosed parts.
lPrior to reassembly, blow through any pipes,
channels or crevices with compressed air.
Locking devices
General
Always replace locking devices with one of the same
design.
Tab Washers
Always release locking tabs and fit new locking
washers, do not re-use locking tabs. Ensure the new
tab washer is the same design as that replaced.
Locking Nuts
Always use a backing spanner when loosening or
tightening locking nuts, brake and fuel pipe unions.
Roll Pins
Always fit new roll pins of an interference fit in the
hole.
Circlips
Always fit new circlips of the correct size for the
groove.
Locking wire
Always fit locking wire of the correct type. Arrange
wire so that its tension tends to tighten the bolt heads
or nuts to which it is fitted.
Keys and Keyways
Remove burrs from edges of keyways with a fine file
and clean thoroughly before attempting to refit key.
Clean and inspect key closely; keys are suitable for
refitting only if indistinguishable from new, as any
indentation may indicate the onset of wear.
Page 52 of 1007
GENERAL INFORMATION
03-21
It should be noted that these precautions are not
restricted to operations performed when servicing
the SRS system, the same care should be exercised
when working on ancillary systems and components
located in the vicinity of SRS components; these
include but are not limited to:
lSteering system – steering wheel airbag,
rotary coupler.
lFront fascia – passenger front airbag (where
fitted); SRS DCU behind centre console, on
transmission tunnel under the HeVAC system.
lFront seats – seat belt pre-tensioners, integral
with seat belt buckle assembly.
lElectrical system – SRS harnesses, link leads
and connectors.
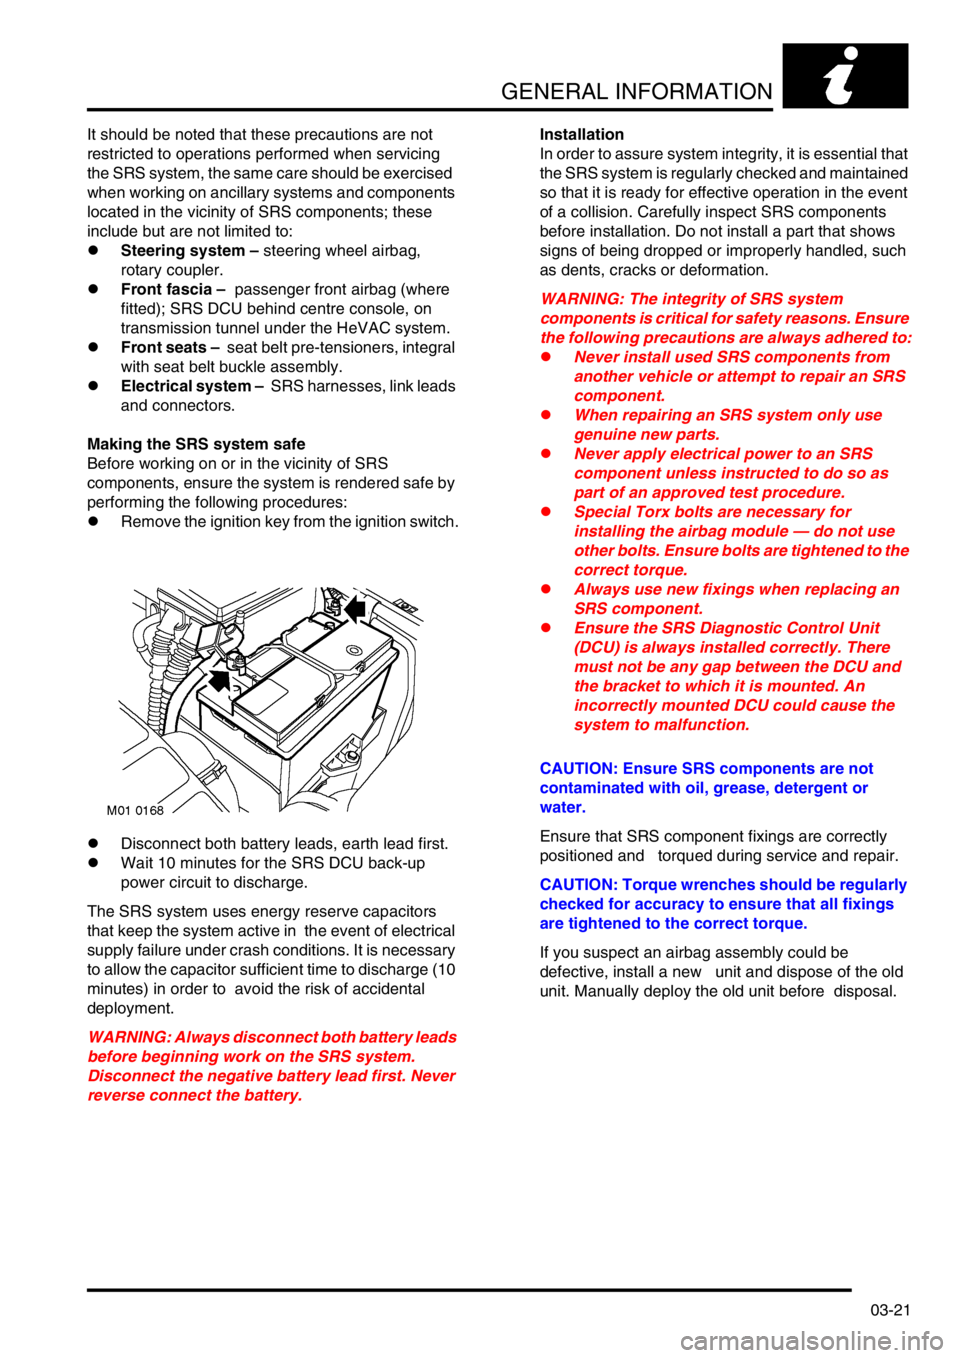
Making the SRS system safe
Before working on or in the vicinity of SRS
components, ensure the system is rendered safe by
performing the following procedures:
lRemove the ignition key from the ignition switch.
lDisconnect both battery leads, earth lead first.
lWait 10 minutes for the SRS DCU back-up
power circuit to discharge.
The SRS system uses energy reserve capacitors
that keep the system active in the event of electrical
supply failure under crash conditions. It is necessary
to allow the capacitor sufficient time to discharge (10
minutes) in order to avoid the risk of accidental
deployment.
WARNING: Always disconnect both battery leads
before beginning work on the SRS system.
Disconnect the negative battery lead first. Never
reverse connect the battery.Installation
In order to assure system integrity, it is essential that
the SRS system is regularly checked and maintained
so that it is ready for effective operation in the event
of a collision. Carefully inspect SRS components
before installation. Do not install a part that shows
signs of being dropped or improperly handled, such
as dents, cracks or deformation.
WARNING: The integrity of SRS system
components is critical for safety reasons. Ensure
the following precautions are always adhered to:
lNever install used SRS components from
another vehicle or attempt to repair an SRS
component.
lWhen repairing an SRS system only use
genuine new parts.
lNever apply electrical power to an SRS
component unless instructed to do so as
part of an approved test procedure.
lSpecial Torx bolts are necessary for
installing the airbag module — do not use
other bolts. Ensure bolts are tightened to the
correct torque.
lAlways use new fixings when replacing an
SRS component.
lEnsure the SRS Diagnostic Control Unit
(DCU) is always installed correctly. There
must not be any gap between the DCU and
the bracket to which it is mounted. An
incorrectly mounted DCU could cause the
system to malfunction.
CAUTION: Ensure SRS components are not
contaminated with oil, grease, detergent or
water.
Ensure that SRS component fixings are correctly
positioned and torqued during service and repair.
CAUTION: Torque wrenches should be regularly
checked for accuracy to ensure that all fixings
are tightened to the correct torque.
If you suspect an airbag assembly could be
defective, install a new unit and dispose of the old
unit. Manually deploy the old unit before disposal.
Page 105 of 1007

TORQUE WRENCH SETTINGS
06-2
Engine – Td4
TORQUE DESCRIPTION METRIC IMPERIAL
Acoustic cover to engine 8 Nm 6 lbf.ft
Ancillary drive belt jockey pulley Allen bolt
*24 Nm 18 lbf.ft
Ancillary drive belt tensioner arm nut 10 Nm 7.5 lbf.ft
Big end bearing cap bolts:
⇒ Stage 15 Nm 3.5 lbf.ft
⇒ Stage 225 Nm 18 lbf.ft
⇒ Stage 3+70°+70°
Camshaft bearing cap bolts
† 10 Nm 7.5 lbf.ft
Camshaft cover bolts
† 10 Nm 7.5 lbf.ft
Camshaft sprocket retaining screw:
⇒ Stage 120 Nm 15 lbf.ft
⇒ Stage 2+35°+35°
Chain lubrication jet bolt 10 Nm 7.5 lbf.ft
Coolant rail to exhaust manifold bolts 20 Nm 15 lbf.ft
Coolant rail to exhaust manifold bolts 8 Nm 6 lbf.ft
Crankshaft pulley:
⇒ Stage 1100 Nm 74 lbf.ft
⇒ Stage 2+60 °+60 °
⇒ Stage 3+60 °+60 °
⇒ Stage 4+30 °+30 °
Crankshaft rear oil seal housing:
⇒ M6 bolts10 Nm 7.5 lbf.ft
⇒ M8 bolts22 Nm 16 lbf.ft
Cylinder block reinforcing plate 22 Nm 16 lbf.ft
Cylinder head bolts: (Stages 1 to 5 relate to bolts 1 to 11. Stage 6 is for bolt 12 only.)
⇒ Stage 1
†80 Nm 59 lbf.ft
⇒ Stage 2 - loosen all bolts
†-1/2 turn -1/2 turn
⇒ Stage 3
†50 Nm 37 lbf.ft
⇒ Stage 4
†+90°+90°
⇒ Stage 5
†+90°+90°
⇒ Stage 6 – tighten 41 mm bolt in position 12 110 Nm 81 lbf.ft
Cylinder head to timing cover Allen screws 15 Nm 11 lbf.ft
Dipstick tube to oil filter housing bolt 10 Nm 7.5 lbf.ft
Drive plate to crankshaft bolts
† 115 Nm 85 lbf.ft
EGR cooler to cylinder head and lifting bracket bolts 25 Nm 18 lbf.ft
Engine breather pipe to air cleaner housing bolt 10 Nm 7.5 lbf.ft
Engine lifting eye bolts 20 Nm 15 lbf.ft
Engine mounting bracket assembly to engine bolts 100 Nm 74 lbf.ft
Engine mounting bracket to hydramount nut 85 Nm 63 lbf.ft
Engine lower steady bracket bolts:
⇒ M1045 Nm 33 lbf.ft
⇒ M1250 Nm 37 lbf.ft
Engine steady mounting bolt 100 Nm 74 lbf.ft
Exhaust manifold to cylinder head nuts 24 Nm 18 lbf.ft
Flywheel to crankshaft bolts
† 115 Nm 85 lbf.ft
Fuel pipe bracket to oil filter housing bolt 10 Nm 7.5 lbf.ft
Fuel pipe union nuts 30 Nm 22 lbf.ft
Fuel pump drive chain lower guide Allen bolt 24 Nm 18 lbf.ft
Page 128 of 1007
TORQUE WRENCH SETTINGS
06-25
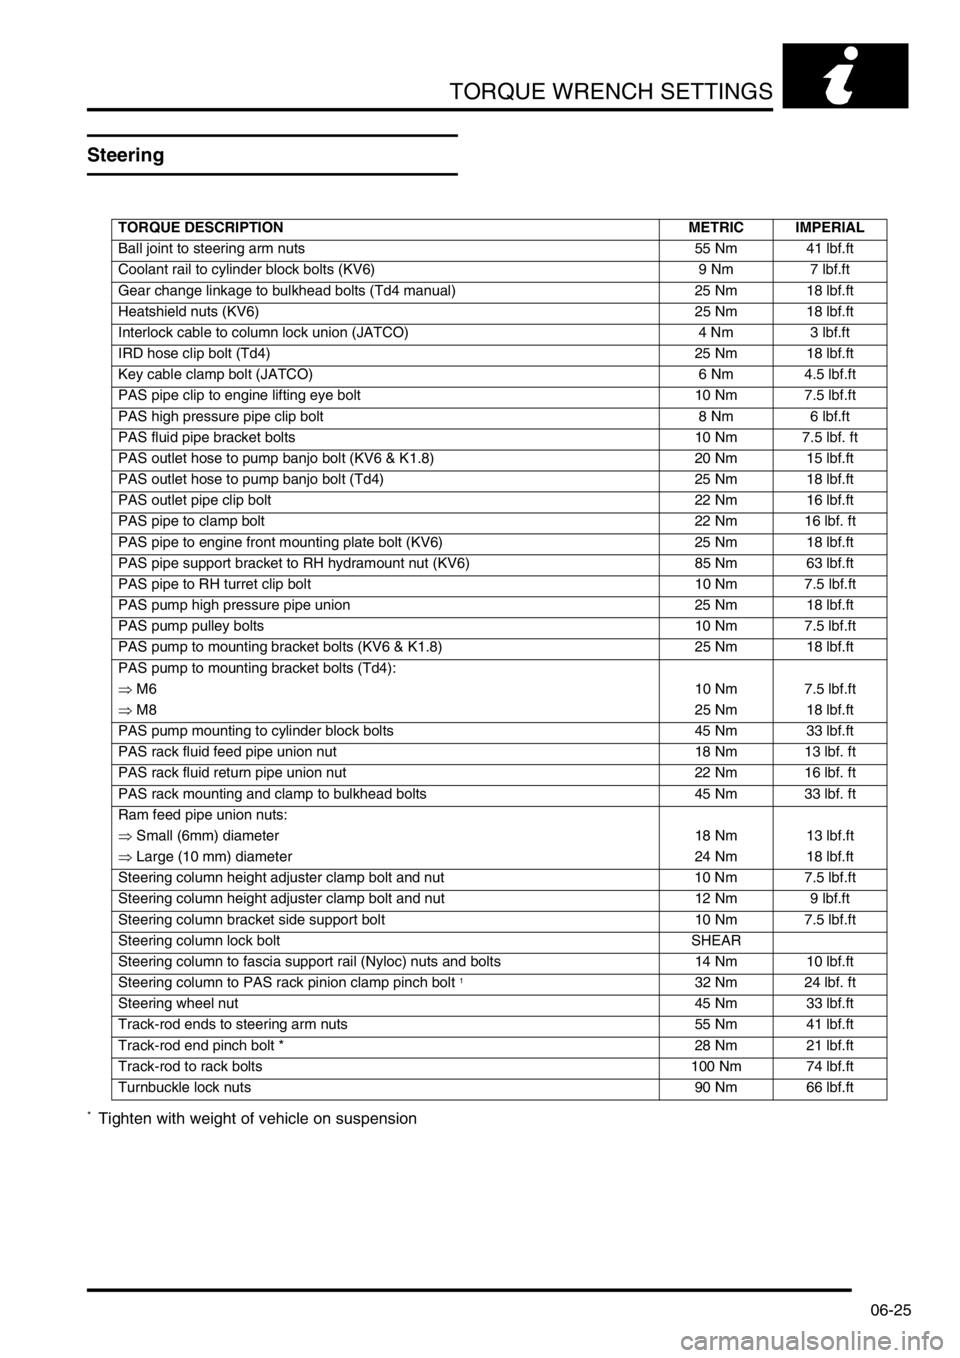
Steering
* Tighten with weight of vehicle on suspension
TORQUE DESCRIPTION METRIC IMPERIAL
Ball joint to steering arm nuts 55 Nm 41 lbf.ft
Coolant rail to cylinder block bolts (KV6) 9 Nm 7 lbf.ft
Gear change linkage to bulkhead bolts (Td4 manual) 25 Nm 18 lbf.ft
Heatshield nuts (KV6) 25 Nm 18 lbf.ft
Interlock cable to column lock union (JATCO) 4 Nm 3 lbf.ft
IRD hose clip bolt (Td4) 25 Nm 18 lbf.ft
Key cable clamp bolt (JATCO) 6 Nm 4.5 lbf.ft
PAS pipe clip to engine lifting eye bolt 10 Nm 7.5 lbf.ft
PAS high pressure pipe clip bolt 8 Nm 6 lbf.ft
PAS fluid pipe bracket bolts 10 Nm 7.5 lbf. ft
PAS outlet hose to pump banjo bolt (KV6 & K1.8) 20 Nm 15 lbf.ft
PAS outlet hose to pump banjo bolt (Td4) 25 Nm 18 lbf.ft
PAS outlet pipe clip bolt 22 Nm 16 lbf.ft
PAS pipe to clamp bolt 22 Nm 16 lbf. ft
PAS pipe to engine front mounting plate bolt (KV6) 25 Nm 18 lbf.ft
PAS pipe support bracket to RH hydramount nut (KV6) 85 Nm 63 lbf.ft
PAS pipe to RH turret clip bolt 10 Nm 7.5 lbf.ft
PAS pump high pressure pipe union 25 Nm 18 lbf.ft
PAS pump pulley bolts 10 Nm 7.5 lbf.ft
PAS pump to mounting bracket bolts (KV6 & K1.8) 25 Nm 18 lbf.ft
PAS pump to mounting bracket bolts (Td4):
⇒ M610 Nm 7.5 lbf.ft
⇒ M825 Nm 18 lbf.ft
PAS pump mounting to cylinder block bolts 45 Nm 33 lbf.ft
PAS rack fluid feed pipe union nut 18 Nm 13 lbf. ft
PAS rack fluid return pipe union nut 22 Nm 16 lbf. ft
PAS rack mounting and clamp to bulkhead bolts 45 Nm 33 lbf. ft
Ram feed pipe union nuts:
⇒ Small (6mm) diameter 18 Nm 13 lbf.ft
⇒ Large (10 mm) diameter 24 Nm 18 lbf.ft
Steering column height adjuster clamp bolt and nut 10 Nm 7.5 lbf.ft
Steering column height adjuster clamp bolt and nut 12 Nm 9 lbf.ft
Steering column bracket side support bolt 10 Nm 7.5 lbf.ft
Steering column lock bolt SHEAR
Steering column to fascia support rail (Nyloc) nuts and bolts 14 Nm 10 lbf.ft
Steering column to PAS rack pinion clamp pinch bolt
132 Nm 24 lbf. ft
Steering wheel nut 45 Nm 33 lbf.ft
Track-rod ends to steering arm nuts 55 Nm 41 lbf.ft
Track-rod end pinch bolt * 28 Nm 21 lbf.ft
Track-rod to rack bolts 100 Nm 74 lbf.ft
Turnbuckle lock nuts 90 Nm 66 lbf.ft
Page 141 of 1007
LIFTING AND TOWING
08-2
Raising the front of a vehicle
Position the cup of the hydraulic arm under the
centre of the front body crossmember assembly.
Use jack to raise front road wheels to enable safety
stands to be installed under the front end of each
longitudinal member.
Carefully lower jack until vehicle sits securely on
safety stands.
Before working on the underside of a vehicle re-
check the stability of the vehicle on the stands.
Use the reverse procedure when removing a vehicle
from stands.
NOTE: For some repair operations it may be
necessary to use a jack to support the engine under
the sump. In this case, a block of wood should be
used on the jack to protect the sump.
Raising the rear of a vehicle
Position cup of hydraulic arm under the centre of the
rear subframe crossmember at the position
identified by the embossed arrows.
Use jack to raise rear road wheels to enable safety
stands to be installed under the rear ends of the
body longitudinal members.
Carefully lower jack until vehicle sits securely on
safety stands.
Before working on the underside of a vehicle, re-
check the stability of the vehicle on the stands.
Use the reverse procedure when removing a vehicle
from stands.
Wheel-free lift
Locate the lifting pads under the ends of the body
longitudinal members. Raise the ramp to support the
weight of the vehicle, ensure the vehicle is secure on
the lifting pads, then raise the ramp to the required
height.
Towing
General
The vehicle has permanent four wheel drive. The
following instructions must be adhered to:
Towing the vehicle on all four wheels with driver
operating steering and brakes
lTurn ignition key to position '1' to release
steering lock and then to position 'II' to enable
the brake lights, wipers and direction indicators
to be operated, if necessary.
l Select neutral in gearbox and ensure HDC (hill
descent control) is deselected.
lSecure tow rope, chain or cable to towing eye.
lRelease the parking brake.
CAUTION: The brake servo and power assisted
steering system will not be functional without the
engine running. Greater pedal pressure will be
required to apply the brakes and the steering
system will require greater effort to turn the front
road wheels. The vehicle tow connection should
only be used under normal road conditions,
'snatch' recovery should be avoided.
Suspended tow by breakdown vehicle
Mark propeller shaft drive flanges and mating flanges
with identification lines to enable the propeller shaft
to be refitted in its original position.
Remove the propeller shaft fixings then remove the
shaft from the vehicle.
CAUTION: To prevent vehicle damage, rear
propeller shaft MUST BE removed.
Page 142 of 1007
LIFTING AND TOWING
08-3
If the front of the vehicle is to be trailed, turn ignition
key to position 'I' to release steering lock.
WARNING: Do not turn the starter switch to
position '0' or remove the ignition key while the
vehicle is being towed.
CAUTION: If it is considered unsafe to turn the
starter switch to position '1' due to accident
damage or an electrical fault; disconnect the
battery before turning the ignition switch.
CAUTION: The steering wheel and/or linkage
must be secured in a straight ahead position. DO
NOT use the steering lock mechanism for this
purpose.
CAUTION: Under no circumstances should the
vehicle be towed or recovered by means of
lashing to the rear subframe. Serious damage to
the subframe and body could result.
CAUTION: Only use the rear towing eye for
towing another vehicle.
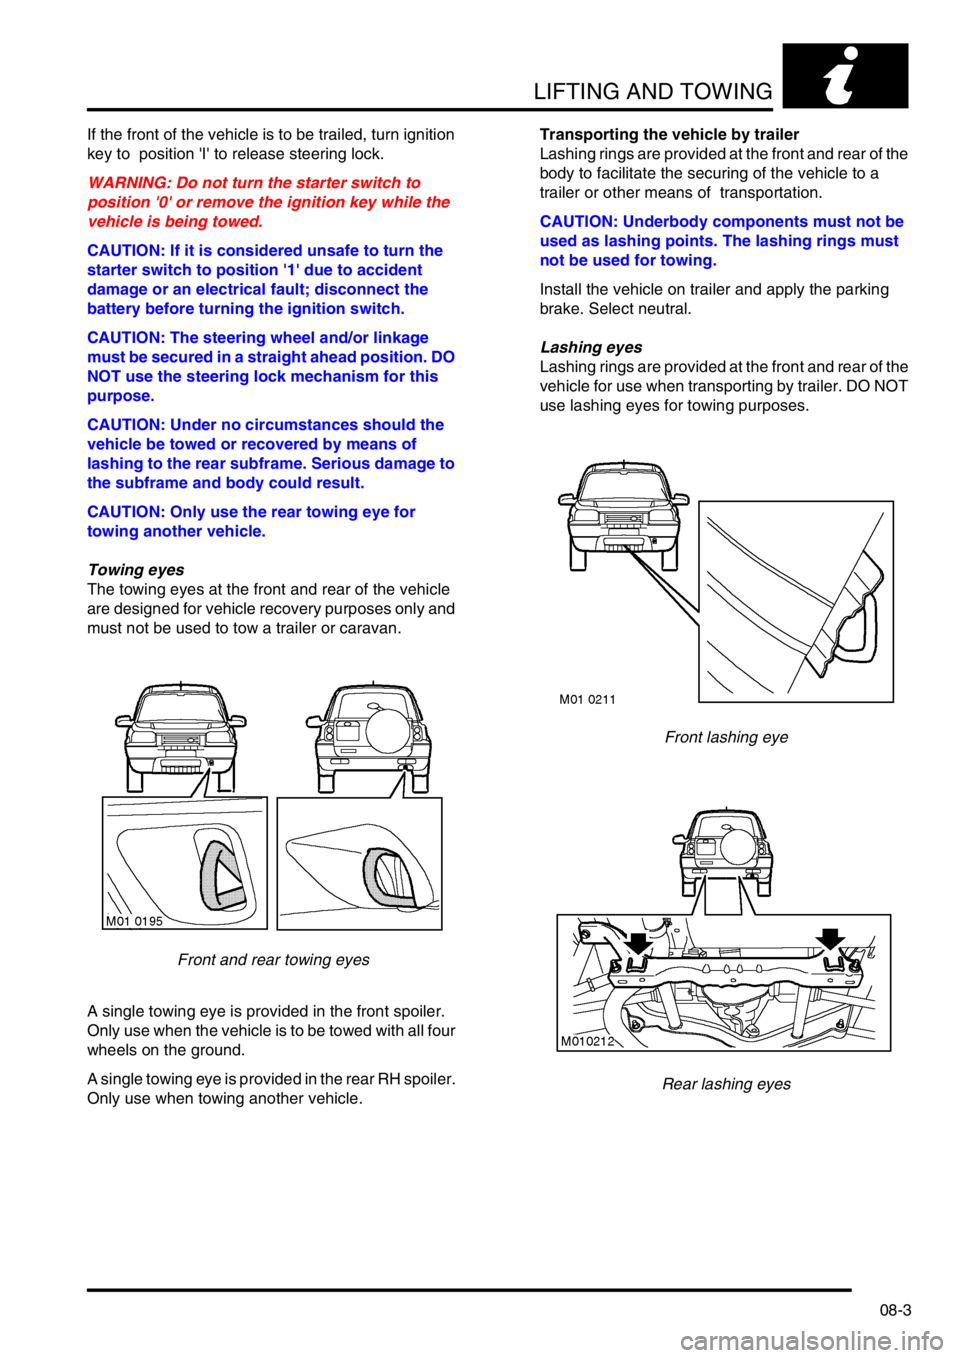
Towing eyes
The towing eyes at the front and rear of the vehicle
are designed for vehicle recovery purposes only and
must not be used to tow a trailer or caravan.
Front and rear towing eyes
A single towing eye is provided in the front spoiler.
Only use when the vehicle is to be towed with all four
wheels on the ground.
A single towing eye is provided in the rear RH spoiler.
Only use when towing another vehicle.Transporting the vehicle by trailer
Lashing rings are provided at the front and rear of the
body to facilitate the securing of the vehicle to a
trailer or other means of transportation.
CAUTION: Underbody components must not be
used as lashing points. The lashing rings must
not be used for towing.
Install the vehicle on trailer and apply the parking
brake. Select neutral.
Lashing eyes
Lashing rings are provided at the front and rear of the
vehicle for use when transporting by trailer. DO NOT
use lashing eyes for towing purposes.
Front lashing eye
Rear lashing eyes
Page 153 of 1007
MAINTENANCE
10-6 MAINTENANCE
Alarm Handset Battery
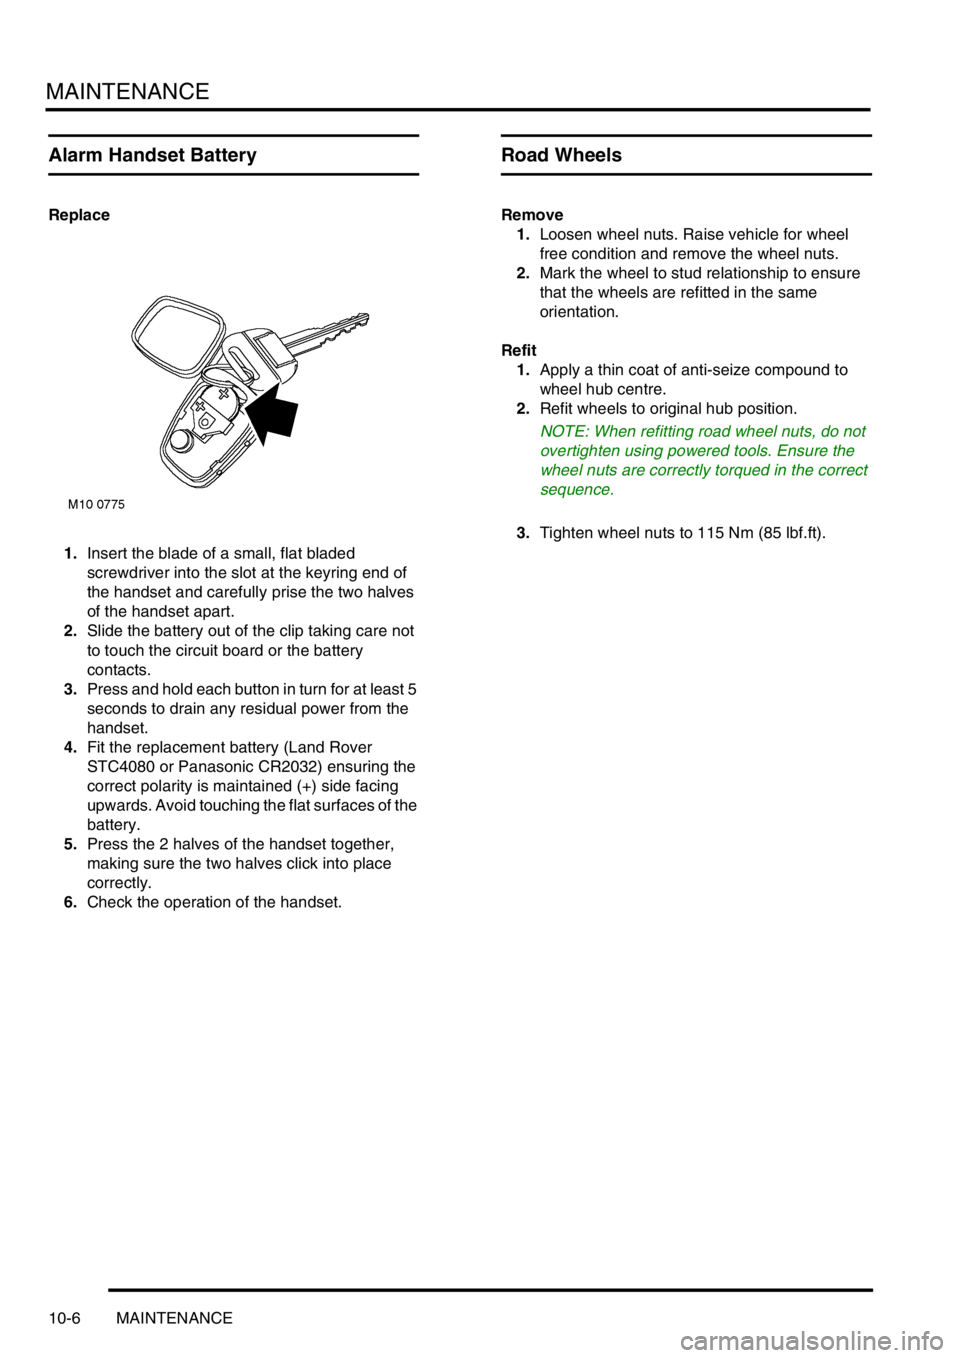
Replace
1.Insert the blade of a small, flat bladed
screwdriver into the slot at the keyring end of
the handset and carefully prise the two halves
of the handset apart.
2.Slide the battery out of the clip taking care not
to touch the circuit board or the battery
contacts.
3.Press and hold each button in turn for at least 5
seconds to drain any residual power from the
handset.
4.Fit the replacement battery (Land Rover
STC4080 or Panasonic CR2032) ensuring the
correct polarity is maintained (+) side facing
upwards. Avoid touching the flat surfaces of the
battery.
5.Press the 2 halves of the handset together,
making sure the two halves click into place
correctly.
6.Check the operation of the handset.
Road Wheels
Remove
1.Loosen wheel nuts. Raise vehicle for wheel
free condition and remove the wheel nuts.
2.Mark the wheel to stud relationship to ensure
that the wheels are refitted in the same
orientation.
Refit
1.Apply a thin coat of anti-seize compound to
wheel hub centre.
2.Refit wheels to original hub position.
NOTE: When refitting road wheel nuts, do not
overtighten using powered tools. Ensure the
wheel nuts are correctly torqued in the correct
sequence.
3.Tighten wheel nuts to 115 Nm (85 lbf.ft).