LAND ROVER FRELANDER 2 2006 Repair Manual
Manufacturer: LAND ROVER, Model Year: 2006, Model line: FRELANDER 2, Model: LAND ROVER FRELANDER 2 2006Pages: 3229, PDF Size: 78.5 MB
Page 1301 of 3229
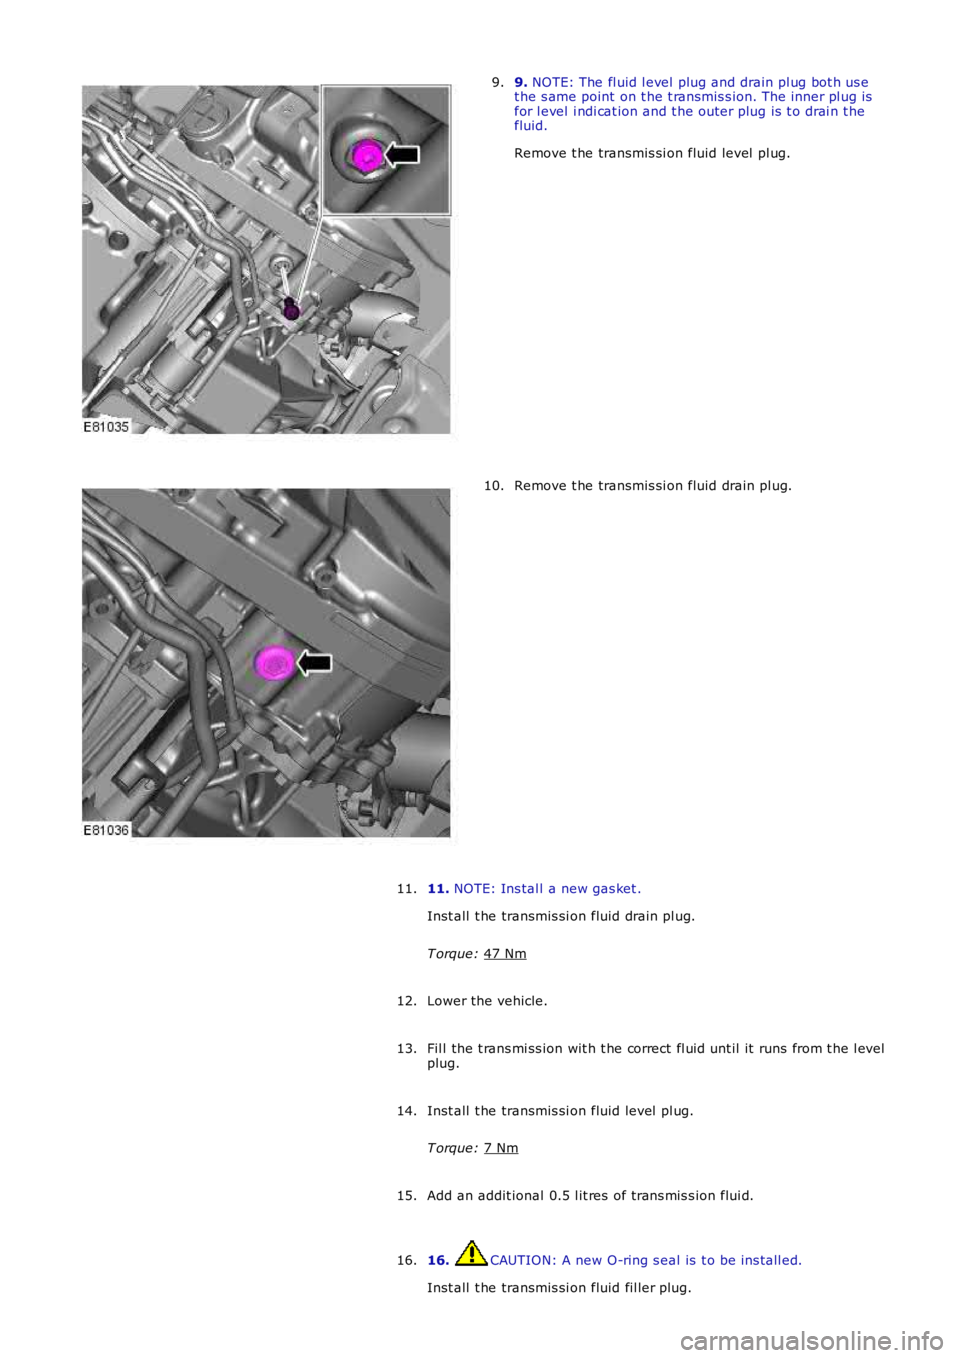
9.
NOTE: The fl uid l evel plug and drain pl ug bot h us e
t he s ame point on t he t ransmis s ion. The inner pl ug is
for l evel i ndi cat ion and t he outer plug is t o drai n t he
fluid.
Remove t he transmis si on fluid level pl ug.
9. Remove t he transmis si on fluid drain pl ug.
10.
11. NOTE: Ins tal l a new gas ket .
Inst all t he transmis si on fluid drain pl ug.
T orque: 47 Nm 11.
Lower the vehicle.
12.
Fil l the t rans mi ss ion wit h t he correct fl uid unt il it runs from t he l evel
plug.
13.
Inst all t he transmis si on fluid level pl ug.
T orque: 7 Nm 14.
Add an addit ional 0.5 l it res of t rans mis s ion flui d.
15.
16. CAUTION: A new O-ring s eal is t o be ins tall ed.
Inst all t he transmis si on fluid fil ler plug.
16.
Page 1302 of 3229
T orque:
40 Nm Inst all t he air cleaner hous ing.
Refer t o: Air Cleaner (303-12B Intake Ai r Dis tribut ion and Fil tering -
TD4 2.2L Dies el, Removal and Inst all ati on).
17.
Connect t he Land Rover approved diagnos t ic equipment. St art and
run the engine.
18.
Us ing t he diagnos ti c equi pment t o moni tor t he transmis s ion fluid
t emperature, al low the t emperat ure t o reach 60 degrees C.
19.
Move t he s el ect or lever from 'P' t hrough all t he gear pos it ions ,
pausi ng in each gear posi ti on for 2-3 s econds and ret urn to t he 'P'
pos it ion.
20.
Rais e t he vehicle.
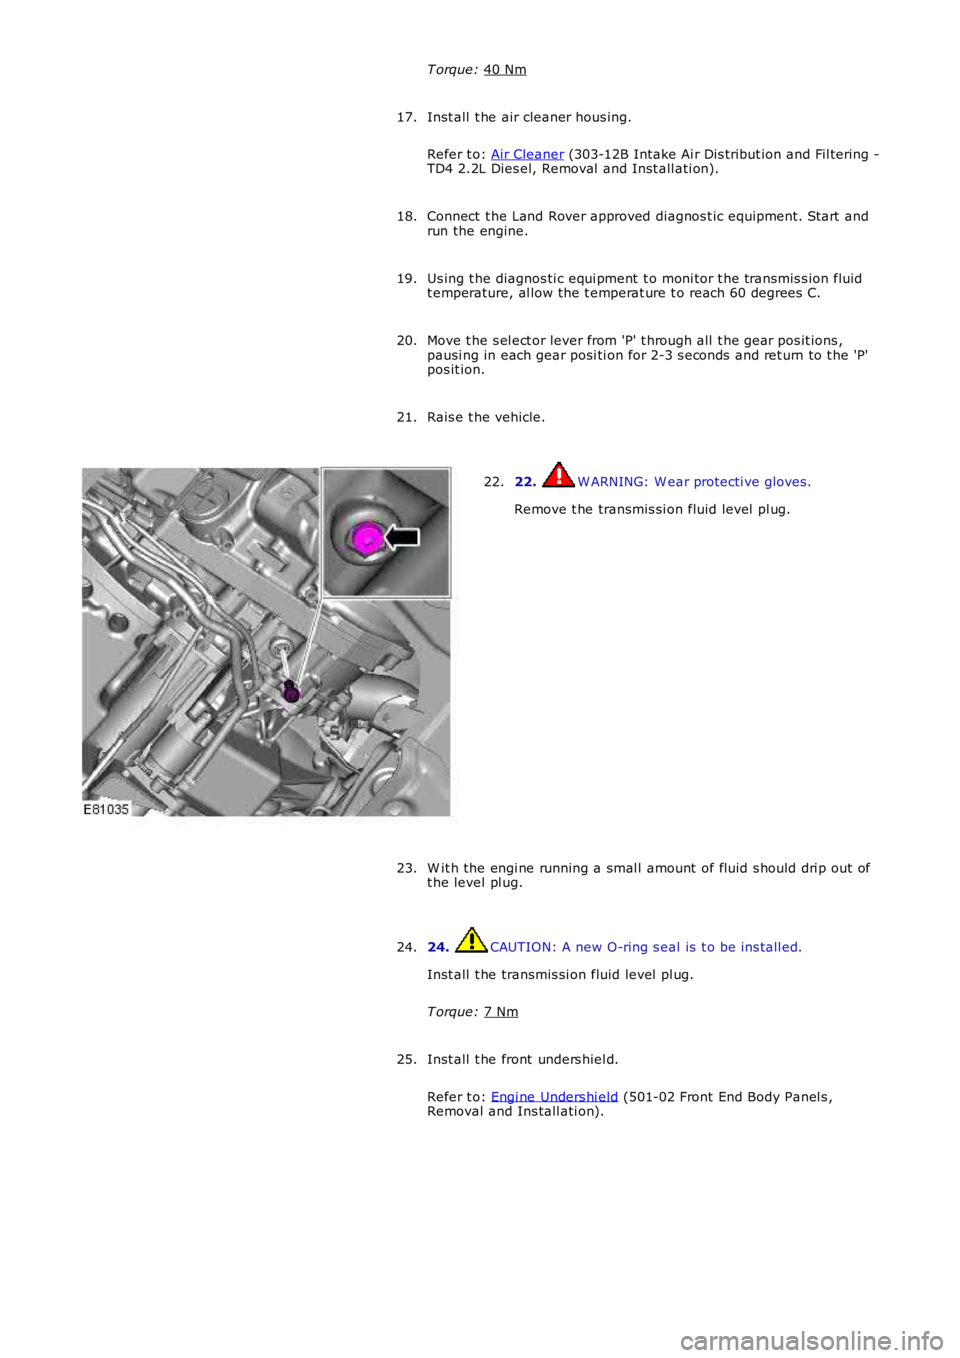
21. 22. W ARNING: W ear protecti ve gloves.
Remove t he transmis si on fluid level pl ug.
22.
W it h the engi ne running a smal l amount of fluid s hould dri p out of
t he level pl ug.
23.
24. CAUTION: A new O-ring s eal is t o be ins tall ed.
Inst all t he transmis si on fluid level pl ug.
T orque: 7 Nm 24.
Inst all t he front unders hiel d.
Refer t o: Engi ne Unders hi eld (501-02 Front End Body Panel s ,
Removal and Ins tall ati on).
25.
Page 1303 of 3229
Publi s hed: 11-May-2011
Automatic Transmission/Transaxle - Transmission Fluid Level CheckTD4
2.2L Diesel
General Procedures W ARNING: Observe due care when drai ning, as the flui d can be very hot .
Ens ure t hat the aut omat ic trans mi s si on is in 'P' and t he handbrake is
ful ly appli ed.
1.
Clean t he area around the trans mi s si on fl uid fil ler plug.
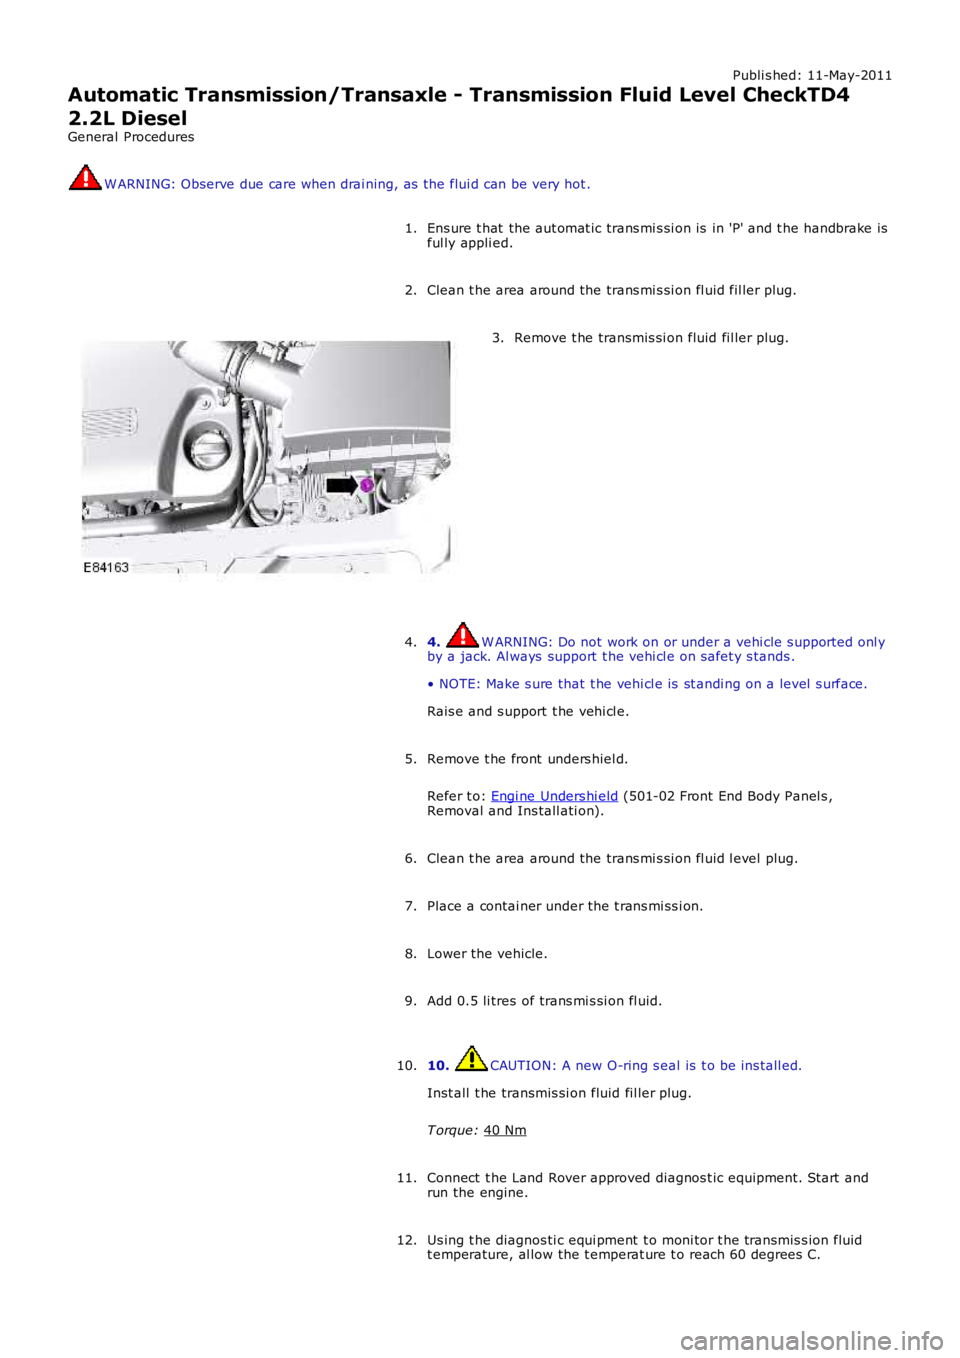
2. Remove t he transmis si on fluid fil ler plug.
3.
4. W ARNING: Do not work on or under a vehi cle s upported onl y
by a jack. Al ways support t he vehi cl e on s afet y s tands .
• NOTE: Make s ure that t he vehi cl e is st andi ng on a level s urface.
Rais e and s upport t he vehi cl e.
4.
Remove t he front unders hiel d.
Refer t o: Engi ne Unders hi eld (501-02 Front End Body Panel s ,
Removal and Ins tall ati on).
5.
Clean t he area around the trans mi s si on fl uid l evel plug.
6.
Place a contai ner under the t rans mi ss i on.
7.
Lower the vehicle.
8.
Add 0.5 li tres of trans mi s si on fl uid.
9.
10. CAUTION: A new O-ring s eal is t o be ins tall ed.
Inst all t he transmis si on fluid fil ler plug.
T orque: 40 Nm 10.
Connect t he Land Rover approved diagnos t ic equipment. St art and
run the engine.
11.
Us ing t he diagnos ti c equi pment t o moni tor t he transmis s ion fluid
t emperature, al low the t emperat ure t o reach 60 degrees C.
12.
Page 1304 of 3229
Move t he s el ect or lever from 'P' t hrough all t he gear pos it ions ,
pausi ng in each gear posi ti on for 2-3 s econds and ret urn to t he 'P'
pos it ion.
13.
Rais e t he vehicle.
14. 15.
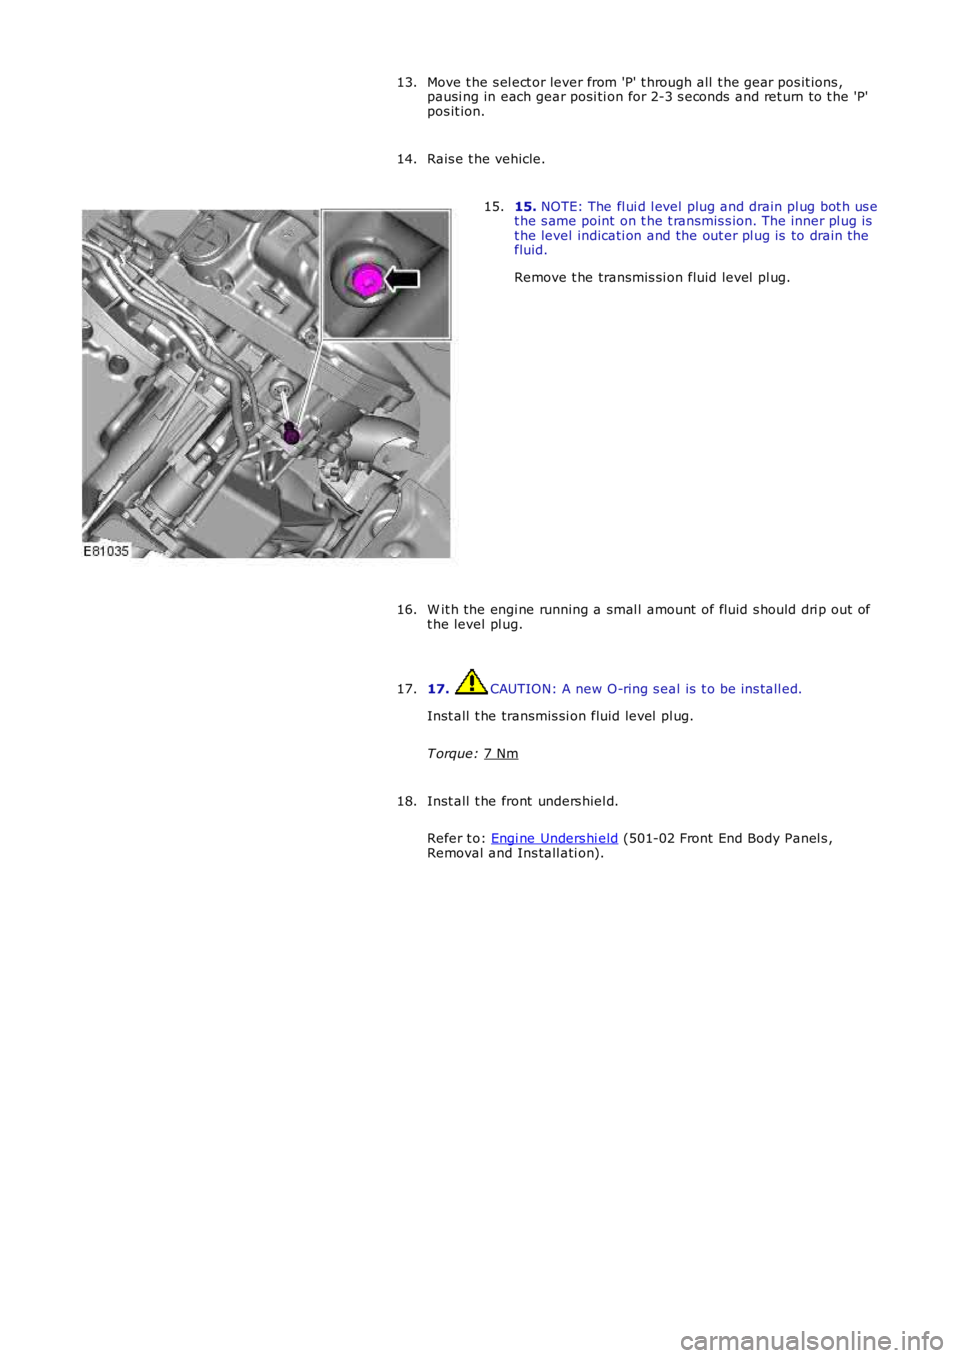
NOTE: The fl ui d l evel plug and drain pl ug bot h us e
t he s ame point on t he t ransmis s ion. The inner pl ug is
t he level indicati on and the out er pl ug is to drain the
fluid.
Remove t he transmis si on fluid level pl ug.
15.
W it h the engi ne running a smal l amount of fluid s hould dri p out of
t he level pl ug.
16.
17. CAUTION: A new O-ring s eal is t o be ins tall ed.
Inst all t he transmis si on fluid level pl ug.
T orque: 7 Nm 17.
Inst all t he front unders hiel d.
Refer t o: Engi ne Unders hi eld (501-02 Front End Body Panel s ,
Removal and Ins tall ati on).
18.
Page 1305 of 3229
Publi s hed: 11-May-2011
Automatic Transmission/Transaxle - Transmission Fluid Drain and RefillTD4
2.2L Diesel
General Procedures W ARNING: Observe due care when drai ning, as the flui d can be very hot .
Ens ure t hat the aut omat ic trans mi s si on is in 'P' and t he handbrake is
ful ly appli ed.
1.
Clean t he area around the trans mi s si on fl uid fil ler plug.
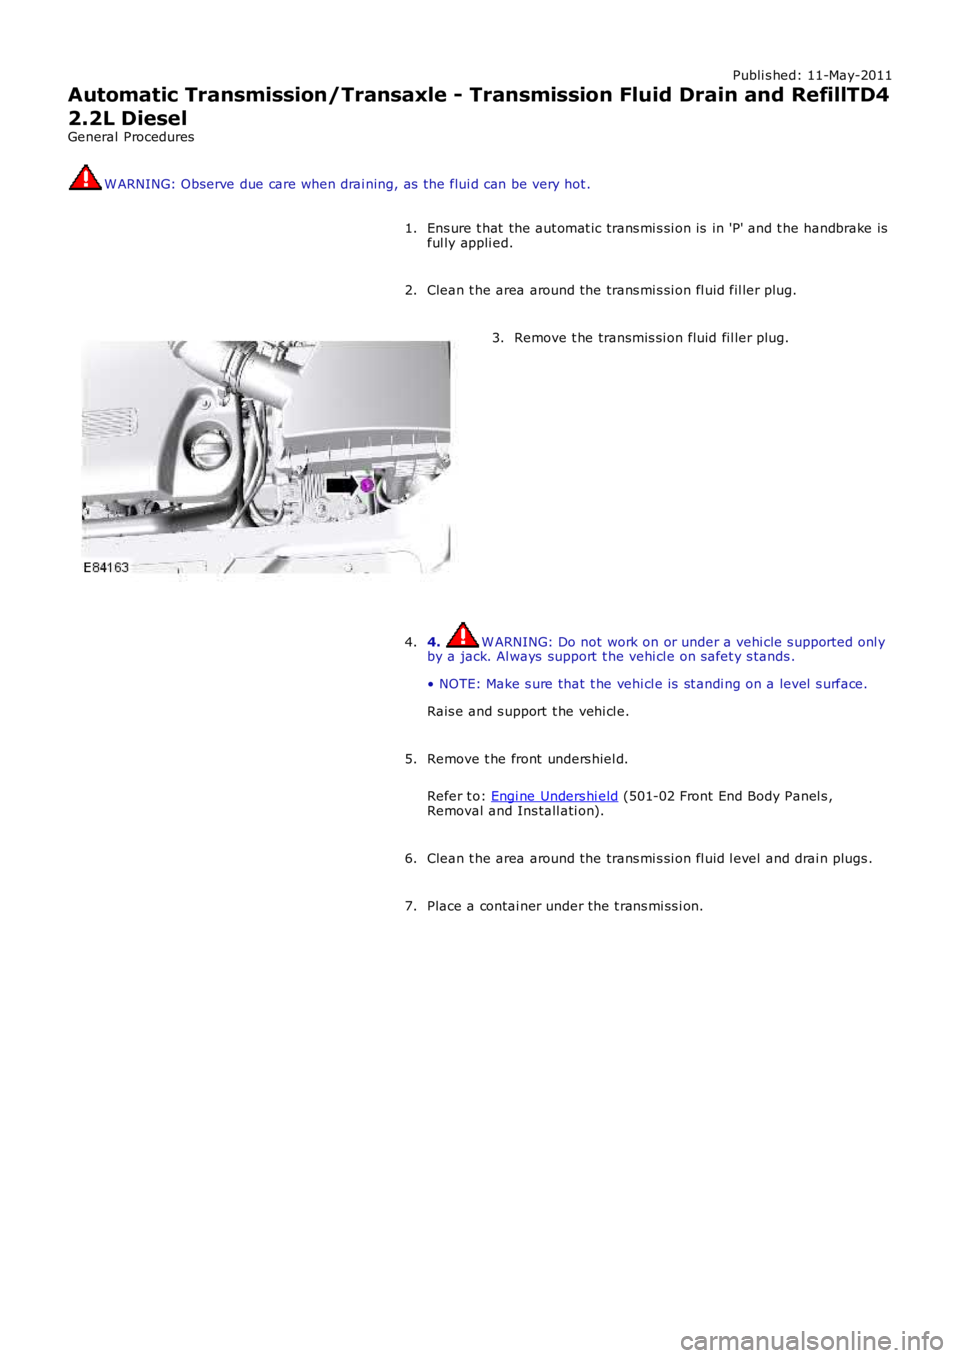
2. Remove t he transmis si on fluid fil ler plug.
3.
4. W ARNING: Do not work on or under a vehi cle s upported onl y
by a jack. Al ways support t he vehi cl e on s afet y s tands .
• NOTE: Make s ure that t he vehi cl e is st andi ng on a level s urface.
Rais e and s upport t he vehi cl e.
4.
Remove t he front unders hiel d.
Refer t o: Engi ne Unders hi eld (501-02 Front End Body Panel s ,
Removal and Ins tall ati on).
5.
Clean t he area around the trans mi s si on fl uid l evel and drai n plugs .
6.
Place a contai ner under the t rans mi ss i on.
7.
Page 1306 of 3229
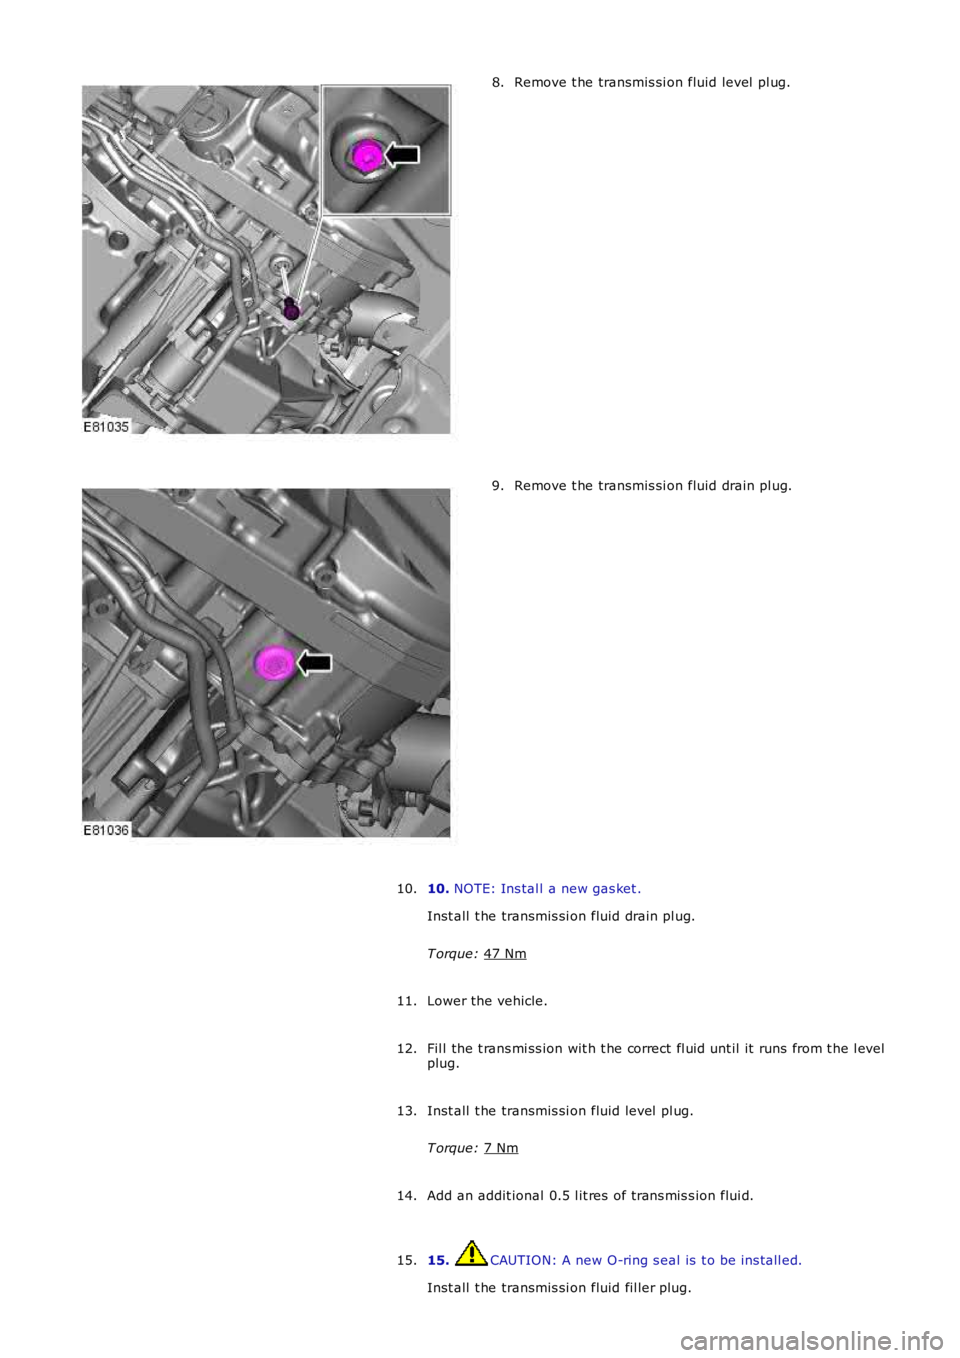
Remove t he transmis si on fluid level pl ug.
8. Remove t he transmis si on fluid drain pl ug.
9.
10. NOTE: Ins tal l a new gas ket .
Inst all t he transmis si on fluid drain pl ug.
T orque: 47 Nm 10.
Lower the vehicle.
11.
Fil l the t rans mi ss ion wit h t he correct fl uid unt il it runs from t he l evel
plug.
12.
Inst all t he transmis si on fluid level pl ug.
T orque: 7 Nm 13.
Add an addit ional 0.5 l it res of t rans mis s ion flui d.
14.
15. CAUTION: A new O-ring s eal is t o be ins tall ed.
Inst all t he transmis si on fluid fil ler plug.
15.
Page 1307 of 3229
T orque:
40 Nm Connect t he Land Rover approved diagnos t ic equipment. St art and
run the engine.
16.
Us ing t he diagnos ti c equi pment t o moni tor t he transmis s ion fluid
t emperature, al low the t emperat ure t o reach 60 degrees C.
17.
Move t he s el ect or lever from 'P' t hrough all t he gear pos it ions ,
pausi ng in each gear posi ti on for 2-3 s econds and ret urn to t he 'P'
pos it ion.
18.
Rais e t he vehicle.
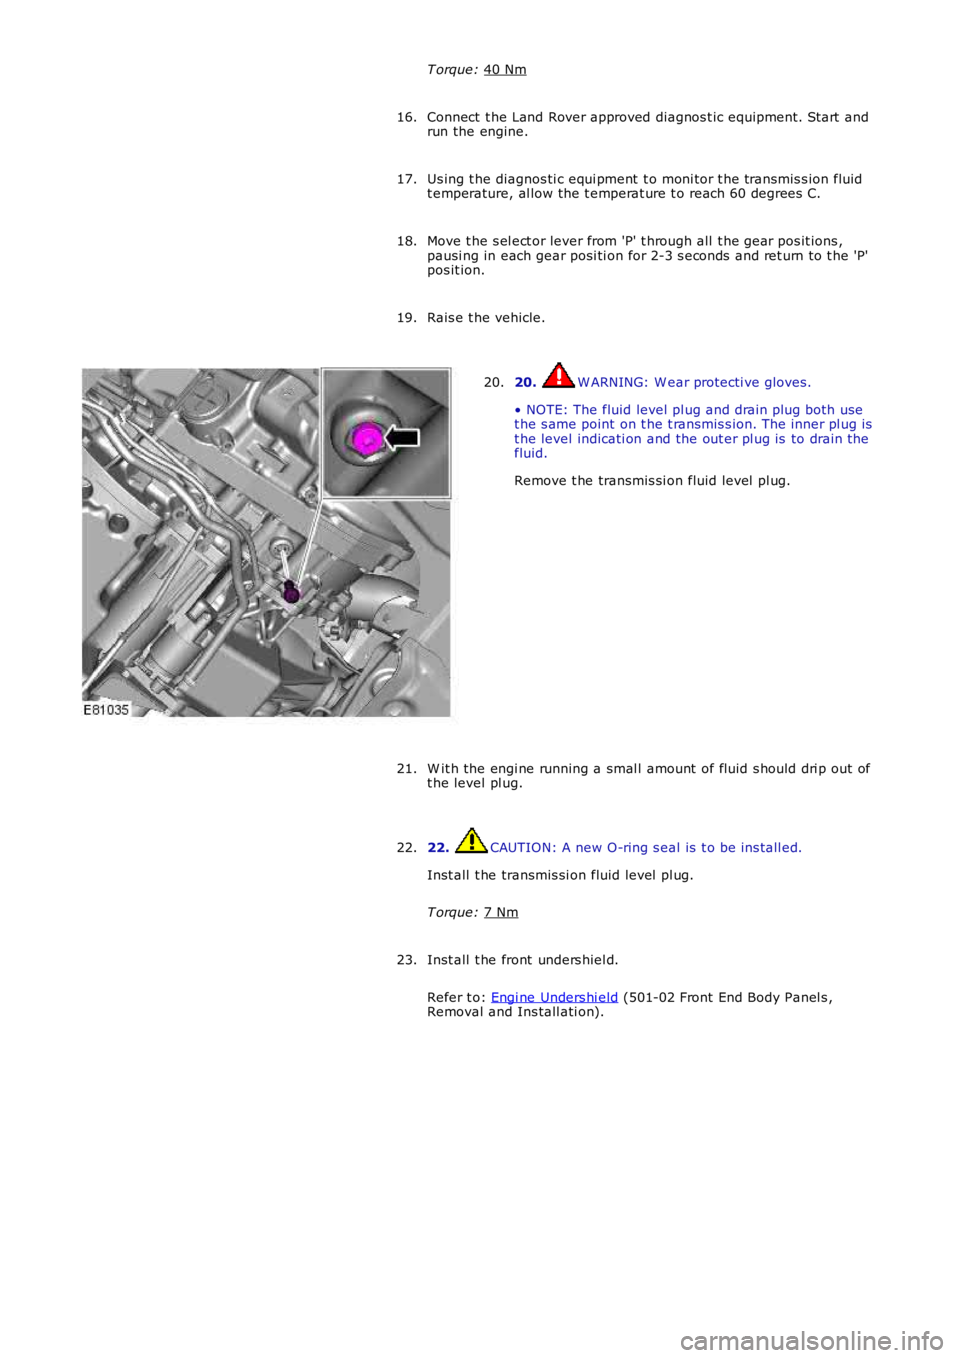
19. 20. W ARNING: W ear protecti ve gloves.
• NOTE: The fluid level pl ug and drain plug both use
t he s ame point on t he t ransmis s ion. The inner pl ug is
t he level indicati on and the out er pl ug is to drain the
fluid.
Remove t he transmis si on fluid level pl ug.
20.
W it h the engi ne running a smal l amount of fluid s hould dri p out of
t he level pl ug.
21.
22. CAUTION: A new O-ring s eal is t o be ins tall ed.
Inst all t he transmis si on fluid level pl ug.
T orque: 7 Nm 22.
Inst all t he front unders hiel d.
Refer t o: Engi ne Unders hi eld (501-02 Front End Body Panel s ,
Removal and Ins tall ati on).
23.
Page 1308 of 3229
Publi s hed: 11-May-2011
Automatic Transmission/Transaxle - Selector Shaft SealI6 3.2L Petrol
Removal and Inst all ati on
Removal
• NOTE: Removal s t eps in t his procedure may cont ain i nst all ati on det ail s.
1. W ARNING: Make sure t o s upport the vehicle wit h axles tands .
Rais e and s upport t he vehi cl e.
1.
Remove t he cover and dis connect the bat tery ground cabl e.
Refer t o: Specificati ons (414-00 Bat tery and Charging Sys tem -General Informat ion, Specificati ons).
2.
Remove t he transmis si on cont rol module (TCM).
Refer t o: Transmis s ion Control Modul e (TCM) - I6 3.2L Petrol (307-01Automat ic Transmis si on/Trans axl e, Removal and Ins t allat ion).
3.
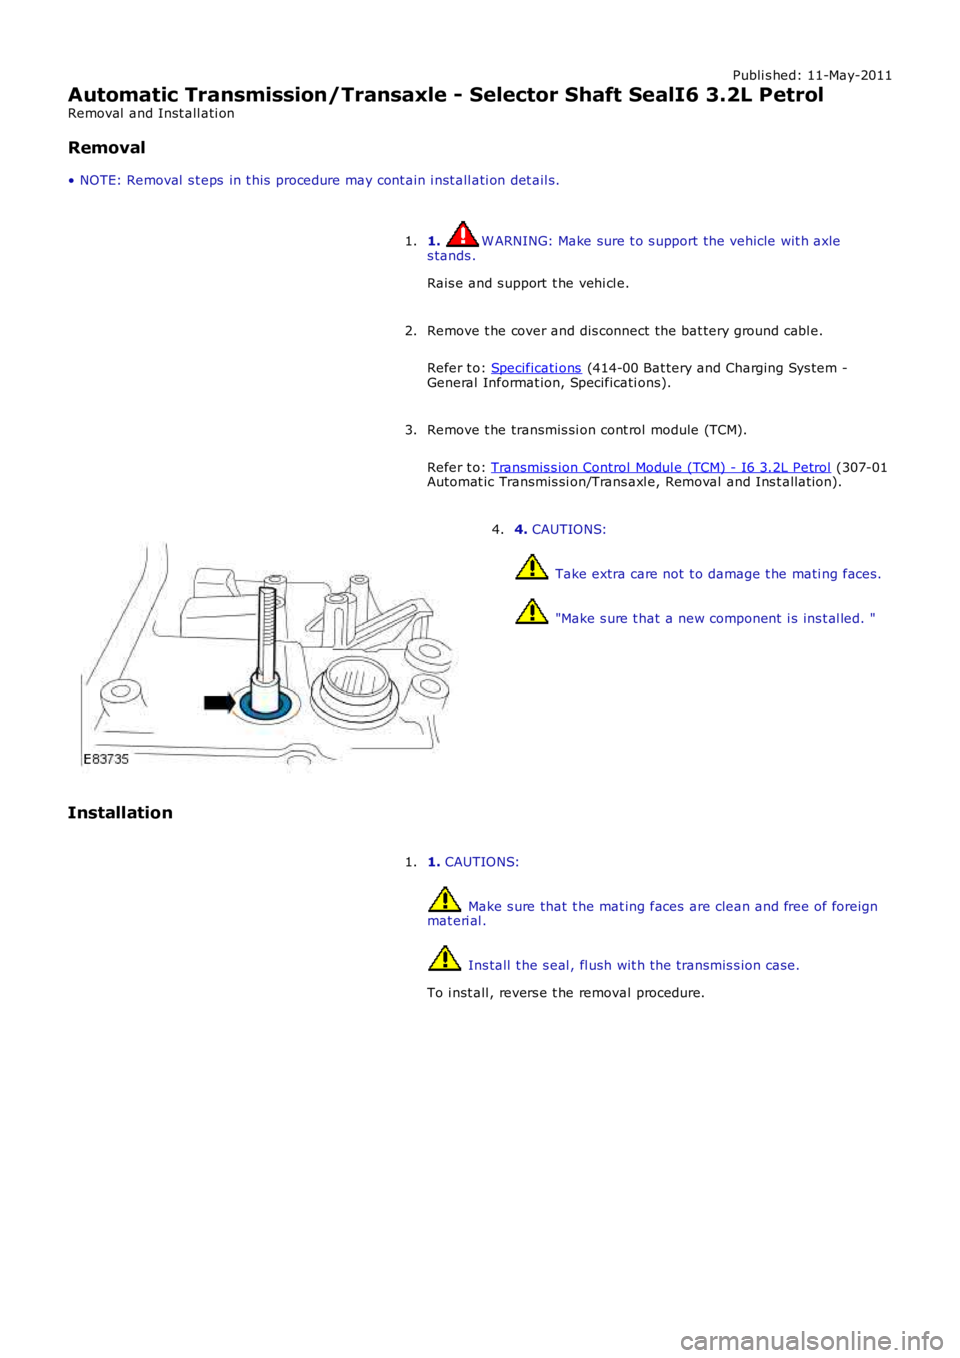
4. CAUTIONS:
Take extra care not t o damage t he mati ng faces .
"Make s ure t hat a new component i s ins t al led. "
4.
Installation
1. CAUTIONS:
Make s ure that t he mat ing faces are clean and free of foreignmat eri al .
Ins tall t he s eal , fl ush wit h t he transmis s ion case.
To i nst all , revers e t he removal procedure.
1.
Page 1309 of 3229
Publi s hed: 11-May-2011
Automatic Transmission/Transaxle - Selector Shaft SealTD4 2.2L Diesel
Removal and Inst all ati on
Removal
• NOTE: Removal s t eps in t his procedure may cont ain i nst all ati on det ail s.
1. W ARNING: Make sure t o s upport the vehicle wit h axles tands .
Rais e and s upport t he vehi cl e.
1.
Remove t he cover and dis connect the bat tery ground cabl e.
Refer t o: Specificati ons (414-00 Bat tery and Charging Sys tem -General Informat ion, Specificati ons).
2.
Remove t he transmis si on cont rol module (TCM).
Refer t o: Transmis s ion Control Modul e (TCM) - TD4 2.2L Di es el(307-01 Automat ic Trans mi s si on/Trans axl e, Removal andInst all at ion).
3.
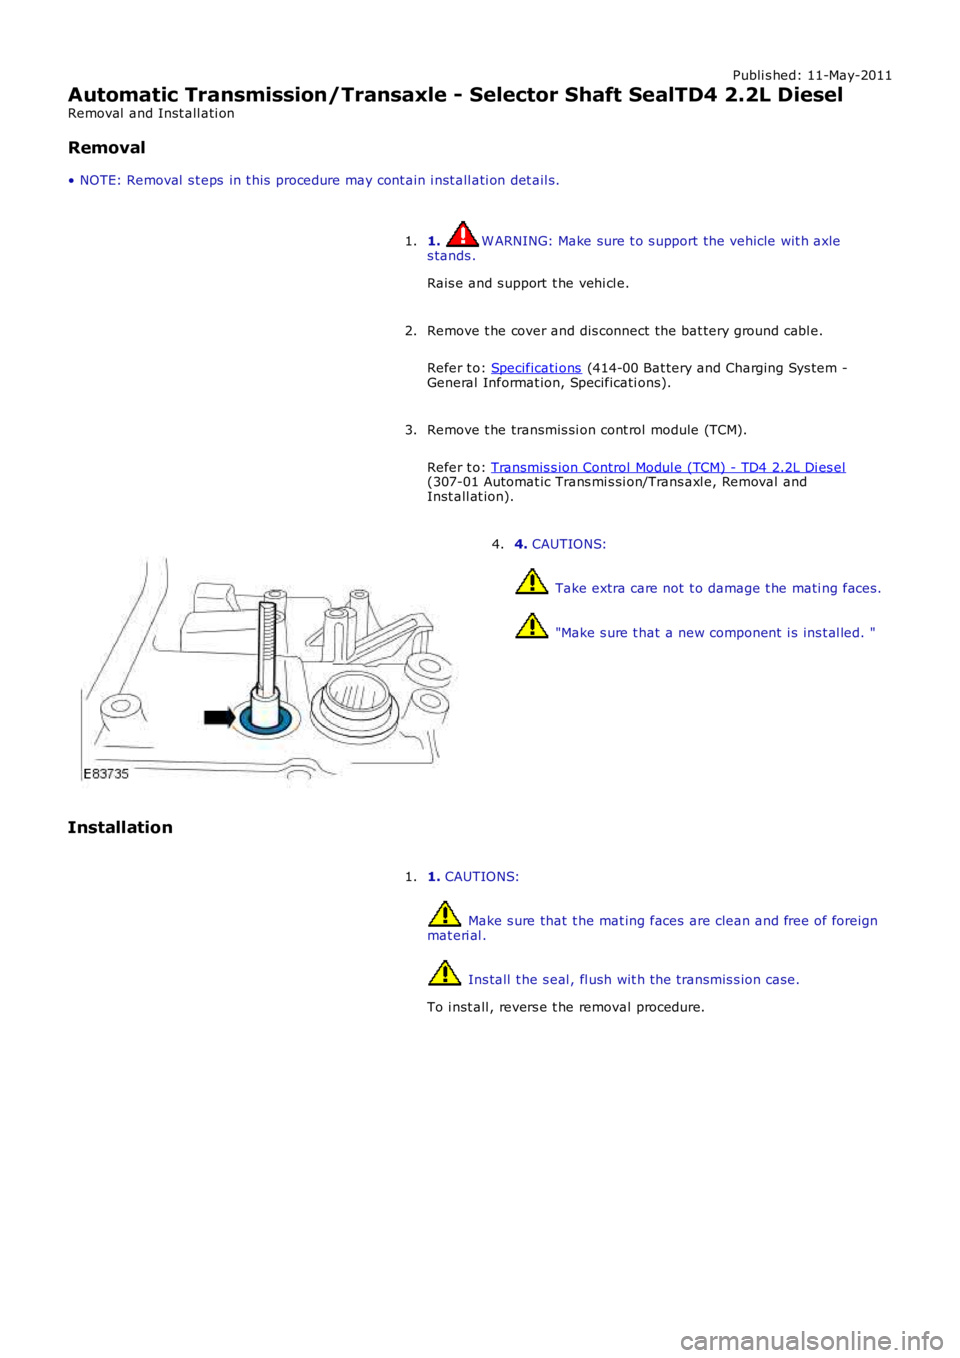
4. CAUTIONS:
Take extra care not t o damage t he mati ng faces .
"Make s ure t hat a new component i s ins t al led. "
4.
Installation
1. CAUTIONS:
Make s ure that t he mat ing faces are clean and free of foreignmat eri al .
Ins tall t he s eal , fl ush wit h t he transmis s ion case.
To i nst all , revers e t he removal procedure.
1.
Page 1310 of 3229
Publi s hed: 11-May-2011
Automatic Transmission/Transaxle - Transmission Control Module (TCM)I6
3.2L Petrol
Removal and Inst all ati on
Removal
1. W ARNING: Make sure t o s upport the vehicle wit h axles tands .
Rais e and s upport t he vehi cl e.
1.
Remove t he cover and dis connect the bat tery ground cabl e.
Refer t o: Specificati ons (414-00 Bat tery and Charging Sys tem -General Informat ion, Specificati ons).
2.
Remove t he A/C compress or mounti ng bracket .
Refer t o: Acces sory Dri ve Component Bracket (303-05A Access oryDrive - I6 3.2L Pet rol , Removal and Ins t al lat ion).
3.
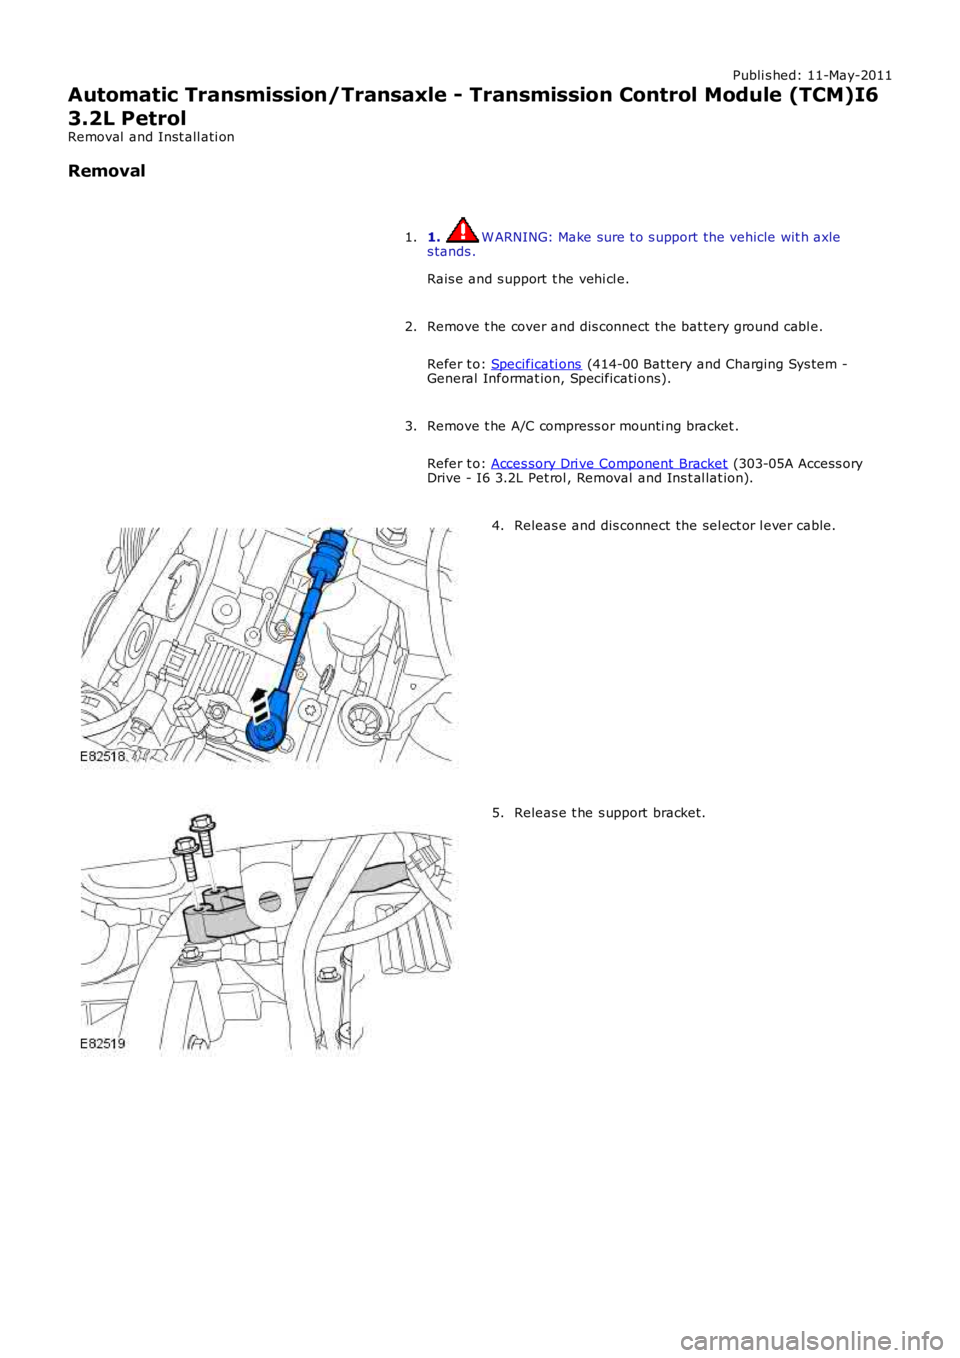
Releas e and dis connect the sel ect or l ever cable.4.
Releas e t he s upport bracket.5.