LAND ROVER FRELANDER 2 2006 Repair Manual
FRELANDER 2 2006
LAND ROVER
LAND ROVER
https://www.carmanualsonline.info/img/64/57251/w960_57251-0.png
LAND ROVER FRELANDER 2 2006 Repair Manual
Trending: fuse box, buttons, airbag off, water pump, sunroof, checking oil, washer fluid
Page 1331 of 3229
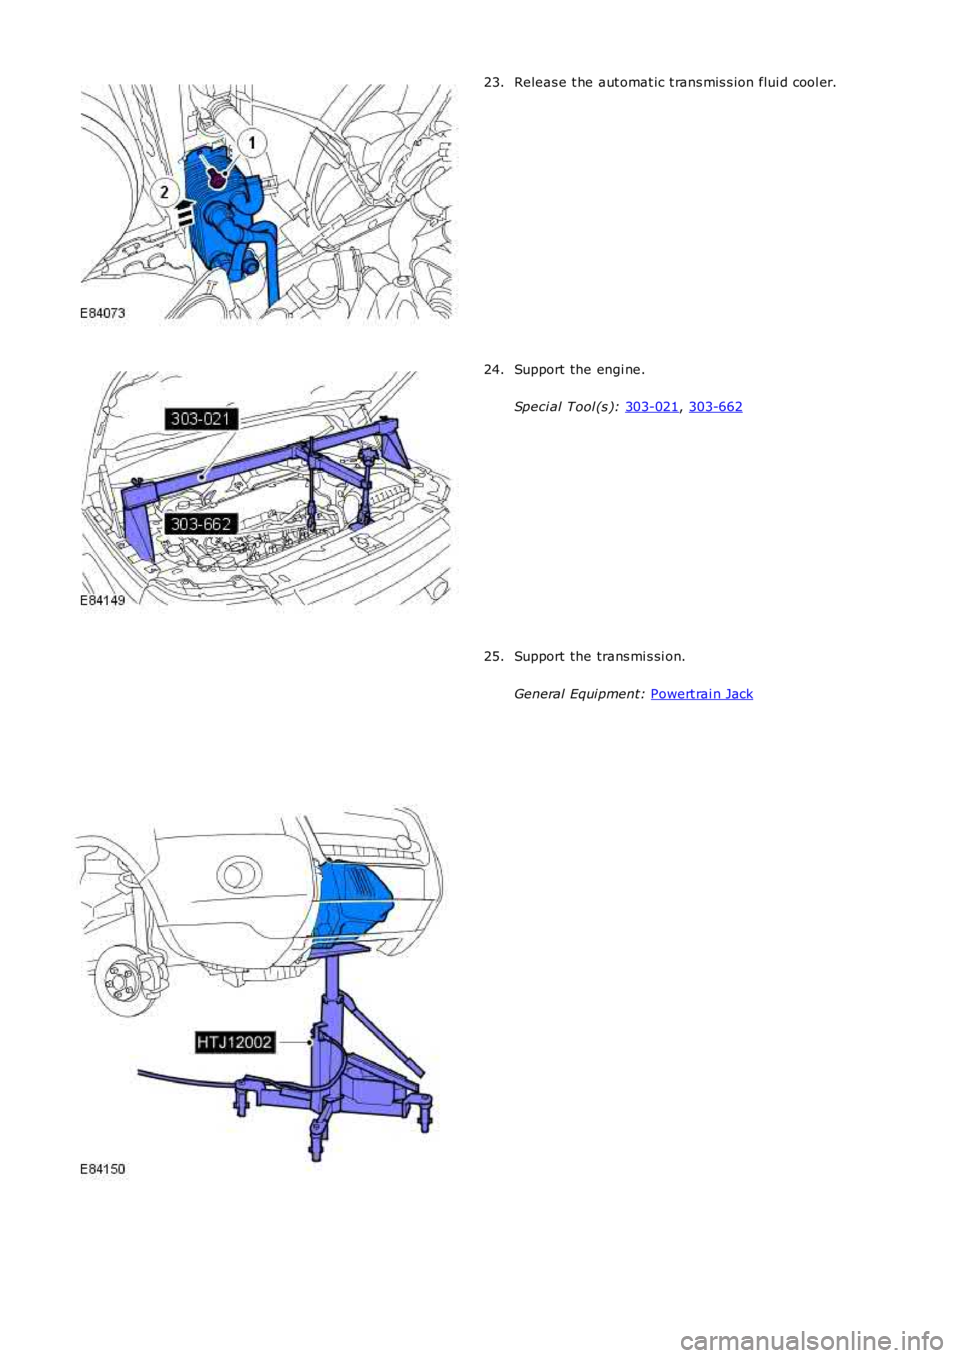
Releas e t he aut omat ic t rans mis s ion flui d cool er.
23. Support the engi ne.
Speci al Tool (s ): 303-021 ,
303-662 24.
Support the trans mi s si on.
General Equi pment: Powert rai n Jack 25.
Page 1332 of 3229
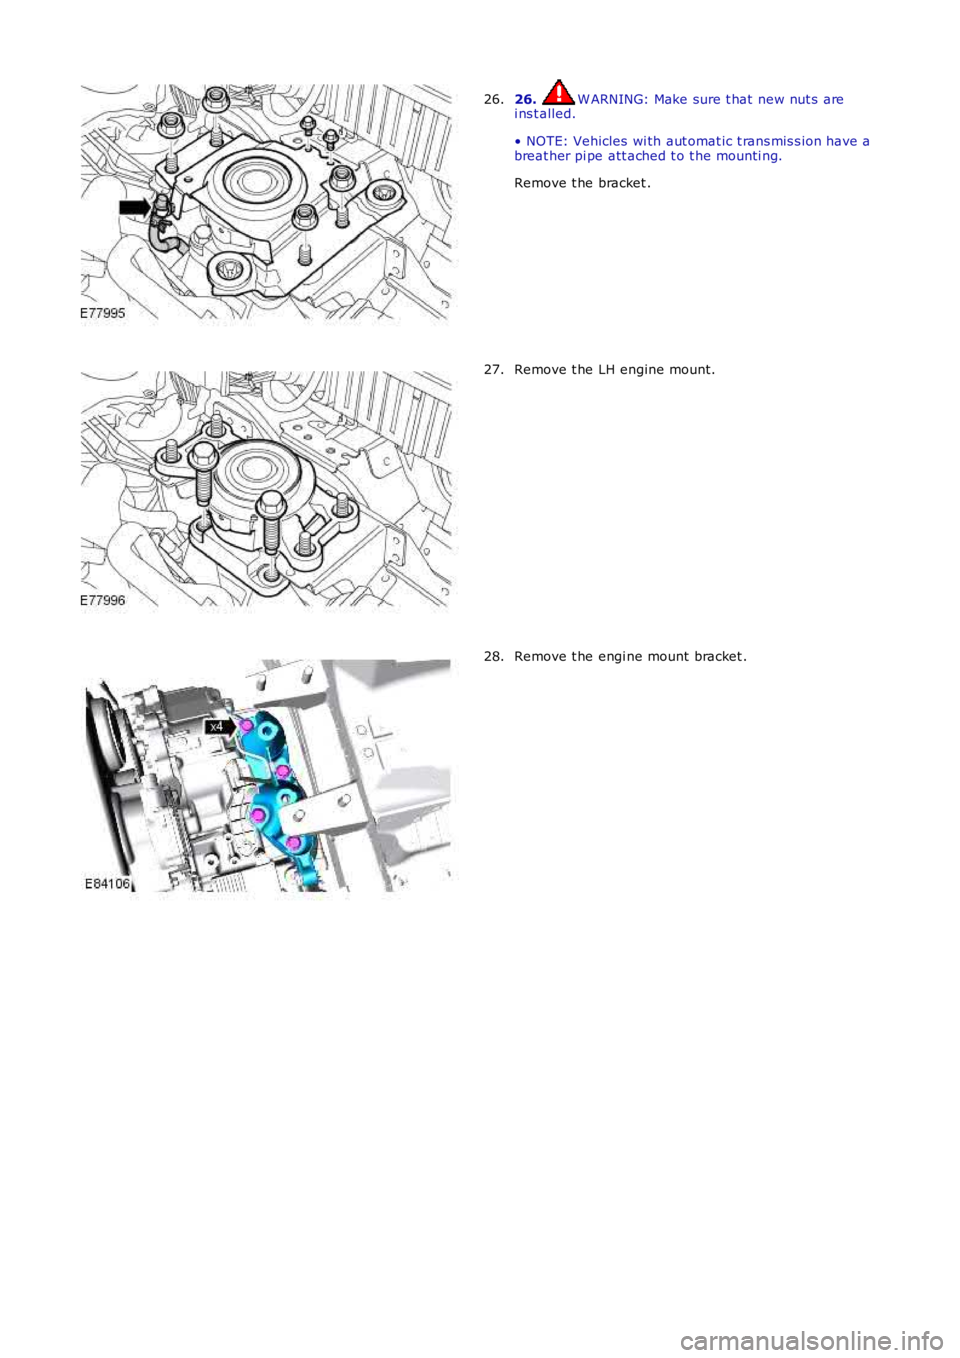
26. W ARNING: Make sure t hat new nut s are
i ns t alled.
• NOTE: Vehicles wi th aut omat ic t rans mis s ion have a
breat her pi pe att ached t o t he mounti ng.
Remove t he bracket .
26. Remove t he LH engine mount.
27. Remove t he engi ne mount bracket .
28.
Page 1333 of 3229
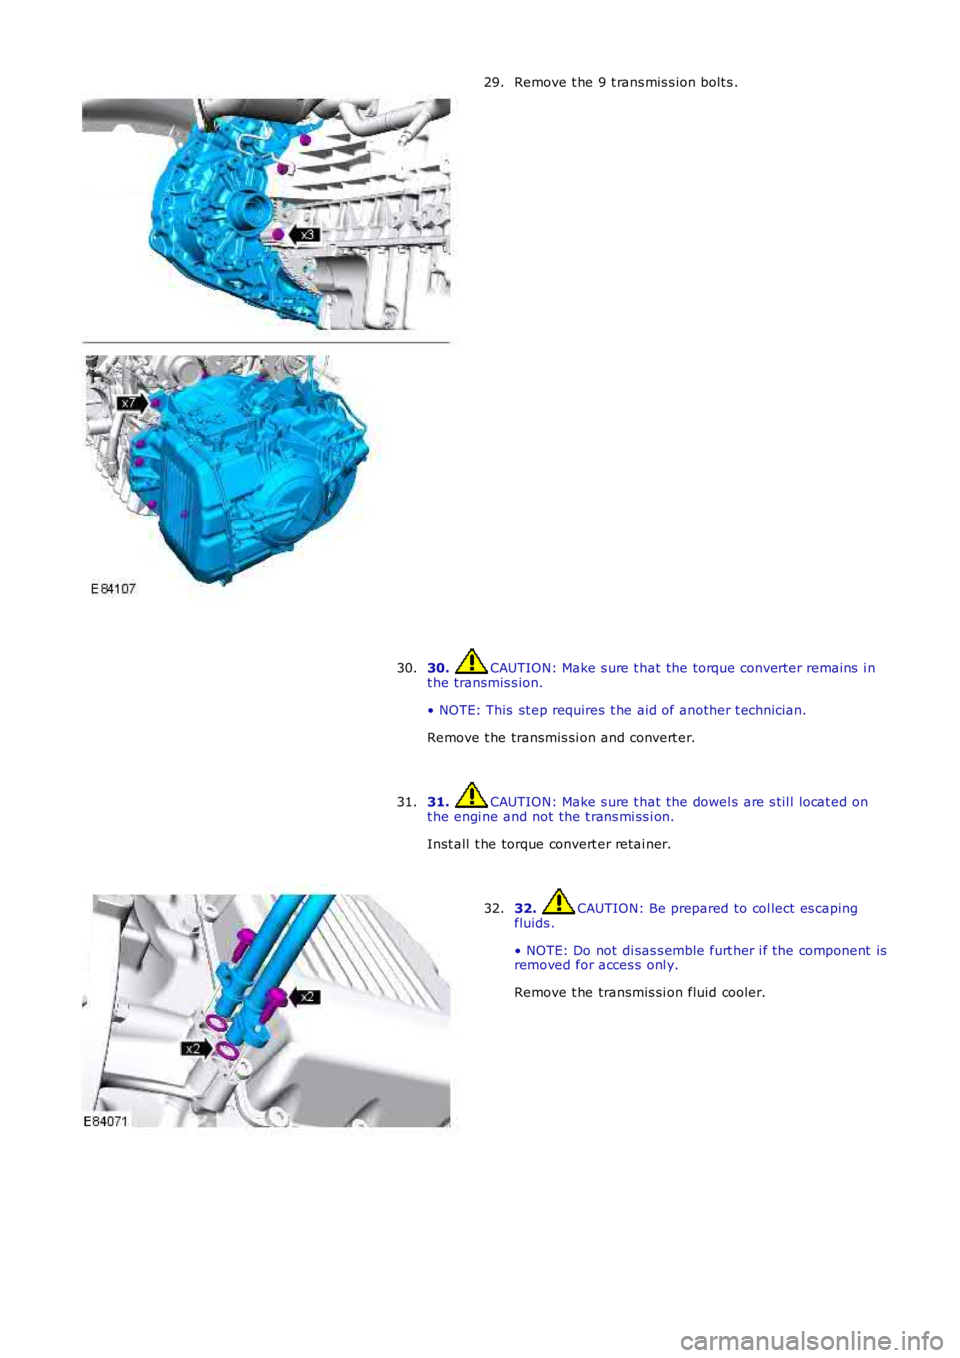
Remove t he 9 t rans mis s ion bolt s .
29.
30. CAUTION: Make s ure t hat the torque converter remains i n
t he transmis s ion.
• NOTE: This st ep requires t he aid of another t echnician.
Remove t he transmis si on and convert er.
30.
31. CAUTION: Make s ure t hat the dowel s are s t il l locat ed on
t he engi ne and not the t rans mi ss i on.
Inst all t he torque convert er retai ner.
31. 32. CAUTION: Be prepared to col lect es caping
fluids .
• NOTE: Do not di sas s emble furt her i f the component is
removed for acces s onl y.
Remove t he transmis si on fluid cooler.
32.
Page 1334 of 3229
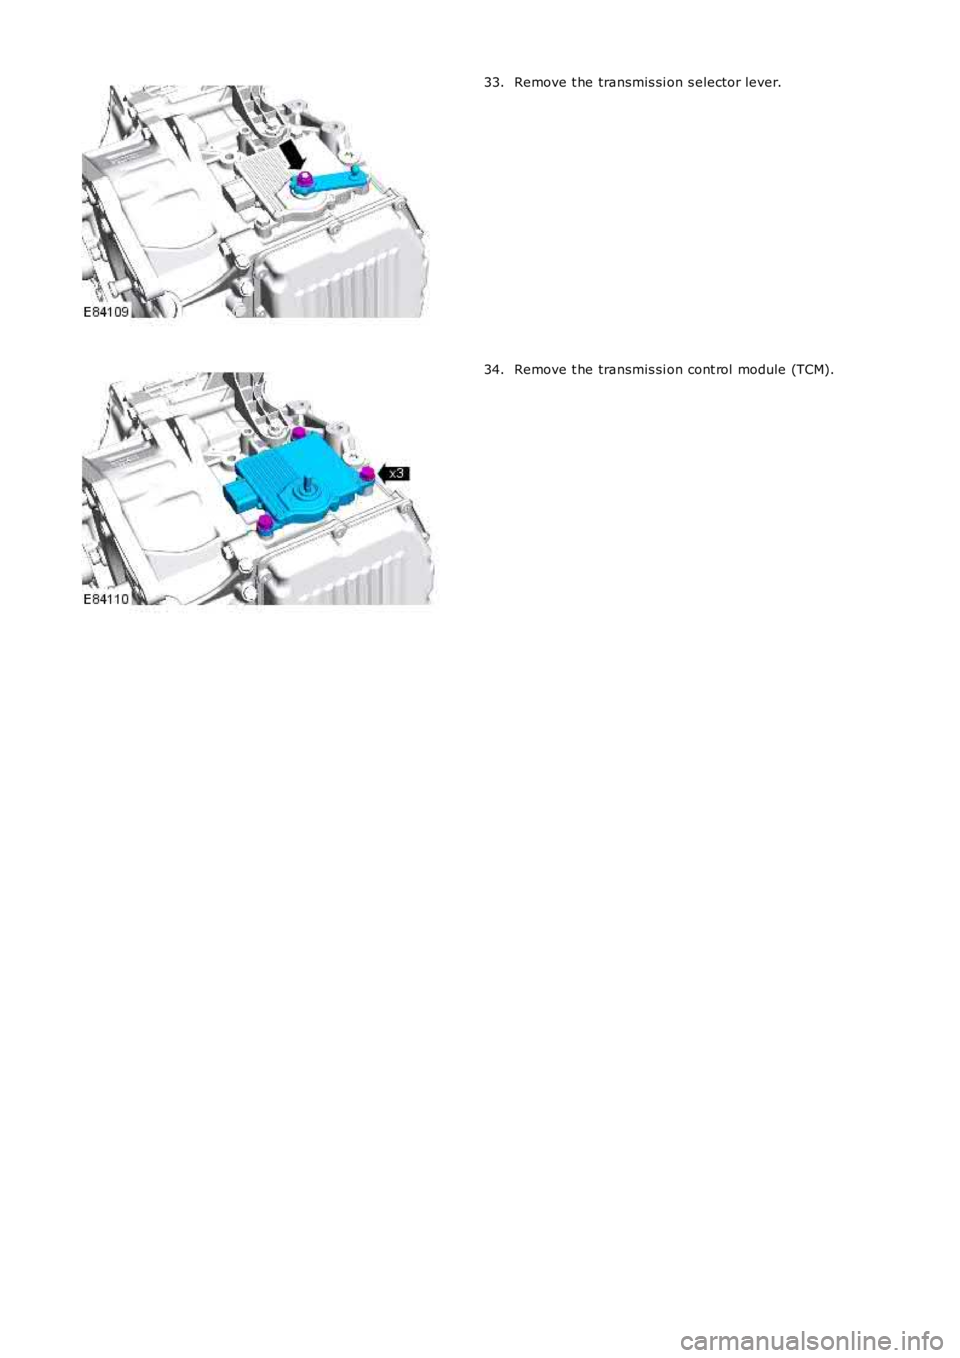
Remove t he transmis si on s elector lever.
33. Remove t he transmis si on cont rol module (TCM).
34.
Page 1335 of 3229
Publi s hed: 11-May-2011
Automatic Transmission/Transaxle - TransmissionTD4 2.2L Diesel
Removal
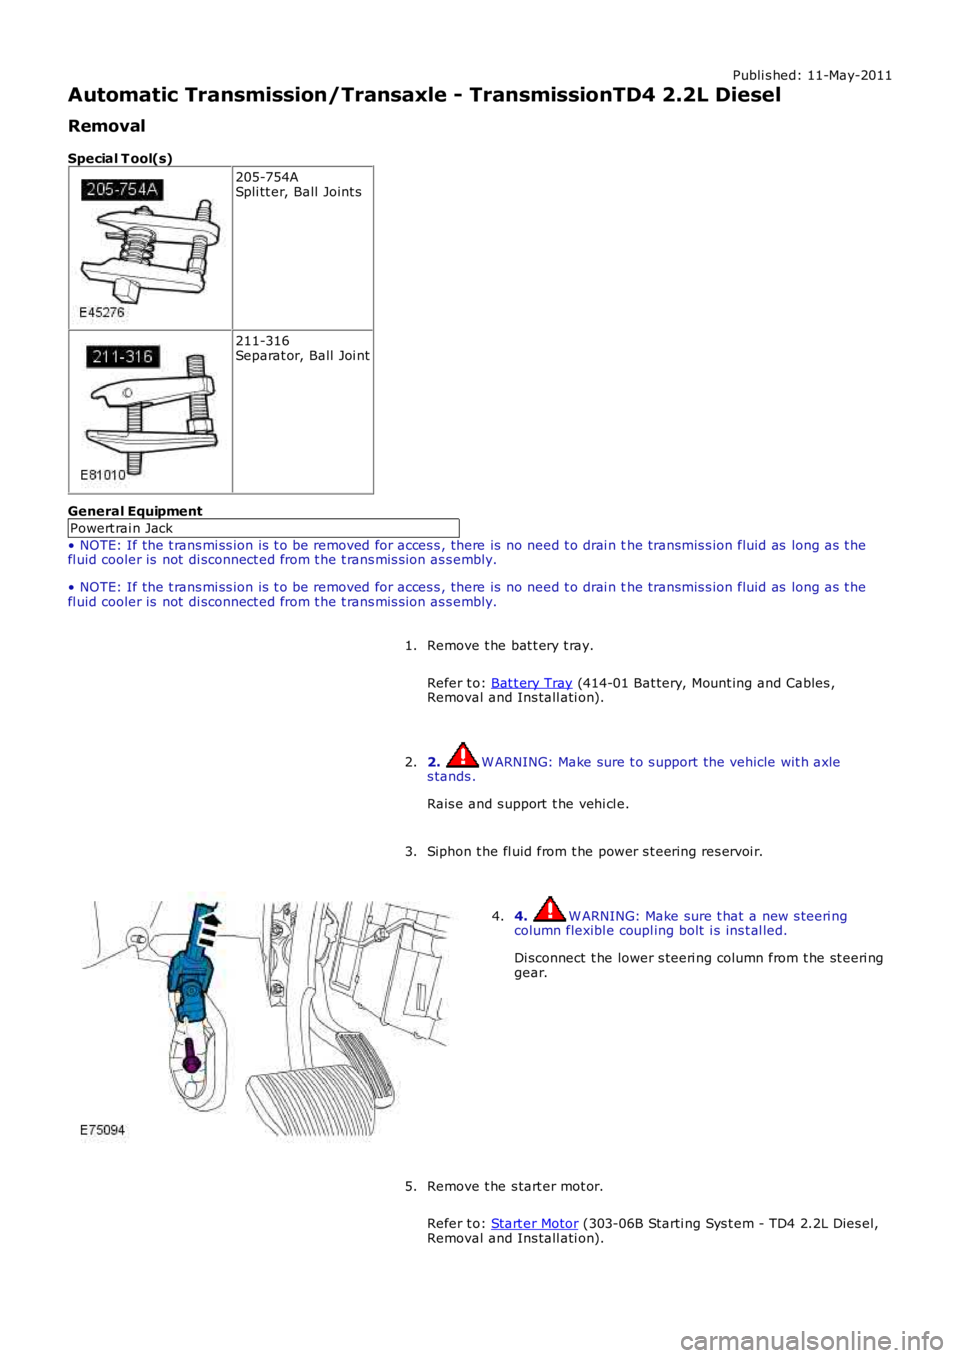
Special T ool(s) 205-754A
Spli tt er, Ball Joint s 211-316
Separat or, Ball Joi nt
General Equipment Powert rai n Jack
• NOTE: If the t rans mi ss ion is t o be removed for acces s , there is no need t o drai n t he transmis s ion fluid as long as t he
fl uid cooler is not di sconnect ed from t he t rans mis s ion as s embly.
• NOTE: If the t rans mi ss ion is t o be removed for acces s , there is no need t o drai n t he transmis s ion fluid as long as t he
fl uid cooler is not di sconnect ed from t he t rans mis s ion as s embly.
Remove t he bat t ery t ray.
Refer t o: Bat t ery Tray (414-01 Bat tery, Mount ing and Cables ,
Removal and Ins tall ati on).
1.
2. W ARNING: Make sure t o s upport the vehicle wit h axle
s tands .
Rais e and s upport t he vehi cl e.
2.
Siphon t he fl uid from t he power s t eering res ervoi r.
3. 4. W ARNING: Make sure t hat a new s teeri ng
column flexibl e coupl ing bolt i s ins t al led.
Di sconnect t he lower s teeri ng column from t he st eeri ng
gear.
4.
Remove t he s tart er mot or.
Refer t o: Start er Motor (303-06B Starti ng Sys t em - TD4 2.2L Dies el,
Removal and Ins tall ati on).
5.
Page 1336 of 3229
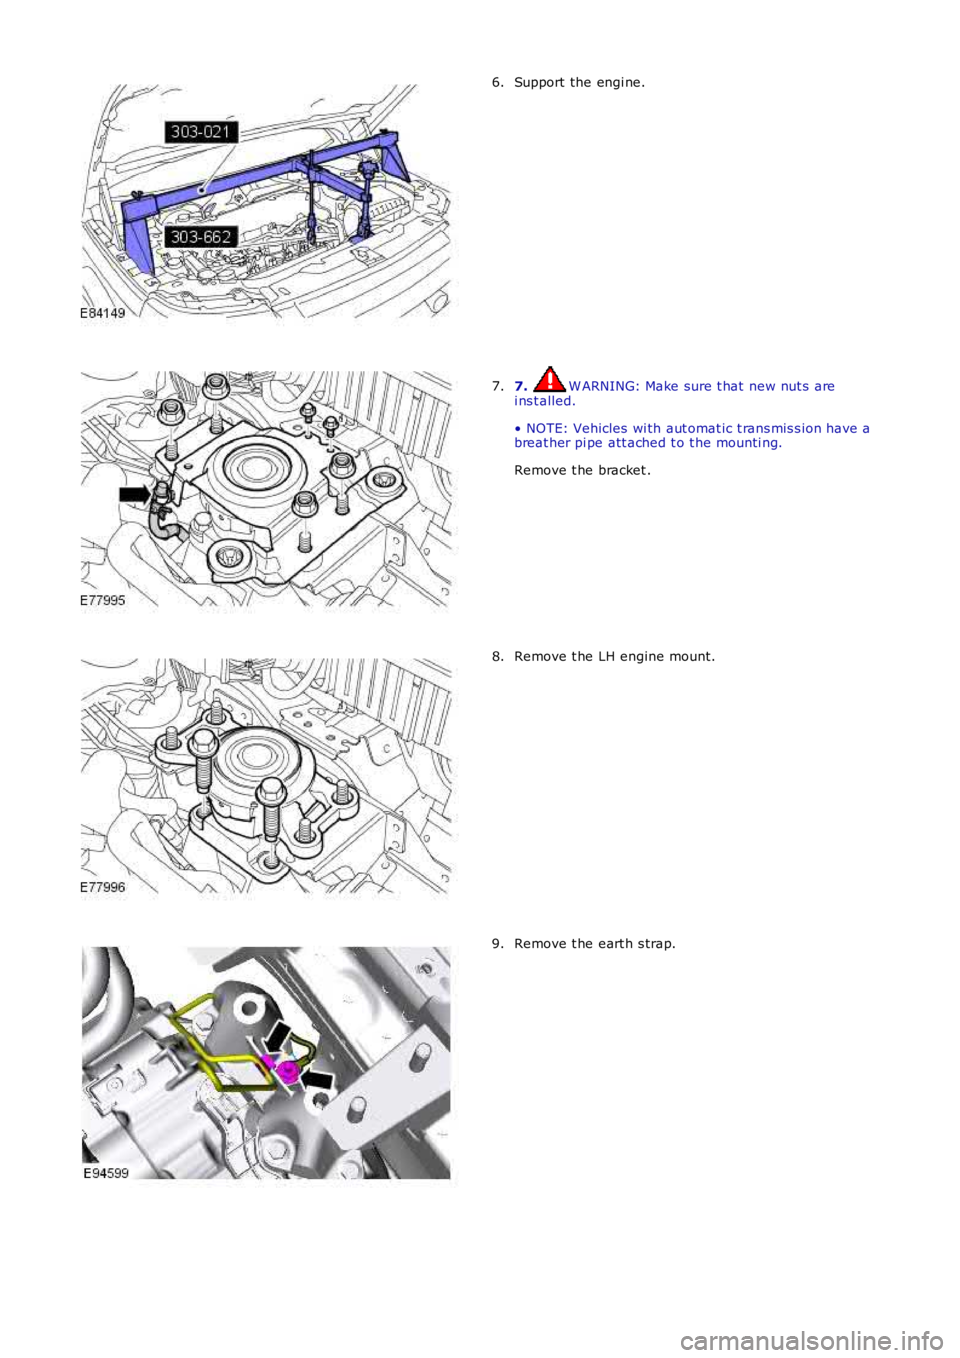
Support the engi ne.
6. 7. W ARNING: Make sure t hat new nut s are
i ns t alled.
• NOTE: Vehicles wi th aut omat ic t rans mis s ion have a
breat her pi pe att ached t o t he mounti ng.
Remove t he bracket .
7. Remove t he LH engine mount.
8. Remove t he eart h s trap.
9.
Page 1337 of 3229
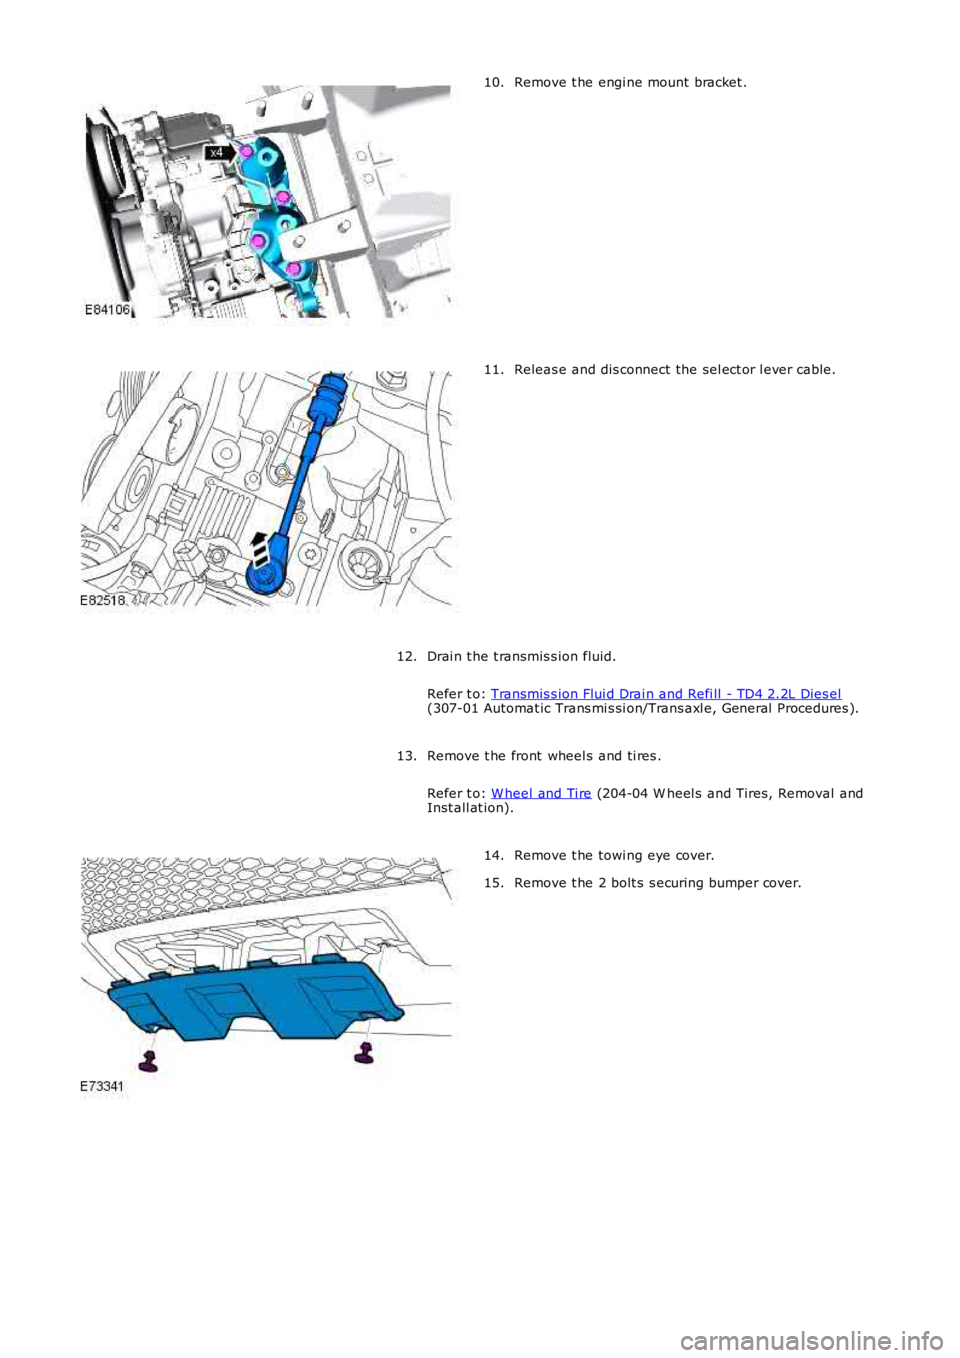
Remove t he engi ne mount bracket .
10. Releas e and dis connect the sel ect or l ever cable.
11.
Drai n t he t ransmis s ion fluid.
Refer t o: Transmis s ion Flui d Drai n and Refi ll - TD4 2.2L Dies el (307-01 Automat ic Trans mi s si on/Trans axl e, General Procedures ).
12.
Remove t he front wheel s and ti res .
Refer t o: W heel and Ti re (204-04 W heel s and Tires, Removal and
Inst all at ion).
13. Remove t he towi ng eye cover.
14.
Remove t he 2 bolt s s ecuring bumper cover.
15.
Page 1338 of 3229
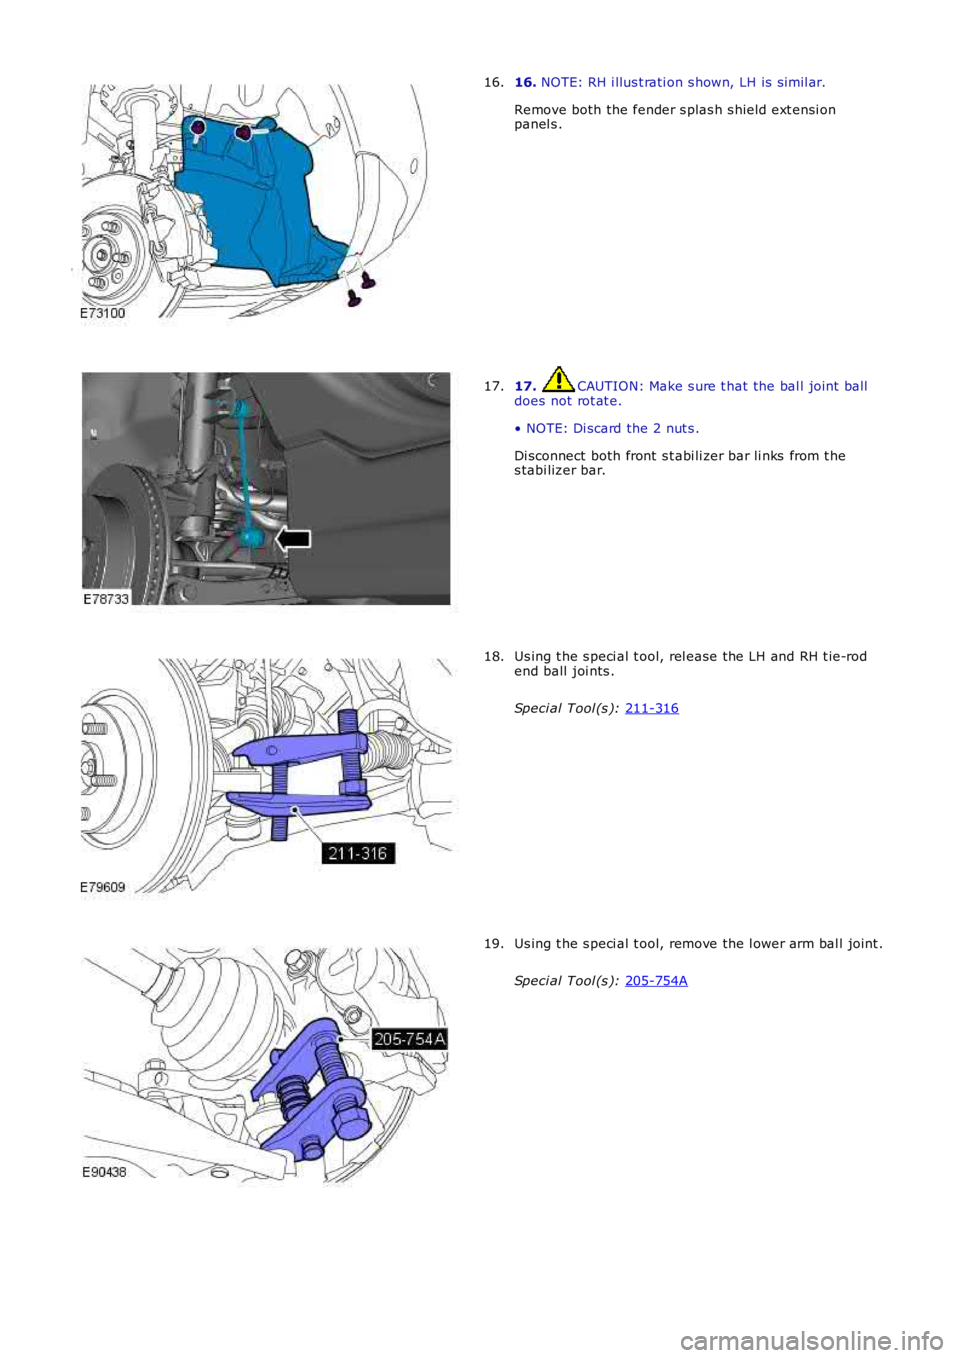
16.
NOTE: RH i llus t rati on s hown, LH is s imil ar.
Remove both the fender s plas h s hield ext ensi on
panel s .
16. 17. CAUTION: Make s ure t hat the bal l joint ball
does not rot at e.
• NOTE: Di scard the 2 nut s .
Di sconnect both front s t abi li zer bar li nks from t he
s tabi lizer bar.
17. Us ing t he s peci al t ool, rel ease the LH and RH t ie-rod
end ball joi nts .
Speci al Tool (s ): 211-316 18.
Us ing t he s peci al t ool, remove the l ower arm bal l joint .
Speci al Tool (s ): 205-754A 19.
Page 1339 of 3229
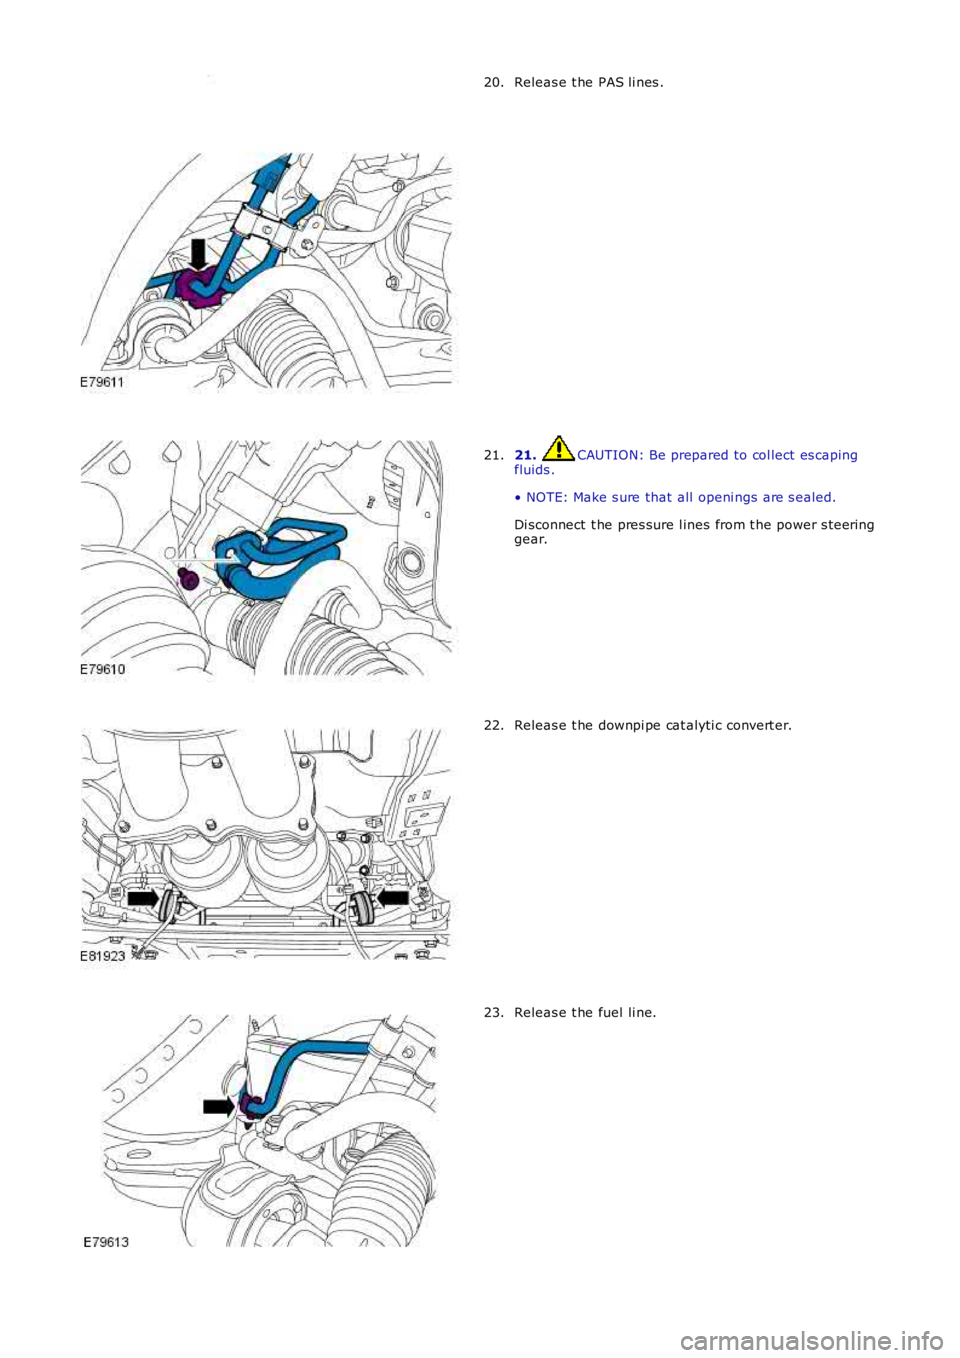
Releas e t he PAS li nes .
20. 21. CAUTION: Be prepared to col lect es caping
fluids .
• NOTE: Make s ure that all openi ngs are s ealed.
Di sconnect t he pres sure l ines from t he power s teeri ng
gear.
21. Releas e t he downpi pe cat alyti c convert er.
22. Releas e t he fuel li ne.
23.
Page 1340 of 3229
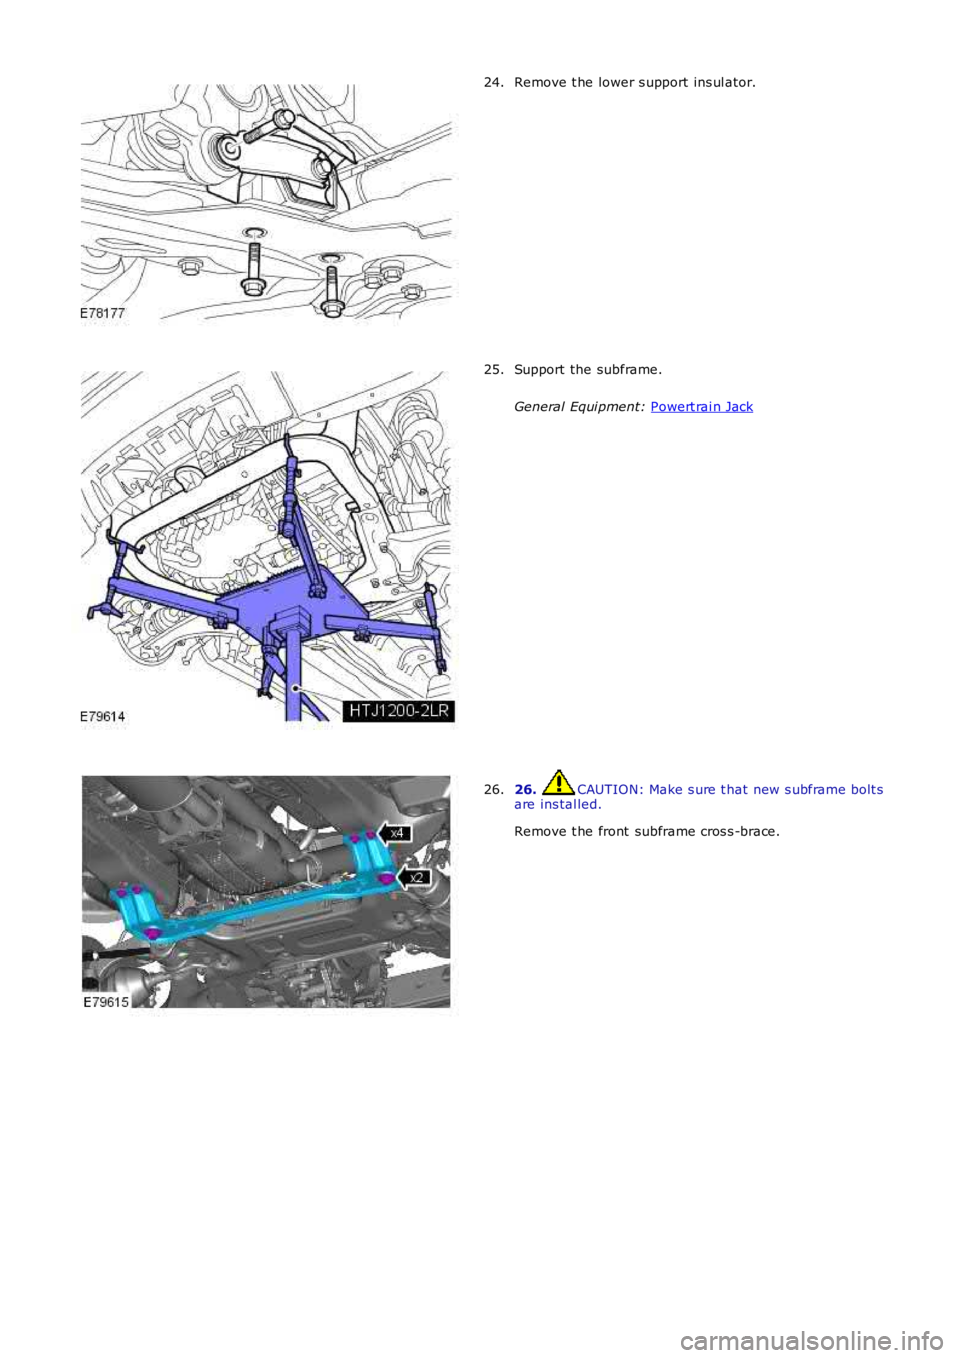
Remove t he lower s upport ins ul ator.
24. Support the subframe.
General Equi pment: Powert rai n Jack 25.
26. CAUTION: Make s ure t hat new s ubframe bolt s
are ins tal led.
Remove t he front subframe cros s -brace.
26.
Trending: jack points, lock, ad blue, check engine, timing belt, heating, high beam
