LEXUS LS430 2003 Factory Repair Manual
Manufacturer: LEXUS, Model Year: 2003,
Model line: LS430,
Model: LEXUS LS430 2003
Pages: 4500, PDF Size: 87.45 MB
LEXUS LS430 2003 Factory Repair Manual
LS430 2003
LEXUS
LEXUS
https://www.carmanualsonline.info/img/36/57050/w960_57050-0.png
LEXUS LS430 2003 Factory Repair Manual
Trending: climate control, oil dipstick, battery capacity, check oil, engine mechanical, valve assy, heating
Page 1661 of 4500
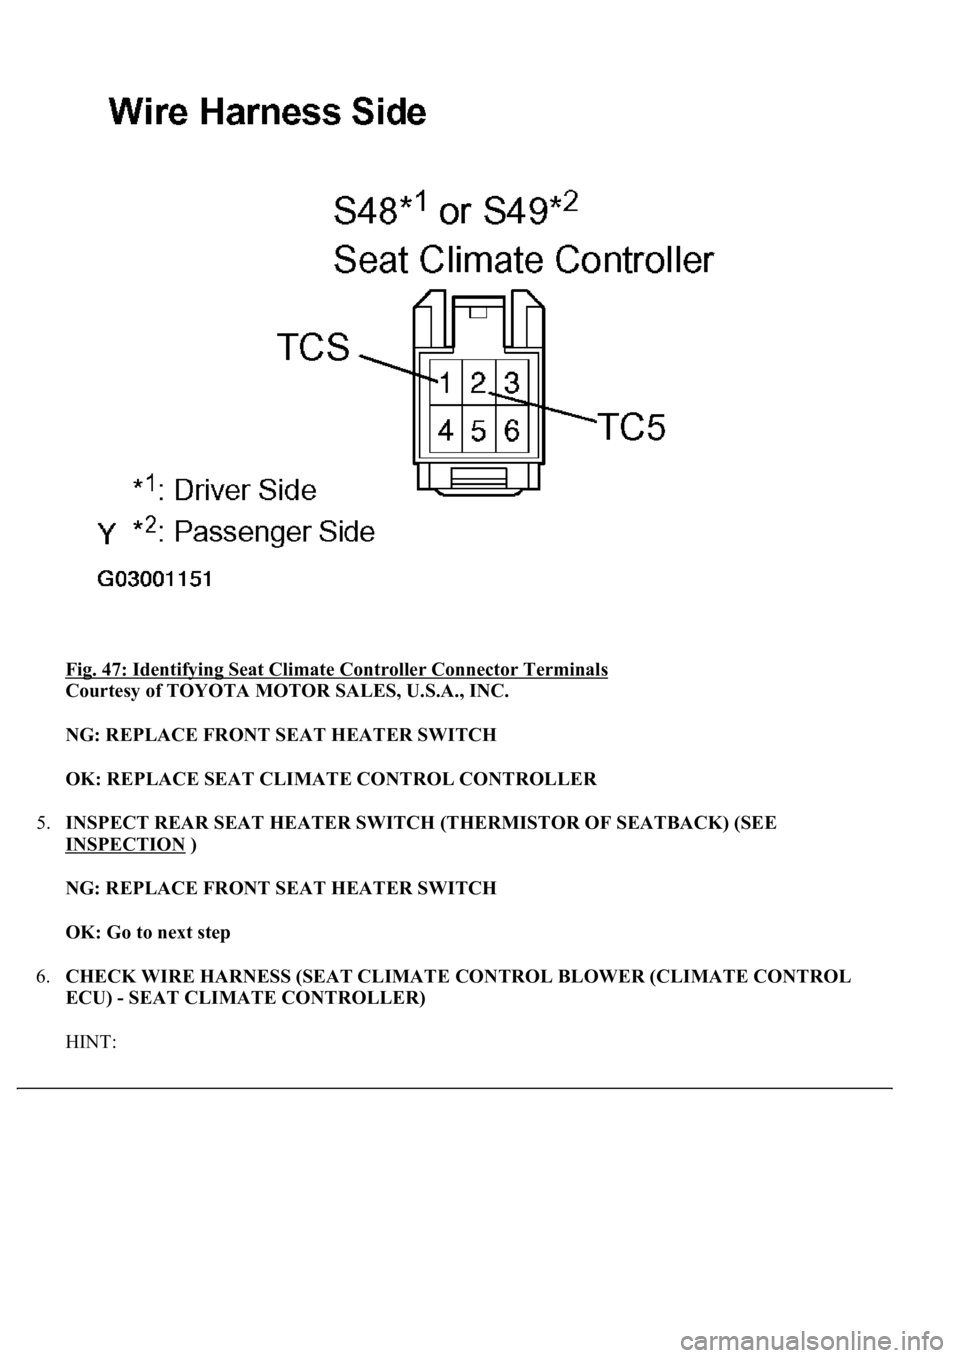
Fig. 47: Identifying Seat Climate Controller Connector Terminals
Courtesy of TOYOTA MOTOR SALES, U.S.A., INC.
NG: REPLACE FRONT SEAT HEATER SWITCH
OK: REPLACE SEAT CLIMATE CONTROL CONTROLLER
5.INSPECT REAR SEAT HEATER SWITCH (THERMISTOR OF SEATBACK) (SEE
INSPECTION
)
NG: REPLACE FRONT SEAT HEATER SWITCH
OK: Go to next step
6.CHECK WIRE HARNESS (SEAT CLIMATE CONTROL BLOWER (CLIMATE CONTROL
ECU) - SEAT CLIMATE CONTROLLER)
HINT:
Page 1662 of 4500
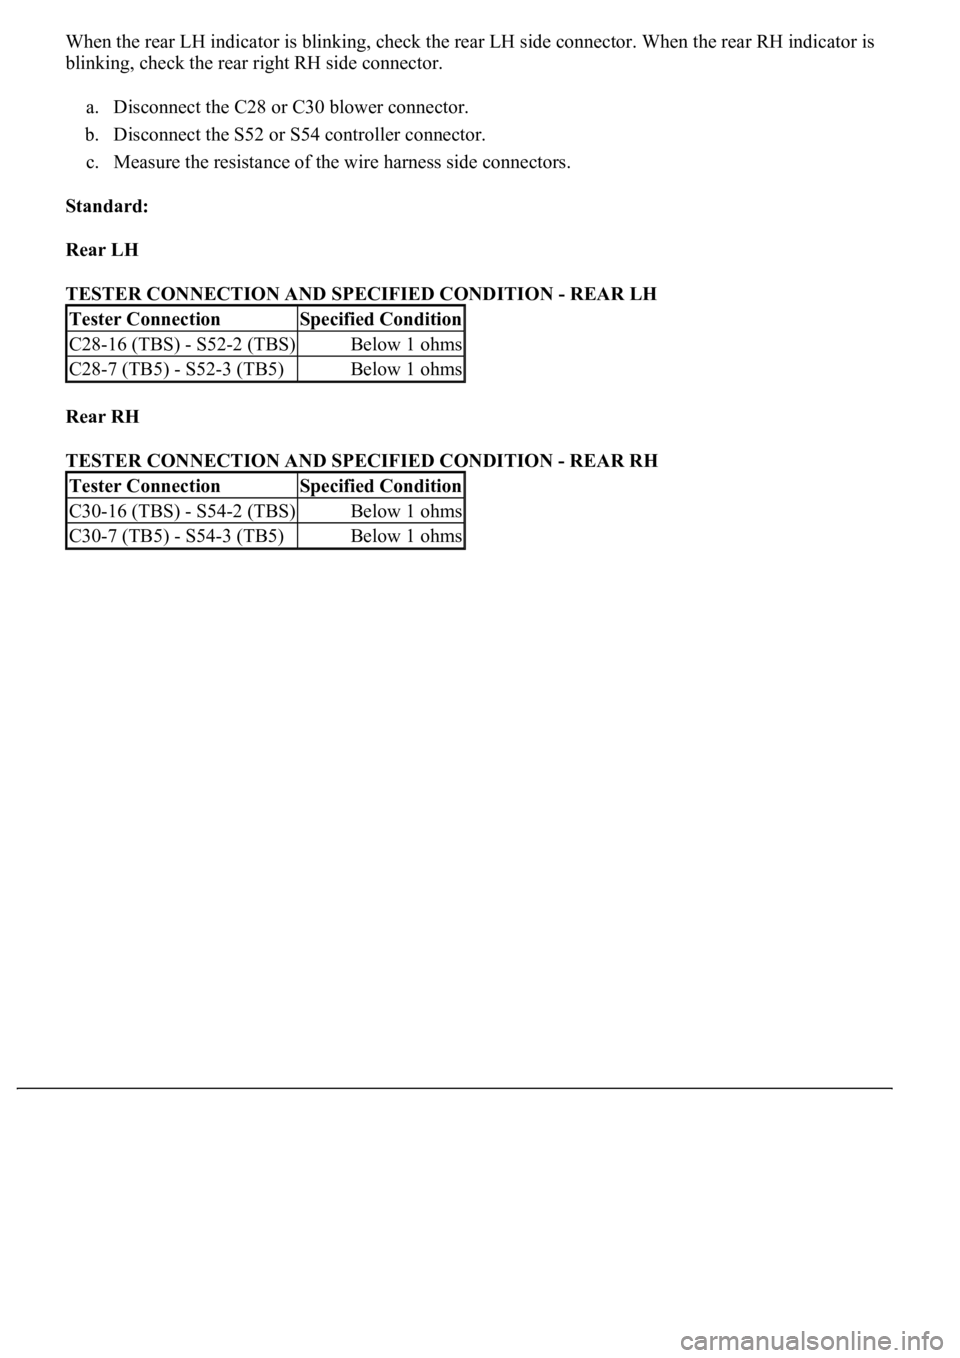
When the rear LH indicator is blinking, check the rear LH side connector. When the rear RH indicator is
blinking, check the rear right RH side connector.
a. Disconnect the C28 or C30 blower connector.
b. Disconnect the S52 or S54 controller connector.
c. Measure the resistance of the wire harness side connectors.
Standard:
Rear LH
TESTER CONNECTION AND SPECIFIED CONDITION - REAR LH
Rear RH
TESTER CONNECTION AND SPECIFIED CONDITION - REAR RH
Tester ConnectionSpecified Condition
C28-16 (TBS) - S52-2 (TBS)Below 1 ohms
C28-7 (TB5) - S52-3 (TB5)Below 1 ohms
Tester ConnectionSpecified Condition
C30-16 (TBS) - S54-2 (TBS)Below 1 ohms
C30-7 (TB5) - S54-3 (TB5)Below 1 ohms
Page 1663 of 4500
Page 1664 of 4500
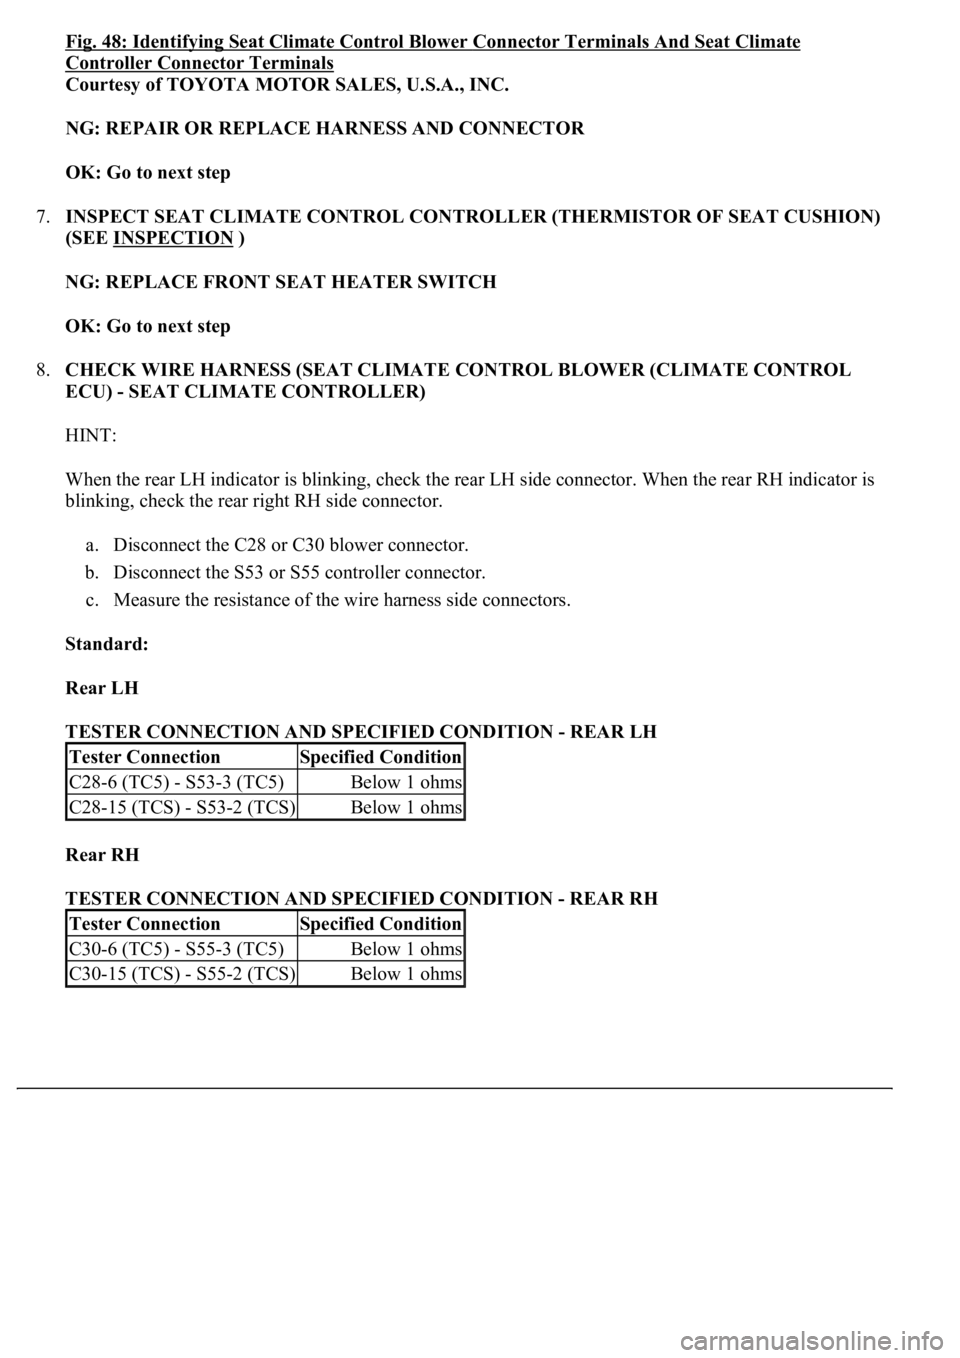
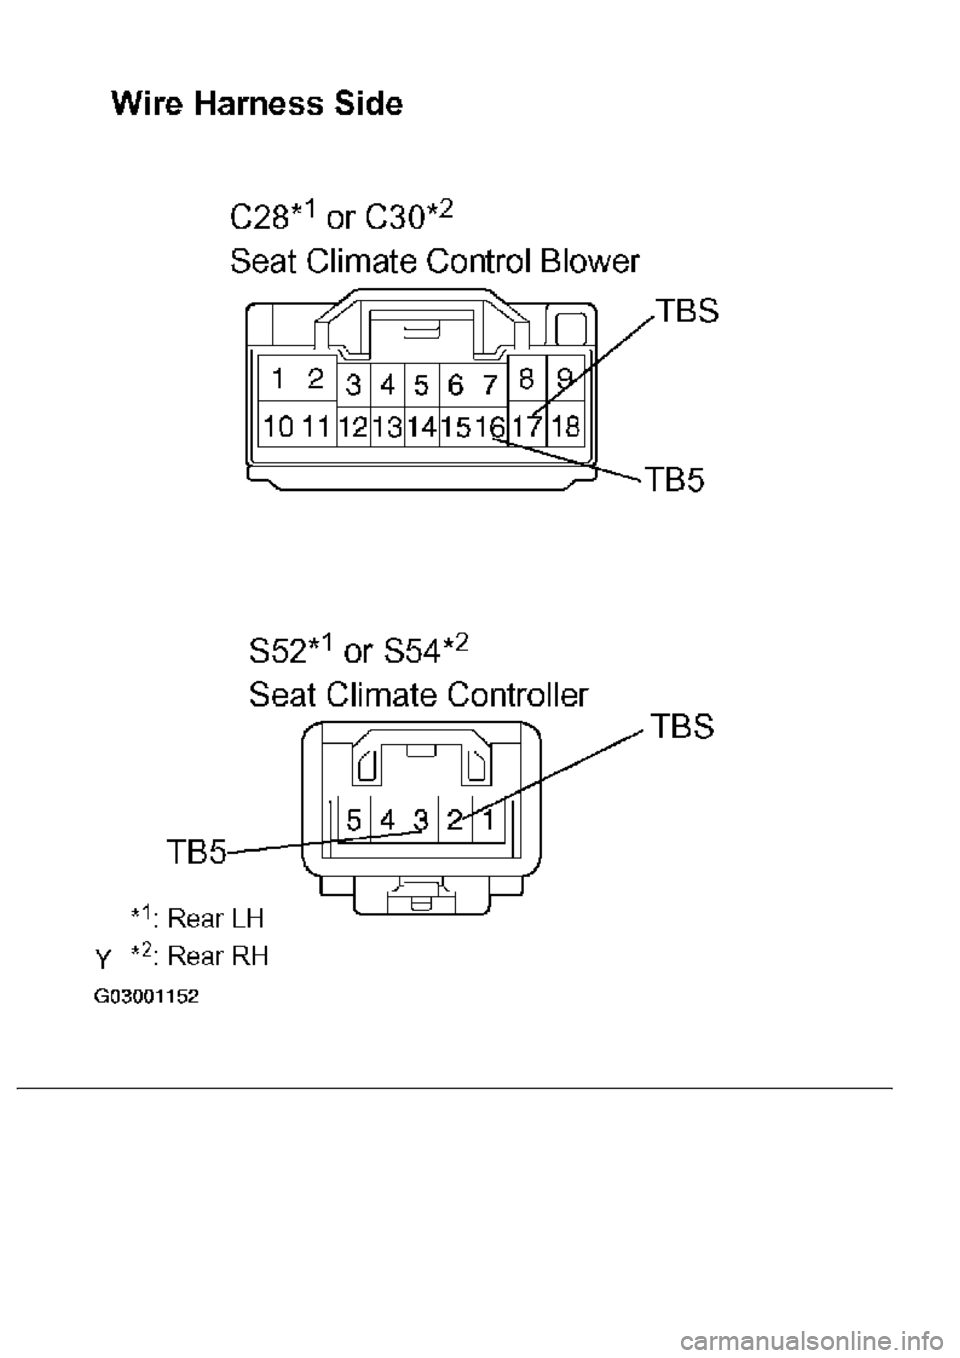
Fig. 48: Identifying Seat Climate Control Blower Connector Terminals And Seat Climate
Controller Connector Terminals
Courtesy of TOYOTA MOTOR SALES, U.S.A., INC.
NG: REPAIR OR REPLACE HARNESS AND CONNECTOR
OK: Go to next step
7.INSPECT SEAT CLIMATE CONTROL CONTROLLER (THERMISTOR OF SEAT CUSHION)
(SEE INSPECTION
)
NG: REPLACE FRONT SEAT HEATER SWITCH
OK: Go to next step
8.CHECK WIRE HARNESS (SEAT CLIMATE CONTROL BLOWER (CLIMATE CONTROL
ECU) - SEAT CLIMATE CONTROLLER)
HINT:
When the rear LH indicator is blinking, check the rear LH side connector. When the rear RH indicator is
blinking, check the rear right RH side connector.
a. Disconnect the C28 or C30 blower connector.
b. Disconnect the S53 or S55 controller connector.
c. Measure the resistance of the wire harness side connectors.
Standard:
Rear LH
TESTER CONNECTION AND SPECIFIED CONDITION - REAR LH
Rear RH
TESTER CONNECTION AND SPECIFIED CONDITION - REAR RH
Tester ConnectionSpecified Condition
C28-6 (TC5) - S53-3 (TC5)Below 1 ohms
C28-15 (TCS) - S53-2 (TCS)Below 1 ohms
Tester ConnectionSpecified Condition
C30-6 (TC5) - S55-3 (TC5)Below 1 ohms
C30-15 (TCS) - S55-2 (TCS)Below 1 ohms
Page 1665 of 4500
Page 1666 of 4500
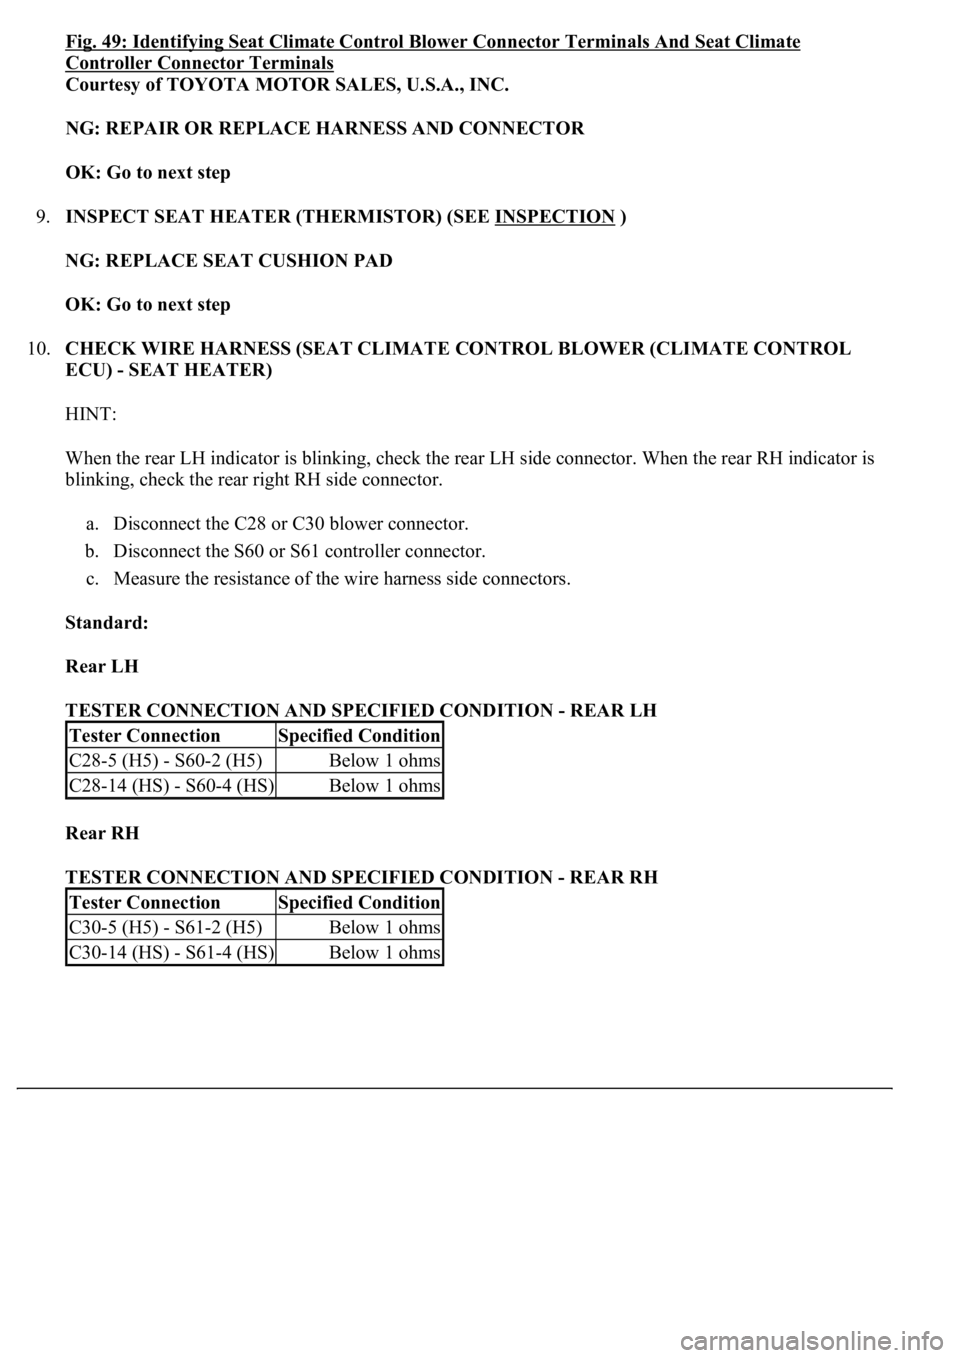
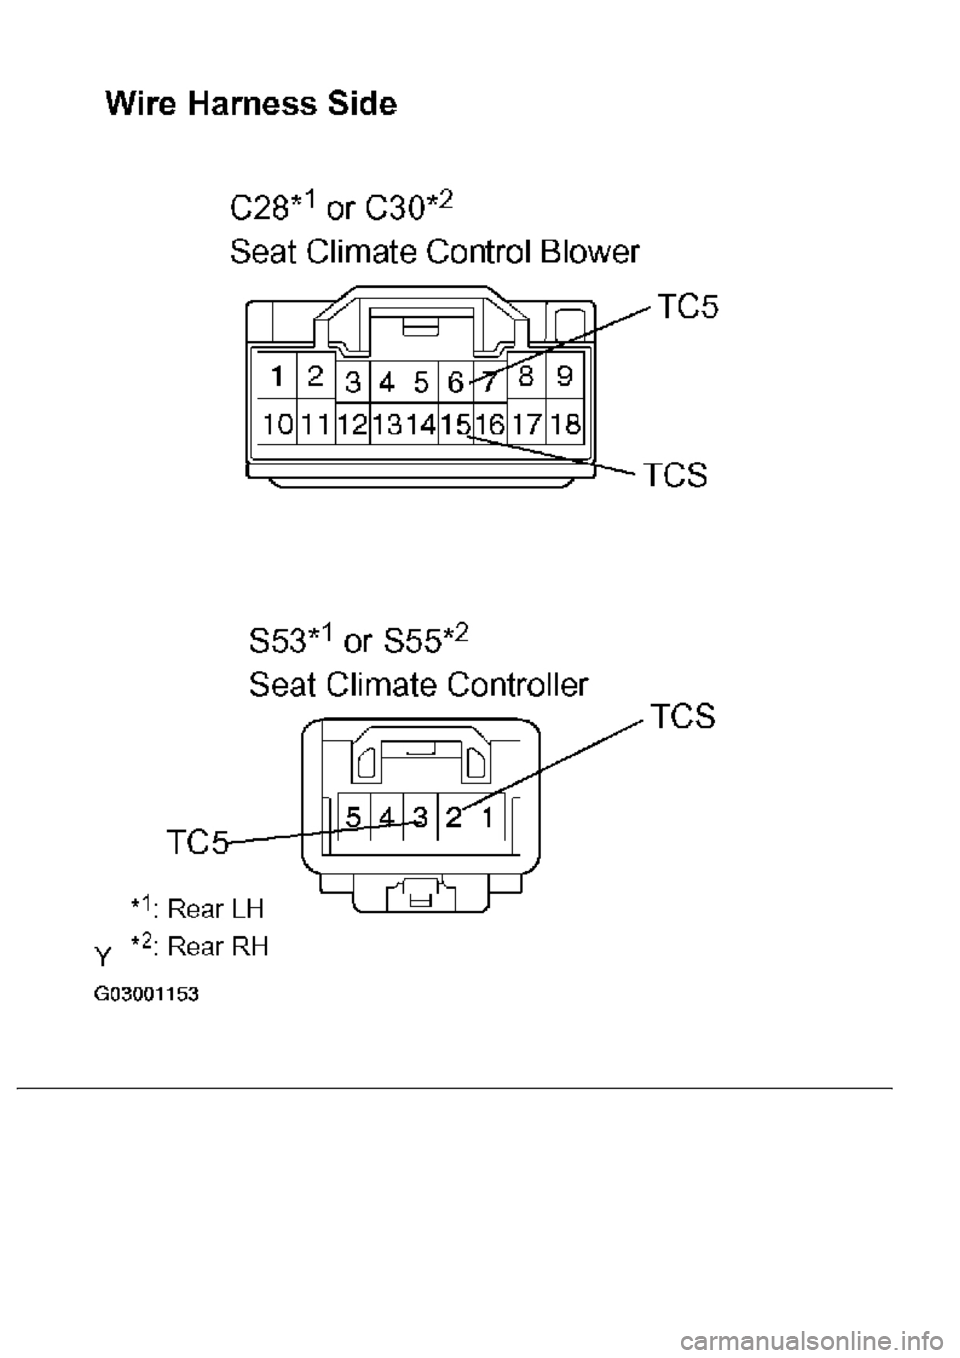
Fig. 49: Identifying Seat Climate Control Blower Connector Terminals And Seat Climate
Controller Connector Terminals
Courtesy of TOYOTA MOTOR SALES, U.S.A., INC.
NG: REPAIR OR REPLACE HARNESS AND CONNECTOR
OK: Go to next step
9.INSPECT SEAT HEATER (THERMISTOR) (SEE INSPECTION
)
NG: REPLACE SEAT CUSHION PAD
OK: Go to next step
10.CHECK WIRE HARNESS (SEAT CLIMATE CONTROL BLOWER (CLIMATE CONTROL
ECU) - SEAT HEATER)
HINT:
When the rear LH indicator is blinking, check the rear LH side connector. When the rear RH indicator is
blinking, check the rear right RH side connector.
a. Disconnect the C28 or C30 blower connector.
b. Disconnect the S60 or S61 controller connector.
c. Measure the resistance of the wire harness side connectors.
Standard:
Rear LH
TESTER CONNECTION AND SPECIFIED CONDITION - REAR LH
Rear RH
TESTER CONNECTION AND SPECIFIED CONDITION - REAR RH
Tester ConnectionSpecified Condition
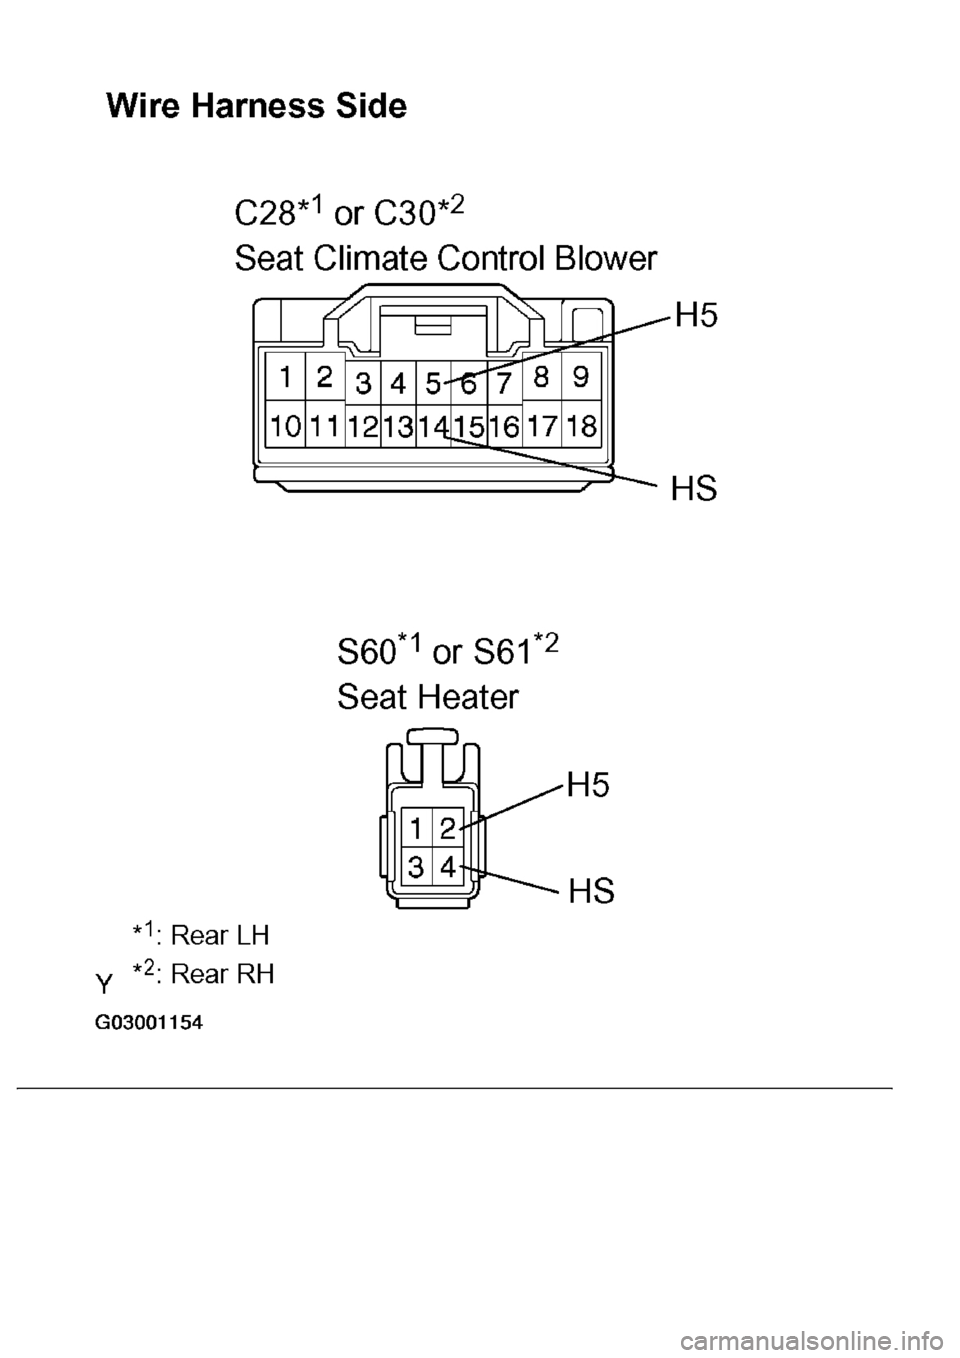
C28-5 (H5) - S60-2 (H5)Below 1 ohms
C28-14 (HS) - S60-4 (HS)Below 1 ohms
Tester ConnectionSpecified Condition
C30-5 (H5) - S61-2 (H5)Below 1 ohms
C30-14 (HS) - S61-4 (HS)Below 1 ohms
Page 1667 of 4500
Page 1668 of 4500
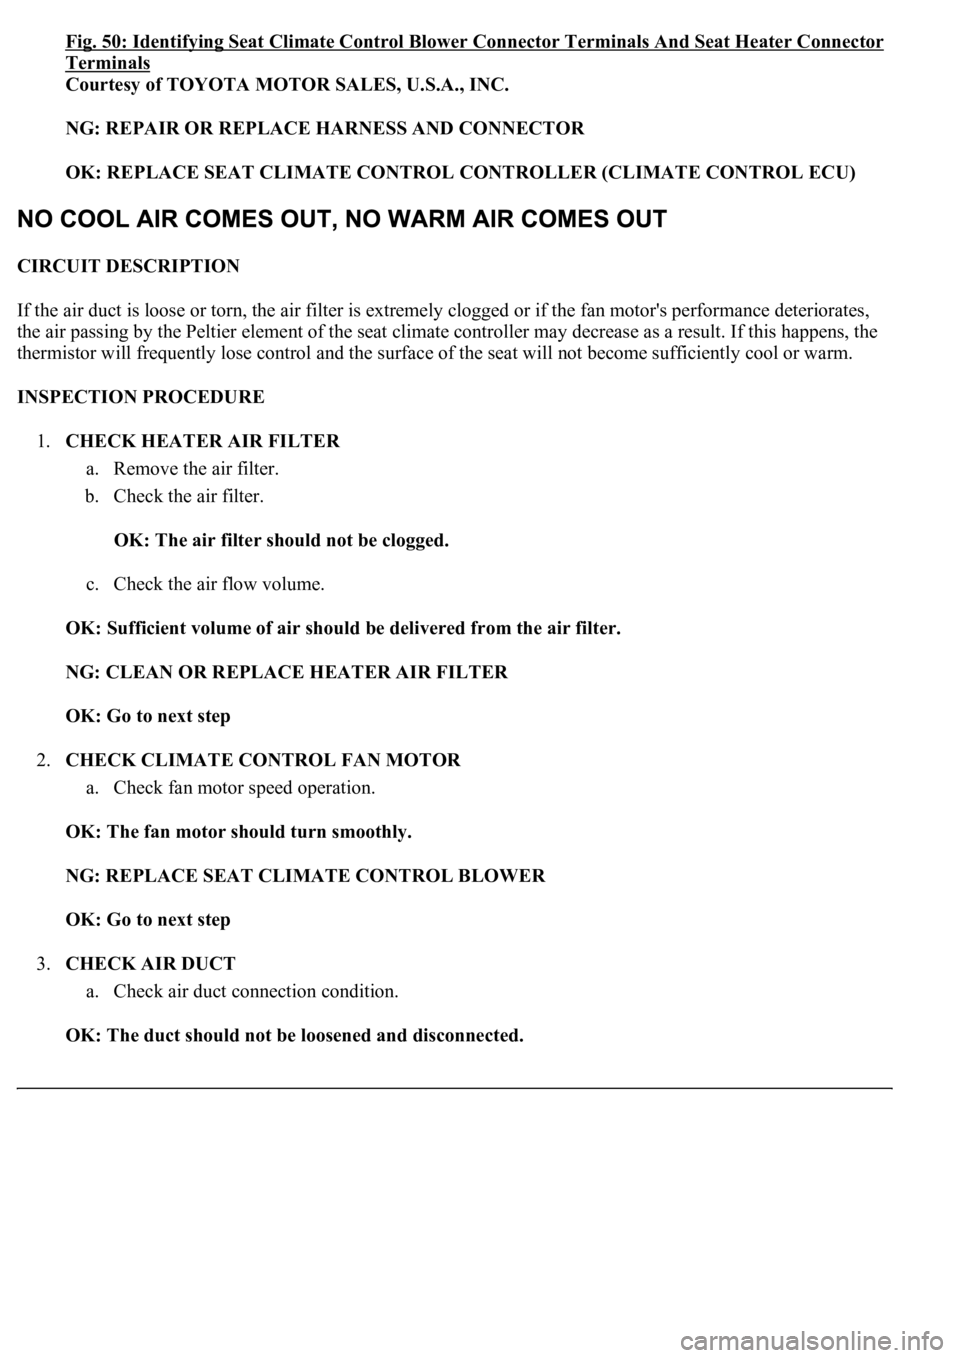
Fig. 50: Identifying Seat Climate Control Blower Connector Terminals And Seat Heater Connector
Terminals
Courtesy of TOYOTA MOTOR SALES, U.S.A., INC.
NG: REPAIR OR REPLACE HARNESS AND CONNECTOR
OK: REPLACE SEAT CLIMATE CONTROL CONTROLLER (CLIMATE CONTROL ECU)
CIRCUIT DESCRIPTION
If the air duct is loose or torn, the air filter is extremely clogged or if the fan motor's performance deteriorates,
the air passing by the Peltier element of the seat climate controller may decrease as a result. If this happens, the
thermistor will frequently lose control and the surface of the seat will not become sufficiently cool or warm.
INSPECTION PROCEDURE
1.CHECK HEATER AIR FILTER
a. Remove the air filter.
b. Check the air filter.
OK: The air filter should not be clogged.
c. Check the air flow volume.
OK: Sufficient volume of air should be delivered from the air filter.
NG: CLEAN OR REPLACE HEATER AIR FILTER
OK: Go to next step
2.CHECK CLIMATE CONTROL FAN MOTOR
a. Check fan motor speed operation.
OK: The fan motor should turn smoothly.
NG: REPLACE SEAT CLIMATE CONTROL BLOWER
OK: Go to next step
3.CHECK AIR DUCT
a. Check air duct connection condition.
OK: The duct should not be loosened and disconnected.
Page 1669 of 4500
NG: REPAIR OR REPLACE AIR DUCT
OK: REPLACE SEAT CLIMATE CONTROL CONTROLLER (SEATBACK OR SEAT
CUSHION)
CIRCUIT DESCRIPTION
If the climate control seat does not operate, the seat climate control blower (climate control ECU) or the wire
harness may be malfunctioning.
WIRE DIAGRAM
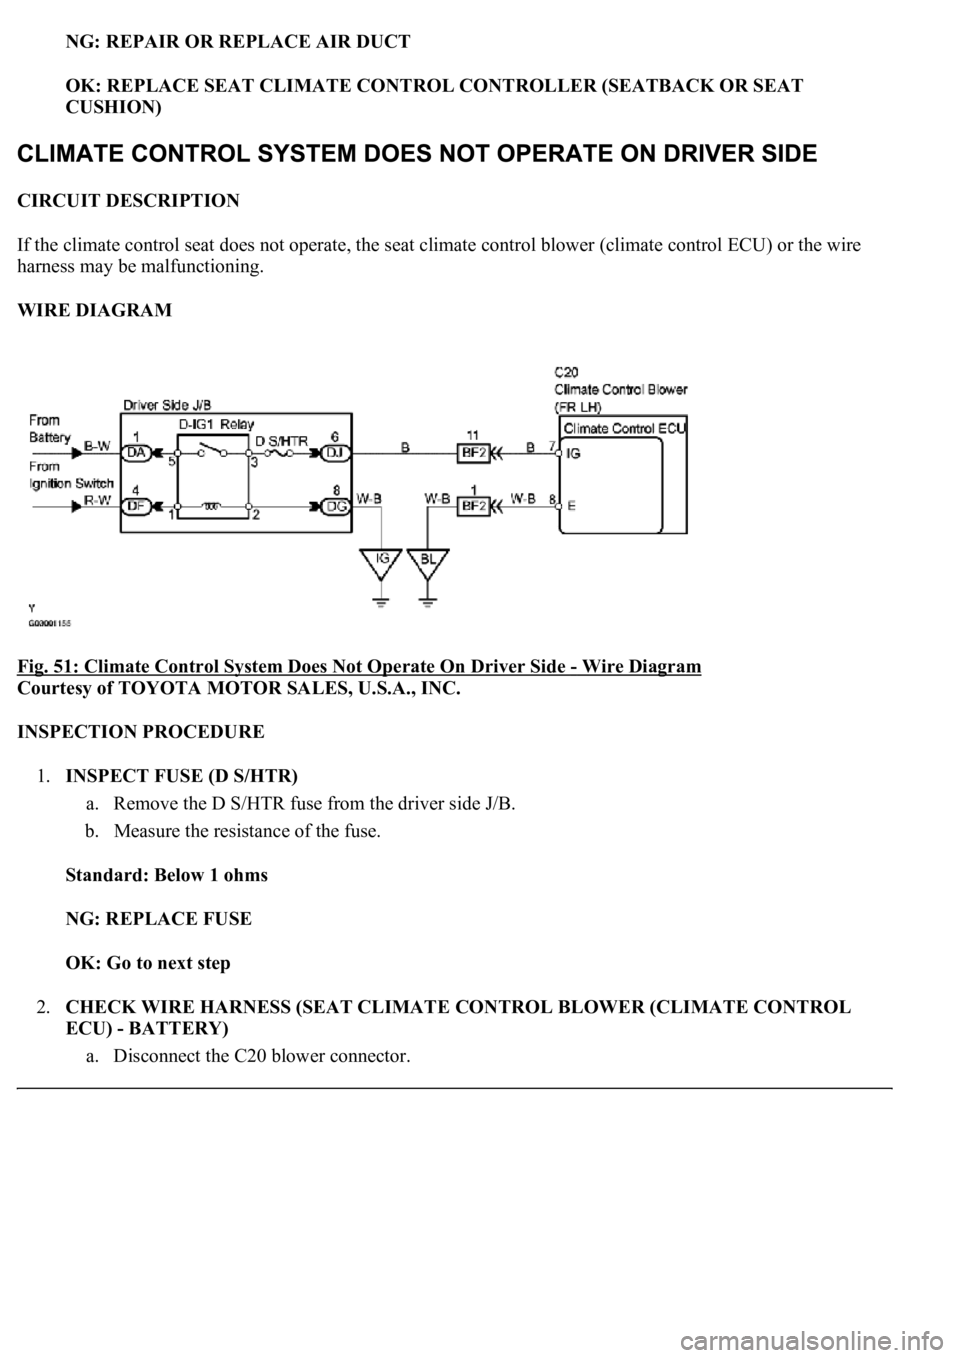
Fig. 51: Climate Control System Does Not Operate On Driver Side
- Wire Diagram
Courtesy of TOYOTA MOTOR SALES, U.S.A., INC.
INSPECTION PROCEDURE
1.INSPECT FUSE (D S/HTR)
a. Remove the D S/HTR fuse from the driver side J/B.
b. Measure the resistance of the fuse.
Standard: Below 1 ohms
NG: REPLACE FUSE
OK: Go to next step
2.CHECK WIRE HARNESS (SEAT CLIMATE CONTROL BLOWER (CLIMATE CONTROL
ECU) - BATTERY)
a. Disconnect the C20 blower connector.
Page 1670 of 4500
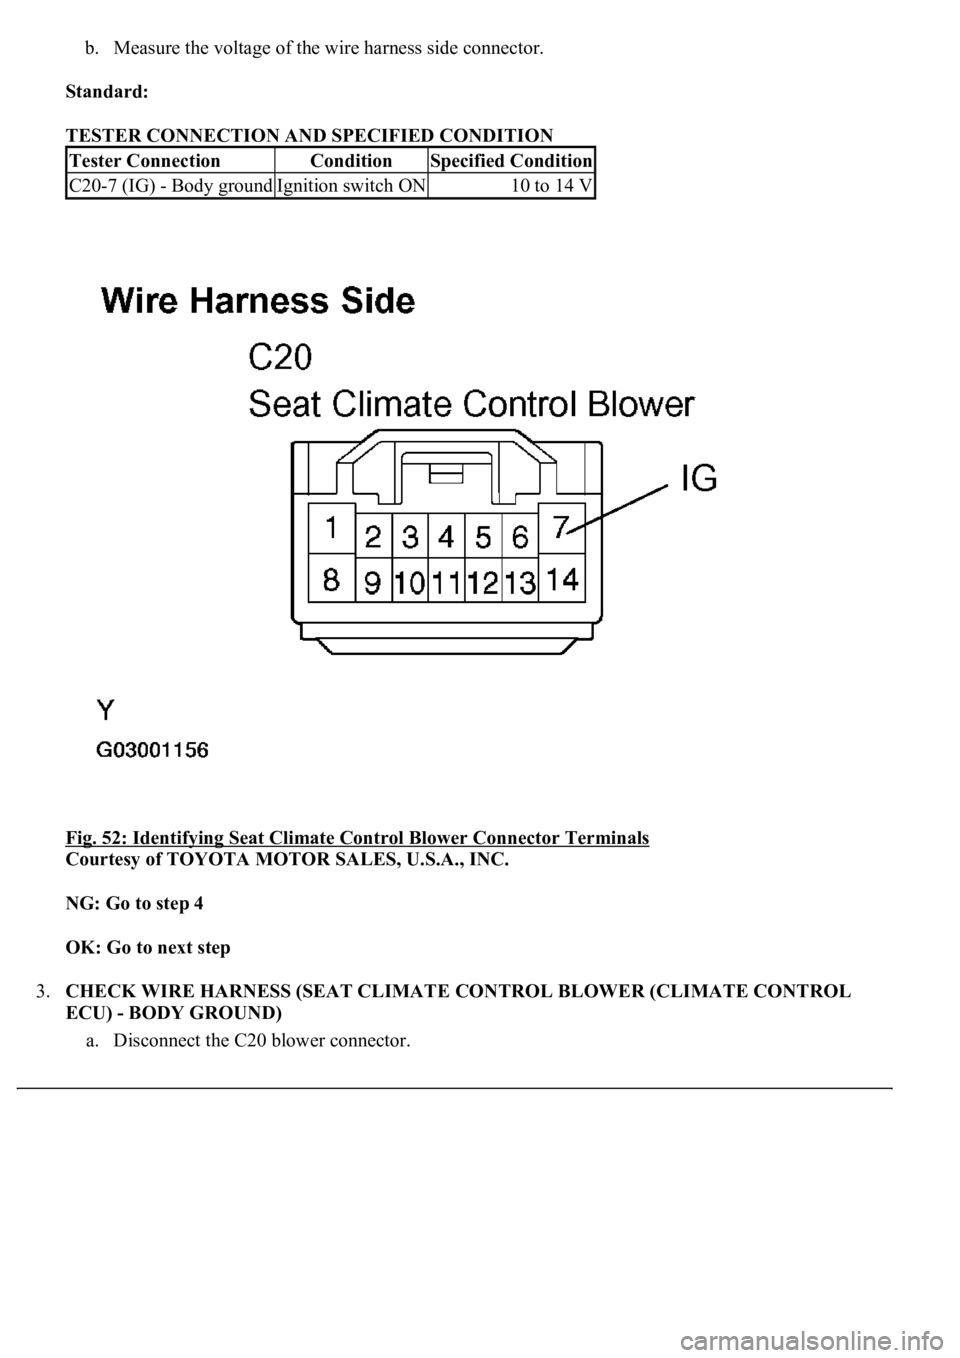
b. Measure the voltage of the wire harness side connector.
Standard:
TESTER CONNECTION AND SPECIFIED CONDITION
Fig. 52: Identifying Seat Climate Control Blower Connector Terminals
Courtesy of TOYOTA MOTOR SALES, U.S.A., INC.
NG: Go to step 4
OK: Go to next step
3.CHECK WIRE HARNESS (SEAT CLIMATE CONTROL BLOWER (CLIMATE CONTROL
ECU) - BODY GROUND)
a. Disconnect the C20 blower connector.
Tester ConnectionConditionSpecified Condition
C20-7 (IG) - Body groundIgnition switch ON10 to 14 V
Trending: key battery, oil capacity, key, engine overheat, headrest, seats, reset
