LEXUS LS430 2003 Factory Repair Manual
Manufacturer: LEXUS, Model Year: 2003,
Model line: LS430,
Model: LEXUS LS430 2003
Pages: 4500, PDF Size: 87.45 MB
LEXUS LS430 2003 Factory Repair Manual
LS430 2003
LEXUS
LEXUS
https://www.carmanualsonline.info/img/36/57050/w960_57050-0.png
LEXUS LS430 2003 Factory Repair Manual
Trending: Max cool damper sensor, Manifold gasket, maintenance, brake fluid, actuator damper, set clock, child lock
Page 1691 of 4500
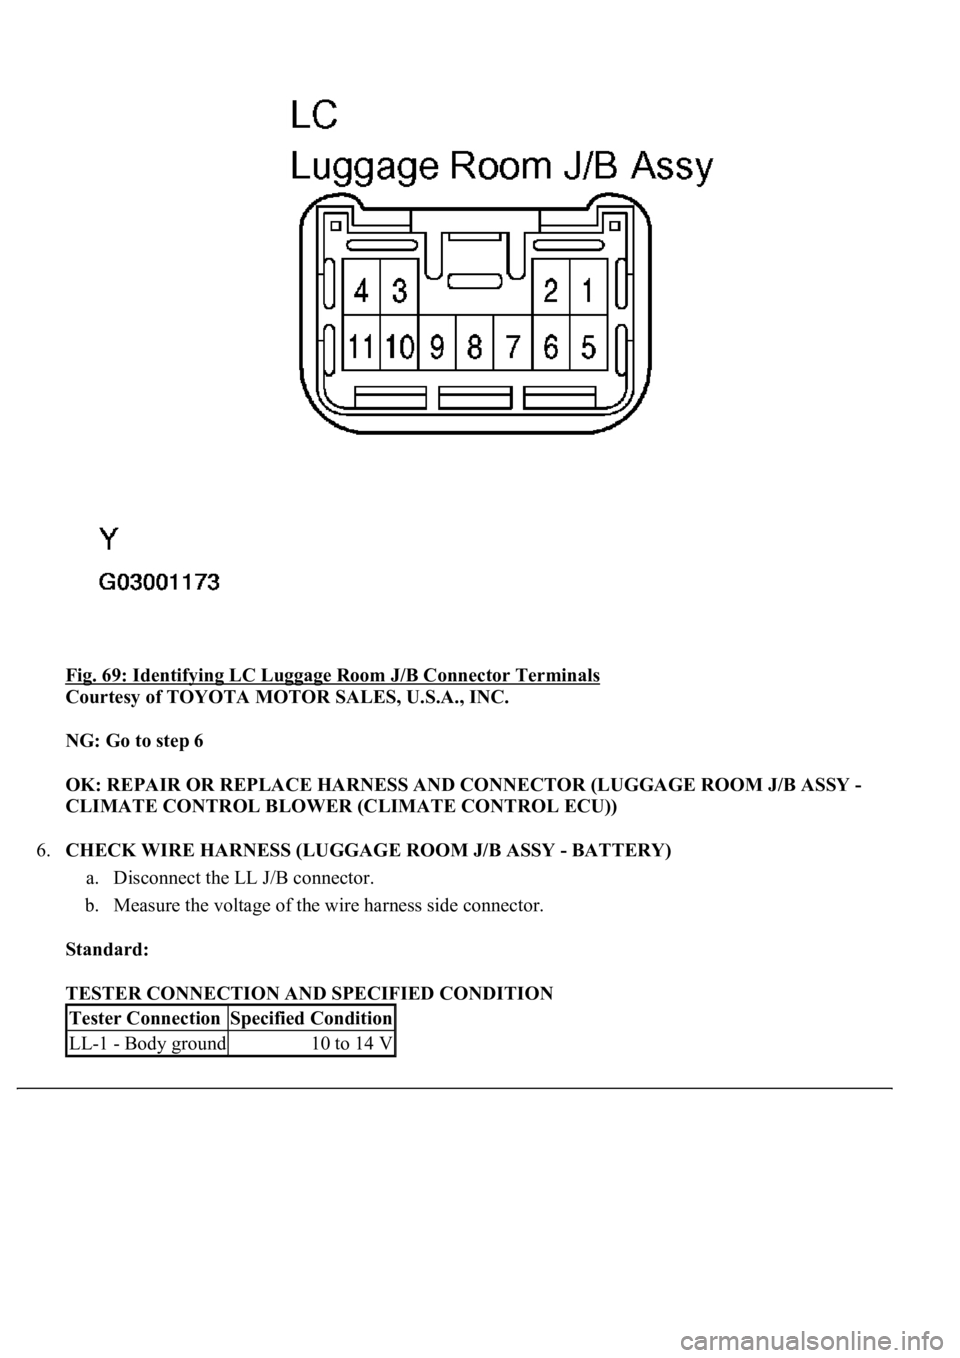
Fig. 69: Identifying LC Luggage Room J/B Connector Terminals
Courtesy of TOYOTA MOTOR SALES, U.S.A., INC.
NG: Go to step 6
OK: REPAIR OR REPLACE HARNESS AND CONNECTOR (LUGGAGE ROOM J/B ASSY -
CLIMATE CONTROL BLOWER (CLIMATE CONTROL ECU))
6.CHECK WIRE HARNESS (LUGGAGE ROOM J/B ASSY - BATTERY)
a. Disconnect the LL J/B connector.
b. Measure the voltage of the wire harness side connector.
Standard:
TESTER CONNECTION AND SPECIFIED CONDITION
Tester ConnectionSpecified Condition
LL-1 - Body ground10 to 14 V
Page 1692 of 4500
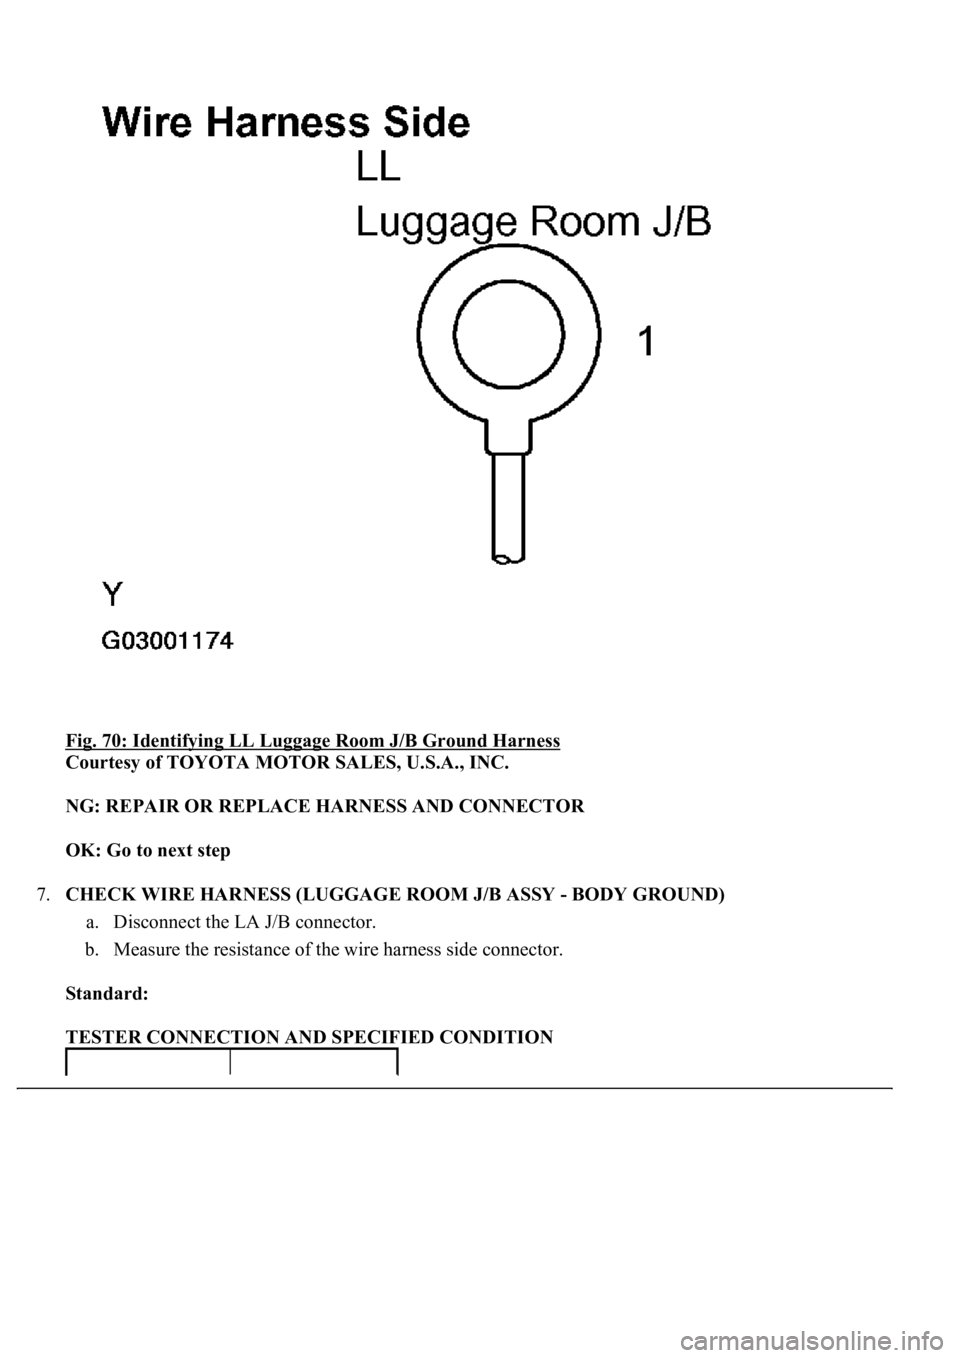
Fig. 70: Identifying LL Luggage Room J/B Ground Harness
Courtesy of TOYOTA MOTOR SALES, U.S.A., INC.
NG: REPAIR OR REPLACE HARNESS AND CONNECTOR
OK: Go to next step
7.CHECK WIRE HARNESS (LUGGAGE ROOM J/B ASSY - BODY GROUND)
a. Disconnect the LA J/B connector.
b. Measure the resistance of the wire harness side connector.
Standard:
TESTER CONNECTION AND SPECIFIED CONDITION
Page 1693 of 4500
Fig. 71: Identifying LA Luggage Room J/B Connector Terminals
Courtesy of TOYOTA MOTOR SALES, U.S.A., INC.
NG: REPAIR OR REPLACE HARNESS AND CONNECTOR
OK: Go to next step
8.INSPECT RELAY (Marking: L-IG1)
a. Remove the L-IG1 relay from the luggage room J/B.
b. Measure the resistance of the relay.
Standard:
Tester ConnectionSpecified Condition
LA-5 - Body groundBelow 1 ohms
Page 1694 of 4500
TESTER CONNECTION AND SPECIFIED CONDITION
Fig. 72: Identifying L
-IG1 Relay Terminals And Circuit
Courtesy of TOYOTA MOTOR SALES, U.S.A., INC.
NG: REPLACE RELAY
OK: Go to next step
9.CHECK WIRE HARNESS (LUGGAGE ROOM J/B ECU - BATTERY AND BODY GROUND)
a. Disconnect the L14 J/B ECU connector.
b. Measure the voltage of the wire harness side connector.
Standard:
TESTER CONNECTION AND SPECIFIED CONDITION
Tester ConnectionSpecified Condition
3 - 510 kohms or higher
3 - 5Below 1ohms (when battery voltage is applied to terminal 1 and 2)
Tester ConnectionConditionSpecified Condition
L14-8 (IG (O)) - Body groundIgnition switch OFF10 to 14 V
L14-14 (P-GND) - Body groundAlwaysBelow 1ohms
Page 1695 of 4500
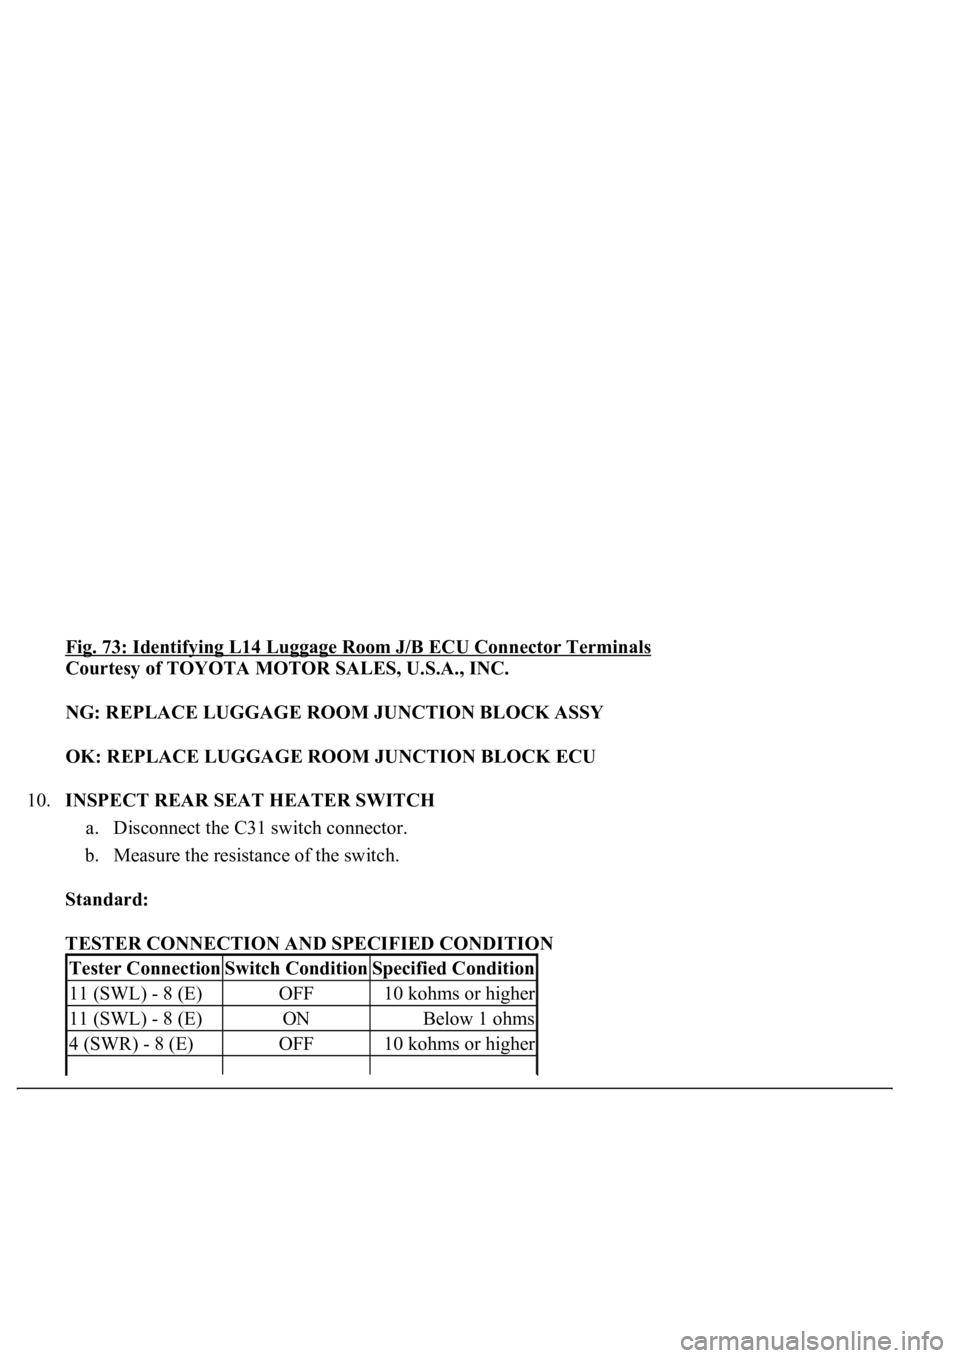
Fig. 73: Identifying L14 Luggage Room J/B ECU Connector Terminals
Courtesy of TOYOTA MOTOR SALES, U.S.A., INC.
NG: REPLACE LUGGAGE ROOM JUNCTION BLOCK ASSY
OK: REPLACE LUGGAGE ROOM JUNCTION BLOCK ECU
10.INSPECT REAR SEAT HEATER SWITCH
a. Disconnect the C31 switch connector.
b. Measure the resistance of the switch.
Standard:
TESTER CONNECTION AND SPECIFIED CONDITION
Tester ConnectionSwitch ConditionSpecified Condition
11 (SWL) - 8 (E)OFF10 kohms or higher
11 (SWL) - 8 (E)ONBelow 1 ohms
4 (SWR) - 8 (E)OFF10 kohms or higher
Page 1696 of 4500
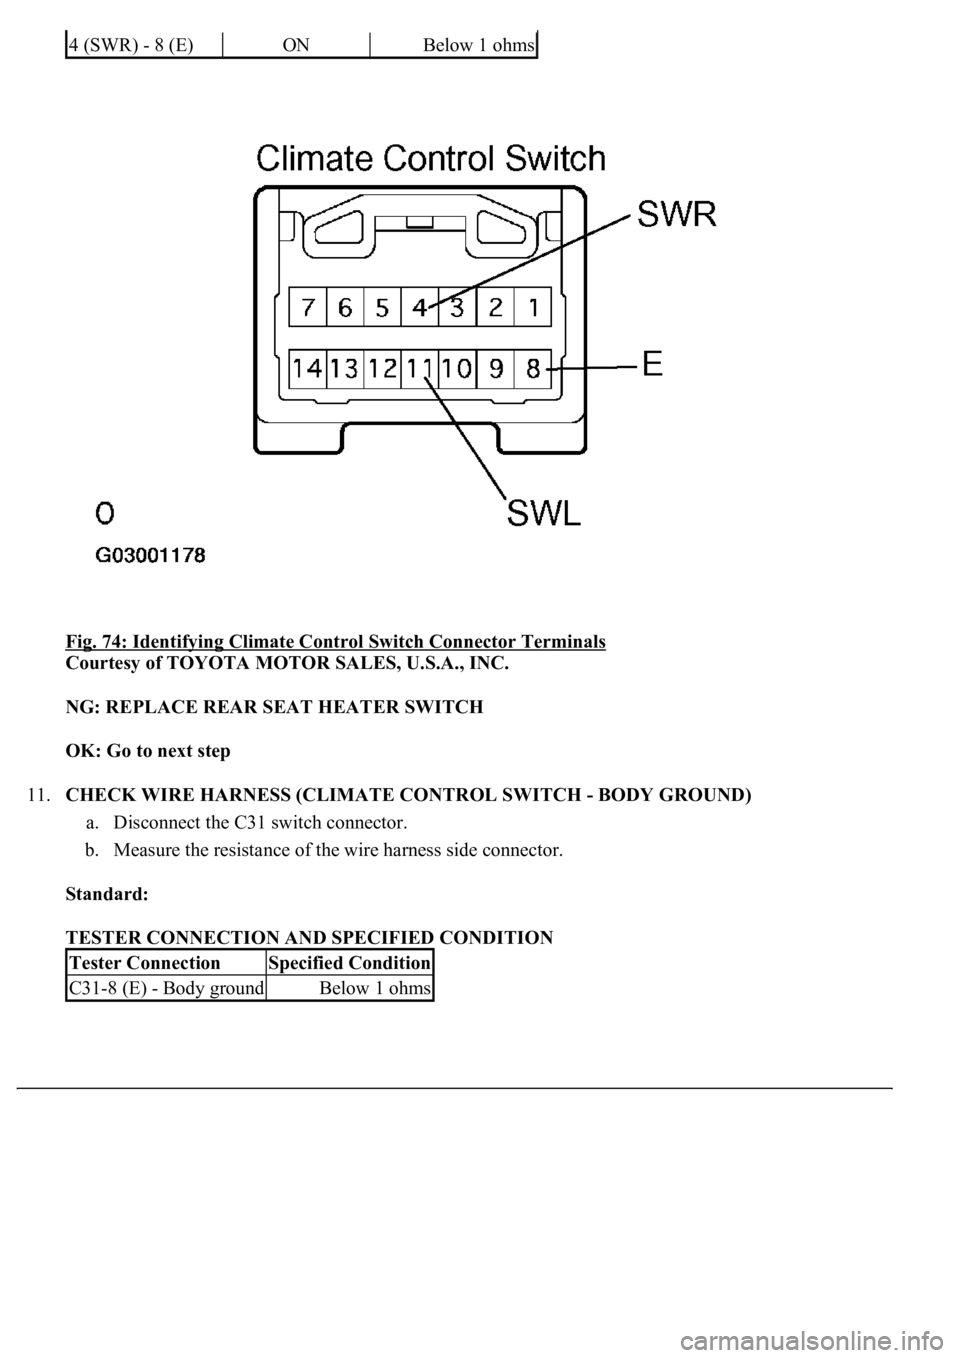
Fig. 74: Identifying Climate Control Switch Connector Terminals
Courtesy of TOYOTA MOTOR SALES, U.S.A., INC.
NG: REPLACE REAR SEAT HEATER SWITCH
OK: Go to next step
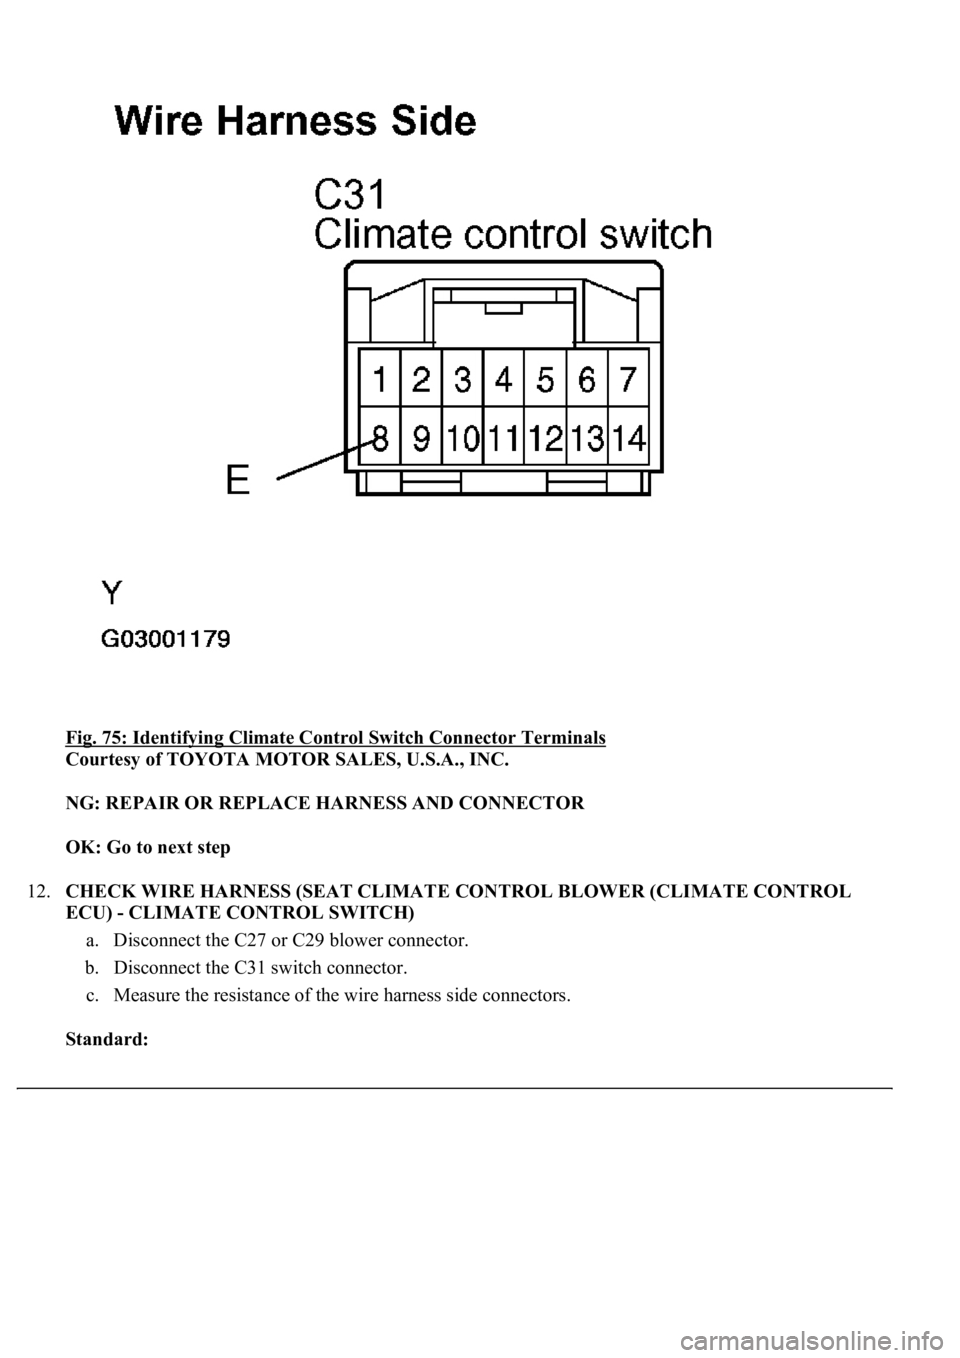
11.CHECK WIRE HARNESS (CLIMATE CONTROL SWITCH - BODY GROUND)
a. Disconnect the C31 switch connector.
b. Measure the resistance of the wire harness side connector.
Standard:
TESTER CONNECTION AND SPECIFIED CONDITION
4 (SWR) - 8 (E)ONBelow 1 ohms
Tester ConnectionSpecified Condition
C31-8 (E) - Body groundBelow 1 ohms
Page 1697 of 4500
Fig. 75: Identifying Climate Control Switch Connector Terminals
Courtesy of TOYOTA MOTOR SALES, U.S.A., INC.
NG: REPAIR OR REPLACE HARNESS AND CONNECTOR
OK: Go to next step
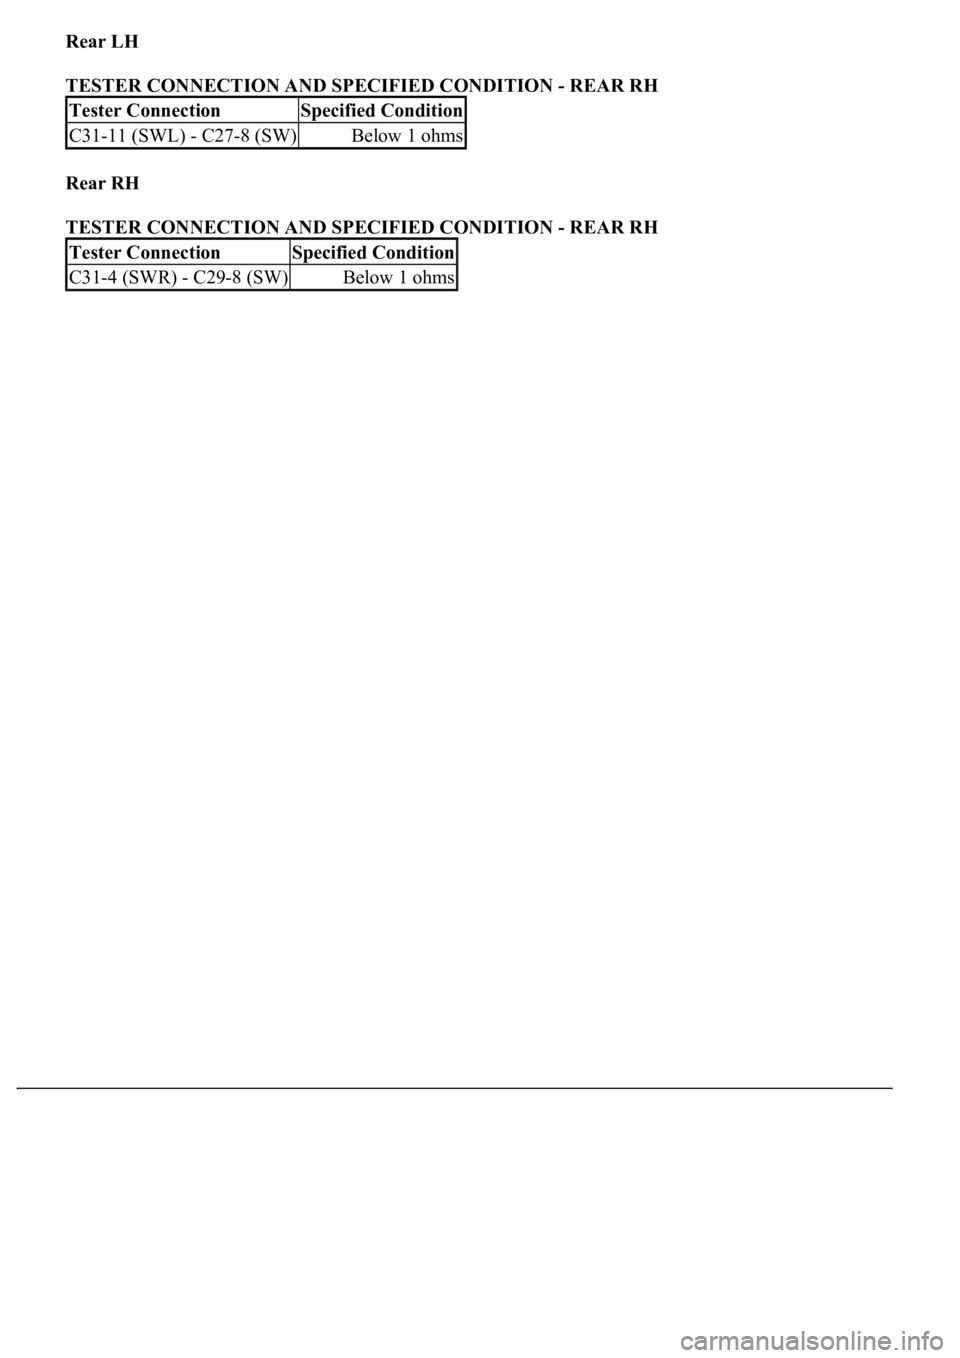
12.CHECK WIRE HARNESS (SEAT CLIMATE CONTROL BLOWER (CLIMATE CONTROL
ECU) - CLIMATE CONTROL SWITCH)
a. Disconnect the C27 or C29 blower connector.
b. Disconnect the C31 switch connector.
c. Measure the resistance of the wire harness side connectors.
Standard:
Page 1698 of 4500
Rear LH
TESTER CONNECTION AND SPECIFIED CONDITION - REAR RH
Rear RH
TESTER CONNECTION AND SPECIFIED CONDITION - REAR RH
Tester ConnectionSpecified Condition
C31-11 (SWL) - C27-8 (SW)Below 1 ohms
Tester ConnectionSpecified Condition
C31-4 (SWR) - C29-8 (SW)Below 1 ohms
Page 1699 of 4500
Page 1700 of 4500
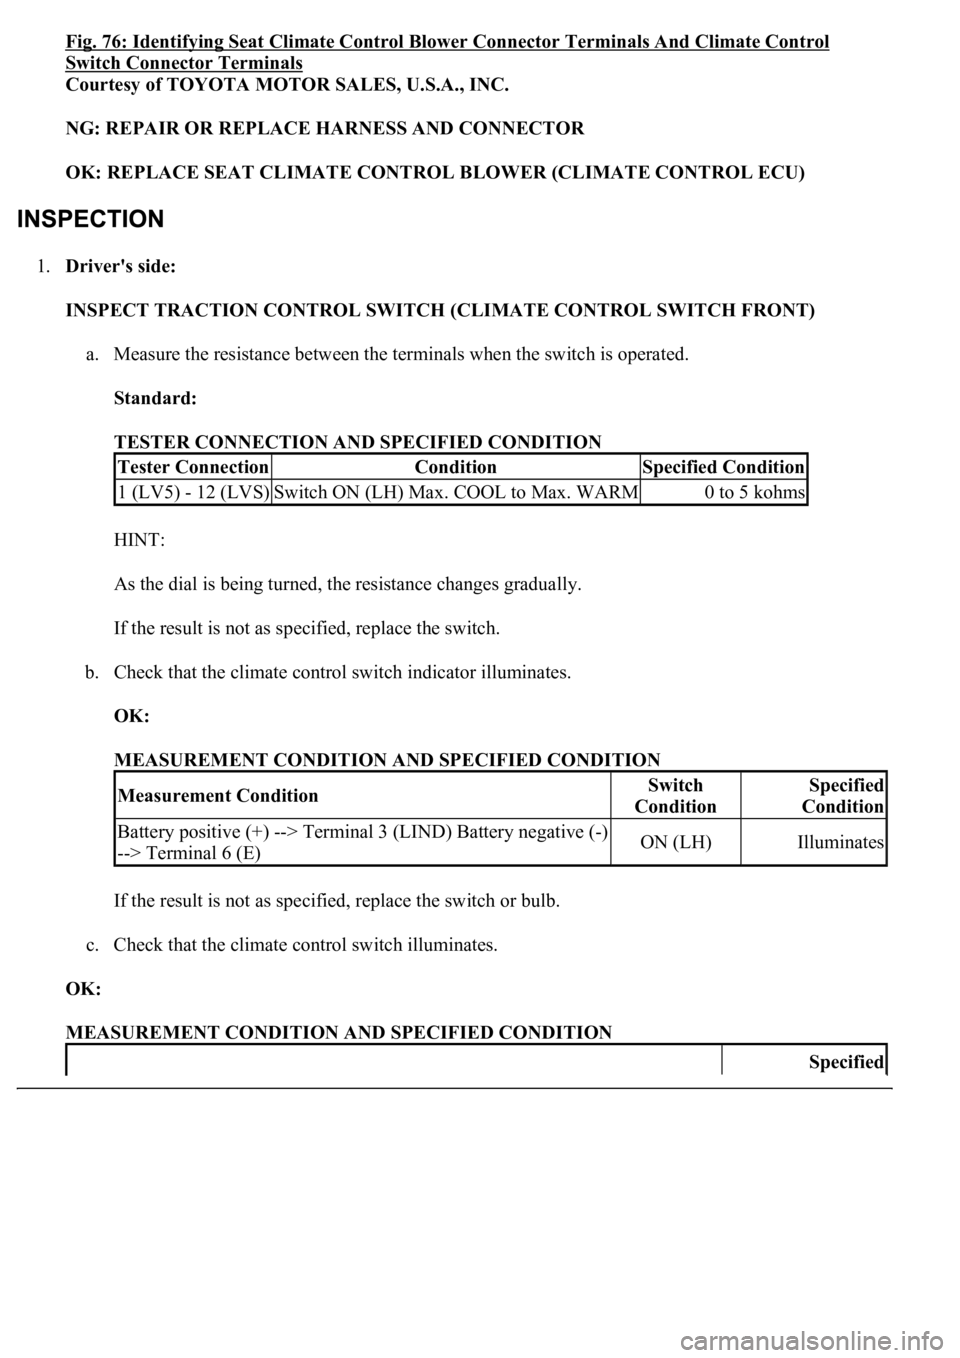
Fig. 76: Identifying Seat Climate Control Blower Connector Terminals And Climate Control
Switch Connector Terminals
Courtesy of TOYOTA MOTOR SALES, U.S.A., INC.
NG: REPAIR OR REPLACE HARNESS AND CONNECTOR
OK: REPLACE SEAT CLIMATE CONTROL BLOWER (CLIMATE CONTROL ECU)
1.Driver's side:
INSPECT TRACTION CONTROL SWITCH (CLIMATE CONTROL SWITCH FRONT)
a. Measure the resistance between the terminals when the switch is operated.
Standard:
TESTER CONNECTION AND SPECIFIED CONDITION
HINT:
As the dial is being turned, the resistance changes gradually.
If the result is not as specified, replace the switch.
b. Check that the climate control switch indicator illuminates.
OK:
MEASUREMENT CONDITION AND SPECIFIED CONDITION
If the result is not as specified, replace the switch or bulb.
c. Check that the climate control switch illuminates.
OK:
MEASUREMENT CONDITION AND SPECIFIED CONDITION
Tester ConnectionConditionSpecified Condition
1 (LV5) - 12 (LVS)Switch ON (LH) Max. COOL to Max. WARM0 to 5 kohms
Measurement ConditionSwitch
ConditionSpecified
Condition
Battery positive (+) --> Terminal 3 (LIND) Battery negative (-)
--> Terminal 6 (E)ON (LH)Illuminates
Specified
Trending: radio, brake, charging, Speedometer, automatic transmission, evap, service interval
